First project - Hexagonal staircase newel cap

OK, I think I got all the changes, and took the time to simulate all the toolpaths, including zooming. I did end up doing the spiral on the big bore box bit, which differed from your screenshot in that it didn’t go into the wedge pockets! I also raised the Bottom to be at the thickness of the wedge (3.125mm) just to be safe.

I will probably reattach one of my junk wood efforts and run the new paths to be sure they’re cutting air.

1 Like

Hah, good catch. I think that whole setup should be using the final hex with wedges installed as a model body (7 bodies total)

And then the surfacing toolpath also specified surfaces to touch, picking the wedge faces, hex faces and the curved surface covering the center post hole, 19 in total to be specific about what we want finished with the ball cutter and to stay out of the center post hole with the ball cutter.

Sounds sensible

Sounds very sensible :wink:

Actually, that isn’t right since there are toolpaths for finishing up the center hex pocket. So, I left it as it was, with surfaces to touch selected. Works fine.

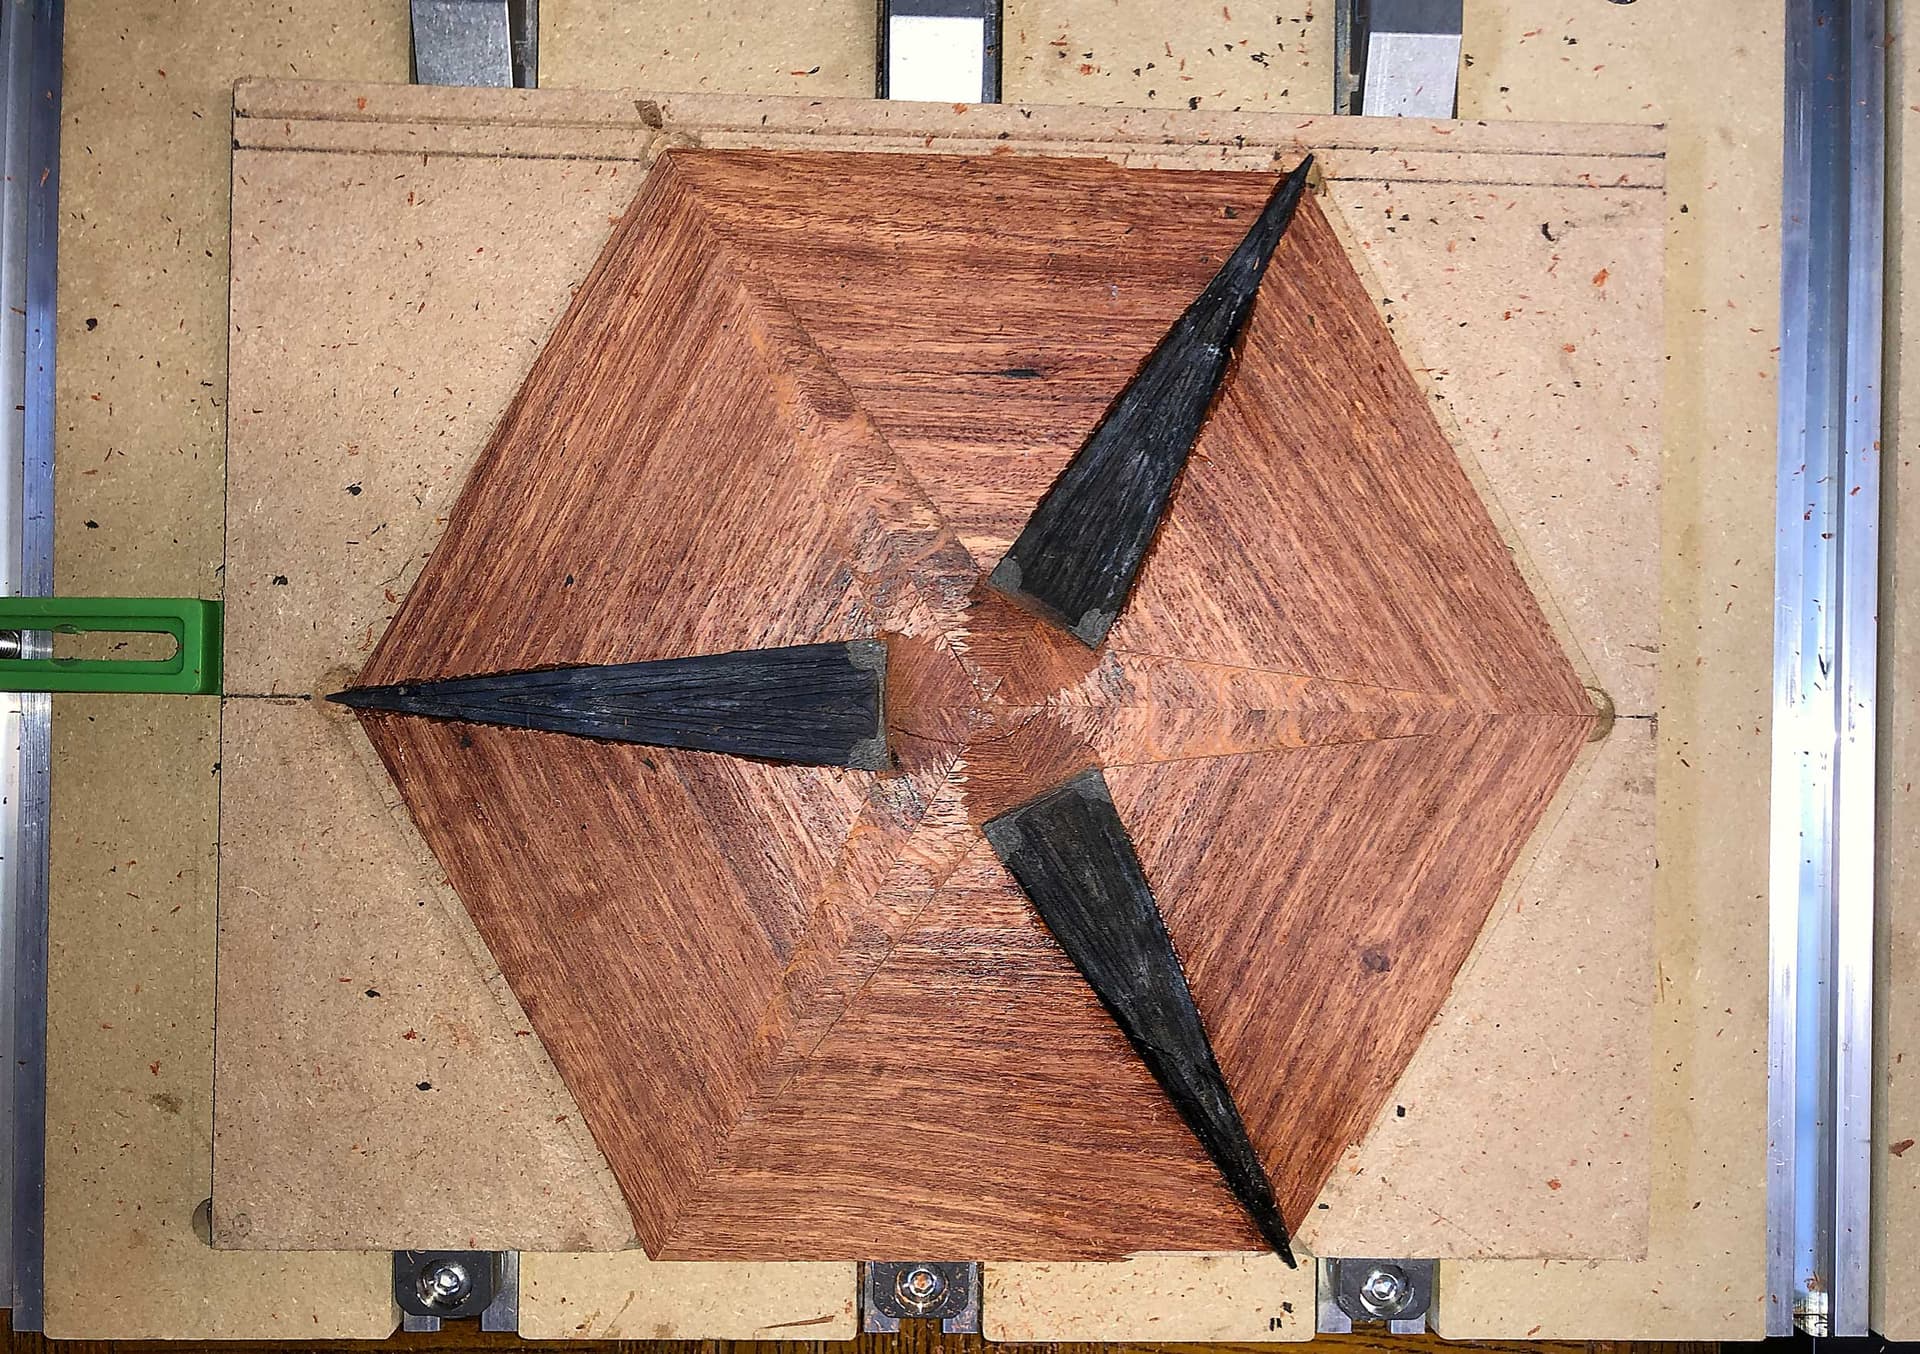
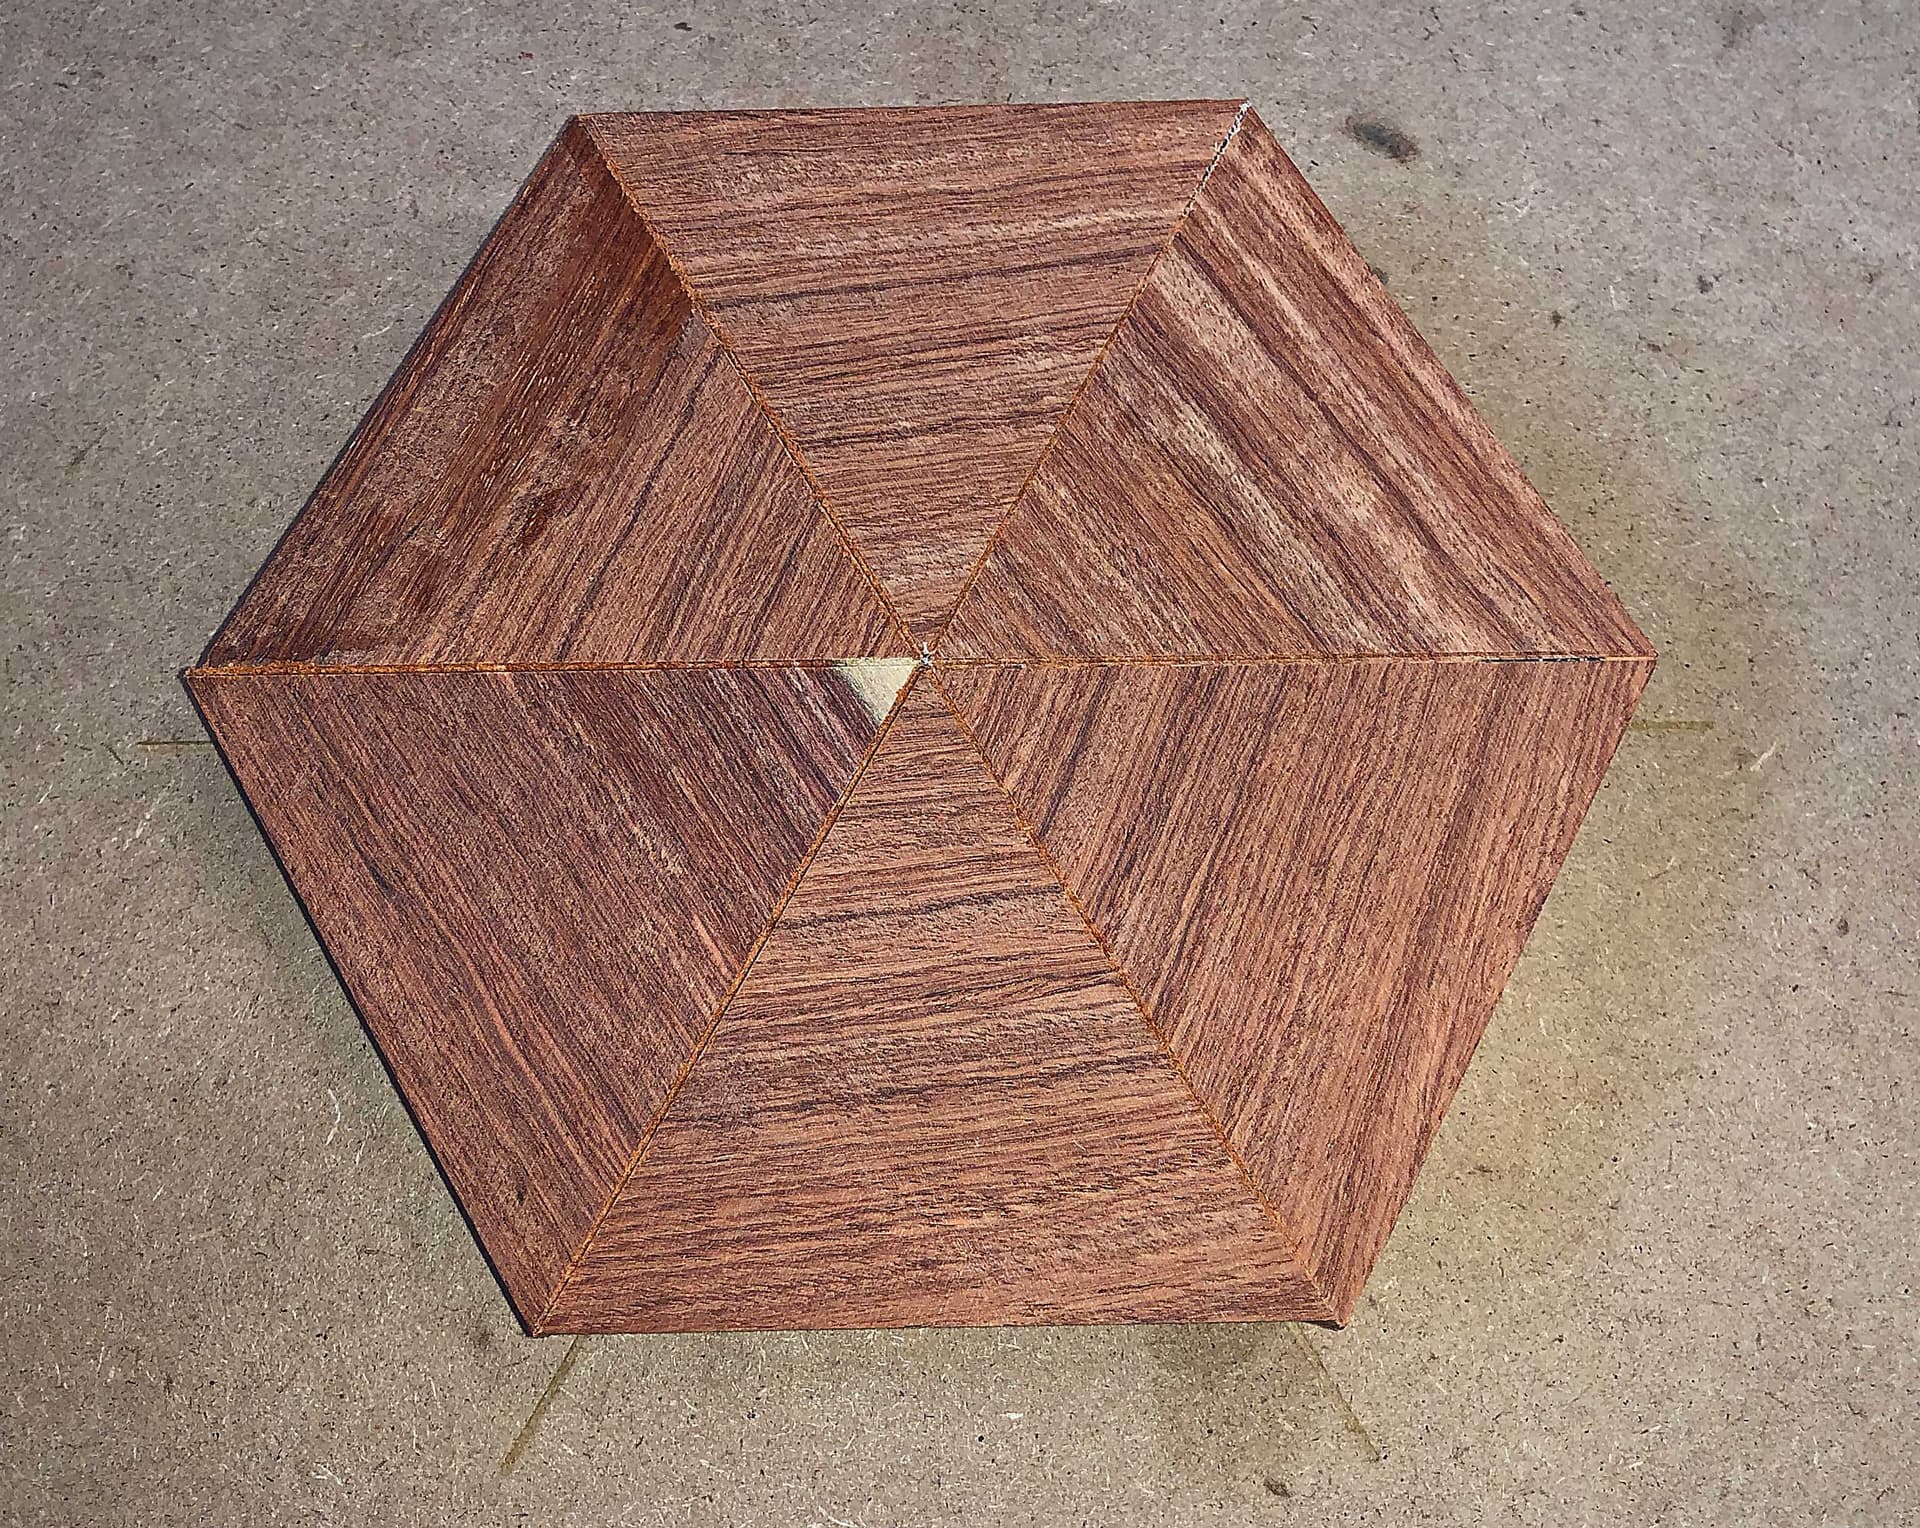
And, I cut another topper. Here’s with the first 3 wedges glued in and second set of pockets cut:

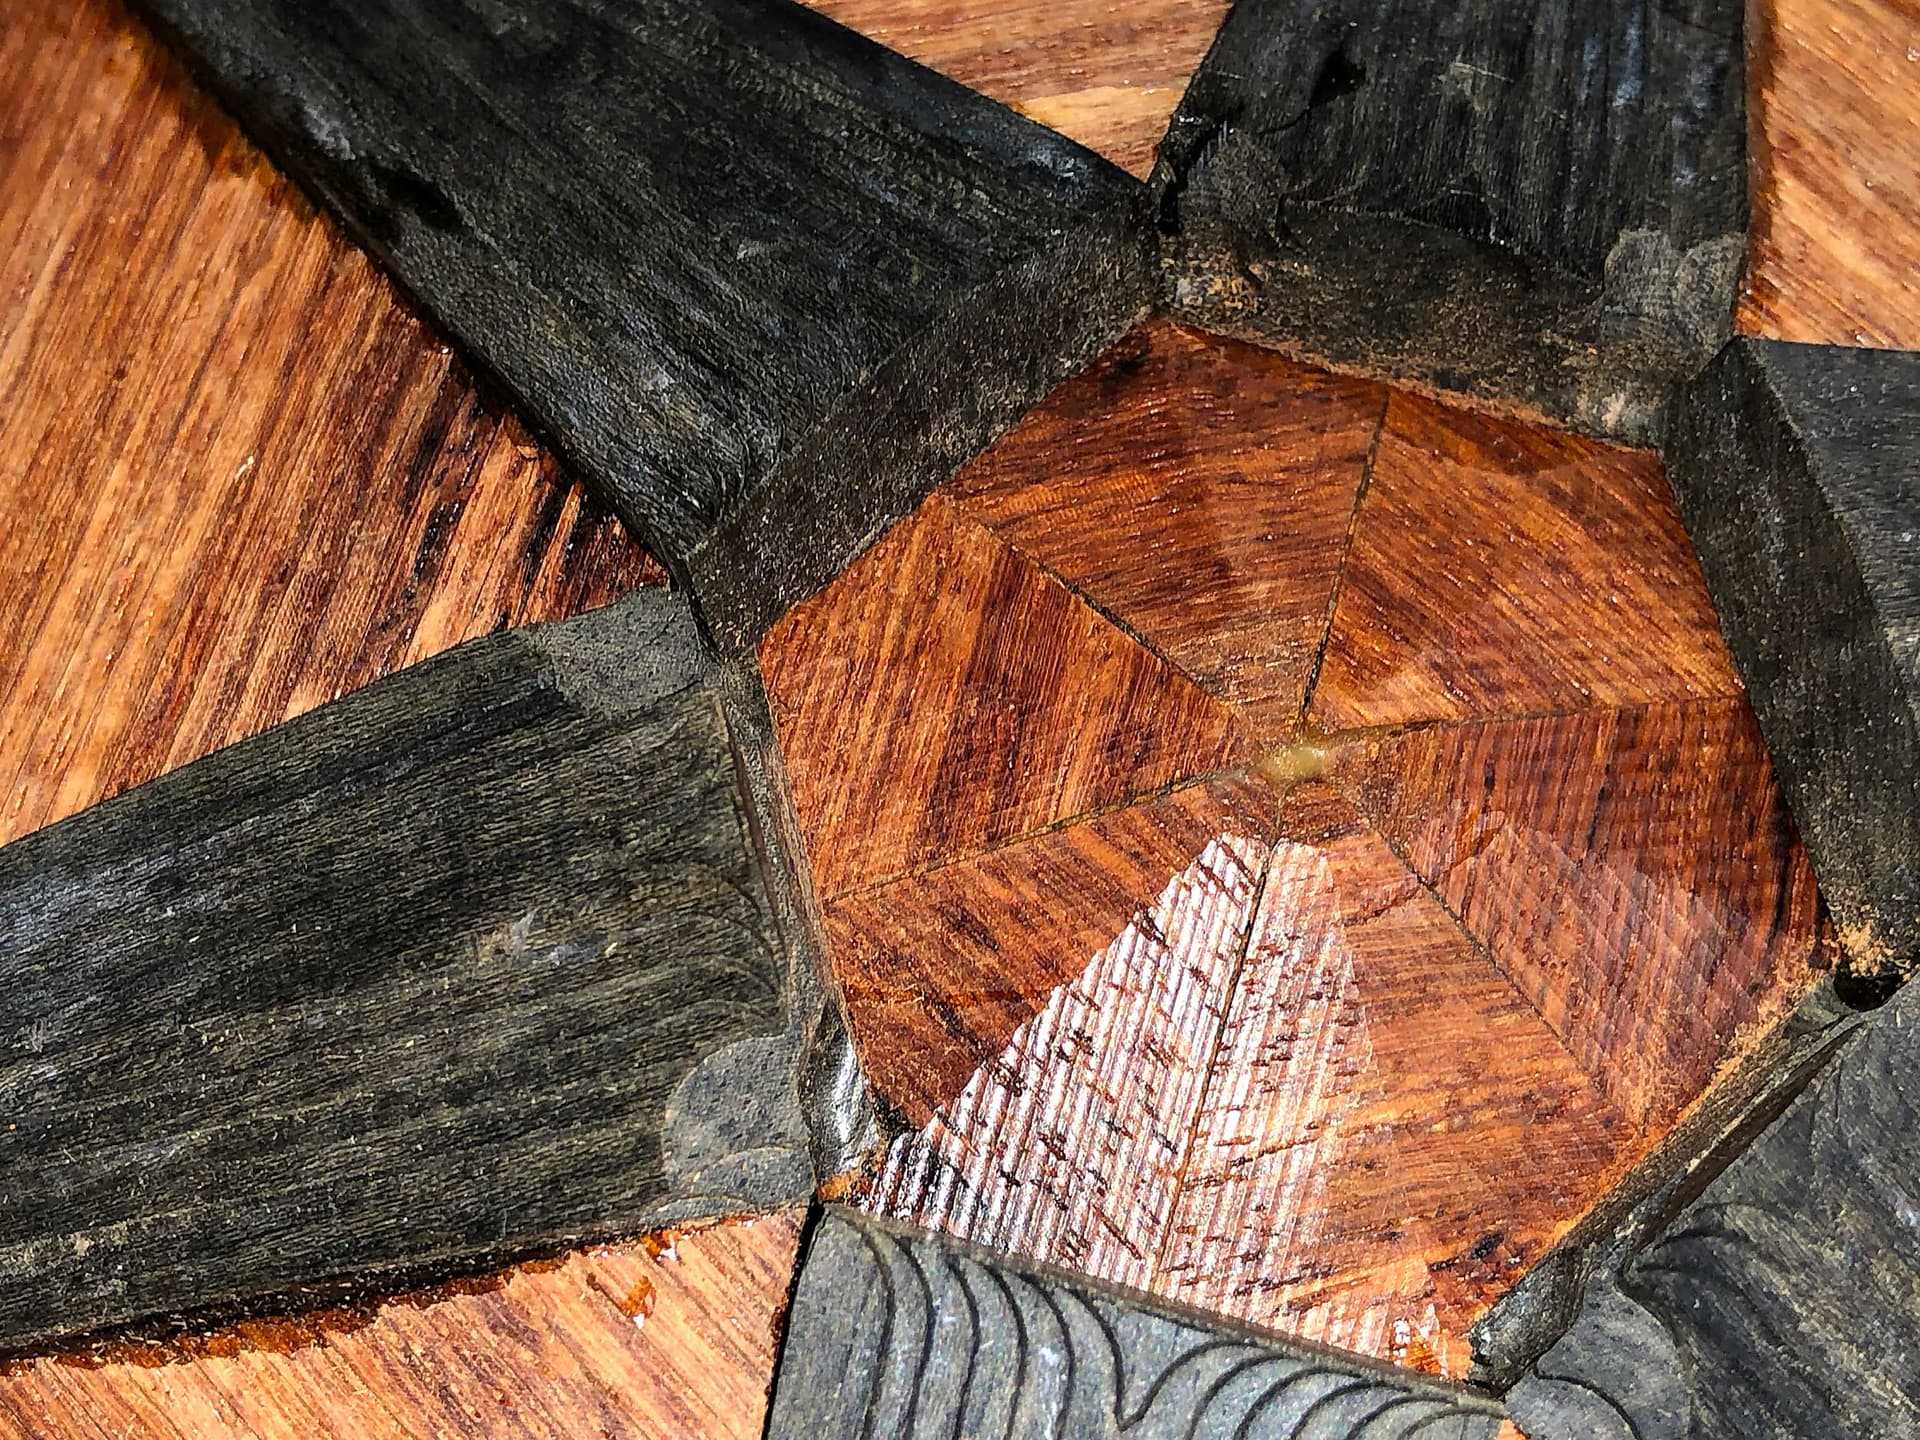
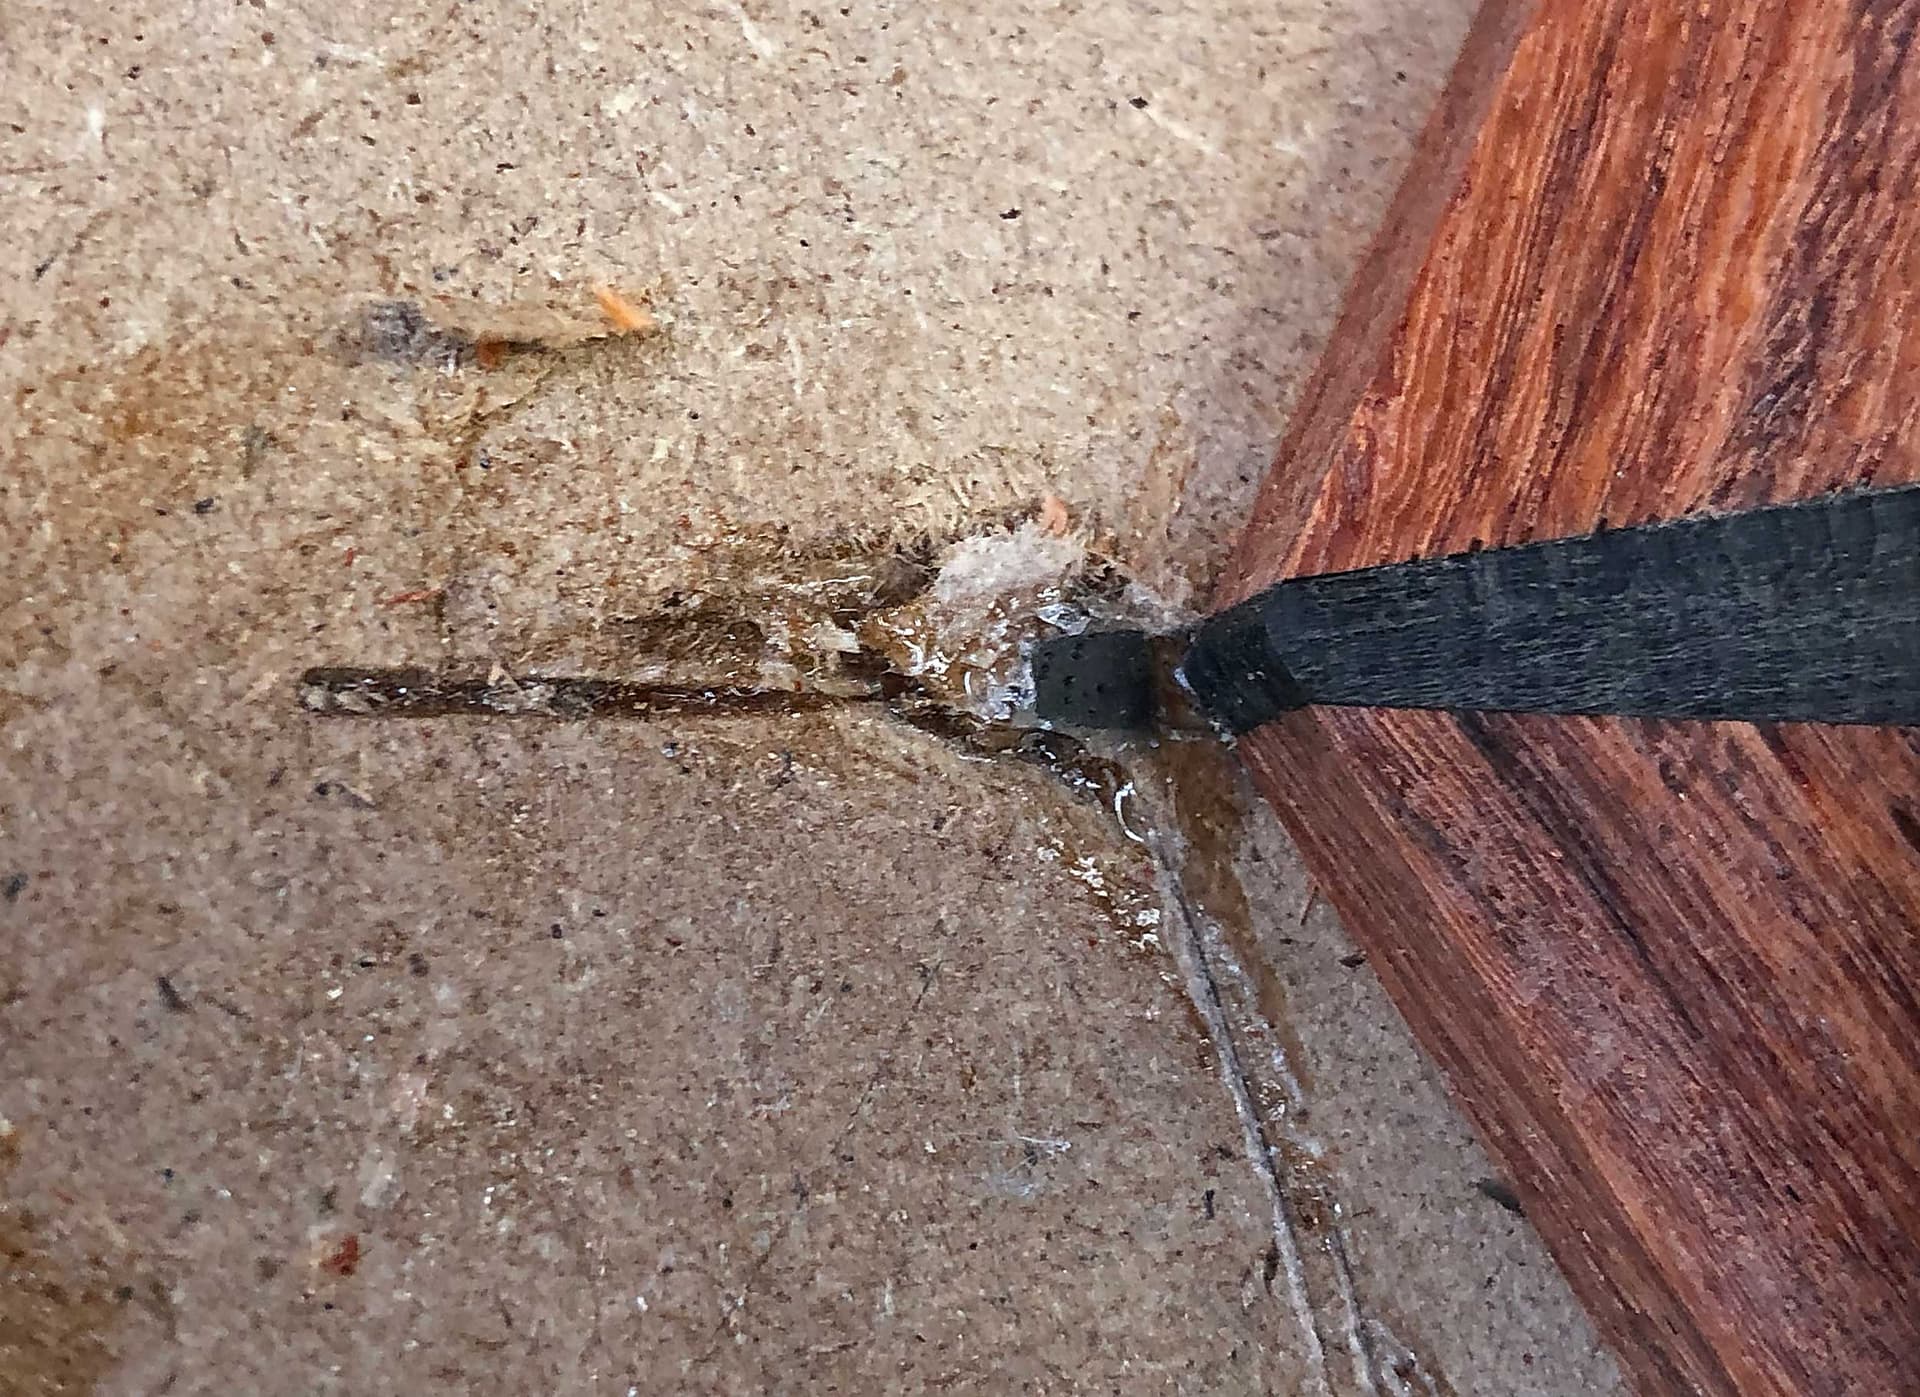
Close up of the previous problem area:

Looks scary, but it’s all good. Essentially, the second set of pocket cuts goes down to the previous adaptive clearing, so no harm done.

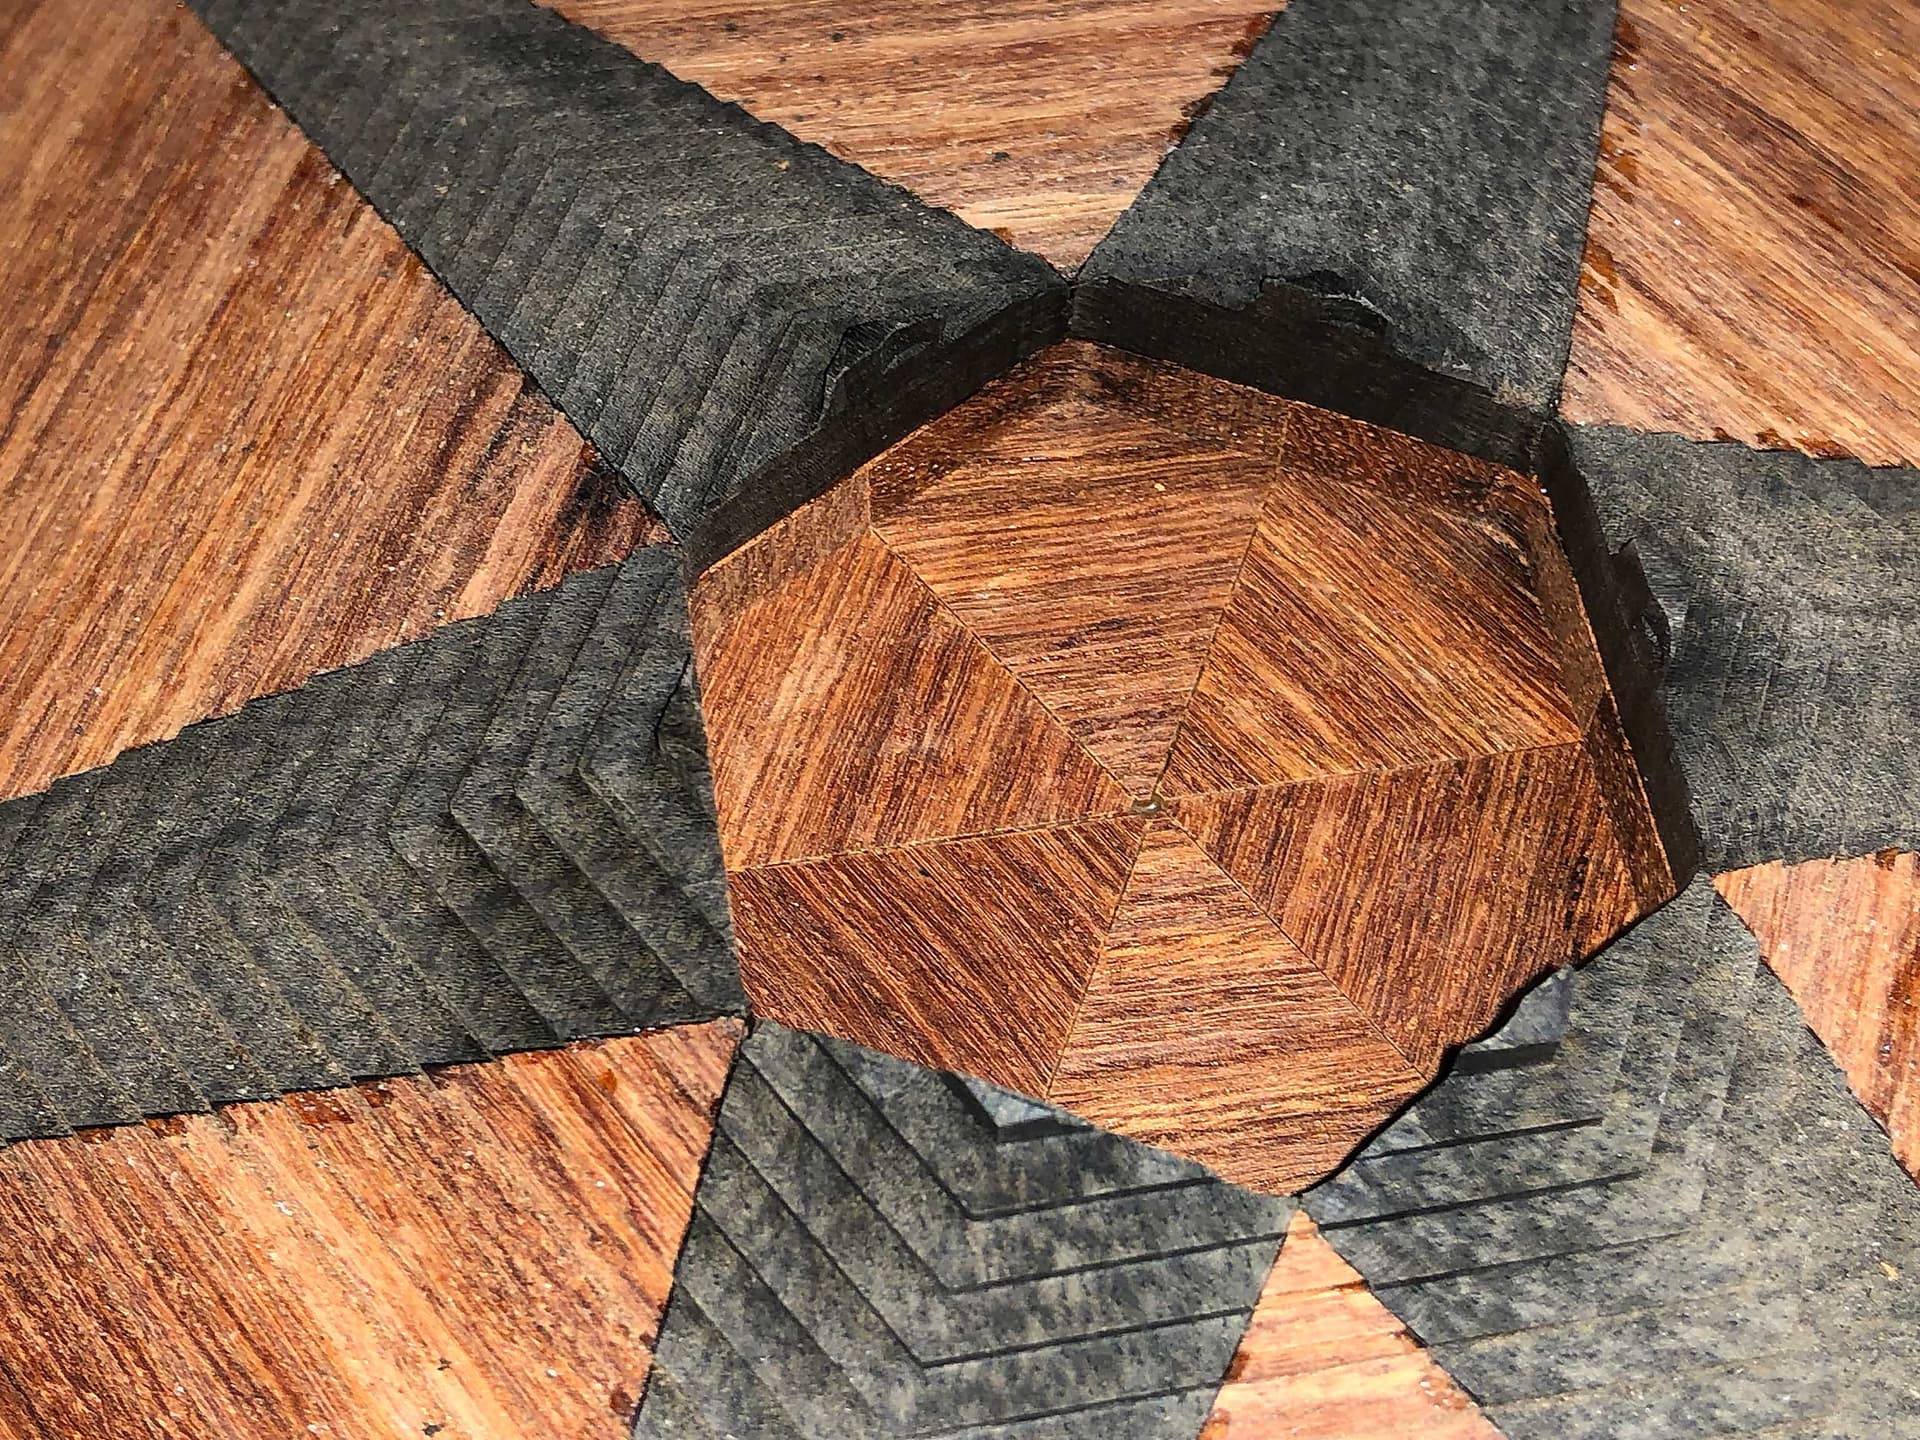
And here’s after the second set of wedges glued in:

And the close-up:

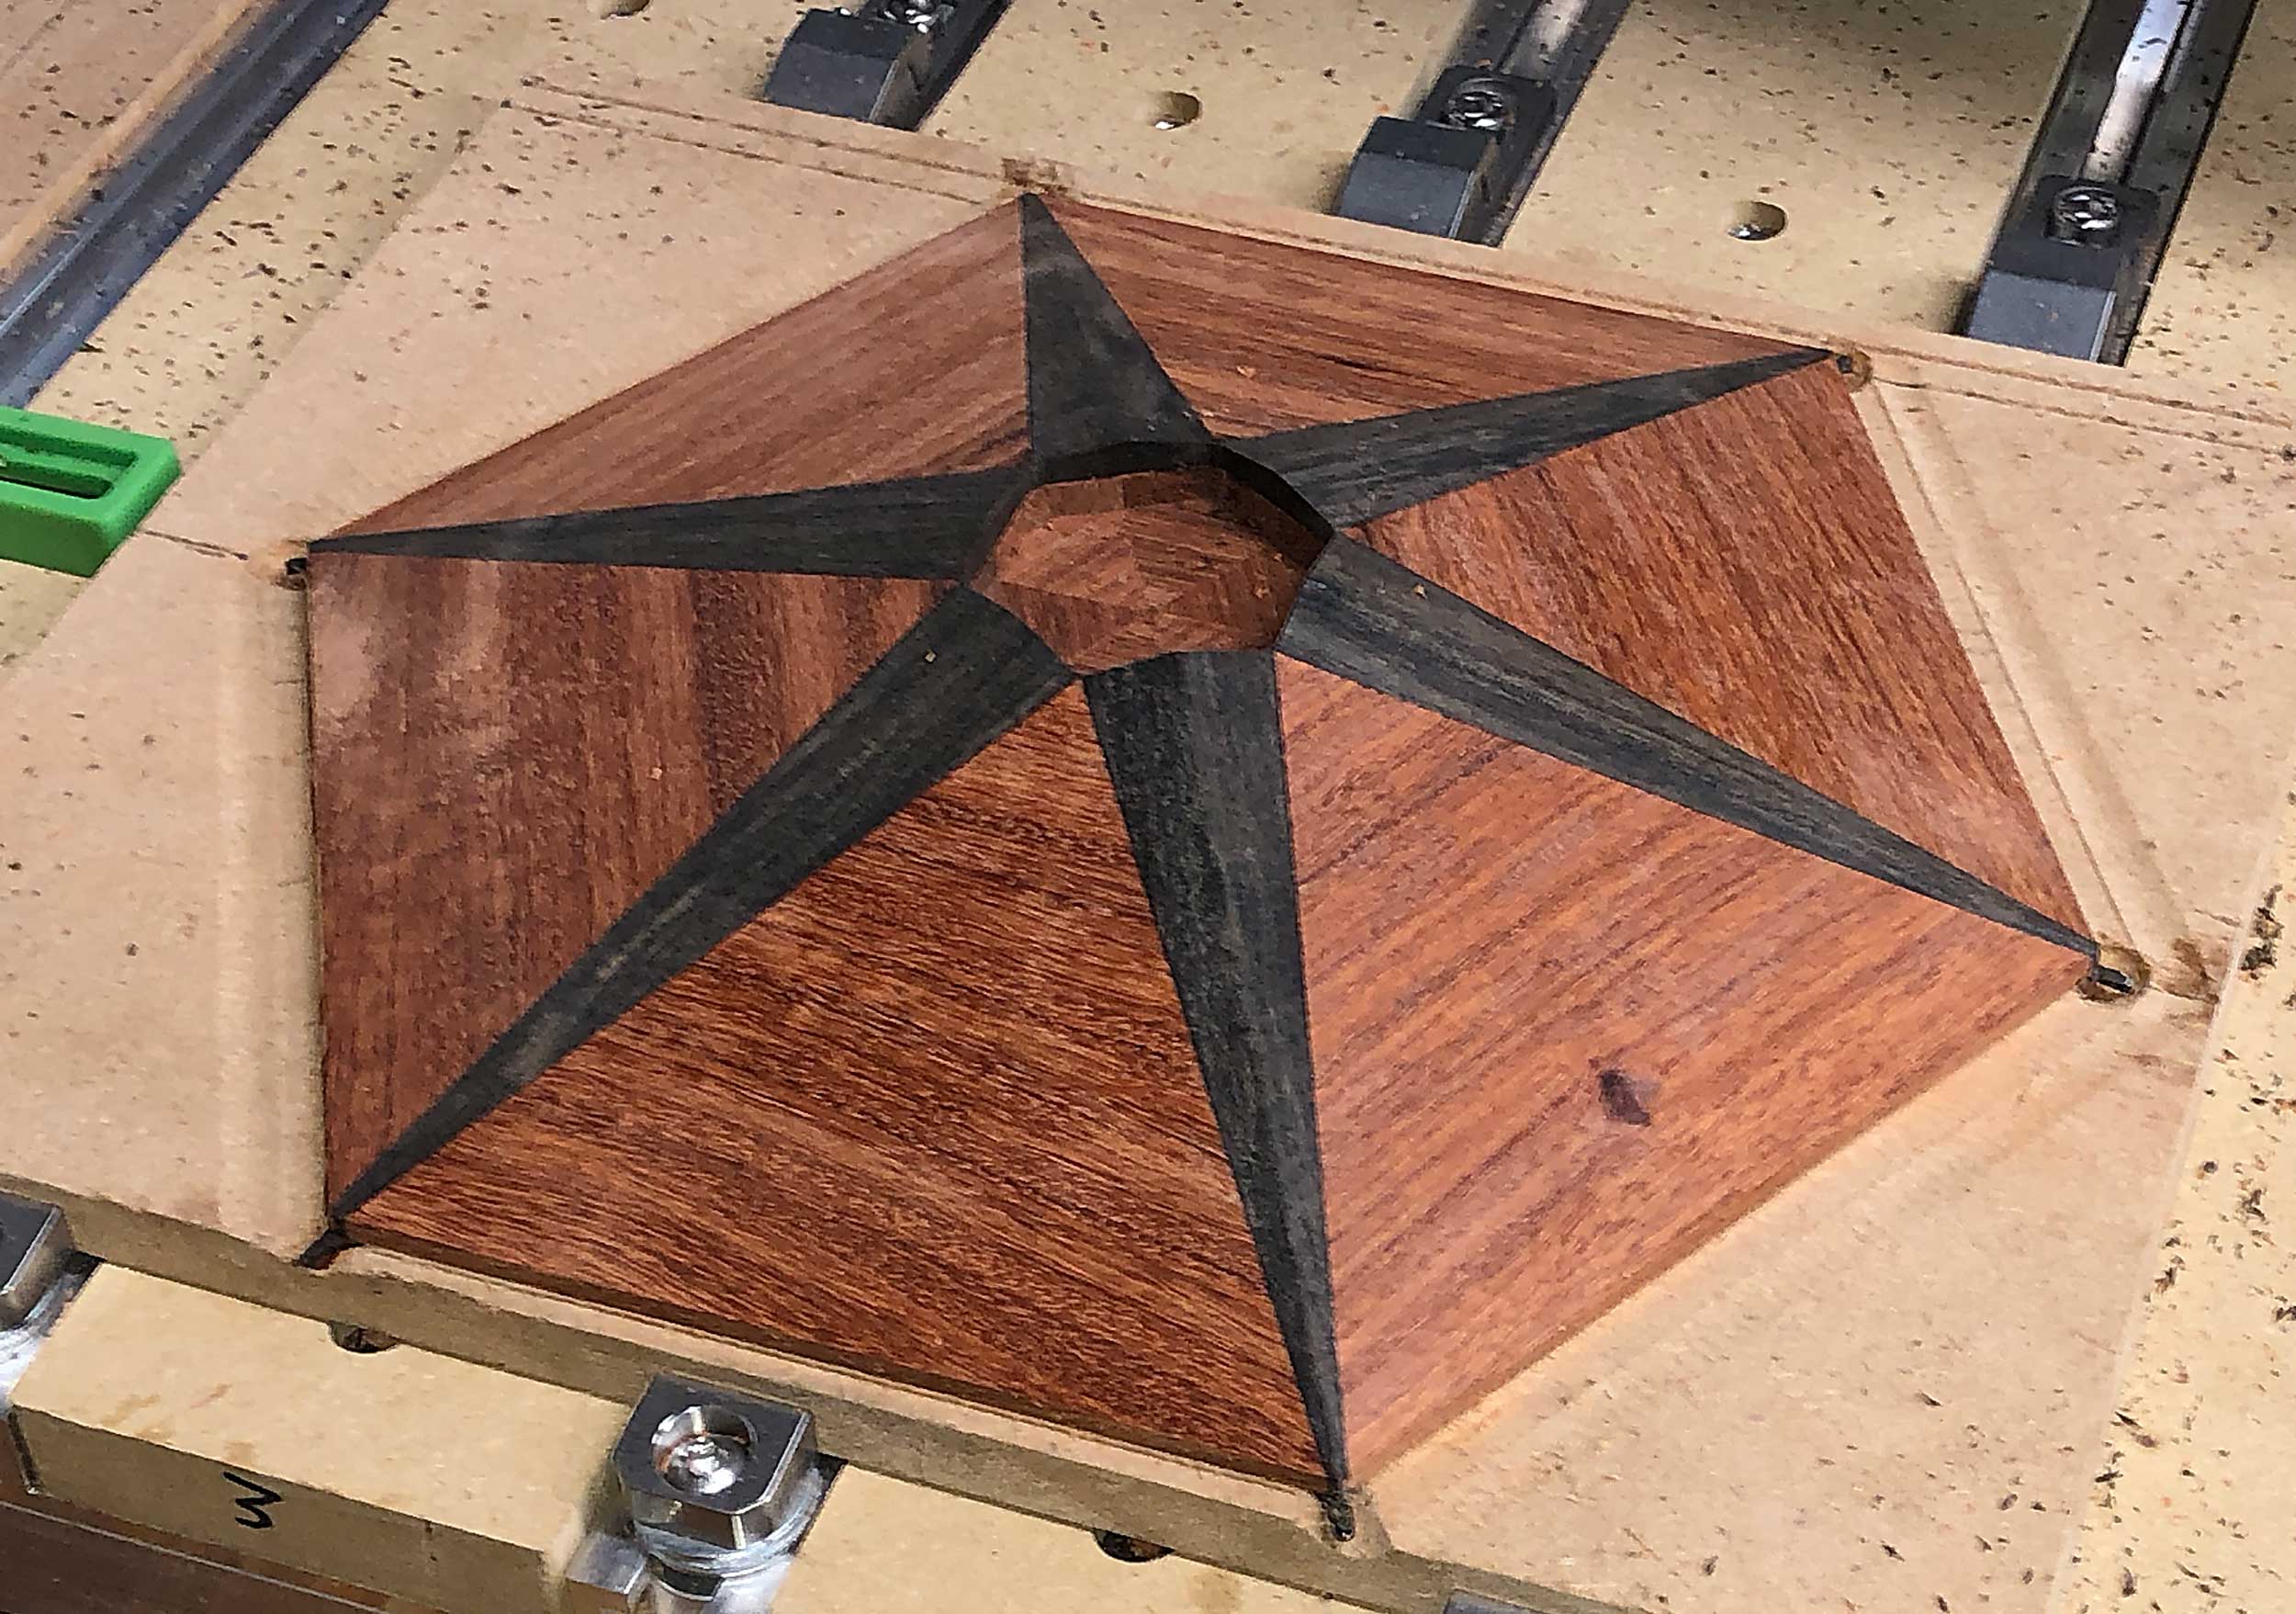
And, here’s with a rough pass on the outside ramp to even up the wedges:

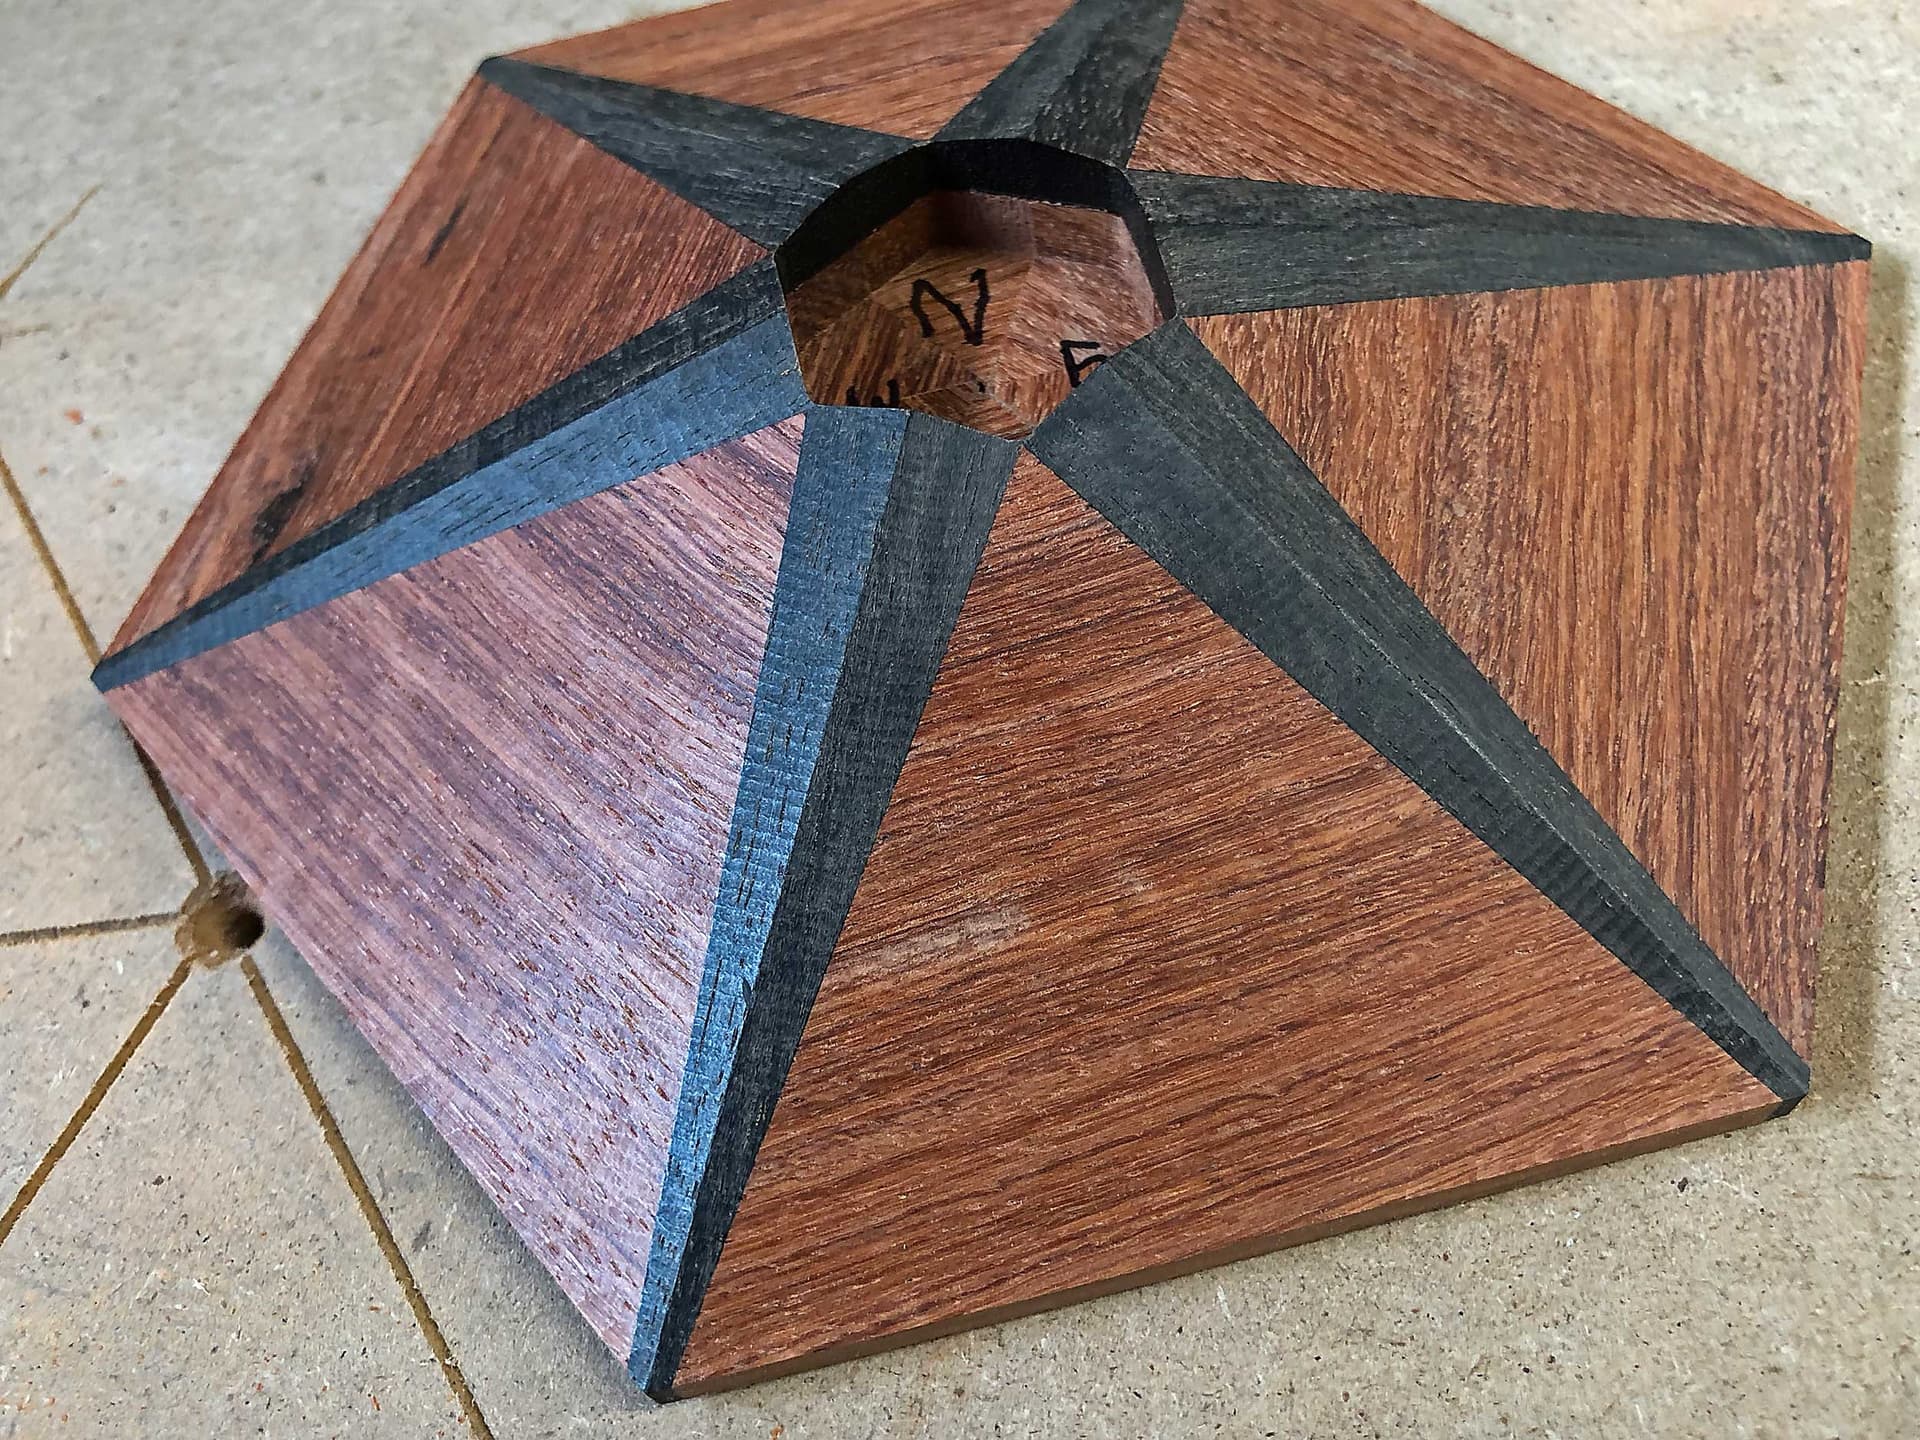
And the close-up of the center:

I did change the finish pass with the big core box bit to be spiral. Here’s what it looks like most of the way done:

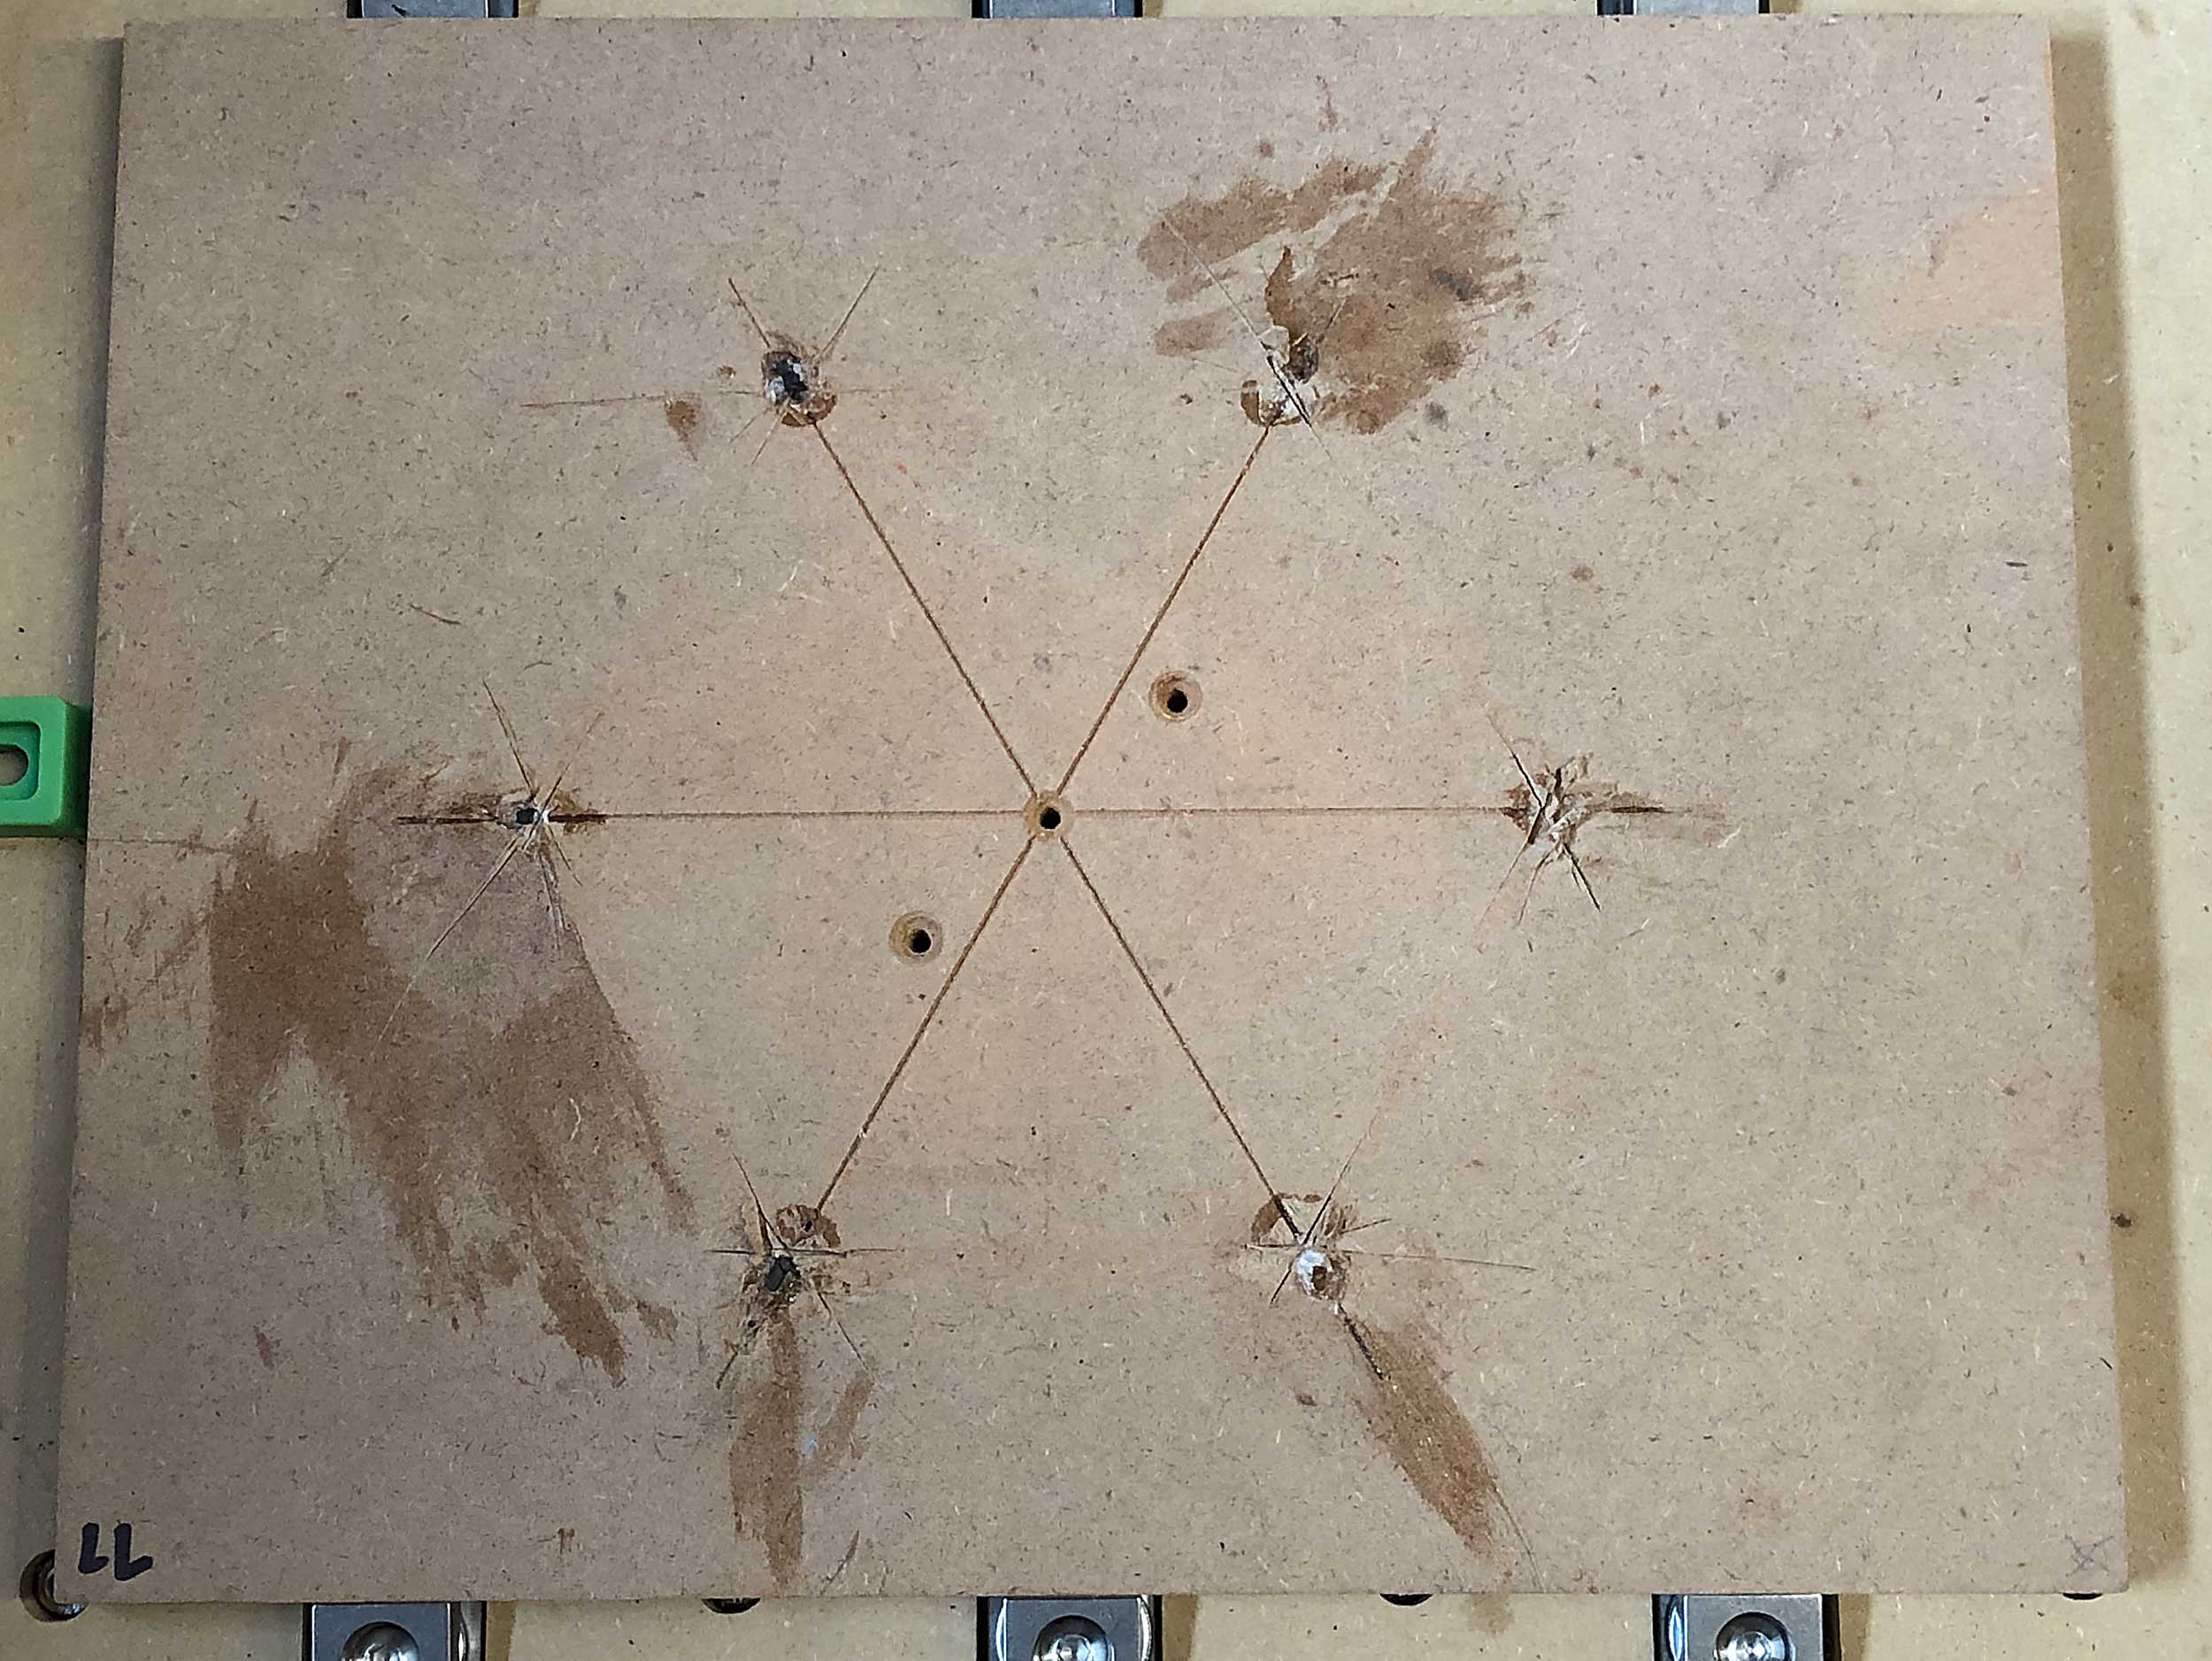
For some reason, once it can no longer touch the model all the way around, it lifts the bit after doing a couple/few passes at each corner to get to the next corner. This is probably from the “do all depths” at the same time combined with some logic about always raising the bit when moving and not cutting. It’s non-optimal, but heck.

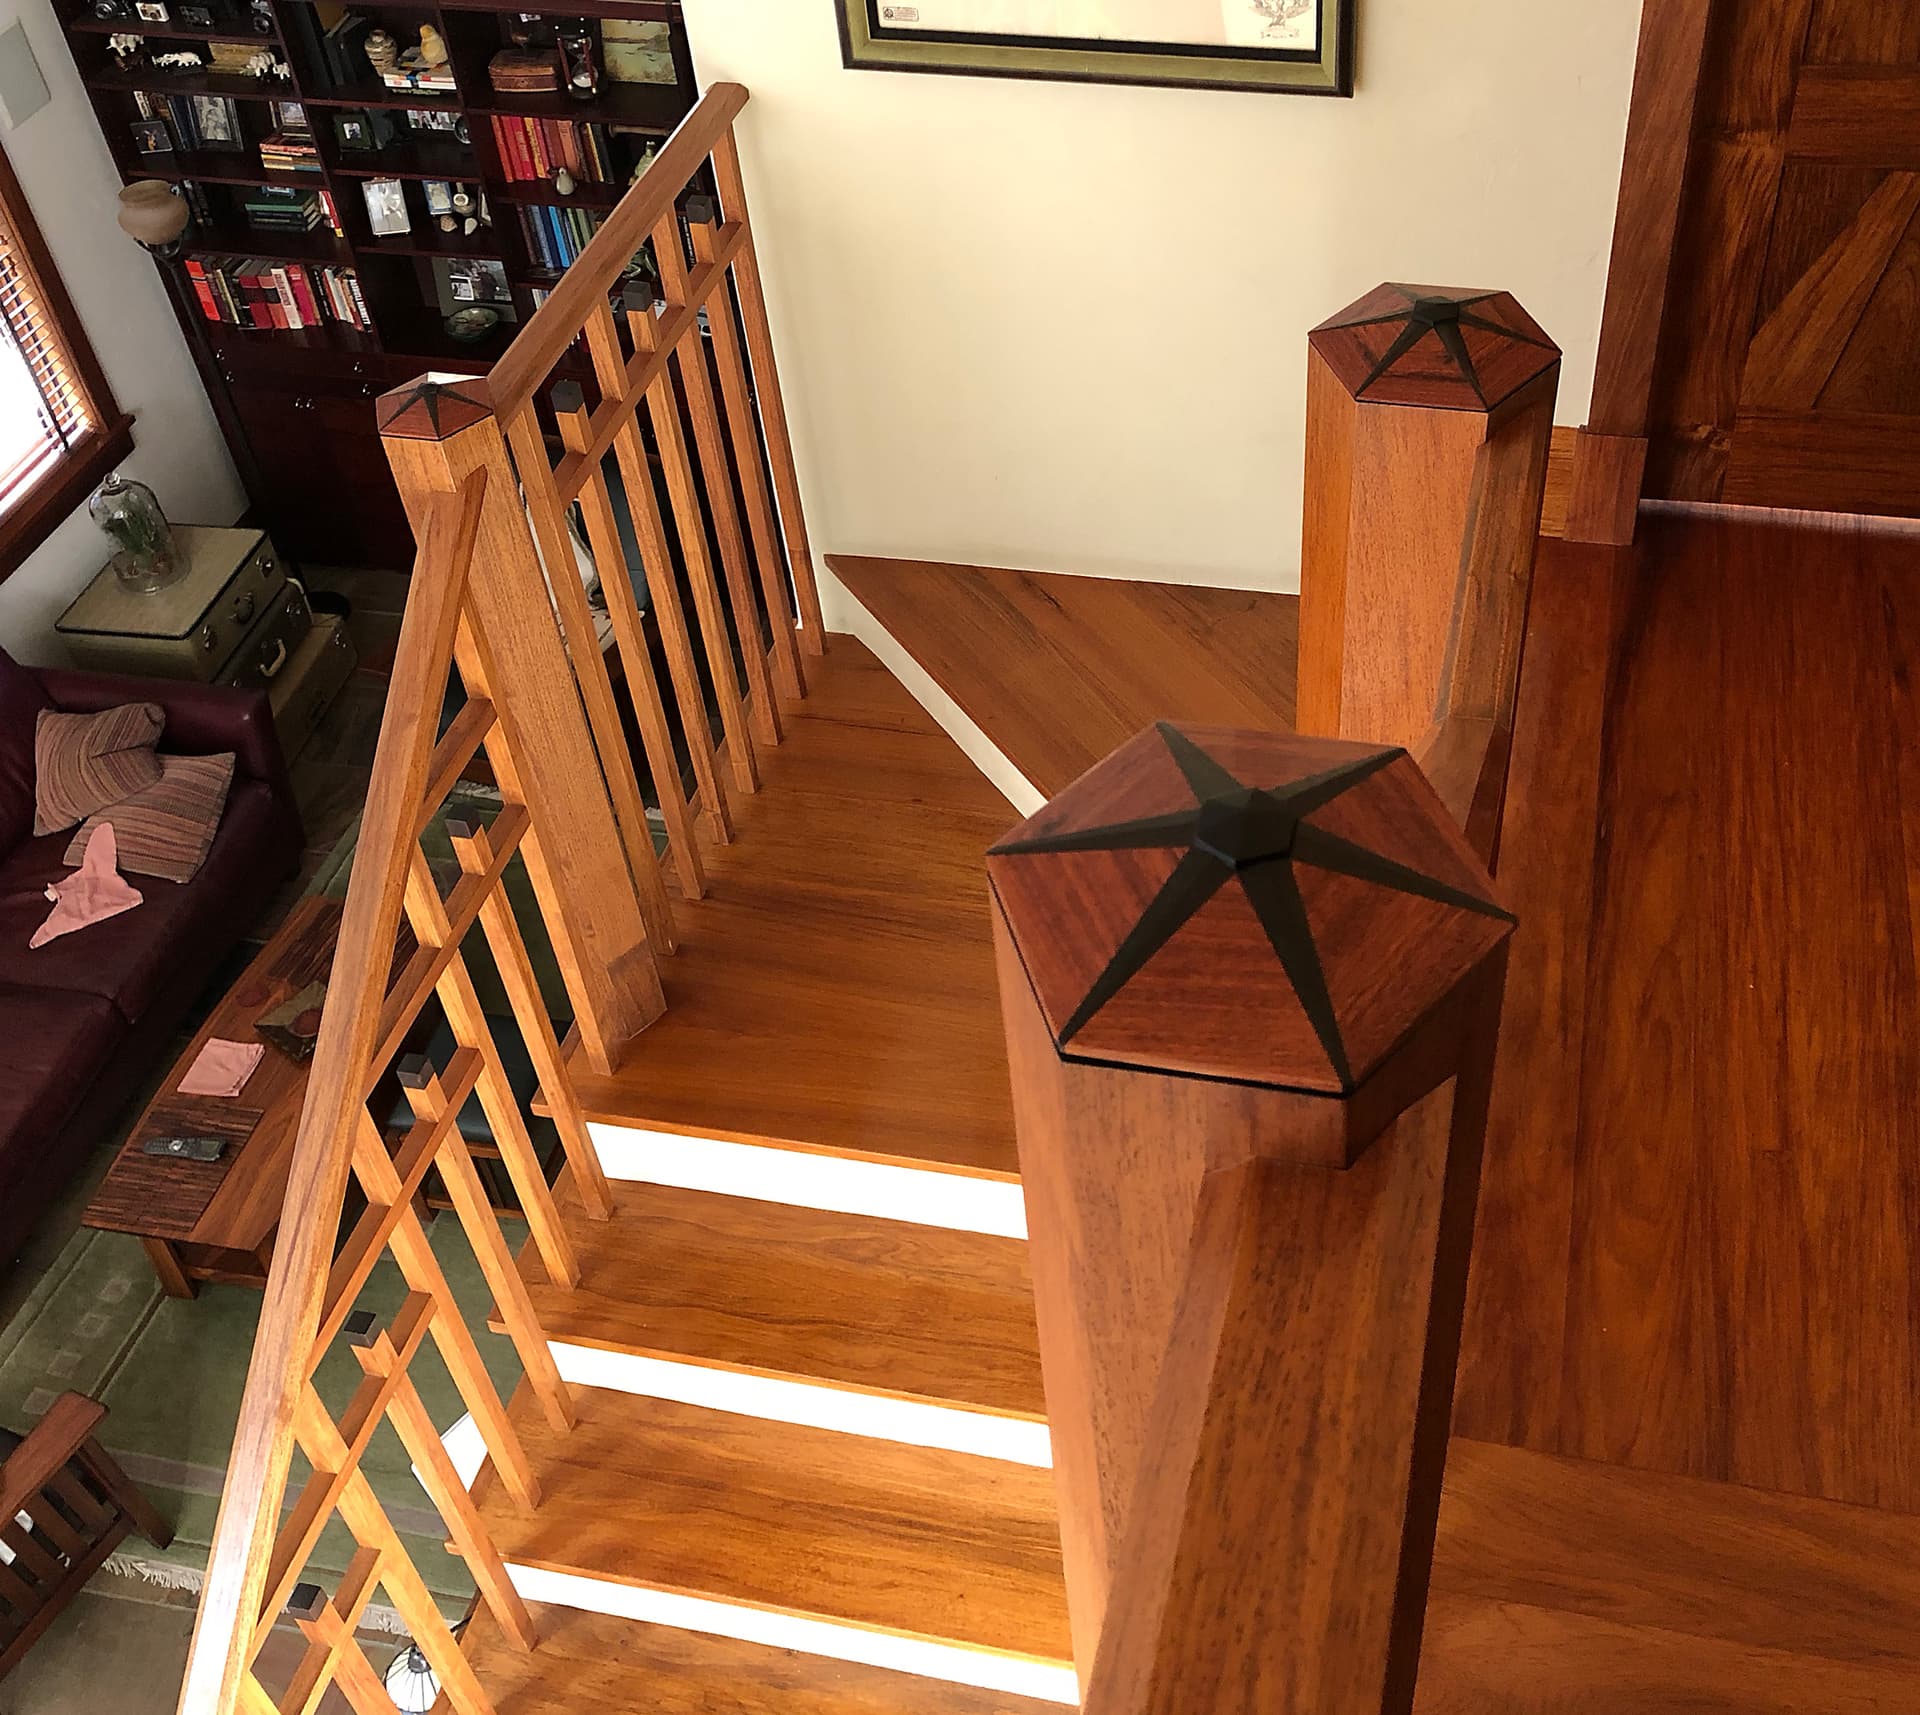
Here’s the hex after the final pass:

And here are a couple close-ups with different lighting so you can see the quality of the surfaces:

It’s actually pretty nice in the middle and upper portions since the cutting direction is mostly with the grain. The ebony is so tight it doesn’t really care. This surface sands smooth starting with 150 grit up through over 600 pretty quickly since all I’m doing is removing tool marks and then removing the scratches from the previous grit.

I’ve already started working on the installation, and at the same time wondering how well Fusion360 will scale to my two smaller sizes. I’m sure that will be an adventure, as all things Fusion are.

2 Likes

Nice, good to see some work product coming out now.

The finish from the spiral path is better than I expected, you can trade stepover for finish quality against time here to whatever your preference is.

As for things to include in the model, you can have the finished wedges included without blocking the center hole, but we’ve kinda doubled up on that by specifying all the surfaces to touch in the spiral toolpath.

Brag and gag time:

Quite a journey to get here, but considering for my first project I took on something of this complexity, had to learn CNCing, learn Fusion360, it wasn’t too bad at all. I’m obviously really stoked how well it came out.

And I can’t give @LiamN enough props for his patience and help. Thanks!

And now on to the second set of toppers, which are 61.6% the size of these. More fun with Fusion360 parameters, I expect…

11 Likes

Great to see the product, looking good, I like the asymmetric entry of the handrail on the main post and the directional grain running round the hex is worth the effort too.

Thanks. I’m actually most proud of the 2mm or so narrow tip of the ebony wedge. That’s not only uniform on all, but the point at each end bisects them perfectly. BTW, I ended up changing the fit tolerance from 0.1mm to 0.05mm. I found that after sanding the center posts were just slightly too loose. The machining surface is pretty darn good, but with ebony I go to 2000 grit since it polishes so well.

I completely forgot about the asymmetric handrail to post thing. I’ll grab some pictures in the future, but the idea was to enable the post to be large enough so that the couple steps that were spiraled around it didn’t have too small a depth at their smallest point (code requirement), AND for the smaller newels to be able to have the posts overhang the edges and extend below the floor level, thereby enabling additional securing to the wall below. I’ve been in too many homes with planar handrails that are shaky. Mine are rock solid.

If that doesn’t make sense, don’t worry - I’ll take some pictures that should explain it.

4 Likes

Doing the middle-sized newels now. Changed the parameters and went into Manufacture and things don’t look right:

Looks like it’s using the old stock size. So I open the Setup up and hit OK. But, I didn’t change anything, so Fusion thinks the toolpaths are all up to date:

I force the update and all appears well:

All this is more than a little bit disconcerting now. It means that some of my changes to parameters when I was working on the larger newel were not reflected in the Manufacture setups. I know that I changed the raw stock size (especially the extra radius and pre-cut angle), but apparently those would not be reflected in the new toolpaths unless I THEN went into each setup and re-OK’d it. Fusion bug?

1 Like

I don’t know if it’s a bug or just a really bad bit of UX, when I’ve made changes, especially to user parameters I go back to manufacture, right click on the setup and select “Generate” and then say “Yes” to the dialog asking if I really want to regenerate all of them.

My recollection (which I can verify if you want) was that just generating the toolpaths wasn’t enough. I had to go and resave the Setup first.

You mean after changing the stock size?

I’ve just done that in the model I’m machining and my toolpaths updated, including things like adaptive clear which is stock size driven.

If you can produce a repeatable error then it’s worth going and posting it on the Fusion 360 forums so they can fix the bug.

That really looks cool!
Now if you can find a fuzzy black earmuff to set on there for Halloween . . . . .

:slight_smile:

So, I had an issue with alignment on the medium-sized toppers. Since the wedges taper down to around 3/32" (2mm), it’s important that the blanks I glue up from equilateral triangles have their glue lines fall within the wedge. Maybe I was getting sloppy building blanks. I ended up addressing the issue by creating a radial hex line toolpath in Carbide Create and using that to etch the wasteboard so that I could line up the blank’s glue lines:

Then as a double-check I ran the etch program on top of the blank (since that gets cut away anyway):

I actually moved center a tiny bit in both X and Y after the blank was mounted to get center just right. One advantage to this technique is that I didn’t have to worry about the outside edges of the blank at all, as you can see.

The other thing I’m doing is glueing the wedges in while the blank stays mounted to the wasteboard and the wasteboard is mounted to the spoilboard. This means I have to manually chop clearance notches in the wasteboard so the excess wedge has some place to go. Kind of a pain, and it ruins the wasteboard so I have to resurface it for each new topper, but for me that’s the price of alignment.

Here you can see what the wedge glued and trimmed looks like on the wasteboard:

It’s actually gluing the topper to the wasteboard, so after I’m all done I have to chop away at the wedge in the wasteboard to free it. Here’s what the wasteboard looks like when I’m done:

You can still see the alignment lines, but they’re ruined at the critical corners so I can’t use it as is for the next topper.

BTW, here’s another shot of the surface finish I’m getting off that 1" core box bit. This is on the medium sized toppers, which I like the proportions of better than the larger ones, surprisingly:

And to help explain in the previous discussion of why the handrail comes out off-center, it’s so the newel itself covers enough of the interior of the corner steps so that the minimum depth of the step is 6", which is required by code:

Hope that makes sense.

7 Likes

Here’s a shot of the completed staircase:

I still have two more toppers to make for a balcony. Securing the small pieces of ebony for the wedges on these smaller toppers is becoming a challenge. I may have to resort to tabs and using larger pieces than I need to in order to have more securing area.

13 Likes

That looks great, really good to see those CAD shapes in real wood and in context with the rest of your work, the patterns in the balusters are a really nice change from the normal too.

How are you holding them down at the moment?

I’ve found that blue tape and CA glue, when it’s the proper Scotch, is frequently so strong I have trouble lifting the work piece afterwards.

If that’s not enough then you could leave about 0.25mm at the bottom of the cut not going all the way through, then just cut through with a marking knife to release the part and sand the sides.

This topic was automatically closed 30 days after the last reply. New replies are no longer allowed.