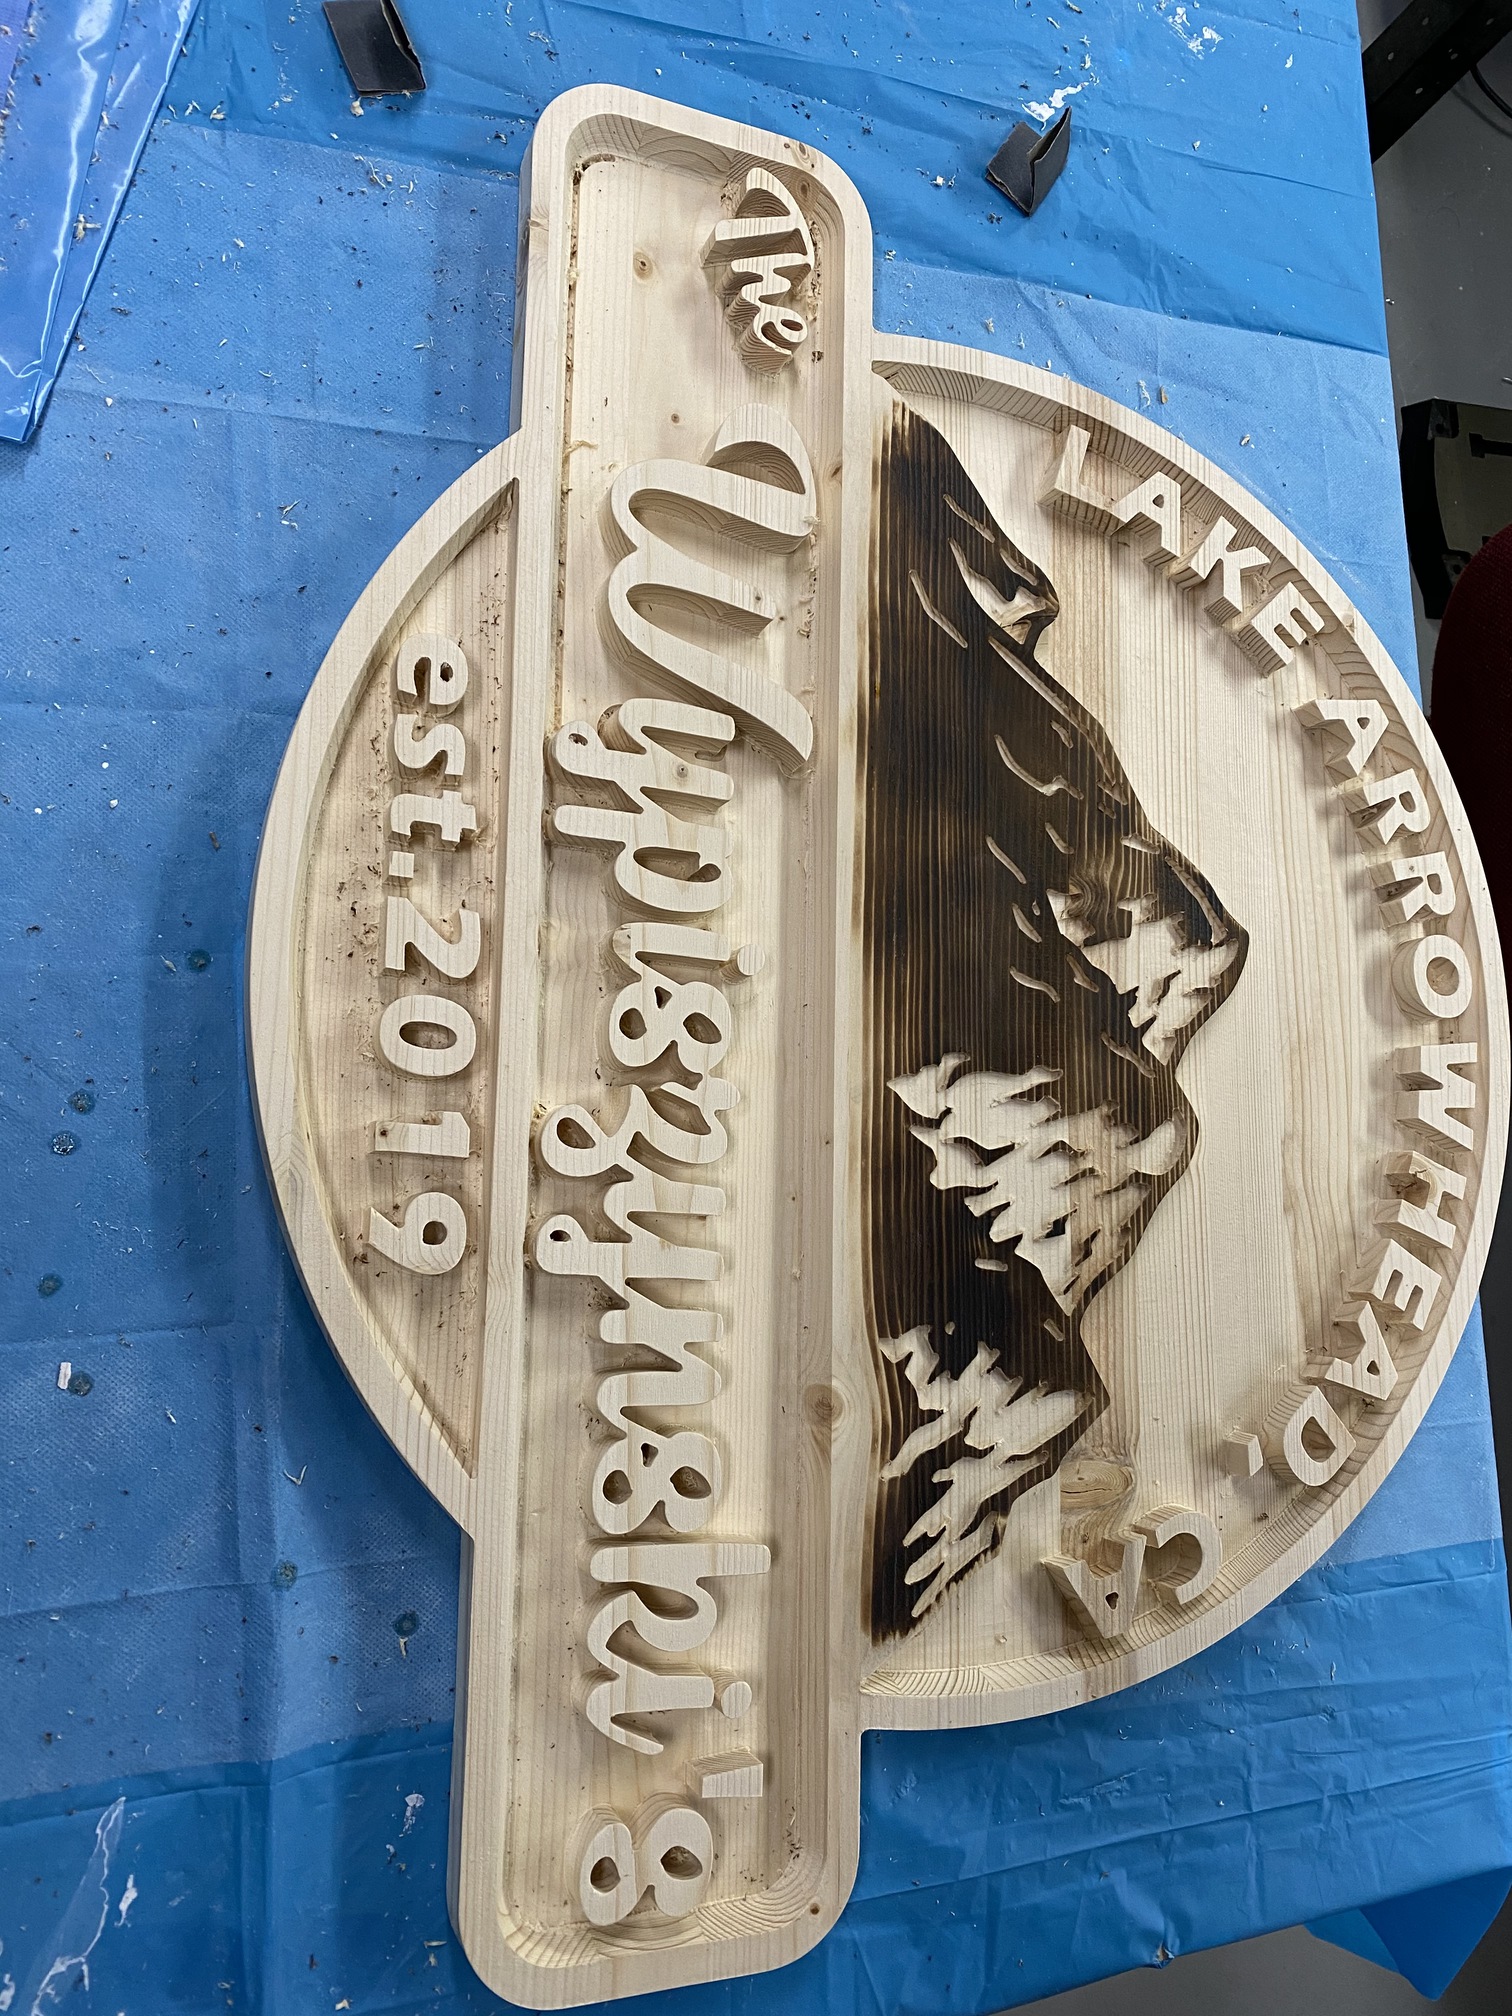
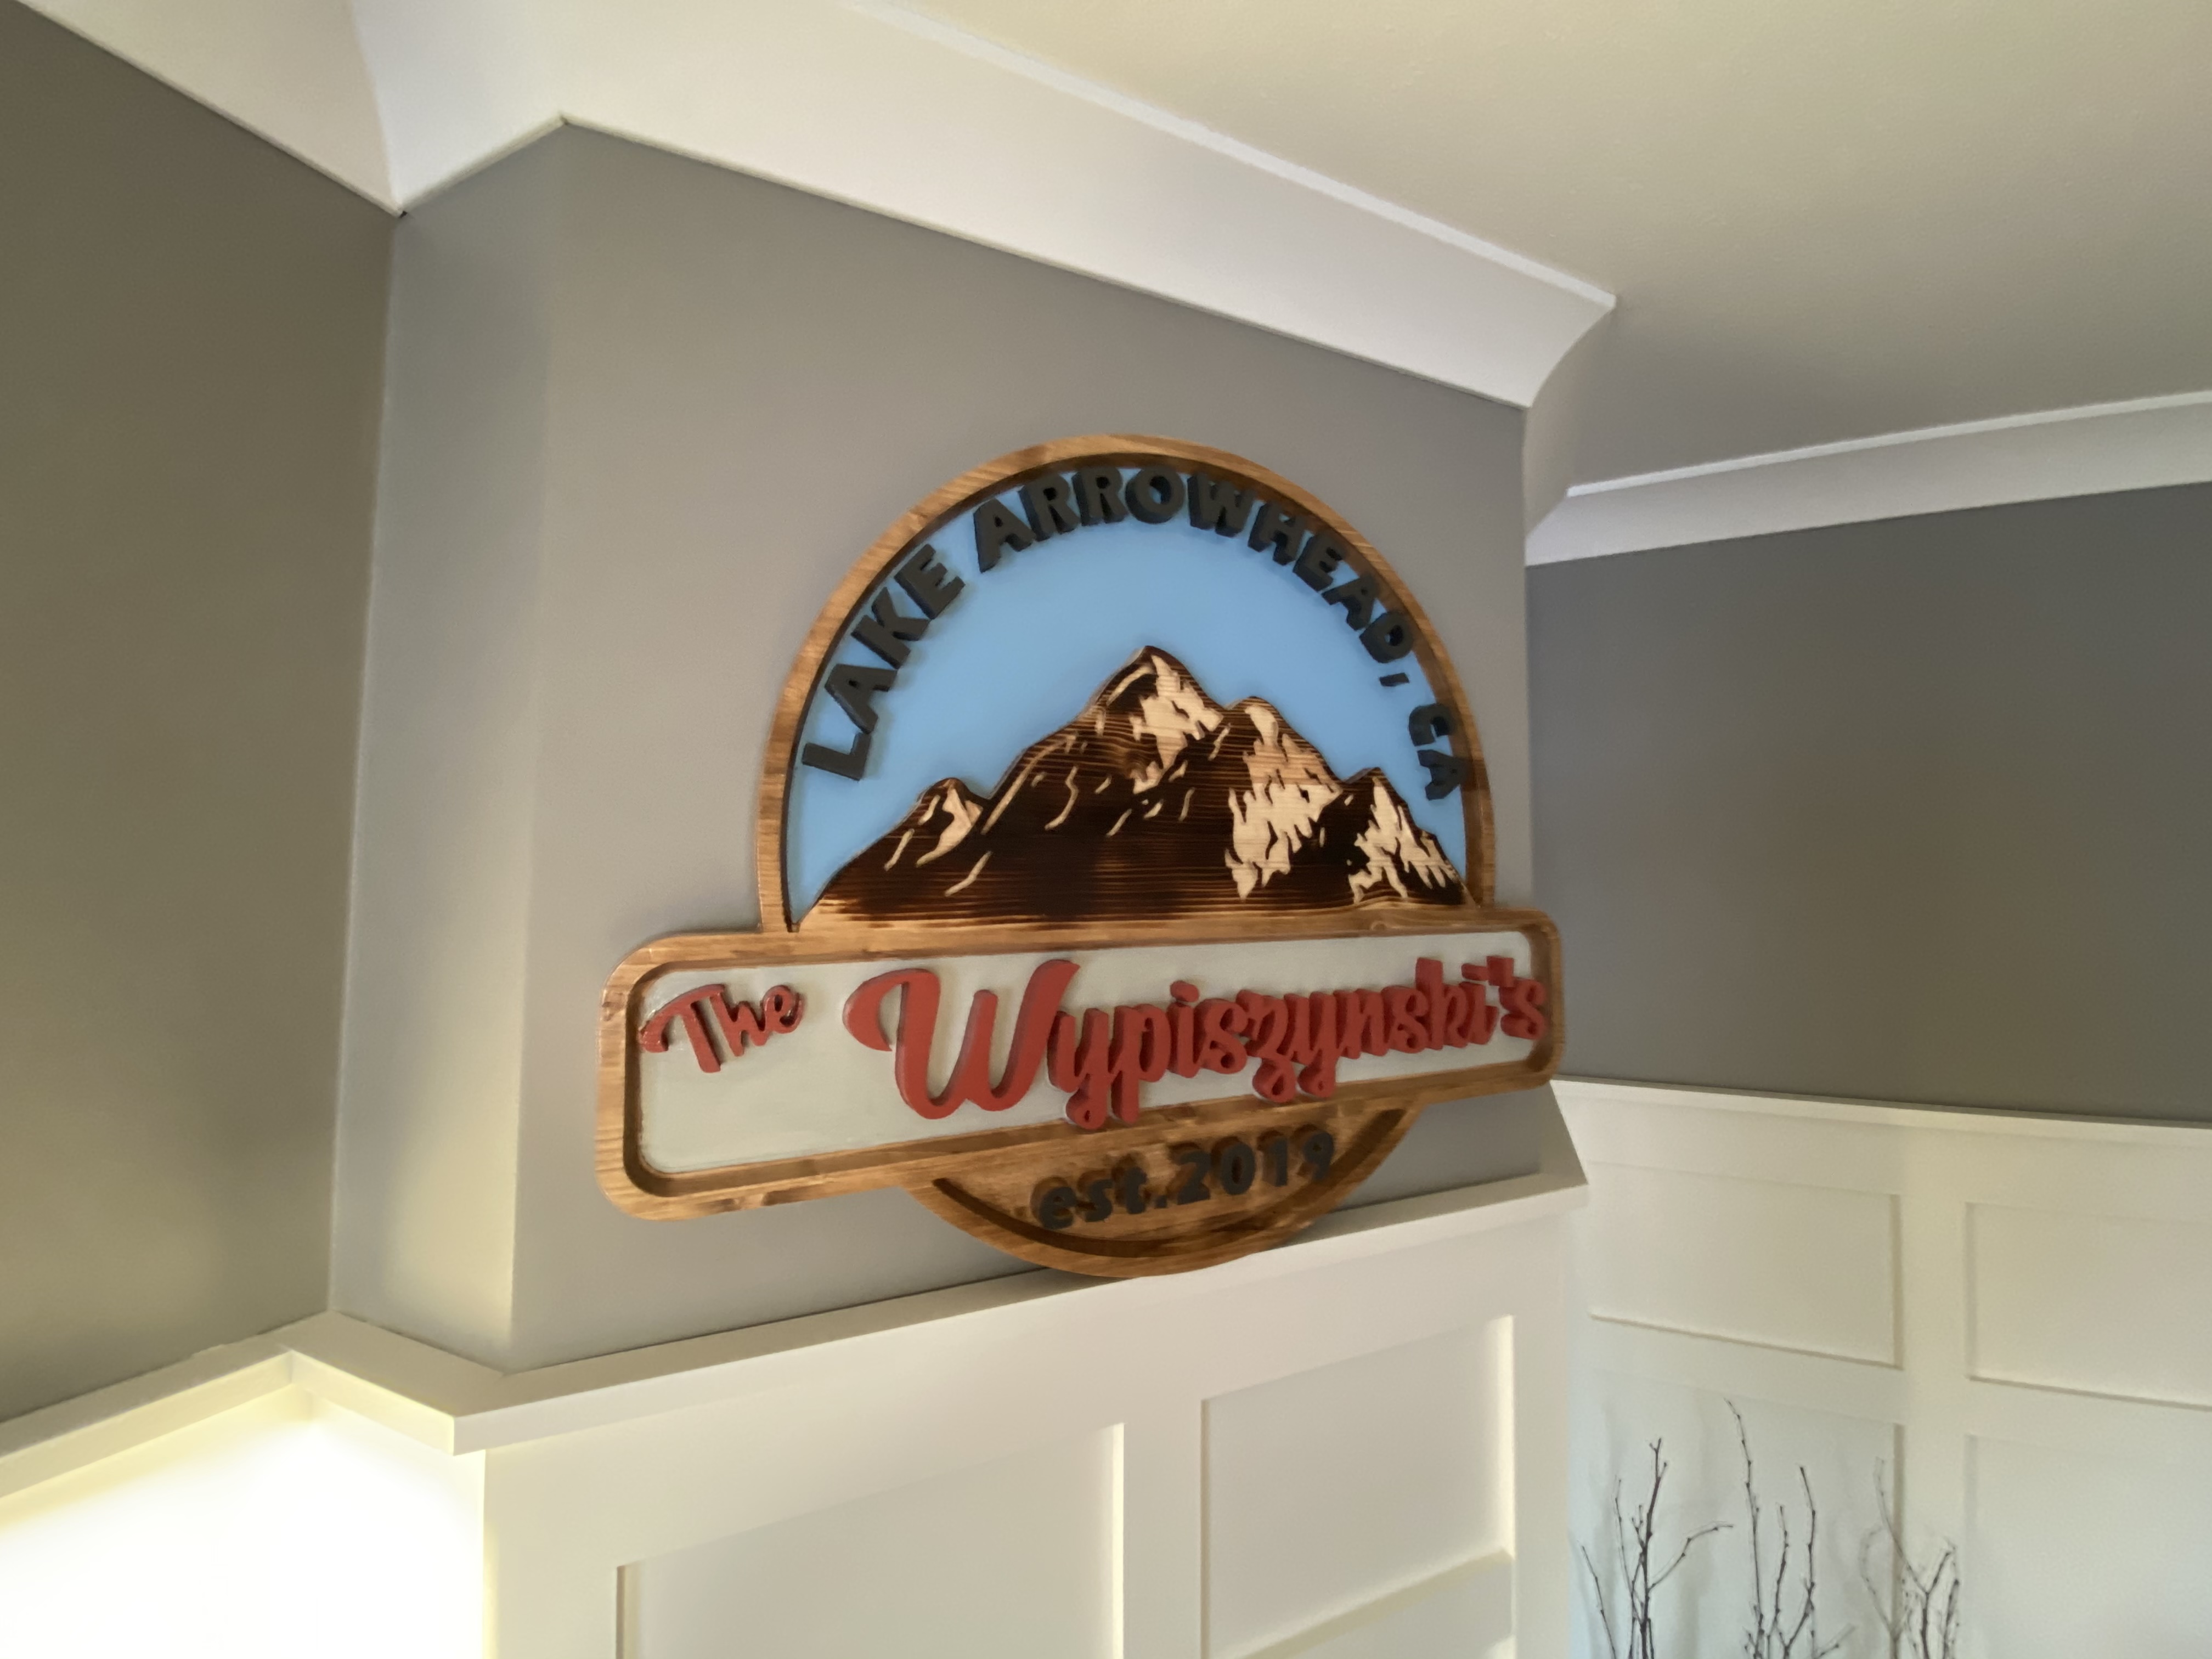
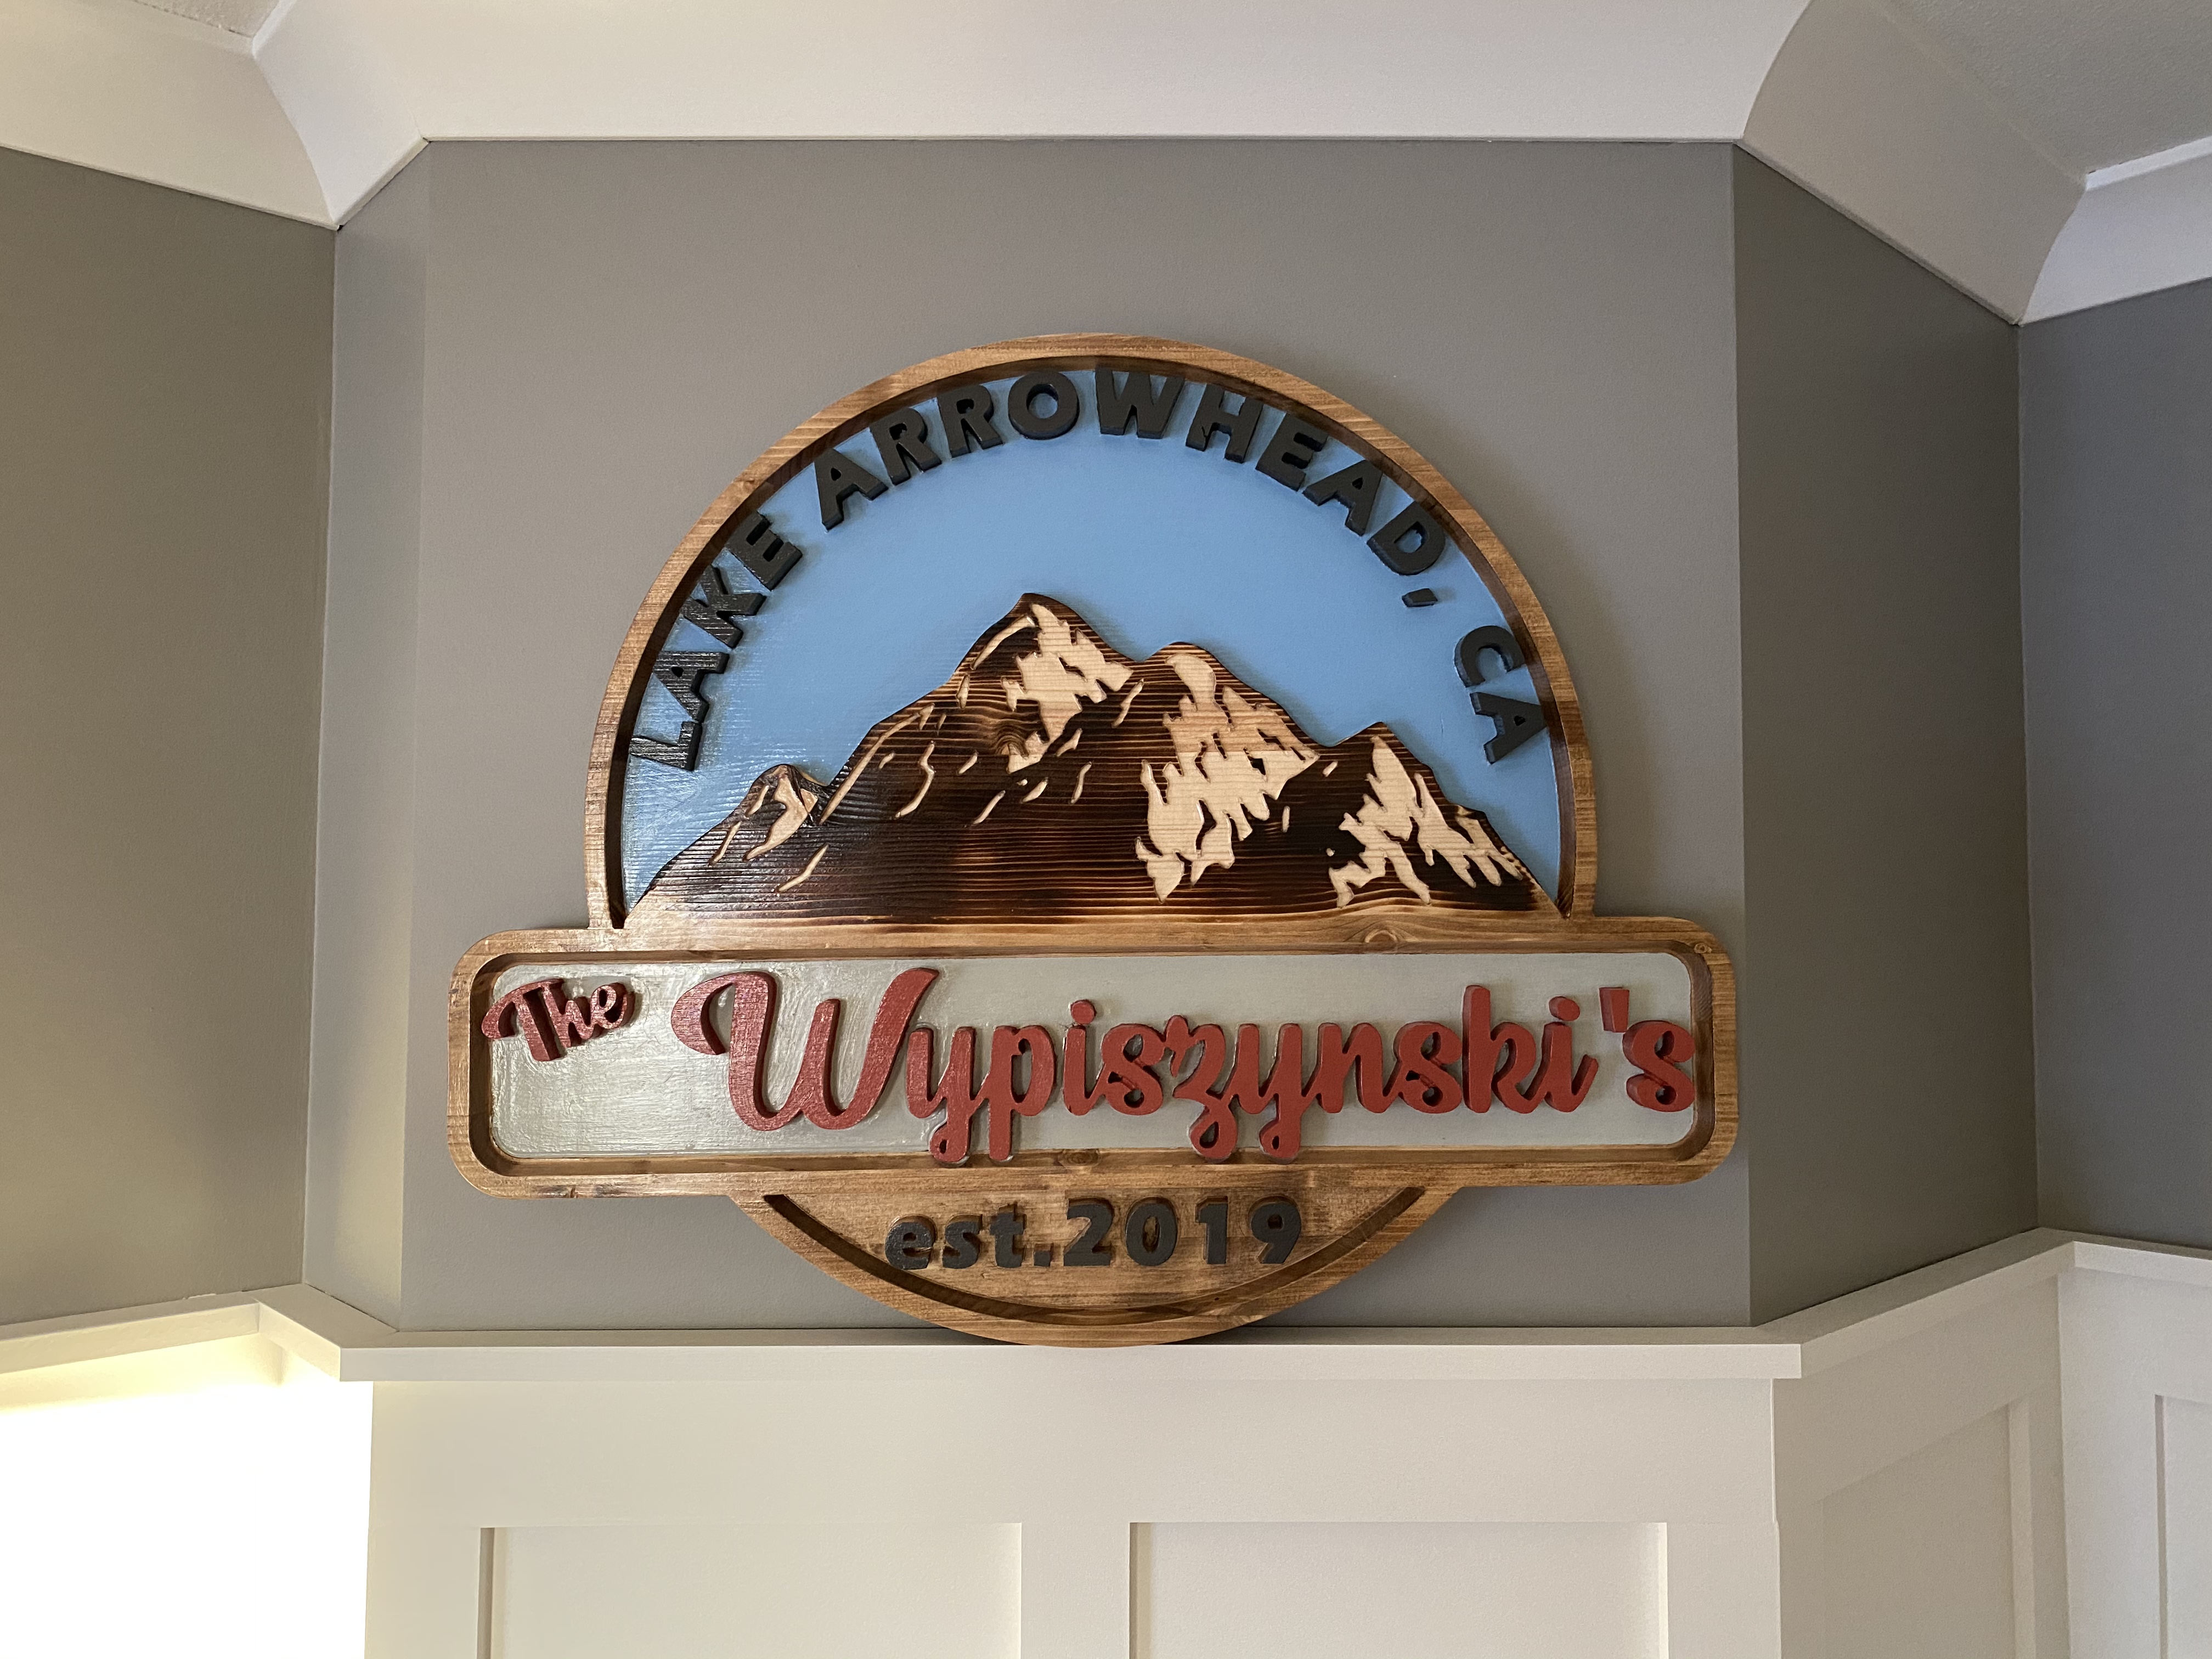
Last weekend i completed my first attempt at machining a sign on the Shapeoko. The sign is a christmas gift for a family member. I used edge glued pine as i didn’t want to invest much on materials for my first attempt. It turned out OK, but i had a couple issues.
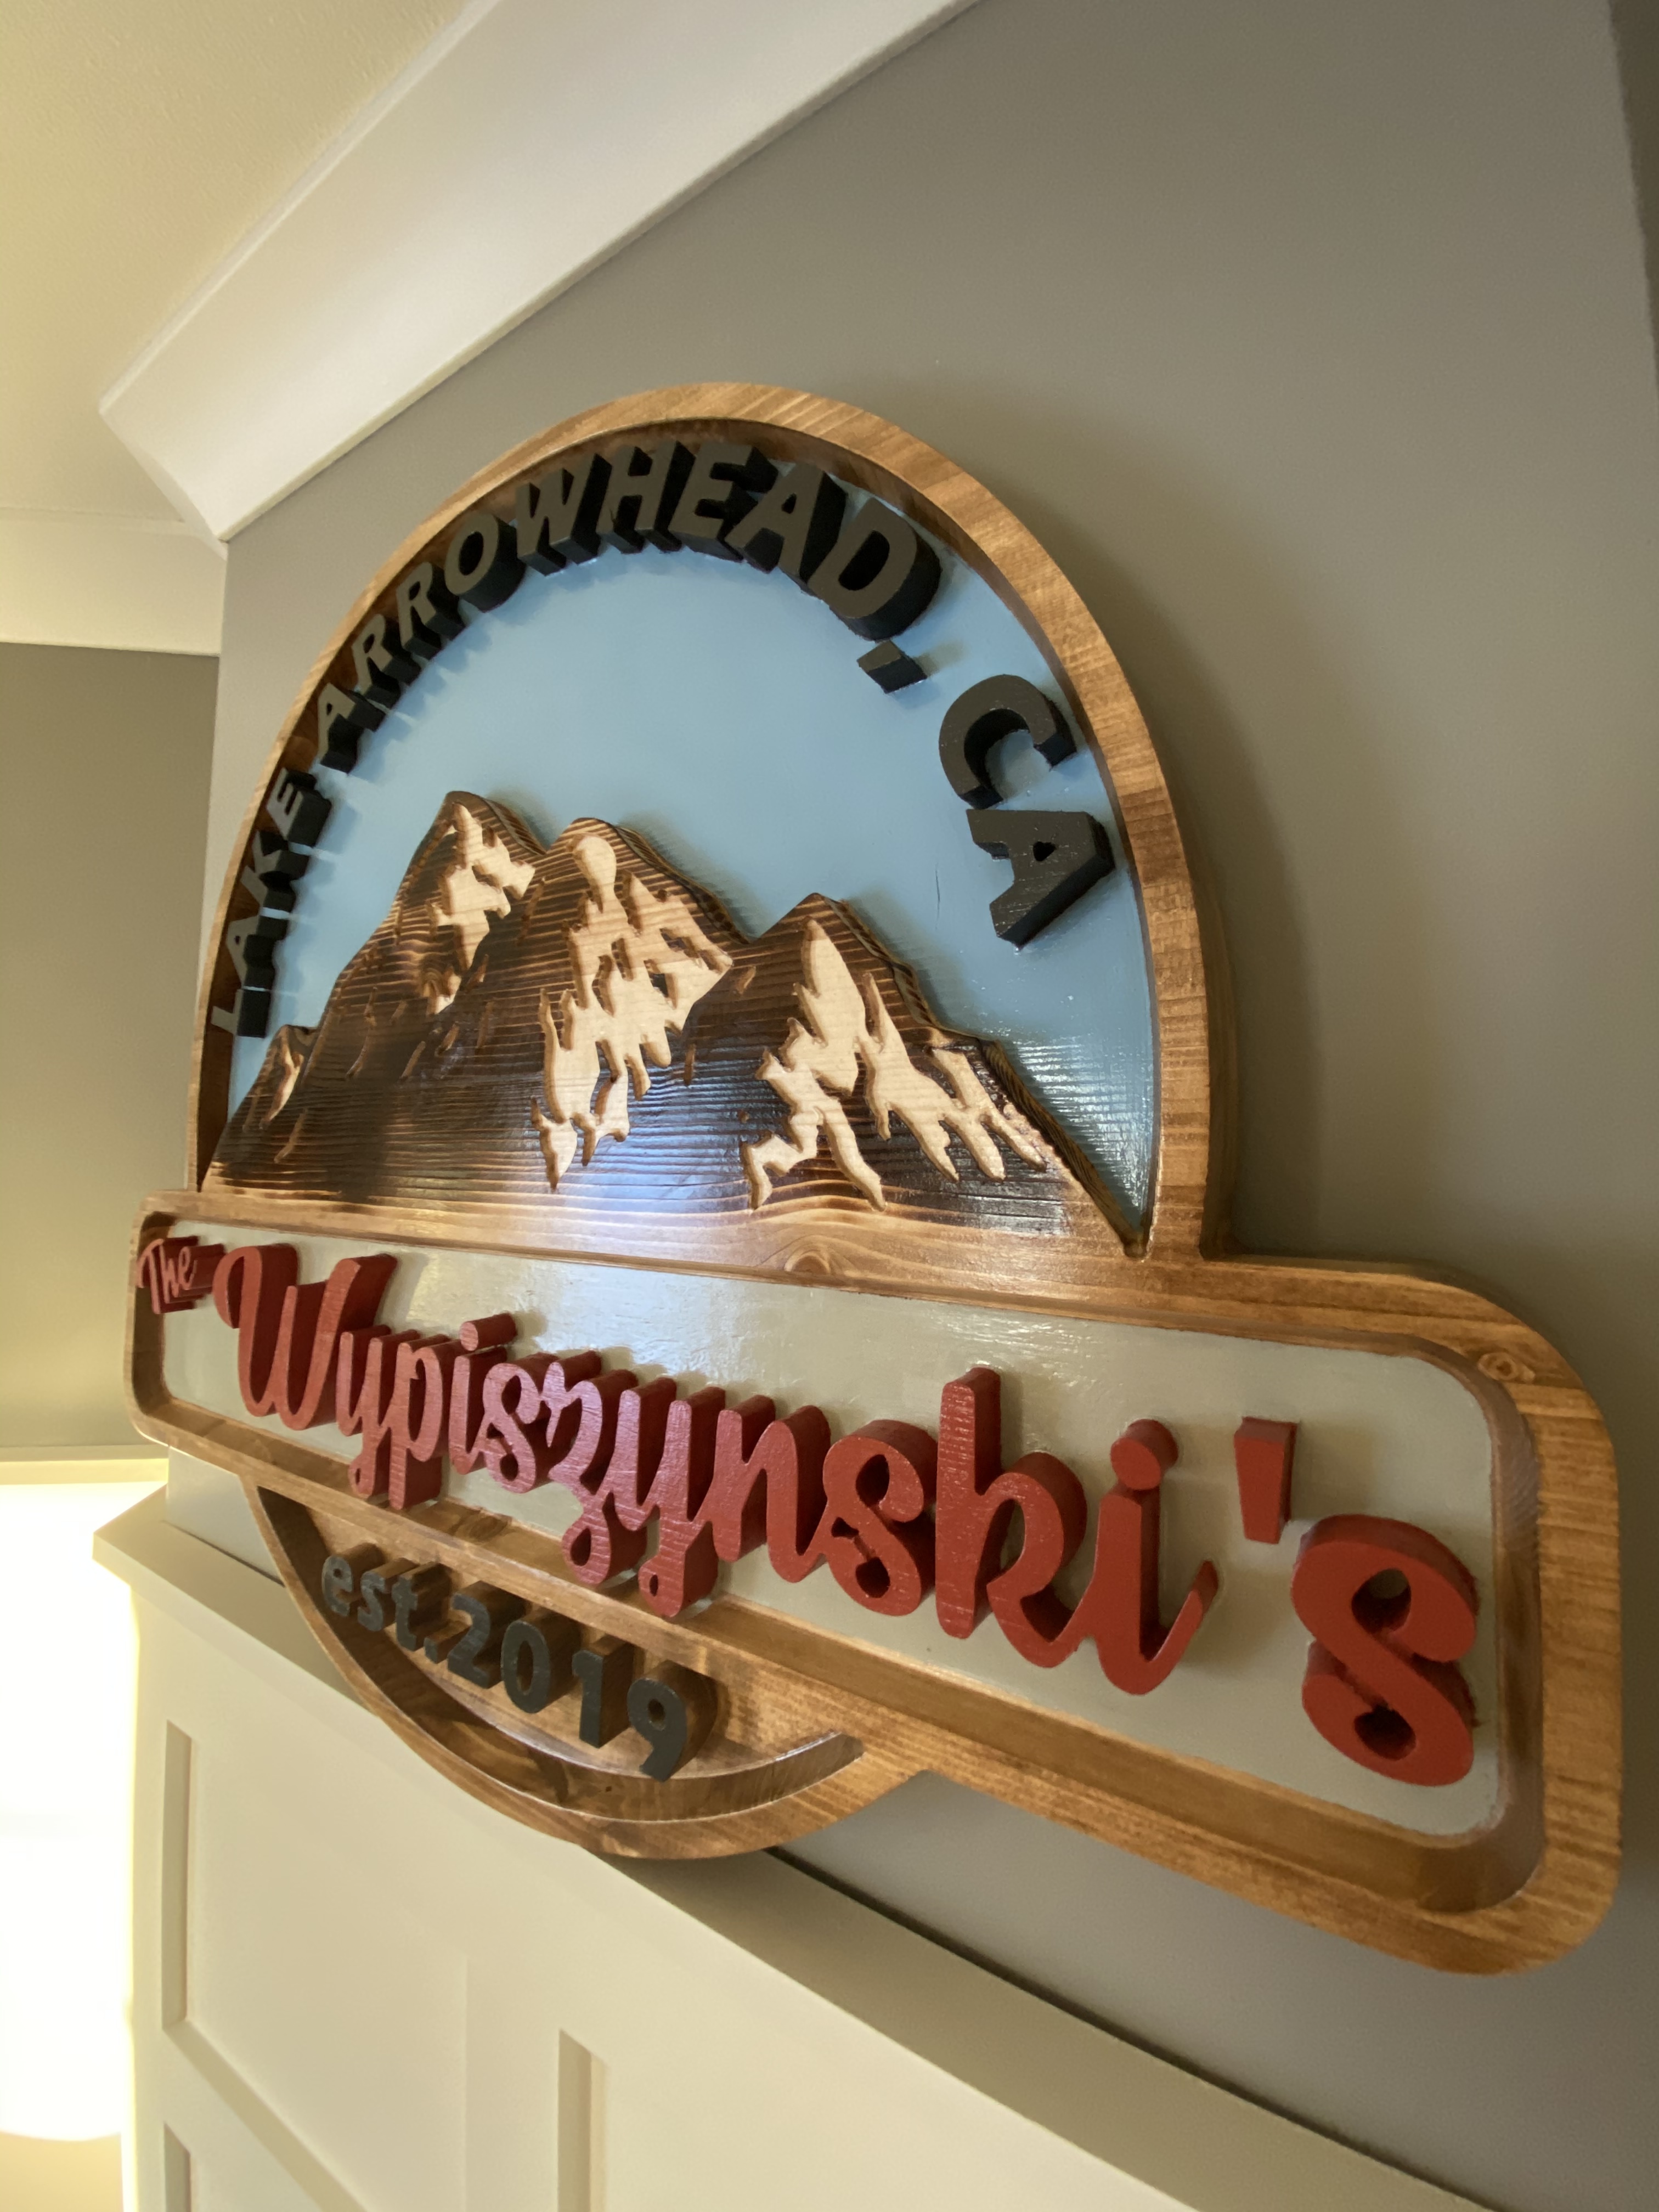
During machining I had Z depth issues twice. The first time it happened I had to reprogram all my sections to cut deeper. This has resulted in the whole sign getting a banana shape to it because i ended up removing so much material. Second time was in the name section…you can see where it cut deeper under “The” and around the “y”.
Questions:
1.How should i fix the curl in the sign? Laminate (screw or glue?) some material to the backside of the sign and flush trim it to the profile of the sign or something?
For the gouge in the name section…I was thinking about doing a shallow pour of resin in this section to hide that blemish and to give the name section some contrast. Thoughts? Any resin recommendations?
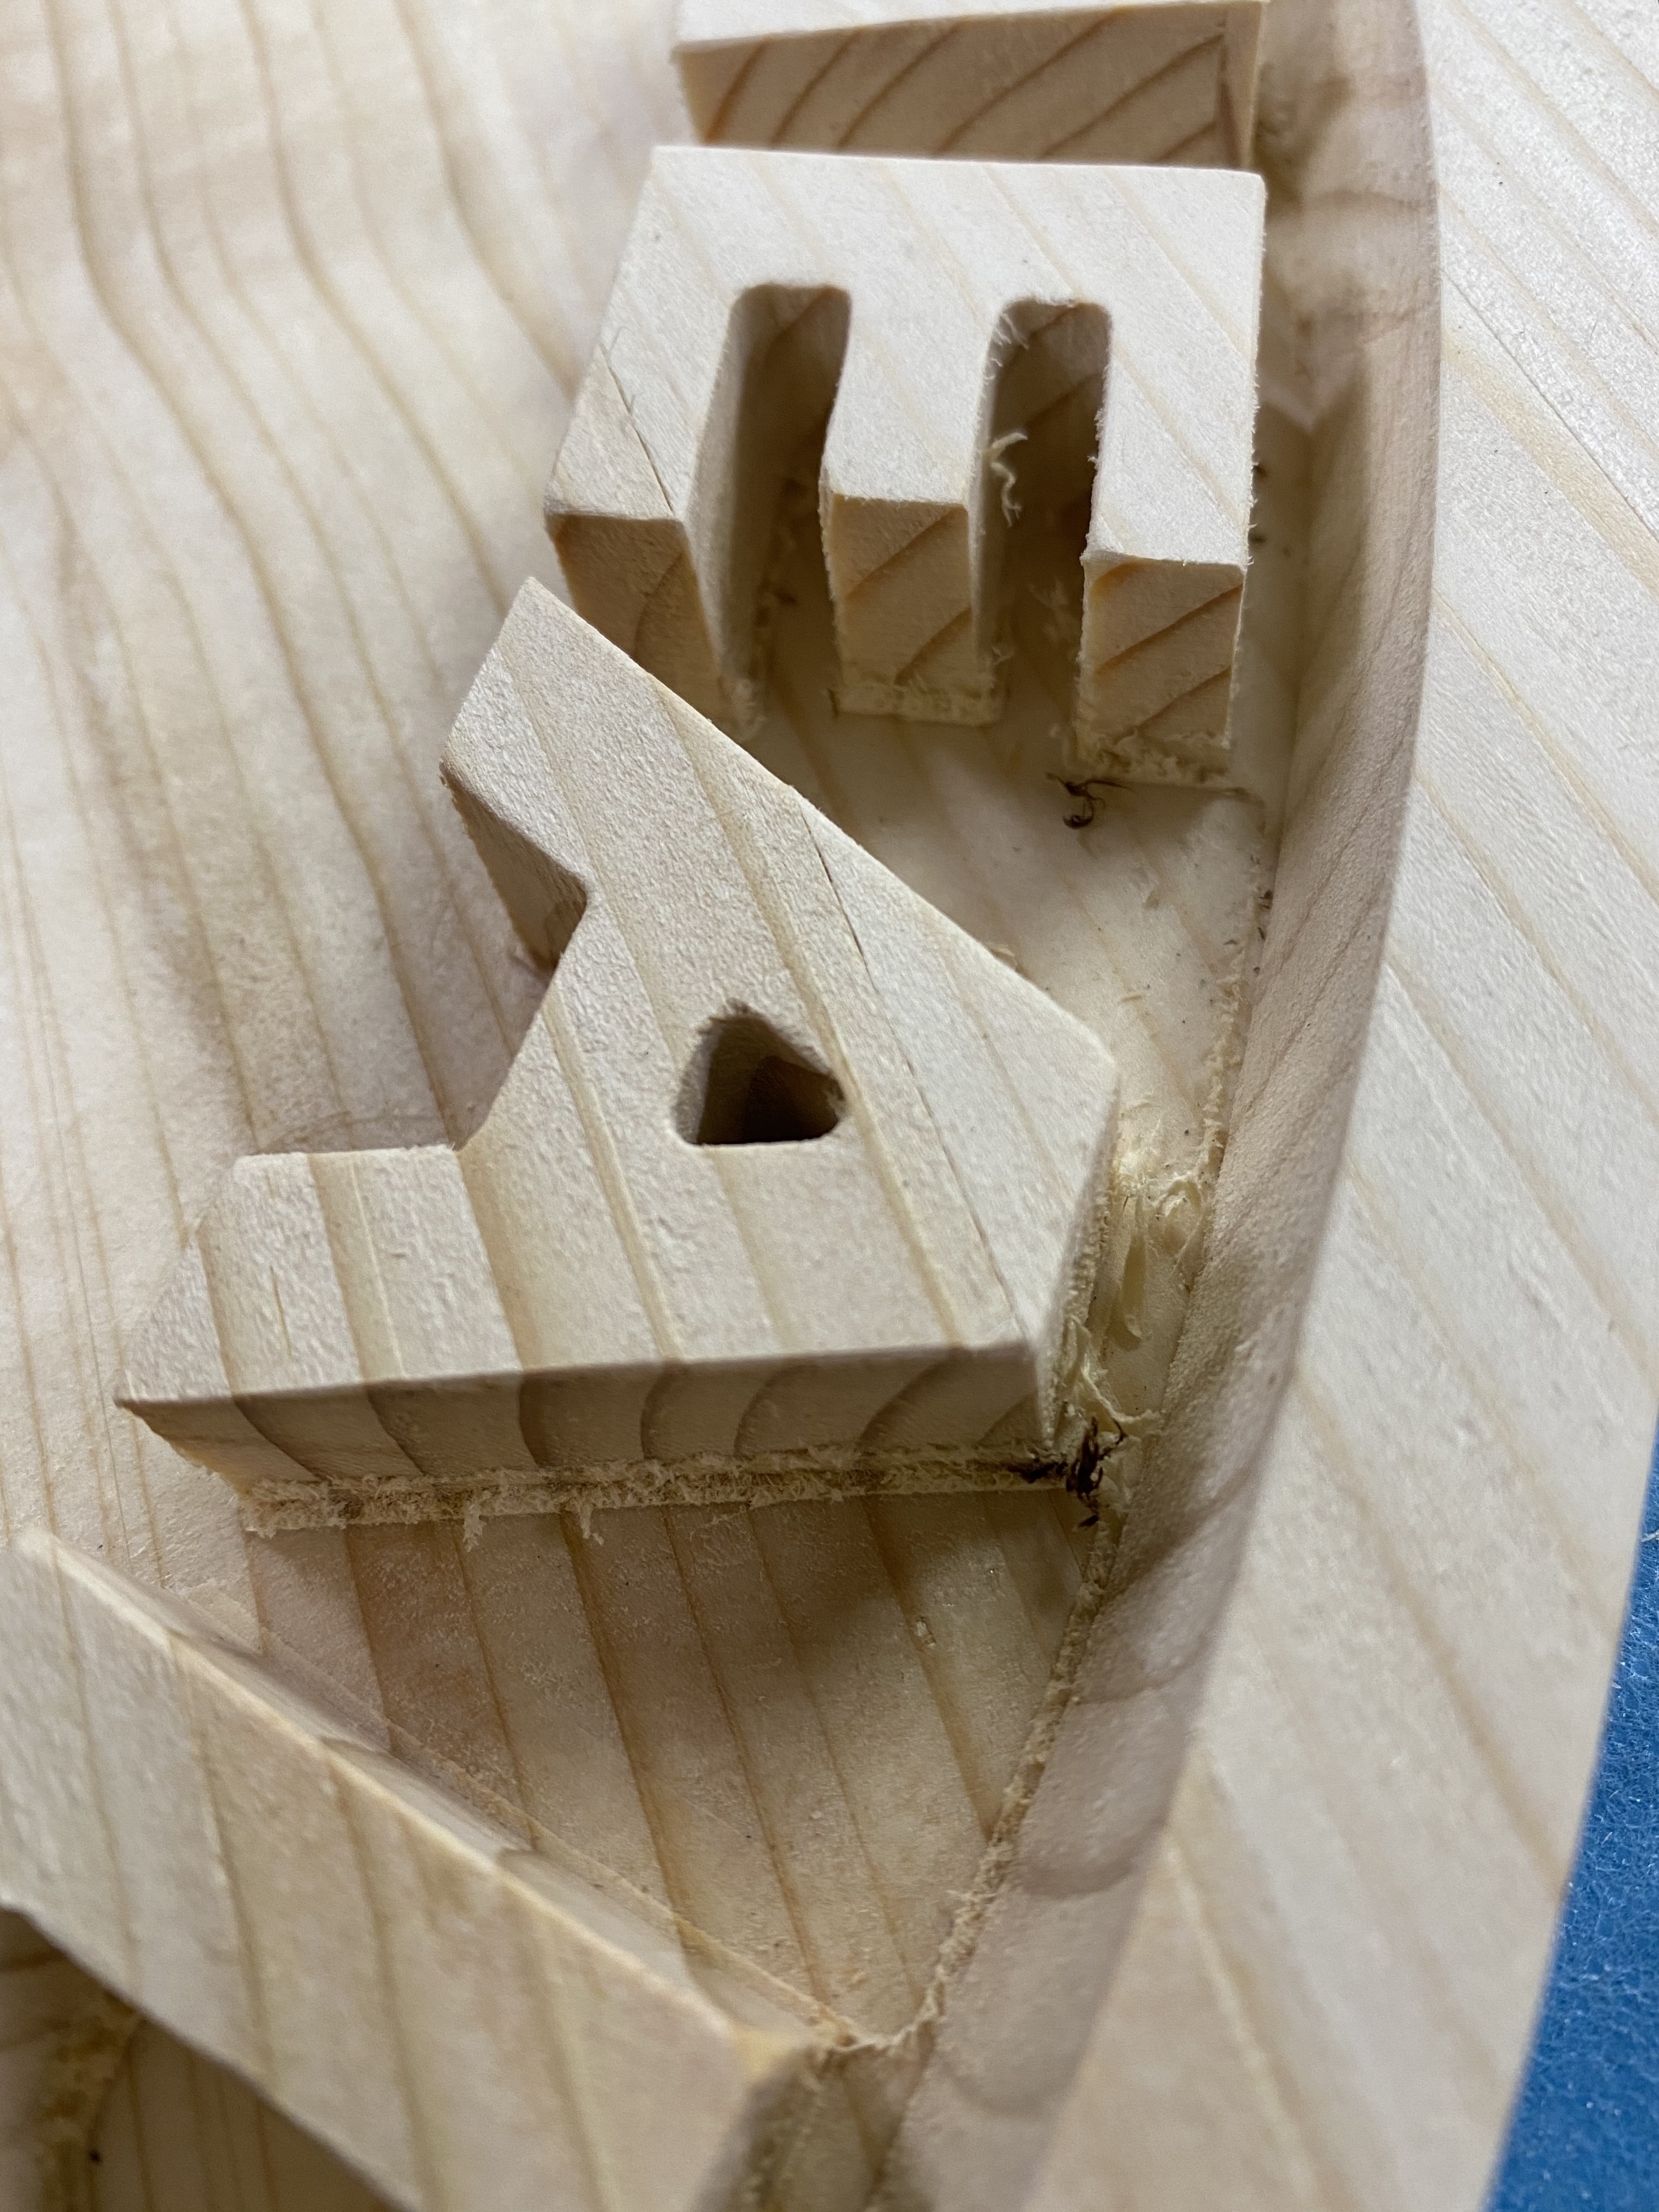
You’ll notice in my close up photo of the letters that there was some mismatch on the vertical walls. Any suggestions on tools to get to clean areas like this up vs just folding over pieces of sandpaper and trying to sand with the creased edge?
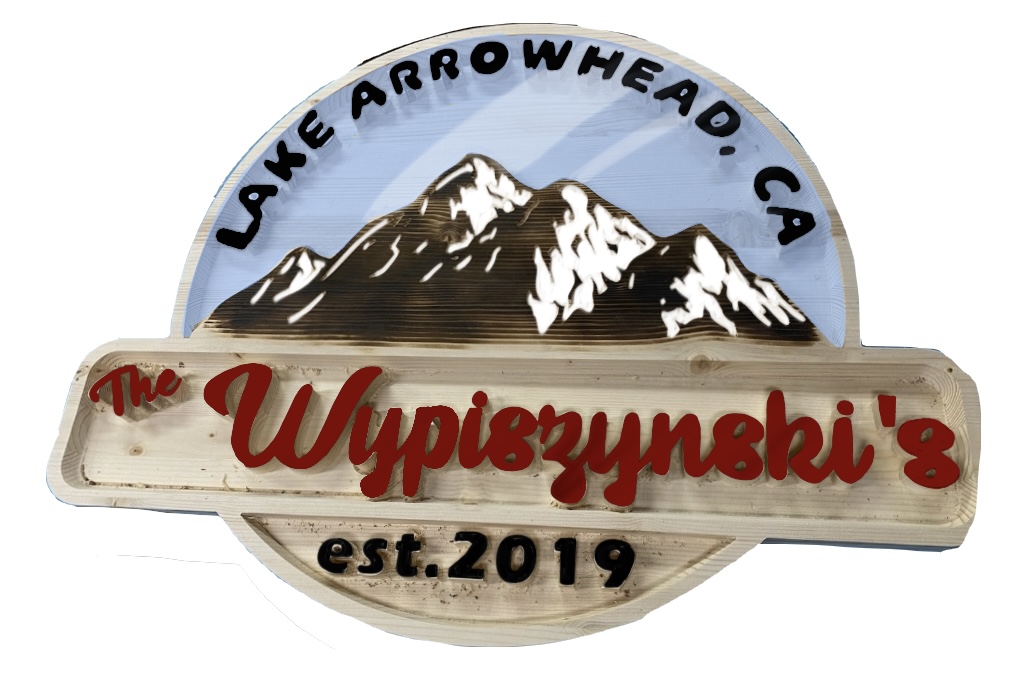
I’m totally stumped on what to do for colors. I obviously did a burn of the mountains to give them contrast but not sure what to do with everything else. Thought about a maroon color for the name section, maybe black for the other font, white in the mountain recesses and maybe a soft blue behind the mountains. Ideas?
There was a finishing pass but for some reason it left that weirdness at the bottoms of the letters. I left .020" during roughing. I’m not to worried about it on future cuts as i’ll play around with getting my programming technique dialed in.
For now, my focus is on rescuing and finishing this sign before i decide to scrap it and roast some marshmallows over it in my firepit!
1 => you could cut a backing plate that matches the outline. Maybe do an inside offset to make it smaller, so as to not have it show from the side, and then it could be an excuse (“it’s on purpose, that’s a hanging system”)
2 => epoxy is a good idea. Don’t forget to seal the wood before pouring.
3 => if the piece was still on the machine I would have said “run the job a second time”, but now pretty much the folded sandpaper indeed.
4 => whatever you end up using, make sure the epoxy you buy is UV resistant / made for outdoor use, or the color may not age well.
@WillAdams Fusion 360. I didn’t put a calipers to it but it feels like more than .020". I’ve ran other projects with roughing and finishing and haven’t had issues. I suspect I just fubar’d something in the programming.
for color, one of the things i’ve recently started doing is a light stain on the whole wood before doing cuts, that way only the pieces of wood that stay on top will have that stain… for some designs that creates a nice contrast
2 Likes
Griff
(Well crap, my hypometric precursor device is blown…)
11
About epoxy - I’ve been using various types/brands since my first hippie wire-spool table in 1969.
Advances have been made but there is still no such thing as UV resistant epoxy. Best you can hope for is 6 months to a year before yellowing.
Here’s what I’m thinking so far. Thinking I’ll stain most areas that are still shown as natural wood. Just need to think of a good contrast color for the resin pour in the name section.
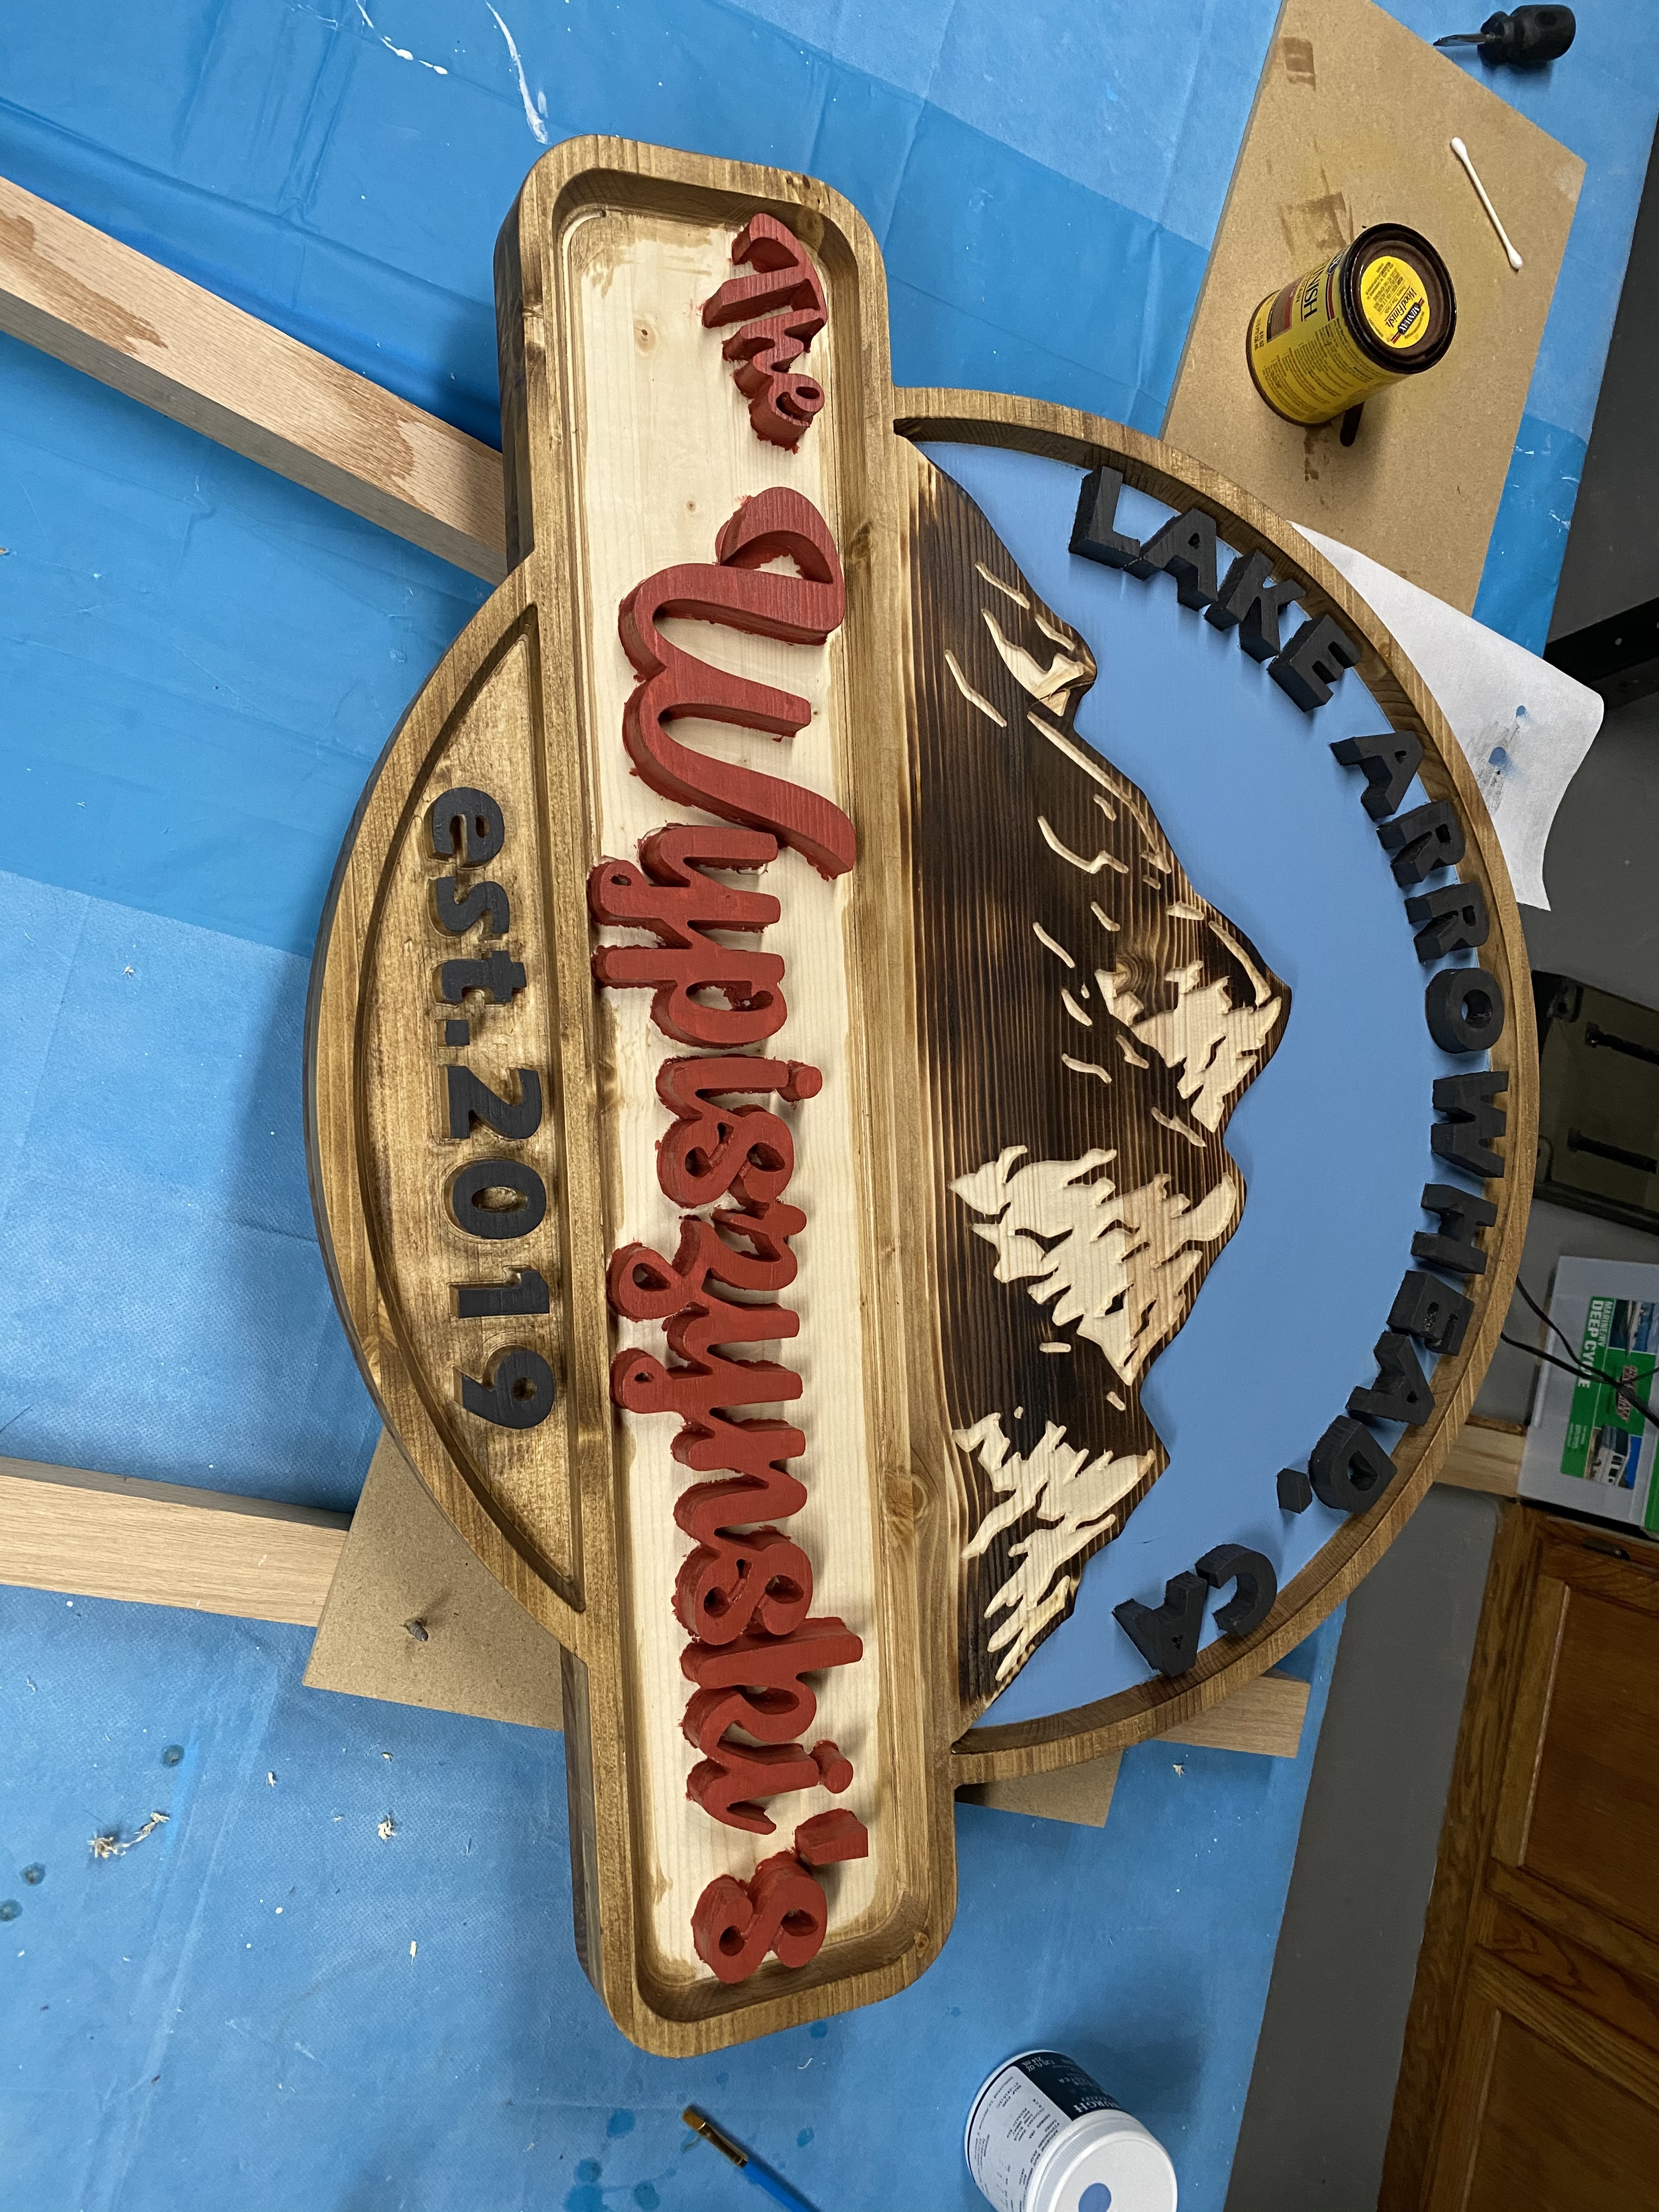
So everything is pretty much painted as the picture is shown with the addition that everything shown as natural wood has now been stained a medium dark color.
Im rethinking my idea to fill in the name area with resin as if it doesn’t go well, it’ll be a mess to fix with limited options to choose from. So i’d rather paint or stain this area. The problem is the screw up i made that runs below the W and around part of the first Y…see that trough where the tool ran deep before i caught it?! Do you think filling that with bondo or something and then painting behind the name would be a better idea? I think stain is out because i don’t think there any fillers that would allow that area to look the same as everywhere else because it’s been filled.
Each additional operation affords another chance at a mistake or error or problem. It’s a good thing to know when to stop on a project — I’d leave it as is.
Well, shipping cutoff date has arrived and had to call it quits. Learned so much on this project, mainly what not to do next time around. Overall I think it turned out ok to most people standards but I’m a model maker by trade so the details is what ruined it for me.