For those with the full size 4’ by 4’ Shapeoko 5 Pro. I’m thinking of using two lower toolbox cabinets back to back to put the machine on, possibly without the wheels to keep it stable, so I can have many easy-access drawers to keep my patterns and parts and fasteners and tools handy.
Does anyone know of an issue I might have with this kind of set up? Is the area under the machine generally unused anyway, or is there an advantage to having some space underneath for electronics, etc…? I’m planning to have my electronics on a wall and at a desk next to the machine, with wires and vacuum hose going along the floor so I can step over it should I need to walk all the way around the machine.
I’ve seen a few set up videos where it’s on a table of some sort, and either home made or bought, it often looks like the space underneath on those machines is mostly unused.
This (buying two tool chests and bolting them together) is one of the more popular options and works well and makes usage of otherwise wasted space.
That said, I’d bolt the electronics to the side of the table the machine is on (or remove one of the drawers or get a chest which has a cupboard area w/ a door to put it inside) — the cable length is rather short relative to the size of the larger machines and it would be easy to envision it being damaged if on a separate surface.
I wish I could have afforded two tool boxes as the drawers would be so very handy.
I built my own table, and it’s been working just fine. In some of the YouTube videos carbide has they even recommend the path you want to take. As long as the box has good locks on the wheels, you shouldn’t need to remove the wheels…
I personally would try to mount the electronics to the side of the boxes, as you never know when you might want to pull that table away from the wall to be able to use the tiling feature to enables you to cut a 4x8 sheet or similar sized material.
Invest in a longer vacuum hose and mount it higher, you don’t want to have a tripping hazard in your shop, even if you know it’s there you could be showing it off to someone and they trip over it. Just precaution.
Awesome! Thanks for the quick reply, this helps so much in my planning here. So glad that I will be able to have the drawers underneath, and also to be sure I’m not overlooking something.
Yes, definitely- I only noticed a toolbox type cabinet once in the videos (probably wasn’t watching for it till I got that far in my planning) and thought my idea was original until today, ha ha.
Thanks for mentioning the wheels, leaving them on would definitely add options like moving it around at some point if necessary, but I was afraid that would sound silly. But if you think that the machine won’t move them around, this is even better.
Your idea of a longer vacuum hose is definitely a good one- I bought a $50 20’ long hose for my shop vac just to use it as a shop vac, and it’s made the machine so much more useful- so whether I use a shop vac or dust collector, having it out of the way with plenty of extra footage, I know just what you mean.
The space under the table is very useful. Some people made a pull out shelf to put their laptop on and push it in when not using the machine. I have an SO3 and have a 4’x4’ 4x4 with 2x6 aprons. Under the table I have a middle tool box and a drawer to put clamps in. In the tool box I keep calipers, wrenches, allen wrenches and router bits.
So most shops are starved for space so you have to use every available space. You said you might remove the wheels. That would be ok IF the machine is in the middle of the room. If it is up against a wall then leave the wheels on. The reason is maintenance and cleaning. Any CNC machine even with good dust collection makes a mess. There is always maintenance to do and limiting your accessibility to the machine would be a mistake.
One reason people get the 4x4 SO5 is they can tile. So if your machine is against a wall or in a corner you need to move the machine out to do tiling.
Keep your options open. Even though the SO5 is quite heavy the wheels locked and pointed in different directions should not have any movement issues. You can also buy U shaped clips to put in from the side of the wheels to keep them from rotating around. When possible use wheels that lock in two directions. Most tool boxes only lock in one direction which is the wheel rotation. The second lock keeps the wheel from rotating around the axis of the wheel. That is where the clips come in to keep the wheels from rotating around their axis.
I have a Rockler Rock Steady bench with a thick top. I echo the “keep it mobile” comments. I’ve already tiled twice requiring me to pull away from the wall. Unless you have it as an island with room to overhang 4’ front/back… then you can likely get away with stationary. But the toolbox idea is great. Storage is never a bad thing. But also keep a spot on the side to mount the electronics.
Hearing so many people say that it’s OK to leave the wheels on as long as they’re locked makes me feel good about doing it that way, I guess I expected a little more momentum rocking the machine around that there is. BTW, I never even saw wheel chocks like those metal ones… those look effective AND kinda cool.
Well, now it’s changed since I’m feeling good about being able to leave the wheels on as long as they are locked, and that so many people pointed out the value of having at least one of the boxed include a side cabinet for electronics, not just straight drawers all the way through.
But when I pick something up, I’ll post a photo and the brand and dimensions and model, for whatever helps the next person.
Also, it’s worth mentioning that in all my research, there seems to be very few people setting up a Pro 5 from scratch… at least 80% of the Shapeoko 5 Pro’s I see people buy or set up (people that make videos about it at least), nearly all of them have been using whatever table they were using from a Shapeoko 4. Says good things when people are happy with a brand and stay within it as they expand. This gave me a lot of peace of mind that I’m on the right track.
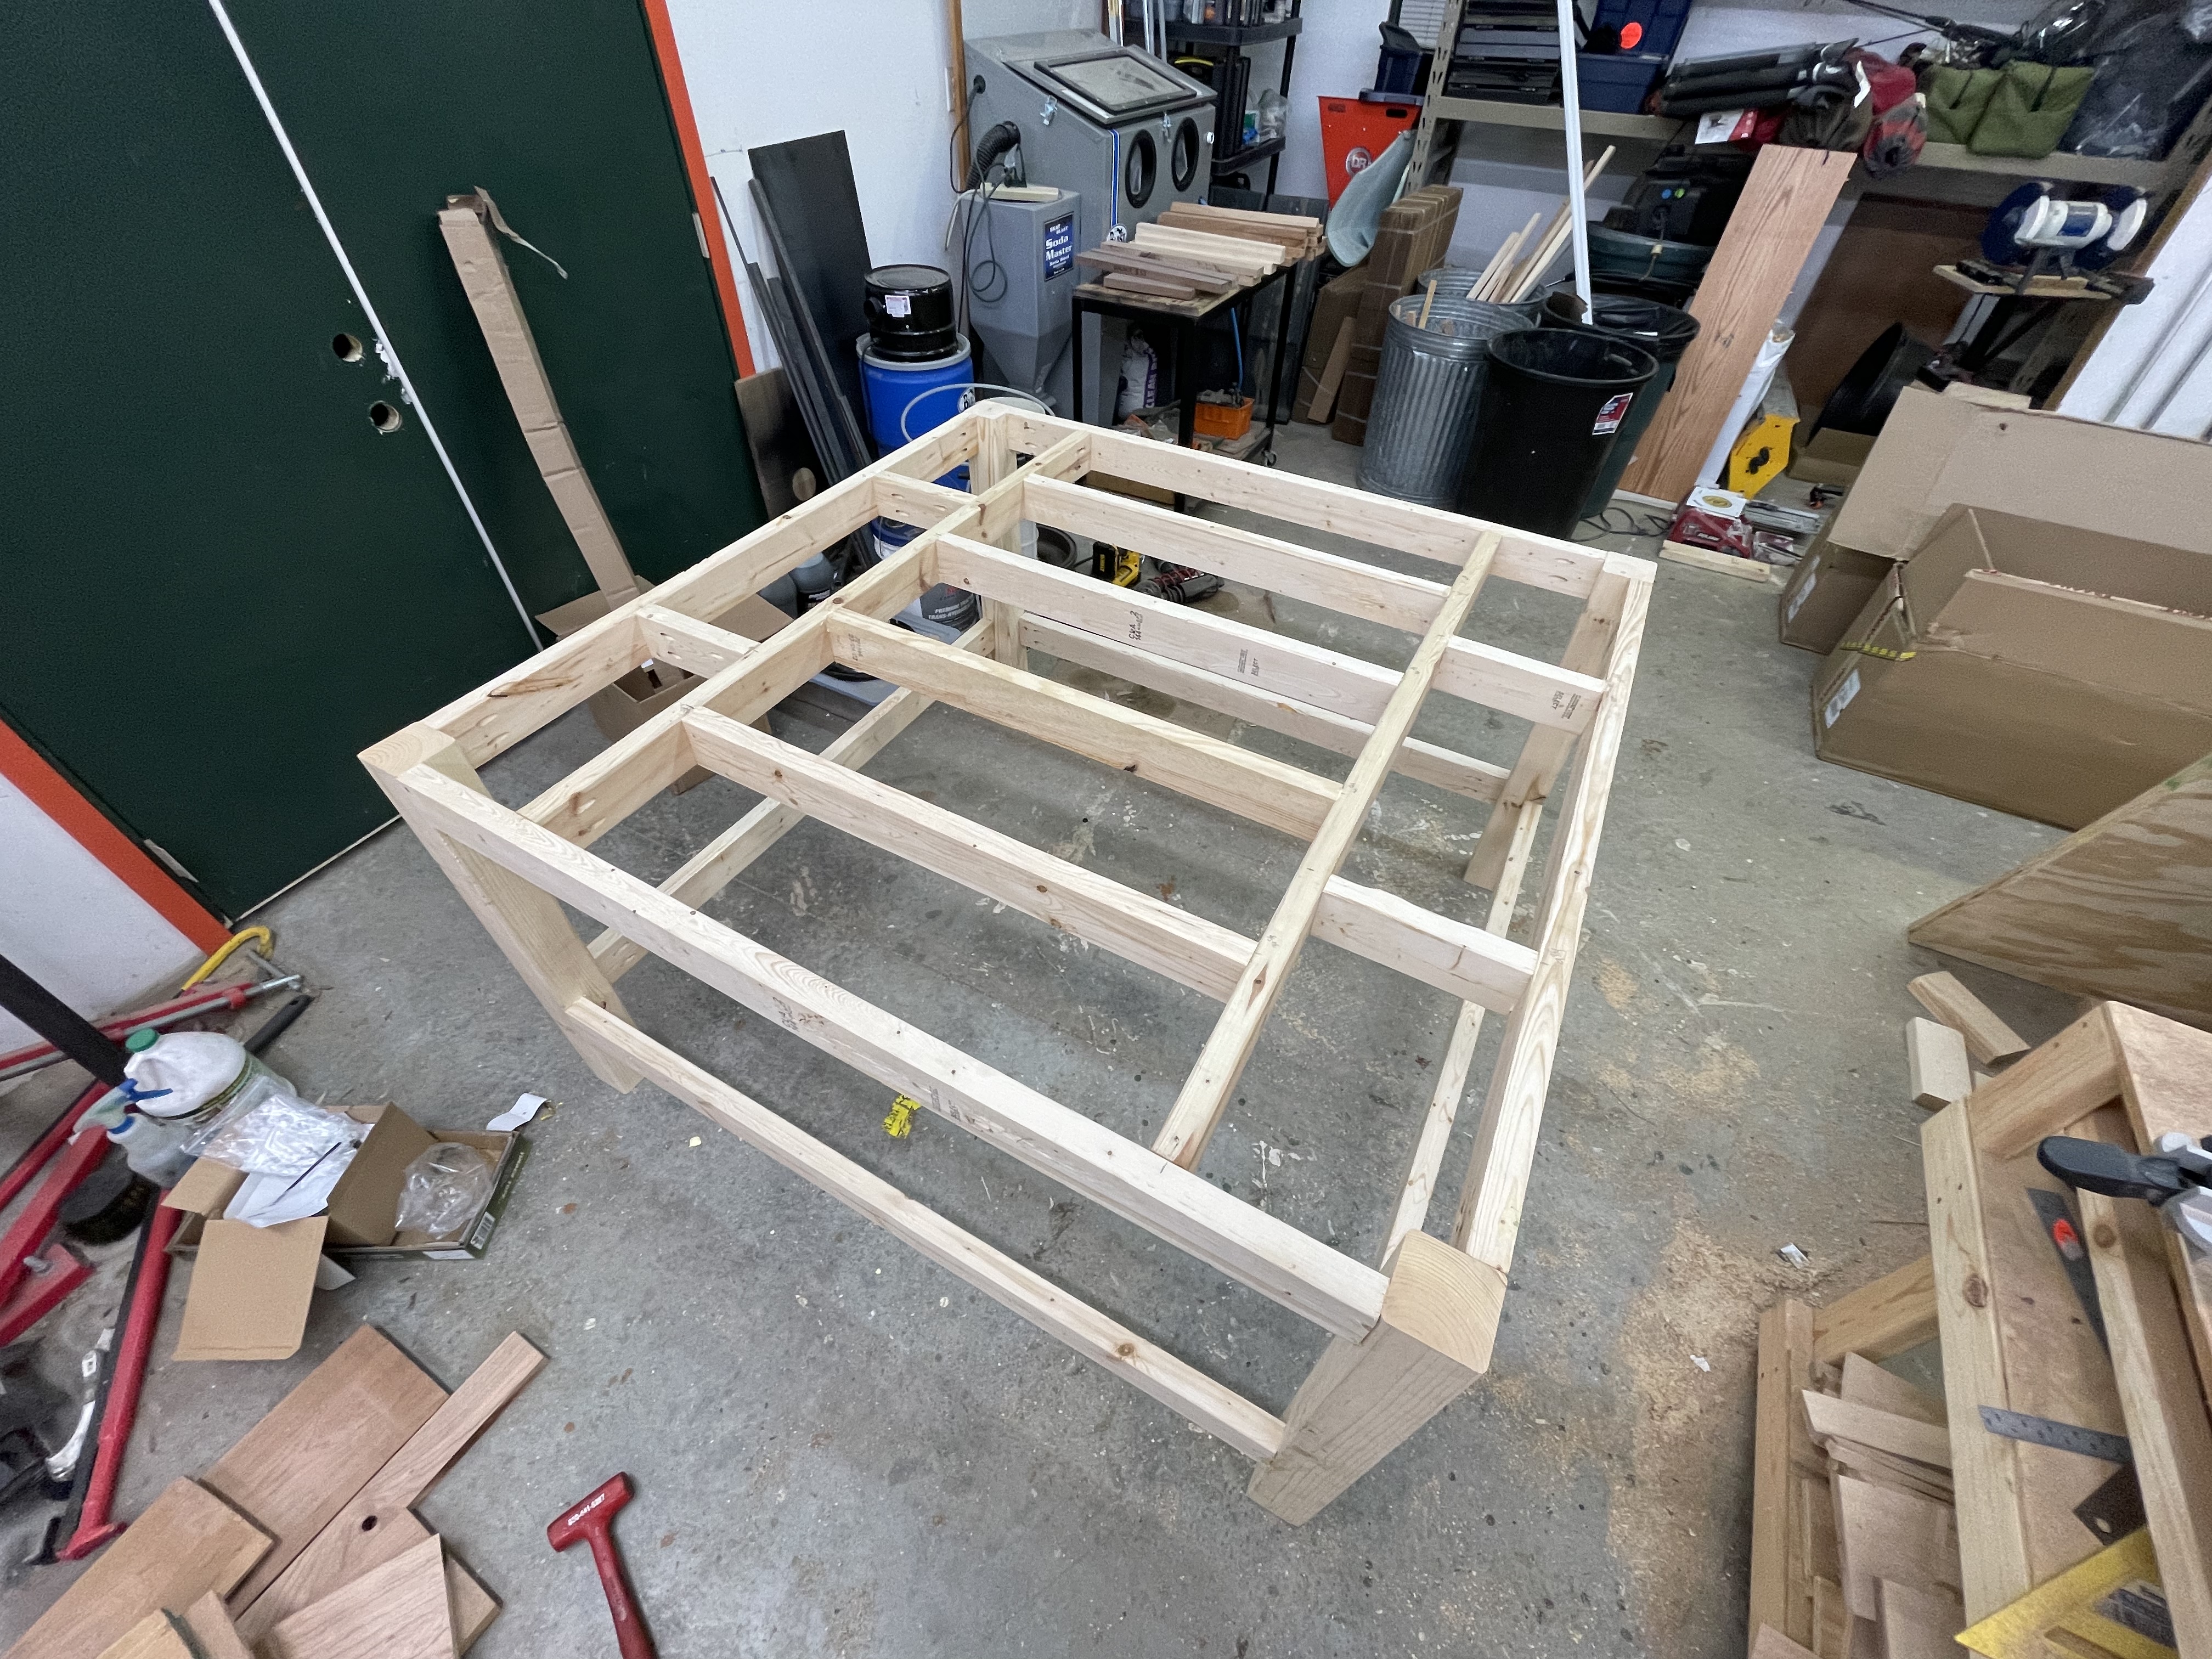
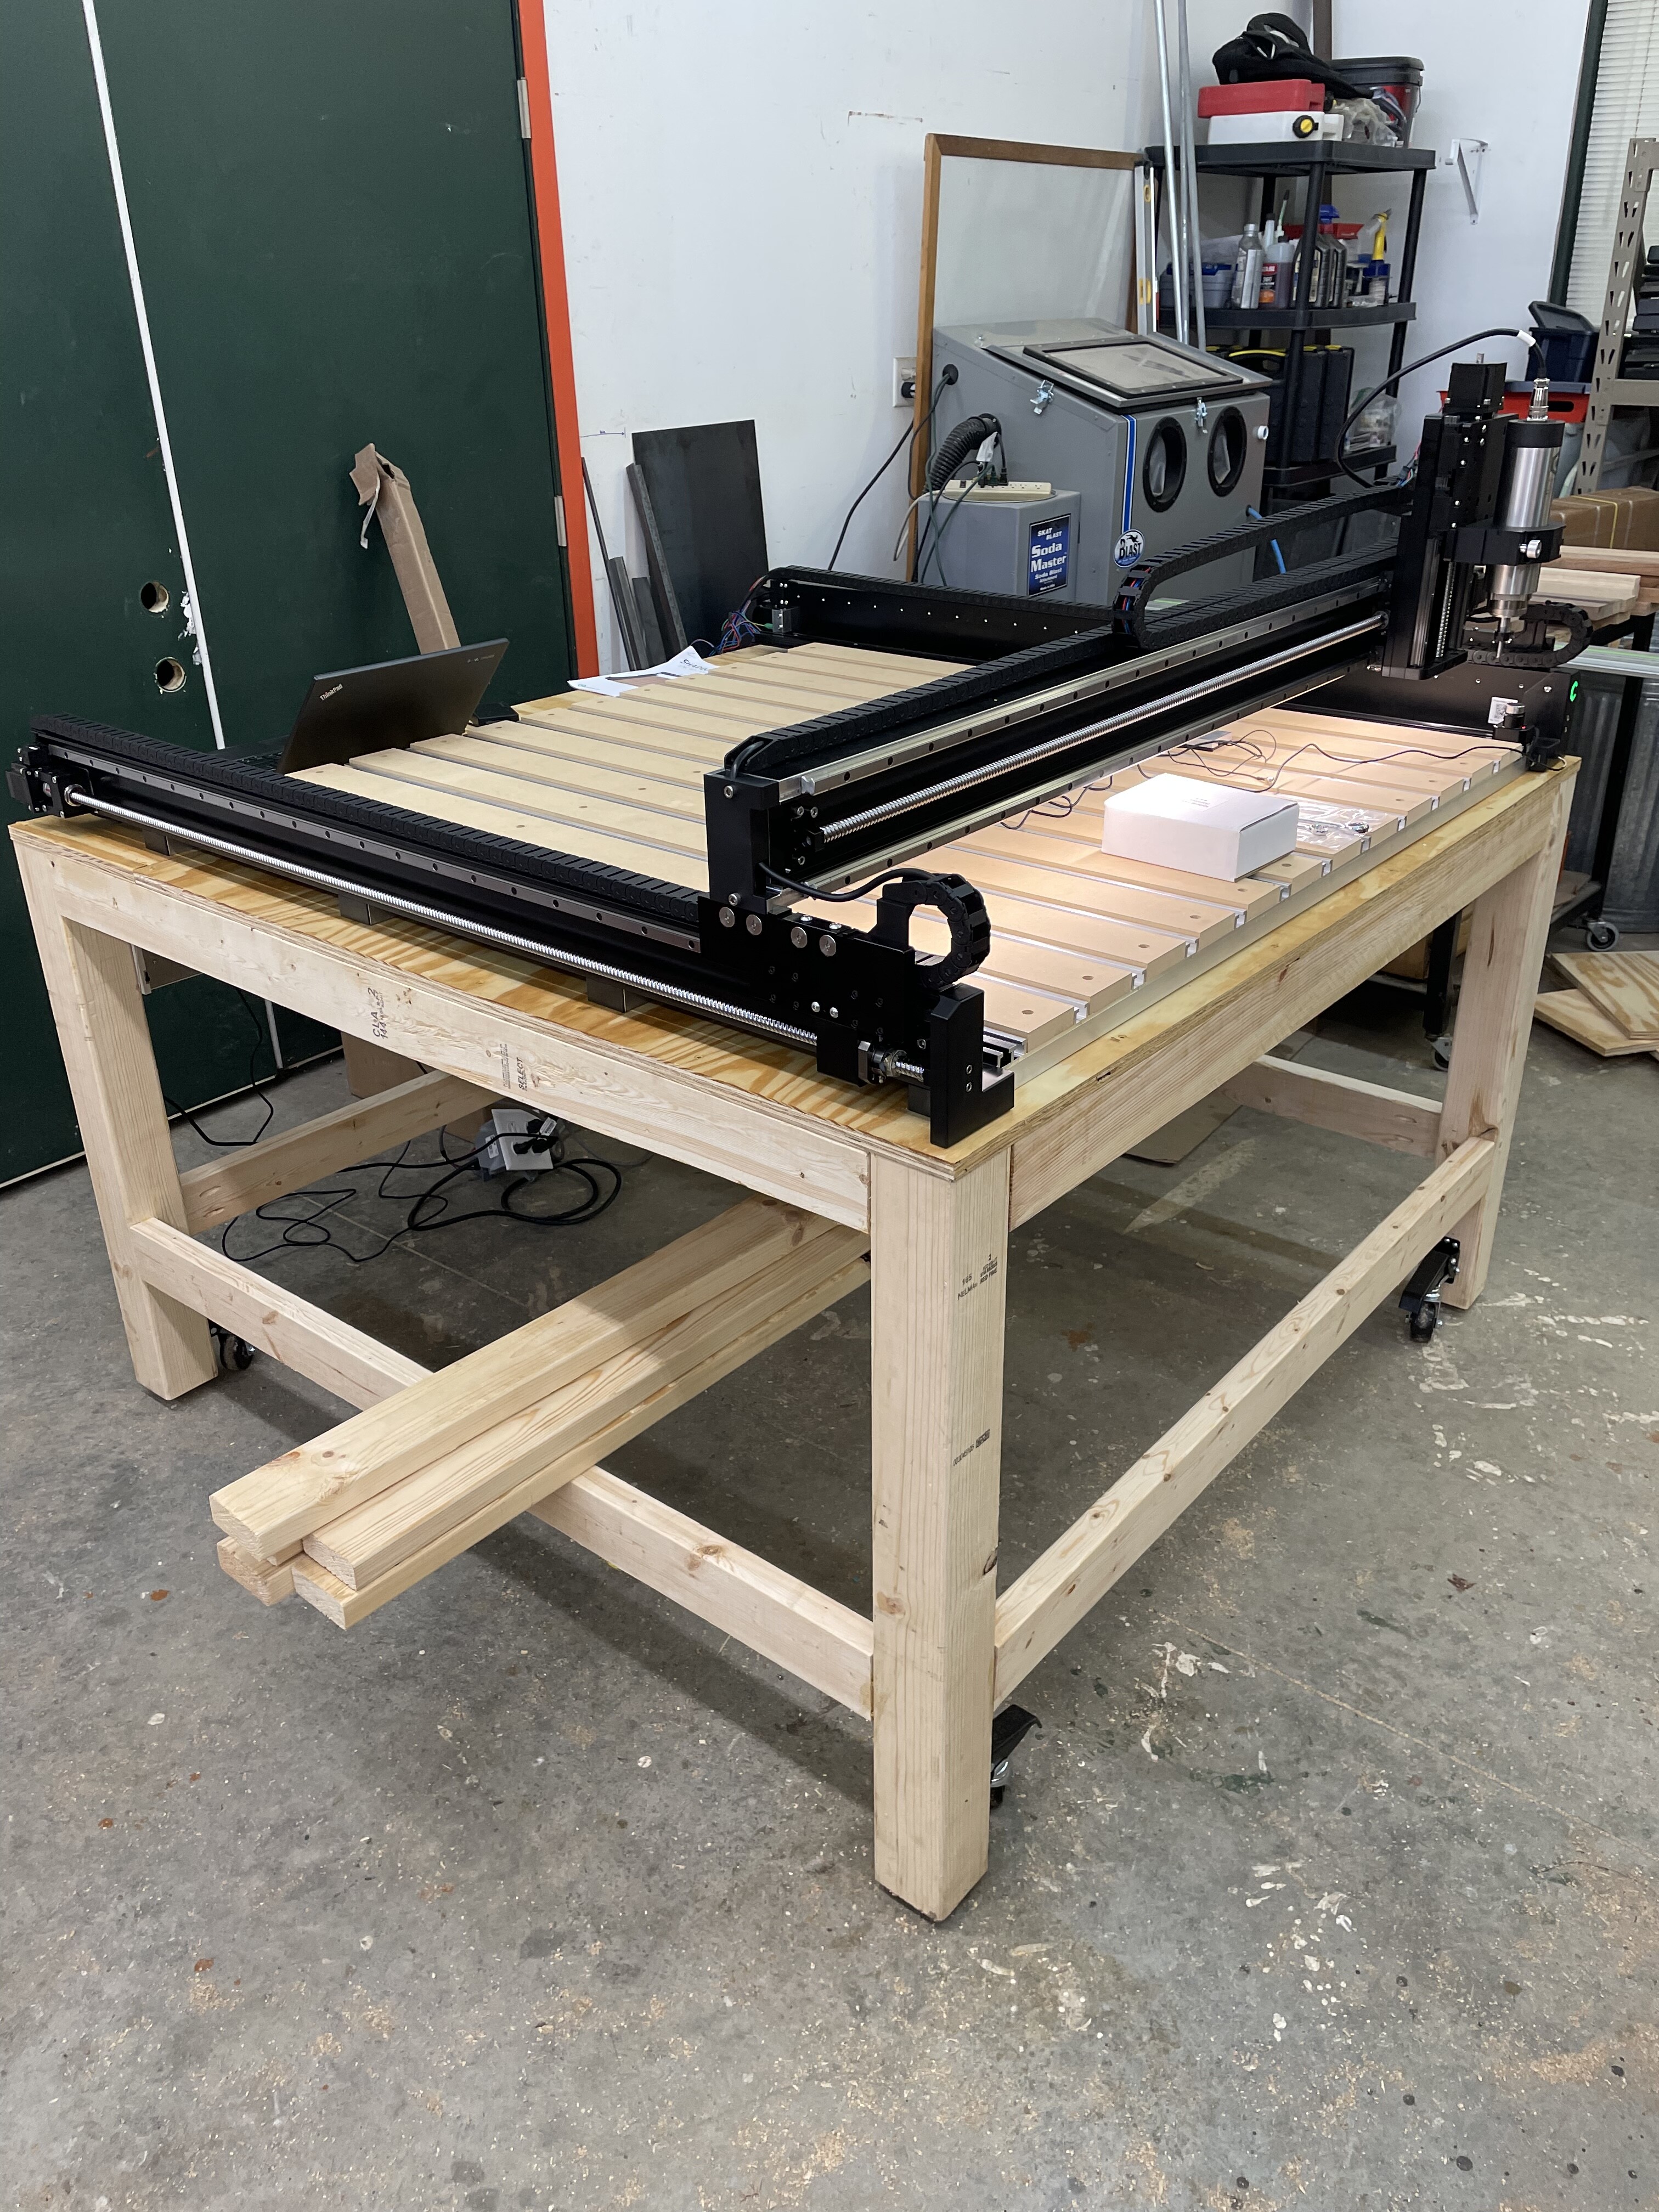
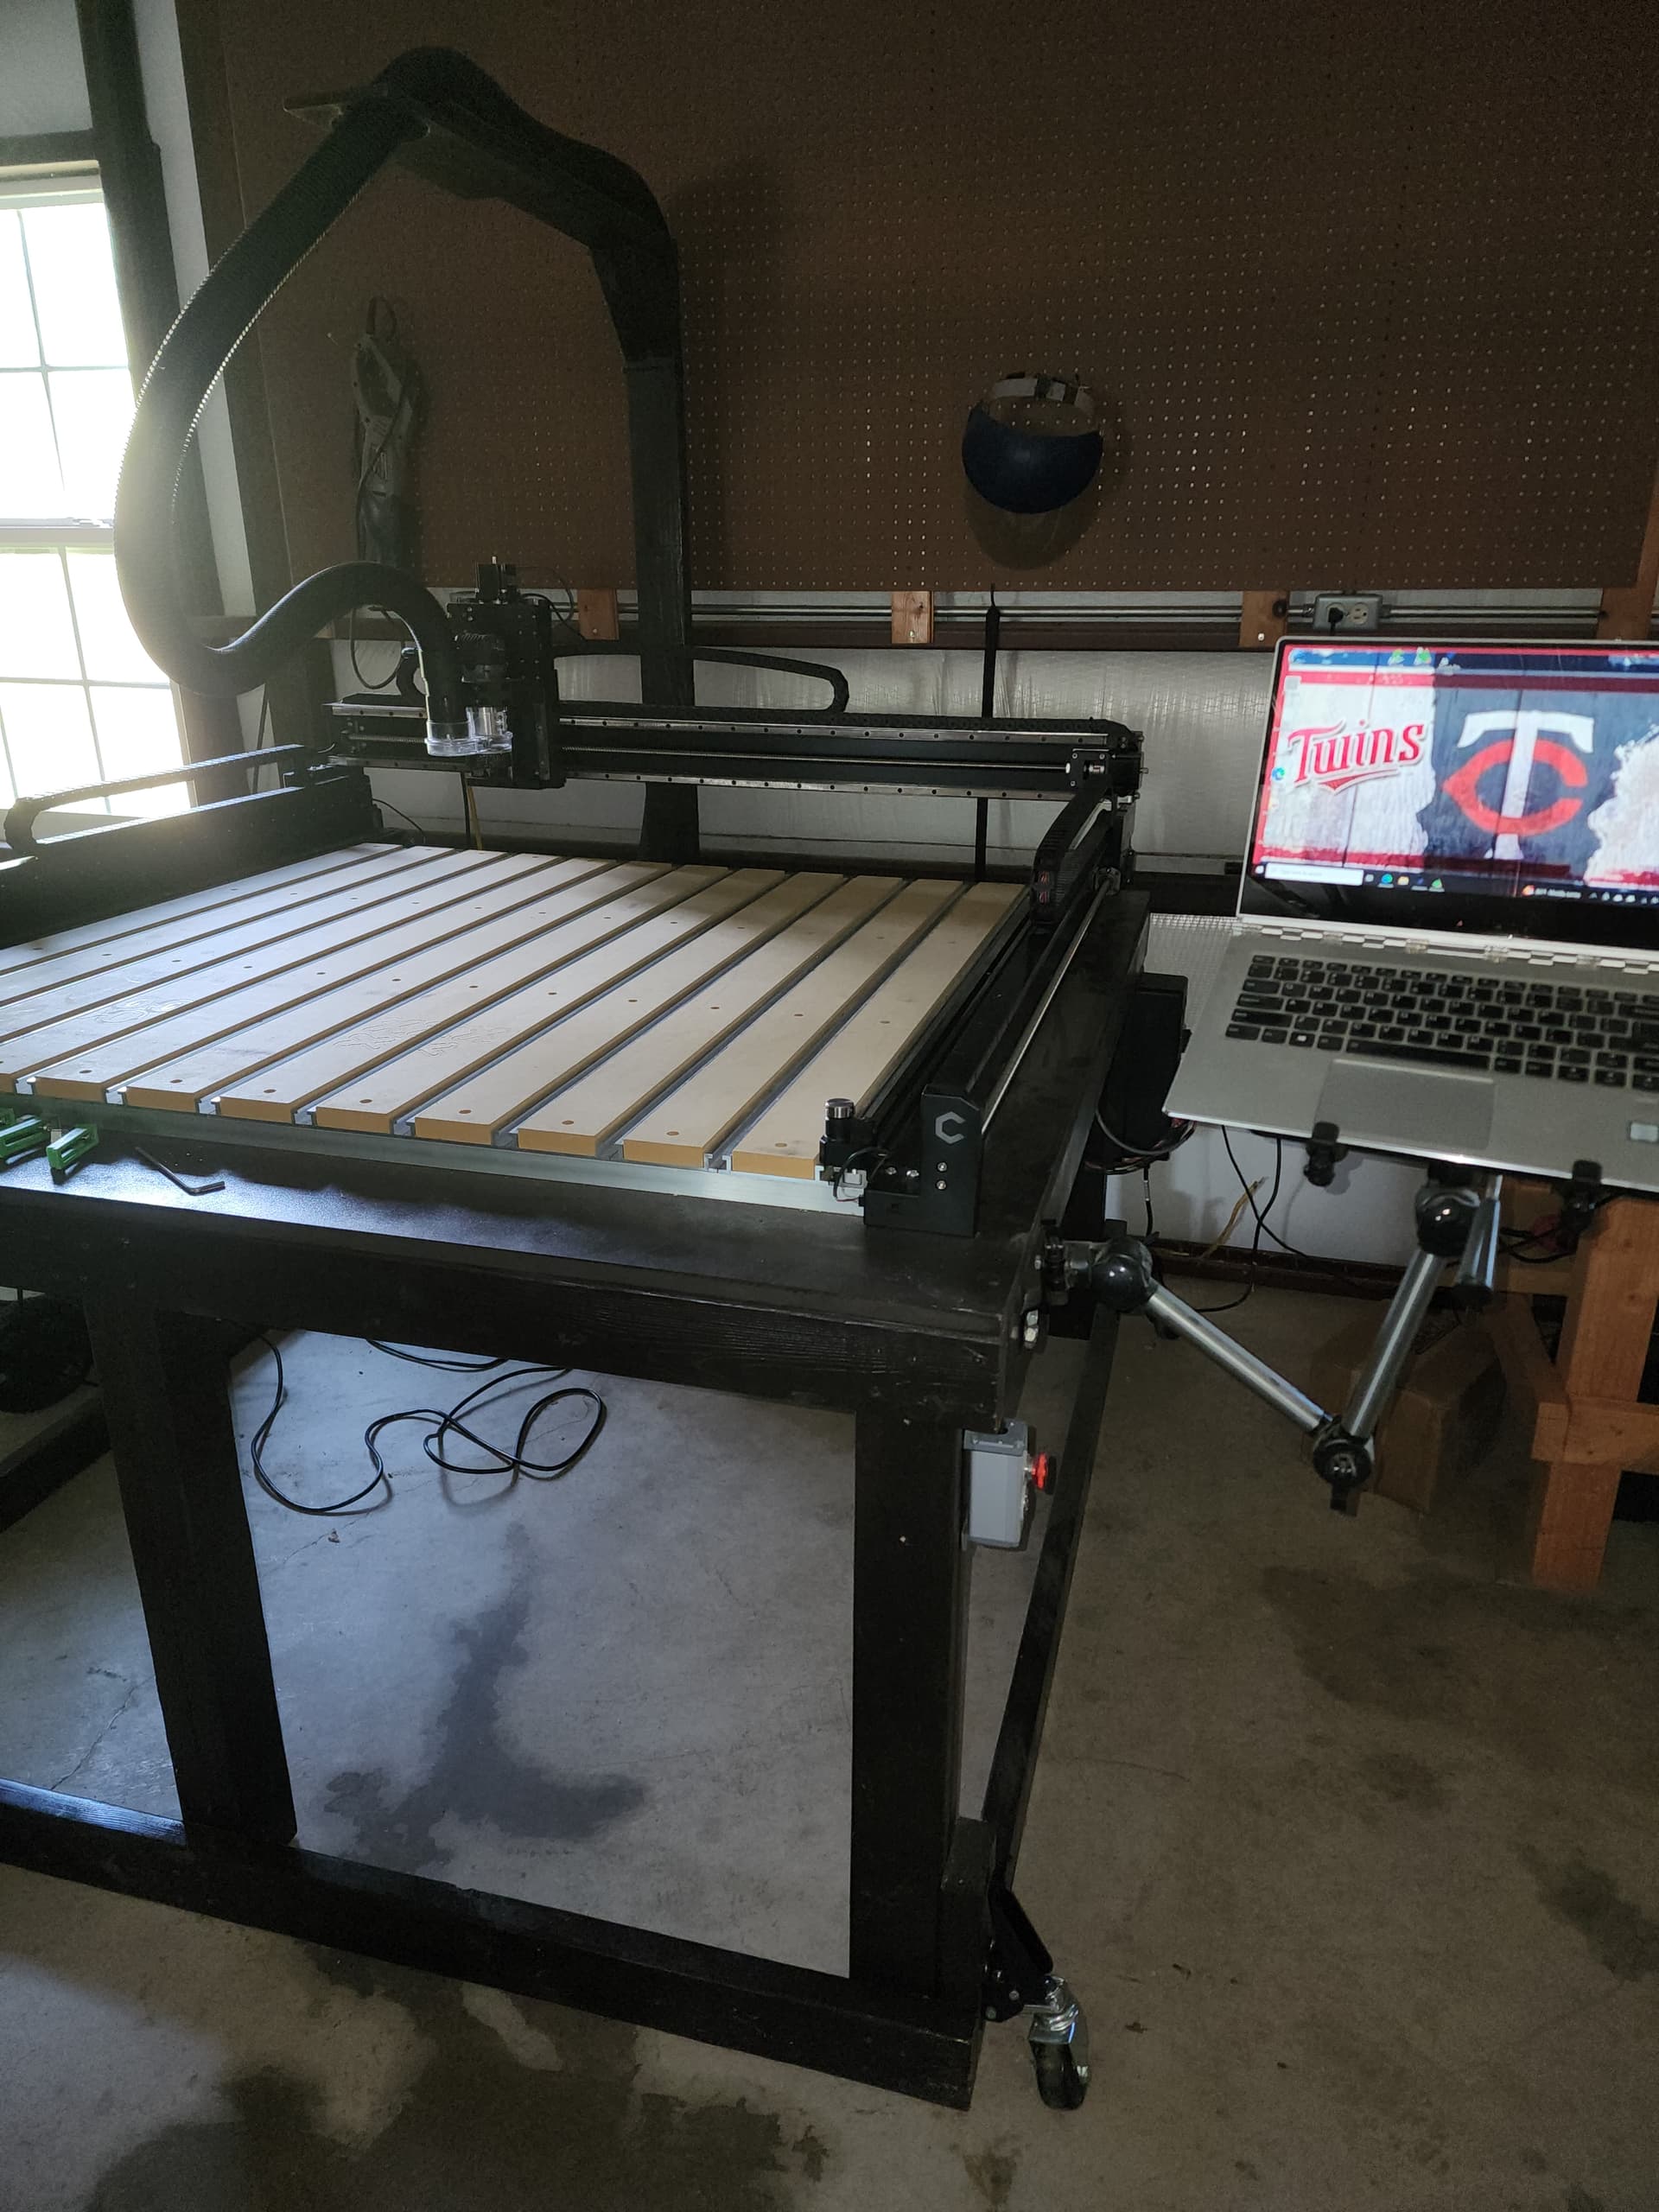
I’m in the process of setting up my Pro 5, it just arrived last week. I built a table using 4x4’s for the main posts and then 2x4 bracing and a 3/4" top. 60"x60". I have flip up casters, so i can move it when i need to, otherwise it sits on the 4x4 posts. I need to cut the bottom shelf yet and then i’ll build some drawers or set a toolbox on it. Total cost was $150.
I definitely love your plans of using a multi-drawer tool box. The more you use your machine the more stuff you will need (think lots of mills, v-bits, hold downs, rulers calipers…).
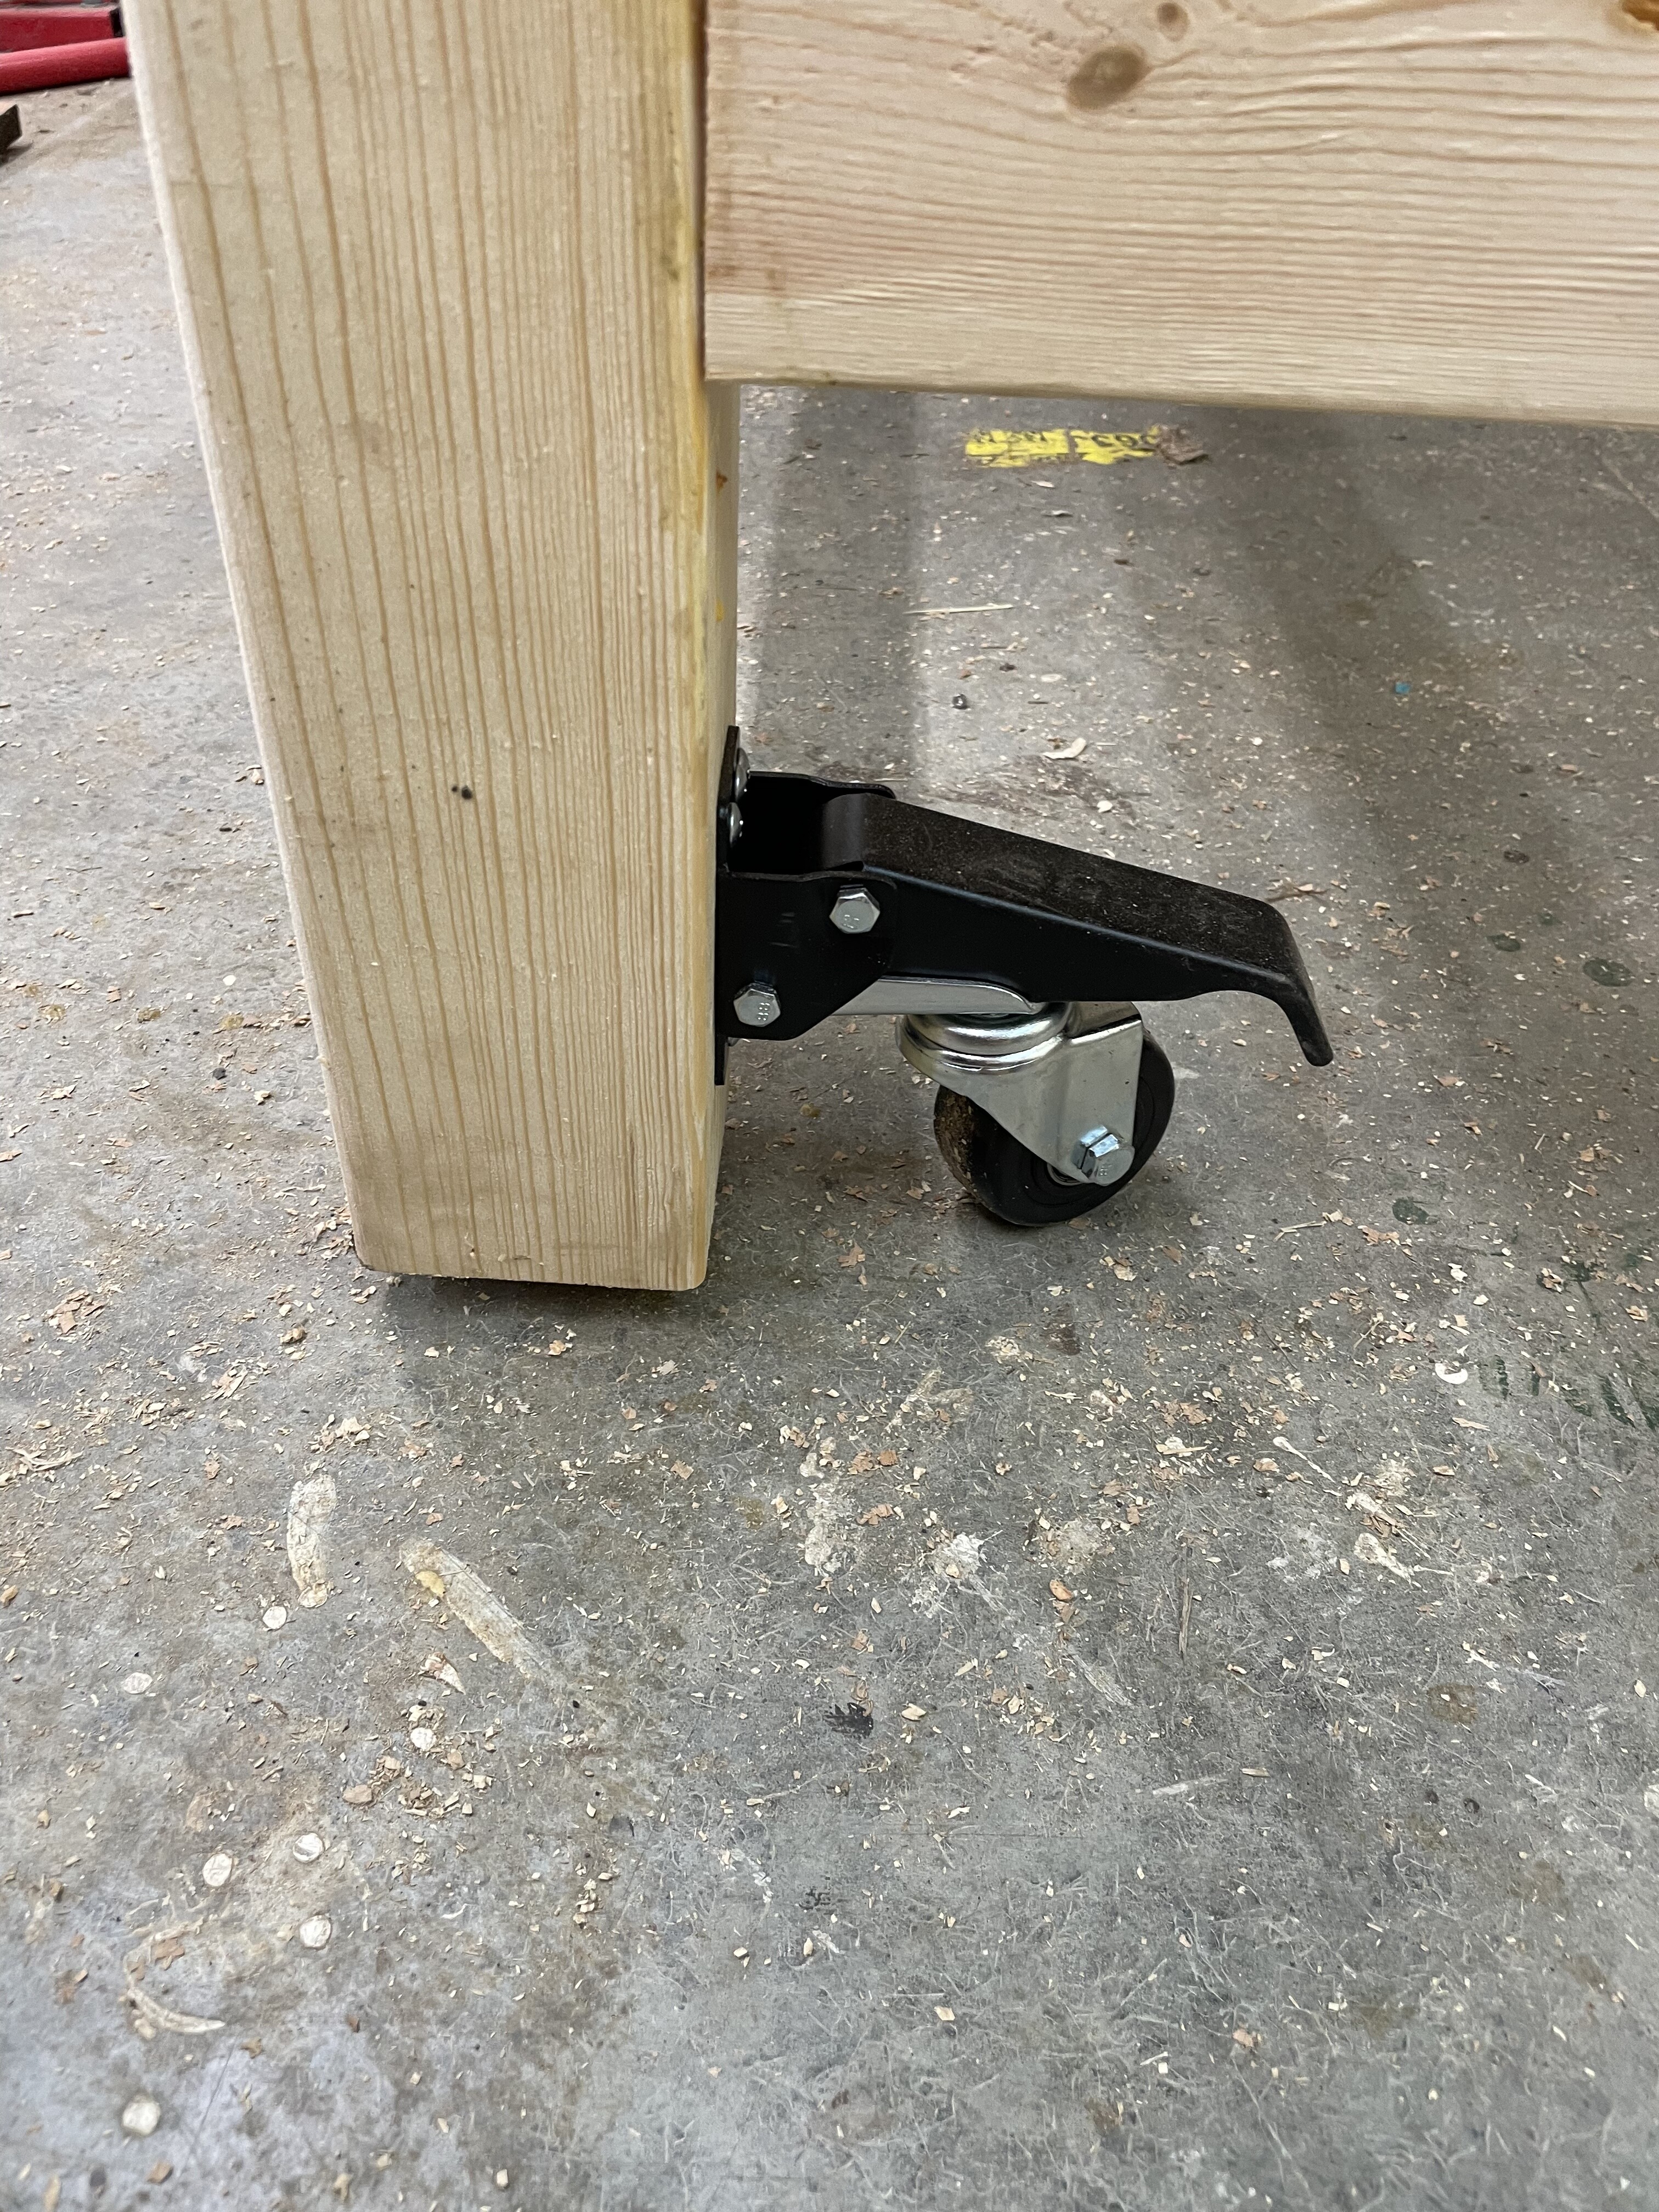
Definitely keep the table mobile. Just make sure the wheels are capable of holding a lot of weight.
Here are few. Because it’s 60” you will need a brace for the plywood edge, I decided to brace it all for the sake of it. Then the casters are just $25 from Amazon. Step on them to raise the table and release to drop it down.
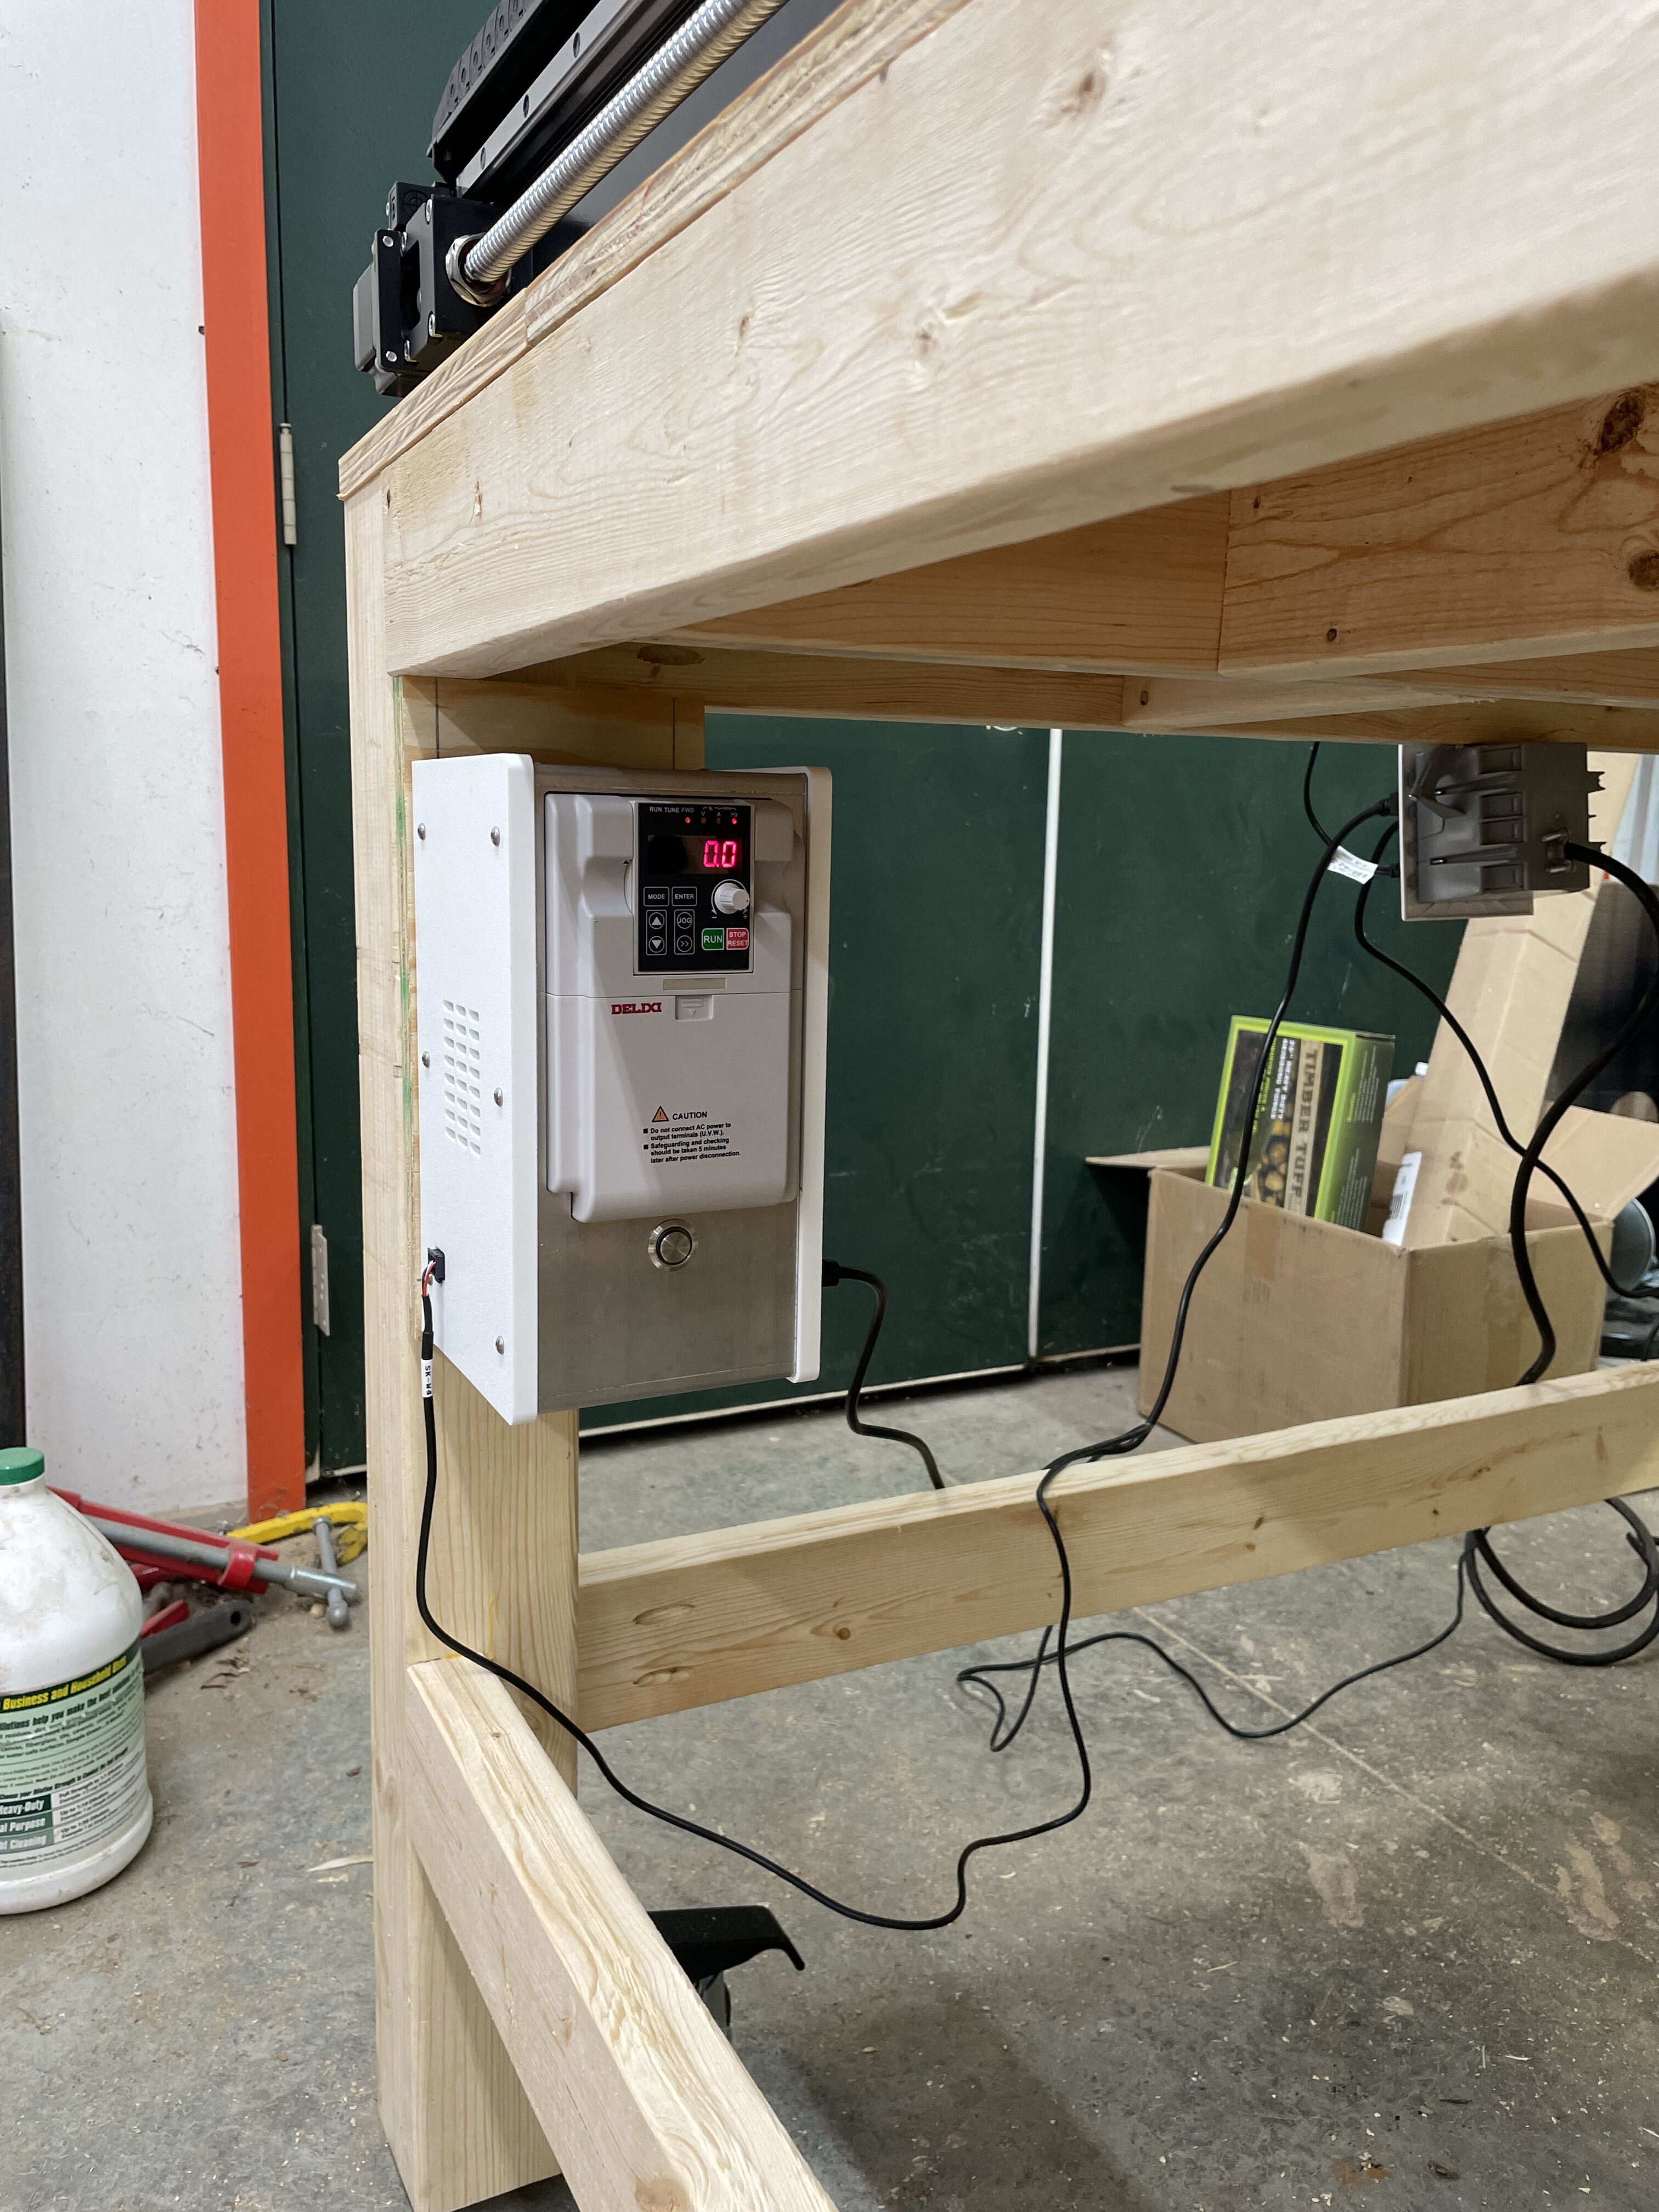
I’m working on the bottom shelf and mounts for the VFD box and power box today.
VFD mounted in the corner, there isn’t much power cord left on the 4x4 to mount anywhere else. Would have been nice to have a couple extra feet.
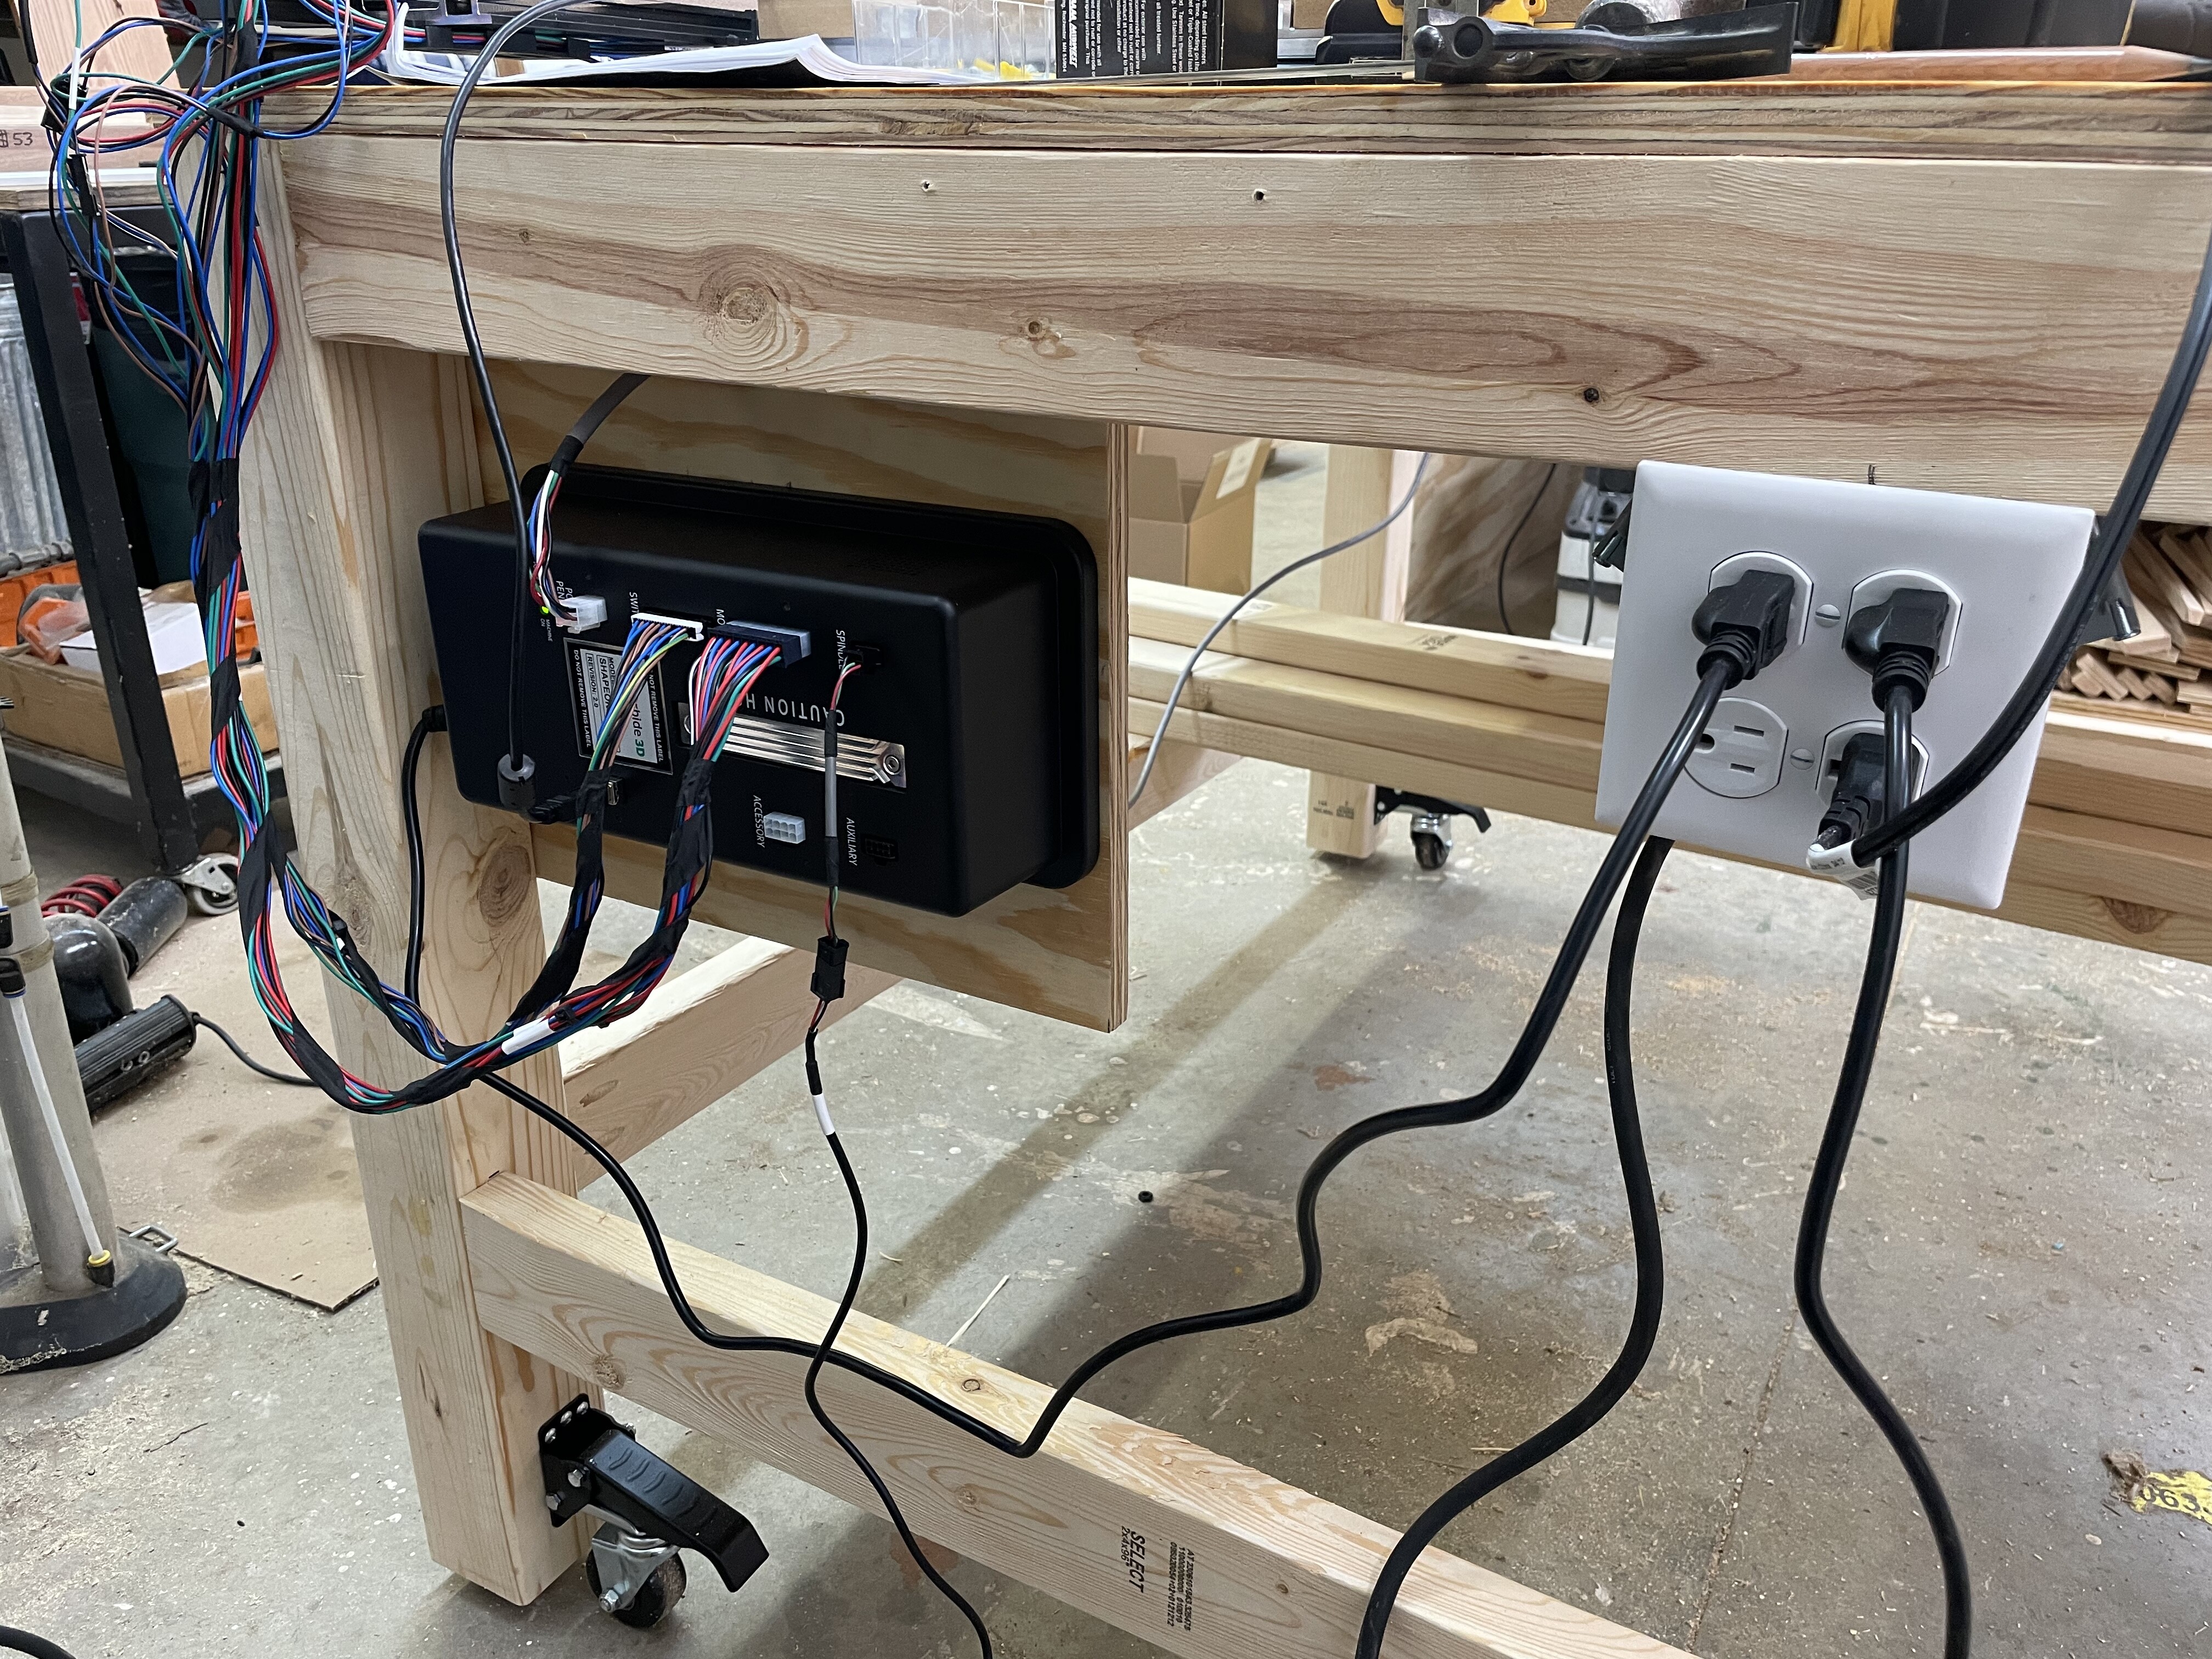
I mounted the power box on the rear and I also made a 15ft power whip for the table to everything is plugged in to the table itself and then I have a 15ft heavy duty cord to plug in the shop somewhere.
Still need to tidy up the cords. I’ll tuck everything up under the table.
Thank you for sharing the pictures. Table looking very sturdy. Did you come up with the design yourself? I need build one for Shapeoko Pro CNC Router XXL so dimensions are smaller.
Tables and benches have been made from dimensional lumber for a long time. We all stand on the shoulders of those who came before us. So the design is not as critical as making the bench/stand not rack. The basic 4 corner post with some reinforcement is pretty standard. The posts in the middle can help the table from sagging but most people’s houses are made out of 2x4 16" apart holding up thousnds of pounds of weight. So dont sweat the design just look for ways to make it solid and make it your own design.
Most tables are pretty basic in design. A top, apron and legs. The extras are embellishments that make your bench/stand unique for what you are going to use it for. Like the stretchers around the bottom to keep the legs from spreading. Concentrate on the construction techniques that have been used for centuries to make a sturdy bench that is rack resistant.