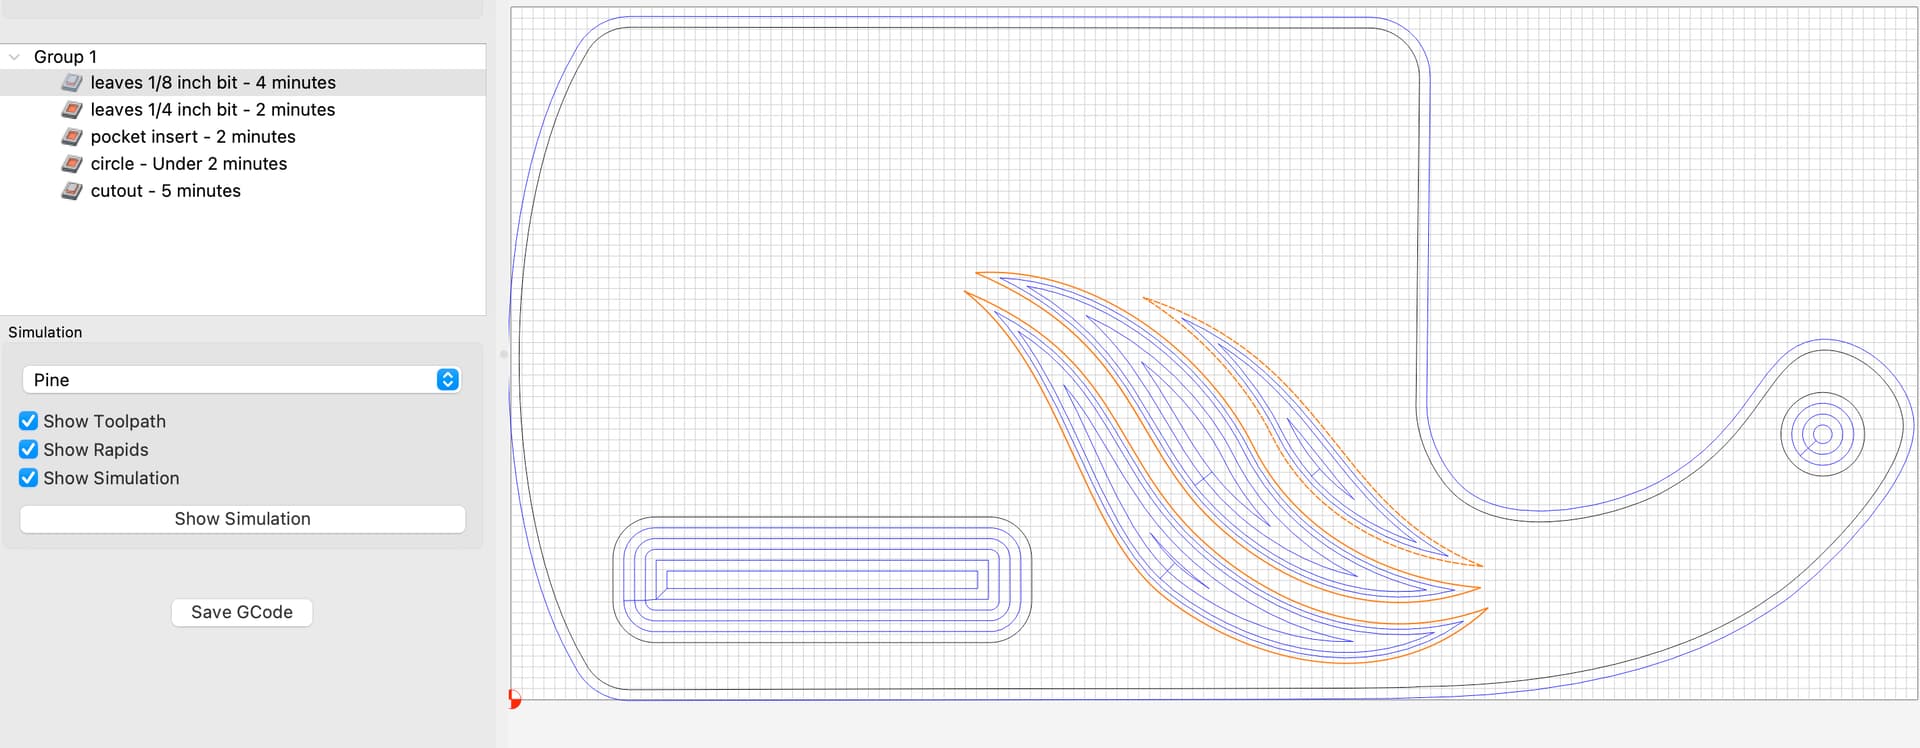
Does anyone know how I’m able to get into corners on the “leaf like” design there, so, they’re sharp? (it’s only being cut .125" deep because I’m going to attempt an inlay.)
I have an 1/8" compression bit to get as close as I can, and I also have a 1/4" compression to get in there and clear out the majority of the material (to save on some time).
I assume it’s a v bit situation? - I’ve only attempted v carving once and it was a disaster so I have not revisited it…
Yeah, unfortunately, the smallest endmill I have is that 1/8" and then the v bits. I can’t even fathom using a 1/16" bit. EVERY time I use the 1/8 inch I’m always biting my nails that I’m gonna snap that little sh*t.
It was over 6 months ago or so and it was a combination of incorrect depth of cut, stepover, plunge rate, all of it, really. I have amana tools and whiteside v bits. I can post in a bit of which ones I actually have if that helps narrow down getting those numbers within respectable reason
Although, I’m confused in the order of operations here.
I have a bitsetter but you dont use v bits with the bit setter so being there is a 1/4 inch endmill here to cut the shallow pocket (rounded rectangle) and then cut out the majority of the waste in those leaf like designs, and then the v bit to clean up the area in the corners and then the 1/4 endmill for cutting out the handle hole and the cutout of the board.
if this is a crap post, and been asked before, then sorry. I was just hoping to get a grasp on this type of design detail cause I’d like to make stuff like this for family for the holidays. (I also have more things like this I’ve made but have been too intimated to try and see it through without potentially damaging my bit and/or material)
I mill all of my stock myself before I take it to the machine for design work so you can see how hesitation becomes a thing. Doing all of that milling then to get to the machine and F something up and you’re just like. “hello darkness my old frienddddd…”
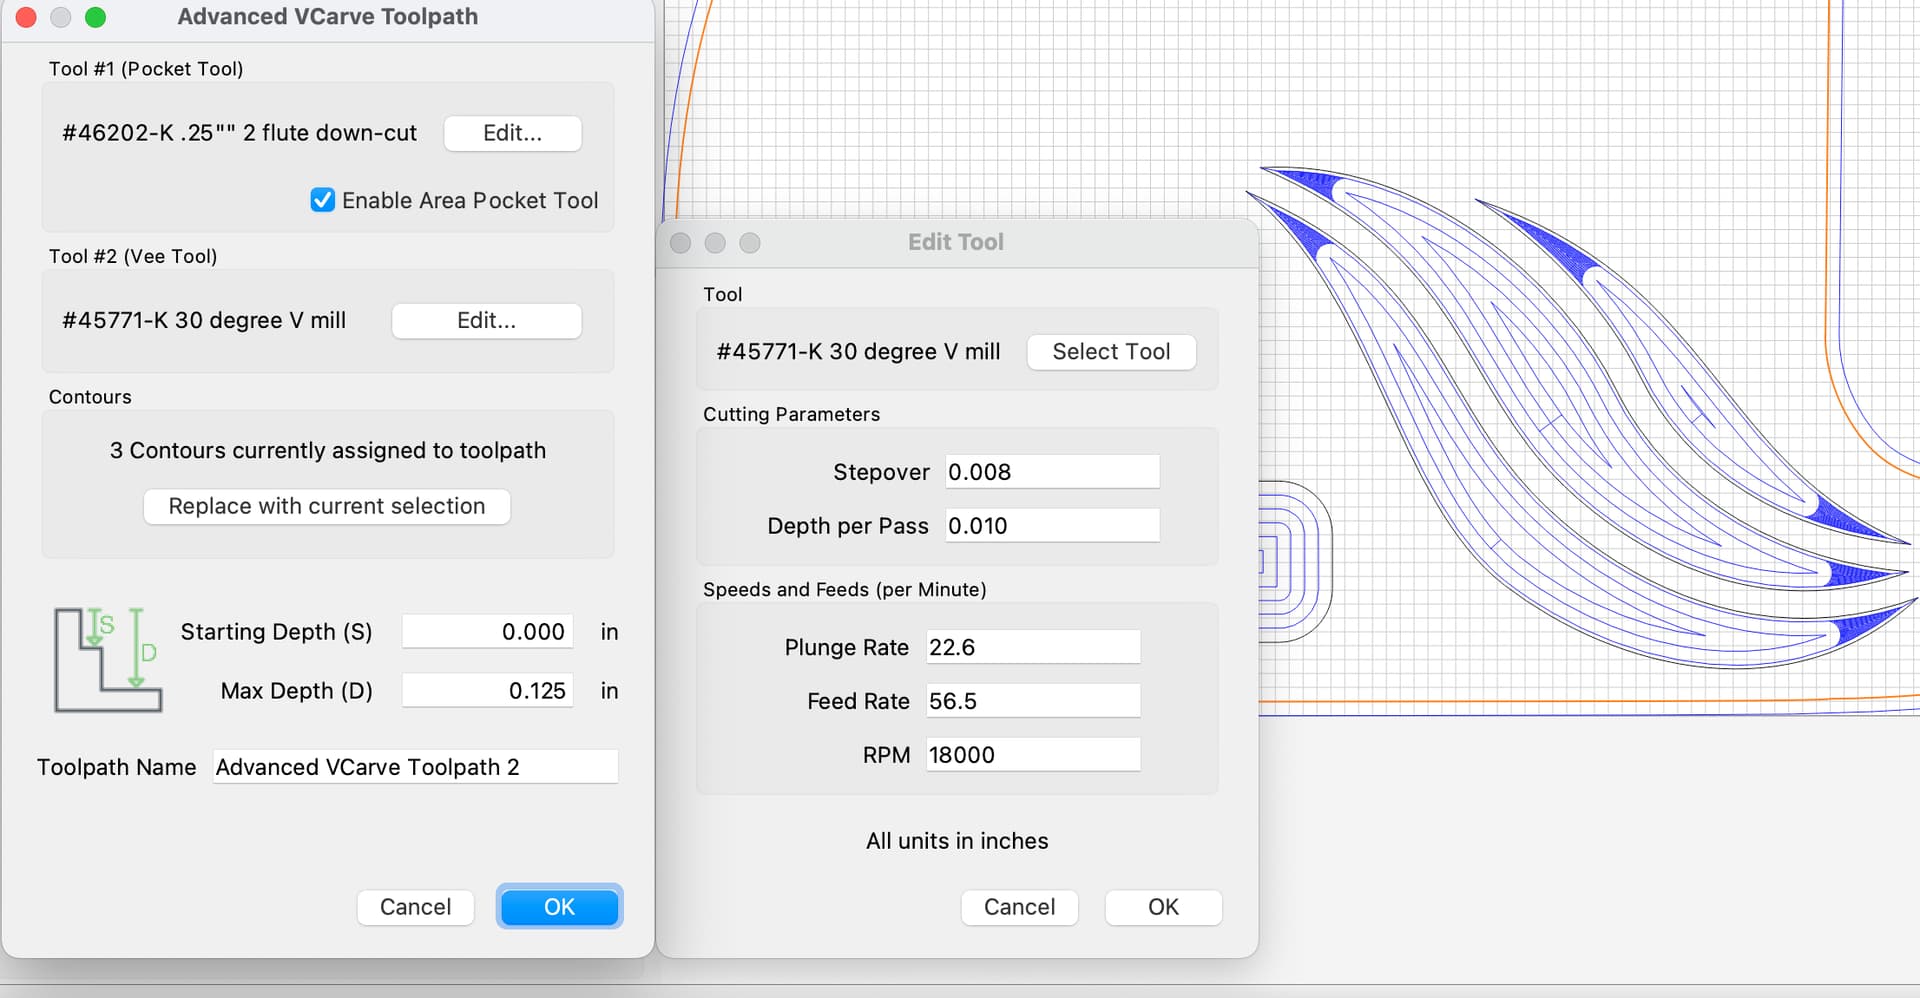
Actually, the bitsetter is most useful when using vbits, especially advanced v-carve, to do exactly what you describe: first use a square endmill to clear out most of the material, and then a vbit to get at the remaining material in the corners. Advanced v-carve is also useful since it allows one to limit the depth of the vcarving to any depth value, to v-carve very large areas without having the vbit dig all the way to Australia
Good to know! I actually have only had the bit setter for a couple of weeks so I had no idea you could use the v bit with the setter. Makes sense though! (still learning)
So order of ops:
1/4 inch to clear out rounded rectangle.
1/4 inch to clear out majority of leaf design
1/4 inch to clear out handle hole.
bit setter change to v bit to clear out detail in leaf design.
bit setter change BACK TO 1/4 to cut out the board fully
Yep. Depending on your workholding, you may even do this to only have one tool change:
1/4 inch to clear out rounded rectangle.
1/4 inch to clear out majority of leaf design
1/4 inch to clear out handle hole.
1/4 inch to cut the board from the stock [if you use tabs or tape& glue workholding and you know the piece won’t move even after doing that profile cut]
bit setter change to v bit to clear out detail in leaf design.
Just order your toolpaths the way you like, save all to a single file, run that with bitsetter enabled.
Since you may not have used the bitsetter much yet, I’ll add that to stay out of trouble, only ever change the tool when
CM prompts you to do so
or explicitly using the button in CM to load a new tool
Thanks for the take on it. I’ve always done the 1/4 inch profile cutouts last cause I felt that always made most sense? However, my preferred method of holding is painters tape and Medium thick CA glue now.
Mostly because the cam clamps I made and 90 degree L brackets (all made out of MDF) are more cumbersome to find placement in my threaded waste board with 2 inch on center hole spacing. - and - sometimes when applying clamping pressure laterally I noticed most pieces lifting in corners and having slight variances rather than applying downward pressure (which I’d prefer), that said, I don’t have clamps that can do that. I tried making some but they were failures lol.
It does make most sense in many cases. Once the profile cut is done, the piece is more likely to break free if workholding is not quite adequate. This is also why I love tape&glue workholding: as long as you put several strips of tape under the stock and make sure that each piece that will get completely cut out of the stock has enough surface of tape under it, it won’t move even after a profile cut. And in cases like above, this can save one tool change (not that it’s a huge deal…just convenient). The vcarve will exert very little force on the piece anyway.
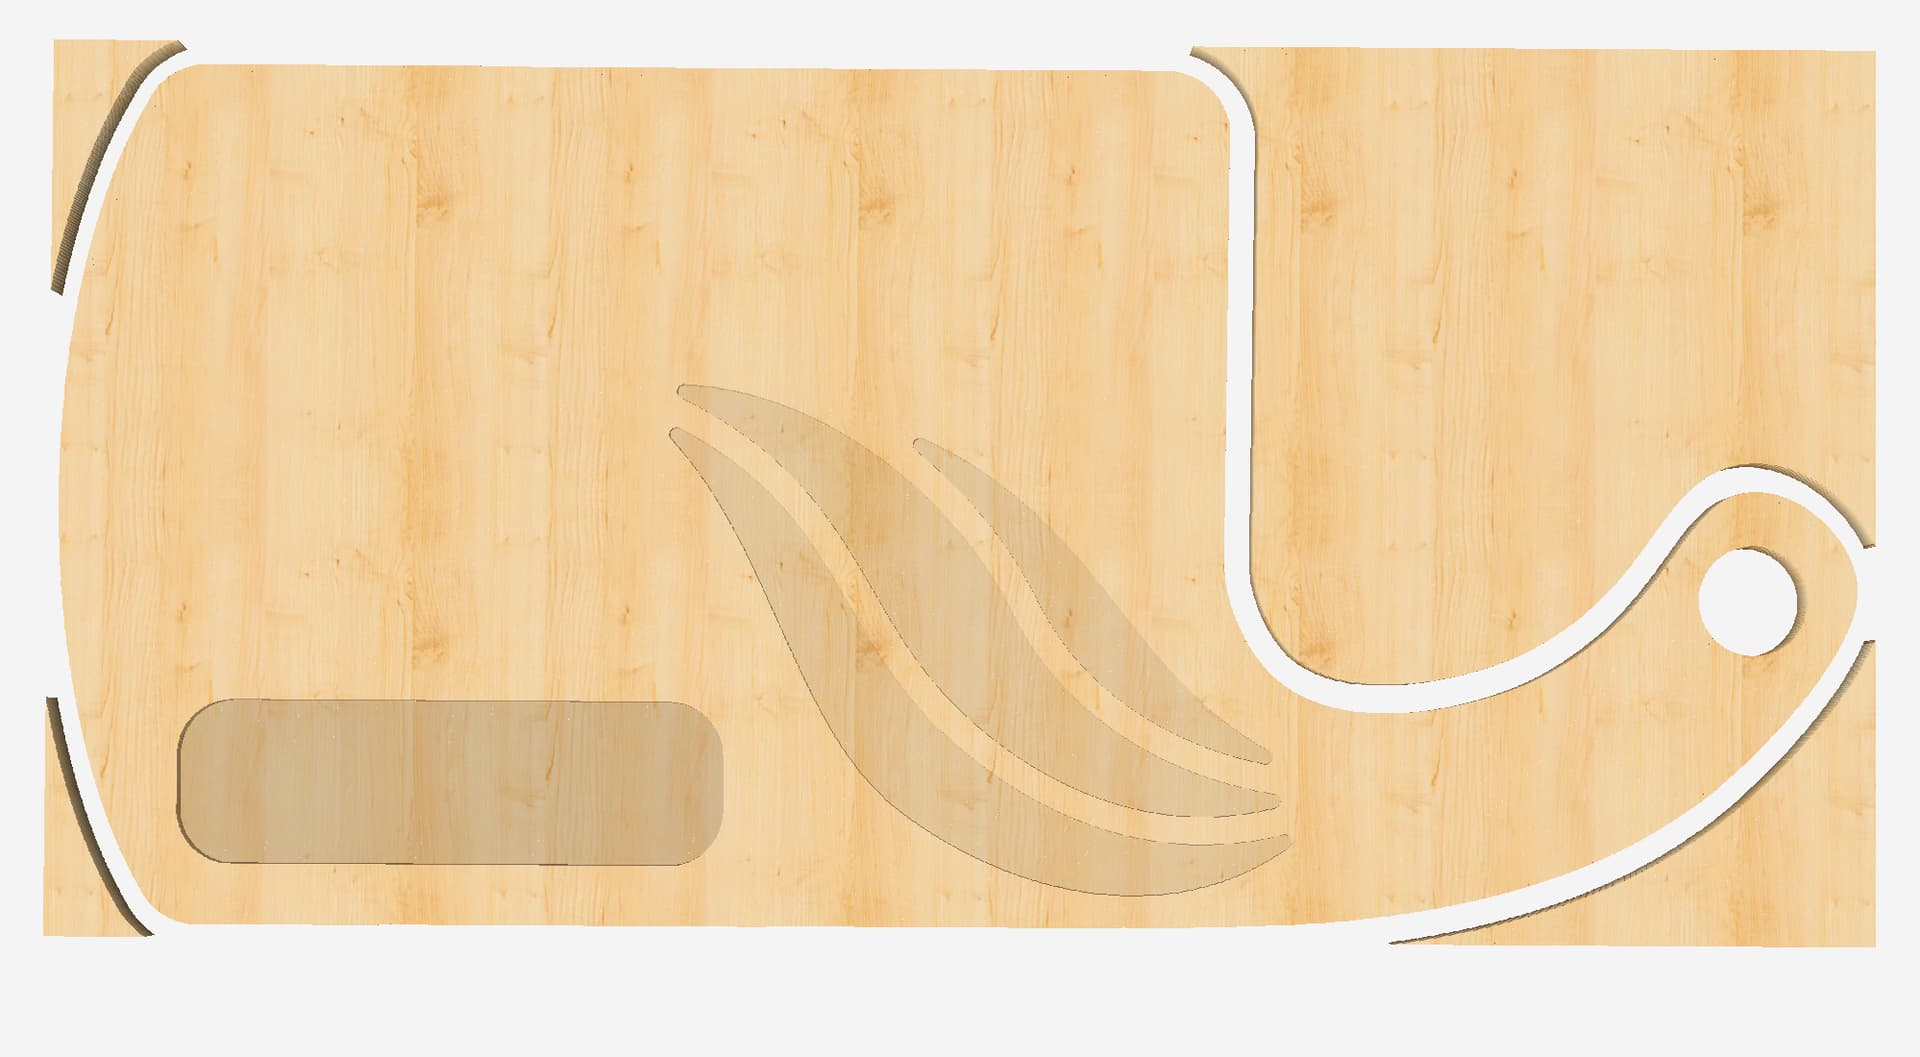
Thanks for the tip. Quick follow up question. Say I wanted to cut those leaves out on another piece of wood 3/16’ think. - toying with an inlay idea) so it sits proud of the pocket created on the board when glued in), do you think using an 1/8" endmill for a contour cut set outside right would be sufficient at giving me that tight line detail I need?
I didn’t know if there was another alternative. Just figured I’d ask!
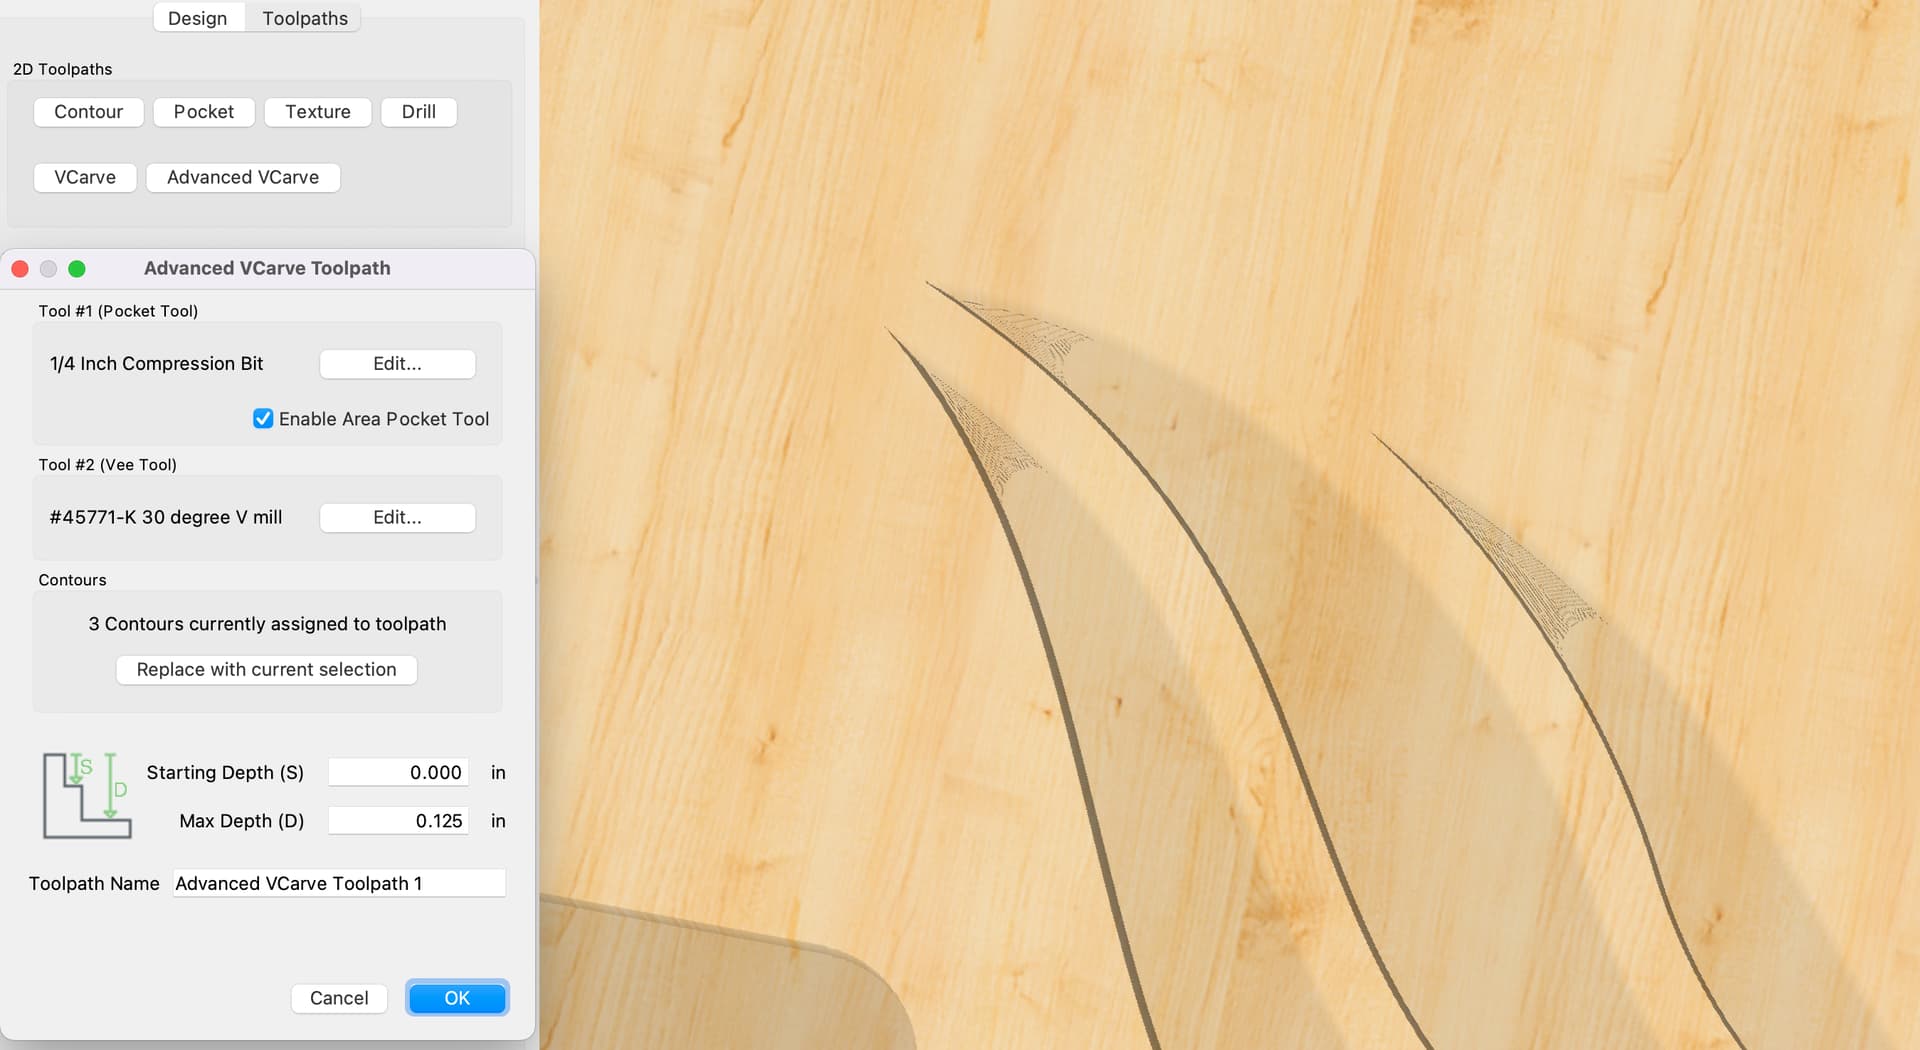
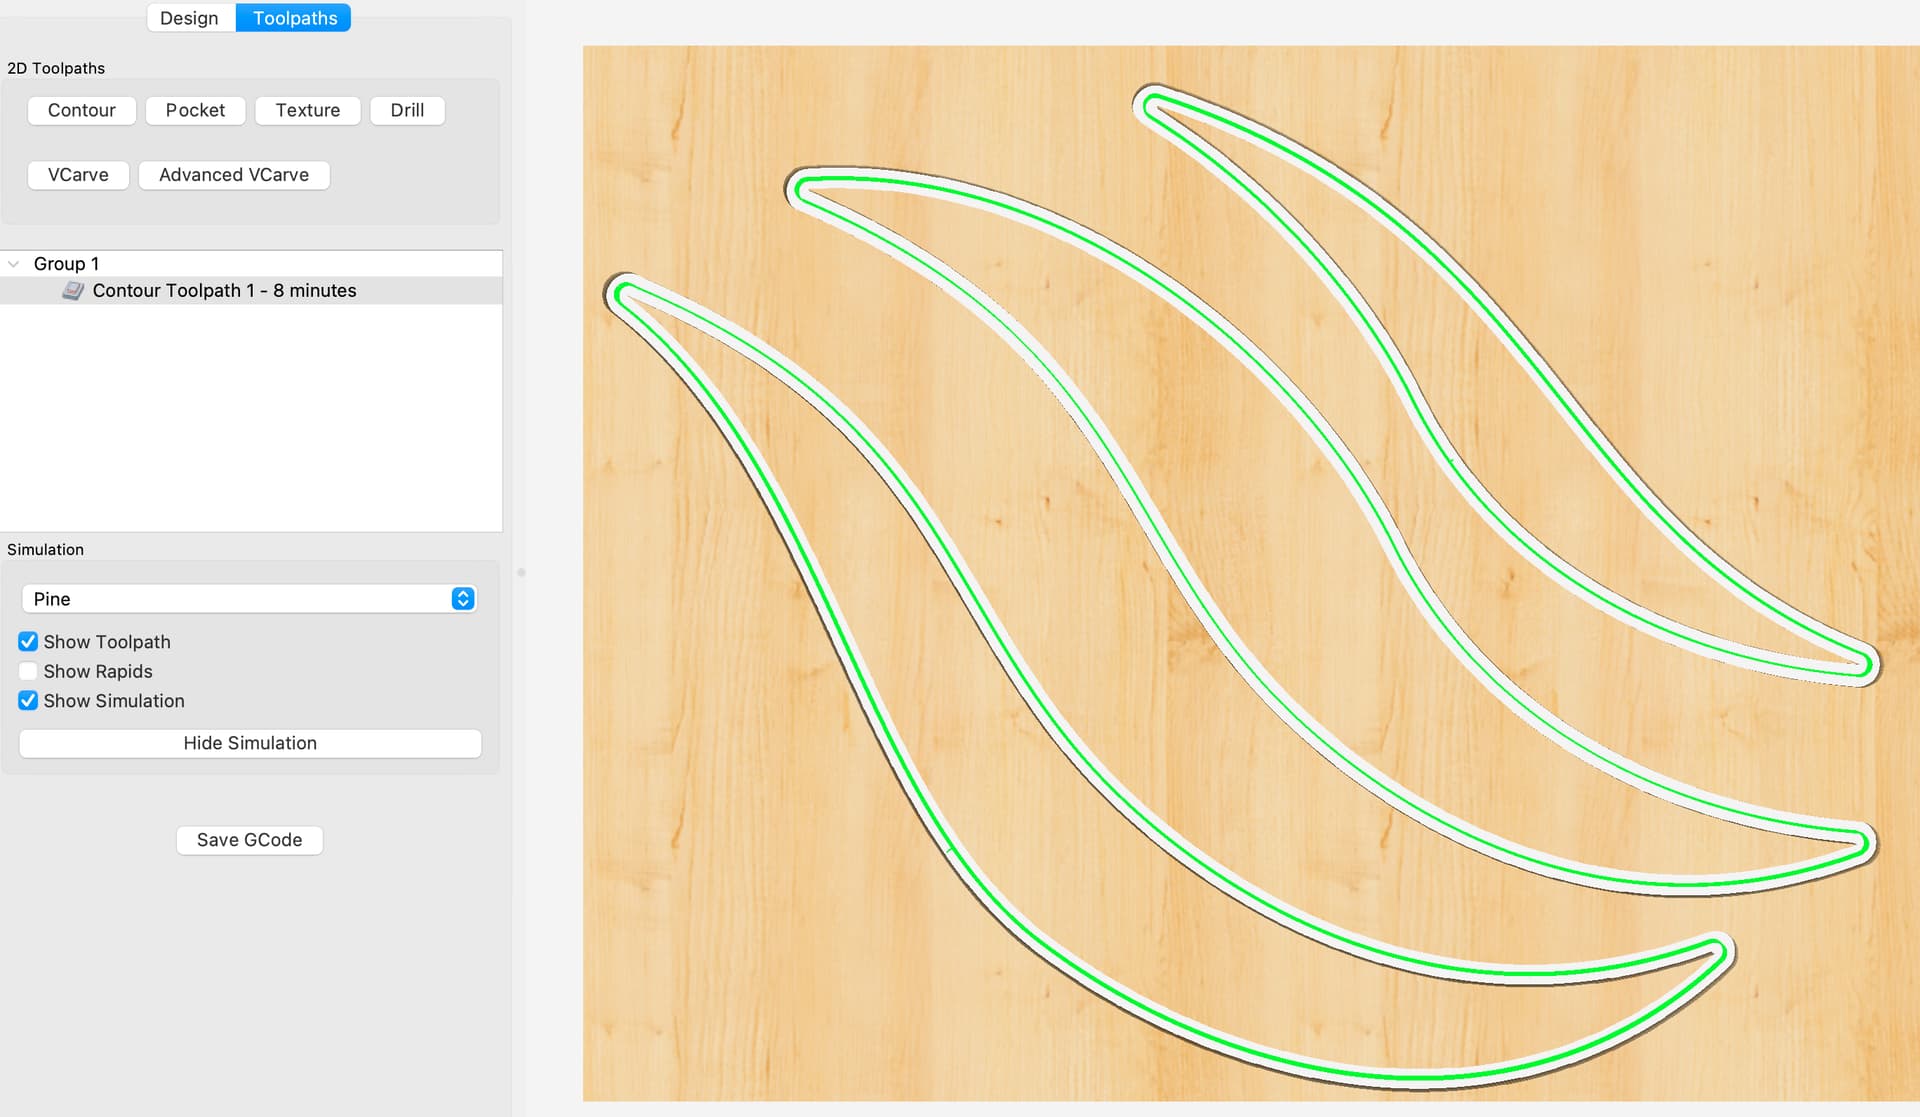
Does anyone know if there is a way to change the start depth on the v bit so it’s not “cutting air” and really only cleaning out the fine points in those leaves after the 1/4 endmill clears out the majority of the waste? I change the start depth on the v bit but then the simulation doesnt exist? but if I leave the start depth at 0.00 it shows what I’m trying to accomplish.
Now I know by me attempting what I said above it’s going to follow the path of what the 1/4 inch bit did (hence the 27 minutes) and eventually get into those corners. I guess I was just trying to see how I get the v bit to just ONLY tackle what needs the detail which are the corners there.
Yes, for an outside cut like that one (with no tight inner corner) any diameter endmill will do the job of cutting exactly the profile, including the pointy parts.
However, inlays are easier to do using v-carve. An inlay using a regular profile cut will require the pocket and inlay to perfectly match (dimensionnally), which is not straightforward.
two things here:
there is no built-in way to have the vbit toolpath just go at the corners. This is called “rest machining”, Carbide Create does not support it. However, you can cheat, and use additional geometry to only v-carve those corners (duplicate the vector then overlay a shape, say a square, with those corners, do a boolean intersection, and use the result as the area for your advanced v-carve)
I guess it really doesn’t. I was just thinking if i cleared out the bulk of the material with my 1/4 endmill and then using the v bit to hit the corners only (which I read what you replied with and I’d have to toy around with that)
My thought was maybe if I told the v bit to start at 0.1875 and end at my desired depth of .125 instead of 0.00 and ending at .125 (even though) it’s following the tool path of what v bits do;
I guess I thought it would cut less air before eventually making it to those corners which is the only reason I need the v bit in this case thus taking less time than 27 minutes since it’s following the path of what the 1/4 endmill already cut out.
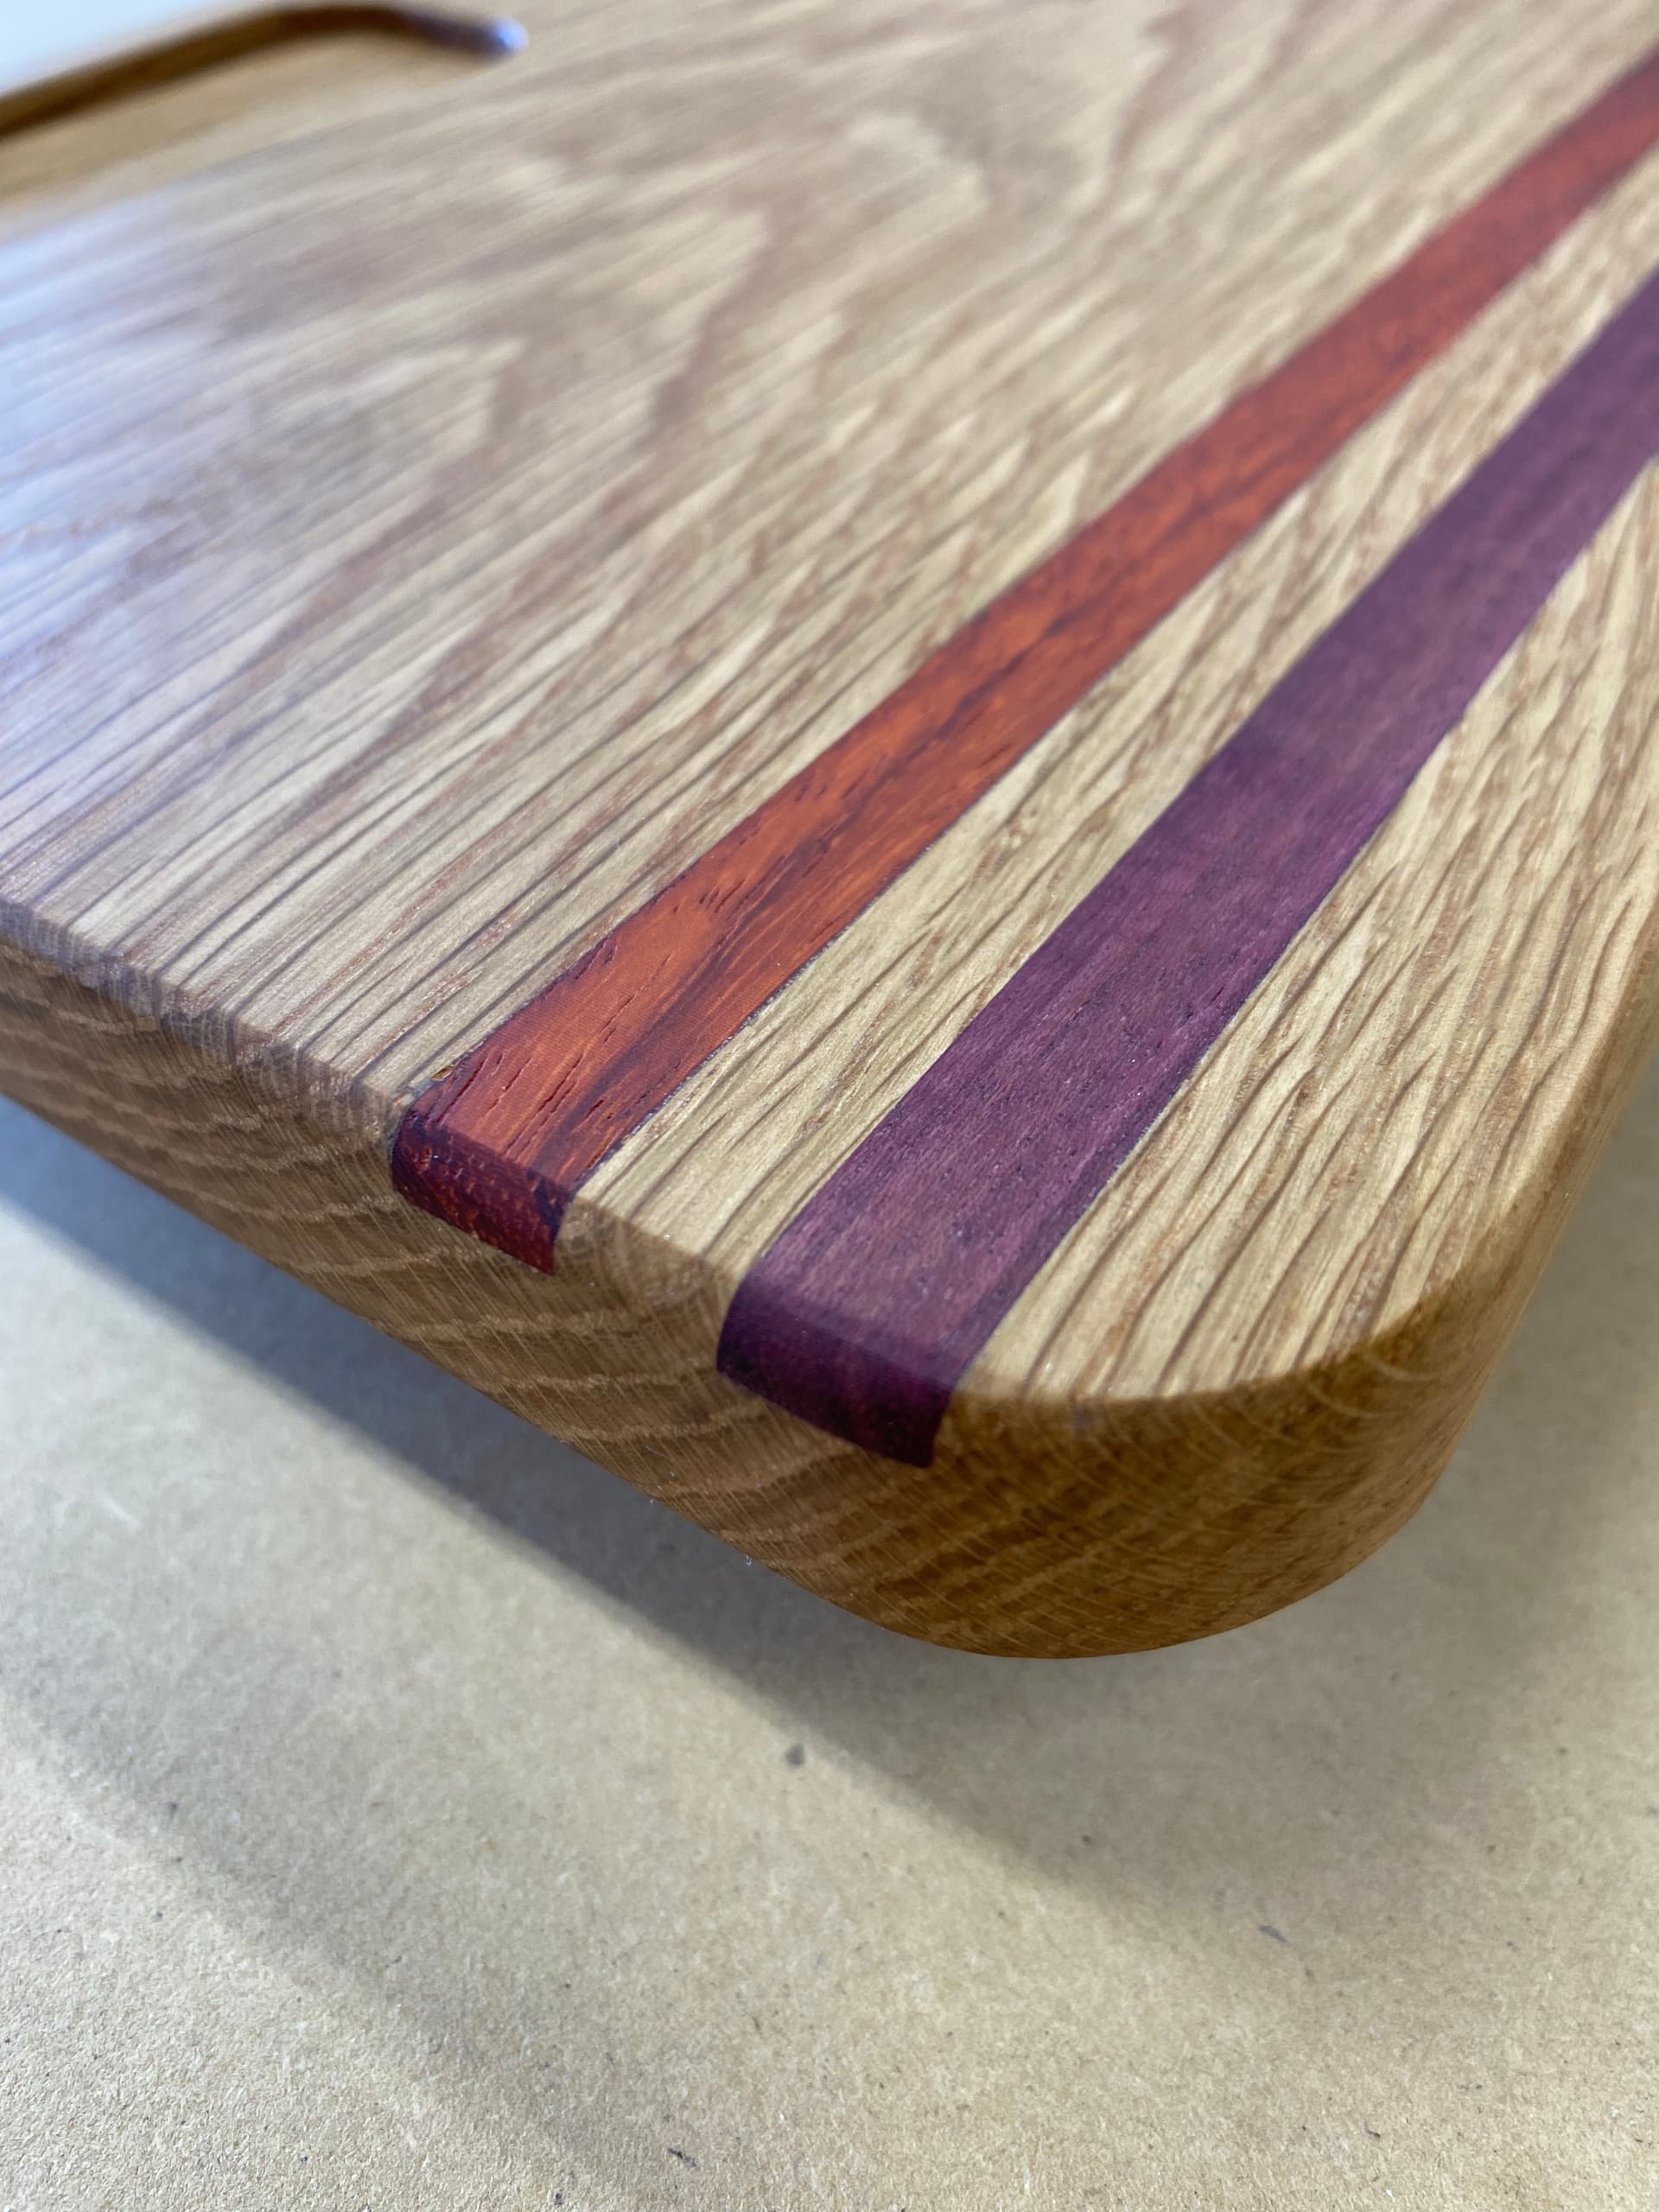
A light sanding and leaving room for glue allowed me to get a tight joint. They sat proud of the pocket when glued in, then I planed it smooth, sanded. Oil and wax and voila. (now I understand this is a simple cut, lol. Hence why I’m trying to challenge myself with this leaf design in a similar fashion (if it was possible).
Yes, if you are going to do inlays, v-carve is just easier than straight pockets, in that it leaves room for dimensional error. You are pretty much guaranteed a perfect fit due to the nature of v-carving. Check out the gazillion threads about this
EDIT: but those straight inlays of yours look great !
Okay, noted. Thanks for always taking time to reply! It means a lot! I did look into some threads about inlays but I guess I can dive deeper. Sometimes the amount of information and side jargon is a lot to filter through to get directly to the answers you’re looking for. If that makes sense.
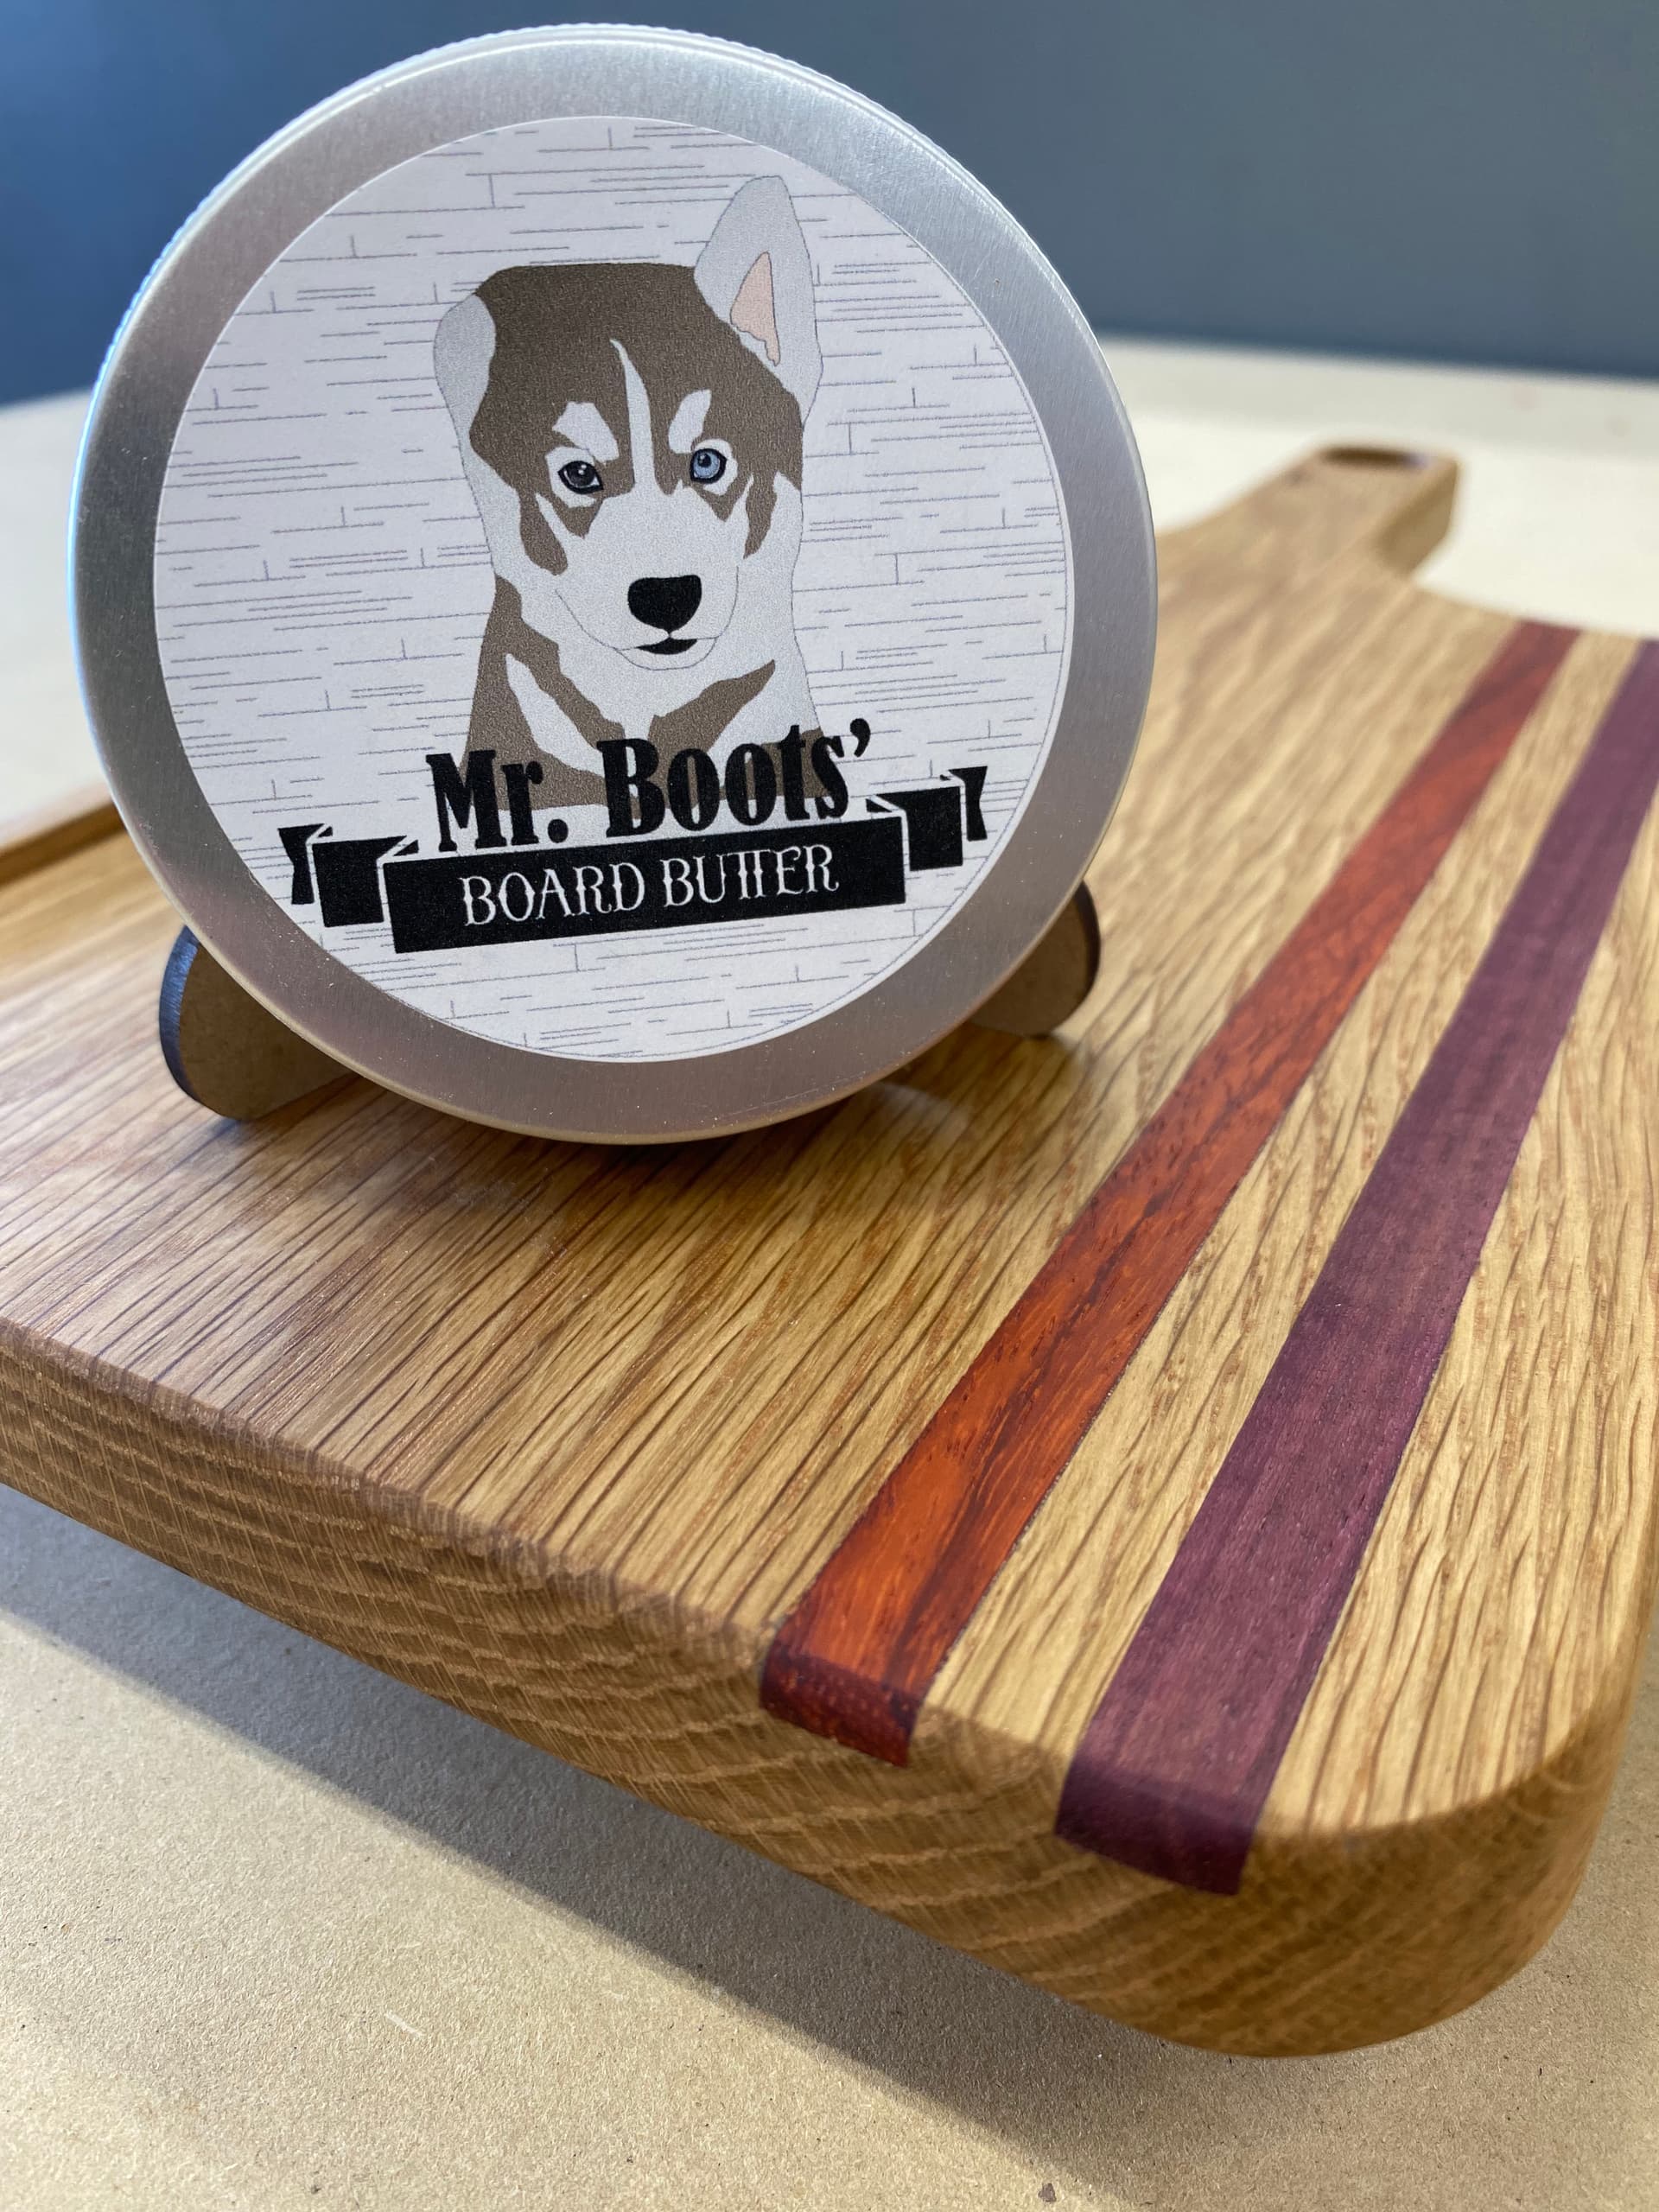
Thank you very much! One of the pieces (although, simple in theory) that I’m very proud of! I just need to have it find a good home now. lol.
I’m going to experiment with it this way and then one where I v carve the entire leaf pocket. That said, does this seem like appropriate numbers for hardwoods? (such as roasted oak - that’s what I’m going to use)
I’ve never used a 30 degree v bit so this is new territory for me. I am nervous!
Sounds about right, if a little conservative. I just checked and I used 18k, 75ipm and 0,5mm per pass when I used my 25deg Vbit for the Samuraï trivet, it was bamboo though.