Only the 2d at the top. The others were printed.
2 Likes
This came across my Youtube recommendations and thought I would share.
5 Likes
Thanks for that. Inspiring to say the least, what a beautiful piece!
I’m chipping away in the design phase. Several body’s in CAD now, none I’m real happy with. Glad I’m not on a deadline!
3 Likes
Still perfecting my design and tool paths. Plus doing a LOT of research. Close to finalizing my components choices.
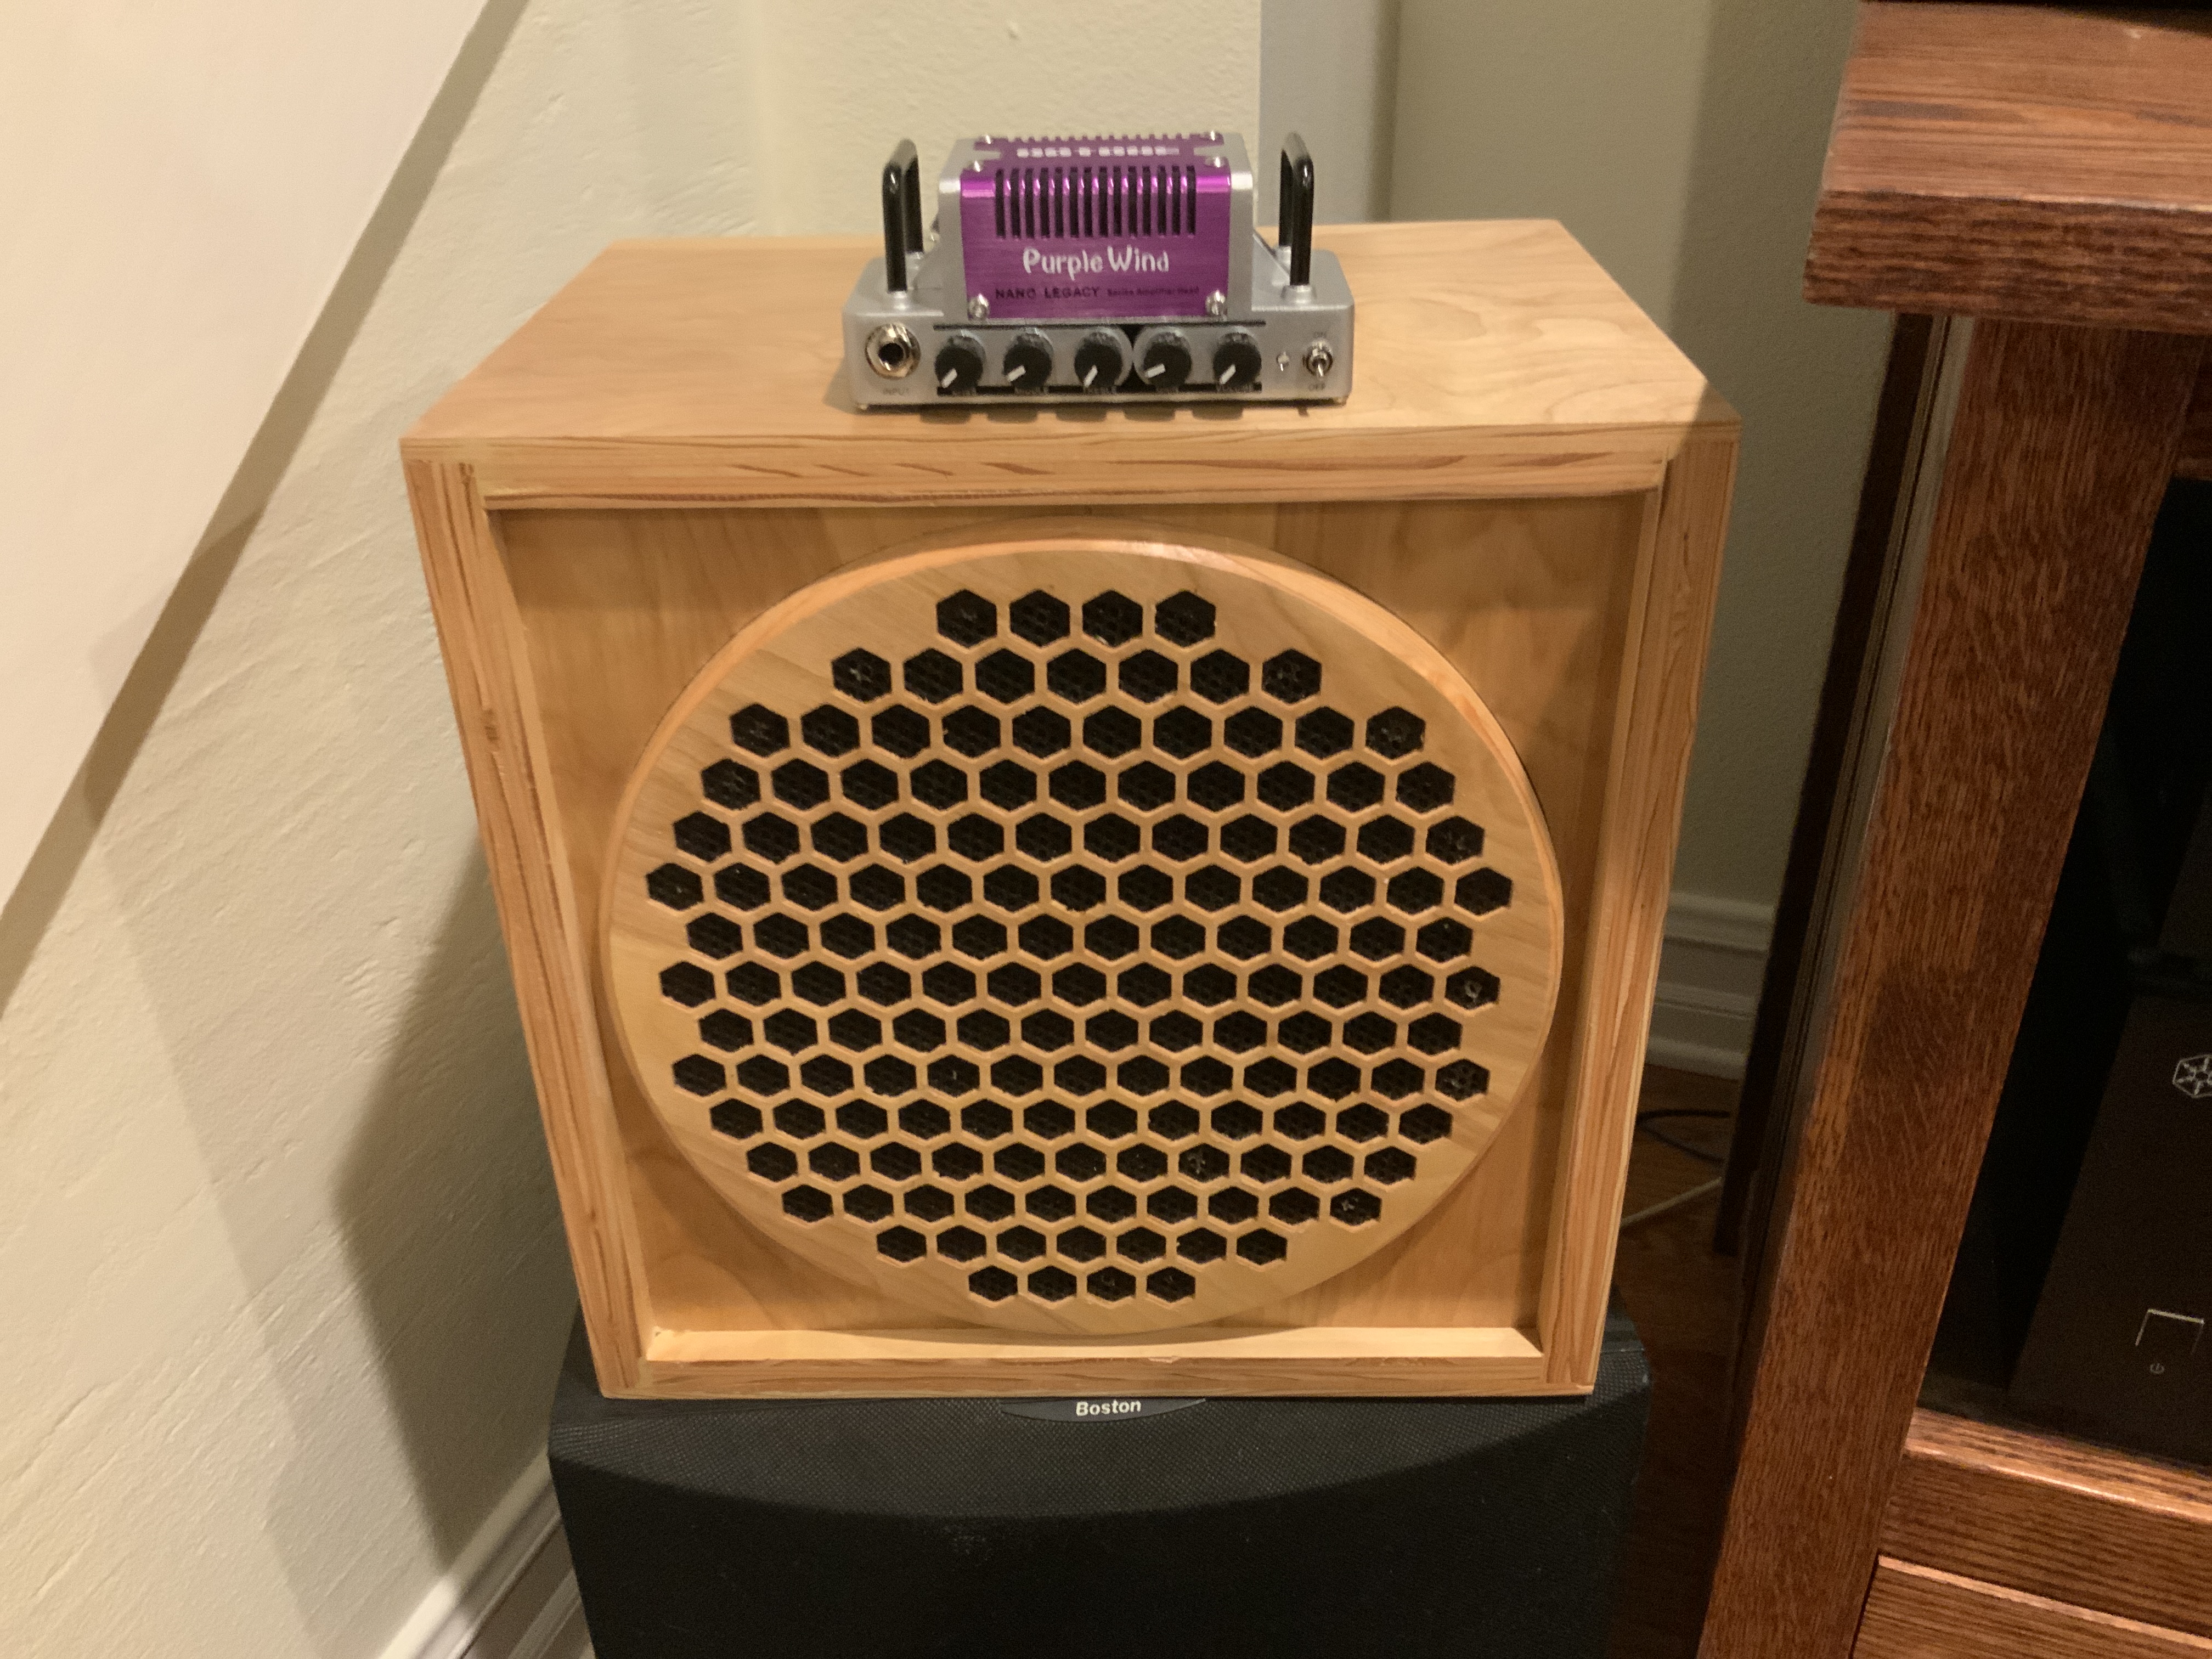
In typical cart-before-the-horse fashion I’ve finished my little amp/speaker project. Couldn’t resist the use of C3D hexes  . Also, cut all the dados/rabbetts with the S. Just because.
As soon as I finish my first read-thru of this thread https://www.tdpri.com/threads/basic-setup.952636/ I suspect I’ll be able to finish up any needed design tweaks. I’d really like to avoid my first try being aesthetically acceptable but un-playable.
12 Likes
Progress continues. Try, Fail, Learn, Repeat.
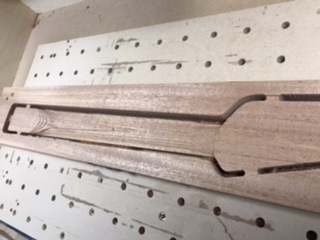
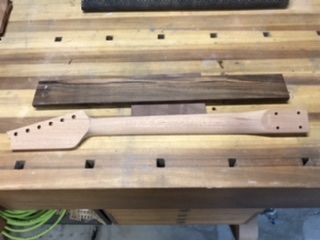
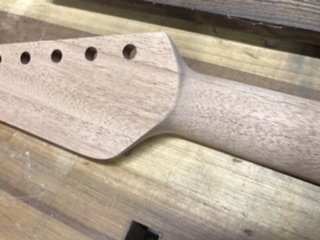
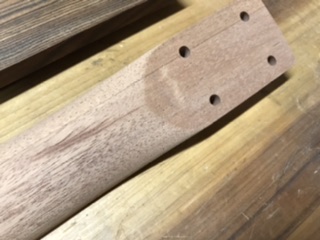
My third attempt at a neck, first using finish grade materials - African Mahogany. Came out pretty well, neck and heel transitions just what I want.
There’s a glue line I’m not happy with, sigh. Tried an edge grain glue up for max strength. Next try will be from a solid blank.
Some sanding with 120 and 150 grit.
Toolpaths pretty simple, adaptive clear for each side. Contour for truss rod slot and cutout with tabs. Bore path for holes. 3D parallel to clean up each side. 2 endmills, a 4” 1/4” flat and a standard 1/4” ball mill.
6 Likes
Griff - Hope that your build on this axe is progressing ok. I’ve wanted to build one since I was a wee lad and am enjoying your progress and learning a lot!
3 Likes

Well, can’t say that I love your reply. Been down that road so many times that I’ve managed to forget a couple of them, a good thing. It’s just sad when life gets in the way of the rest of us learning from you.
On a brighter note, I’ll bet the remodel turns out beautifully!
1 Like
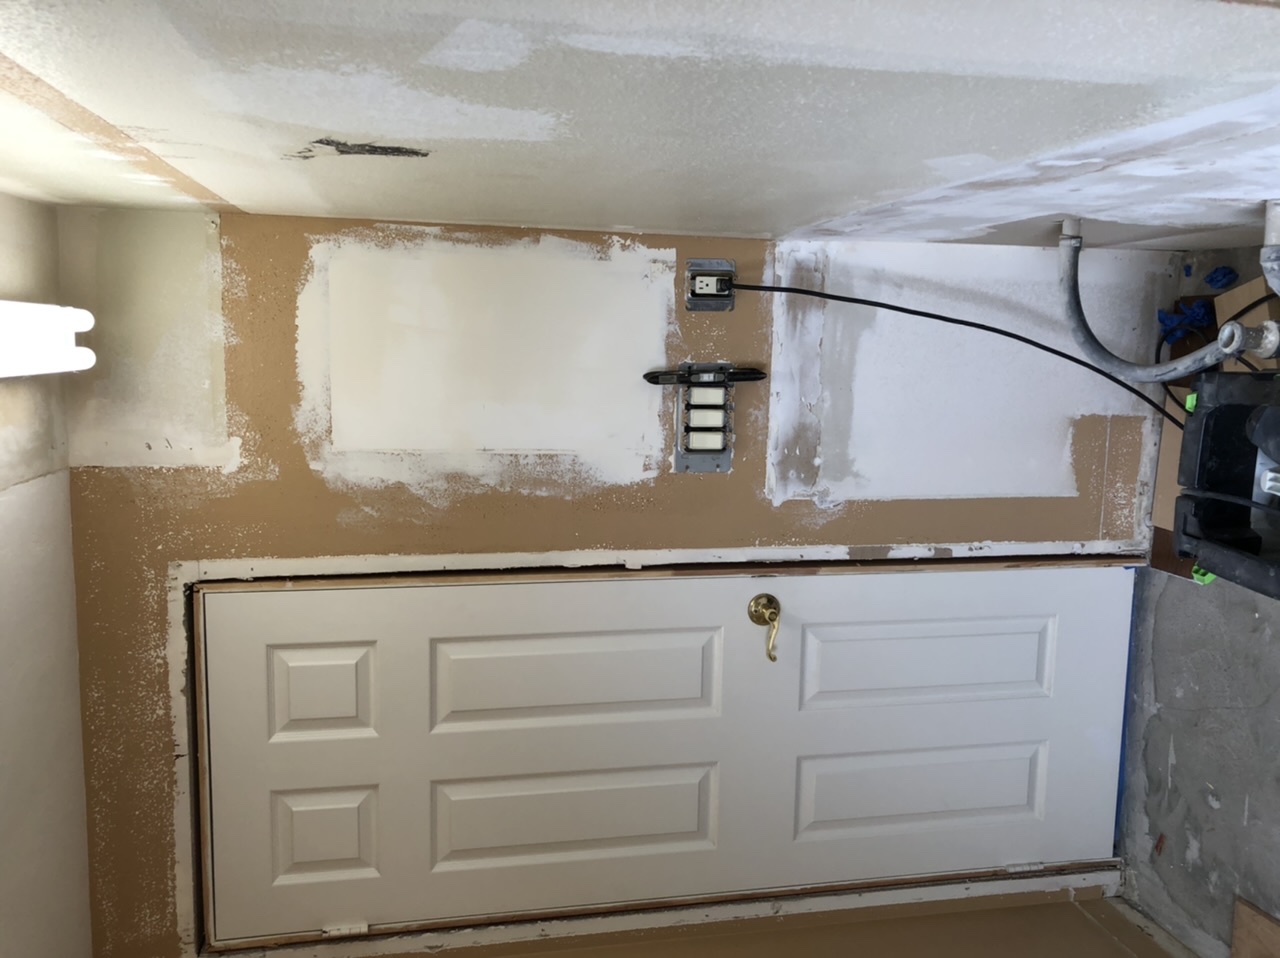
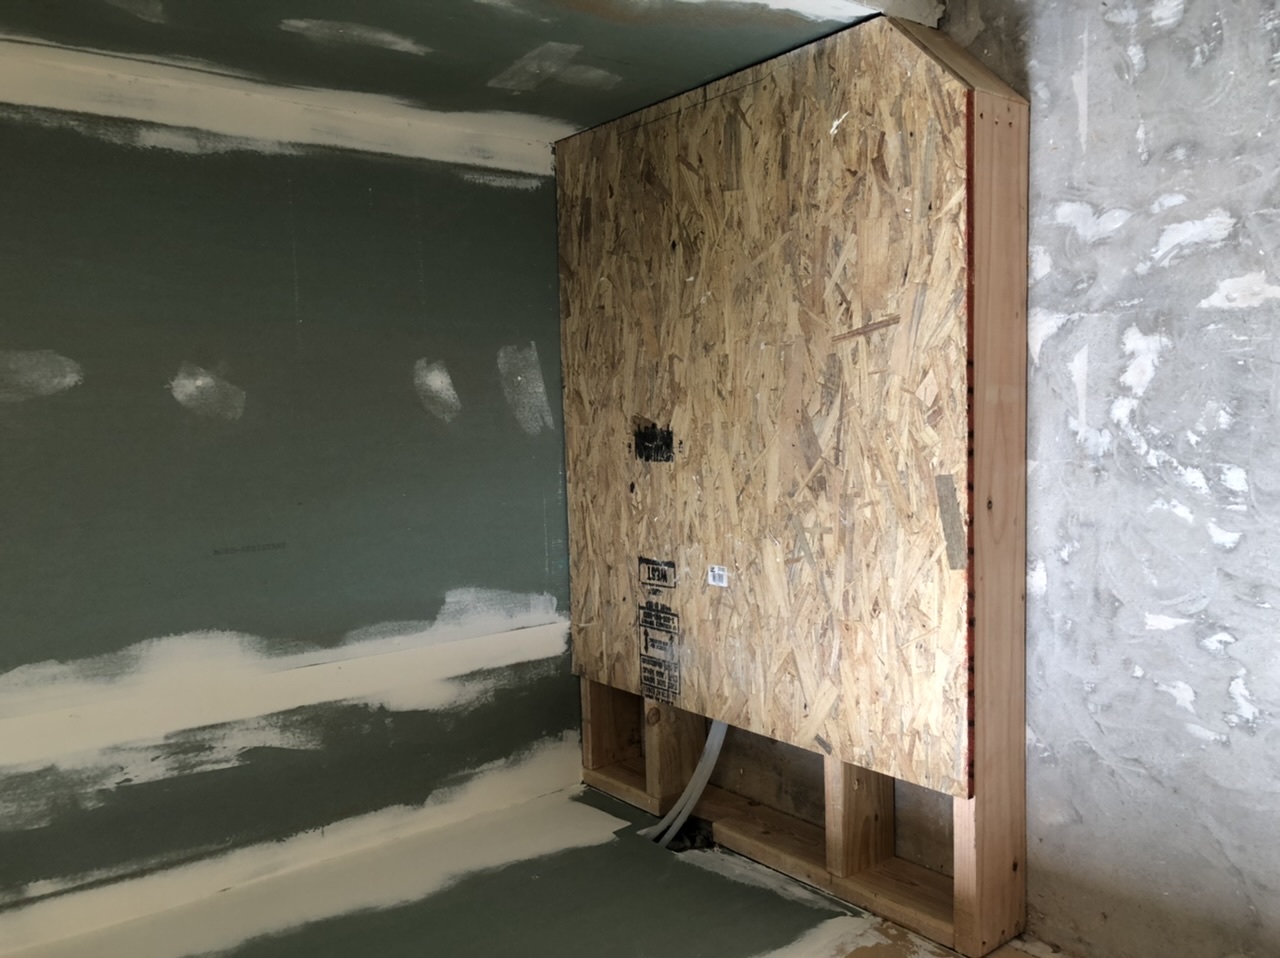
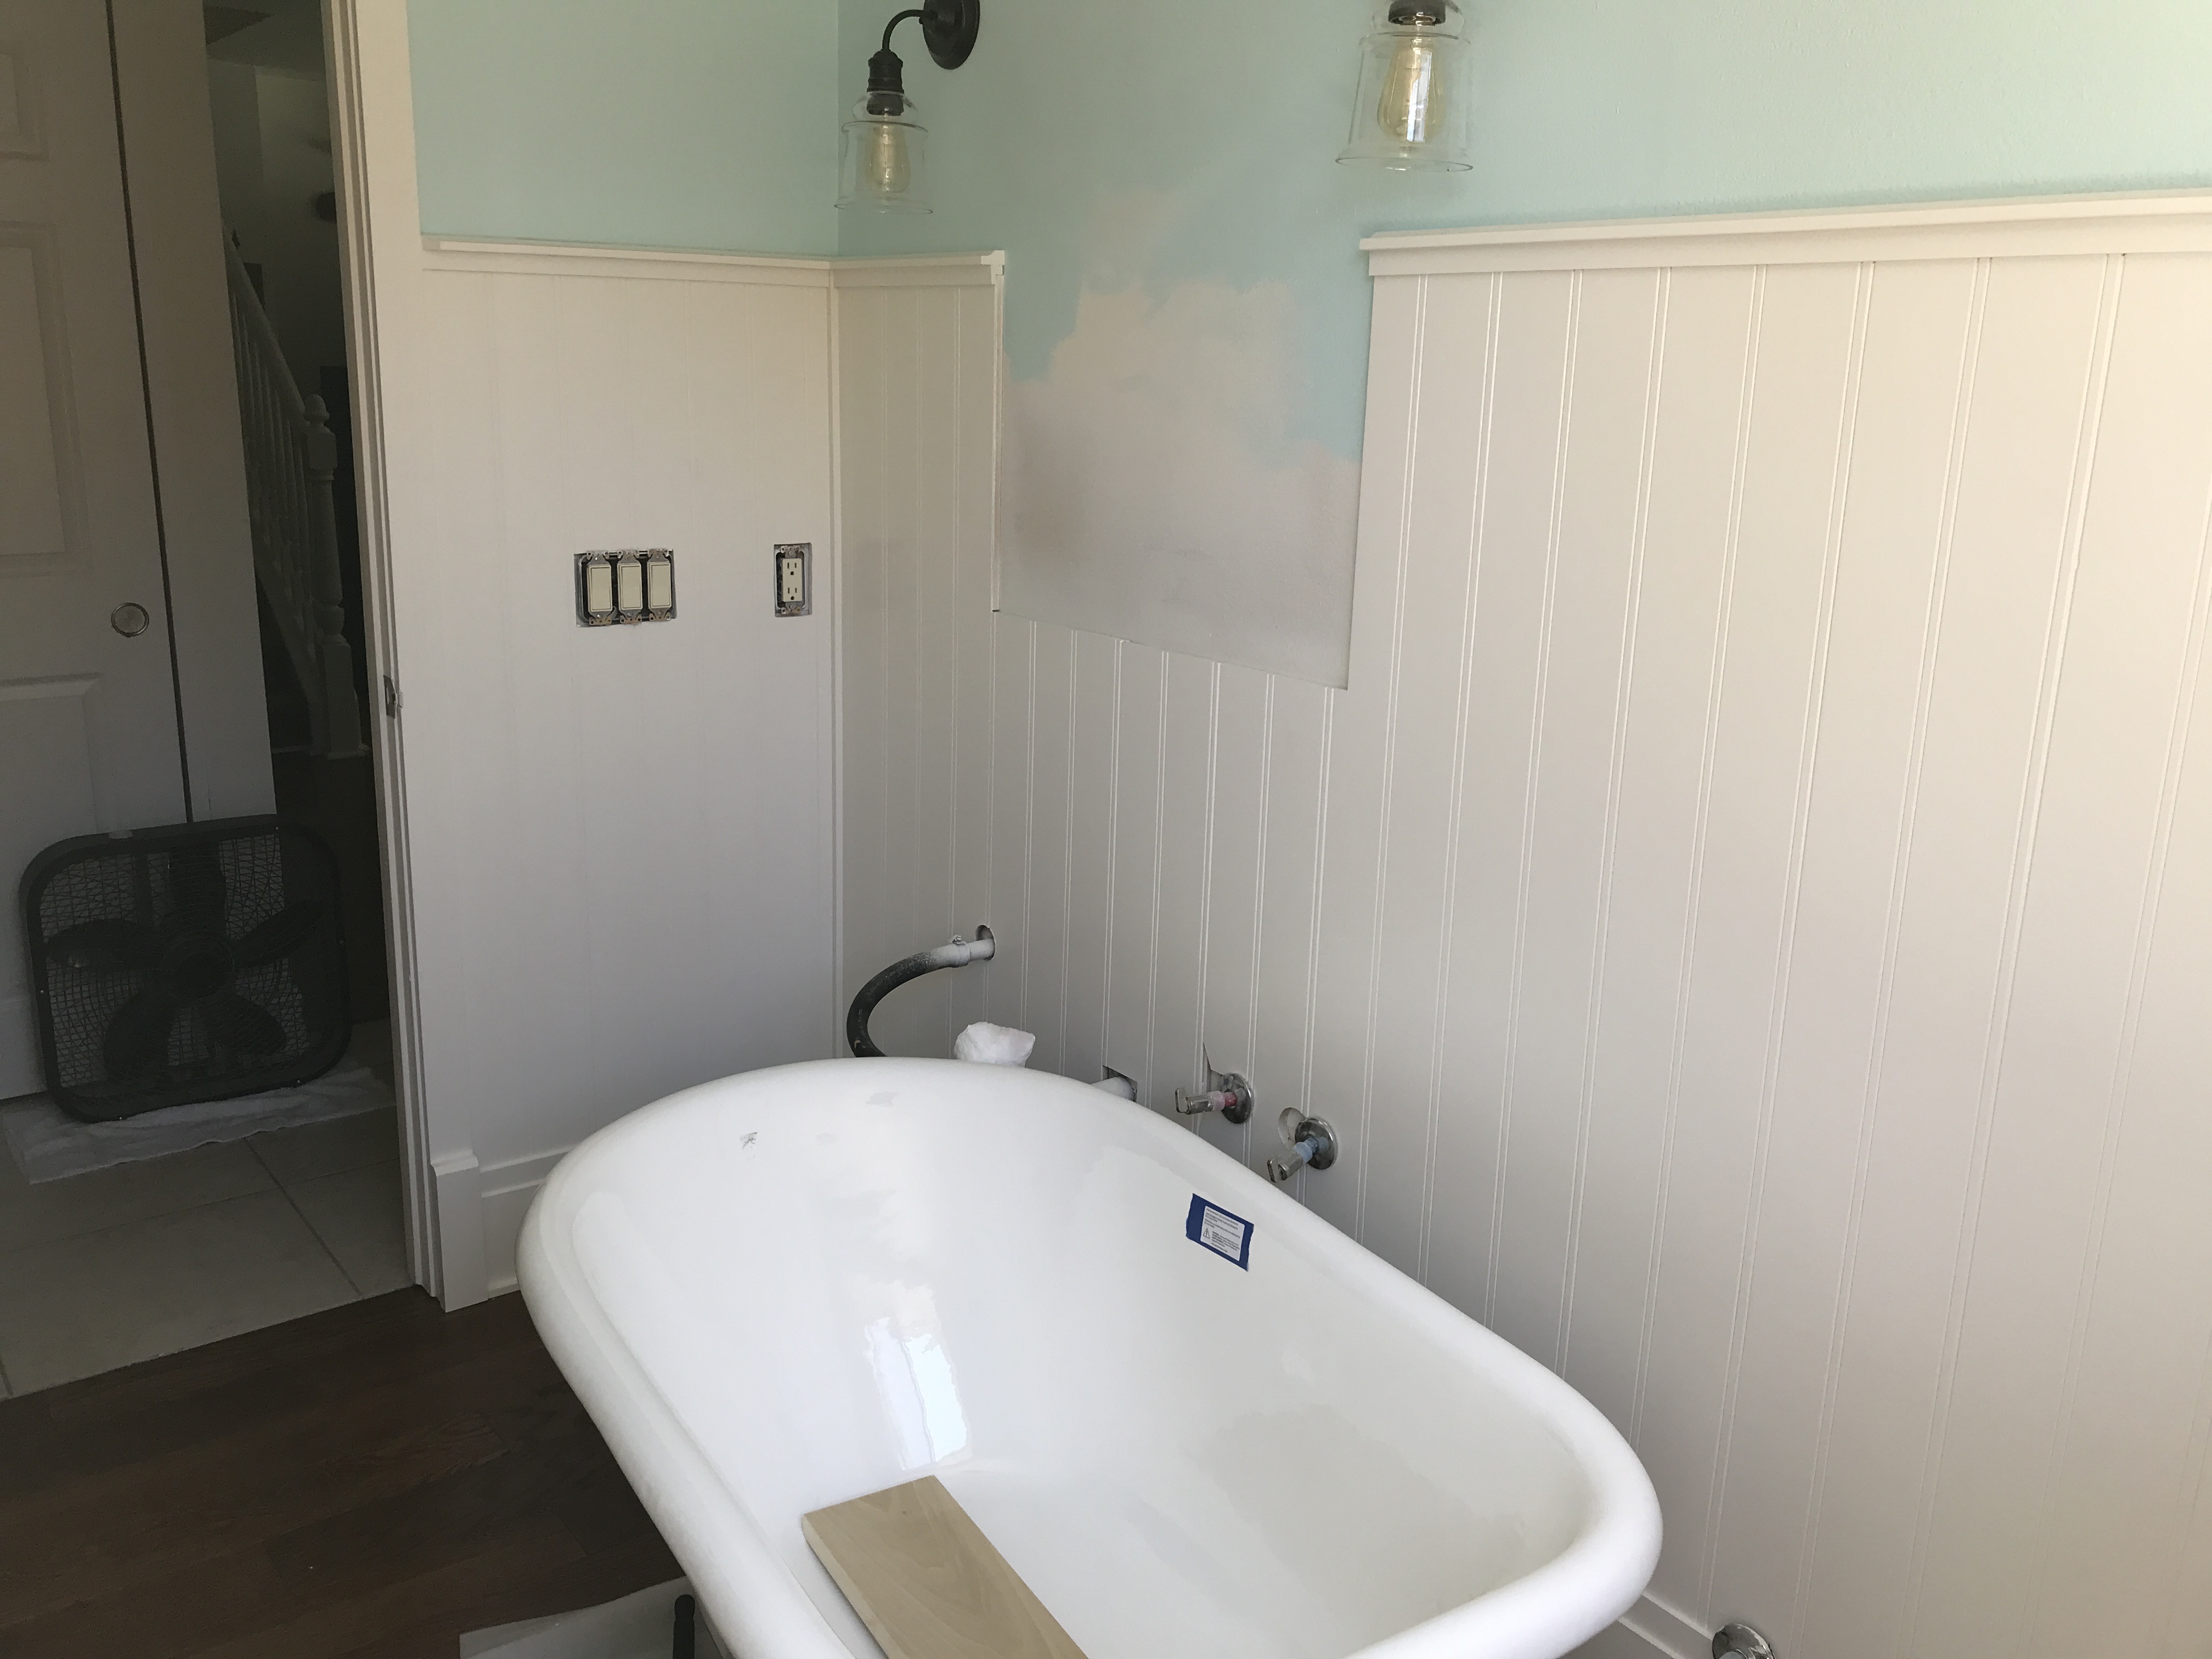
This is my first bathroom remodel, pretty much all’s left is to make the vanity and mirror frame which will be cake compared to the rest.
Hopefully back to the guitar body in a week or so.
4 Likes
I dig the chosen style for the room! Nice work!
My wife wants your tub.
2 Likes
Thank you sir. It’s Craftsman “inspired”. The hardest thing was selling my wife on “square”.
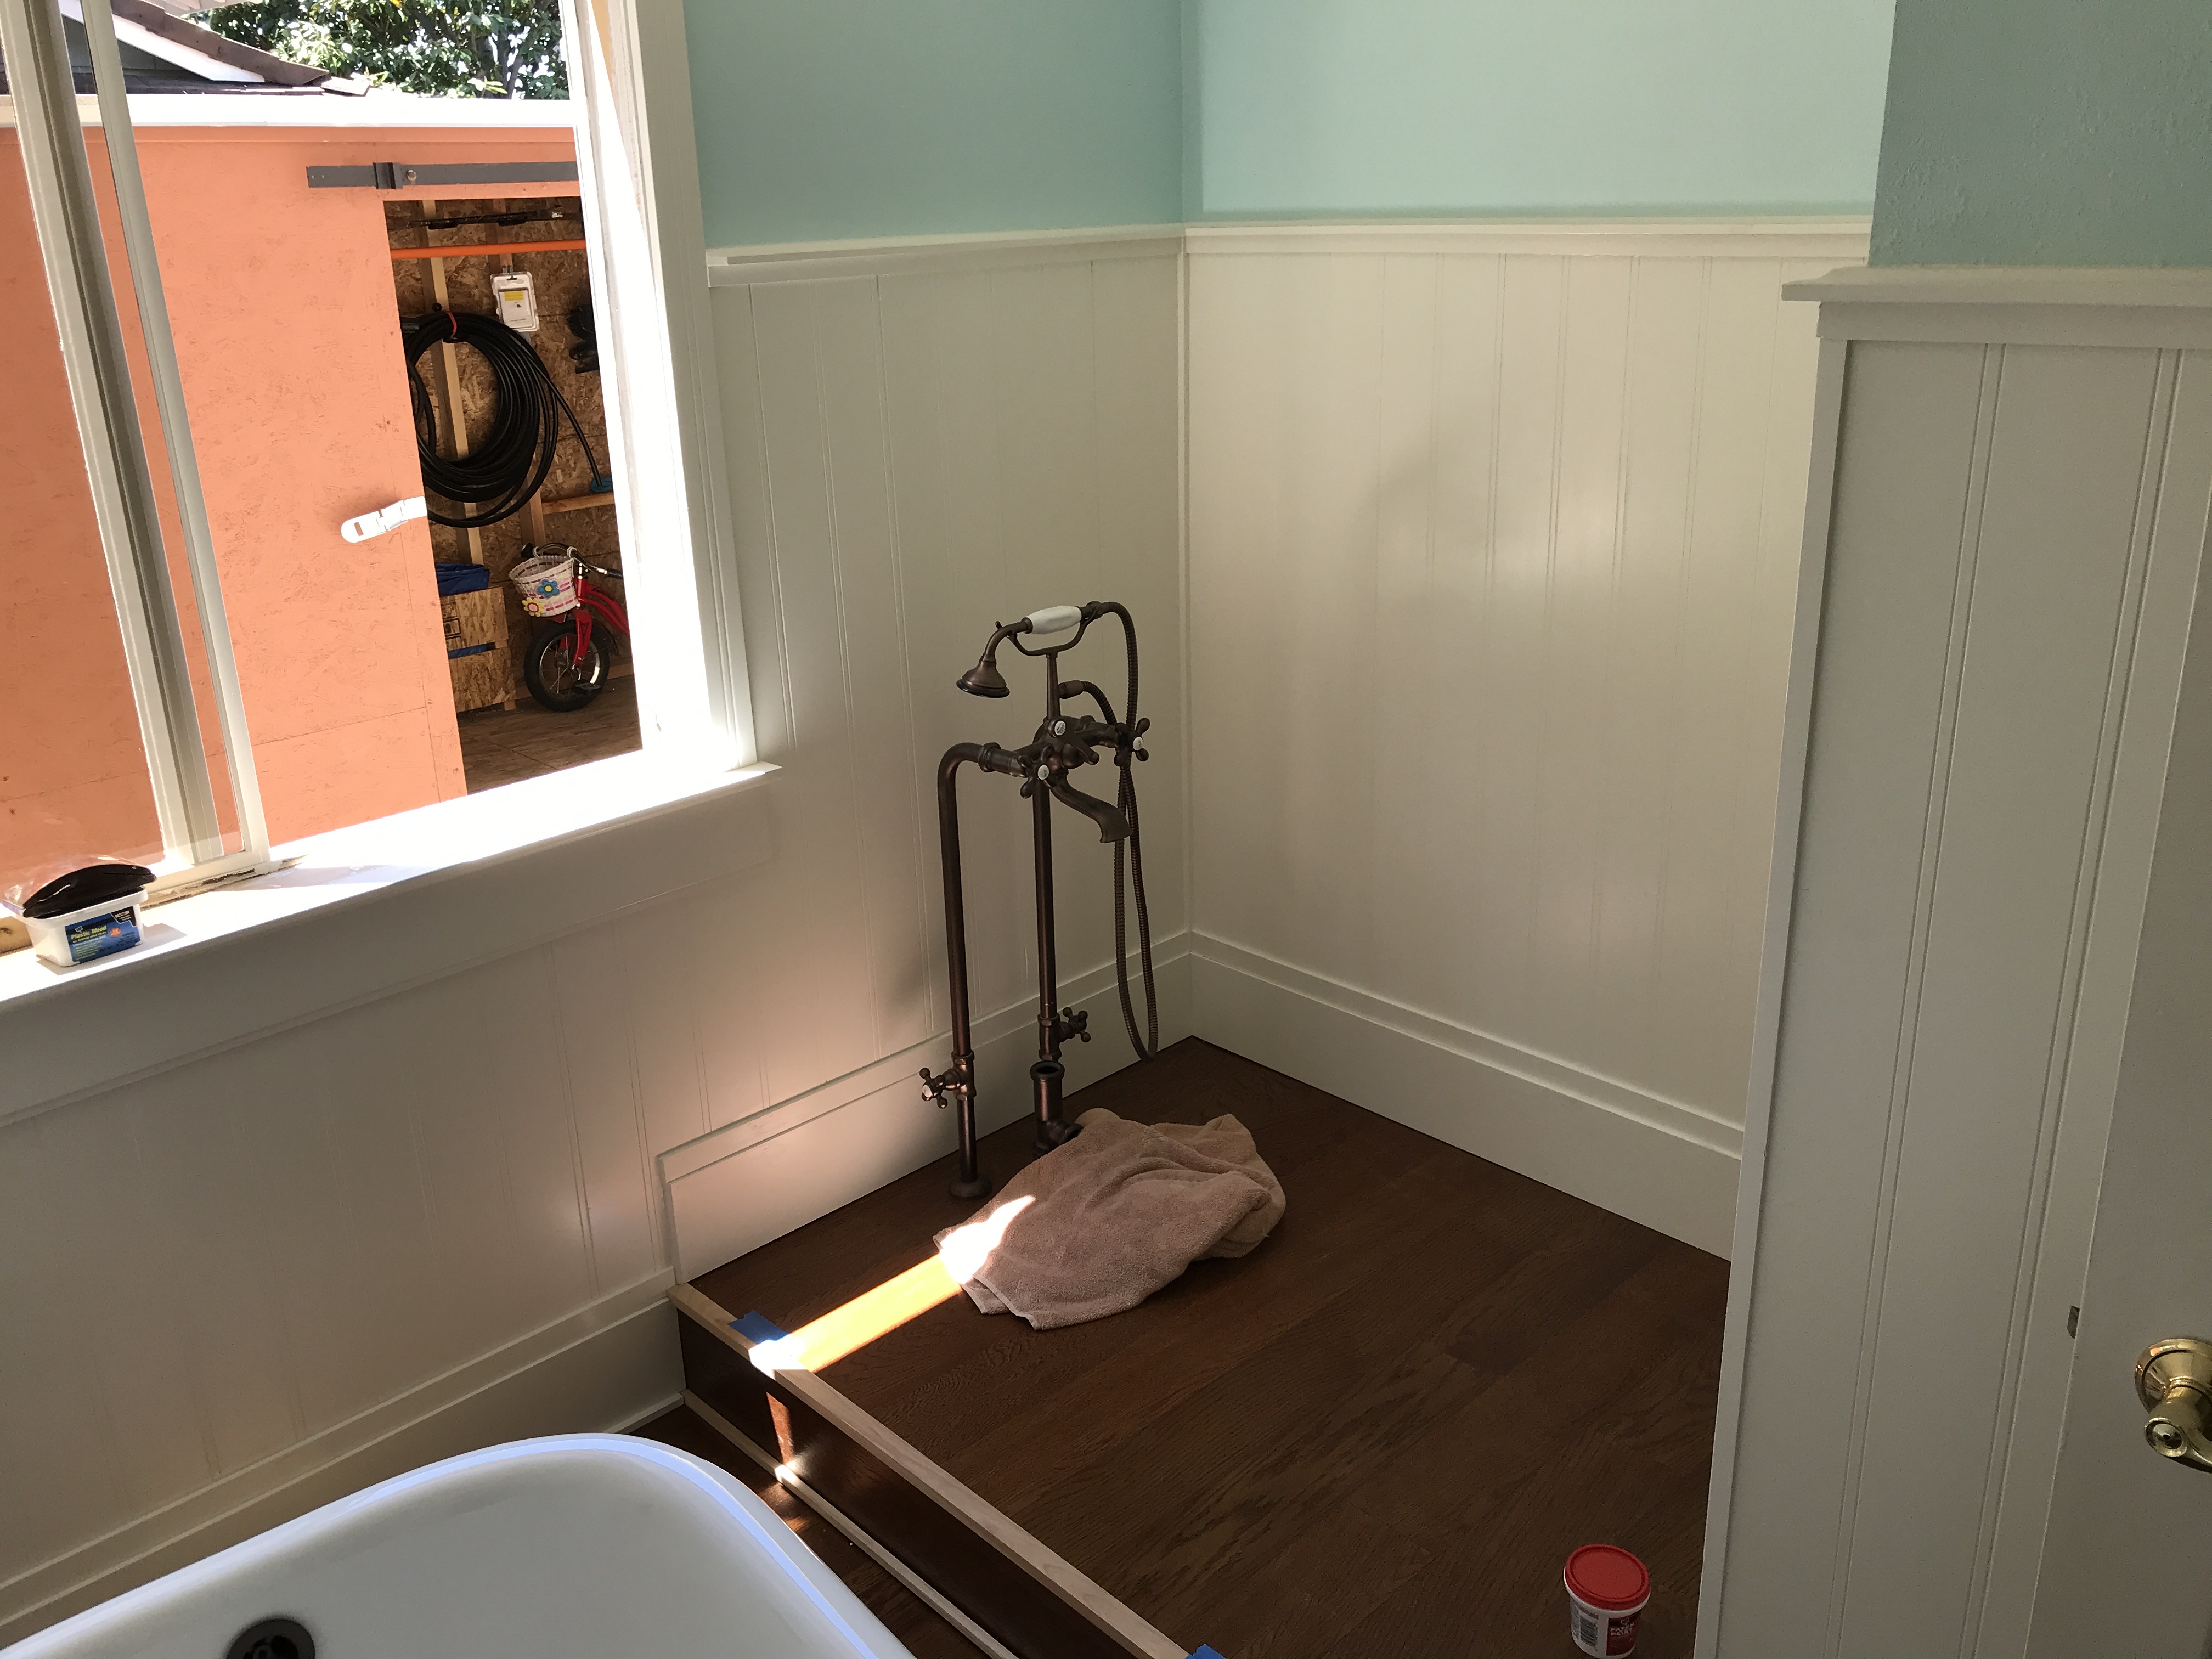
I’ve learned a new respect for finish carpenters. It is really important to plan trim joins ahead, not on the fly.
4 Likes
Like most woodworking projects the finishing is 90% of the job.
I used to live in a 1920s house that had a small single bathroom and a claw foot tub that was original. The thing I hated most about it was you had to have a circular shower curtain. It did not seem how you adjusted the curtain there was always water on the floor. My tub had a stand up pipe to have the shower head mounted on.
3 Likes
I hear you!
No stand up showers here, strictly sit down. After a good soak. I guess.
It’s what the boss spec’d, Tub’s for the grandbrats mostly.
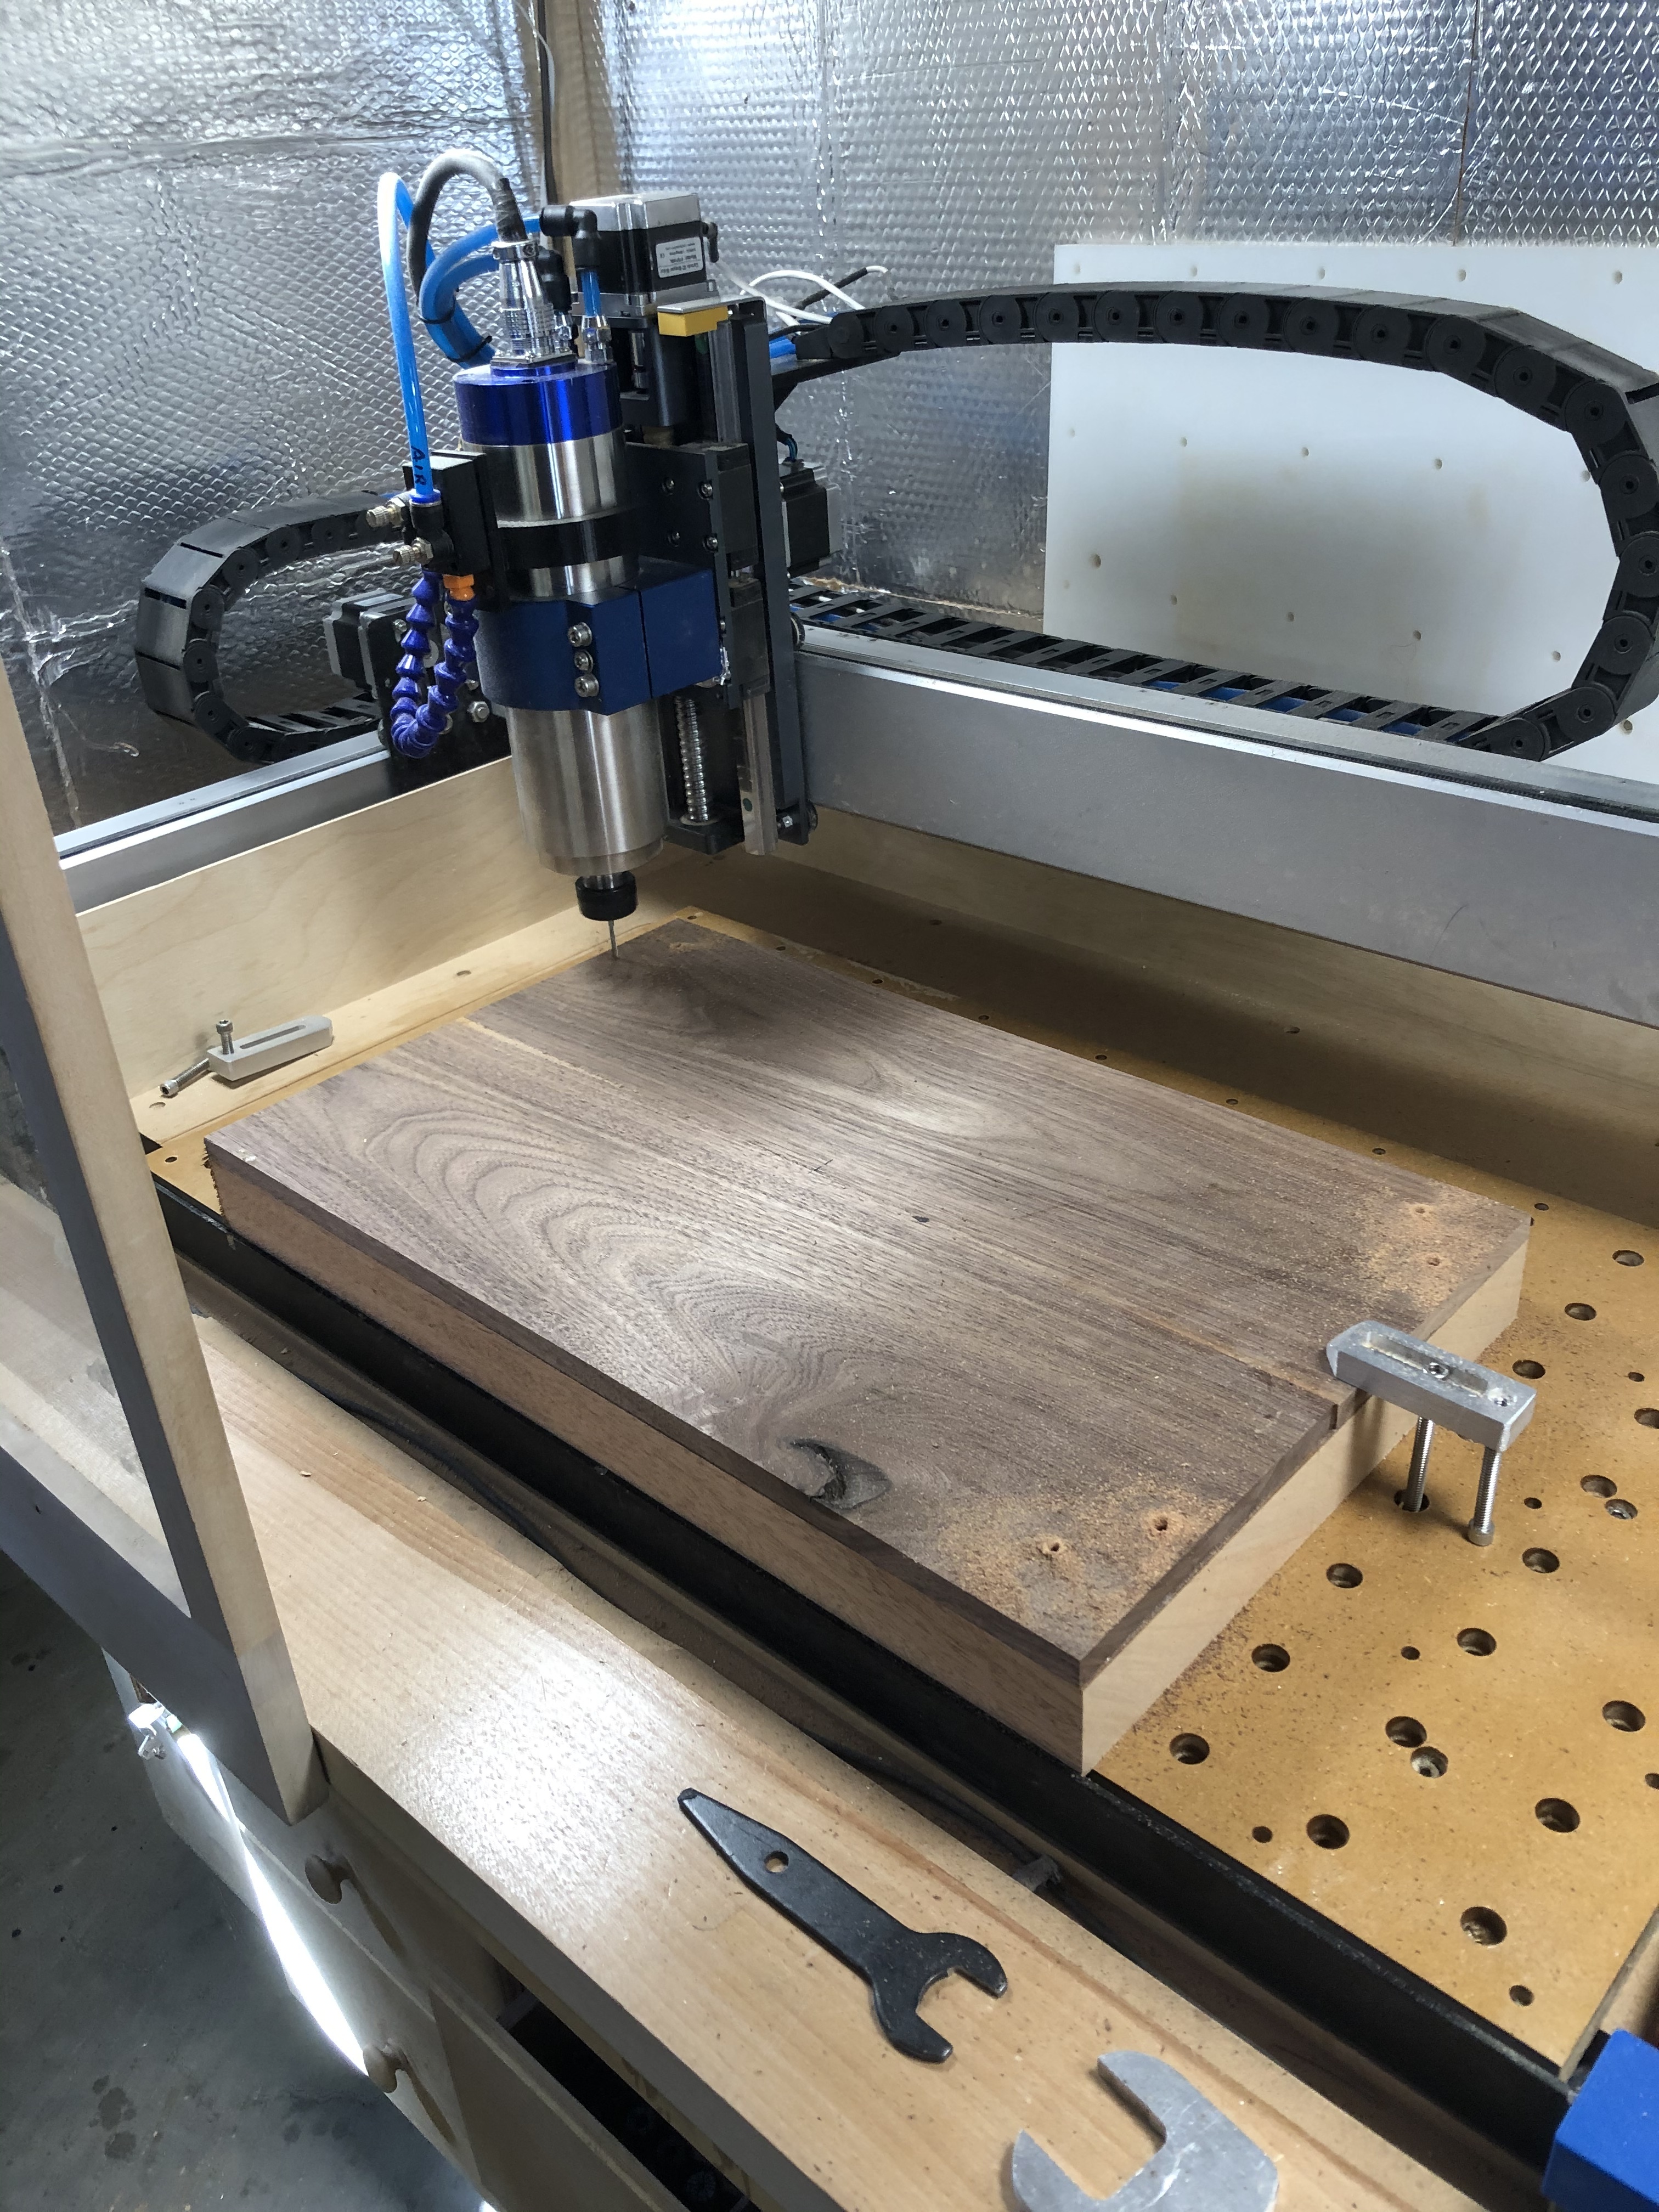
Finally, back to the guitar. Today’s progress:
Uploading: 3A6D2EC4-BFEA-4578-950B-80449BFE61A0.jpeg…
Scrap melamine cut to blank size to confirm dowel locations match locations in wasteboard. 
Bored dowel pin holes and holes for hold down screws.
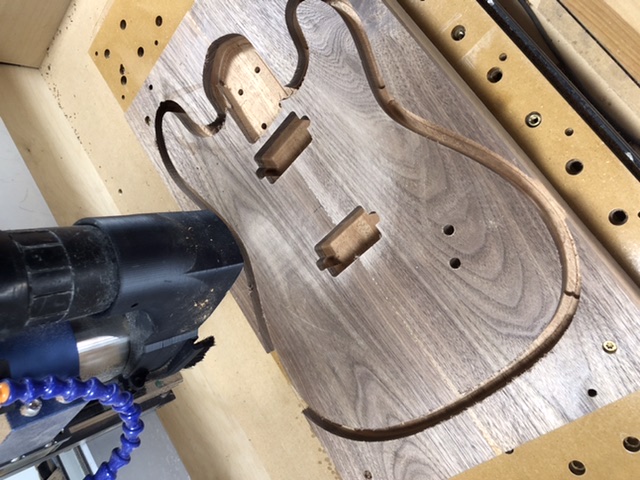
Cut contour with tabs about halfway through.
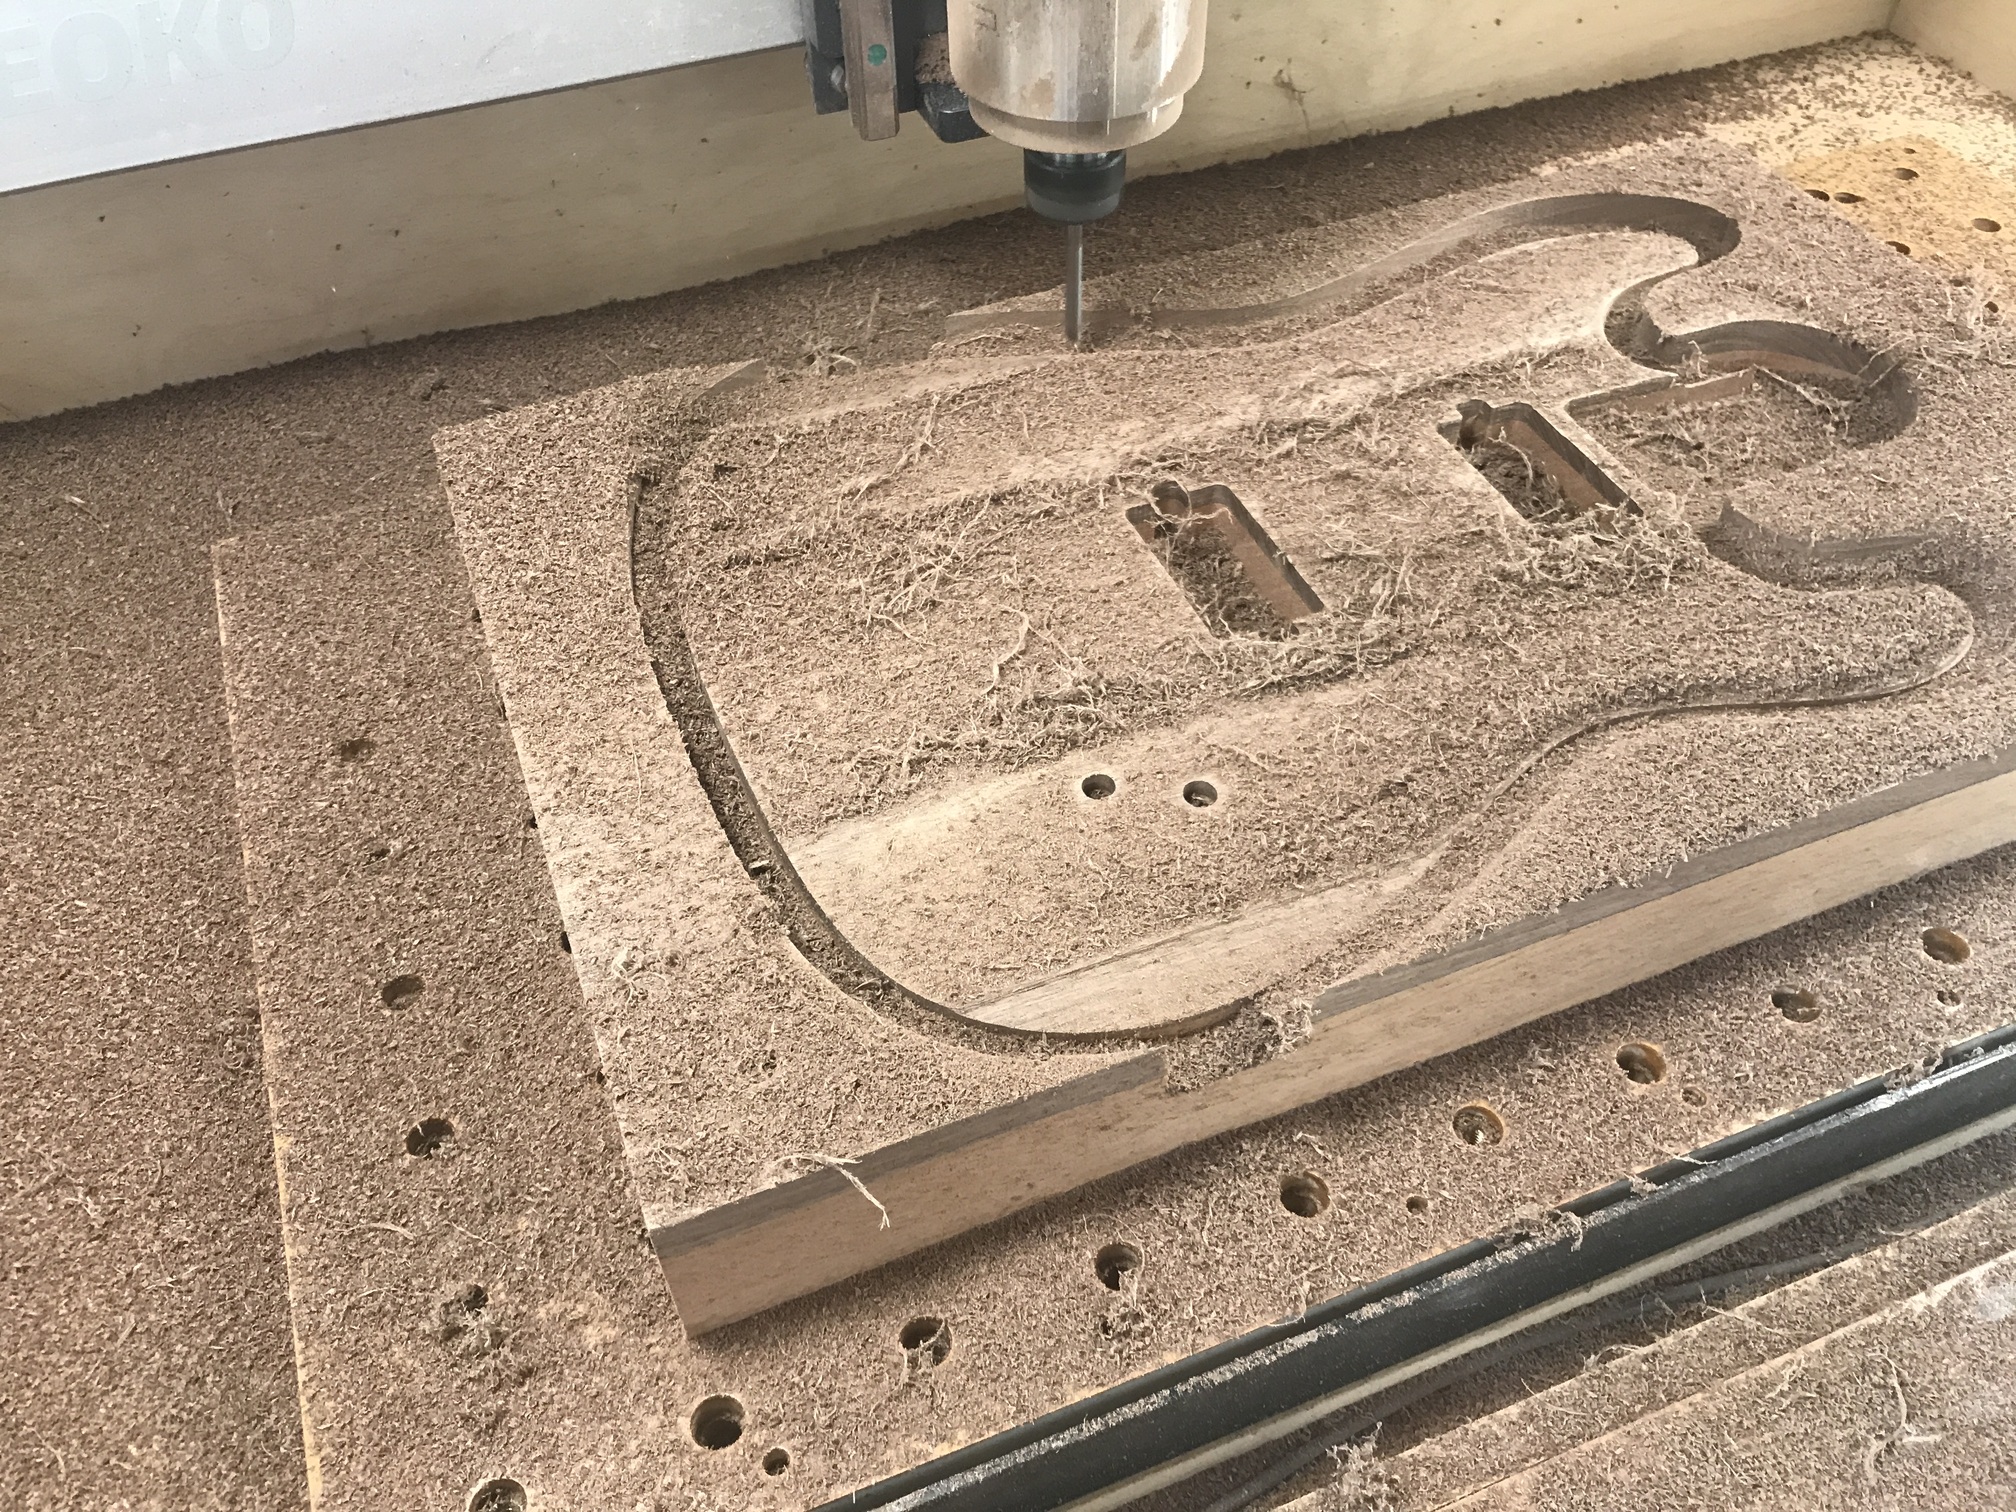
Adaptive clear in progress to expose top radius…
10 Likes
How are you holding your stock down. I see in one picture a single clamp. Are you using painters tape and super glue, Are you bolting down the stock that I cannot see?
Looks like it is bolted down in the 4 corners, and then tabs holding the actual guitar in place when cutting.
1 Like
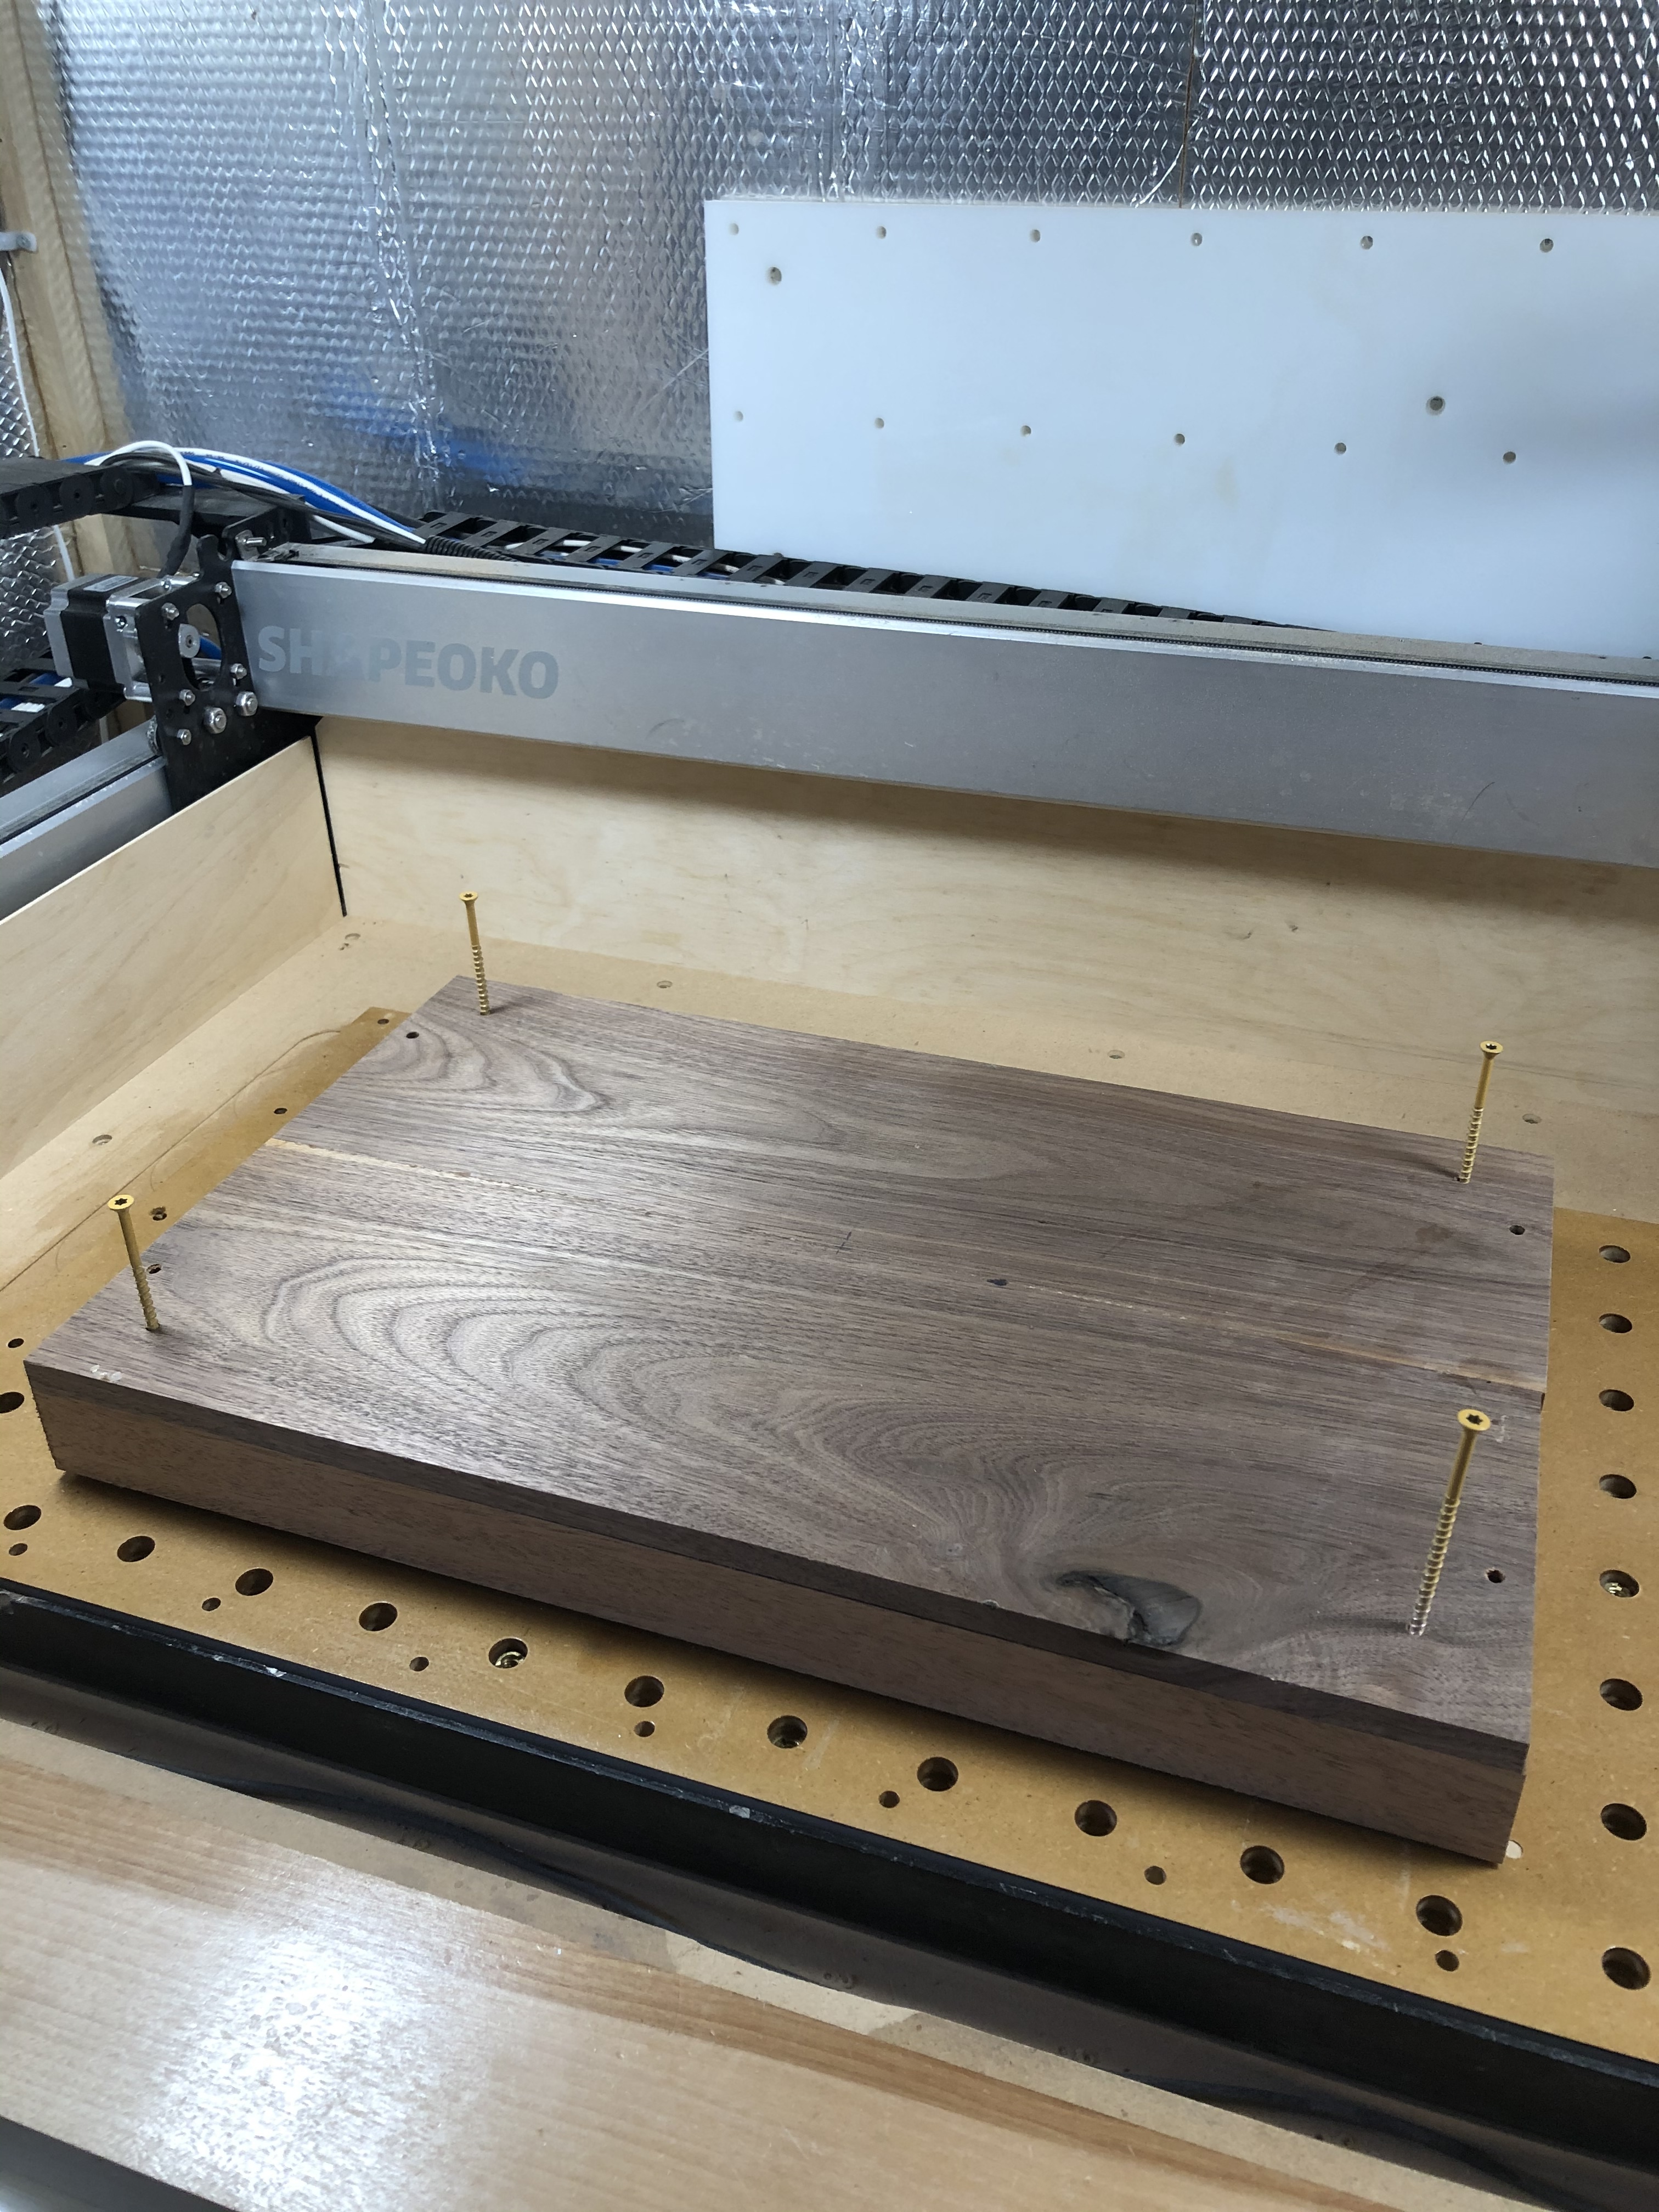
The single clamp pic - the blank is snugged up against two dowel pins you can’t see on the left side as well as against the front lip of the SO3 frame. This was just a setup for bore cuts, no lateral forces involved so clamping can be minimal.
The blank is then setup on four dowel pins placed in the wasteboard to enable accurate flip orientation. It is secured with 4 screws.
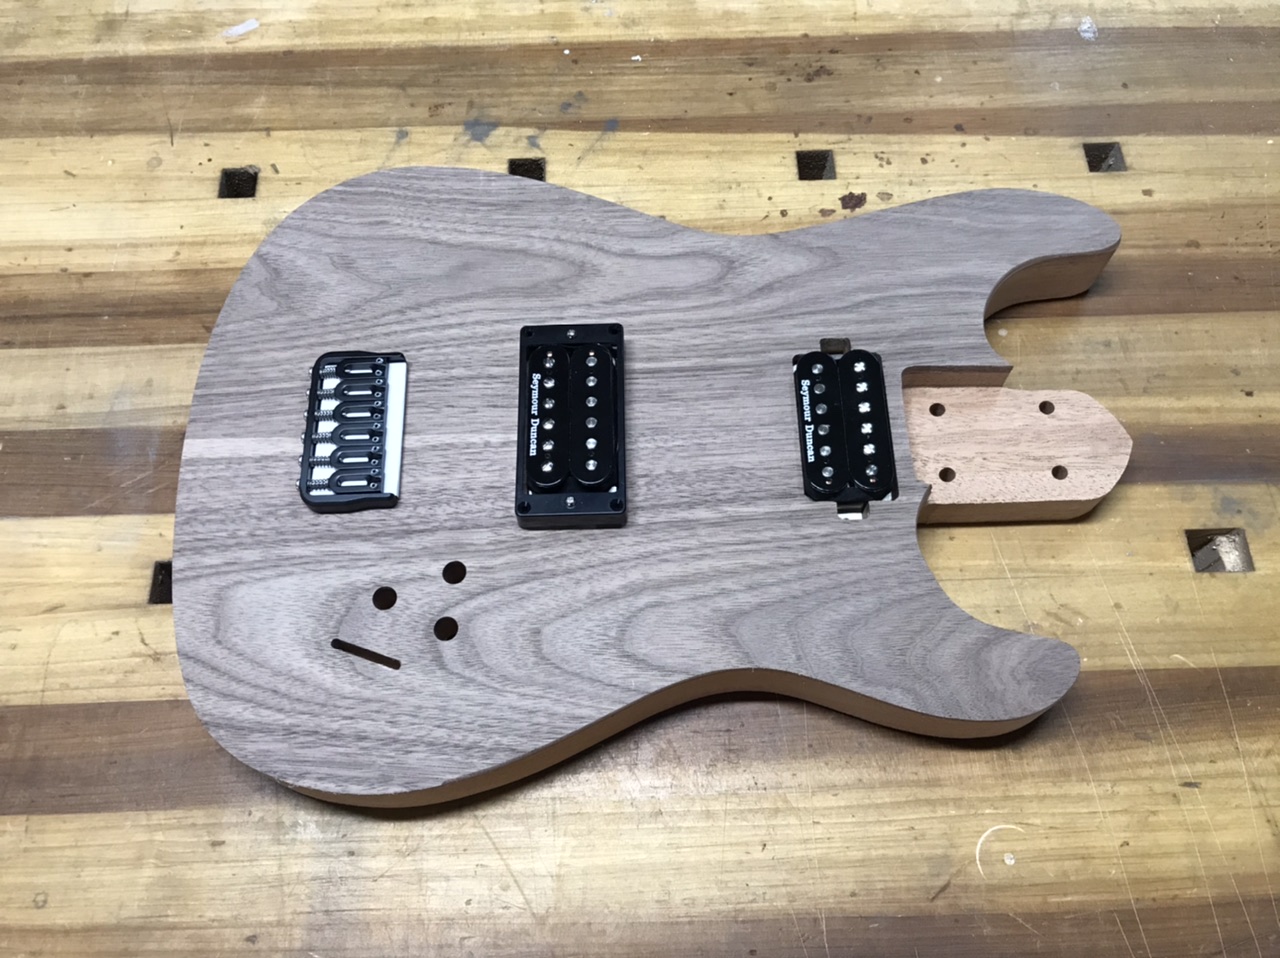
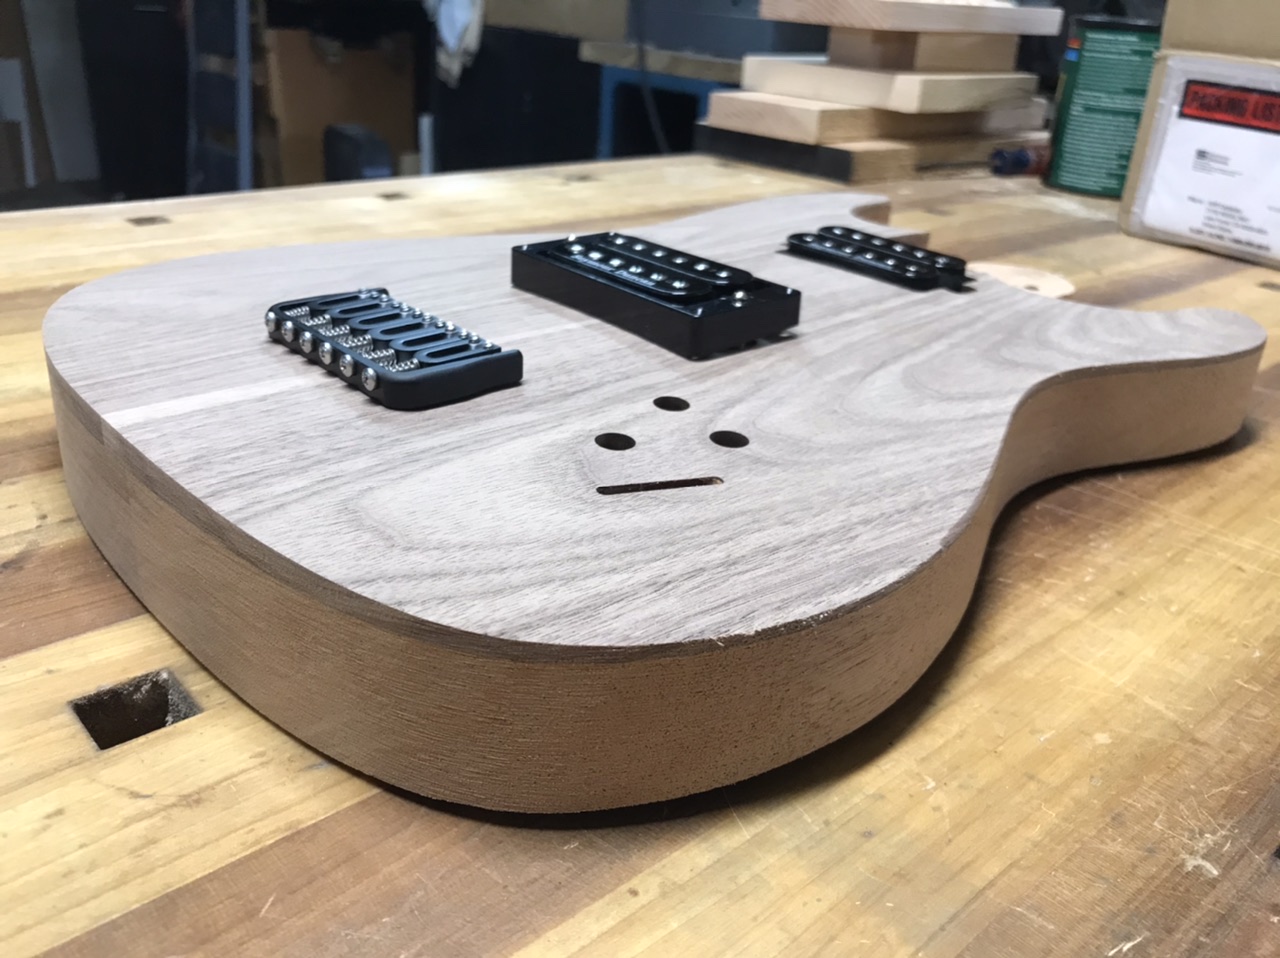
Update:
Rookie mistake in my F360 cut setup, I didn’t think to move the model up in the stock. Resulting in my cutting away too much of my top laminate. Another reason to plane your blank down closer to your desired finish size before you start. It was scrap 1/2” walnut so no big deal.
2 Likes

I’ve now convinced myself I can CAD/CAM reasonable examples of bodies and necks.
Need to finish my research on pots, switches and wiring as well as tuners and strings.
Then finalize pot/switch positions and backside electronics cavity.
14 Likes
Guitar design is now finalized. https://a360.co/32KuXAl
An interesting journey for me in Fusion 360.
I’ve come to discover I really like the Strat style with longer horns. The comfort cutouts on the back were fun to design. This is my 19th try at a design I’m 100% happy with.
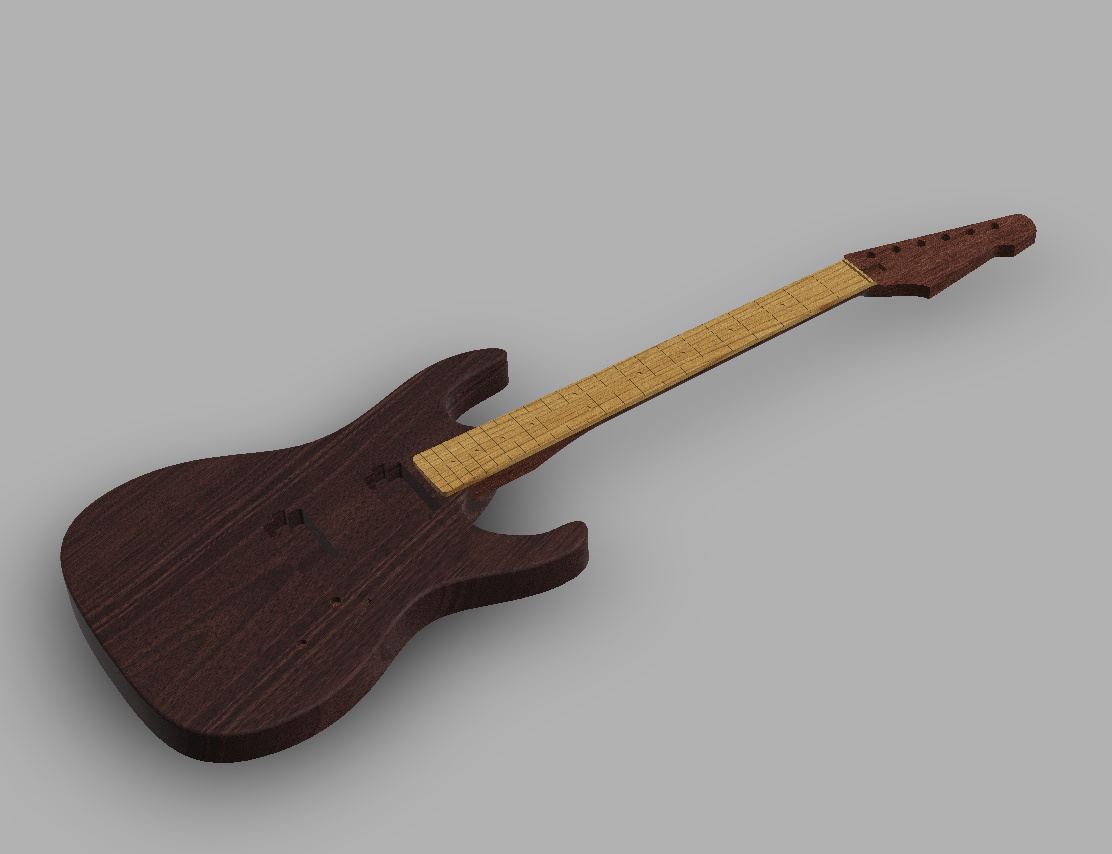
Now to prep some blanks and start cutting.
I’ll post the file and a BOM at some point.
12 Likes
Thank You for sharing Your journey with us and I’m sure it will inspire others to make their own one day.
3 Likes