Back next to my computer. I had to walk away from the machine before it got to me. and decided to post then for some reason. I’m going to dump all the info I can to get it out there, hopefully its not too much
I have a .25" amana plastic specific o flute that I bought for this project 2 years ago. Customer has drug his feet back and forth due to the price and has finally made an order. I originally got all my tooth paths inline on my 3xxl with hdz and 2.2kw spindle. Now that I have a 5pro 4x4 with 2.2kw spindle I started with what I worked up to make the original proto type. Well that Didn’t work, Having horrible harmonics through the bit making roughing passes .25" deep at 100 ipm and 10k rpm, 6k to 24krpm didn’t make much difference. I actually broke that bit trying to get it sorted out.
I have now bought a 1/2" spetools o flute with a 1.25" flute length, and a 1/4 of flute with 1.5" flute length. I know the longer flute length is not helping my harmonics, especially with an o flute, but i need to be able to cut through this 1" and take a full depth finishing pass. I cant go into much detail on what these are, I can just say that surface finish in the concaved areas is crucial.
the 1/4" just showed 10 minutes ago. I do have some balance issues with the 1/2" bit Using the 1/2" I’ve been 6k-11k rpms .25" to .5" doc has been flawless, no harmonics issues what so ever, I even suppressed my roughing operation by accident and did a full depth slotting pass at 100 ipm and 12k rpm, finish was surprisingly good although the machine wasn’t happy.
The issue comes when I do my full length finishing pass due to the nature of this part i have a 1/4" hold down bolt on each end with 17" on center. from what i can tell the forces during my light finishing passes are enough to cause a harmonic movement in the plastic itself and if it lifts in one of the concaved areas it digs into the top edge ruining my finish. I am down to 50 ipm at 1100 rpm with the 1/2" bit for finishing pass. I don’t like that chip load but i can get buy with an air blaster.
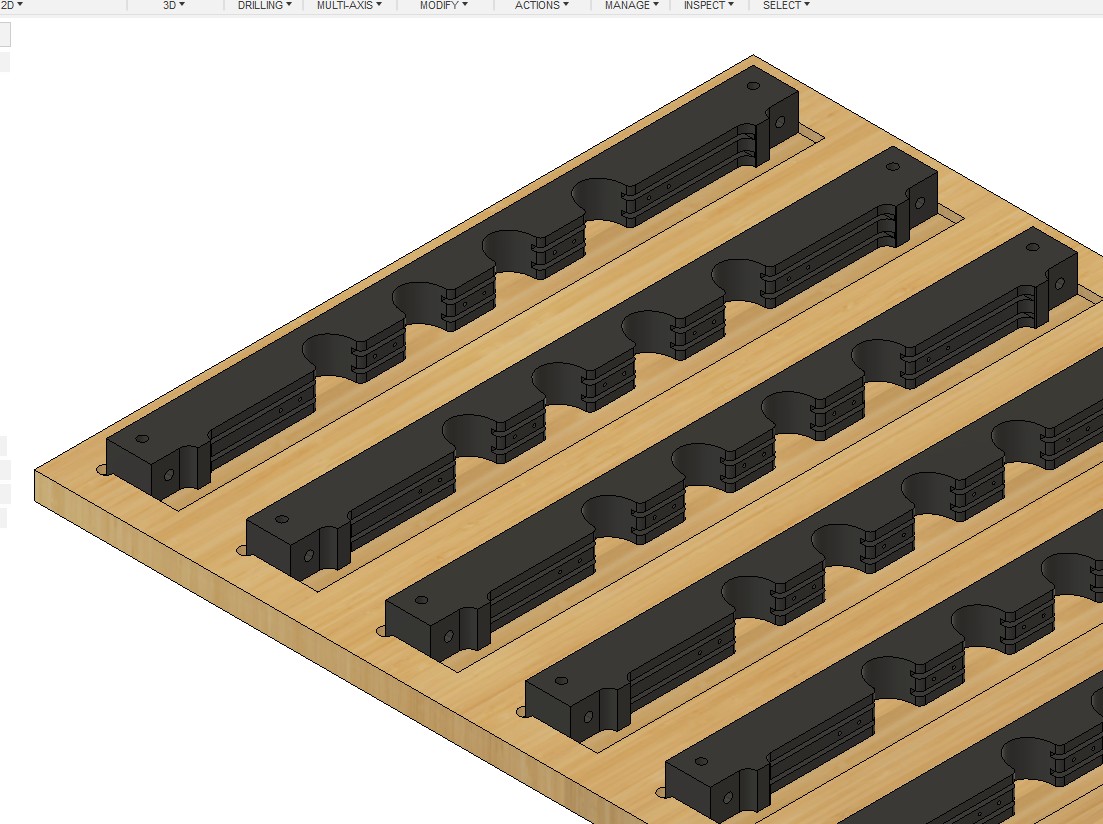
Ideally I do not want to change bits for this operation. At this point of nearly given up on the jig as pictured. I cant risk 10 failing and i need to baby sit it anyway. I do have a vac table which means I need to make jigs to hold parts like these, which is nothing new to me I use front left corner as my zero with zero ontop of waste board. have bards screwed to the edge to locate on the vac plenum for consistency, I also bore 2 1/4" holes in the jig and engrave or write the absolute location of the holes to check alignment if needed. I use screw inserts in the 3/4" plywood for the hold down bolts, I also use a solid carbide drill to drill the hold down holds in the plastic, I’ve found that carbide drills have the least amount of runout.
part has two operations, one flat, the other vertical, I’ve got no issues slotting and drilling on the vertical.
jig has a 1/4" deep pocket to support the backside of the part all though I would love to be able to face the other side and have both sides unsupported
.
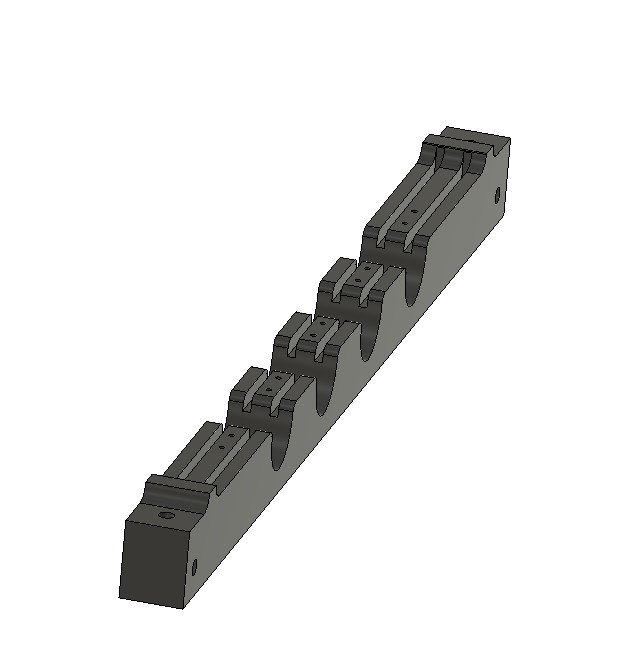
stock is 1" thick , 18" long, and 1.625 wide as show below, this leaves me around 1/8" extra material just to make sure.
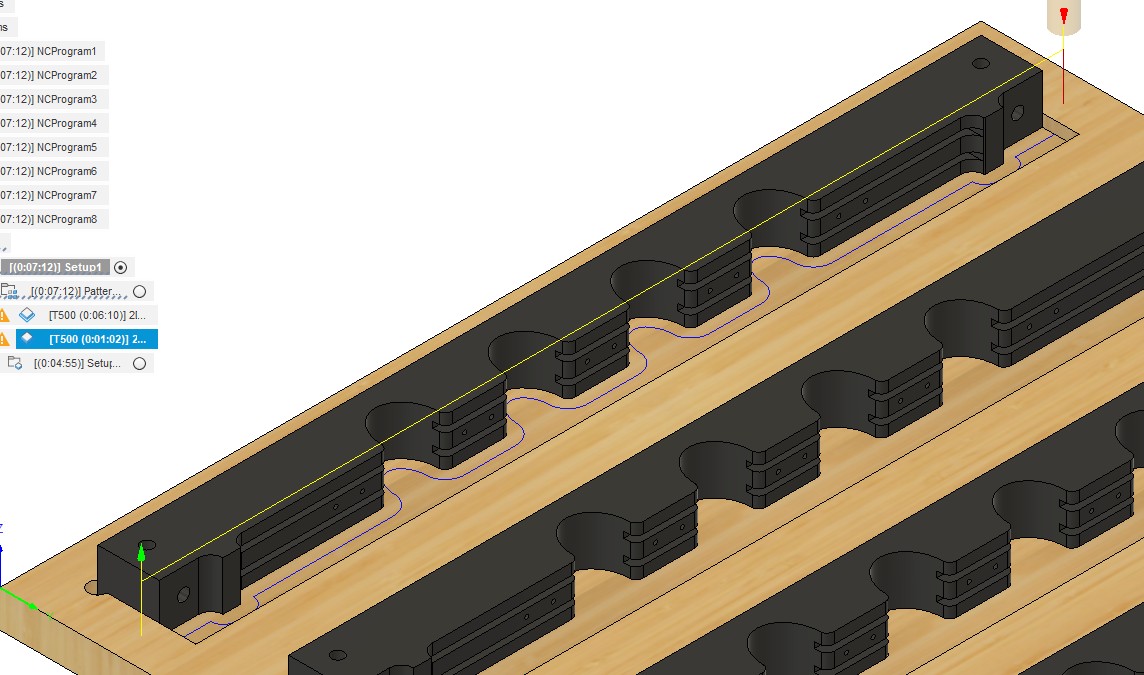
Here is how I’ve been roughing, Haven’t had much of an issue there as long as i keep doc under 3/8 of an inch,
finishing path is simple. the issue happens when entering the concaved areas and getting maximum engagement in the back of the arc.
My current Idea is to machine a 3/8" to 1/2" aluminum brace that goes ontop of the material to help prevent it from lifting, Also hopes this gives me enough friction so I don’t need the support on the back side and can machine both edges to remove saw cut marks.
If you have made it this far through what I’m sure will come across as incoherent rambling, I’m sorry and thank you.