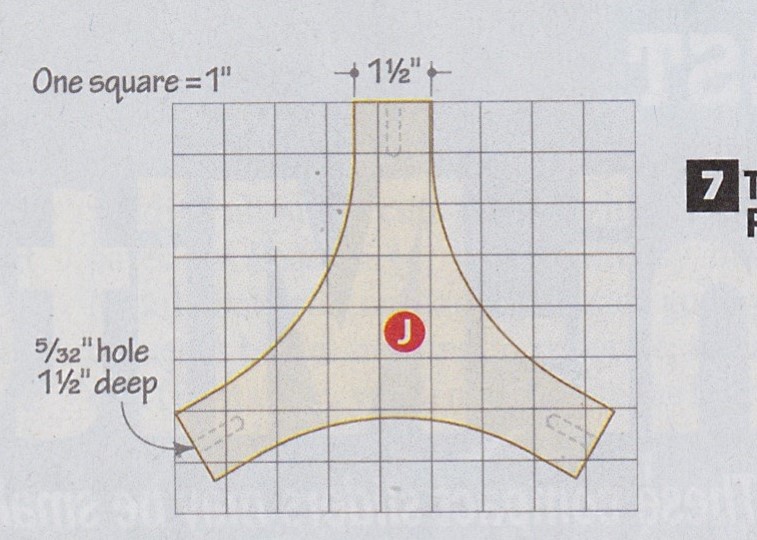
I have a project that I am working on from Wood Magazine. The project is a 3 legged table with this piece called a yoke. Can you suggest how to draw this up in CC. I dont want someone to draw it for me but some guidance on drawing it.
basically you have a nice grid… so you can start with, say, a hexagon (just so that you start with 6 sides), and then edit to polygon points to move them to the coordinates of the corners in the drawing above.
That won’t have the curves yet.
You can add those by inserting points into the edges of the polygon that need to bend and move them to known coordinates from your grid above…
now these points don’t just have a coordinate, but also an “angle” so you can control the curve with that. you might need to play a bit with this to get familiar with the editing system for these, it can be a bit mind bending at first…
anyway the good news is that what you have is already on a grid (if you have a copy of it, I’d try to draw a 2x finer grid inside the current one to get a bit more accuracy)
EDIT: I lied a bit, it’s not easy to add points.
So don’t do a hexagon, but make a 9-a-gon, and place the 3 extra points in the middle of the curved areas
in the point editor, you need to select “smooth curves” on those 3 extra points to select the angles
if you think those curves are basically part of a circle (the circular table might imply that), you can also make the triangle shape and then guess the radius of the circle, and subtract that three times.
(you can find the center point of a circle, even from a partial arc like this, using the standard trick of taking any two points on the arc, drawing a line through the 2 points, finding the center of that line and drawing a line 90 degrees from that middle. if you do that for 2 different “random” set of 2 points, the 90 degree lines will meet in the center of the circle, and once you have the center you can measure the radius)
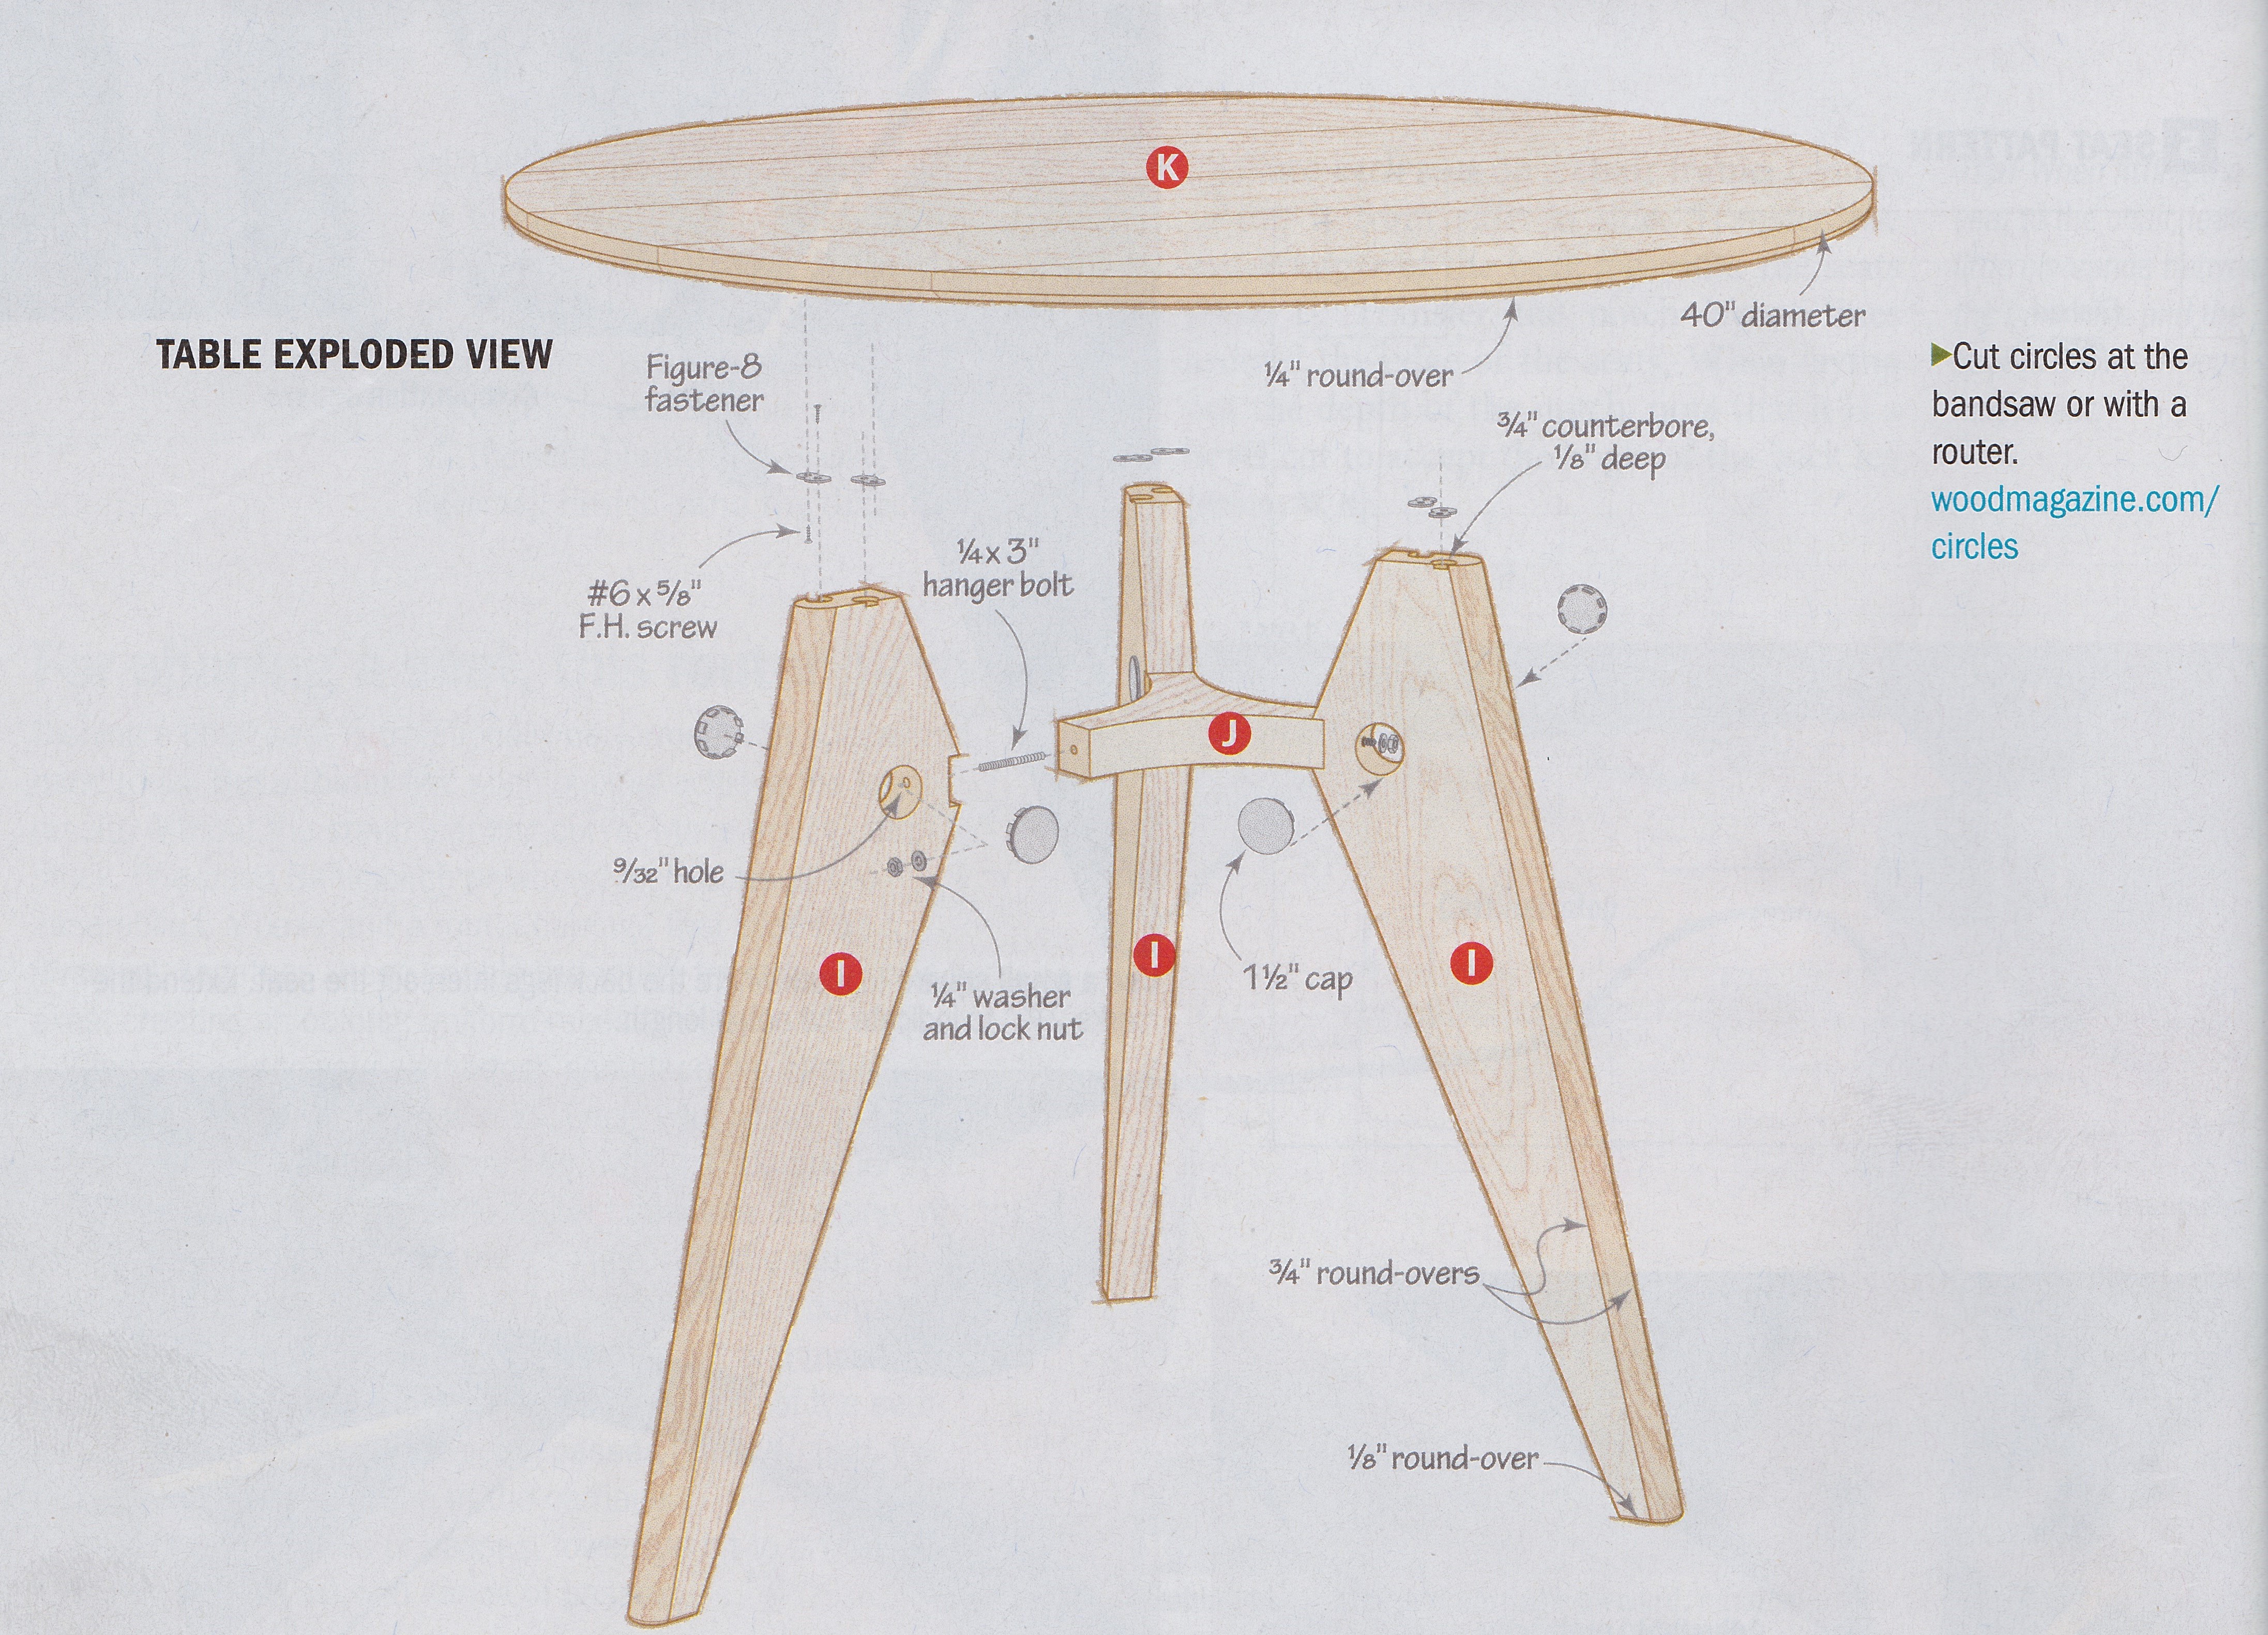
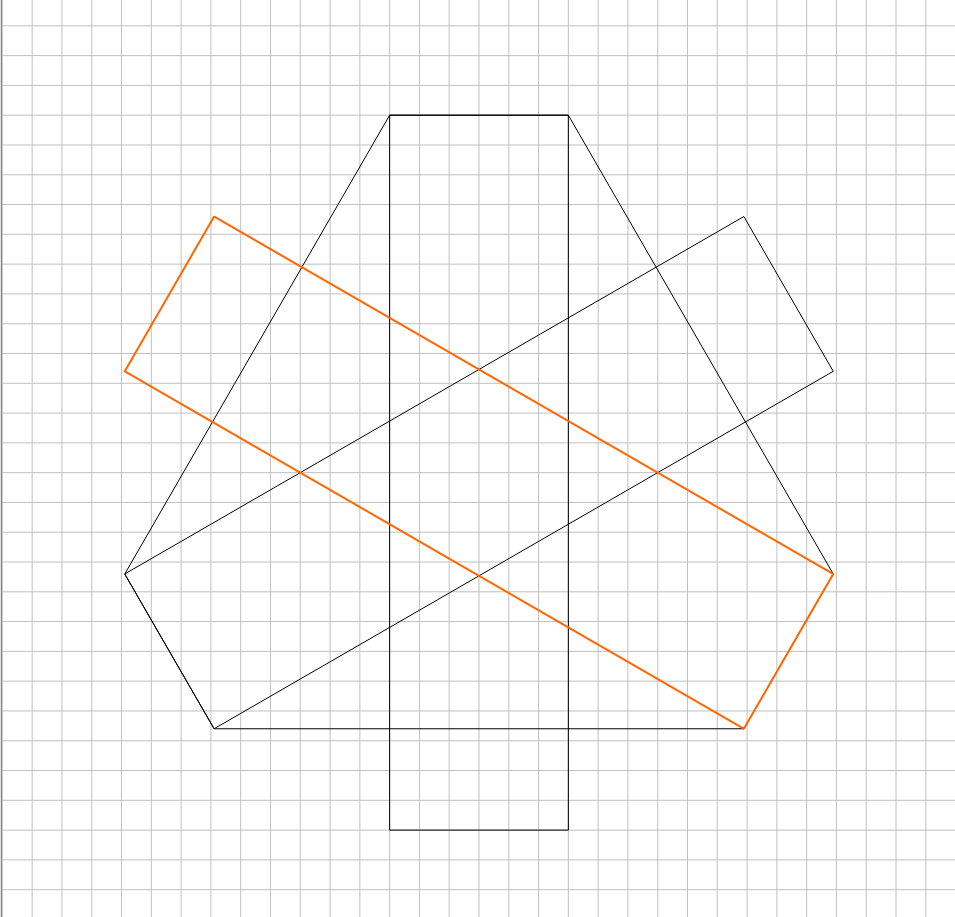
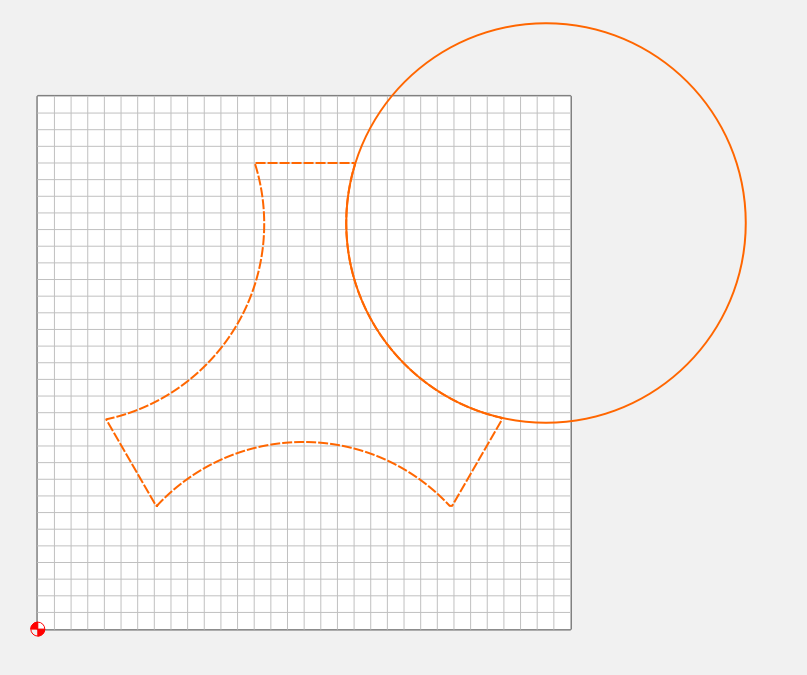
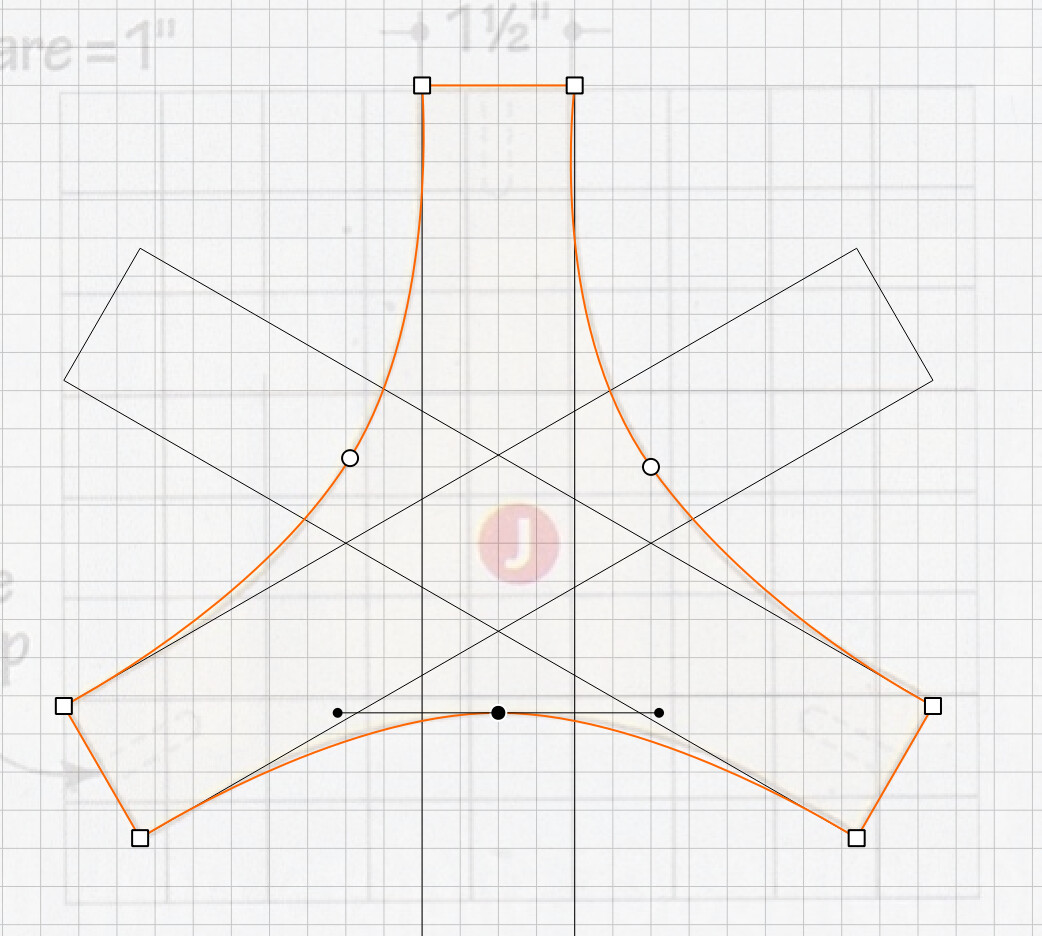
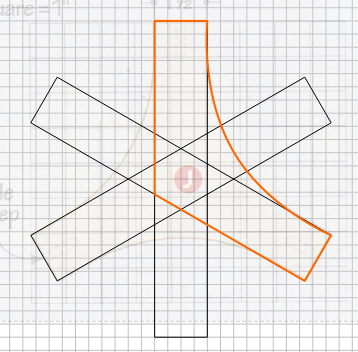
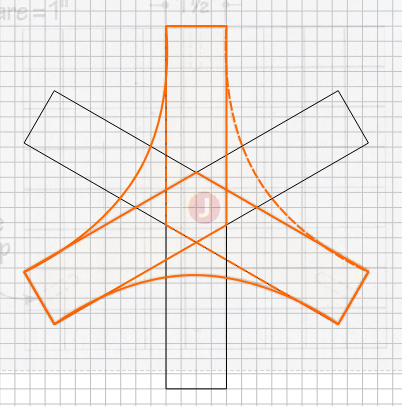
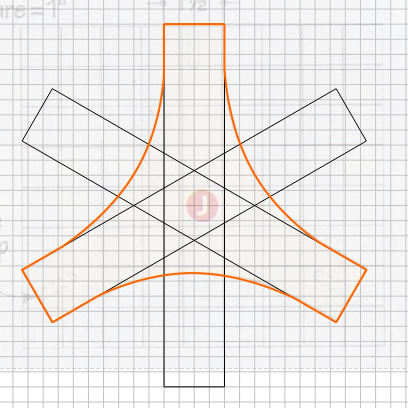
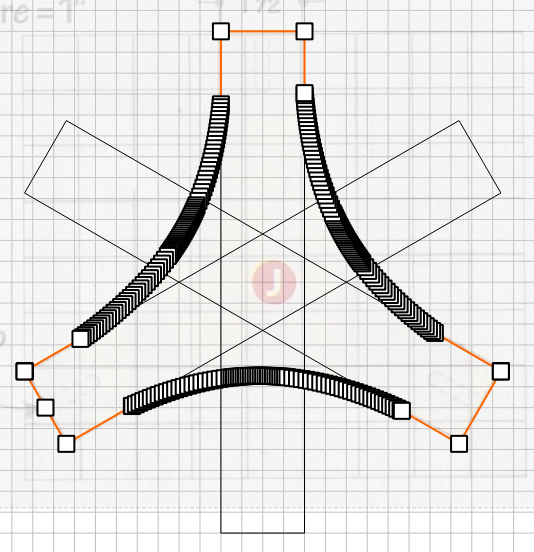
I took what Arjan posted and thought about it. Then I thought about using a box that is 1.5" x 6" and copy and rotate 120 degrees, then copy again and rotate 120 degrees. Select all 3 boxes and center then to the stock, then draw poly line from node to node and I got a nice start. Now I need to experiment with the size circle to intersect the nodes and use boolean add/subtract to make the curved parts. I will think on that and maybe just leave the sides straight. The part is a yoke to join the 3 legs together along with the top using figure 8 hardware. So one will really see the yoke and no one will know I made it straight instead of curved. I will sleep on it and see tomorrow.
I have used several plans lately and drew them up on CC to cut out on the Shapeoko. Making templates and using a pattern router and cutting them on the Shapeoko take about the same amount of time. I think the safety factor about cutting templates on a router with a pattern bit if better if I cut them on the Shapeoko. You can get kickback and run away parts with the pattern bits.
The goal is to build a table and I dont care how I do it as long as the table turns out as a table.
Thinking ahead to the table top I may try a vcarve inlay. I have not tried those yet and there are a lot of posts on the forum that should help me get it done. I will cut the image on scrap and not on the actual table top to make sure it works. There is too many variables for me to have the confidence to do it once on the actual table top.
Again thinking ahead I may glue up part of the top so it will fit on my XXL, cut the inlay and then finish gluing up the top to the 40 inches the plan calls for. I have a carter bandsaw circle jig that works so well. I have made several homemade circle jigs but the carter one is the best one I have ever used.
So I tried a 3 inch radius circle and did a boolean subtract and it worked. I saved both the straight sides and the curved side gcode and will decide tomorrow.
I think you’ve got a nice start there! If you don’t mind some minor manual tweaking, here’s how I got it to work:
Import the drawing as a background.
Construct the three centered rectangles just like you did.
Align and scale the background image to fit the three rectangles.
Draw a polyline like you did, BUT also set an extra point inbetween each arm of the star shape (to subdivide the lines that connect the arms). It will look crooked at first, but we’ll fix that.
With the polyline selected, enter Node Edit mode. You might want to turn off snap-to-grid.
Select the first inbetween-point and turn it into a smoothed point by hitting the S key. Manually drag it to align it with the rounded edge of the background image. Drag the handles to adjust the curvature to fit the drawing.
Do the same for the remaining inbetween-points.
If you want, feel free to create a helper line down the middle of the rectangles for better aligning the points. Alternatively for perfect symmetry, you could just create a polyline for one third of the item, then make rotated copies and do a boolean union of them.
Thanks everyone who replied. I am a late night bird and worked on it last night. I will look at the suggestions and see if I need to modify what I have gotten drawn. Sometimes thinking out loud helps and your suggestions are all good. I did try the trace but wound up with a mess. The picture I used did not seem to have enough contrast to make solid lines. I had also used Inkscape and got the same basic messy output turning the drawing into an svg. I increased the number of scans and changed the thresholds in Inkscape but it still failed to make a suitable image to use.
This is going to sound a bit old fashioned but how about tracing - by hand - the image from Wood Magazine with a fine point sharpie, Then scan that in and trace it with Carbide Create.
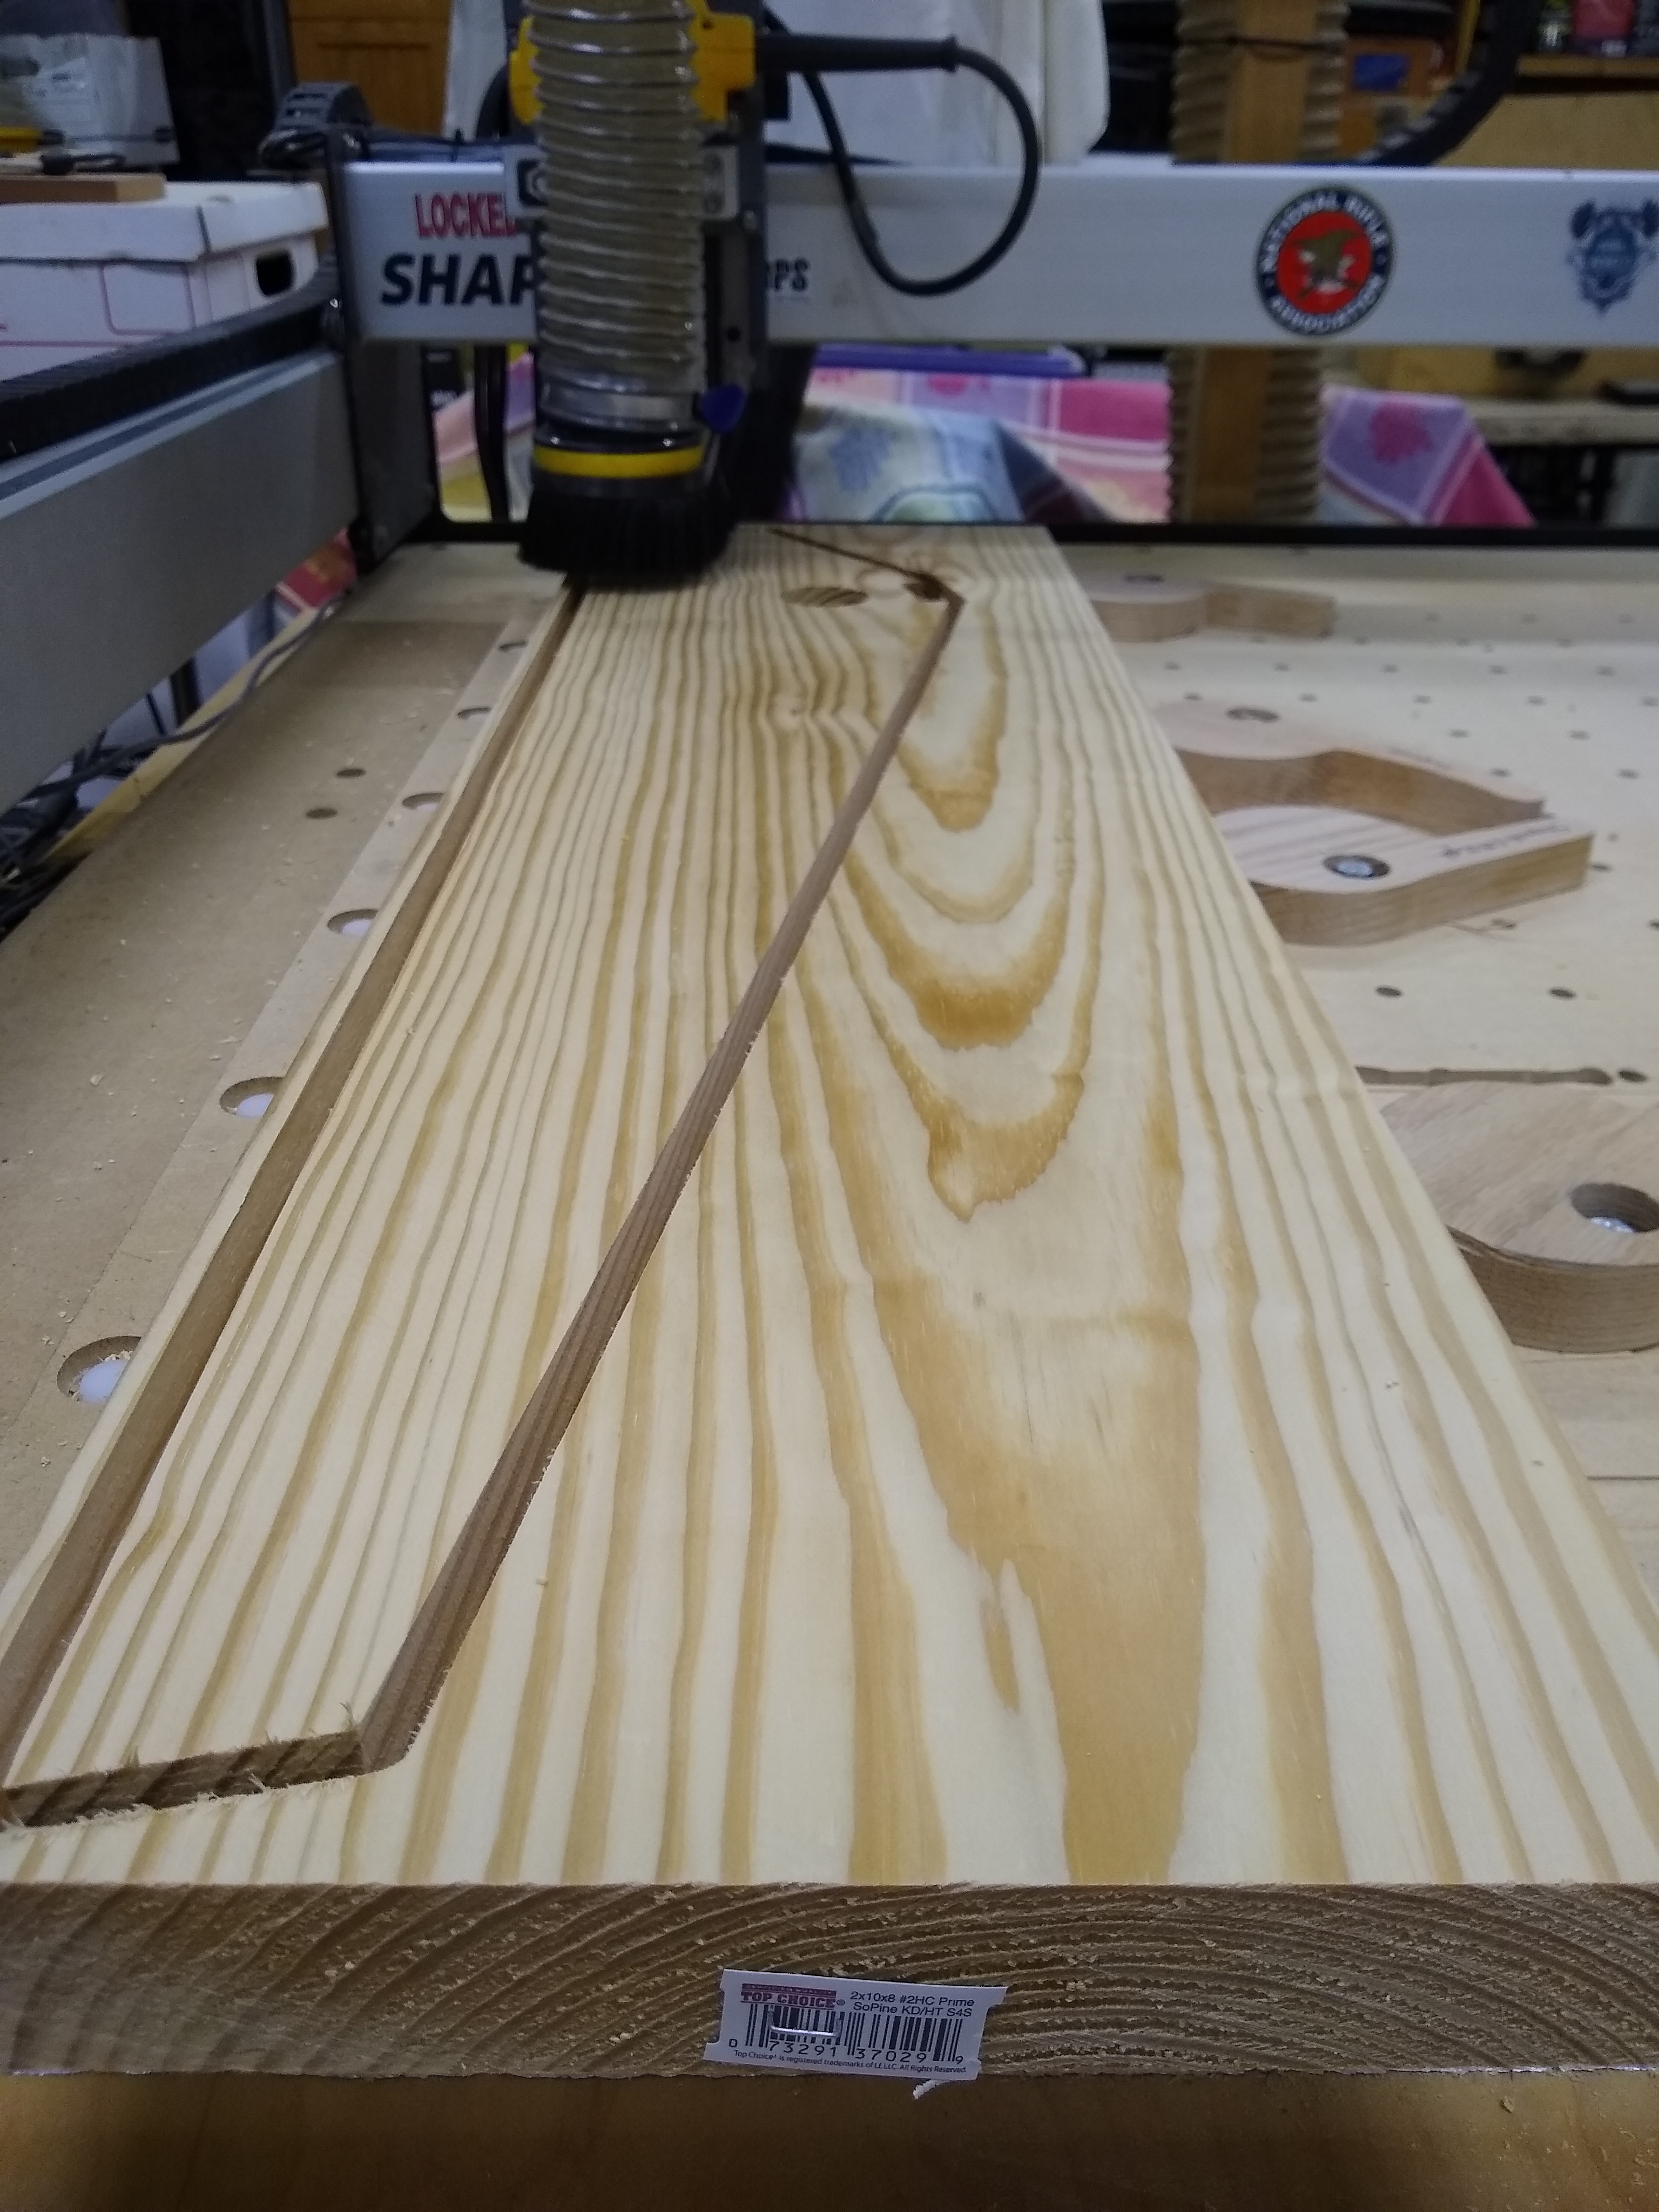
Well cut the first leg of my Wood Mag table. The plan was for a cherry indoor table. I liked the plan so good I thought I would make a patio table from pine.
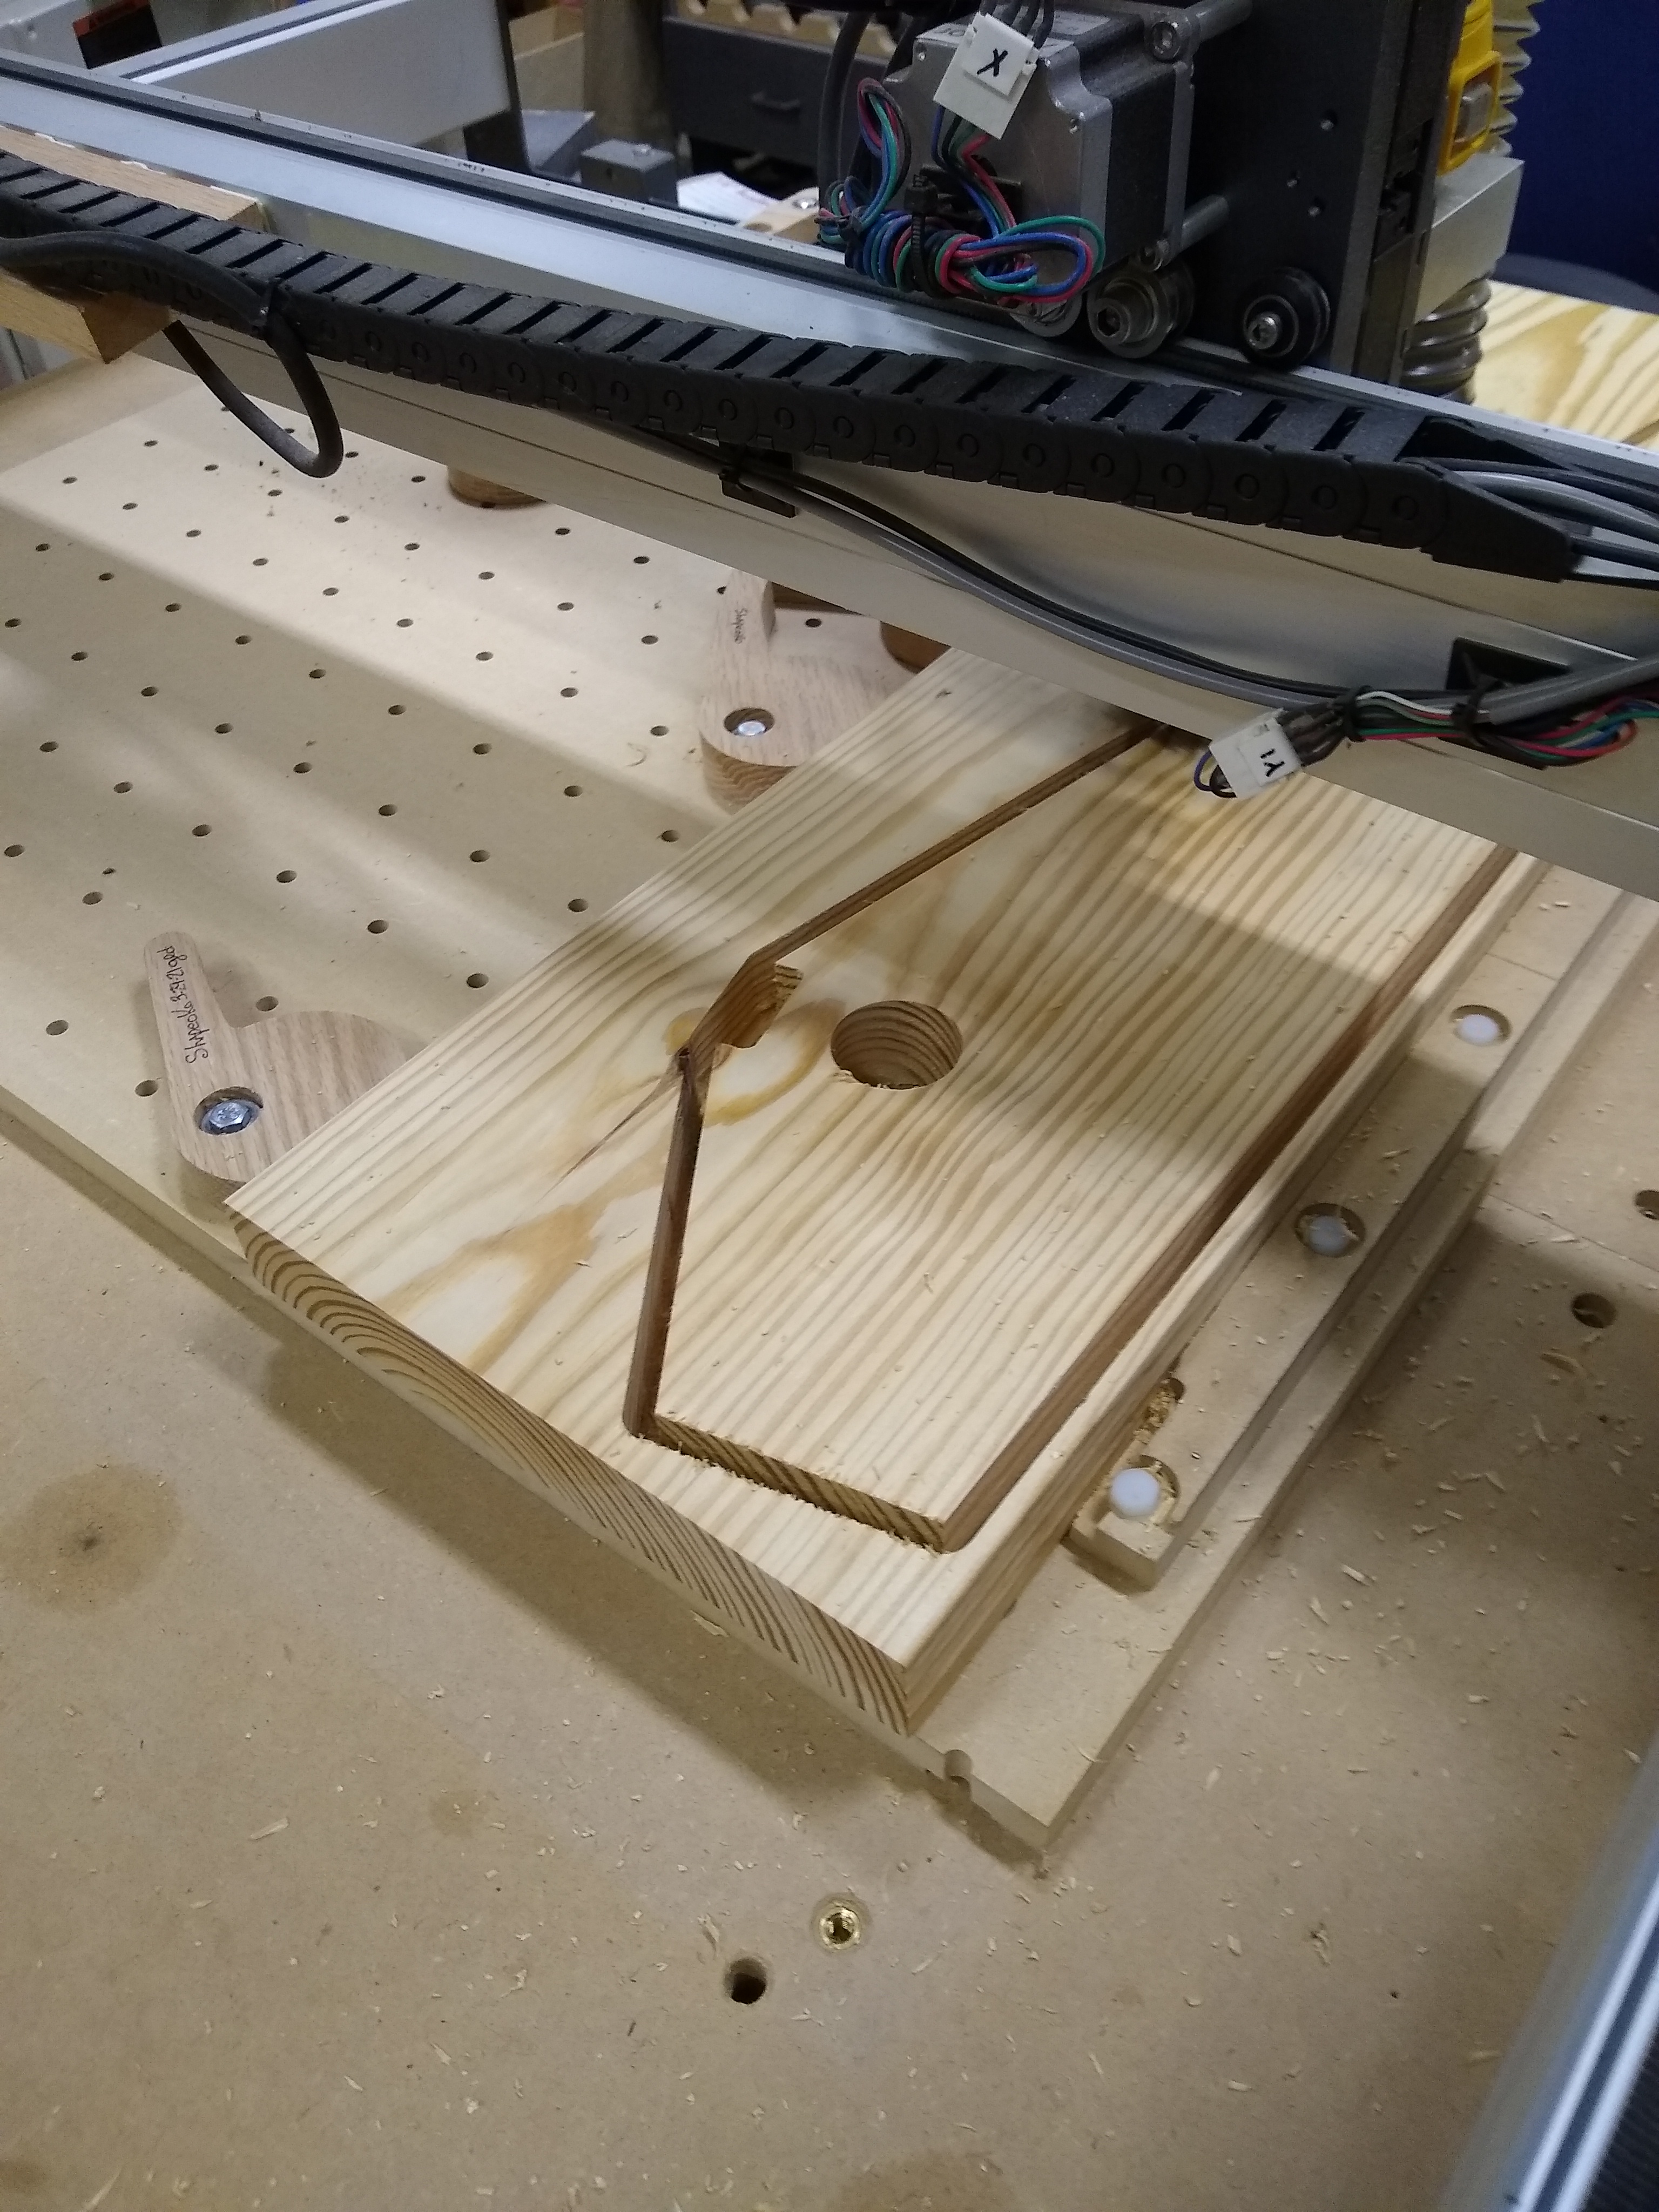
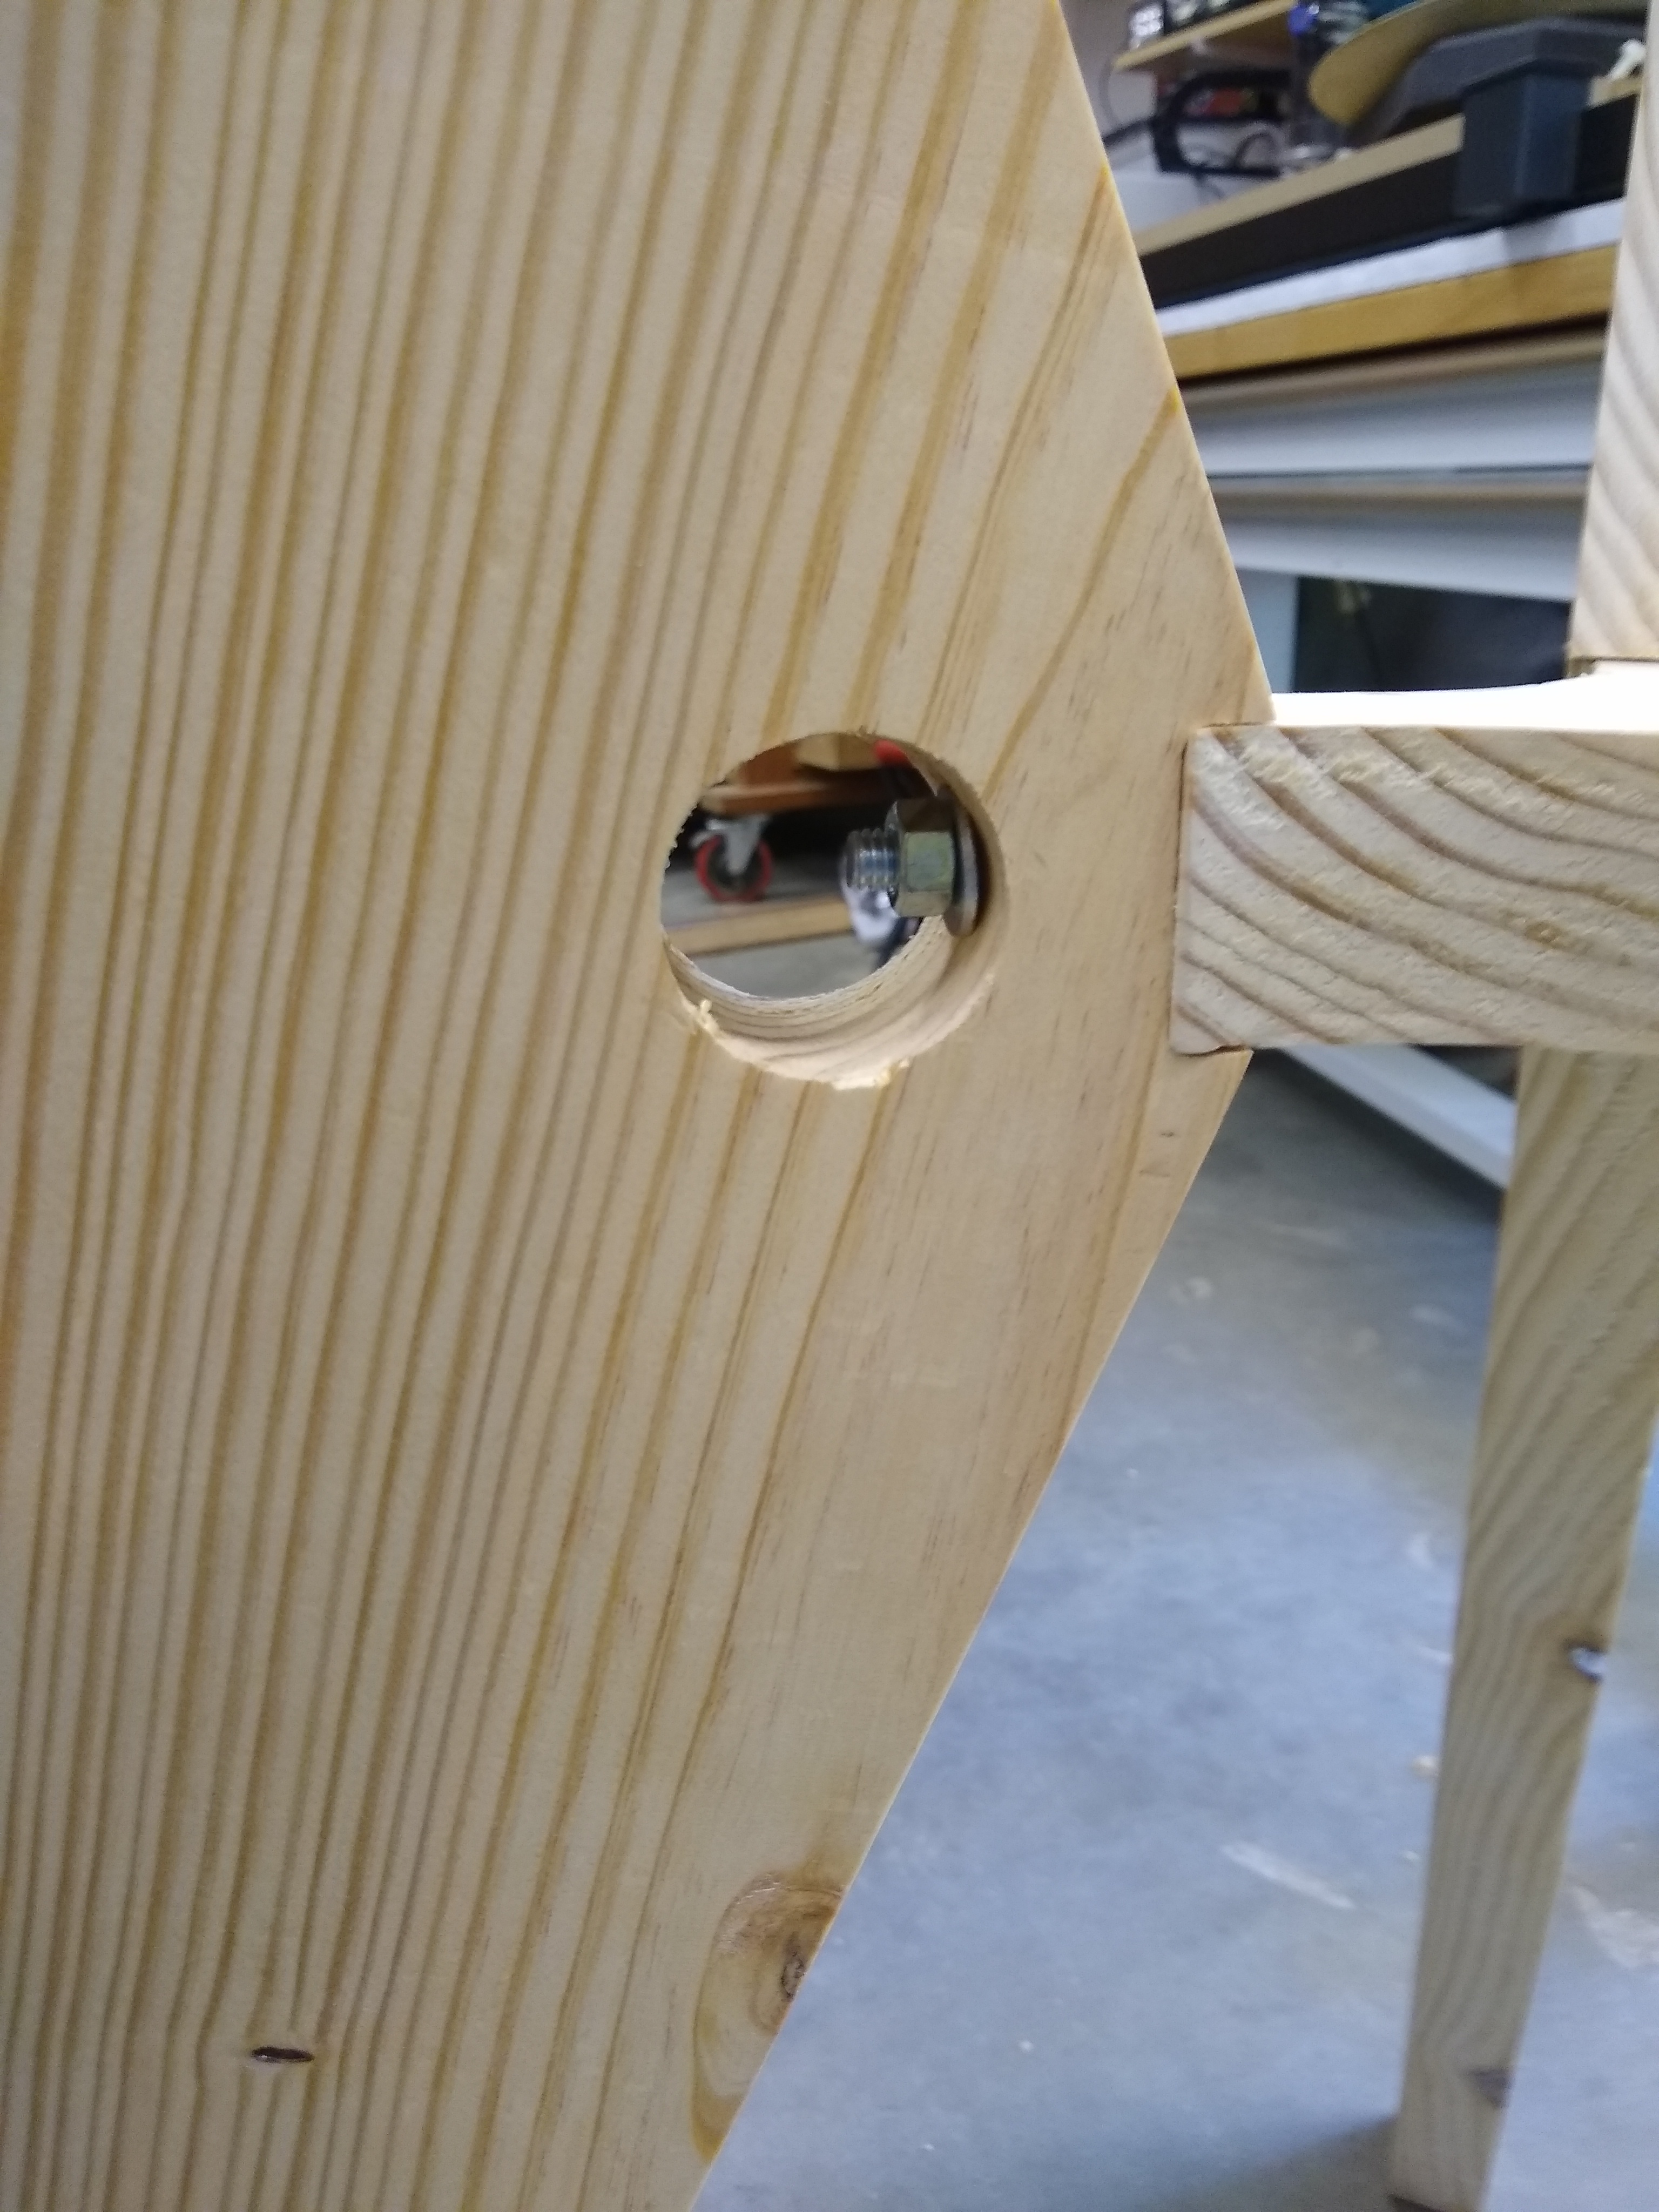
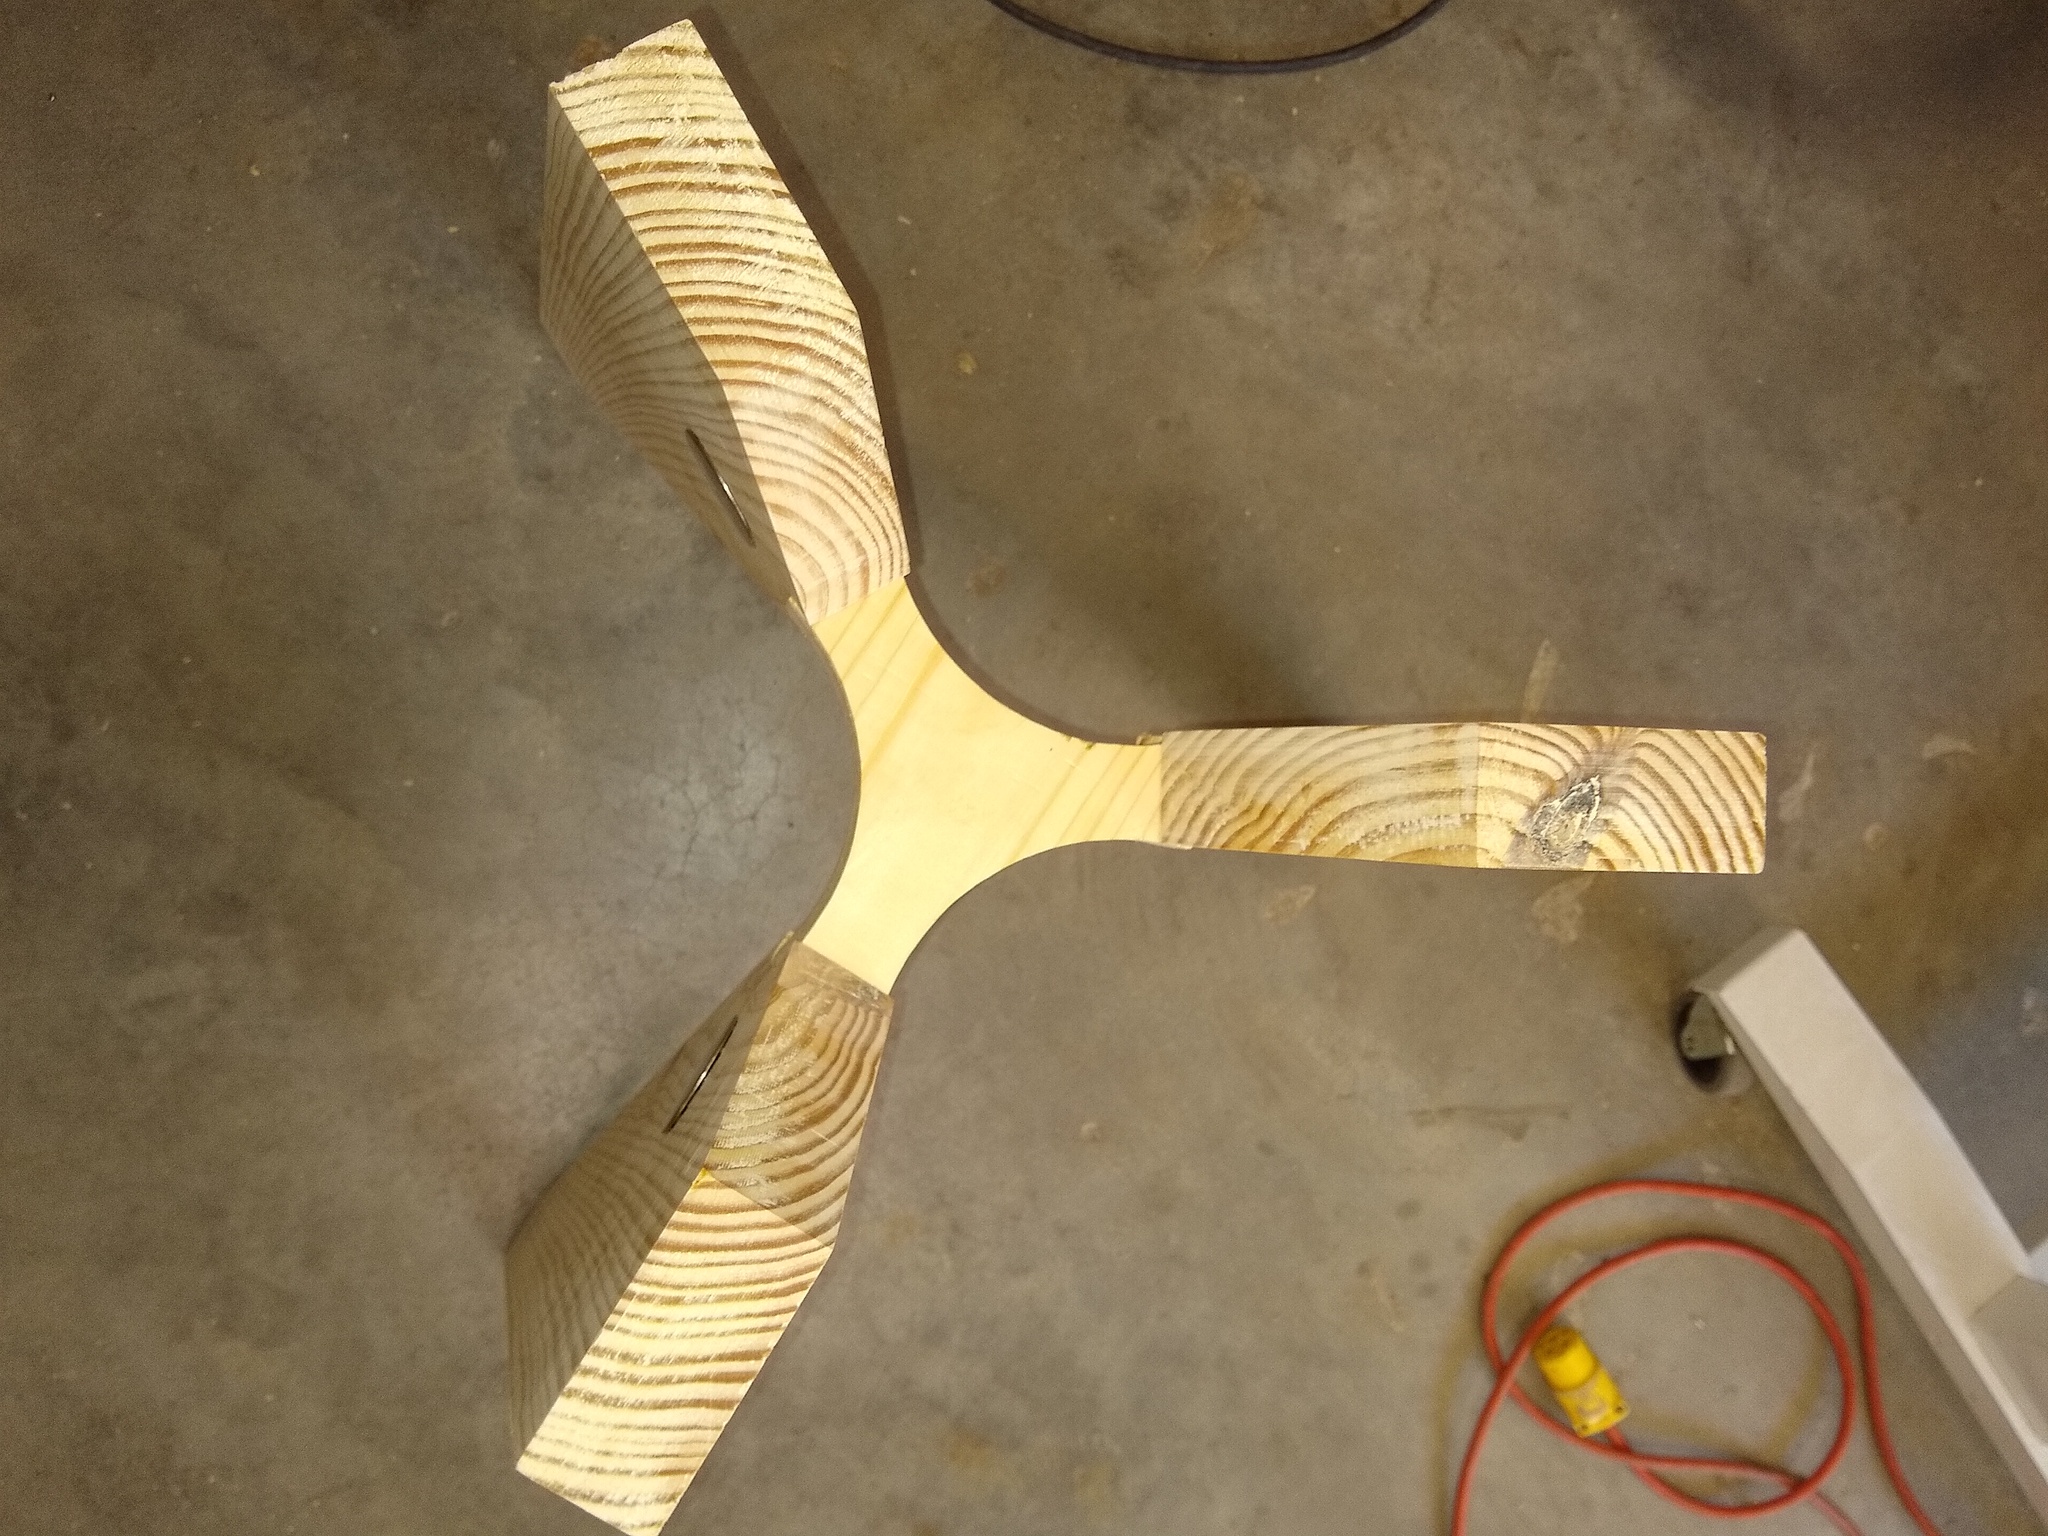
The much debated yoke will be cut tomorrow. I got all the hardware needed except the figure 8 pieces to secure the top. Will order them from Rockler or Woodcraft while babysitting the legs.
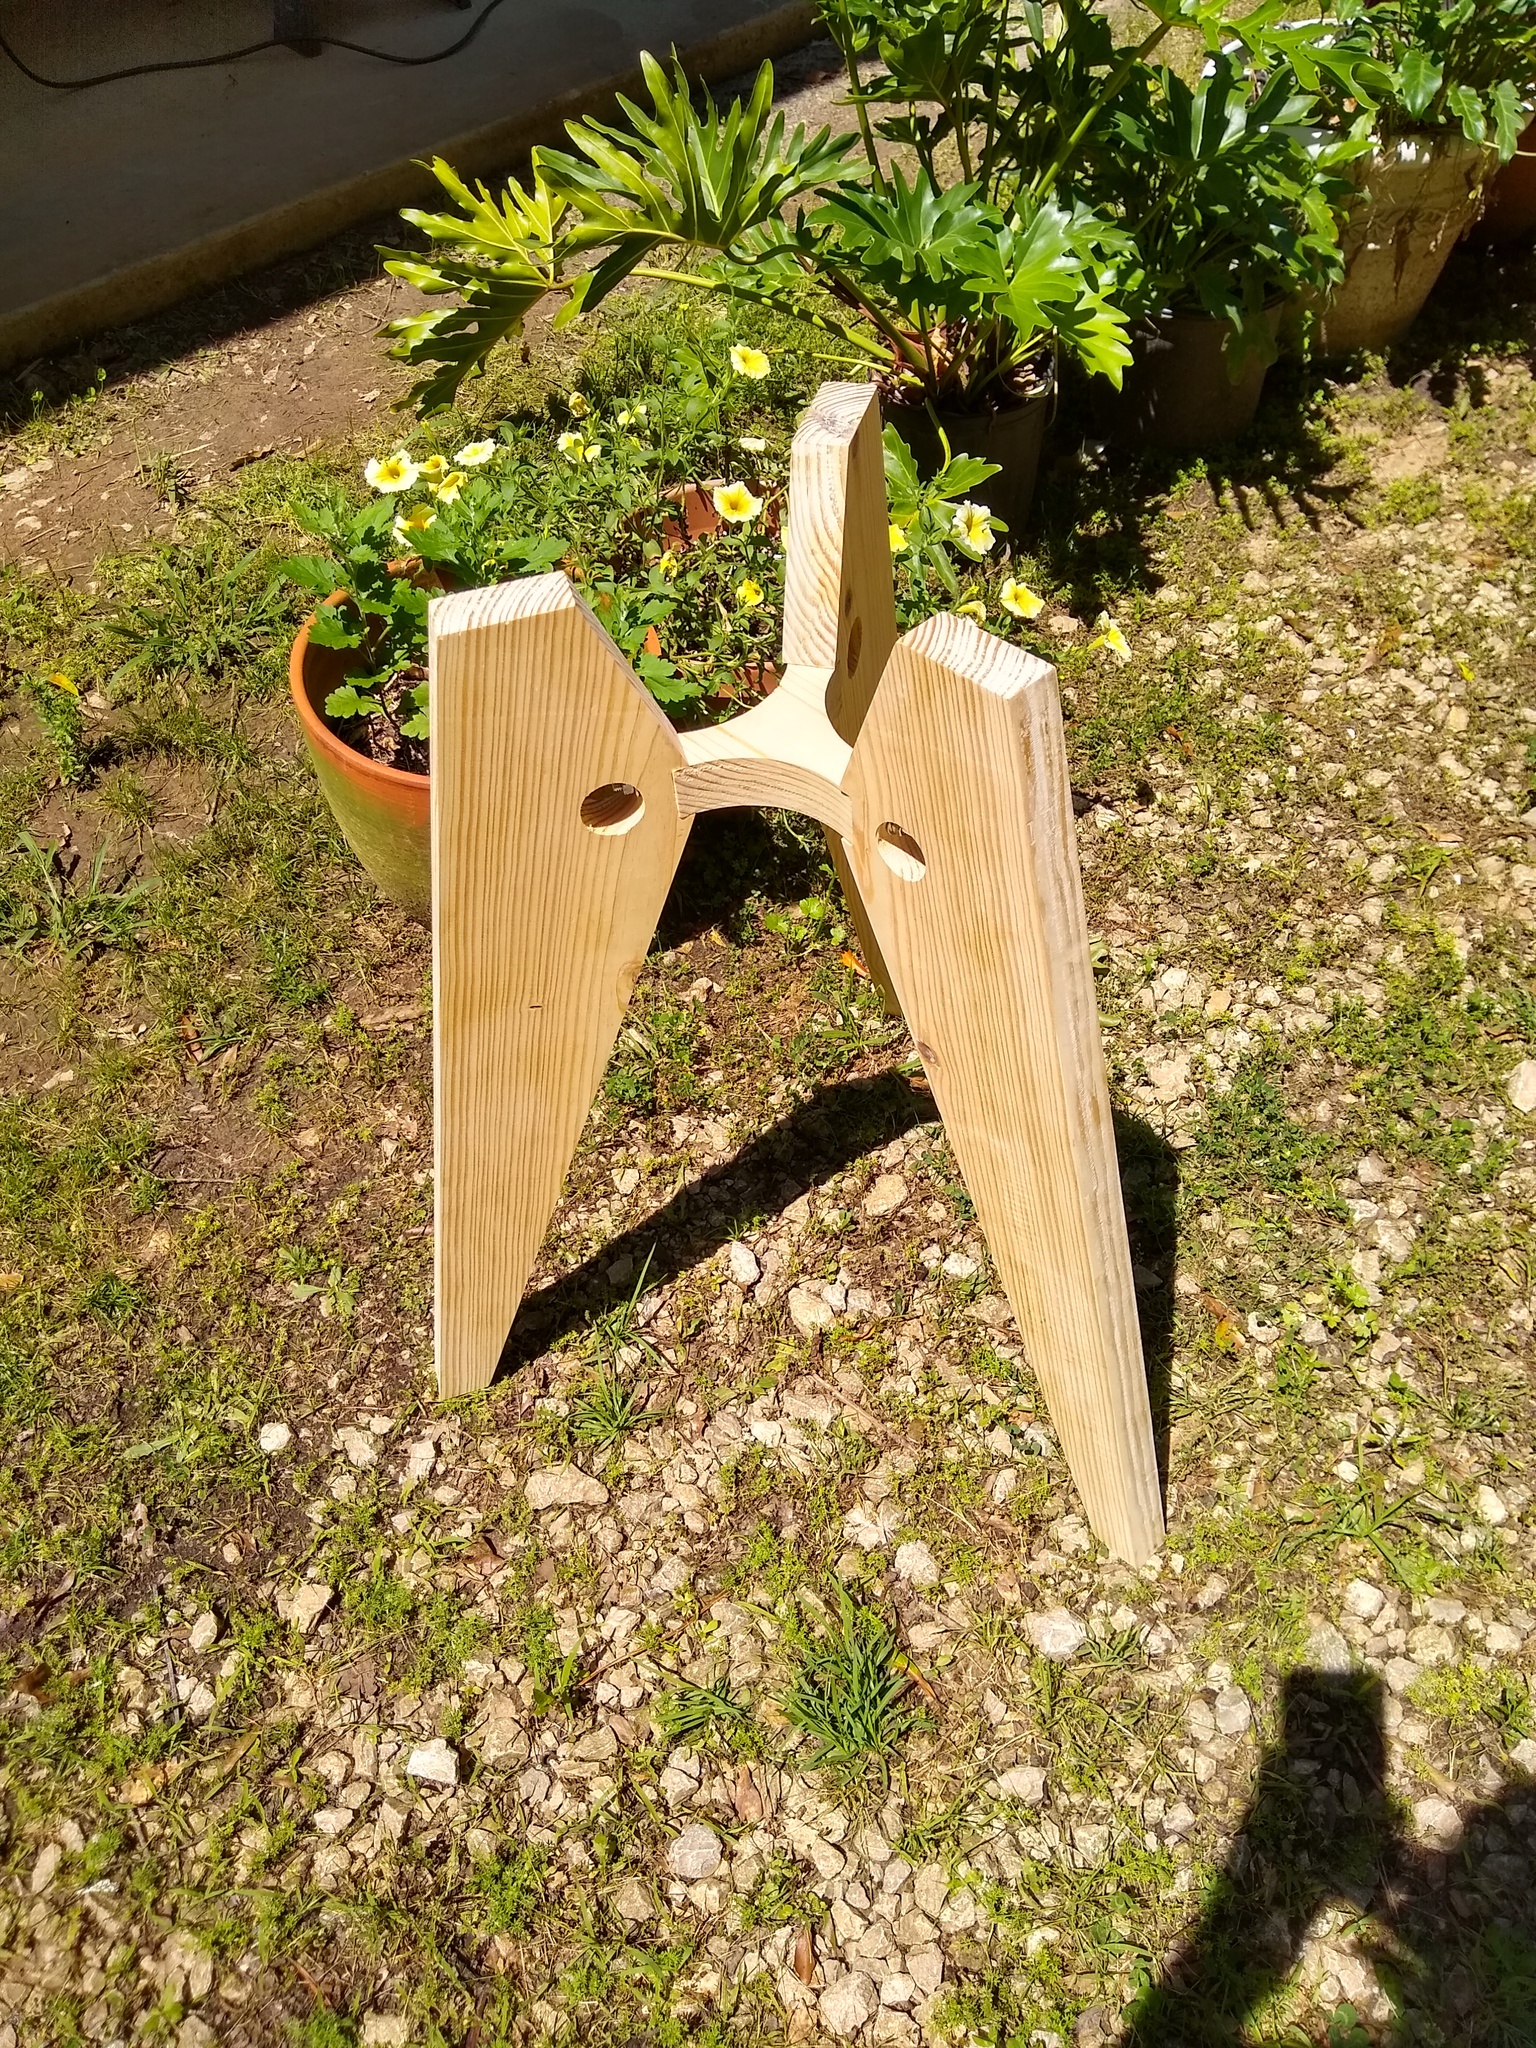
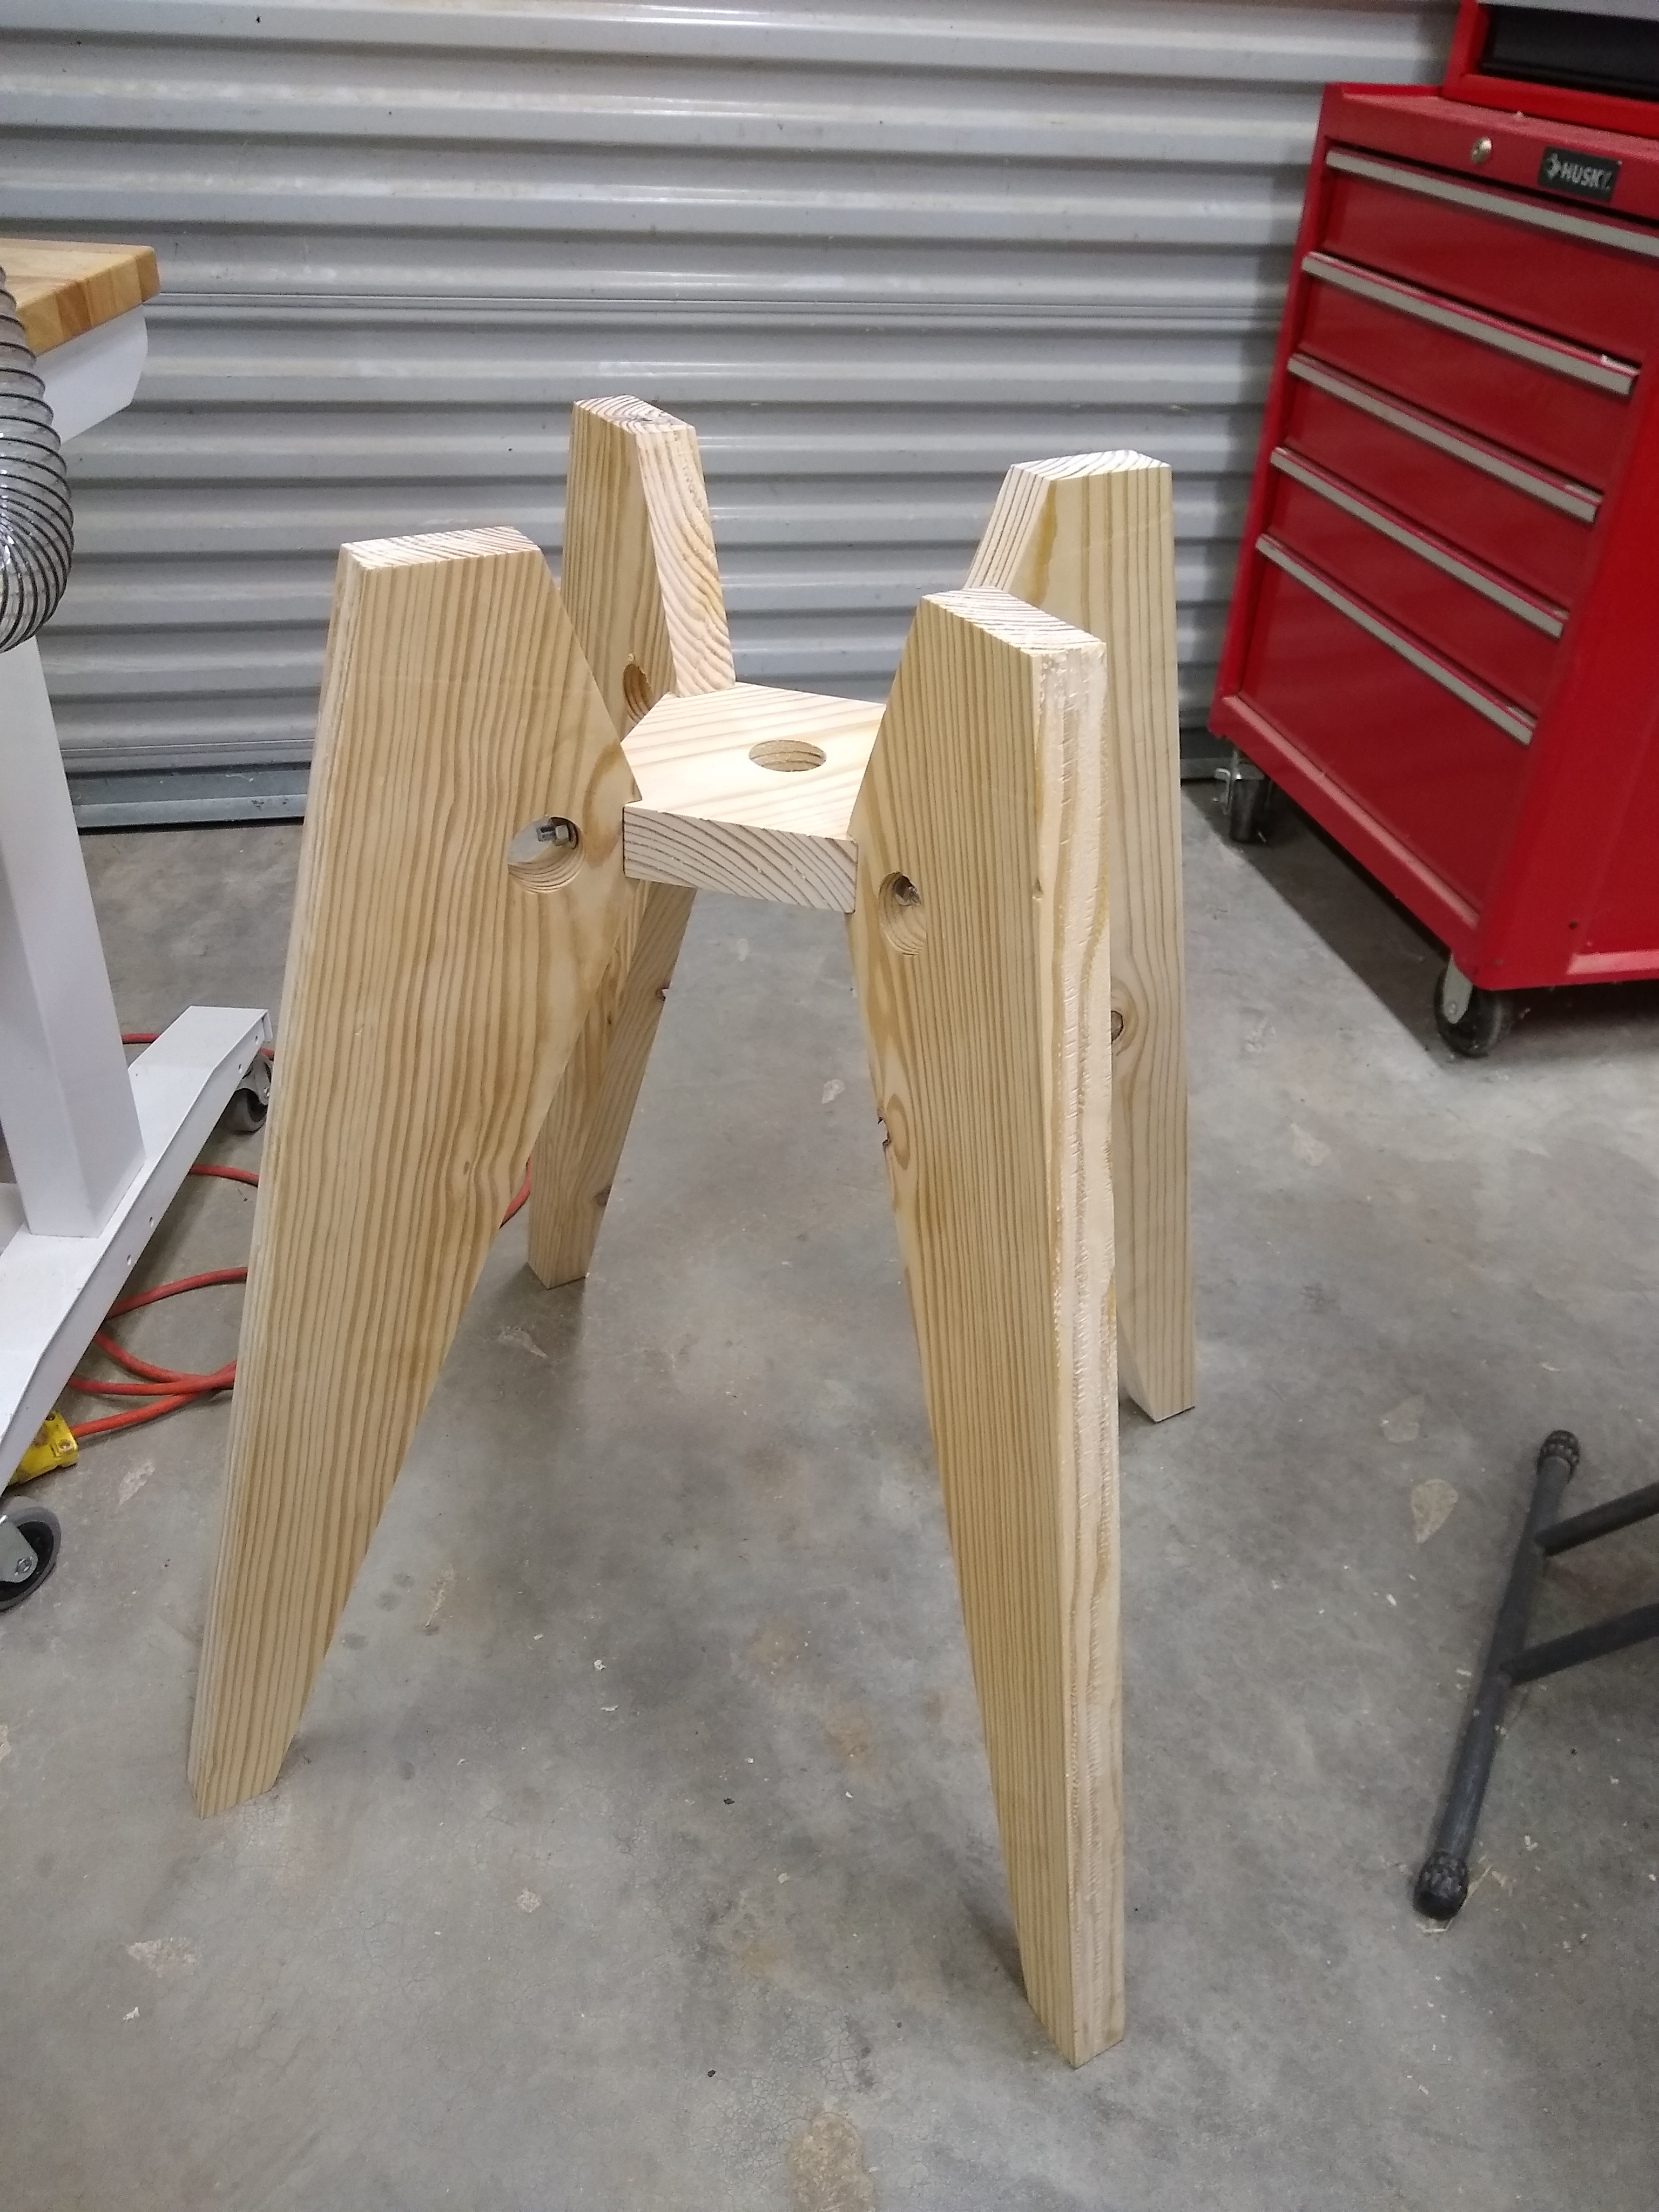
Ok I got the 3 legs cut and the curved yoke. I am going to consider adding a 4th leg and would need a 4 sided yoke. The yoke size is not critical because you use Figure 8 tabs to attach top. I had a top for another project I just set on top to see what it looks like. The 3 legs would make 2 people sit with one comfort but the second person would need to strattle one of the legs. I am going to set it in the shop and look at it and decide.
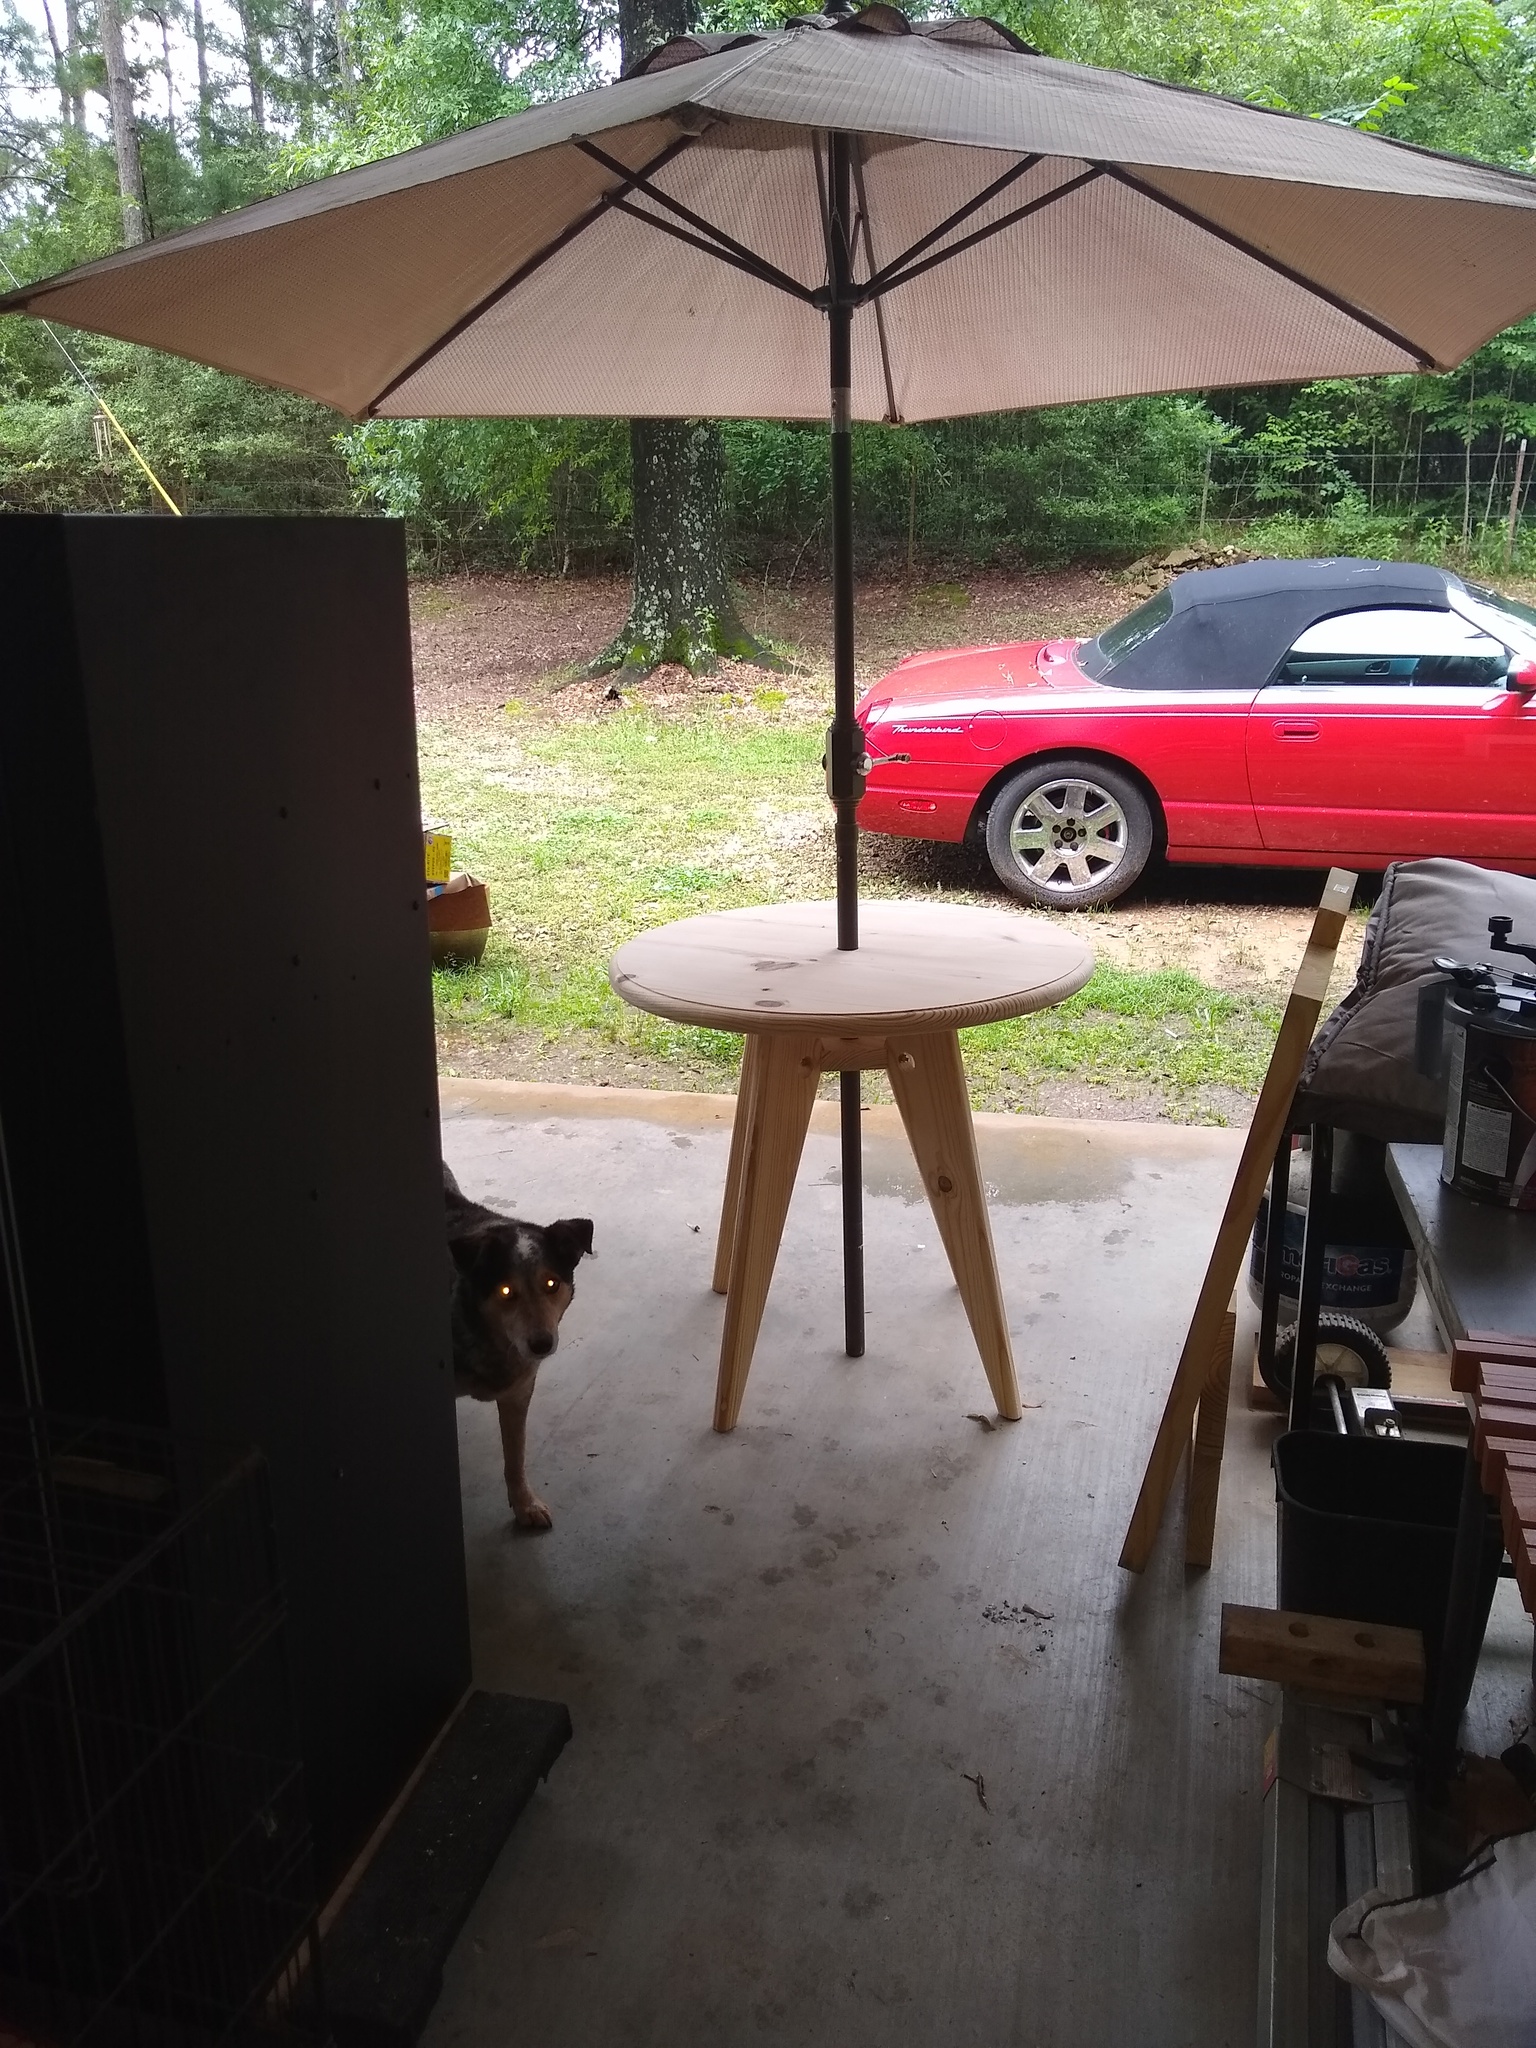
I got the base and top almost finished. I have a cast iron base for the umbrella in the attic. I made this from untreated pine. Will use opaque stain/sealer on base and spar urethane on top. Treated is too expensive and too wet right now. Hope I did not make a mistake but it will be outside under a patio cover. Need to drill for leveling feet and finish sand edge of top. I rounded over legs so I gave same to top.