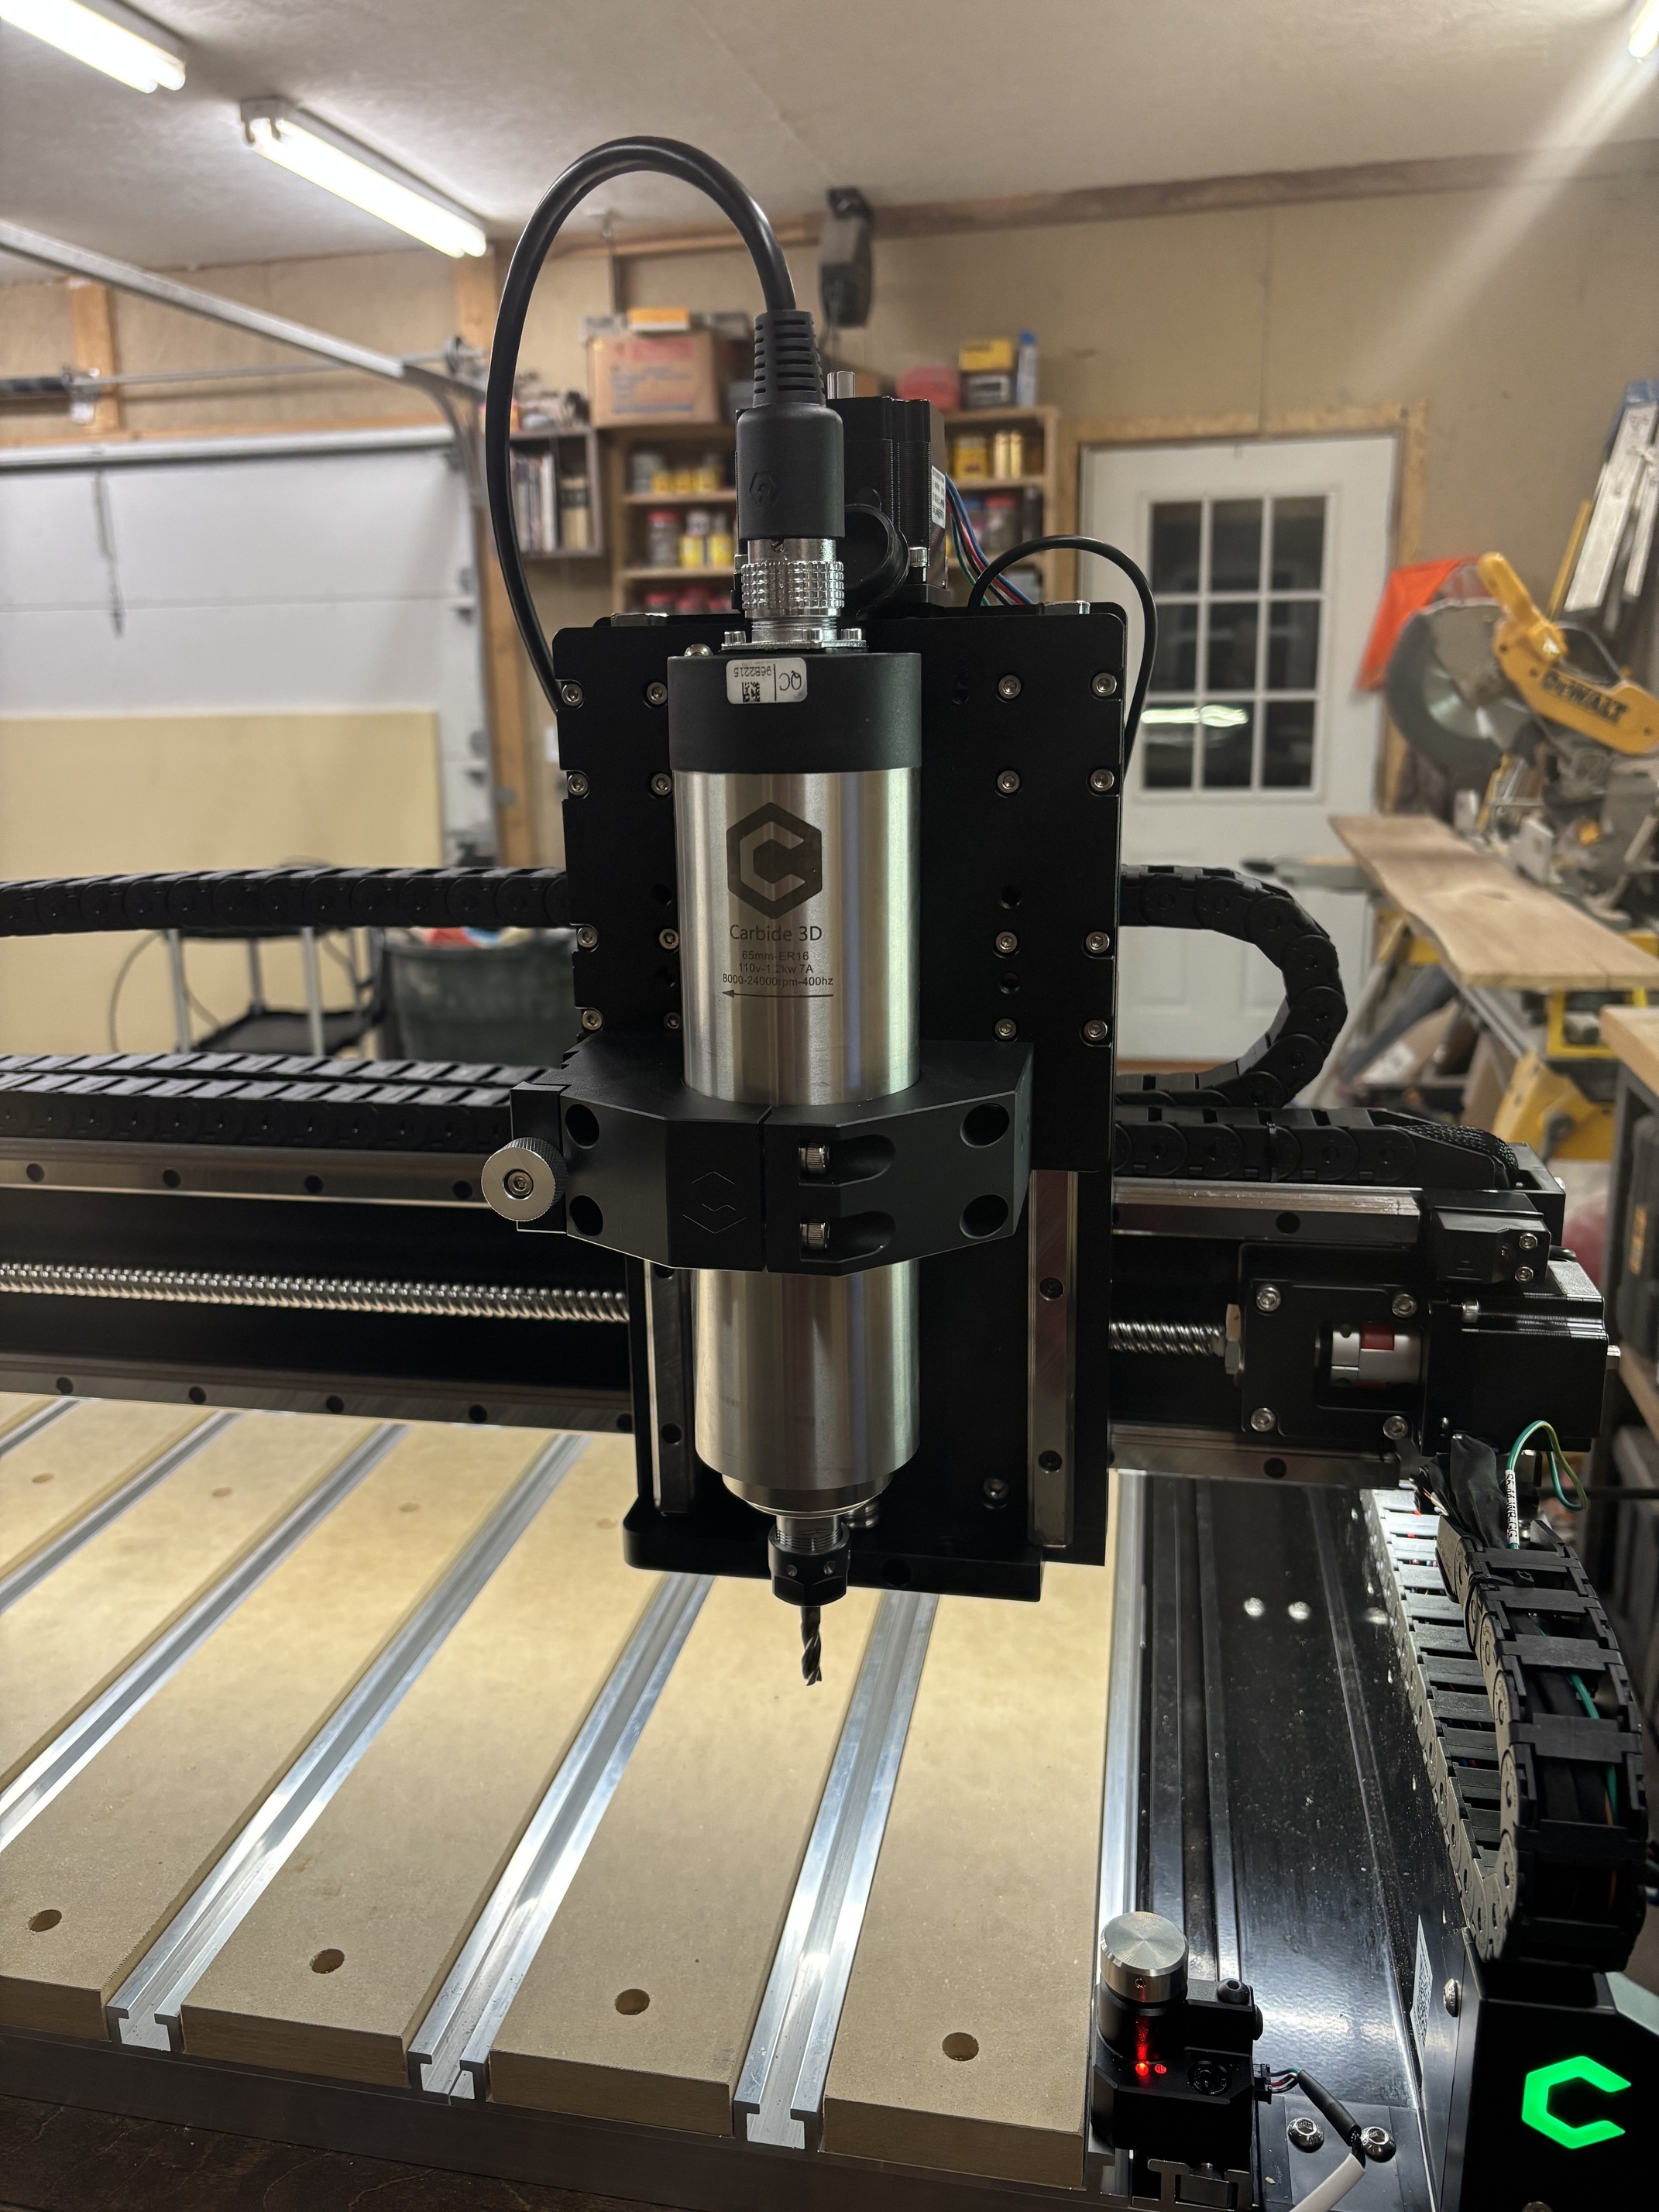
So! Got my Shapeoko 5 pro setup in place over the weekend. Yess!!! So very excited! Spindle arrives today (Monday) just in time! Yes yes!! Get it all installed and the machine ready to go, software installed. Start watching the training videos…the machine is on and moving around
Then…stall. As I’m watching the video(s) my carbide motion doesn’t have the same options as what the videos are showing. I am able to fumble my way around the software and the machine. But finally, I’ve given up fearing that I will ram the new sharp bit into the metal frame (which I nicked once ).
Pics show the setup I have. Literally, all I want is someone to point me to an accurate tutorial that walks me step by step using the carbide 3d equipment that was sent to me.
Any thoughts and help would be appreciated. Currently, I’m giving up for the night frustrated that I can’t figure this out (and I’m usually very tech savvy!)
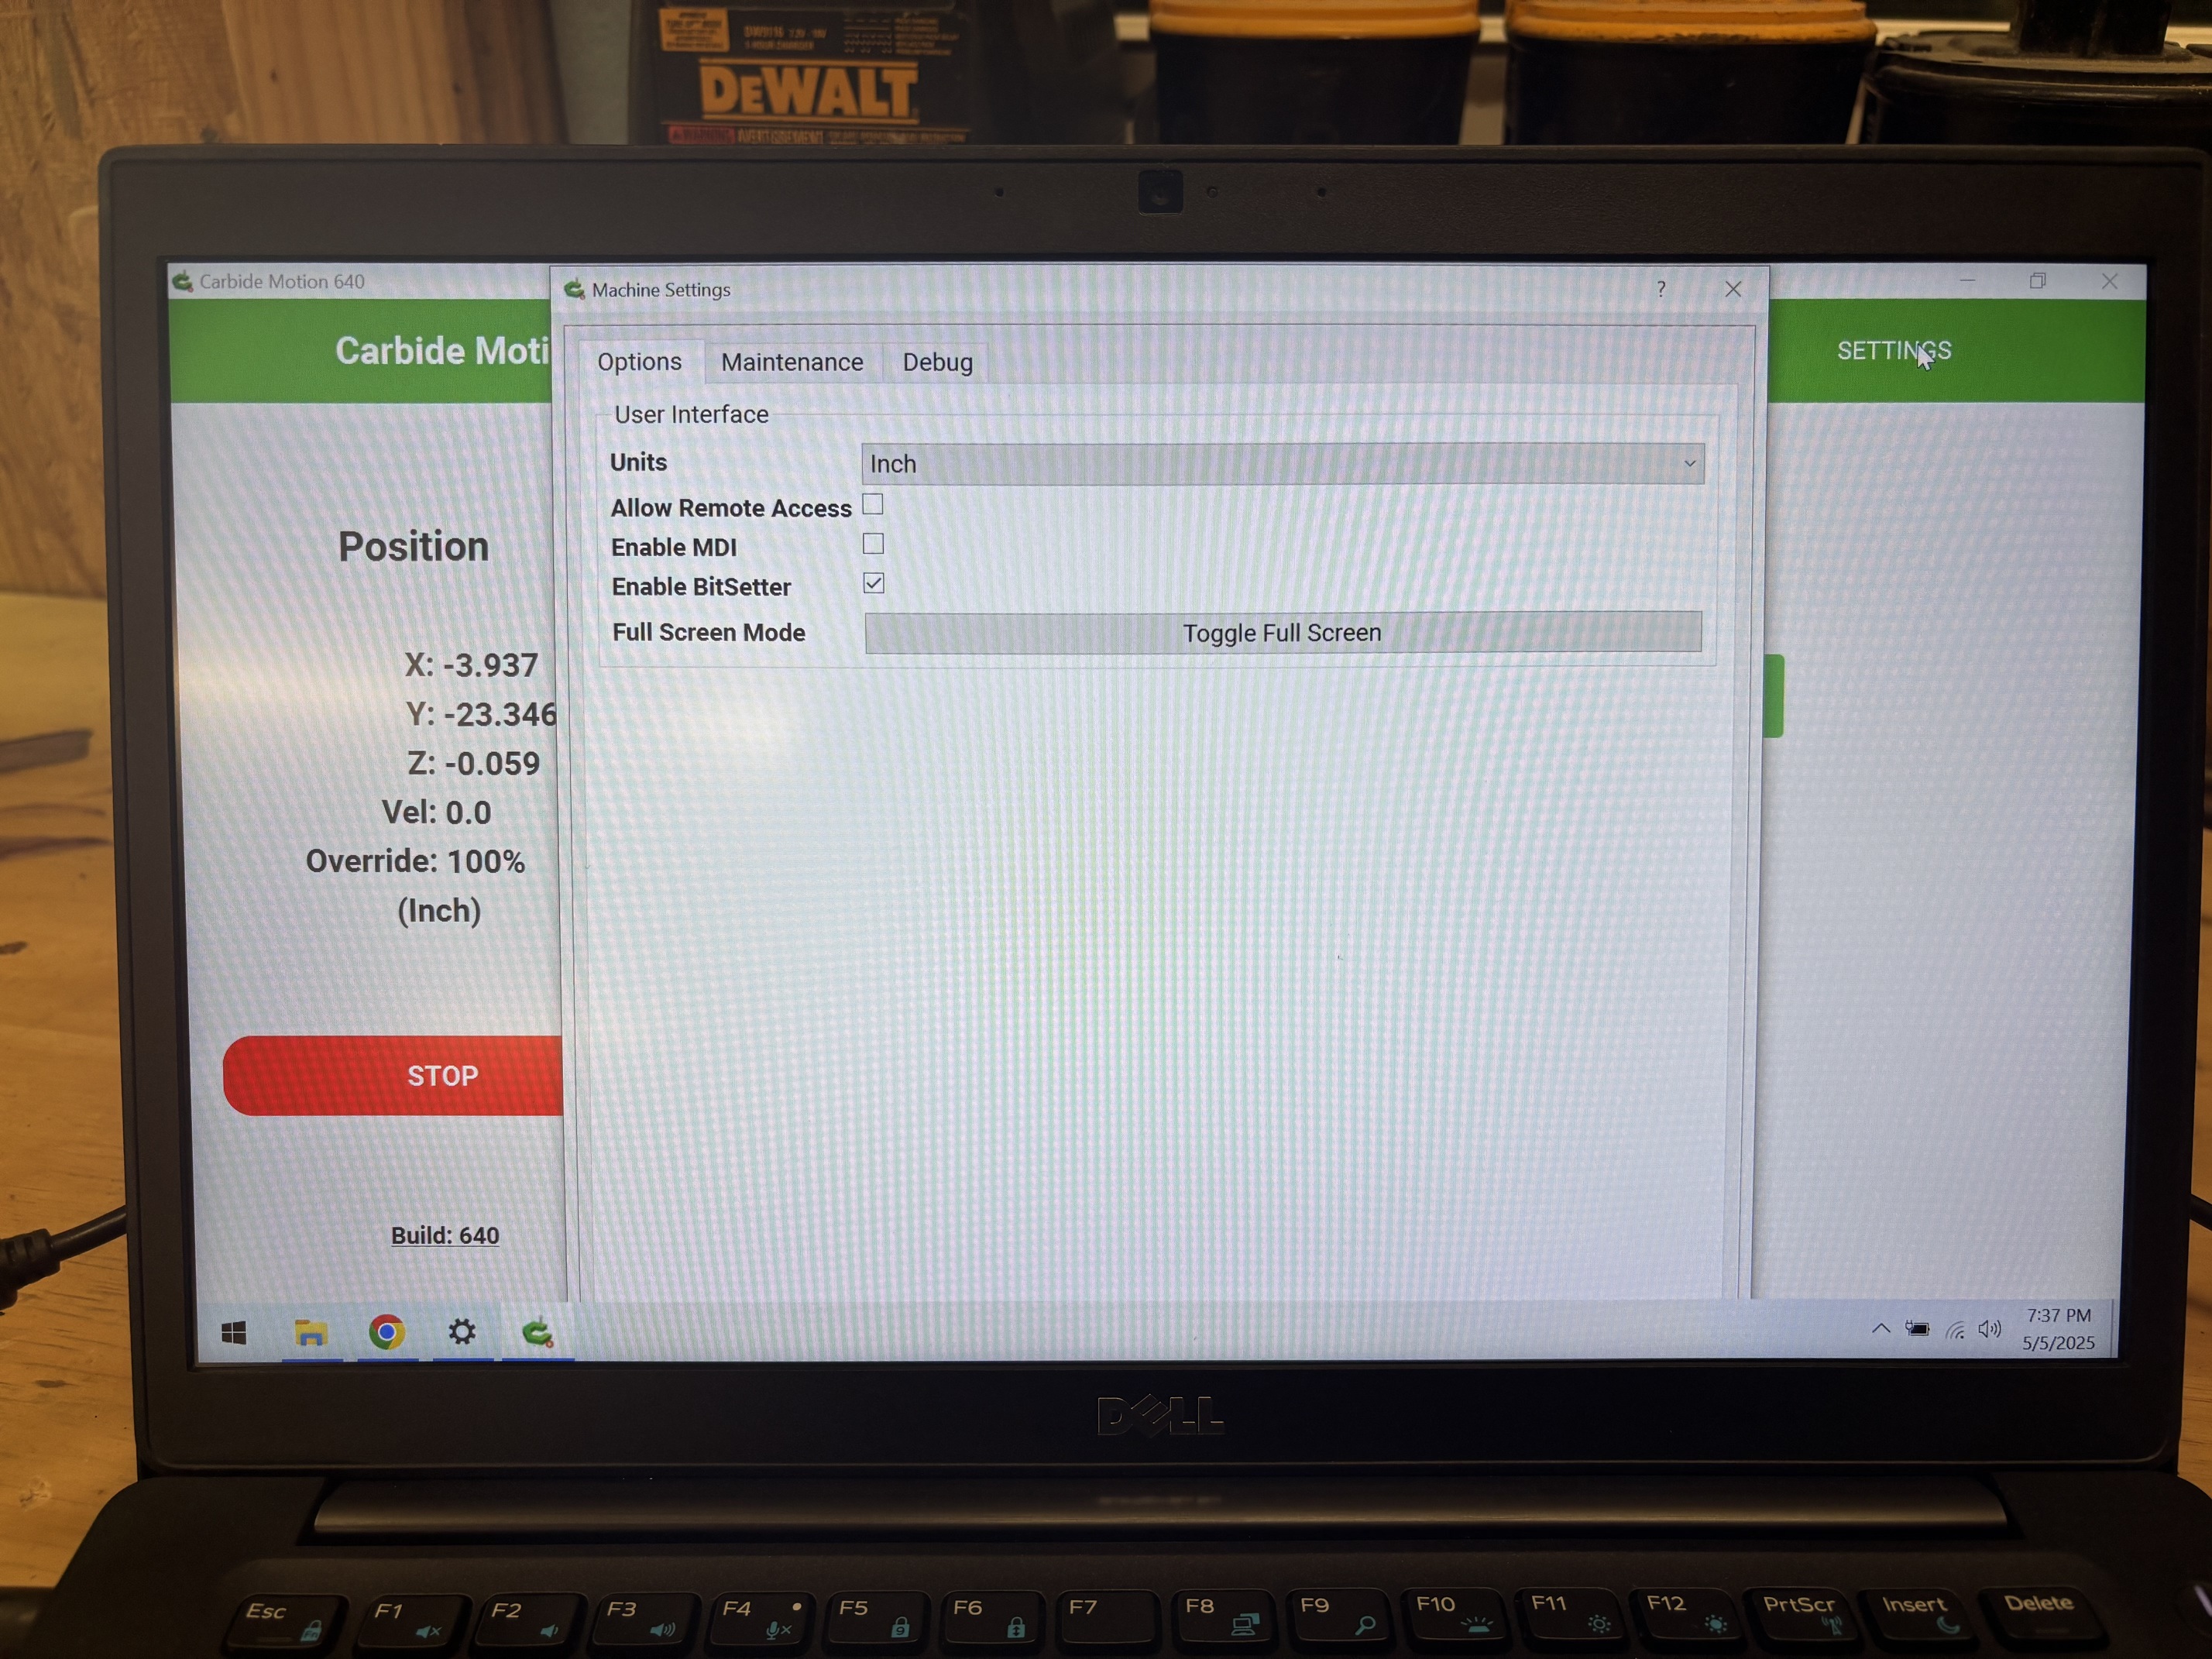
C3D has a complete series of beginning videos, they were very helpful when I put my S5Pro together. Go to the “jog” tab in CM and run the machine around on the jog screen. You can leave the bit out until you’re more comfortable moving the machine around. It just takes using the software to get used to it. The screen you show above is used very little in my case, I only use to disable the bitsetter for very specific operations. You normally will not use it, usually only Run and Jog (at least in my case).
I’ve gone through several of the videos and it just seems like I’m missing a couple of key screens that aren’t matching up with the ones on the tutorials. I’ll keep looking at more to see if I can’t find what I’m missing.
Found the jog screen. But currently, I must have set SOMETHING wrong as one of the options I select moves the bit to a weird place and below the level of the table. But you are right…it takes using the machine to get used to it.
I may or may not have. I will try that. Do I set it spindle over the bit setter when I do that? I feel pretty stupid asking these simple questions…but it’s the only way to learn.
You will need to set or recognize what your current Z zero point is.
To see where it is, you could Jog the Z to zero to see where it is.
If the bit is diving into the table before getting to Zero, stop .
You can use the paper method ( slide it back and forth, when the bit bites your are there) and find the Top of the table.
When you set the Z value, the spindle will go to the probe and set it’s height.
You go to the “jog” screen and set your zeros. You will jog the gantry to your X/Y of your choice. You will use the X/Y zero to set where you selected for your project setup in Carbide Create (the gear icon). This can be on corners or in the middle based on your project. Once you select the X/Y you can then set the Z zero, when you do the spindle will travel over to the bitsetter and set the height of the installed bit and then it will travel back to the X/Y zero. You can set all thre at the same time but remember anytime the Z axis is set the spindle takes a trip to the bitsetter.
The beginning videos do show how to set zeros including using the “paper” method as jtclose mentions above.
Let us know where you get today and we can def help you keep rollin. When i got my 5 Pro last summer and was a complete n00b, it was pretty scary and too felt pretty lost. Lots of videos and pages about various things, but no single one felt like it gave me a safe path to get fully up and running. For me it was playing with Bit Setter and the Bit Setter video enough times on the machine/carbide motion side until i felt fairly comfy with how the machine determined the true zero point for all 3 axis. After that it was digging around in Carbide Create until i was able to connected enough dots to figure out how it did its thing. It will be so worth it once you get past this first phase, though.
@stallent wow! It’s really weird how having someone else say they went through the same thing I am makes me so relieved (I’m NOT an idiot after all!!). I really appreciate the encouragement on this and the further thoughts. I’ll hit it hard tonight. This is a fantastic community!
Most of us went down the same path as your going down now, which is why we are reaching back out to help. This forum was one of the many reasons I went with C3D.
Learning the basic functions of your machine is very important. These basic functions will help in moving/navigating the spindle around for the various needs you may encounter. But the basic functions of the machine are just the tip of the iceberg. Your steep learning curve, and most frustration, more then likely will come when you get into the program and start using the functions of your program, if you don’t already know them.
One point I would like to point out on setting Z zero, there are two ways to set Z zero that can helpful in a project. One way is setting your Z zero to the top of the part/material you plan to use. This is a little more forgiving because your material thickness isn’t as important when you set your material thickness in settings in the program. For example; if I set Z zero to the top of my material and the material is .790" thick, and my program is cutting down .150" total depth, then the machine will cut from set Z zero at top and cut down that .150" without an issue.
Now, the other option is setting Z zero to the top of your table, or in the case of the program, bottom of the part/material, this is where it is very important to type in your exact thickness of your material because the machine needs to know so it won’t come crashing into the top of your material because it is too thick and doesn’t know that your material is .790" instead of .750". The machine would either try to rapid into that extra material, or the very first cut would be an extra .040" deep plus the programmed depth of cut per pass. Again example given; say your depth of cut is .050" per pass, you would be cutting on your first cut at .090" deep because of the difference in thickness to your setting thickness.
I hope you understand what I mean here. But as for just moving the machine around, setting your Z zero up away from anything, in the air, will help get you started on playing with your machine. One note, mentioned before I think, using a piece of paper between the tool and material is good practice, but you also have to realize that a piece of paper is about .010" thick and if you are cutting very fine precise parts and need that .010" for your detail cutting, make adjustments for this thickness, or measure the paper thickness and add it to your program, whichever works best for you. If you are cutting most other types of work, .010" would be no big deal at all.
@bigsmooth911 gosh, thanks for the detailed response! I will definitely keep that in mind as a proceed through the learning of it.
I always expect a large learning curve when I start a new process, using a tool, start up a company. But seldom if ever do I have the great support I’ve had from this community!
I just want to say a big thanks to everyone who contributed to this topic. With the encouragement I had, some specific hints and ideas given, I was able to make it over this hump!!
Solution for me was
Watching a lot of videos so I understood all the different things shown in the options in Carbide Motion. Some of the things I was clicking on I don’t even have the hardware for!
It’s important to understand that this topic was created after a successful build and installation of the physical machine (pro 5 with 65mm vfd spindle kit)
Watched the following video ( Mycarbide3d > shapeoko 5 pro > setup guide > video.
I watched through each section and wrote down notes on the specific steps I needed to take for each action
One key!!! When selecting your machine and size HIT THE DOWNLOAD BUTTON BEFORE HITTING NEXT. I think I missed this step when I first went through it.
Honestly…I deleted Carbide Motion and started all over as if I was a new user. And it all worked out.
Hopefully this helps some poor “idiot” like me some day who is having the same struggles! (Hahaha
One final note…I wanted to give everyone who contributed to this topic a click on the solution button because you all contributed in different ways. Alas, that is not allowed on this forum apparently.