I think I need PATIENCE ! I found that 220 paper on palm sander removes DRY product. I will not use acetone to clean, I think it merges product into the rubber, dilutes the product in the groove which gets wiped out while trying to clean surface.
I noticed the bottom of the groove had debris. I used a dental tool to clear the cuts.
It takes the talcum powder much better.
I changed from a 60 deg VCarve bit to a 1/32 end mill and I shorten the time in ramping to reduce melting.
Puck is 20 F out of the house freezer and it makes a difference with the end mill.
The end mill produced anywhere from mush to small chips or strings.
The final solution was a close up vacuum. I tried air blow and that seemed to push the material back into the grooves.
The process is out of freezer and cut with vacuum.
Use a dental tool to clear grooves. I have a fair amount of flash to trim. I tried sanding it out and lost edge detail before the flash cleared.
The VCarve bit clears bigger chips. I now realize I need to scrap and recut as a normal process.
The back side will have the player name and number. I am going to use the VCarve bit because the features are larger.
Now hopefully I can sand the Rub and Buff off the high side. I am trying that patience concept and letting it dry.
It takes a bit to get the grooves filled and I have to tape the outside cylinder so I don’t have to clean off the Rub and Buff on a cross hatched surface.
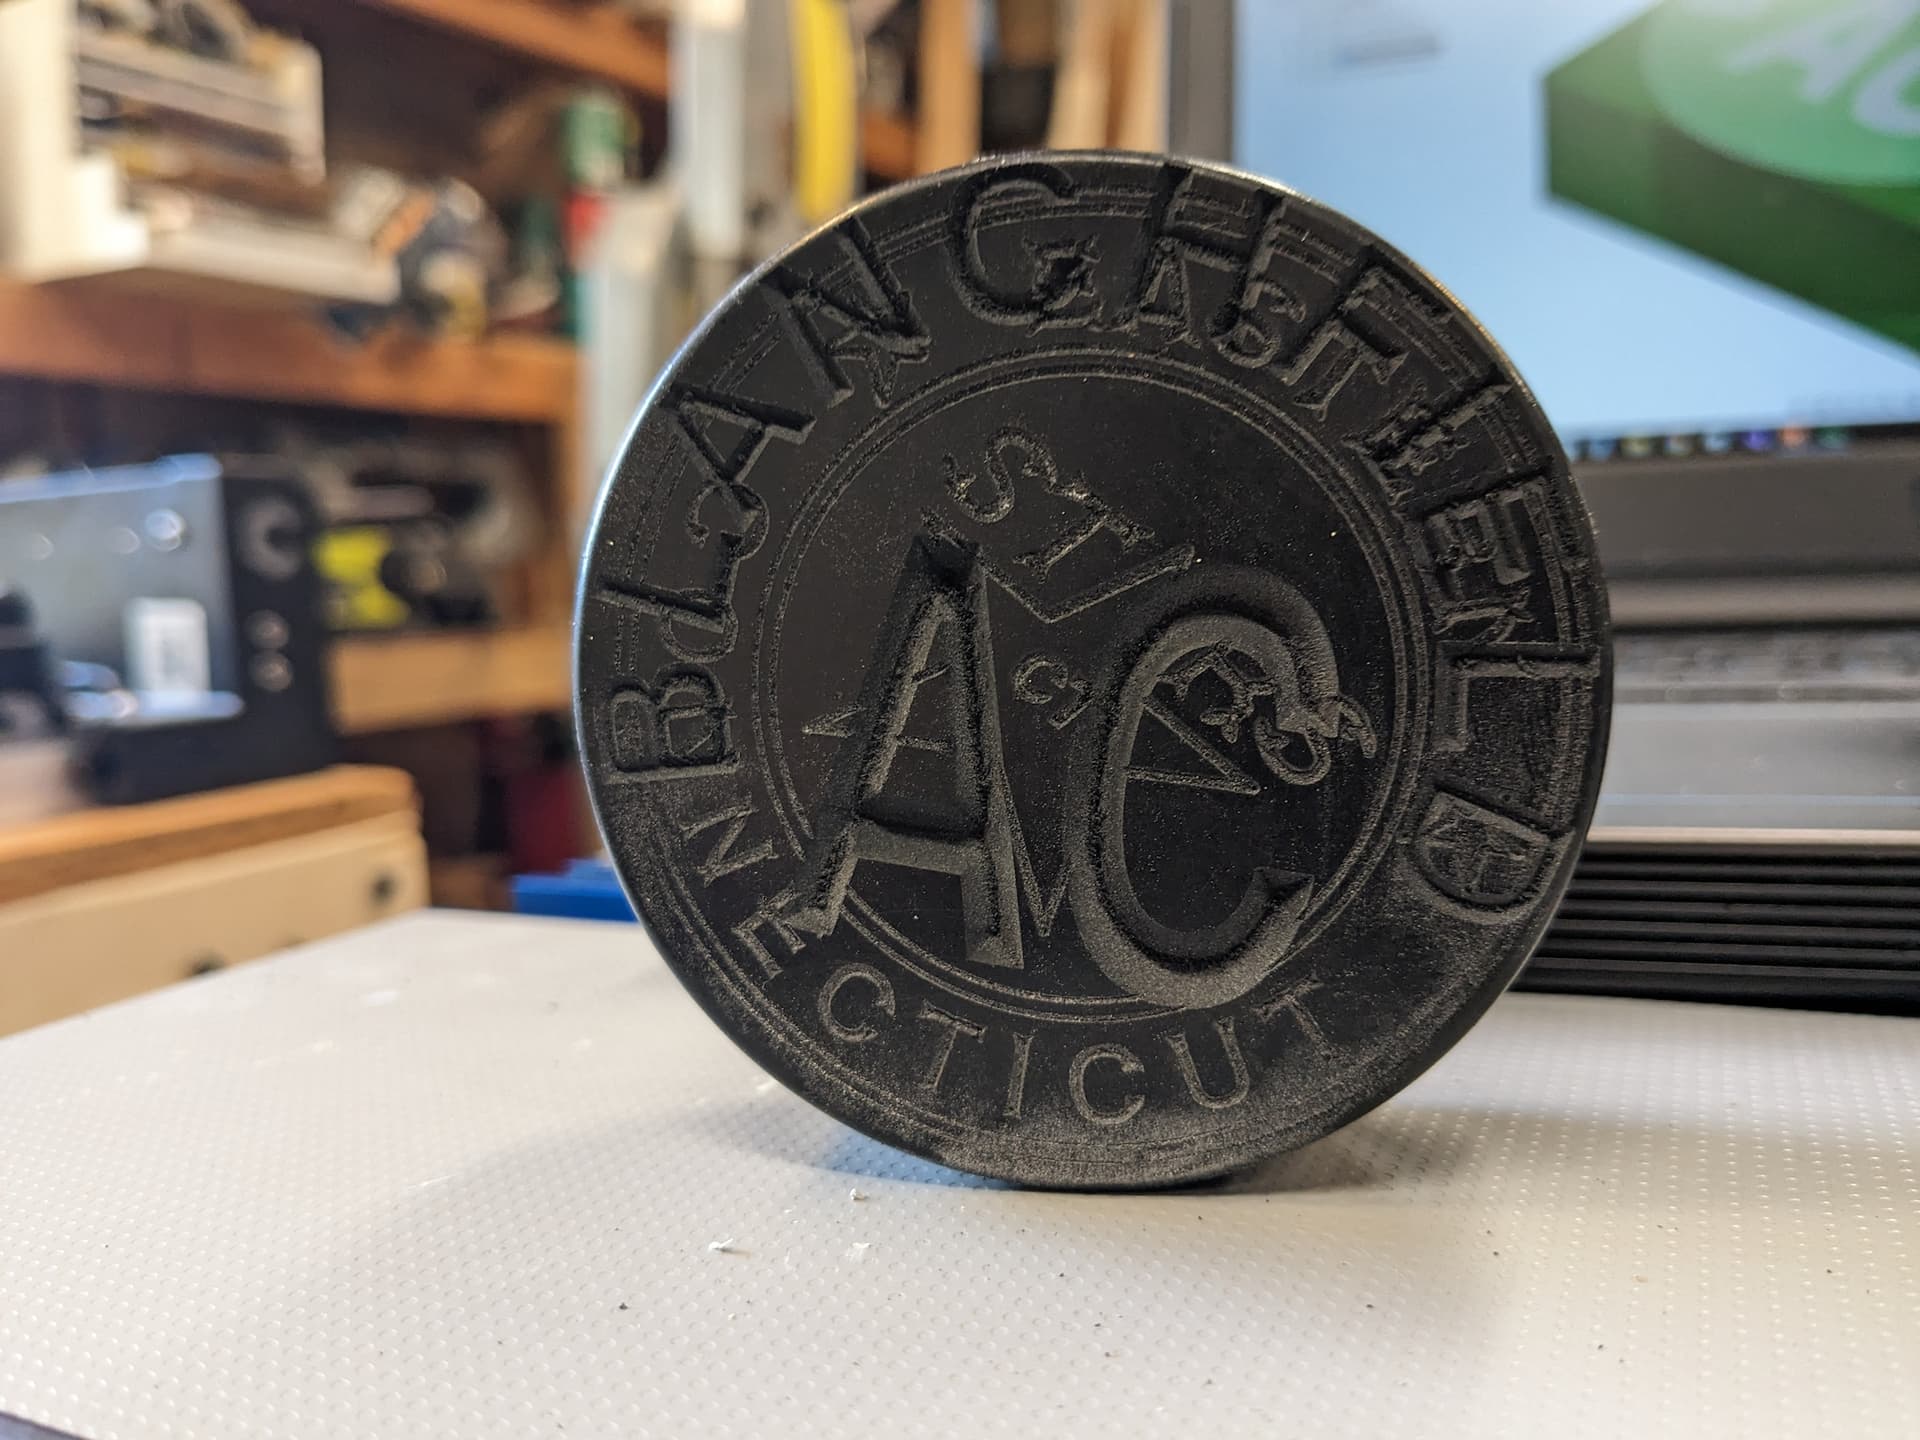
Final test part. Give it a clear acrylic coat and good to go.
I need to fill grooves better. I think the material rolls like mortar that is too dry.
It’s wax based so I am going to try heat to settle the material.
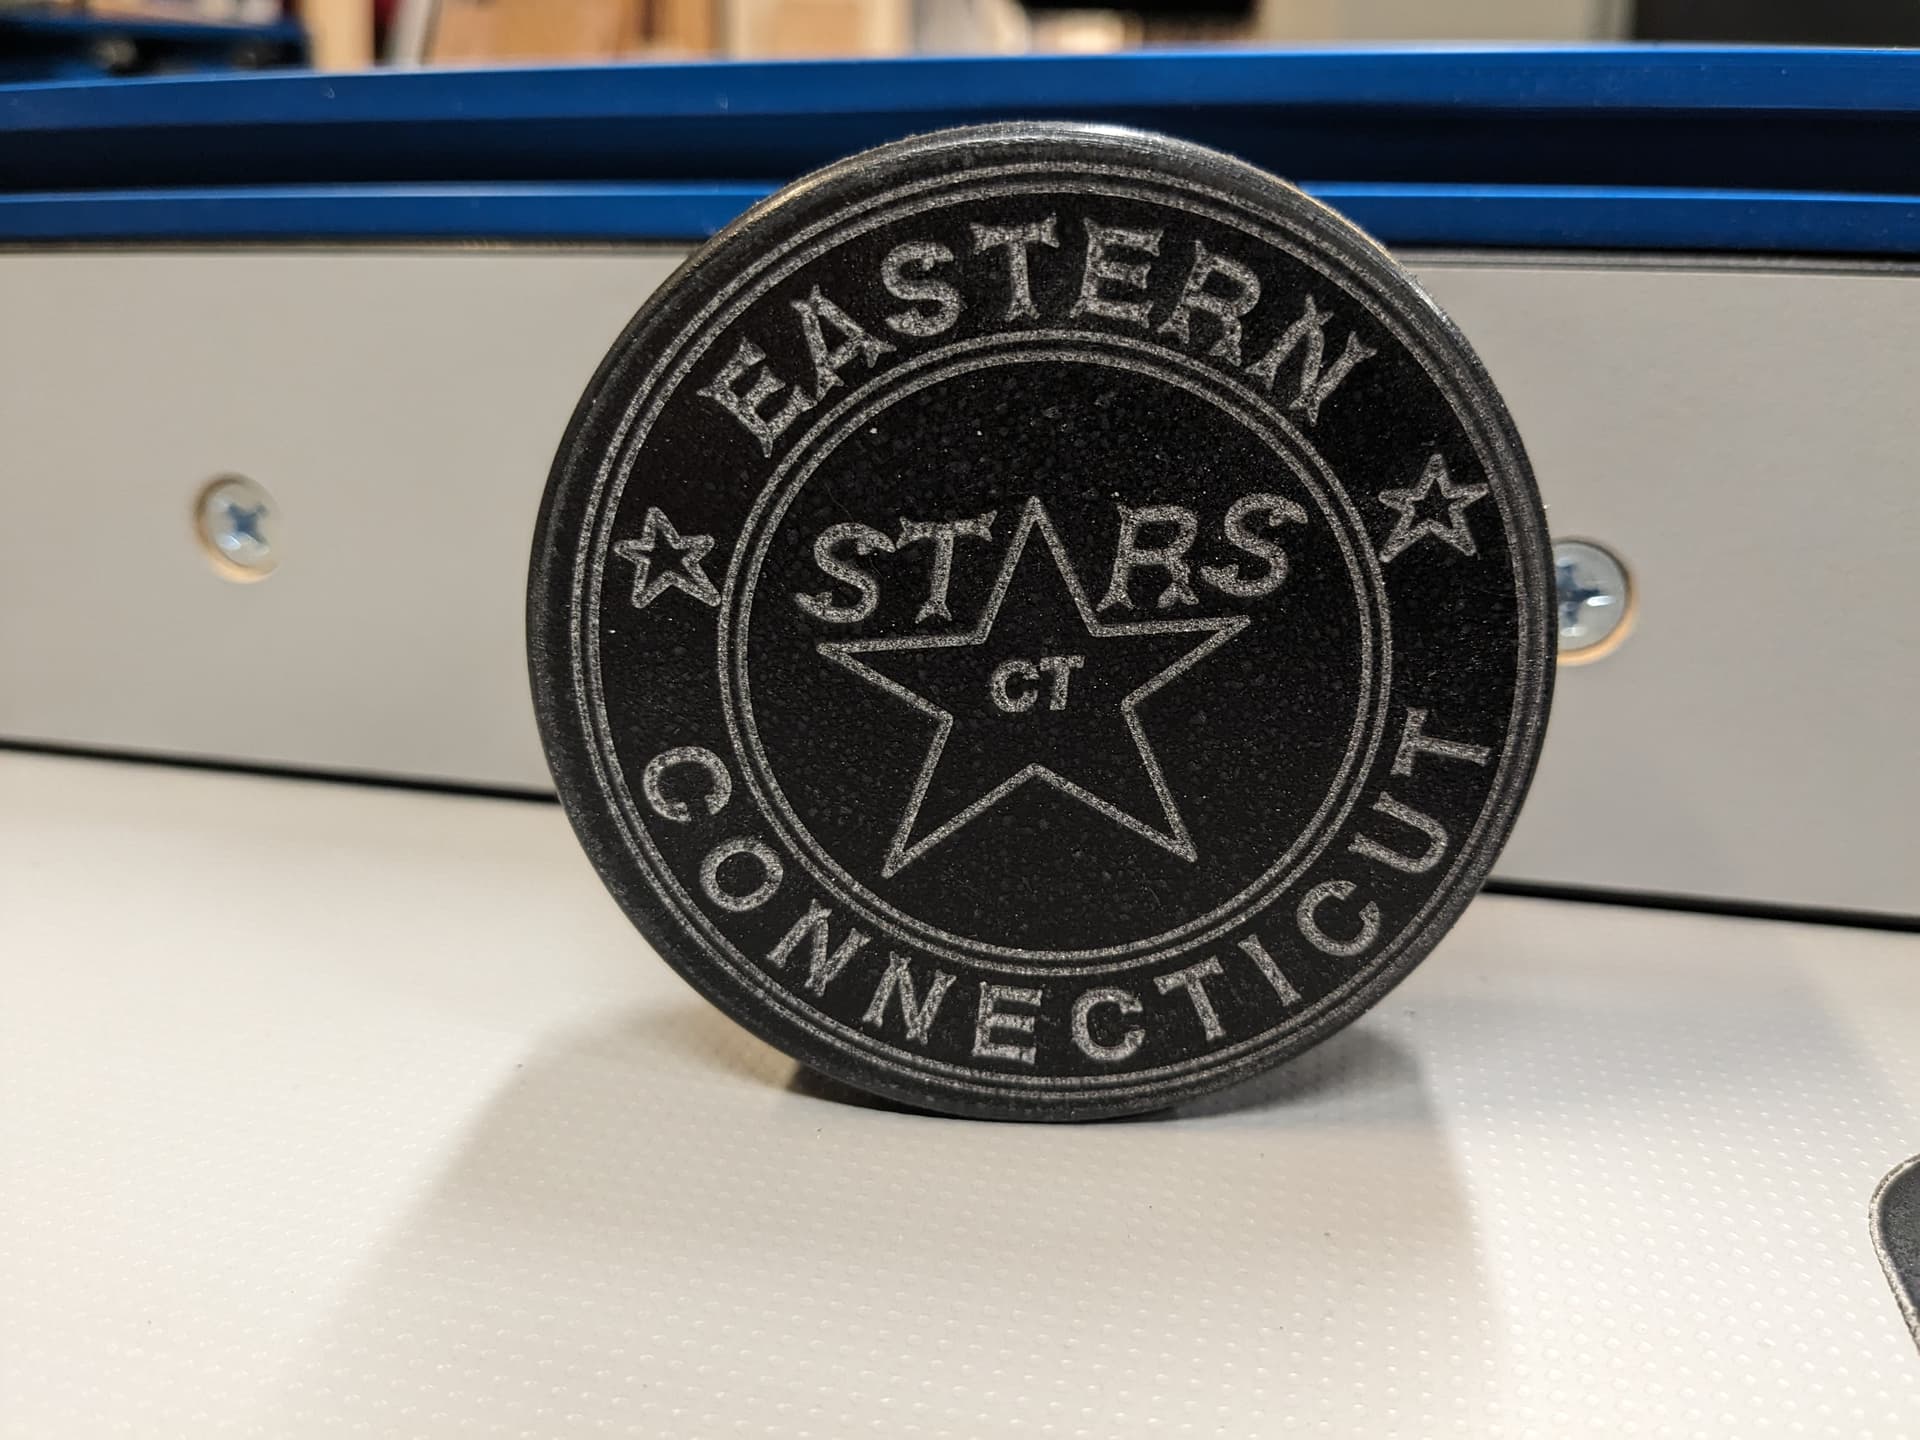
I made progress in quality and repeatability engraving the pucks.
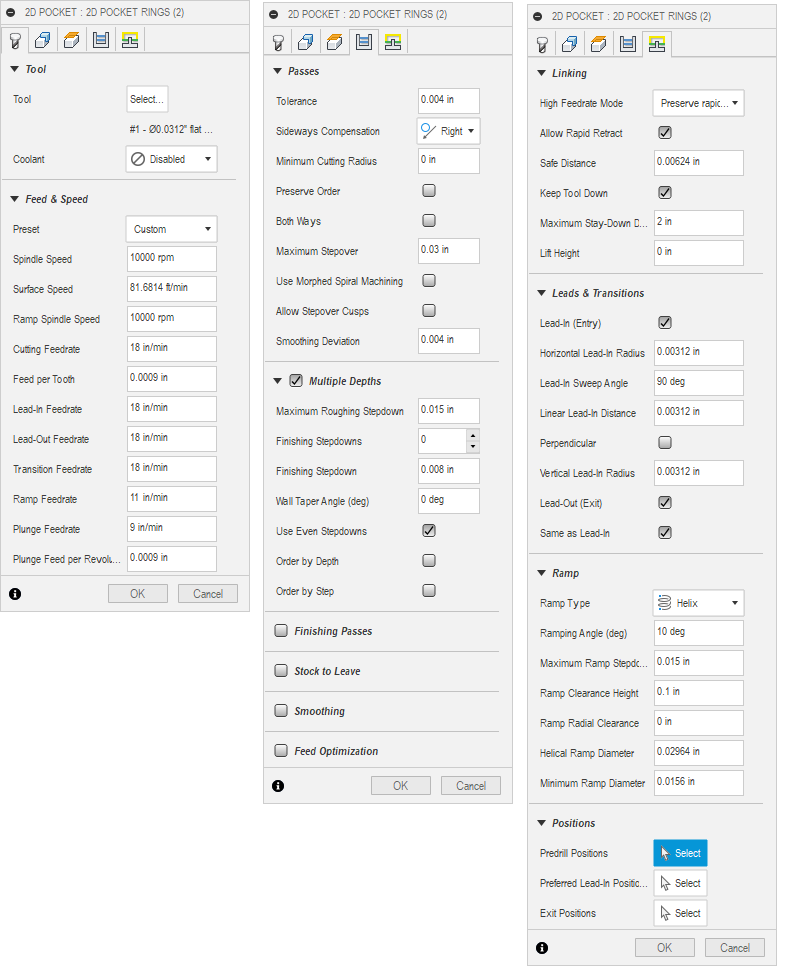
In short I used a Harvey 2 flute bit #957631, this was after buying a single flute bit, asking a question and finding the single flute will not plunge. Oops.
I found this article understandable. The simple examples helped.
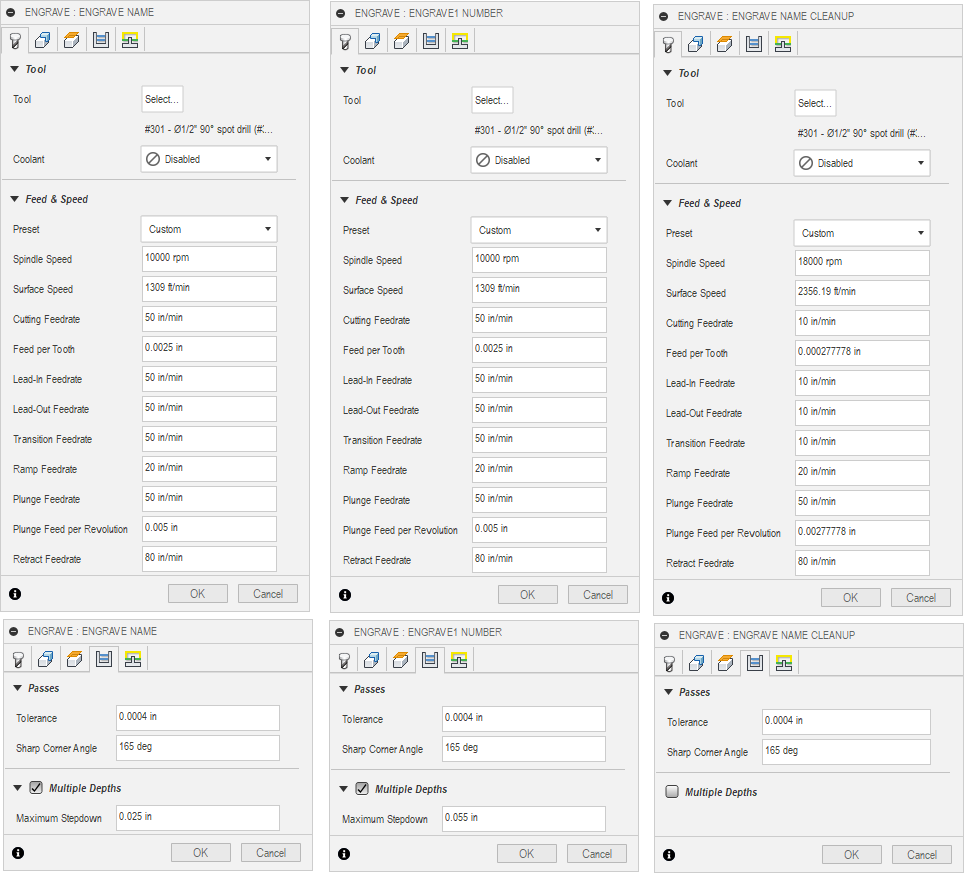
The Harvey tech Dan was very informative. He sent these recommendations ( with appropriate disclaimers ). So I used the following parameters to make the Tool path in Fusion
The runtime is 19 minutes with a few minutes of easy dental work.
The “chips” were strings of material that largely got sucked up. The bit does collect material at times. The material would work it’s way up away from the cutting action.
The process of clearing debris was minimal except for a few things.
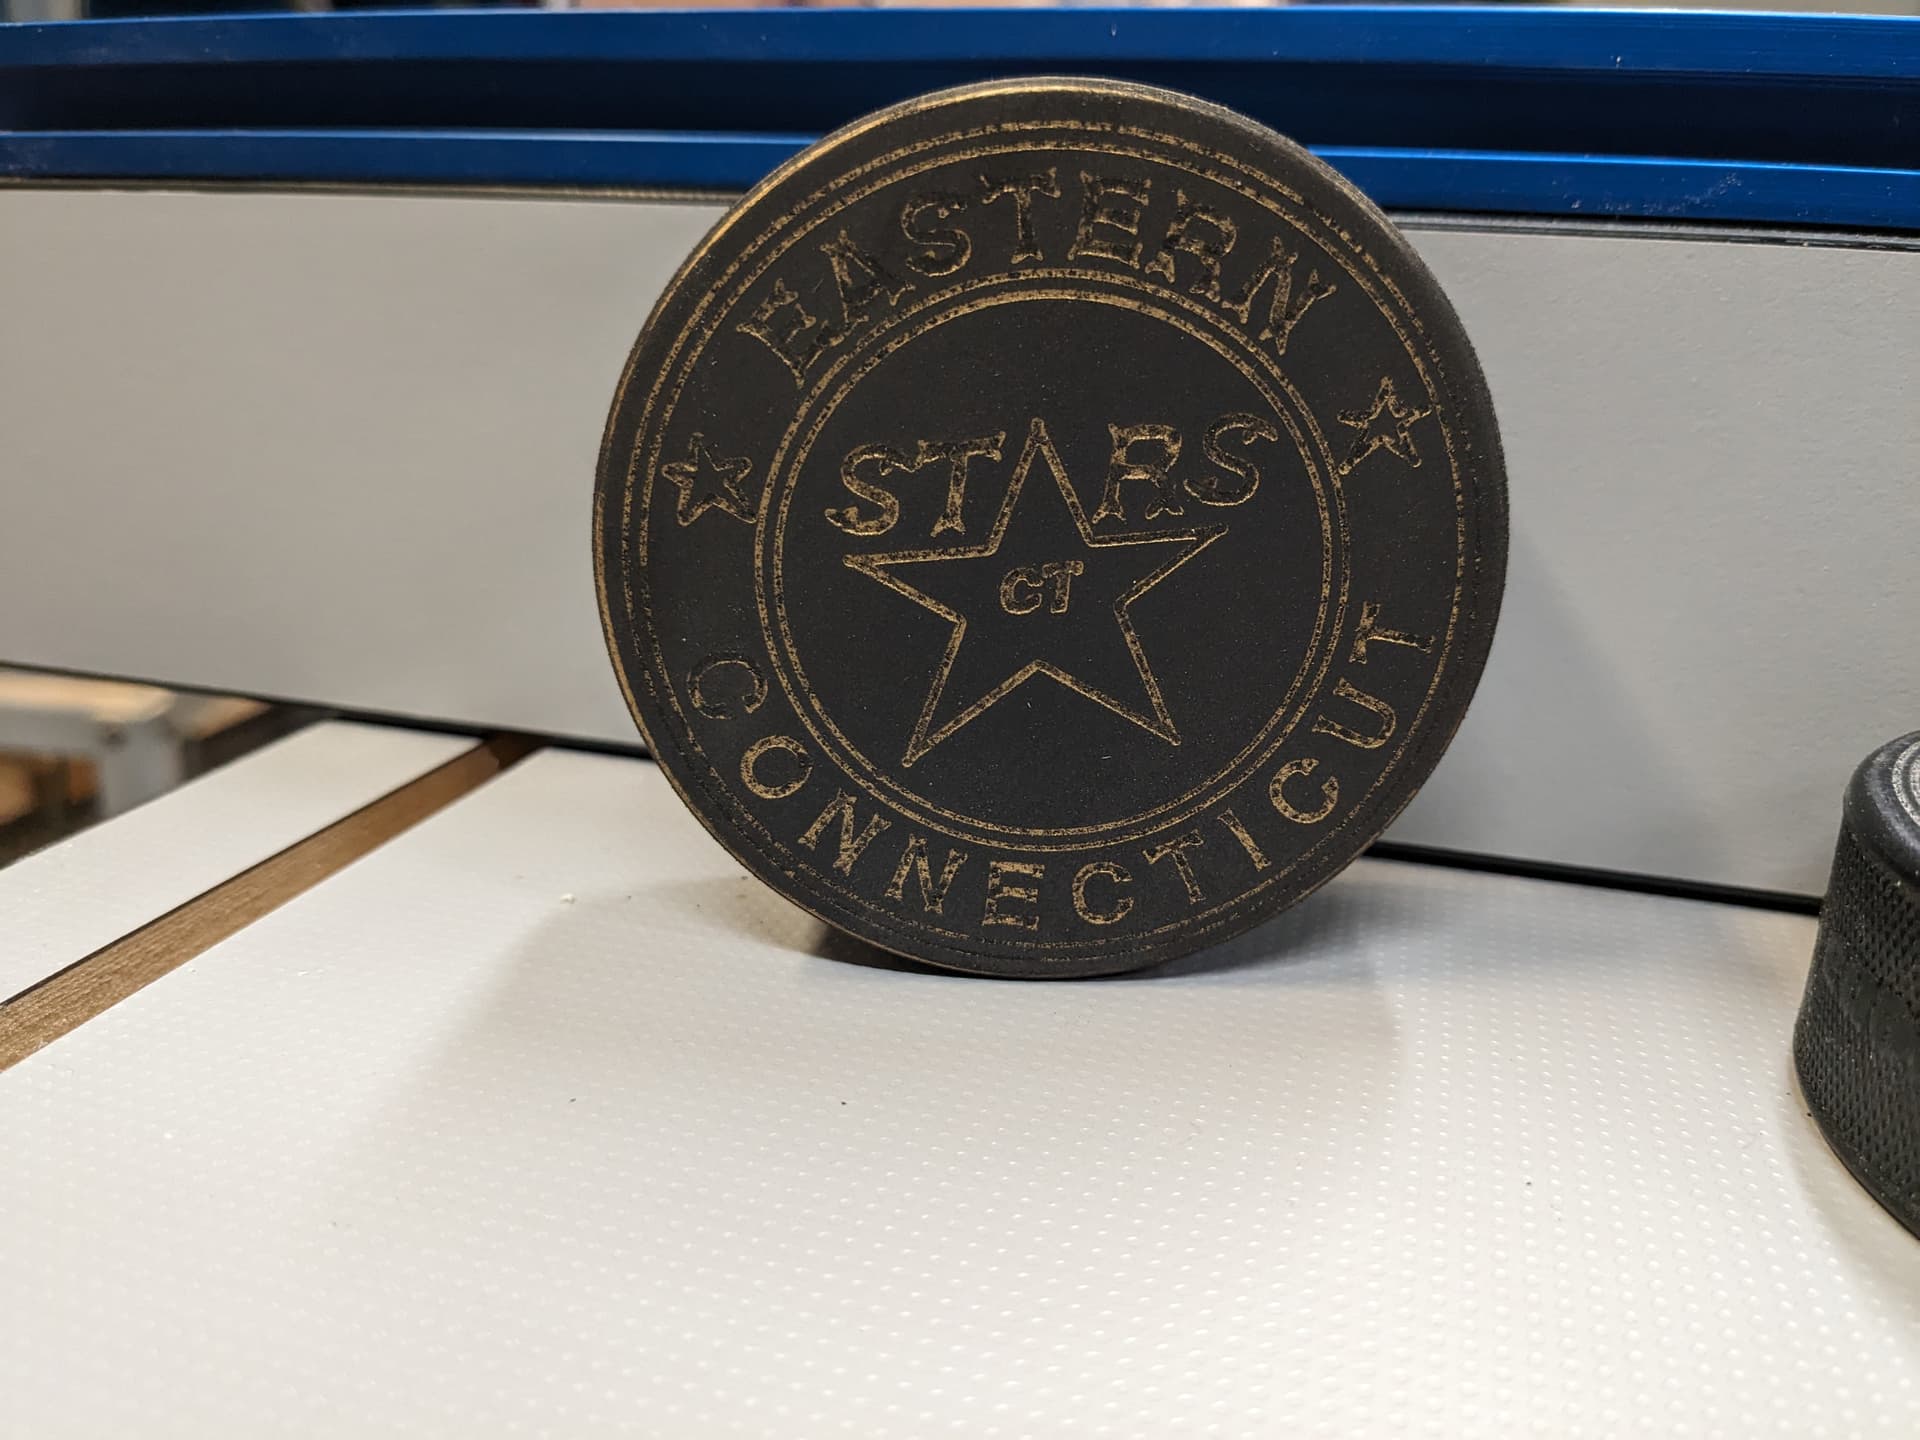
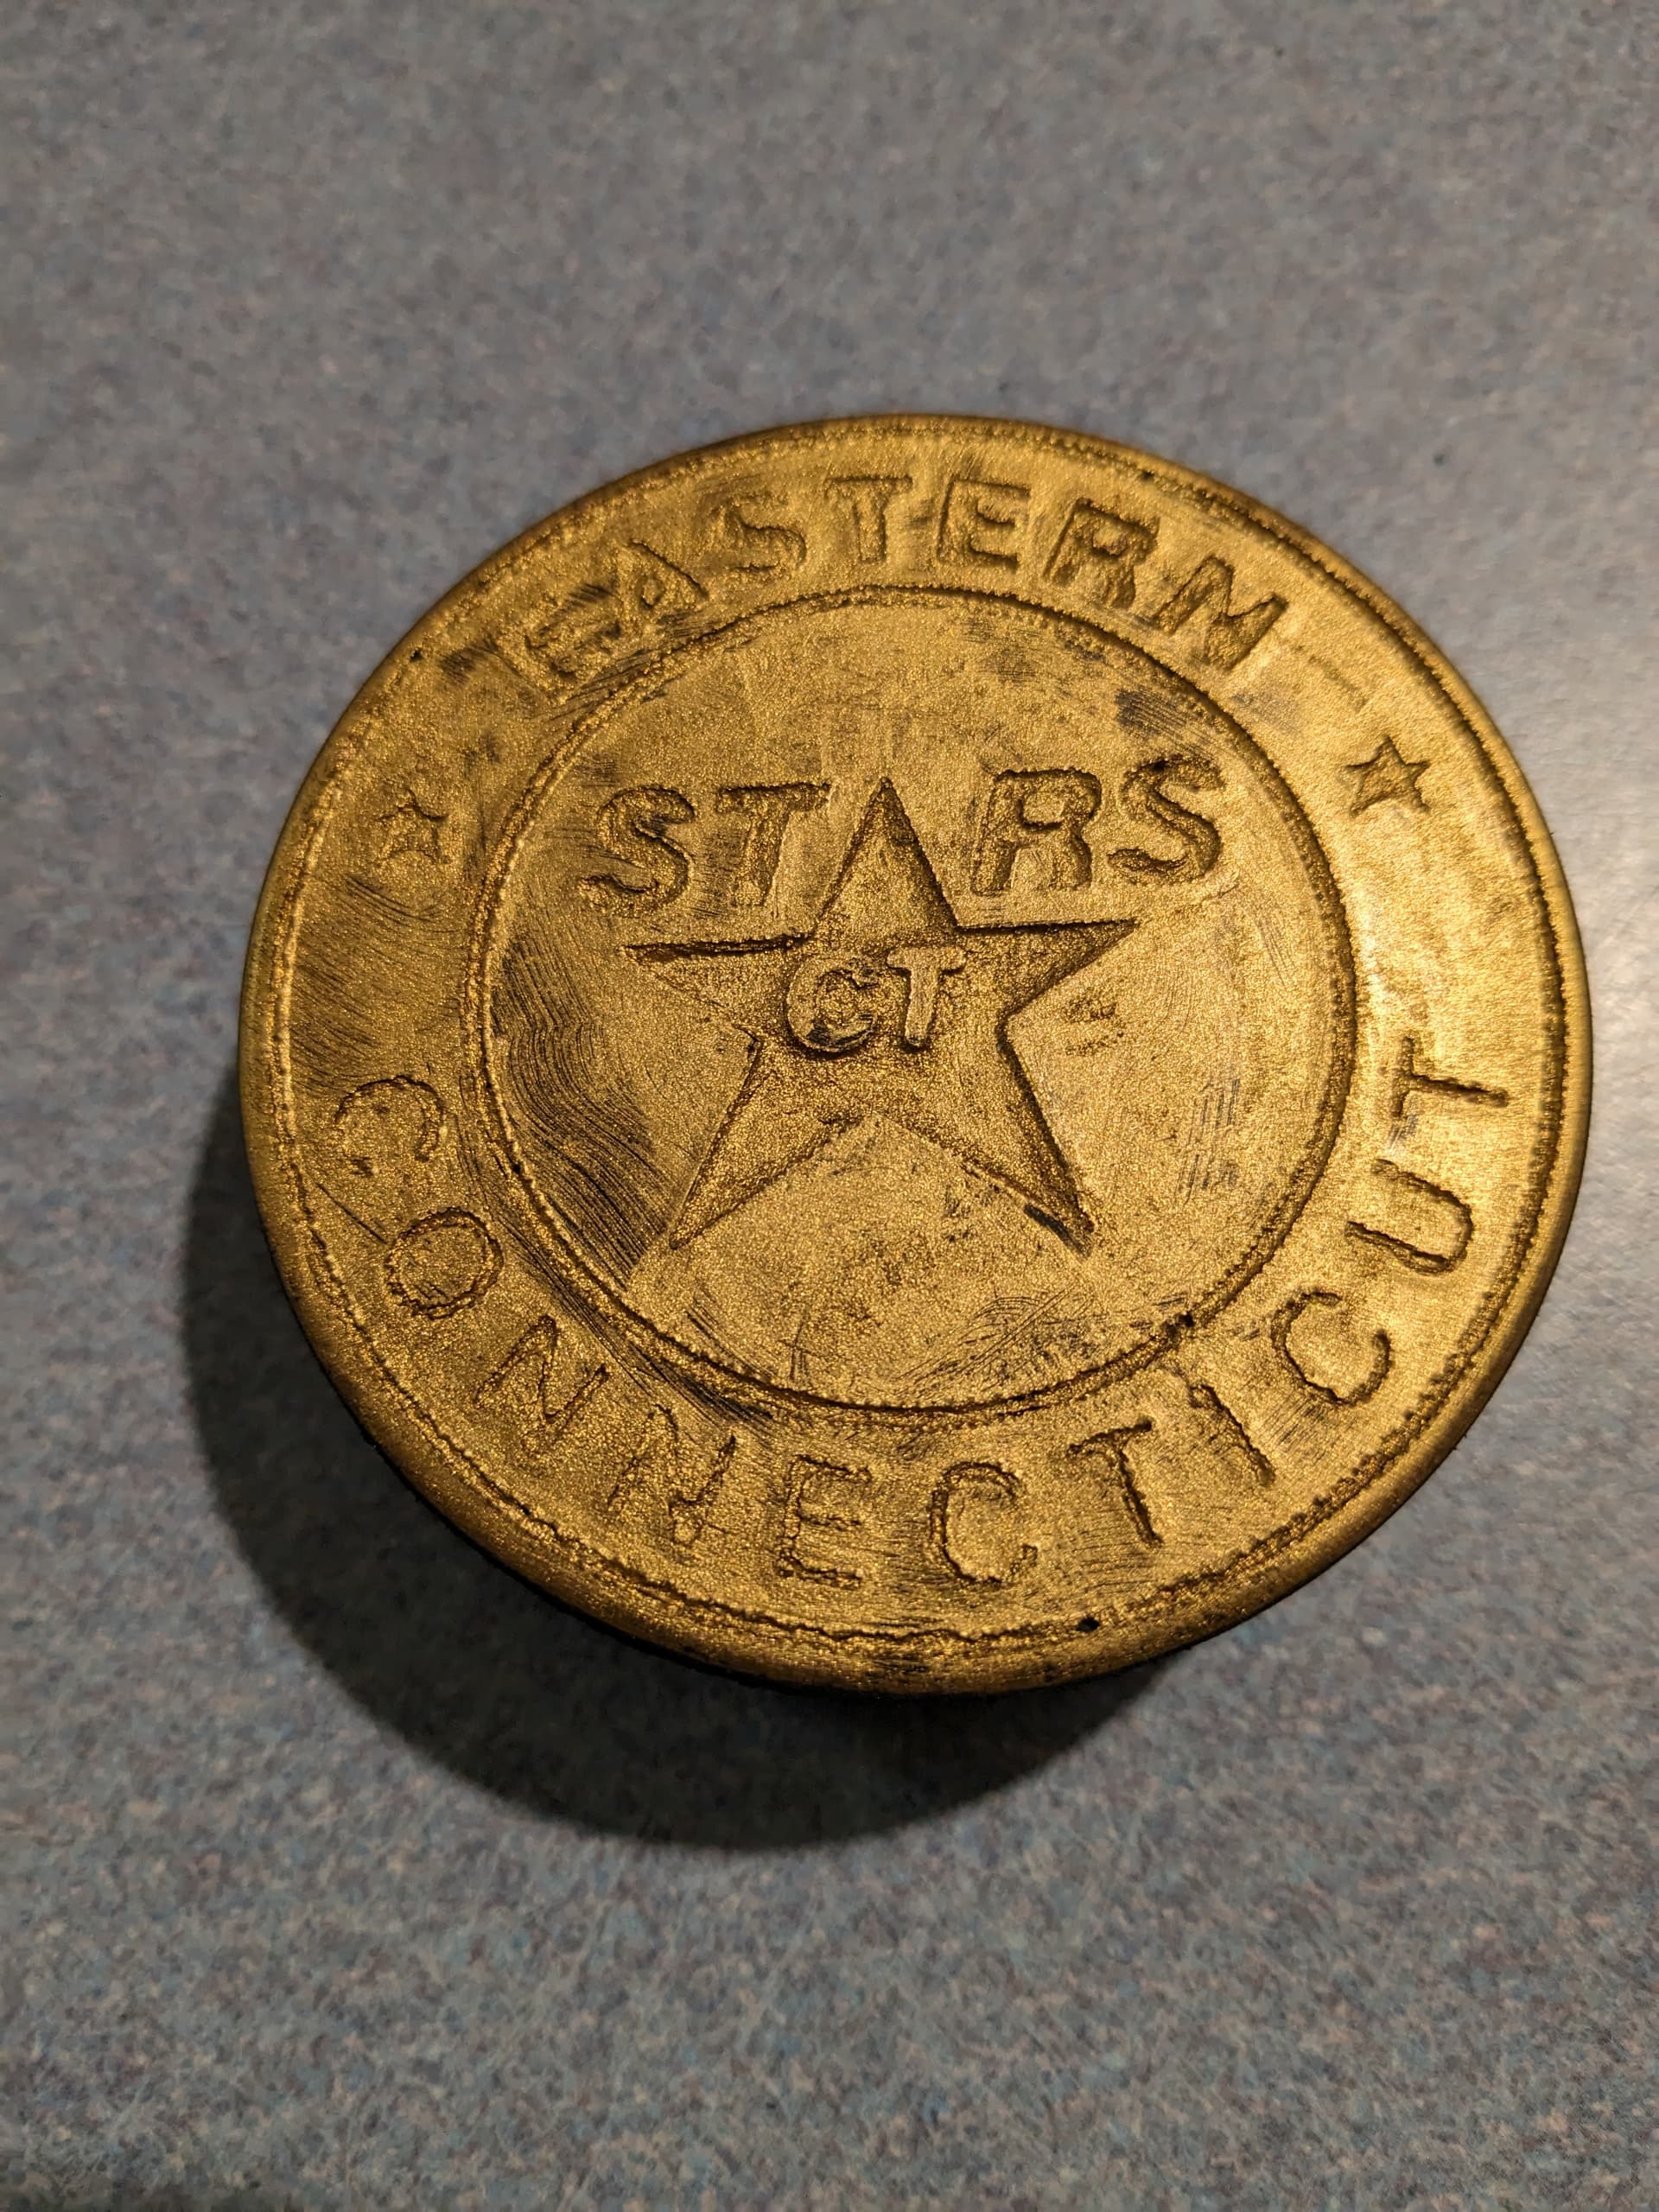
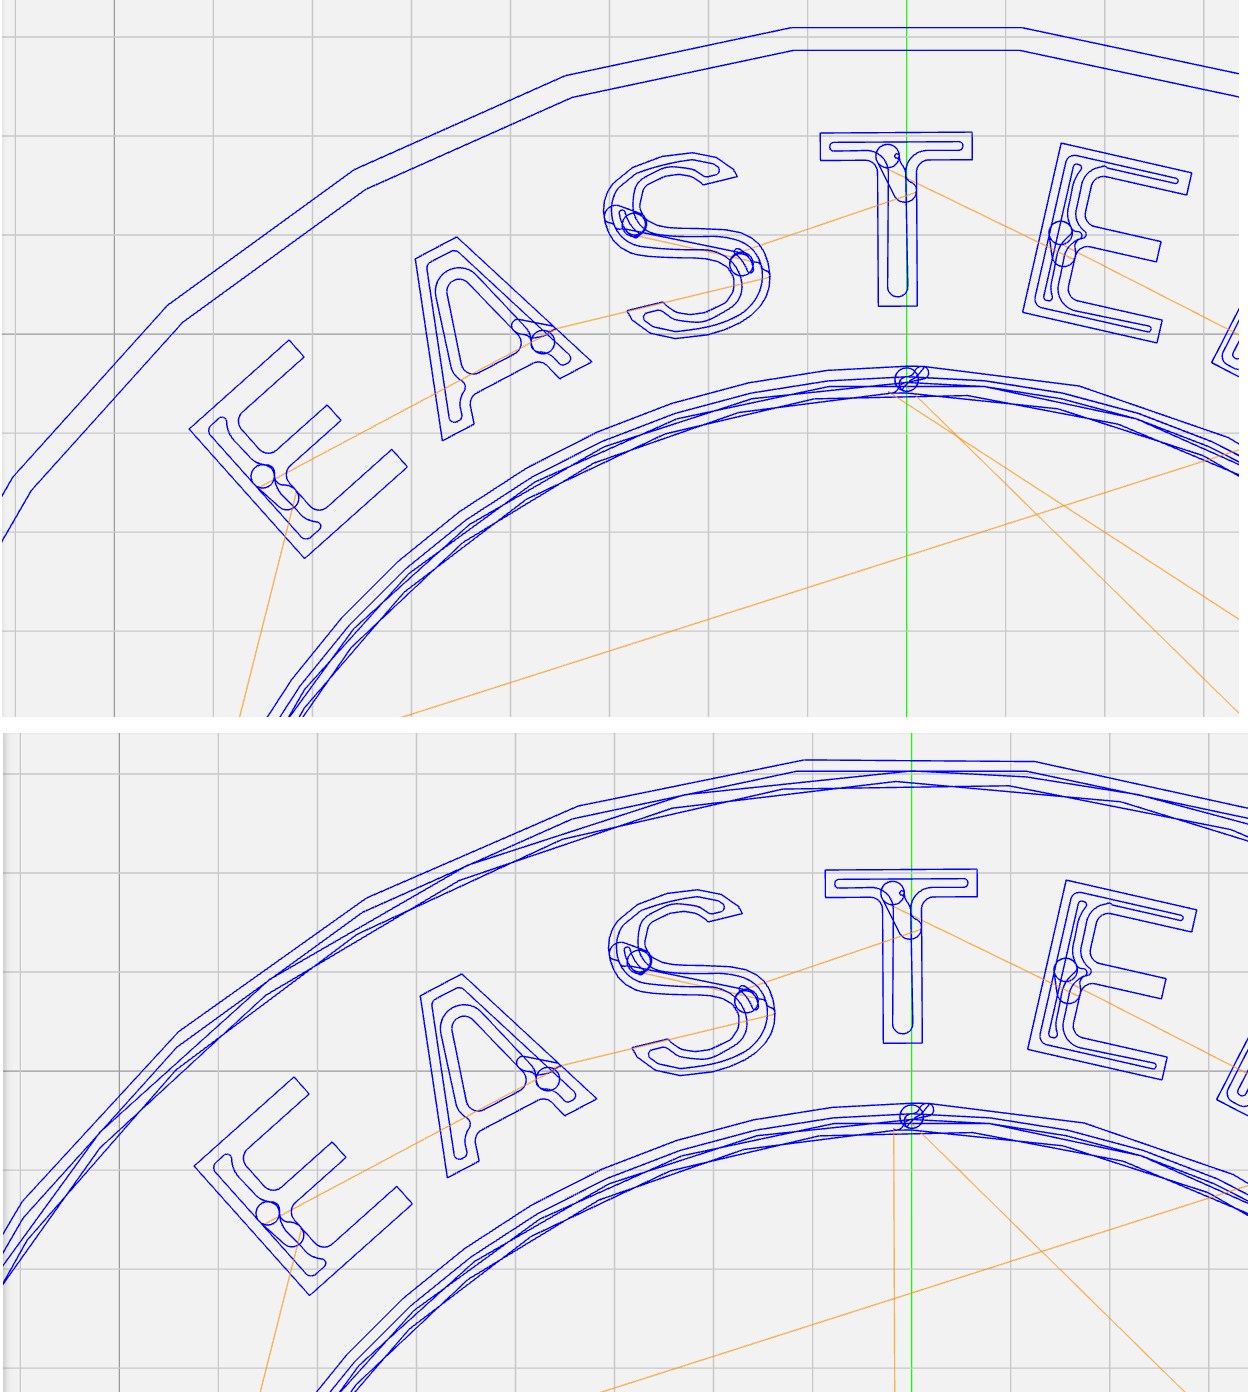
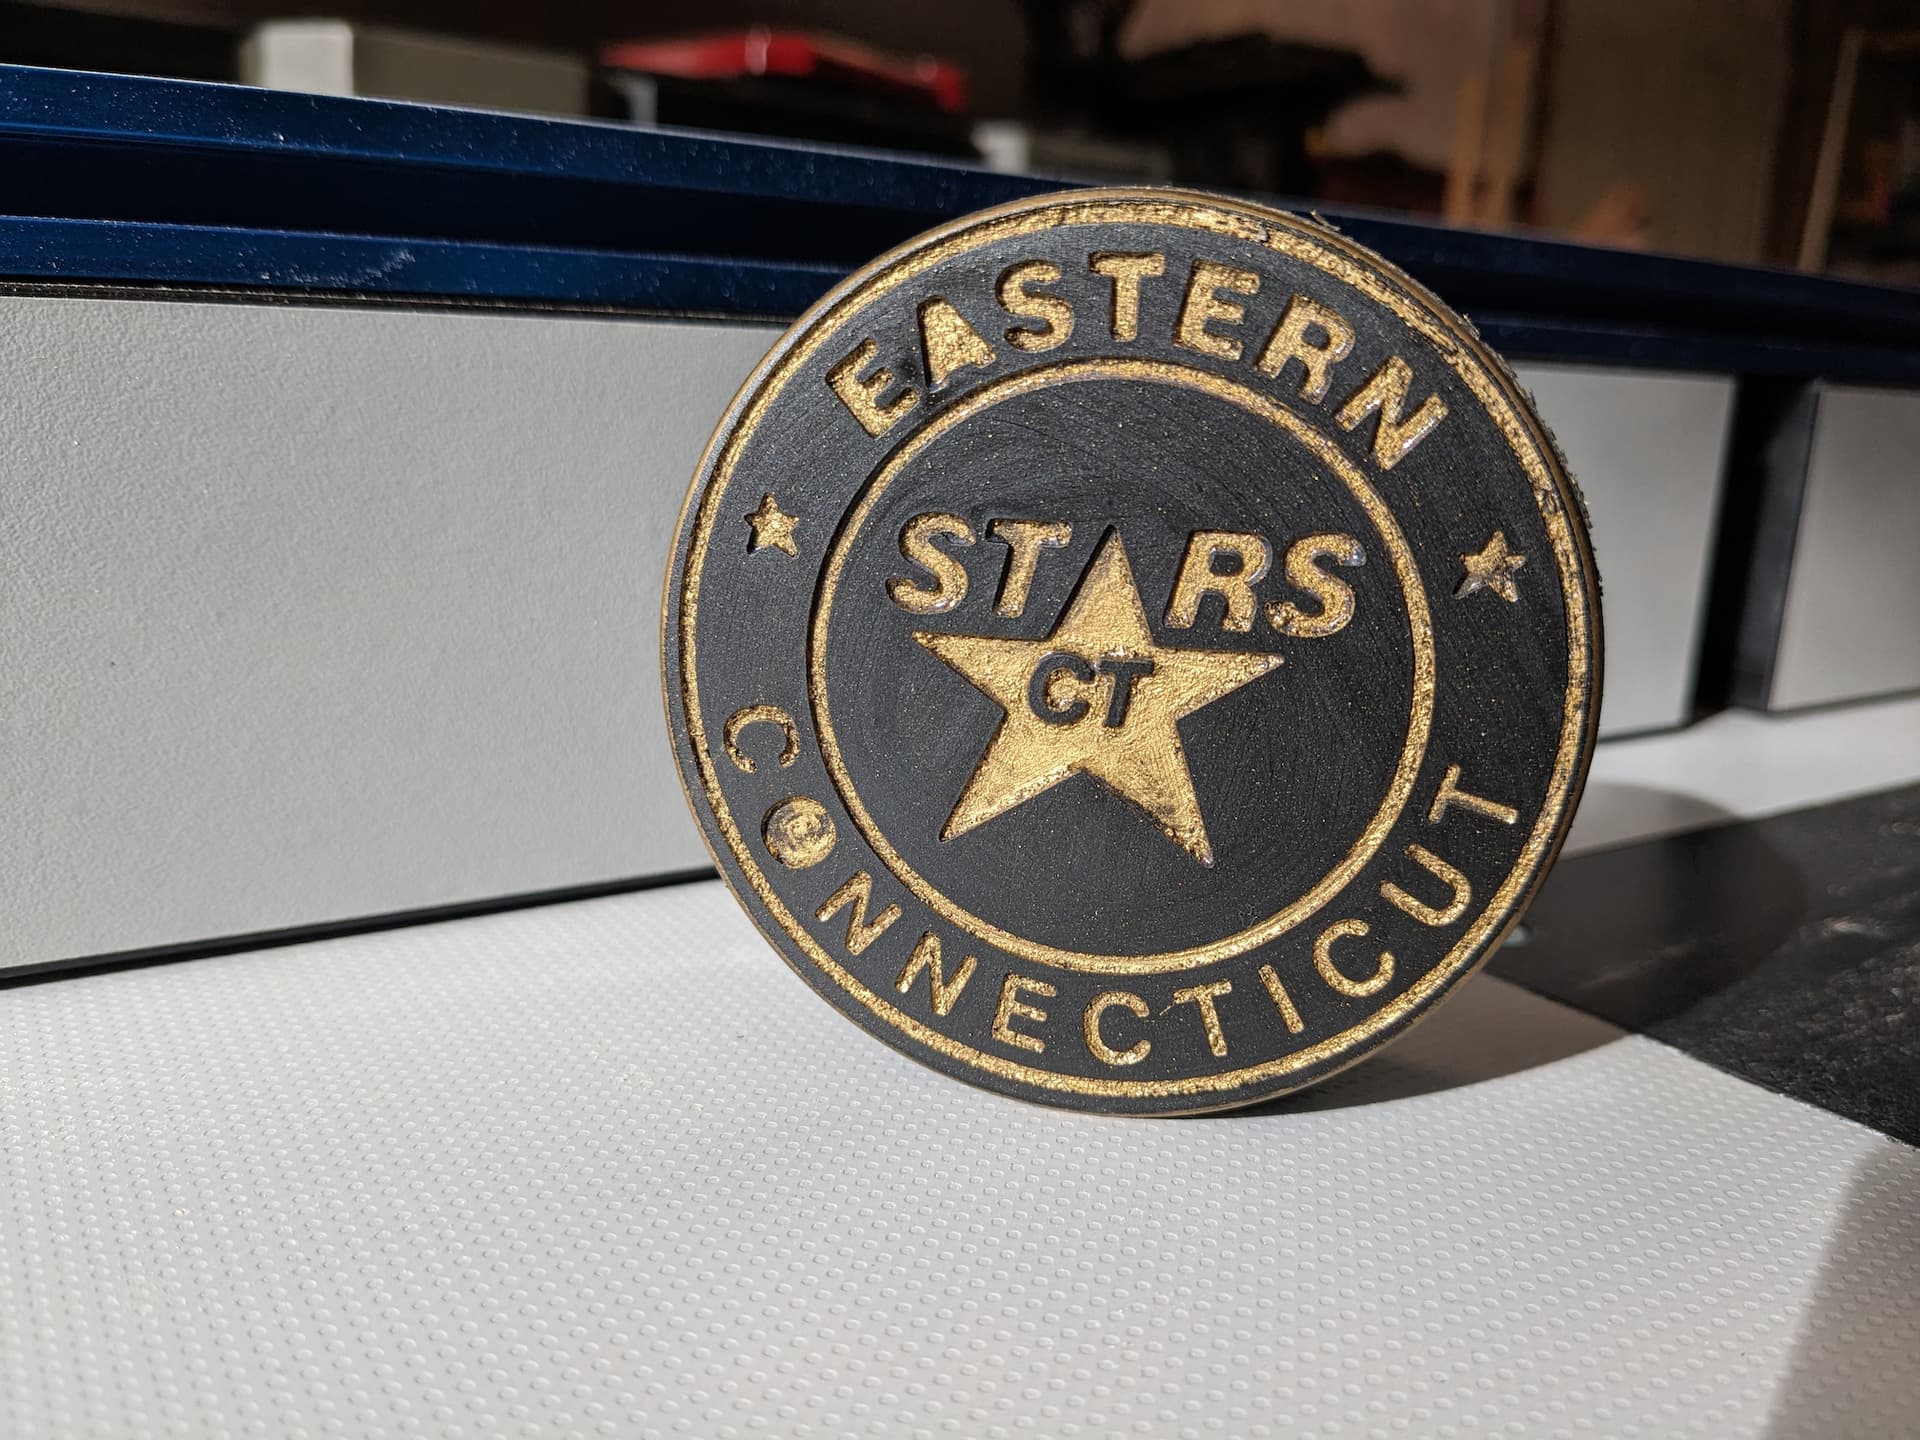
The outer ring did not clear at all and and the first “E” in EASTERN is a problem.
NOTE: Do the dental work when there are hot off the press. I just did 5 that had cooled and the effort was significantly more.
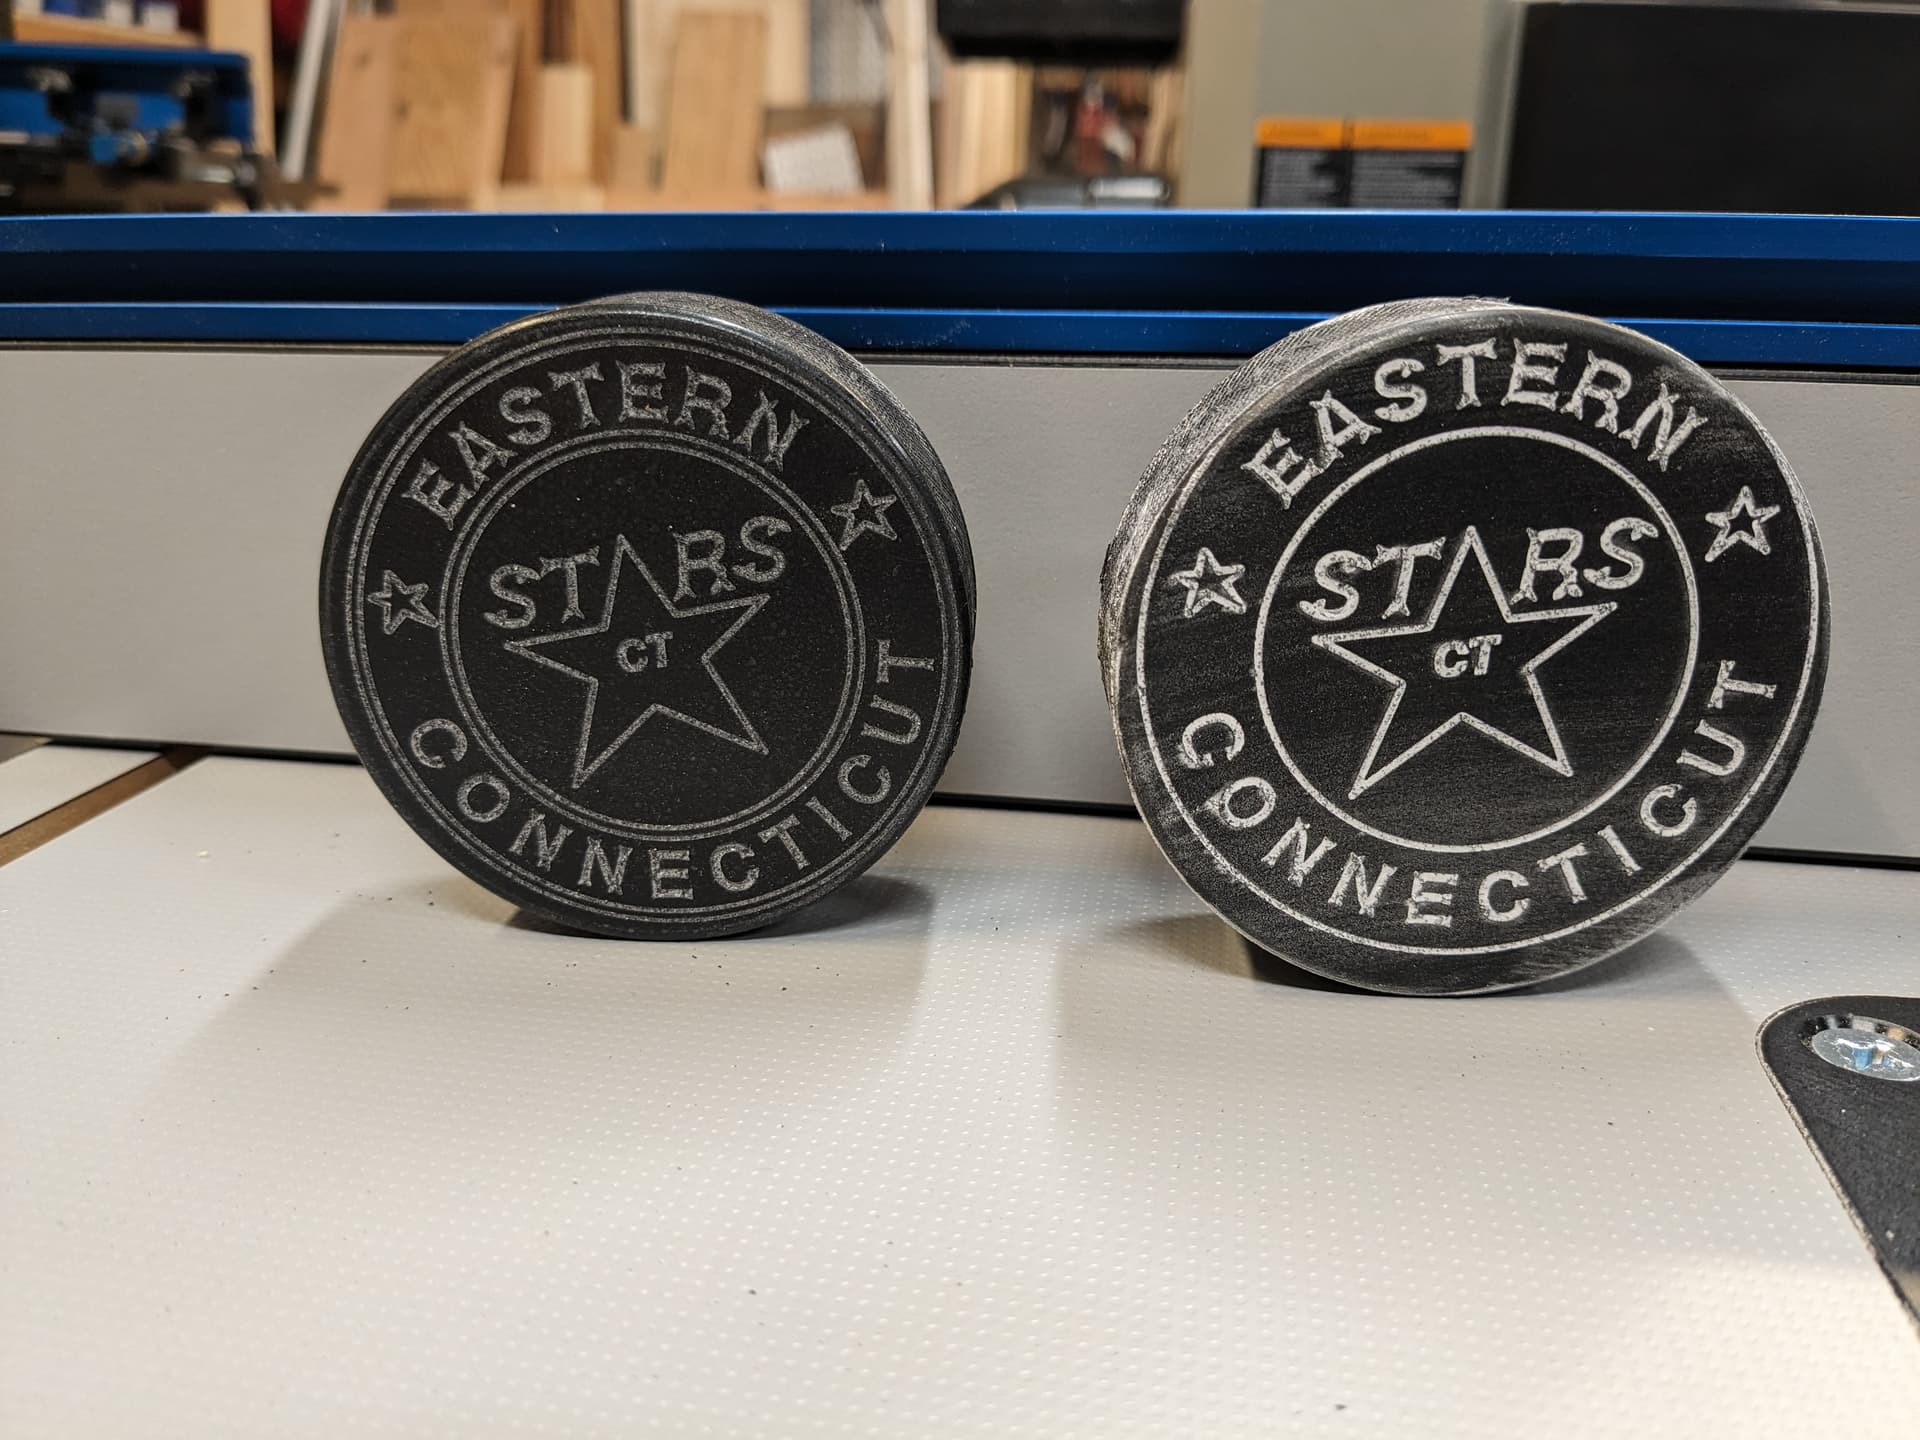
The solution for the outer ring was to increase groove width so it took three paths to clear the area.
Here are the examples. I fixed the outer ring, not the “E”. You can see the path difference in ncviewer . You can also see the other E has a better path . No clue.
My conclusion is to have features more than 2 tool diameters. This also removes most flash issues.
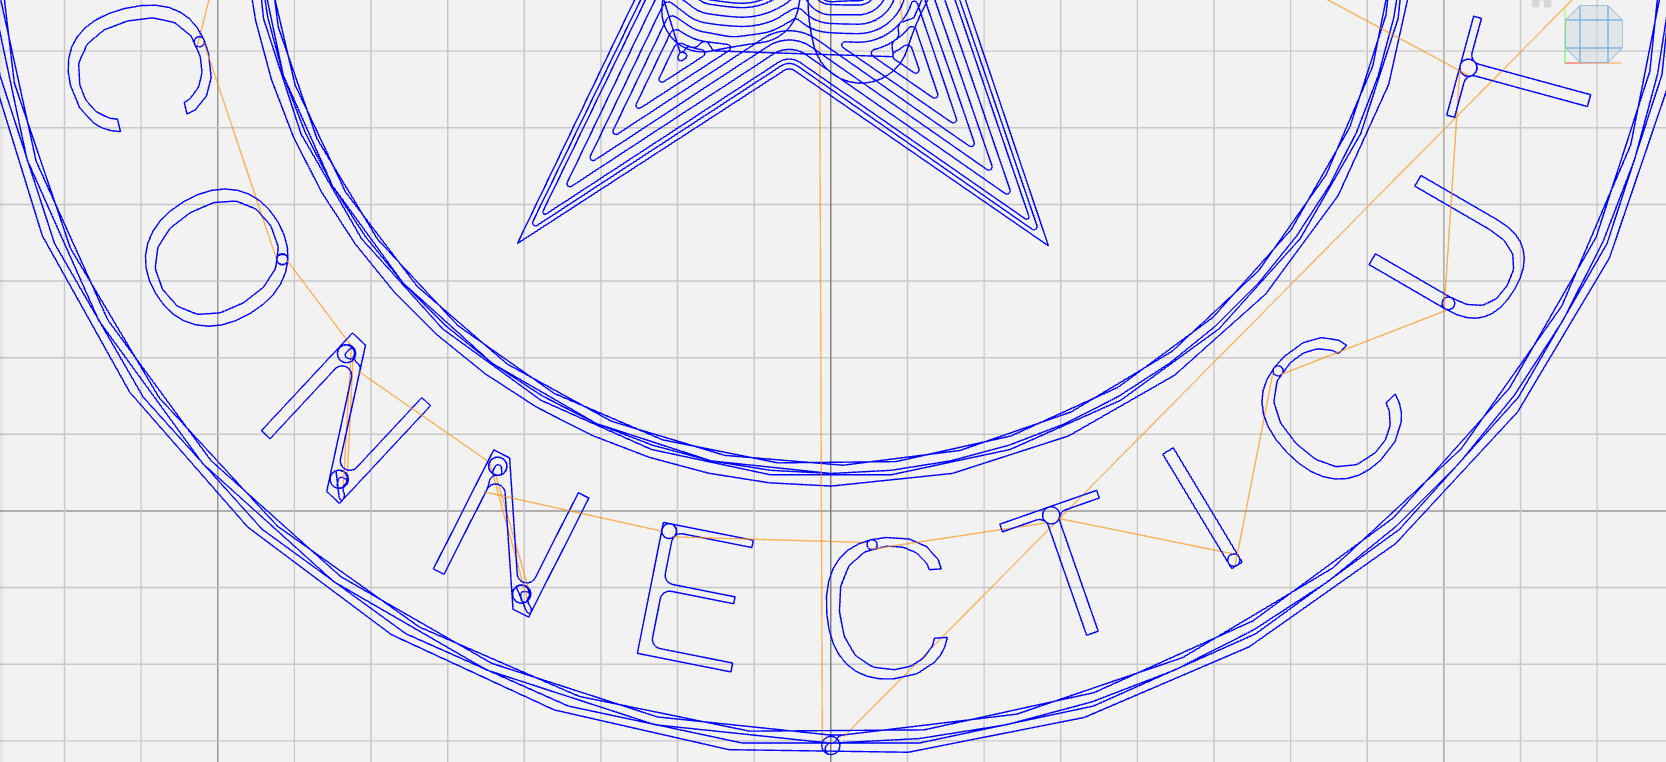
This text also requires dental work and some flash issues . Note the single pass paths.
Using the #301 90 deg bit, I was able to get good Vcarve cut using a chipload of .0025 ( per some acrylic posts ) 10K rpm @ 50 ipm .
The max depth in the Name is 0.037 . The max depth in the Number is 0.106
I found it worked to cut the depth in half to get a good bite. This left the surface finish better than a single pass or lighter passes. There was still rough surface, some debris hanging on the sides and the bottom of the groove.
For cleaning runs, I tried increasing IPM runs, but that just hurt the surface finish as it when faster.
So I used 18K and 10 IPM and it cleaned and fixed ( melted ) the sides nicely. Sweet ! I may go higher RPM.
There still is some light wire brush/dental work, but not bad. The surface sealing is noticeable.
I tried a hair dryer to melt the material into the grooves, which did not work as well as expected.
The rubber takes the material quickly. This means that sanding may remove detail even when careful.
So I tried petroleum jelly on the rubber ( high surfaces ) first, then added the Rub and Buff.
That allowed me to wipe the high surfaces of %70 of the material, but it still left a sheen of material on the rubber.
I tried hand sanding with 320 grit sand paper which did not work, 220 grit worked better.
I ended up using a pad sander with 220 grit with light pressure. The rubber dust goes into the grooves, so you need to vacuum that out ( looks like you lost detail ).
I did not have the patience to let it dry completely before sanding which made some of the rubber dust to stick to the Rub and Buff. Damn lack of patience !!!
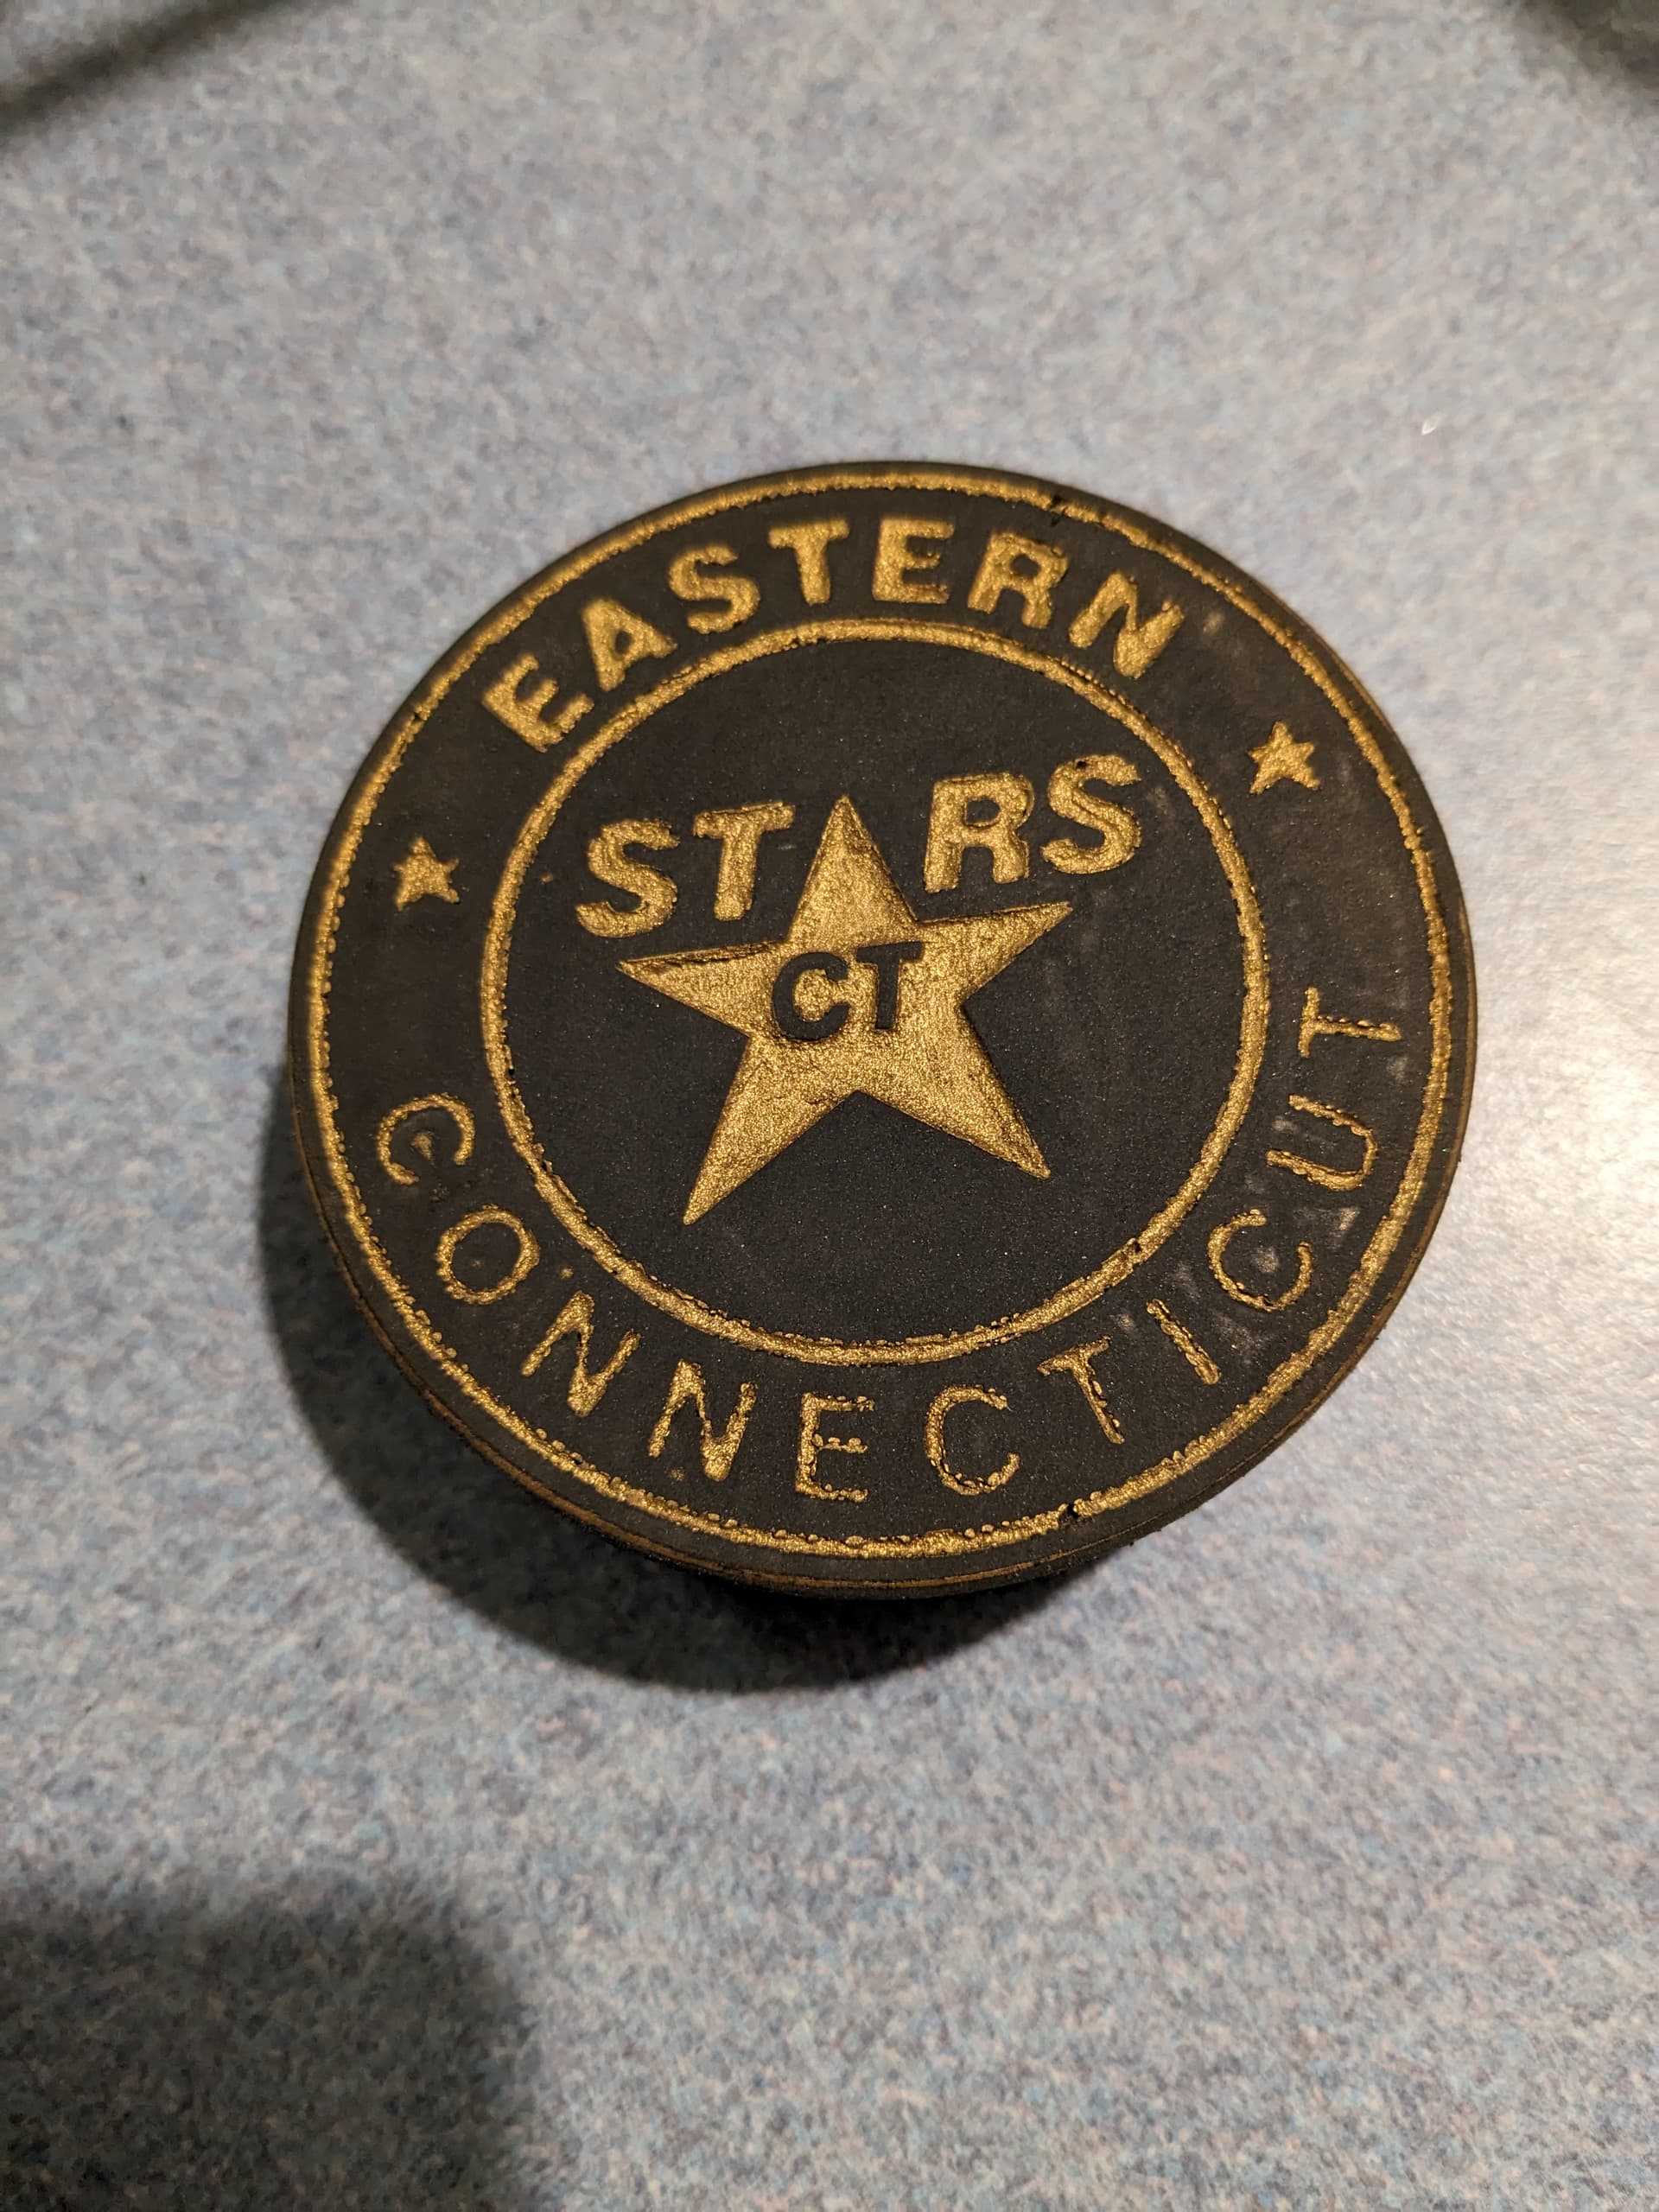
I added a single coat of PolyAcrylic clear satin which shined up the sanded surfaces.
Now the complete process is set ( unless I change my mind again ).
I have a lot of hours left to complete the project, but I am satisfied with the results. The thrill is almost over, now it’s time to slug it out.
.
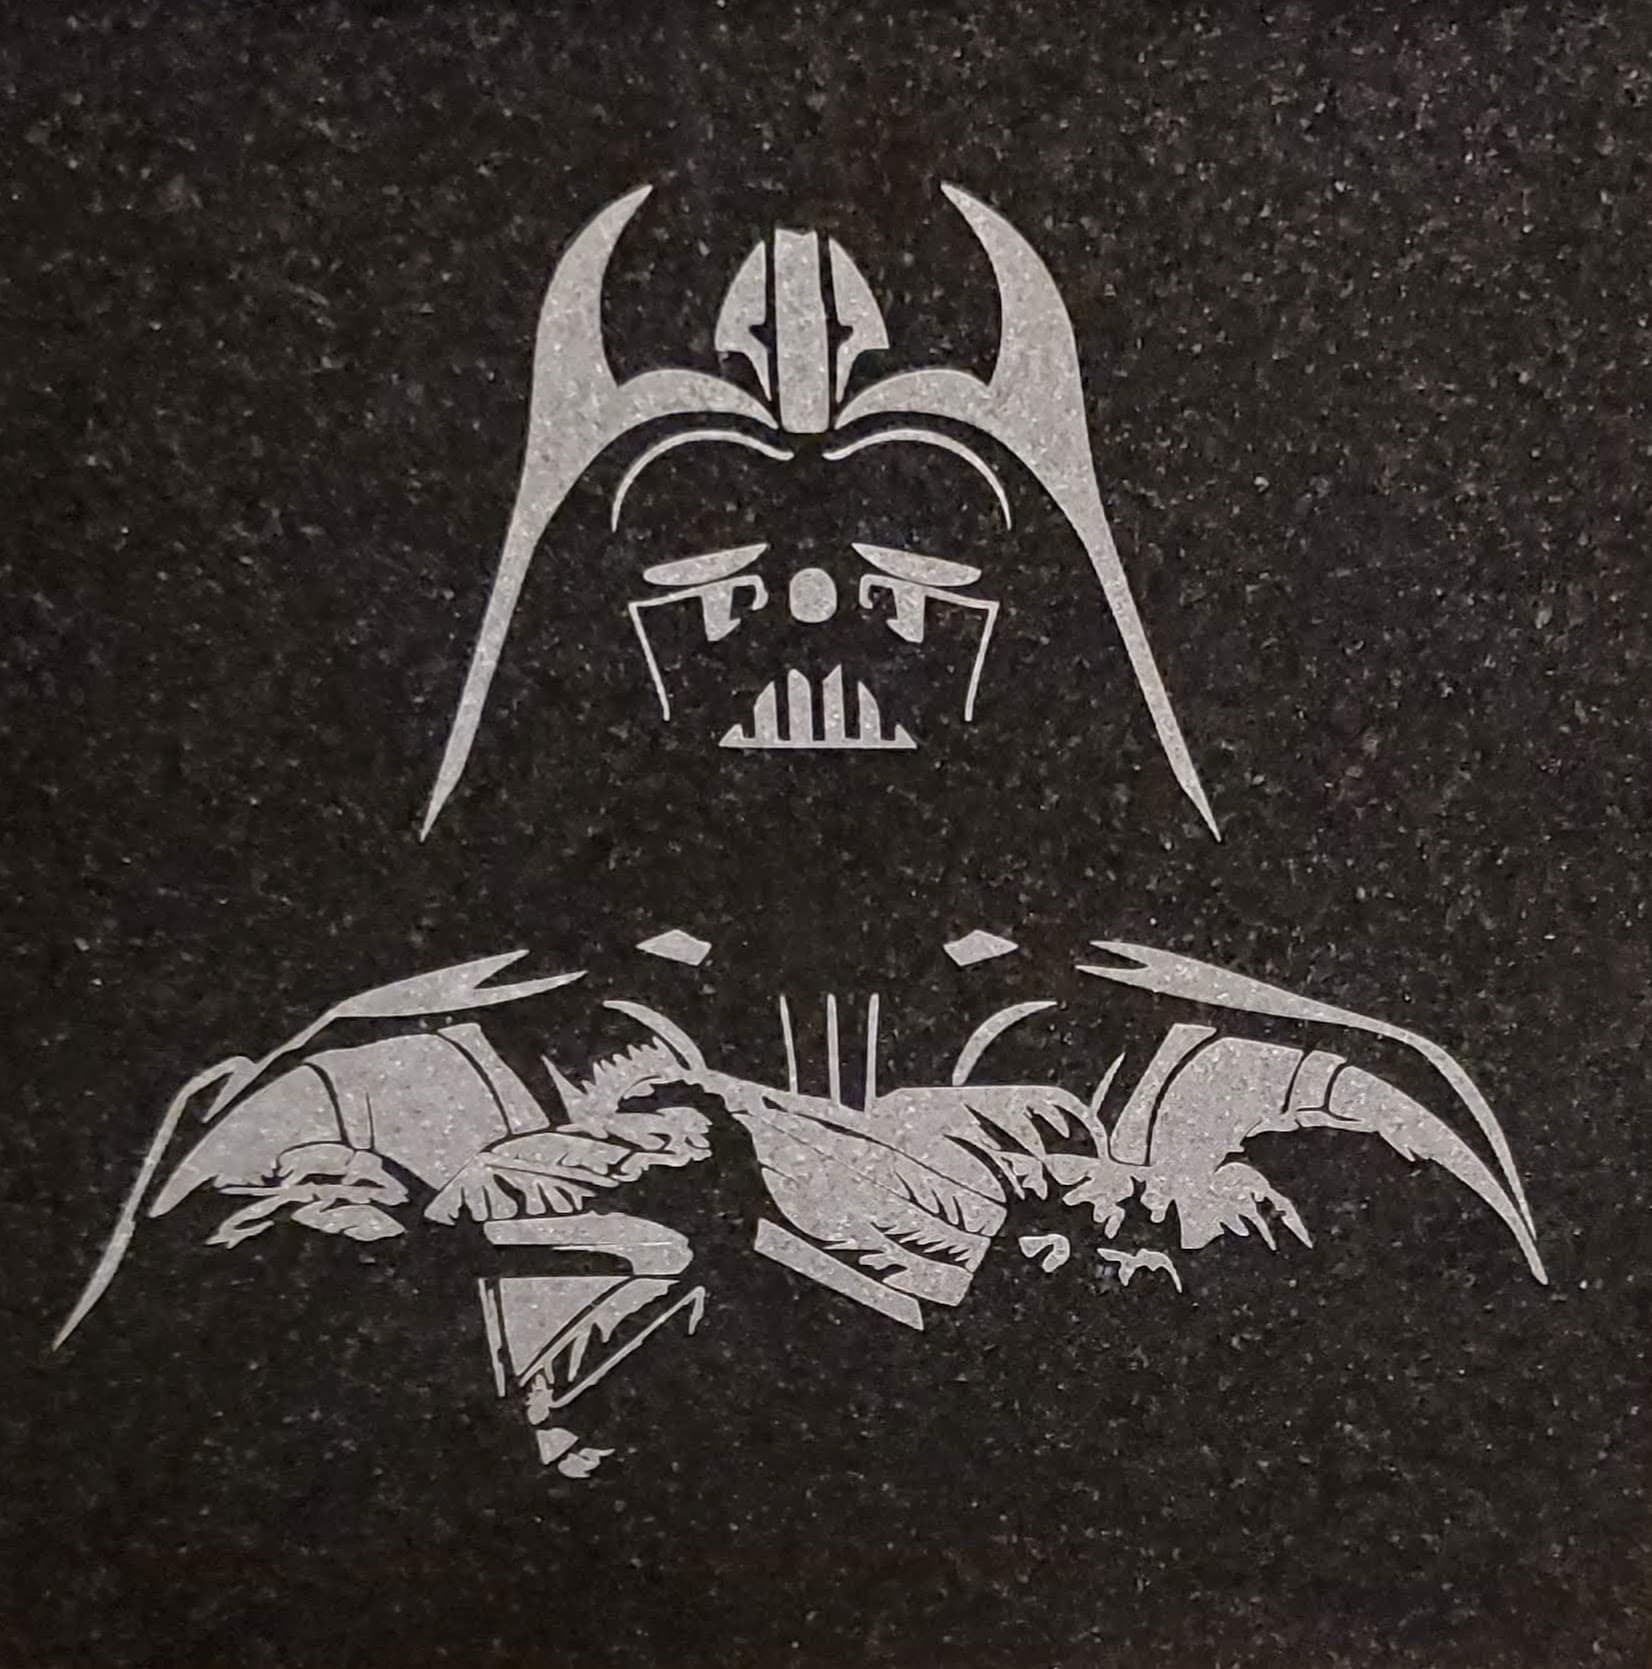
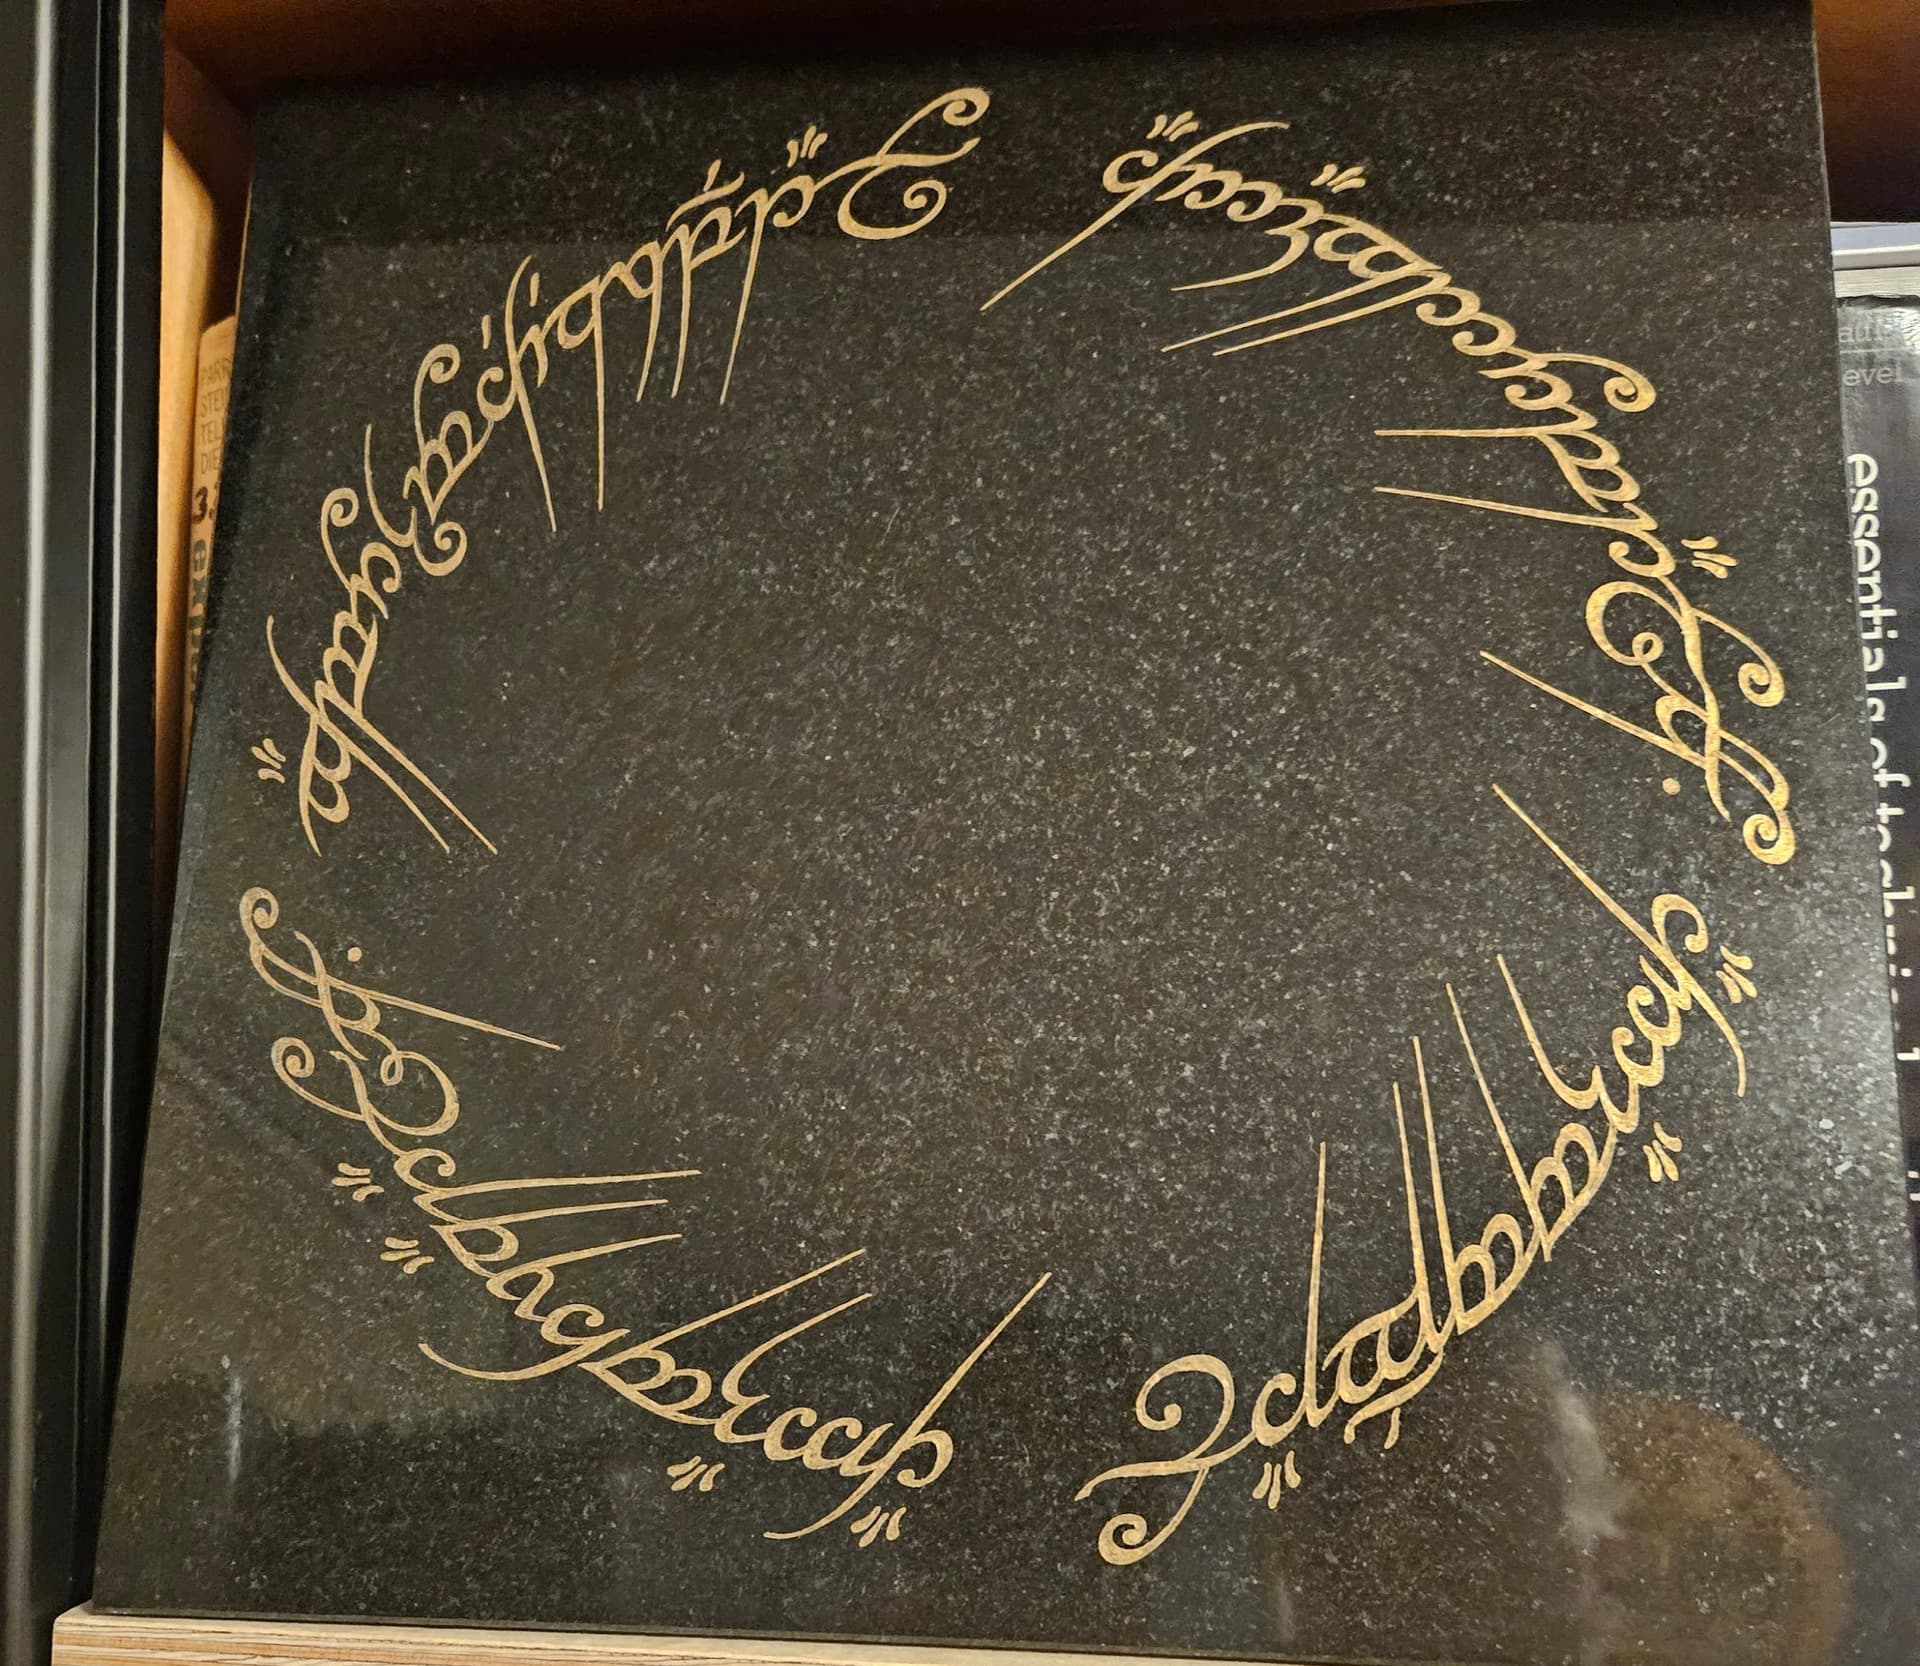
On projects where I use rub-n-buff I thin it just a bit with mineral spirits. This helps it get into diamond drag engravings on granite and to easily spread with a rubber roller (Brayer) for coloring only the tops of v-carved and painted items. The surface of the granite cleaned up well with a rag dampened with mineral spirits.
Those are beautiful !!!
The next project after the pucks is Acrylic. I love the Granite material.
Thank you !!
I had not thought of mineral spirits to thin the Rub and Buff. I will try that.
Your grooves are much smaller that my cuts.
How dry is the R&B when you wipe the top surface off ?
Do you buff the surface by hand or a wheel ? .With what cloth ?
I found that R&B contracts a lot when dry. My grooves are HUGE compared to the Granite/Acrylic examples. I am trying a second layer right now.
Process change !
All my test pucks had been sanded to clean old millings, That added a lot of surface texture .
I decided against the petroleum jelly prep. Wiping the R&B embedded the flakes in the surface texture.
I had tried acetone to clean but it left a cloud which was not hard to remove in hindsight.
I didn’t have to sand the new milling runs. That should help.
I tried a few drying times to get the color to stay in the etching and still be able to get it off. This varied with temperature 15 minutes to an hour. Buffing was done by hand. I found I needed to use a smooth tightly woven cloth (old sheets). T-shirts and microfiber cloths would extract the color from the engravings. The times I let it dry too long (overnight) a dab of mineral spirits and great care would clean to flat surface, also a razor scrapper could remove the bulk of the rub-n-buff from the flat surface.
I also tried micro fiber and paper towels. That did not work well as it removed R&B from the grooves.
I will find an old sheet or my fabraholic wife will have something. Thanks
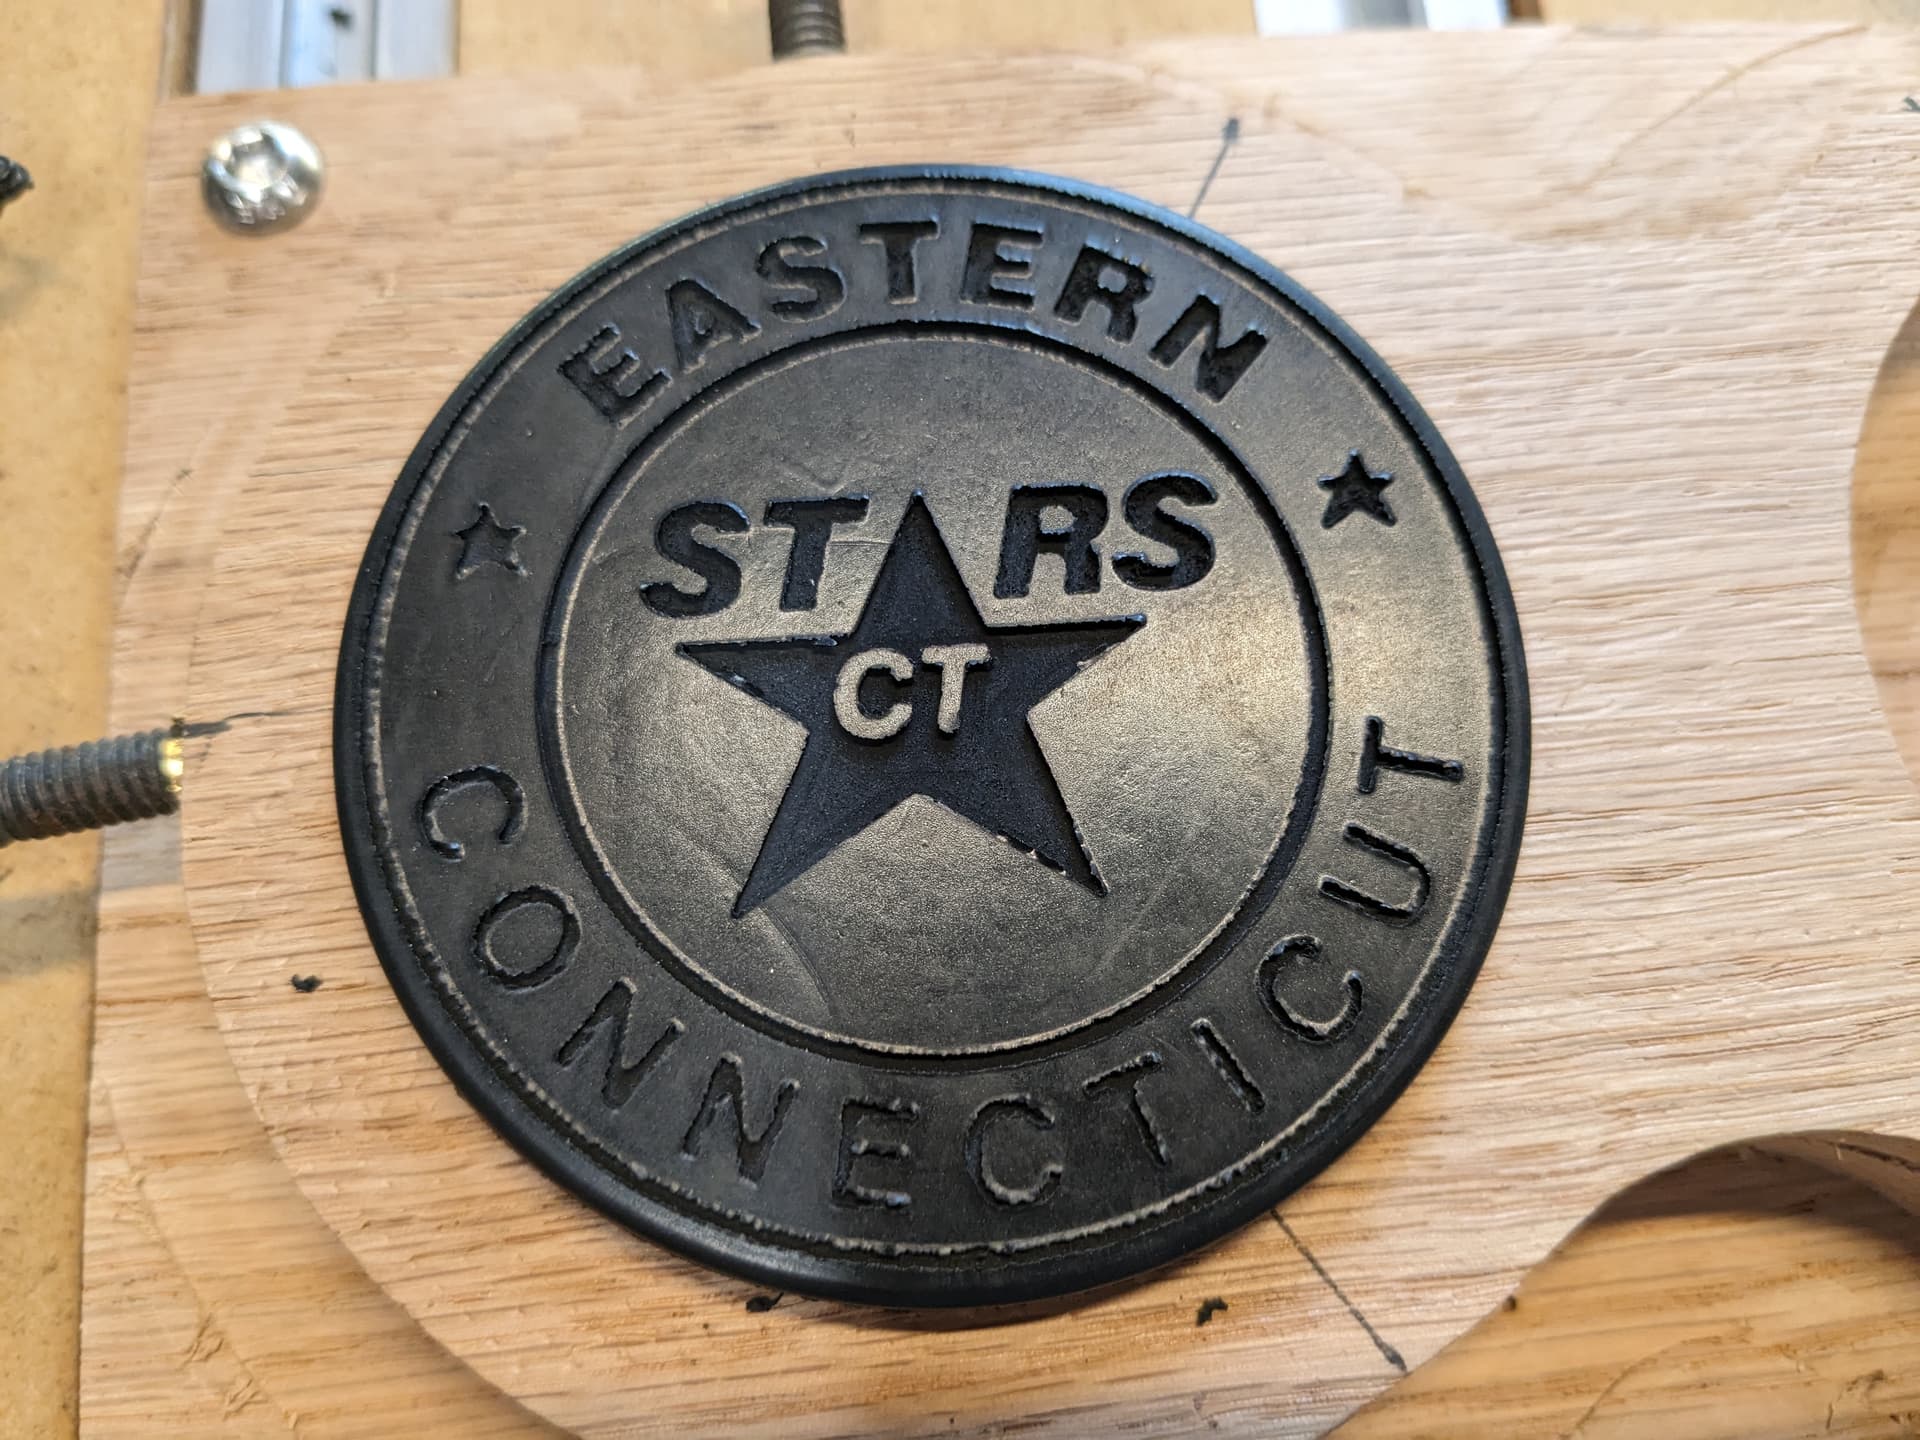
I sanded off the double fill and it looks much better !
I have used rub and buff a lot. As you found out a tee shirt or other fabric that is smooth will work best. MicroFiber towels get the rub and buff in places you dont want. I put on a nitrile glove and wrap the fabric around my finger and use the same spot on the rag to apply the rub and buff. A few drops of mineral spirits also helps on the first coat. Mix it together with the tip of your finger. A drop or two of the mineral spirits is all it takes with about a 1/4" long dab of rub and buff. Very light coats is best and you can recoat in a few minutes because the rub and buff dries very quickly.
I have read a post from October about hockey pucks but unfortunately can’t post there…
EDIT: That thread was re-opened and this post moved to the end of it. Always feel free to ask if you want to continue a discussion and we’ll re-open it.
With recent work on HDPE and using tape and glue to fasten the stock, would this work well with hockey pucks too?
I will most likely make a circular clamp if i get making a bunch, however before i make a clamp, will the glue and tape process work fine? It seems to be a real solid way but id rather ask.
TiA
HDPE is slick. So it might work. Just put a piece of painters tape on the bench and some on the back of the puck with super glue inbetween. Then see how hard it is to pull off. Use lateral pressure because that are the forces the router bit presents to the puck.
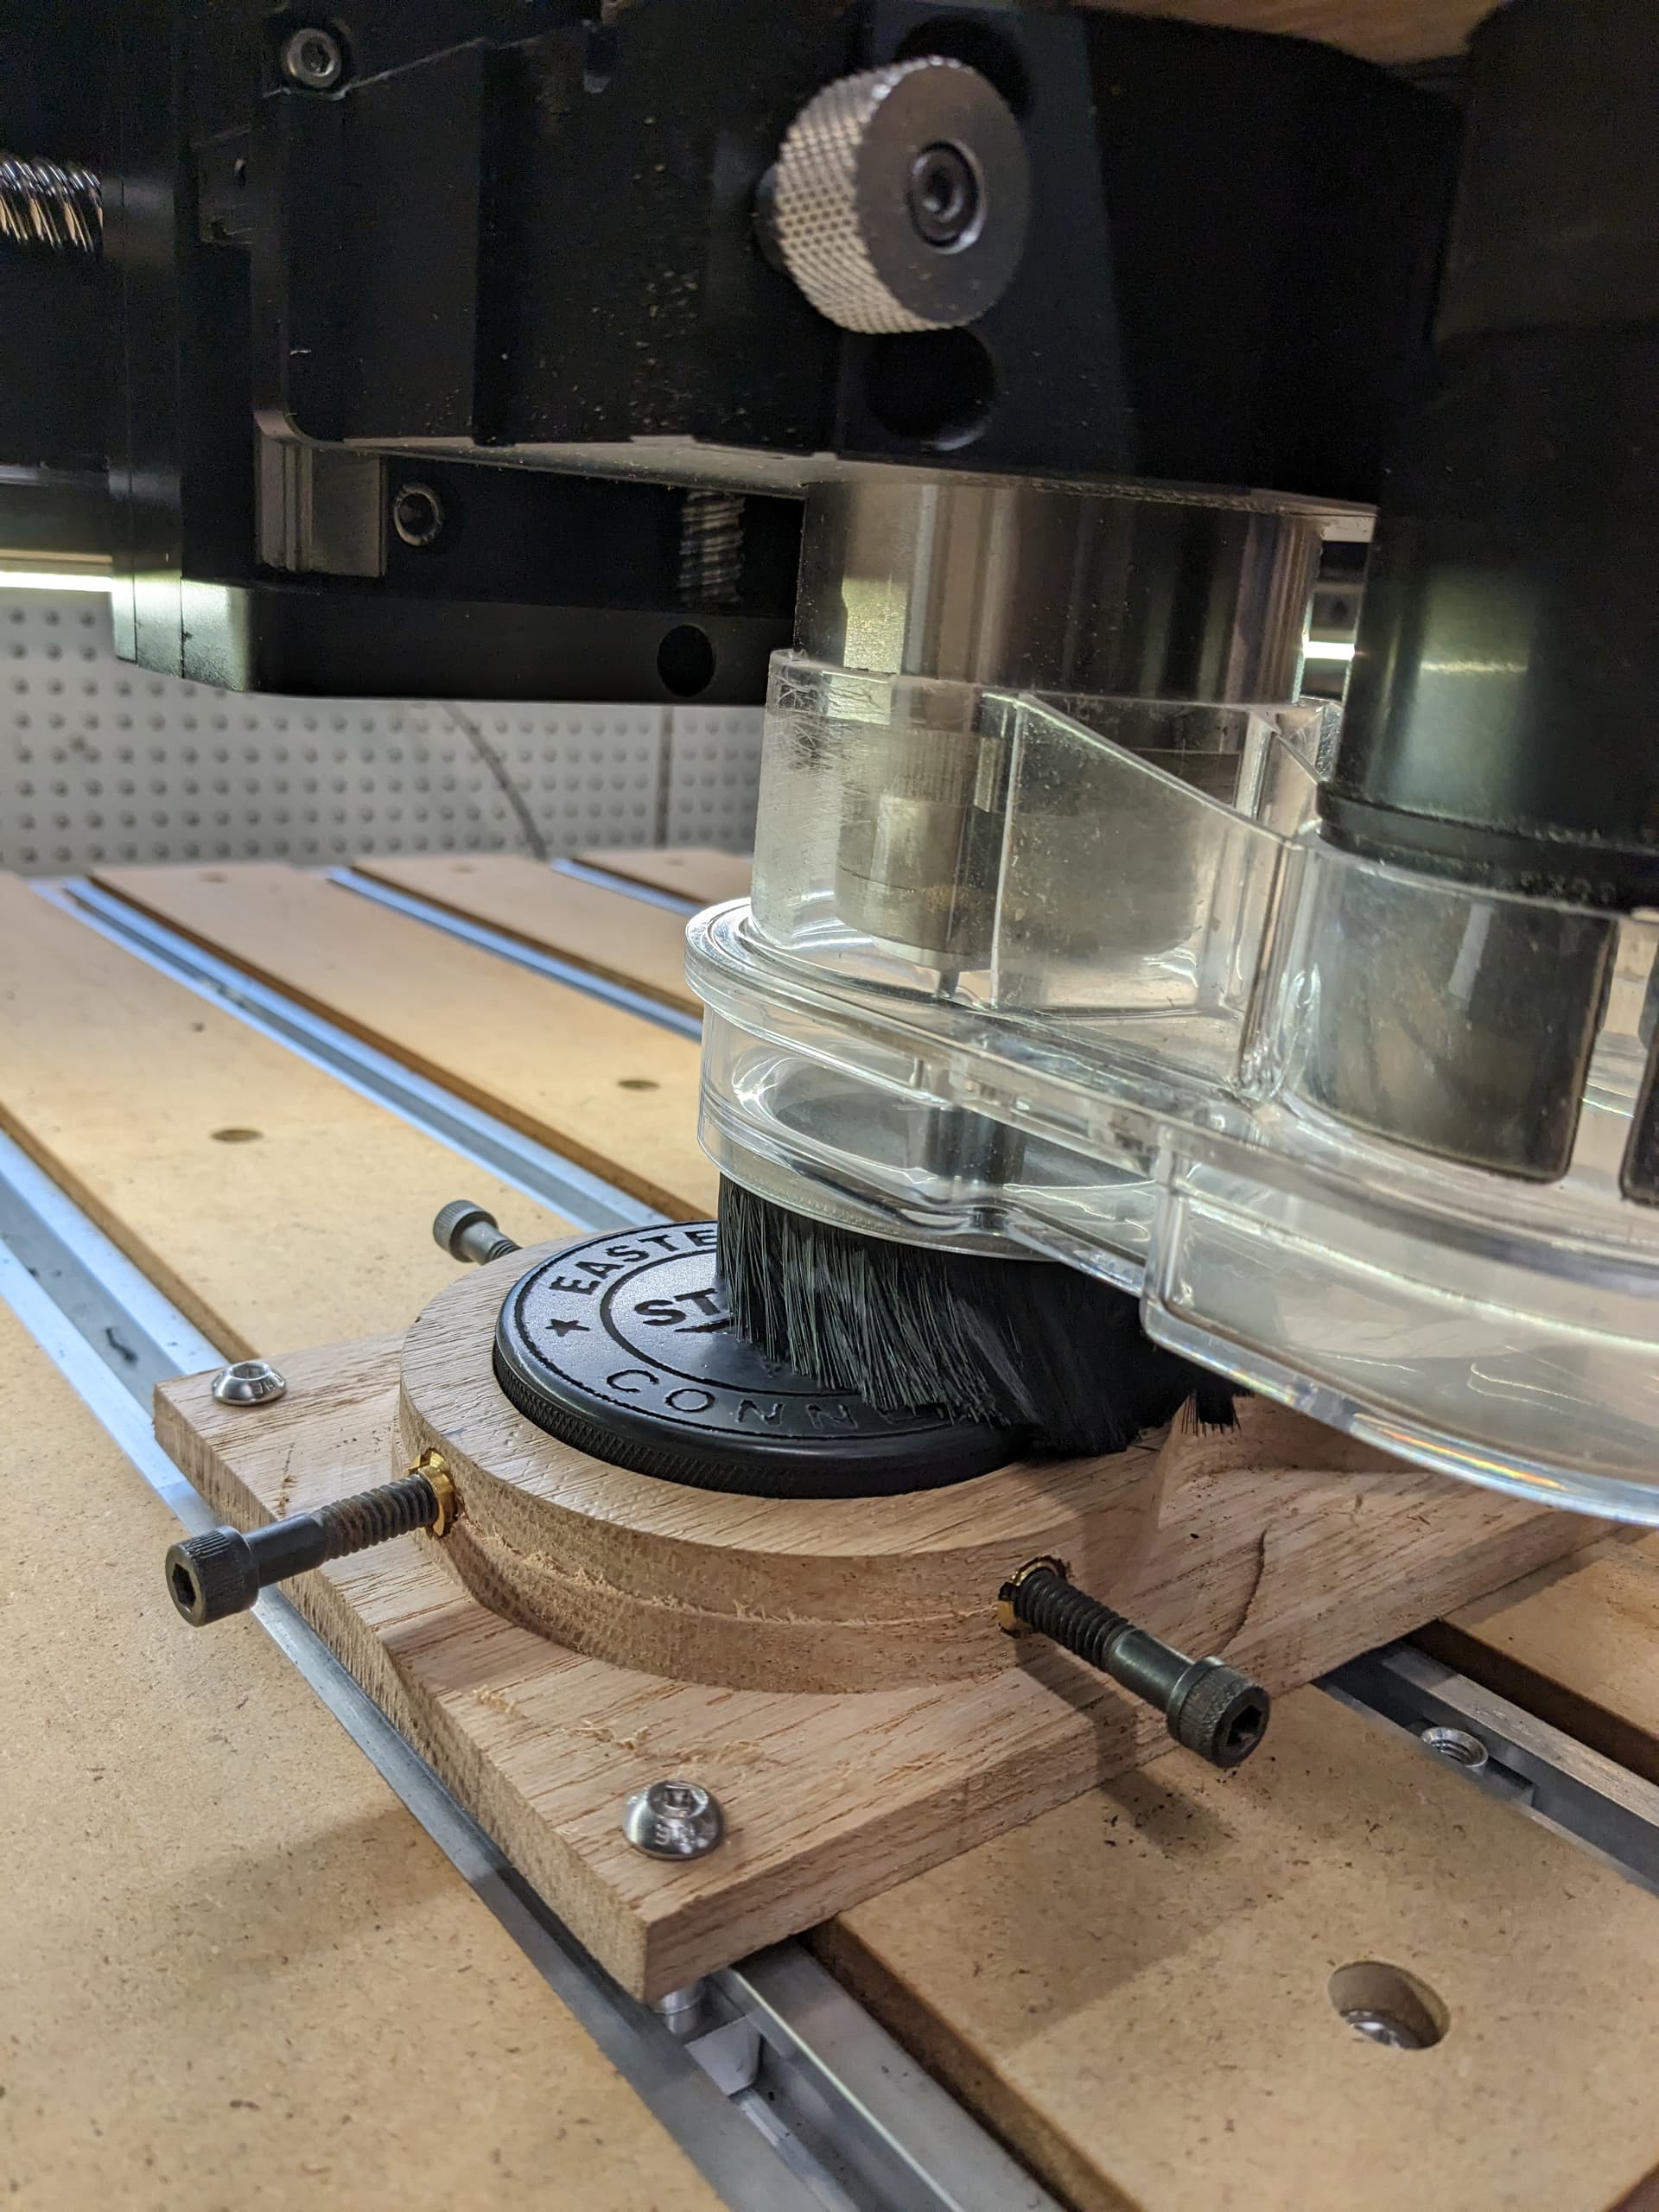
I only used the left side because I ran into the “Set Zero” discussion about repeatability after re-initialization. So I ended up working too hard to find the center and did not want to try a second hole.
You see the drawing has the screw holes at 120 degrees, I tried to do that and gave up quickly.
The puck hole diameter actually measure 2.975. Not sure how that happened but the fit is anywhere from drop in to pretty snug on a 20 F degree puck.
The puck expands quickly. I used dental picks until I destroyed one and moved to an Awl to remove the puck. The puck sticks out 1/4" and I needed that to get ahold of the puck. Some pucks got cosmetic features on the outside face in the cross hatch. I figured I had a vacuum problem so I added three breather holes, which really helps
The A&R puck height are between 1.005 and 1.012 . The surface run out is .003 .
I found if in doubt, go a few thousands deeper.
I put two coats of PolyAcrylic clear gloss. This bough back the black contrast that gets lost with R&B product lightly is the surface. I also noted you can “refloat” the R&B with mineral spirits so I wanted to seal that from the environment.
I finished the original 15 pucks, the next 12 have been cut and need R&B. I just bought 12 more.
I did a few pucks today just to see how things went.
I ended up doing tape and CA Adhesive. It handled it very well to my surprise. To remove it, i twisted the puck and it lifted fine. I then placed a second puck back down where i just removed one. The tape actually held again. This leads me to believe that a sticky type mat would hold it fine as well. Your clamps are the right way to go though. However, you could tape a bunch down and be done with it. Contour a bunch of circles on a board so you can place properly and tape
The thing about re-using adhesives thus is stock is almost always significantly more expensive and you’ll never save enough on the workholding consumable to make up for the cost when it inevitably gives way.