I pasted this in another thread to ask about a scratch on my frame, but I wanted to understand how to troubleshoot and fix a huge slip issue that destroyed a job today.
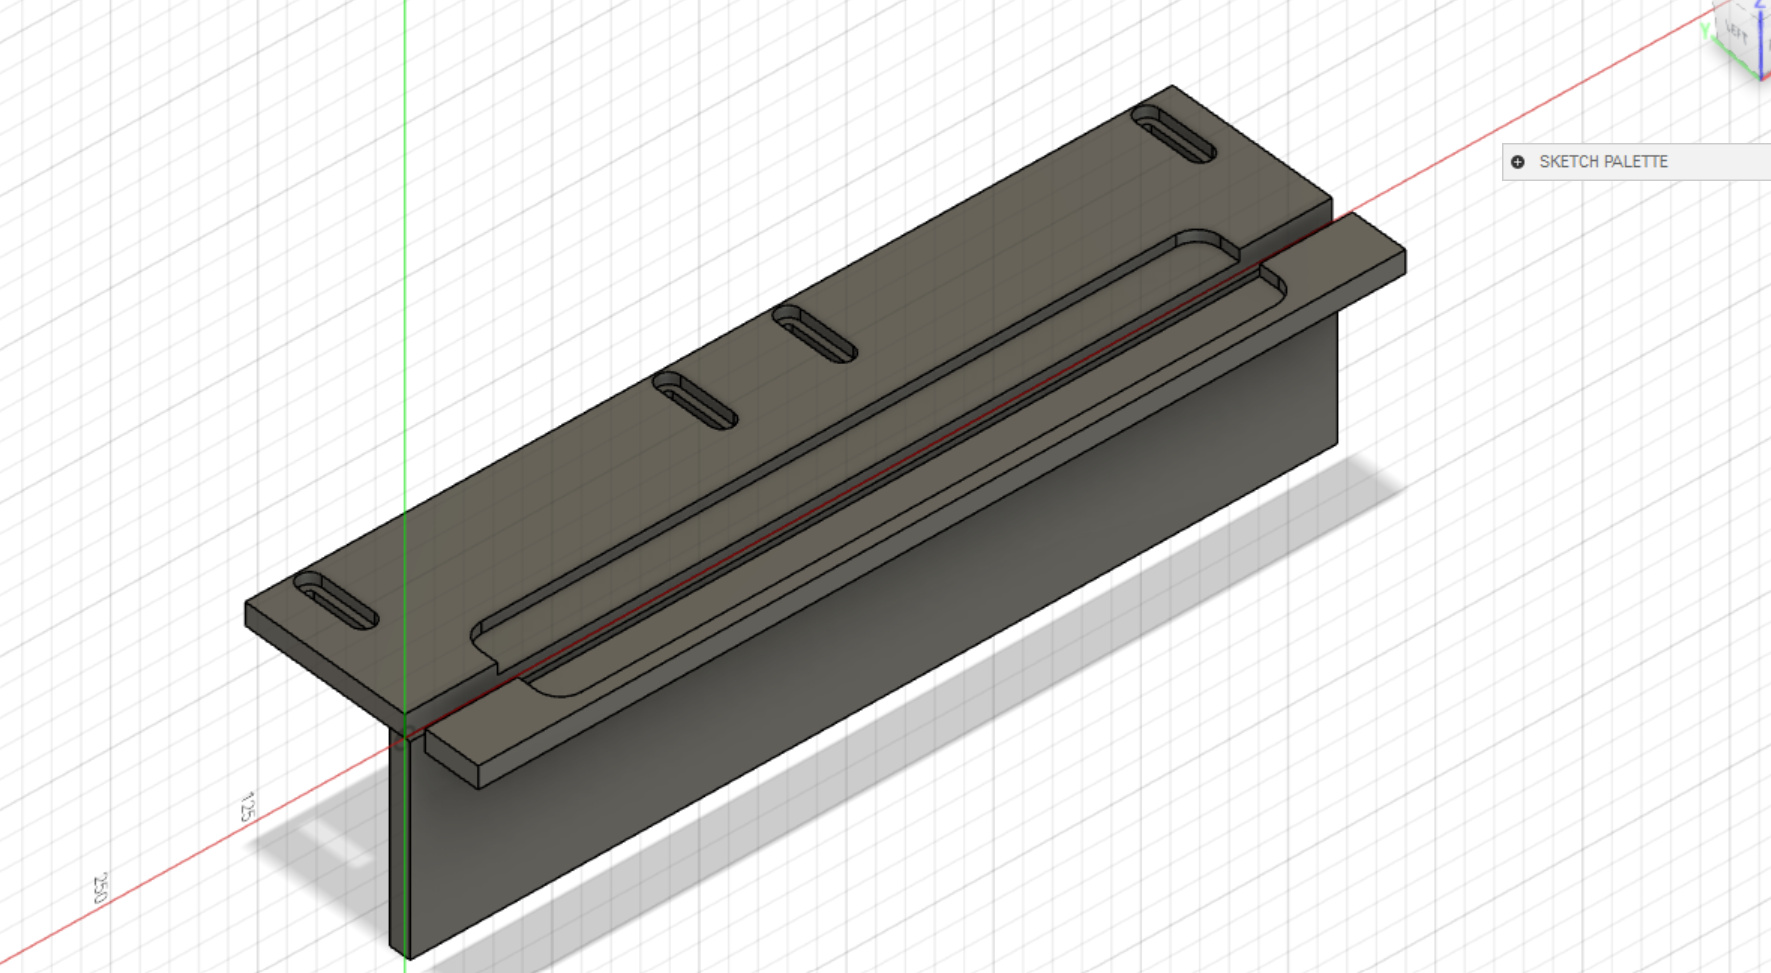
Which would allow for cutting off the front edge of the spoilboard for the purpose of making box joints like dovetails.
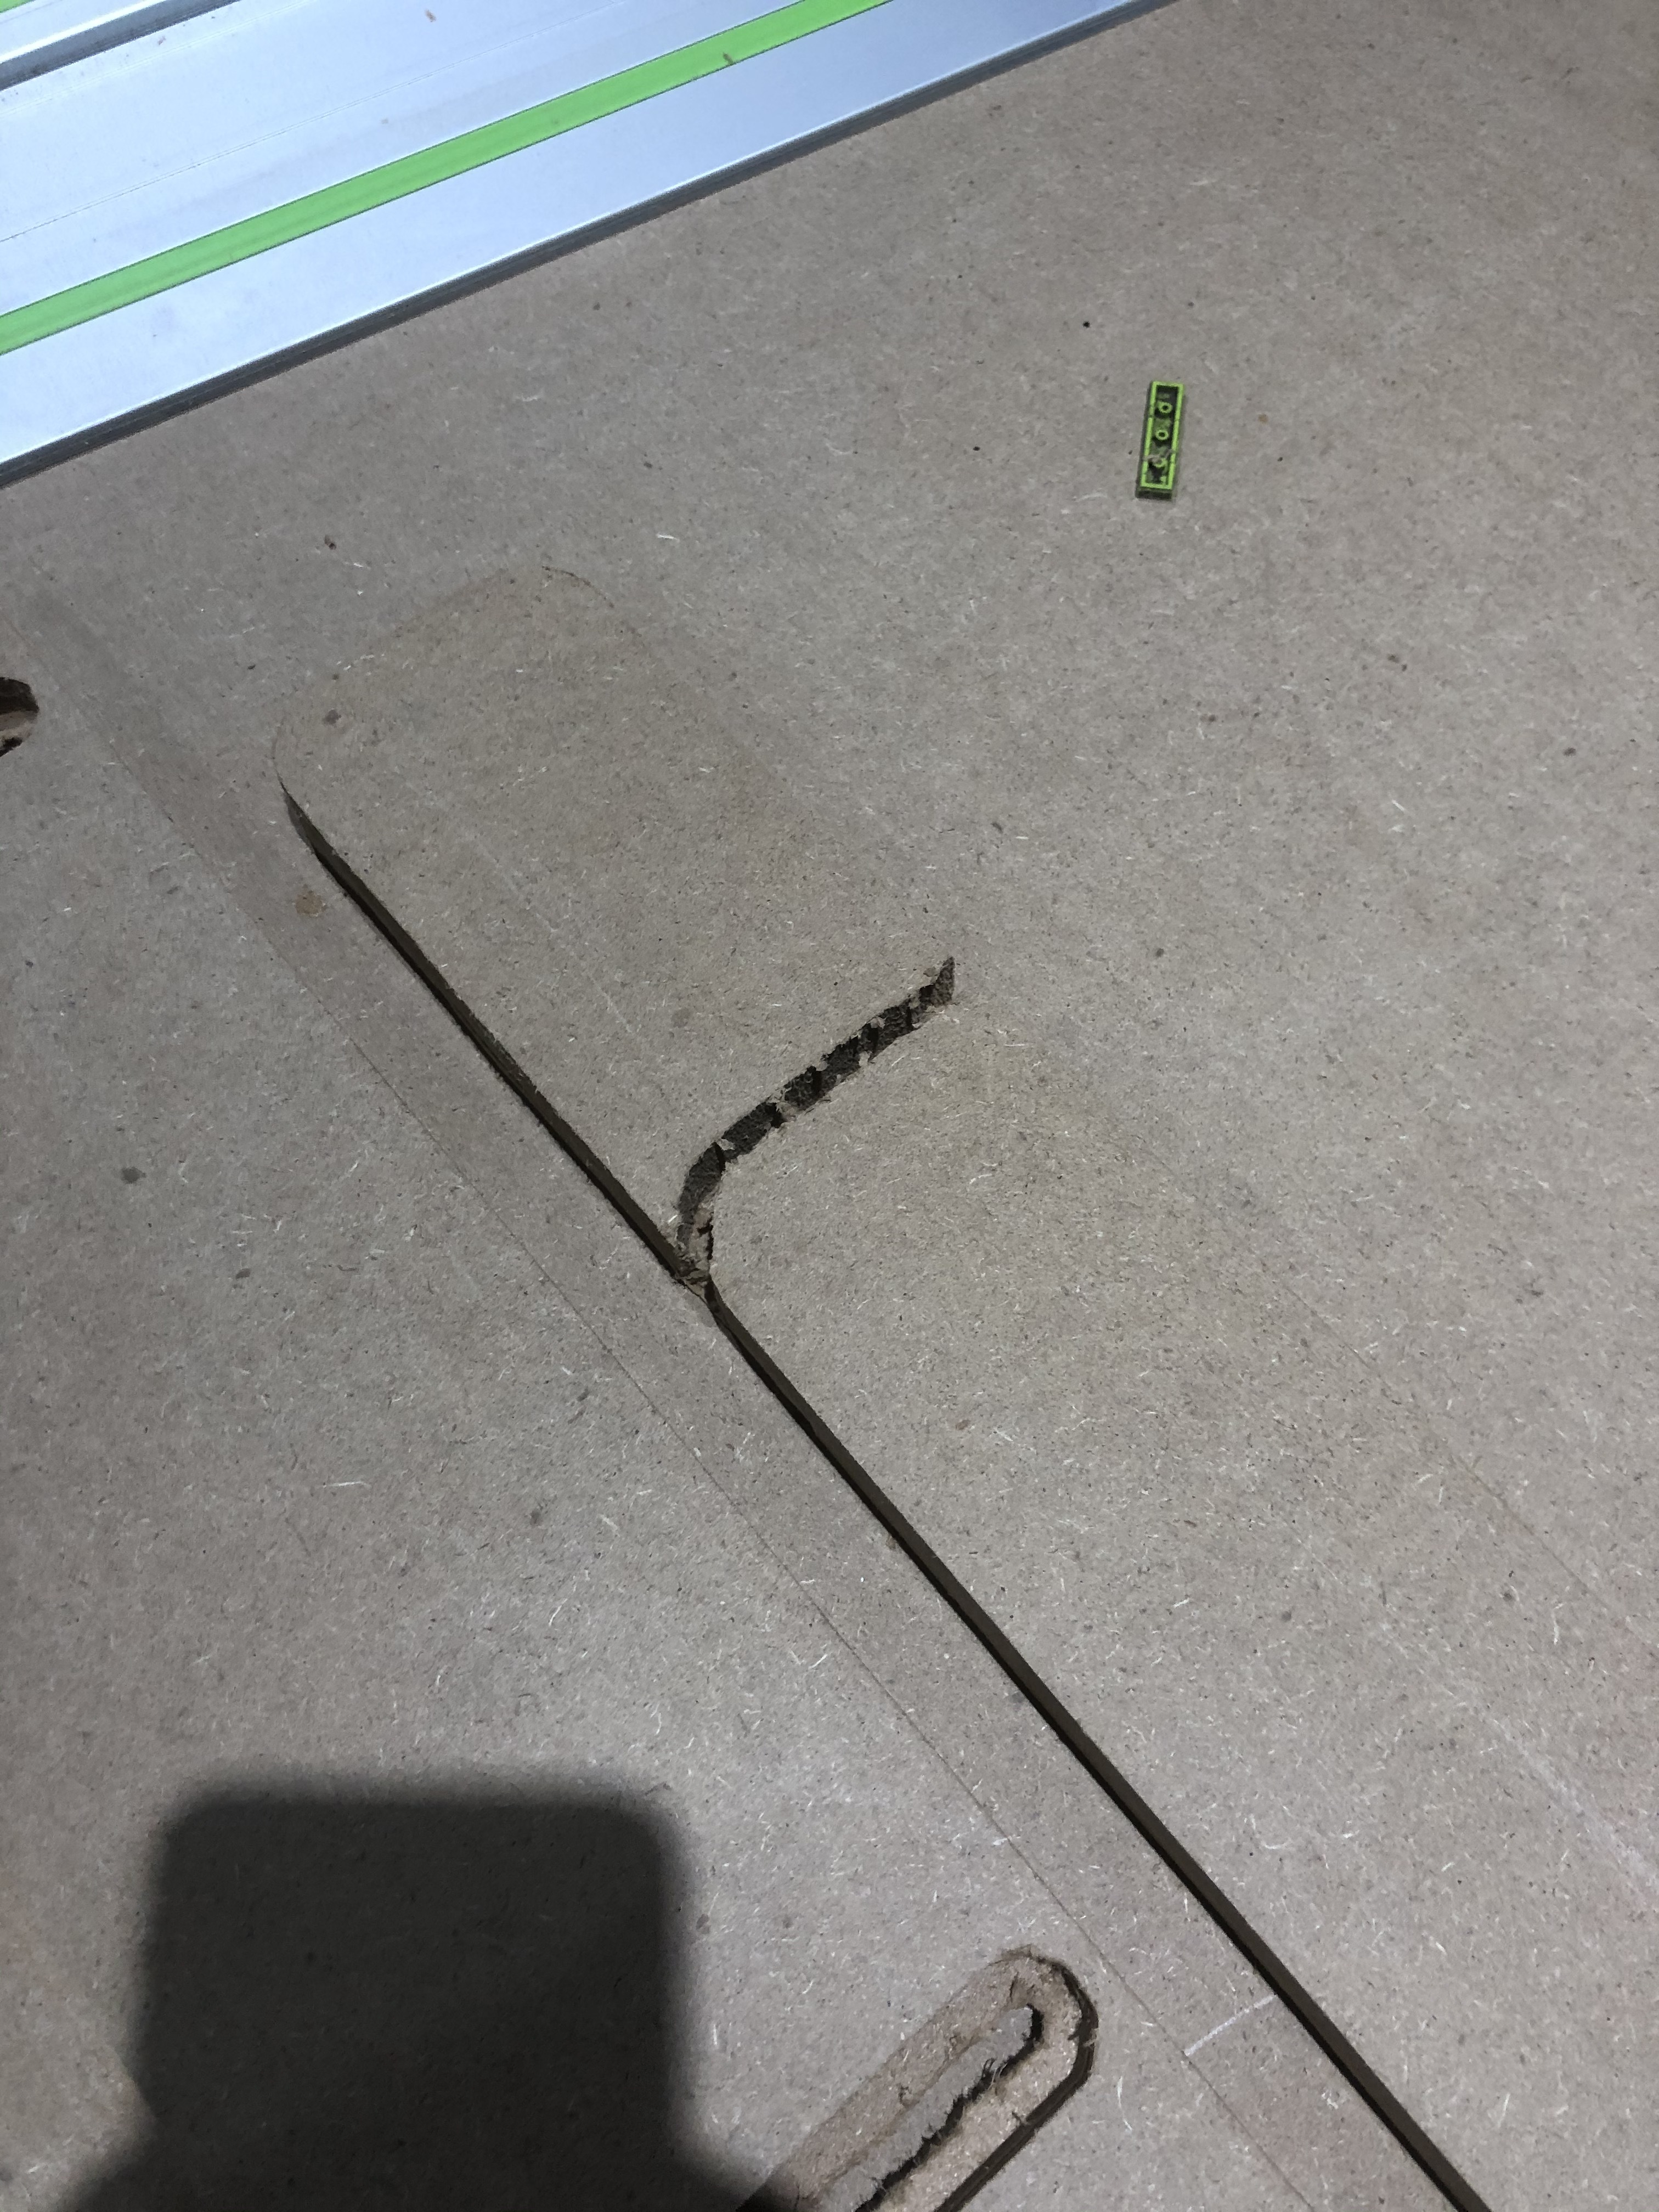
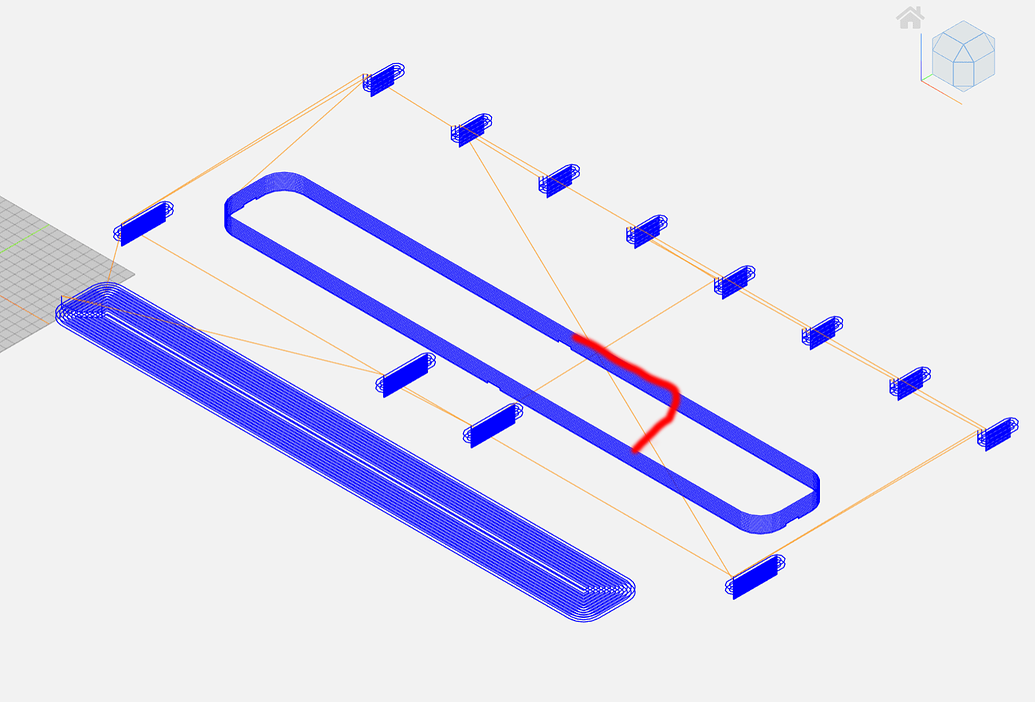
I was 29 minutes into a 30 minute job when I noticed a terrible sound and saw that my #201 bit was cutting full depth into a contour in MDF. I could understand something causing the machine to slip – but this was around 5 or 6 inches off – and after cutting across the piece early, the cut continued exactly in the groove, which makes me think the error was in the g-code and not with the machine.
This is a pretty big deal to me, since I’m worried now that the machine can just jump around in one dimension only. Please let me know if I can get any other data to help figure this out. Thanks.
Thank you very much for your answer. I read your reference, but am still confused.
Does this happen to others, where there are major “jumps” at the multi-inch level?
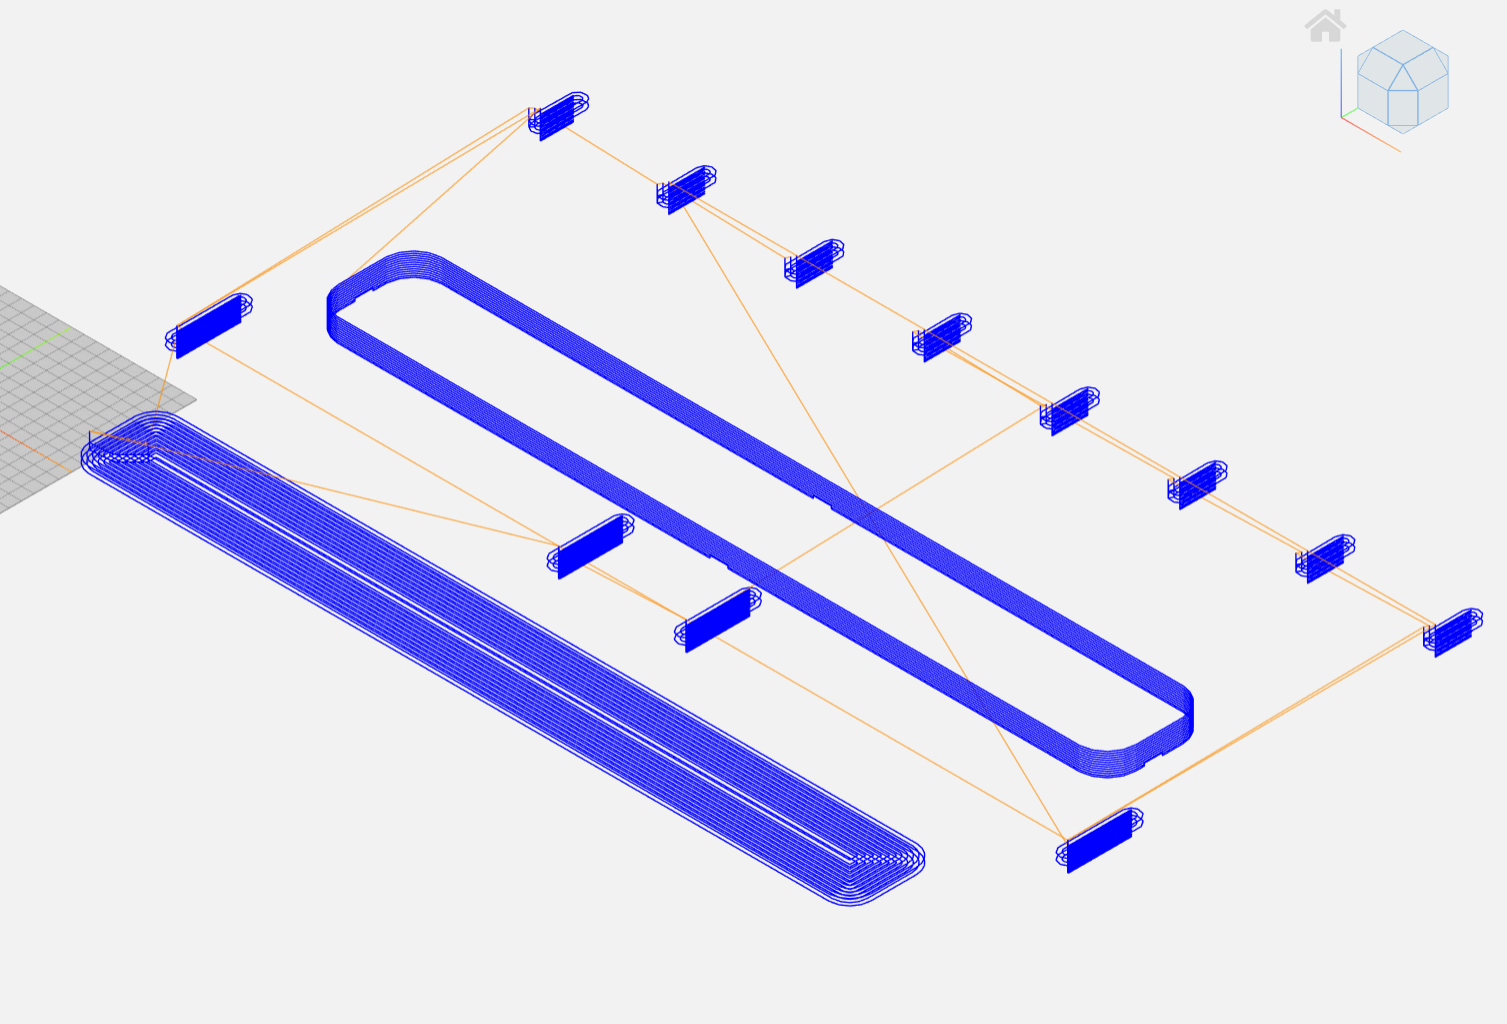
I was cutting a thirty inch rectangle with 20 mm radius corners, which seems like the most basic geometry? Do I need to add extra geometry to do a cut as basic as this?
Thanks for helping me clear this up. I don’t feel comfortable using the machine until I understand what could cause jumps like this.
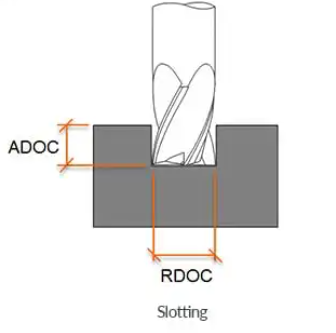
Yes, if you are slotting, you have the maximum possible tooling engagement (aside from plunging) and that makes for the greatest stress on the machine.
Any cut where the endmill is cutting a full width cut through the material is “slotting”. You can run a contour operation when material has already been removed.
Do you have dust collection? How thick, actual thickness, is the MDF? As the cut gets deeper, the chips are harder to extract and you have to cut through packed chips as well.
Ok – I was NOT slotting a full depth of cut. I haven’t communicated well. The goal was to make a single piece cutout: 4 tabs, 2 mm each pass. Everything worked fine until the final cut where an unintentional cut occurred that looked like a 4 inch jump in the X direction and since the machine’s orientation was off, the shapeoko did a full depth cut – I heard it right away and killed the job. I had to jig saw out the rest of the cut.
I’m glad to find out that a 20mm radius curve at 2 mm depth in MDF isn’t too much for the machine.
Hopefully, I’ve explained this better now and my question is – what could have caused the machine to jump over 4 inches in the X direction only? Does this happen often? How could I prevent this in the future. I could have easily broken my bit if I wasn’t cutting in MDF.
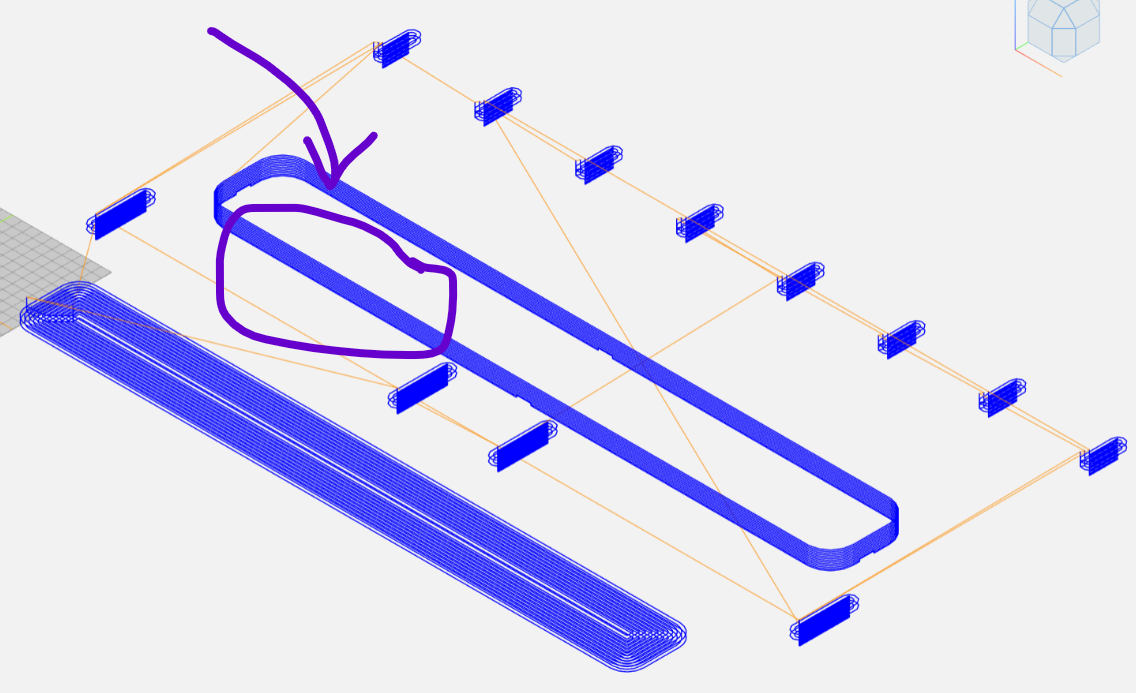
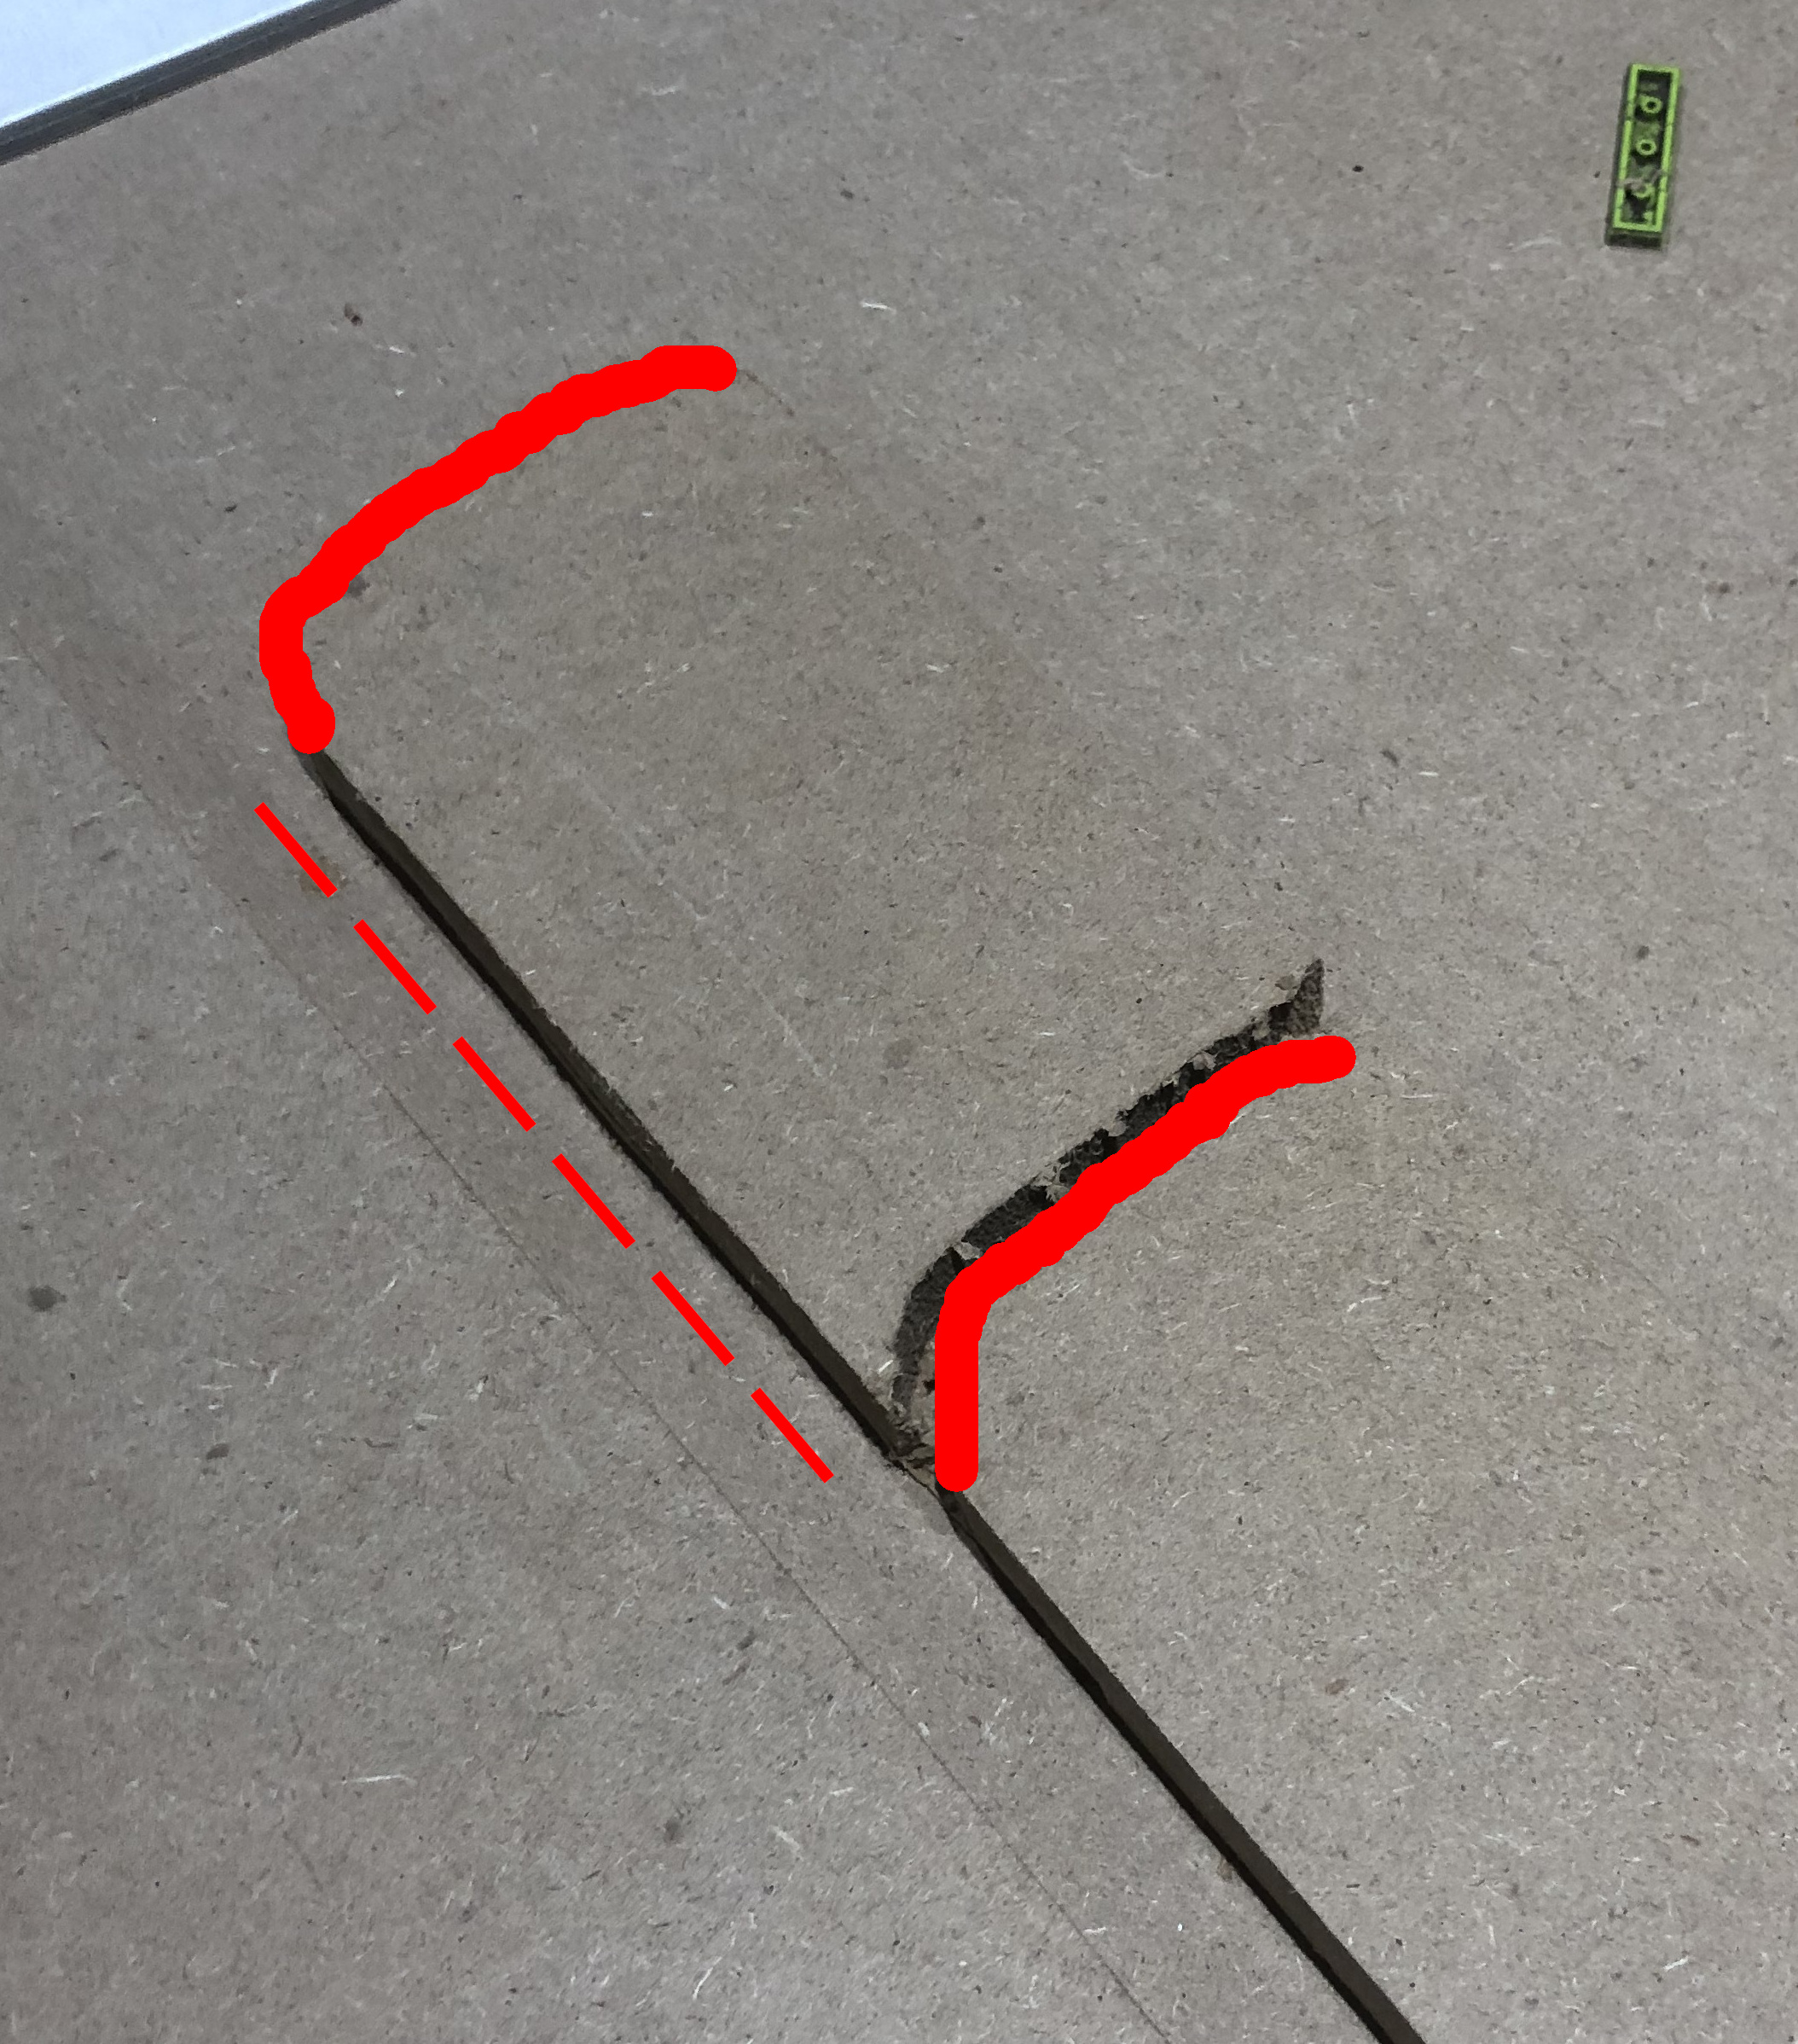
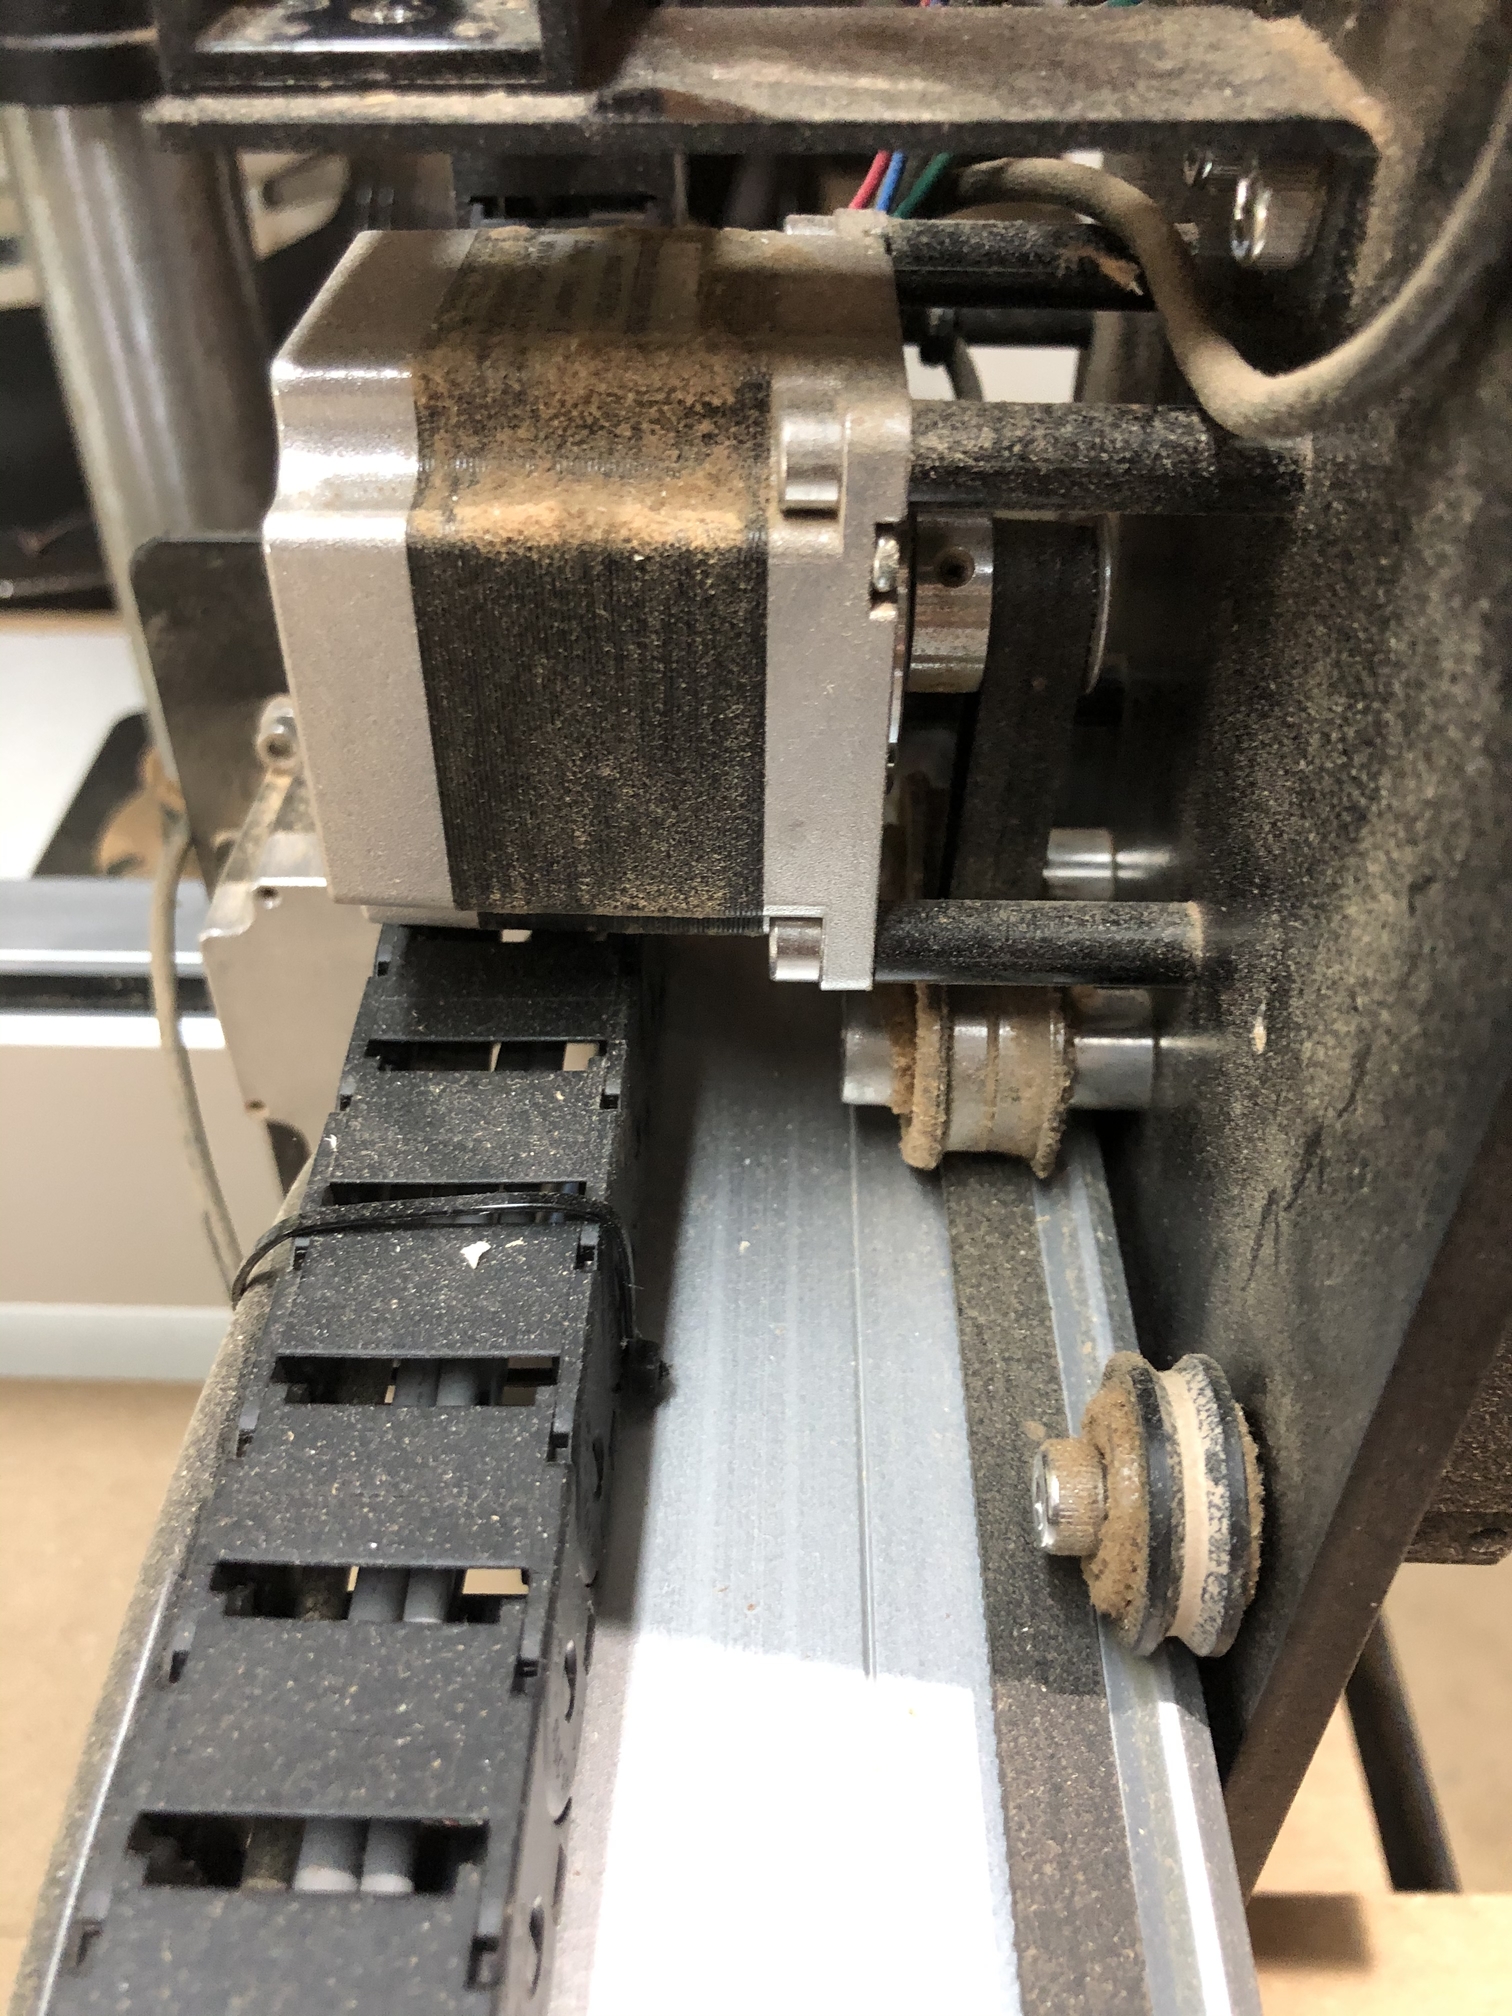
Could it be a pulley slipping on the motor shaft ? The unexpected turn looks very much like the shape of the contour it would have followed a few inches further down the toolpath:
If the dotted line I added is your X axis, I would definitely triple-check the setscrews on the X-motor pulley (you know the drill : one of the two set screws MUST be on the shaft’s flat, both must be tight, you can draw a line with a marker across the shaft and pulley to check if the pulley slipped, after a cut event like this)
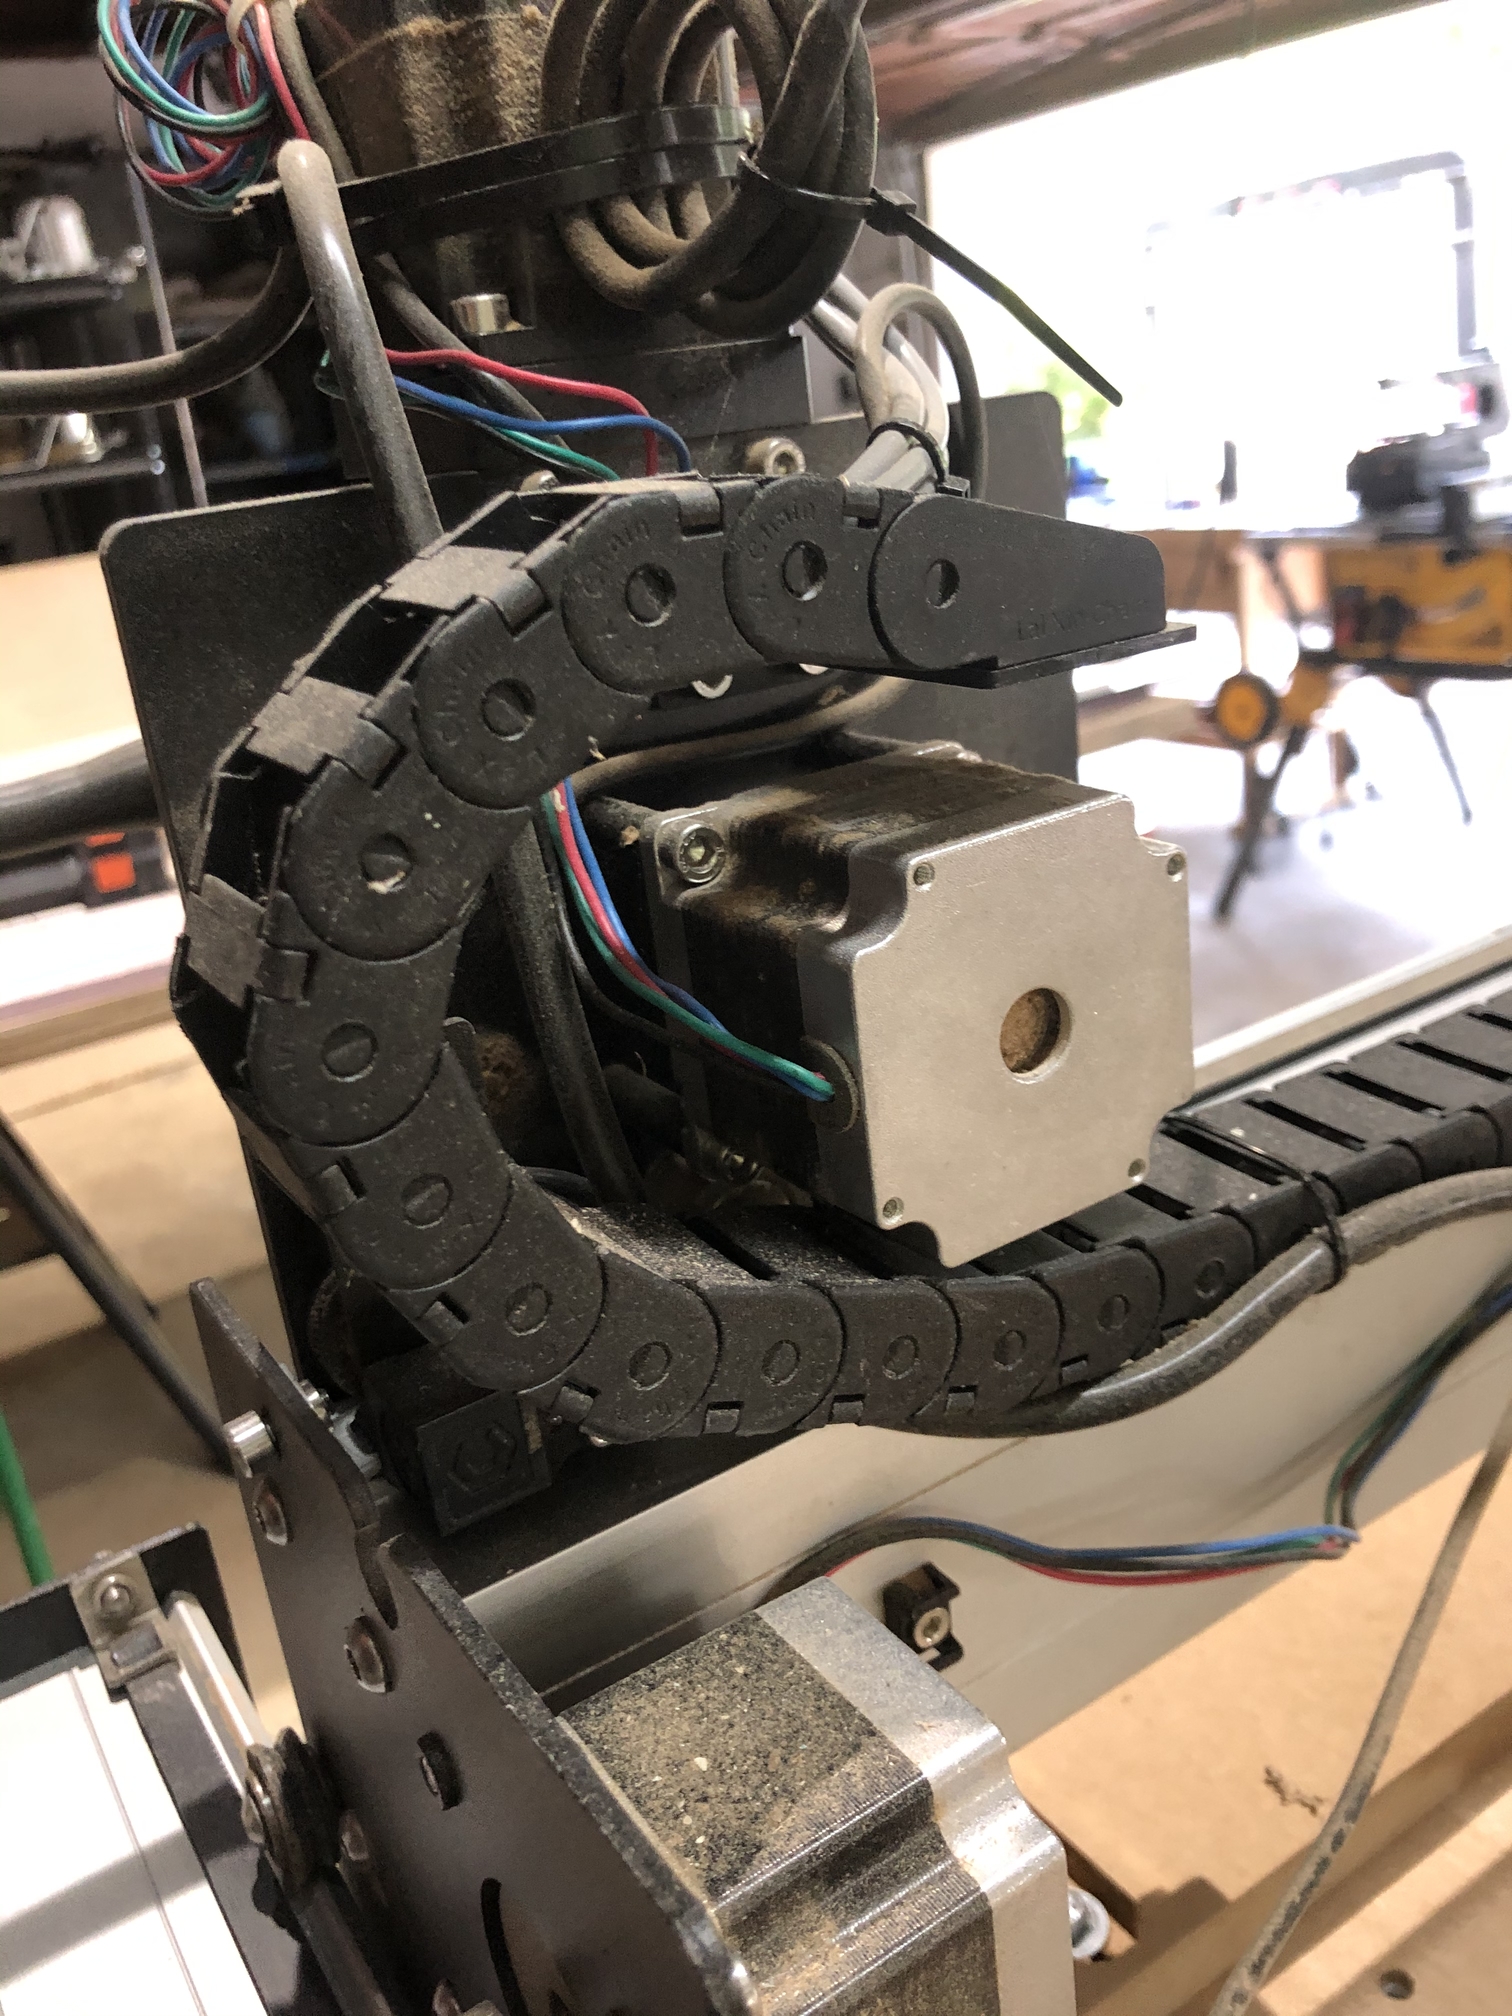
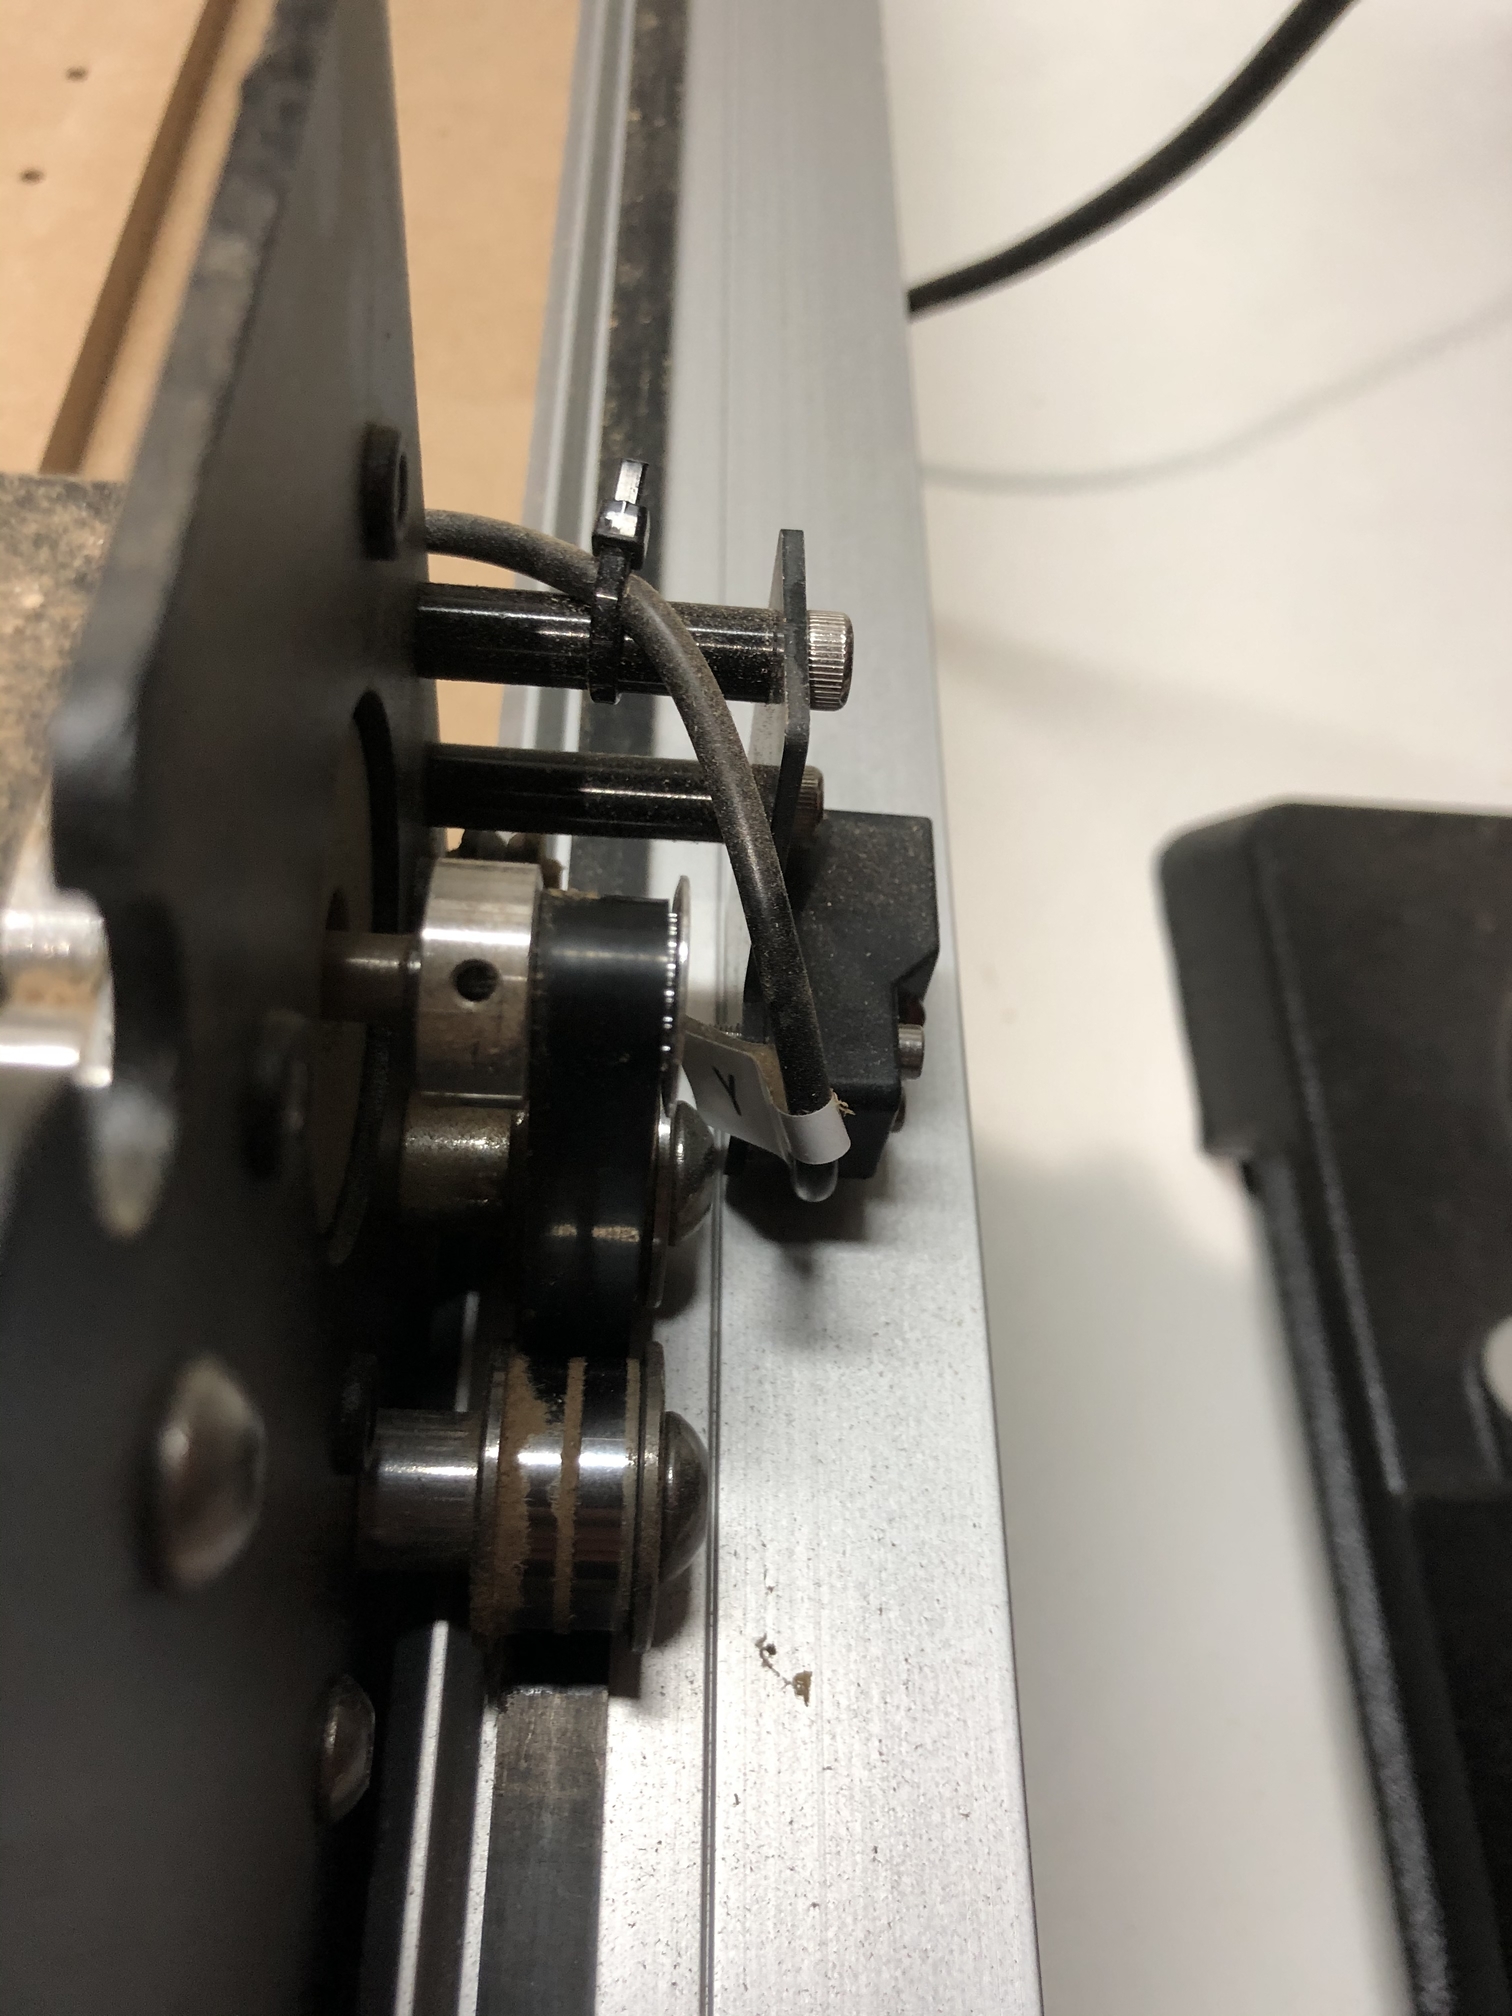
Given the set-screw shaped dent in the extrusion rail it would seem to be a good idea to go check that all the pulleys on the machine have both the set screws homed and tight.
Indeed ! I didn’t even remember that other thread, but maybe @dandangerous is on the money, maybe a setscrew fell off completely, causing this AND the rail dent.
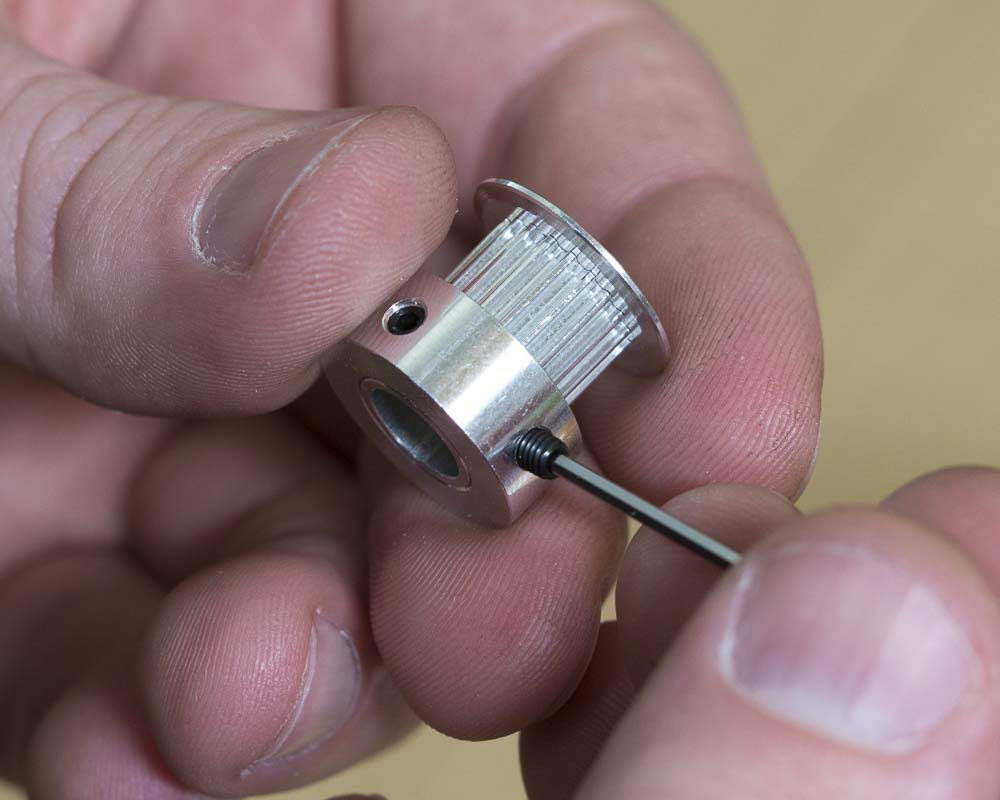
Just checking in case there is any misunderstanding (and please accept my apologies in case I’m stating the obvious), but it’s not possible to see whether the pulley setscrews are there from those pics, they’re the teeny tiny screws inside the threaded holes in the pulleys on each motor, and I must say it’s far from obvious to visually inspect them without removing them.
If you did check them and can tell for a fact that they are still there deep down inside their holes, then the mystery remains.
To piggy back on what Julien said, whether you did or didn’t check them visually, I would suggest checking them physically by trying to tighten them.
As an aside, you may already periodically do this; however, brushing off your v-wheels and transmission components will help ensure your machine is performing at its best.
The set screws are standard M3 set screws ~4.75mm o.a.l. which can be sourced at any decent hardware store. Some folks replace them with M3 SHCS of a suitable length (~8–10mm). If you can’t find them locally or that’s not an option let us know at support@carbide3d.com and we’ll get a replacement out to you.
Replace the set screw and re-tension the belt per your assembly instructions.
Yes, if the pulley isn’t holding in one direction then the machine can get bogged down and pulled into another.
@Bonhoeffer: but I guess still triple-check that your X axis pulley set screws are also tight and one of them is against the flat. Better safe than sorry!