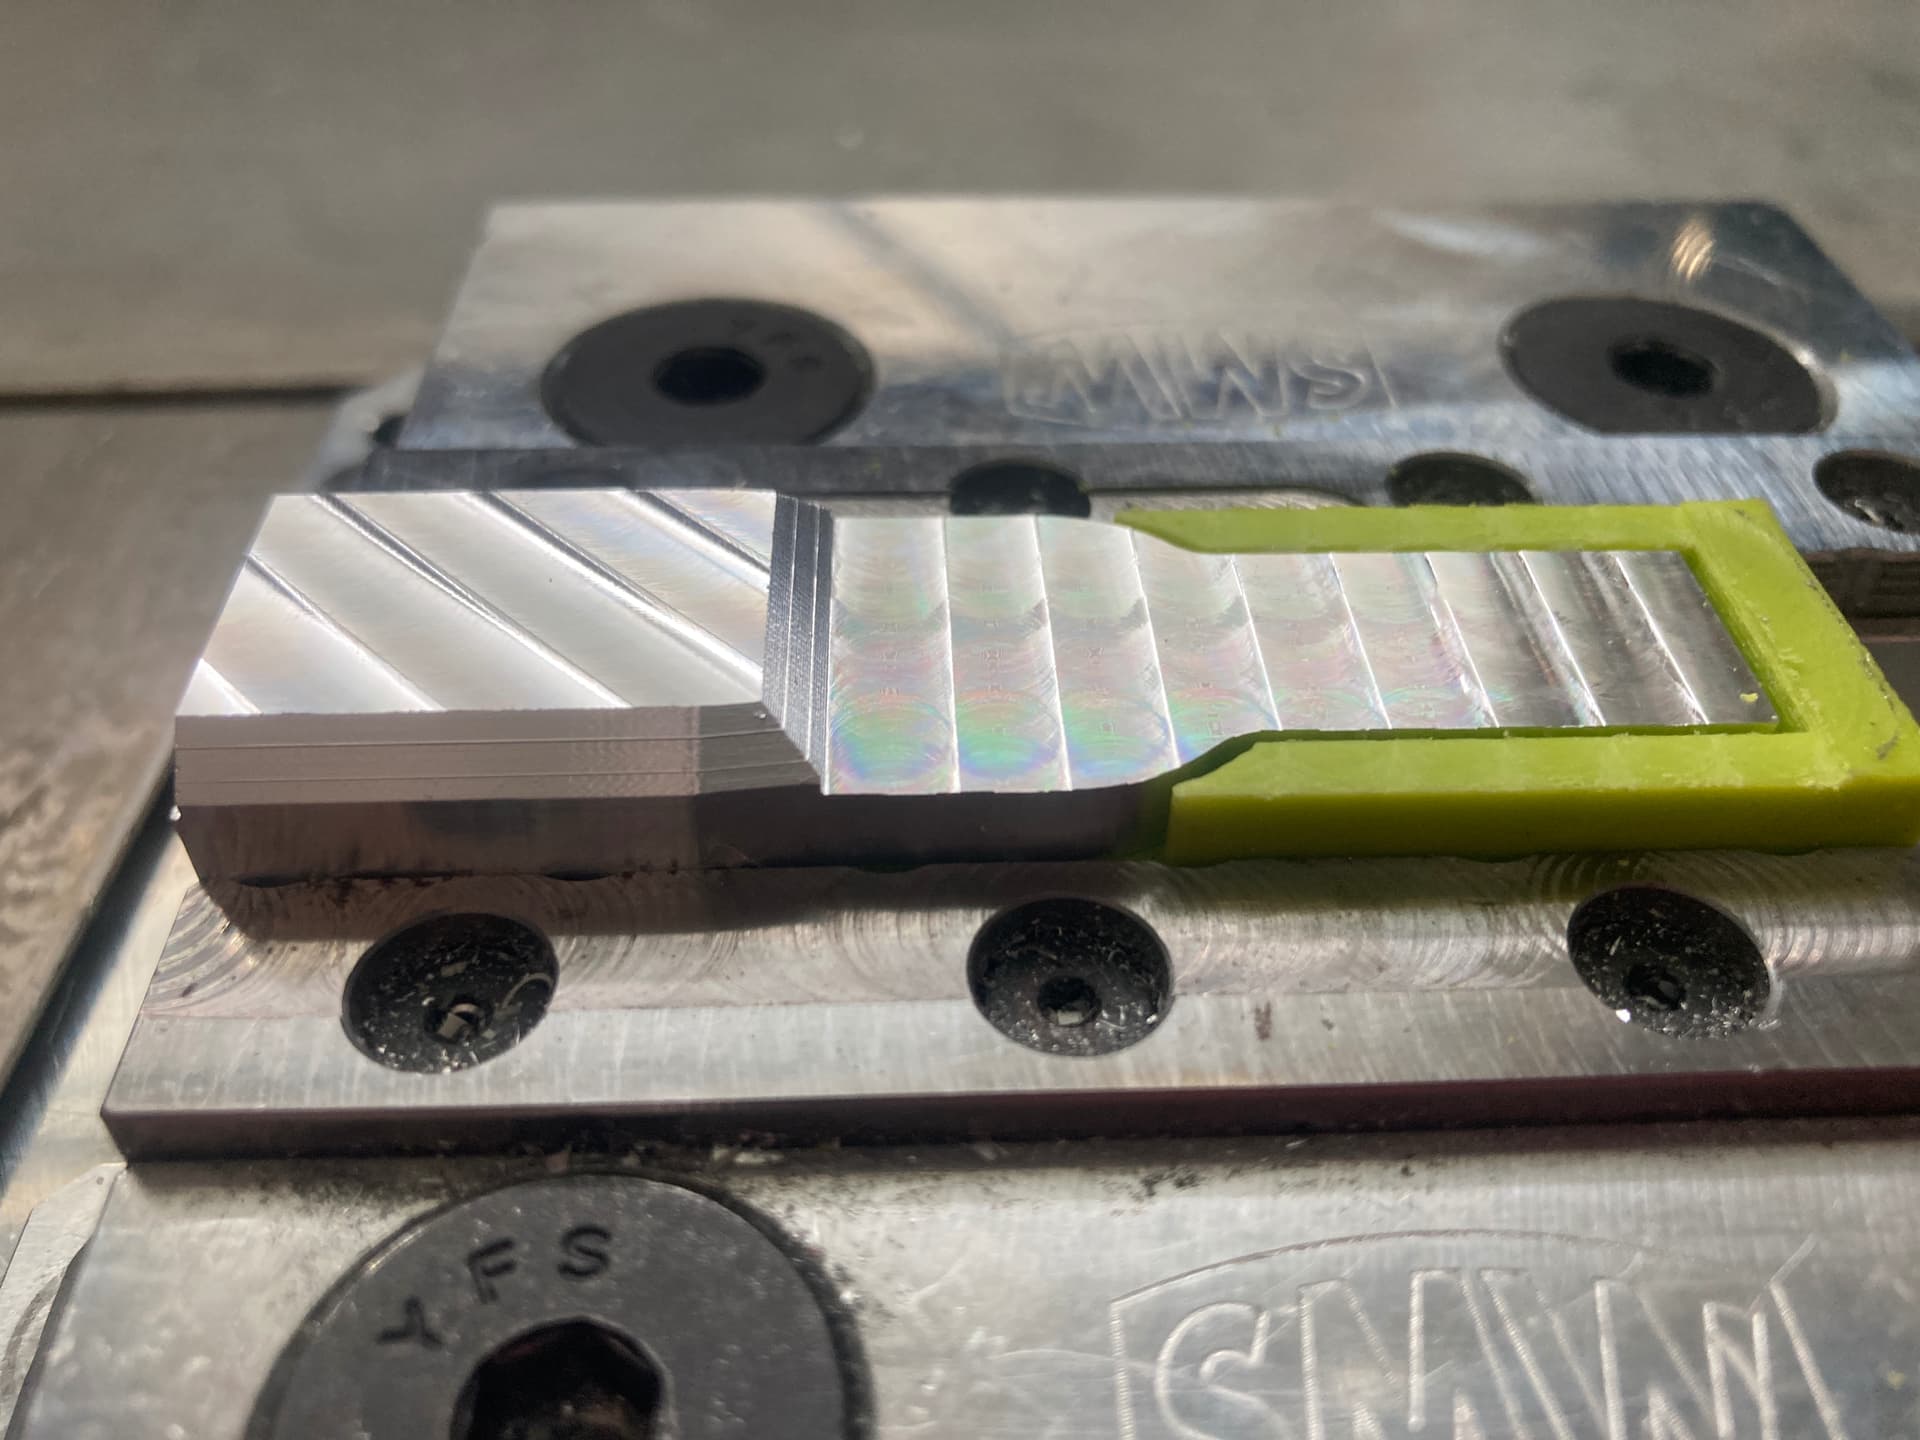
What sort of things are folks doing to improve floor finish in aluminium?
Let’s be honest, tramming the SOPro head is not super precise. Hopefully the new HDZ helps out with that. A few things I’ve thought of which are on the to-do for experimentation
Use an 1/8" endmill instead of 1/4" to reduce the effect of tram issues
Endmill with a wiper insert (Datron), $$$$$$
A corner radiused endmill instead of flat
At the end of the day though, is it just better to commit to post processing? Glass bead blasting to remove tool marks?
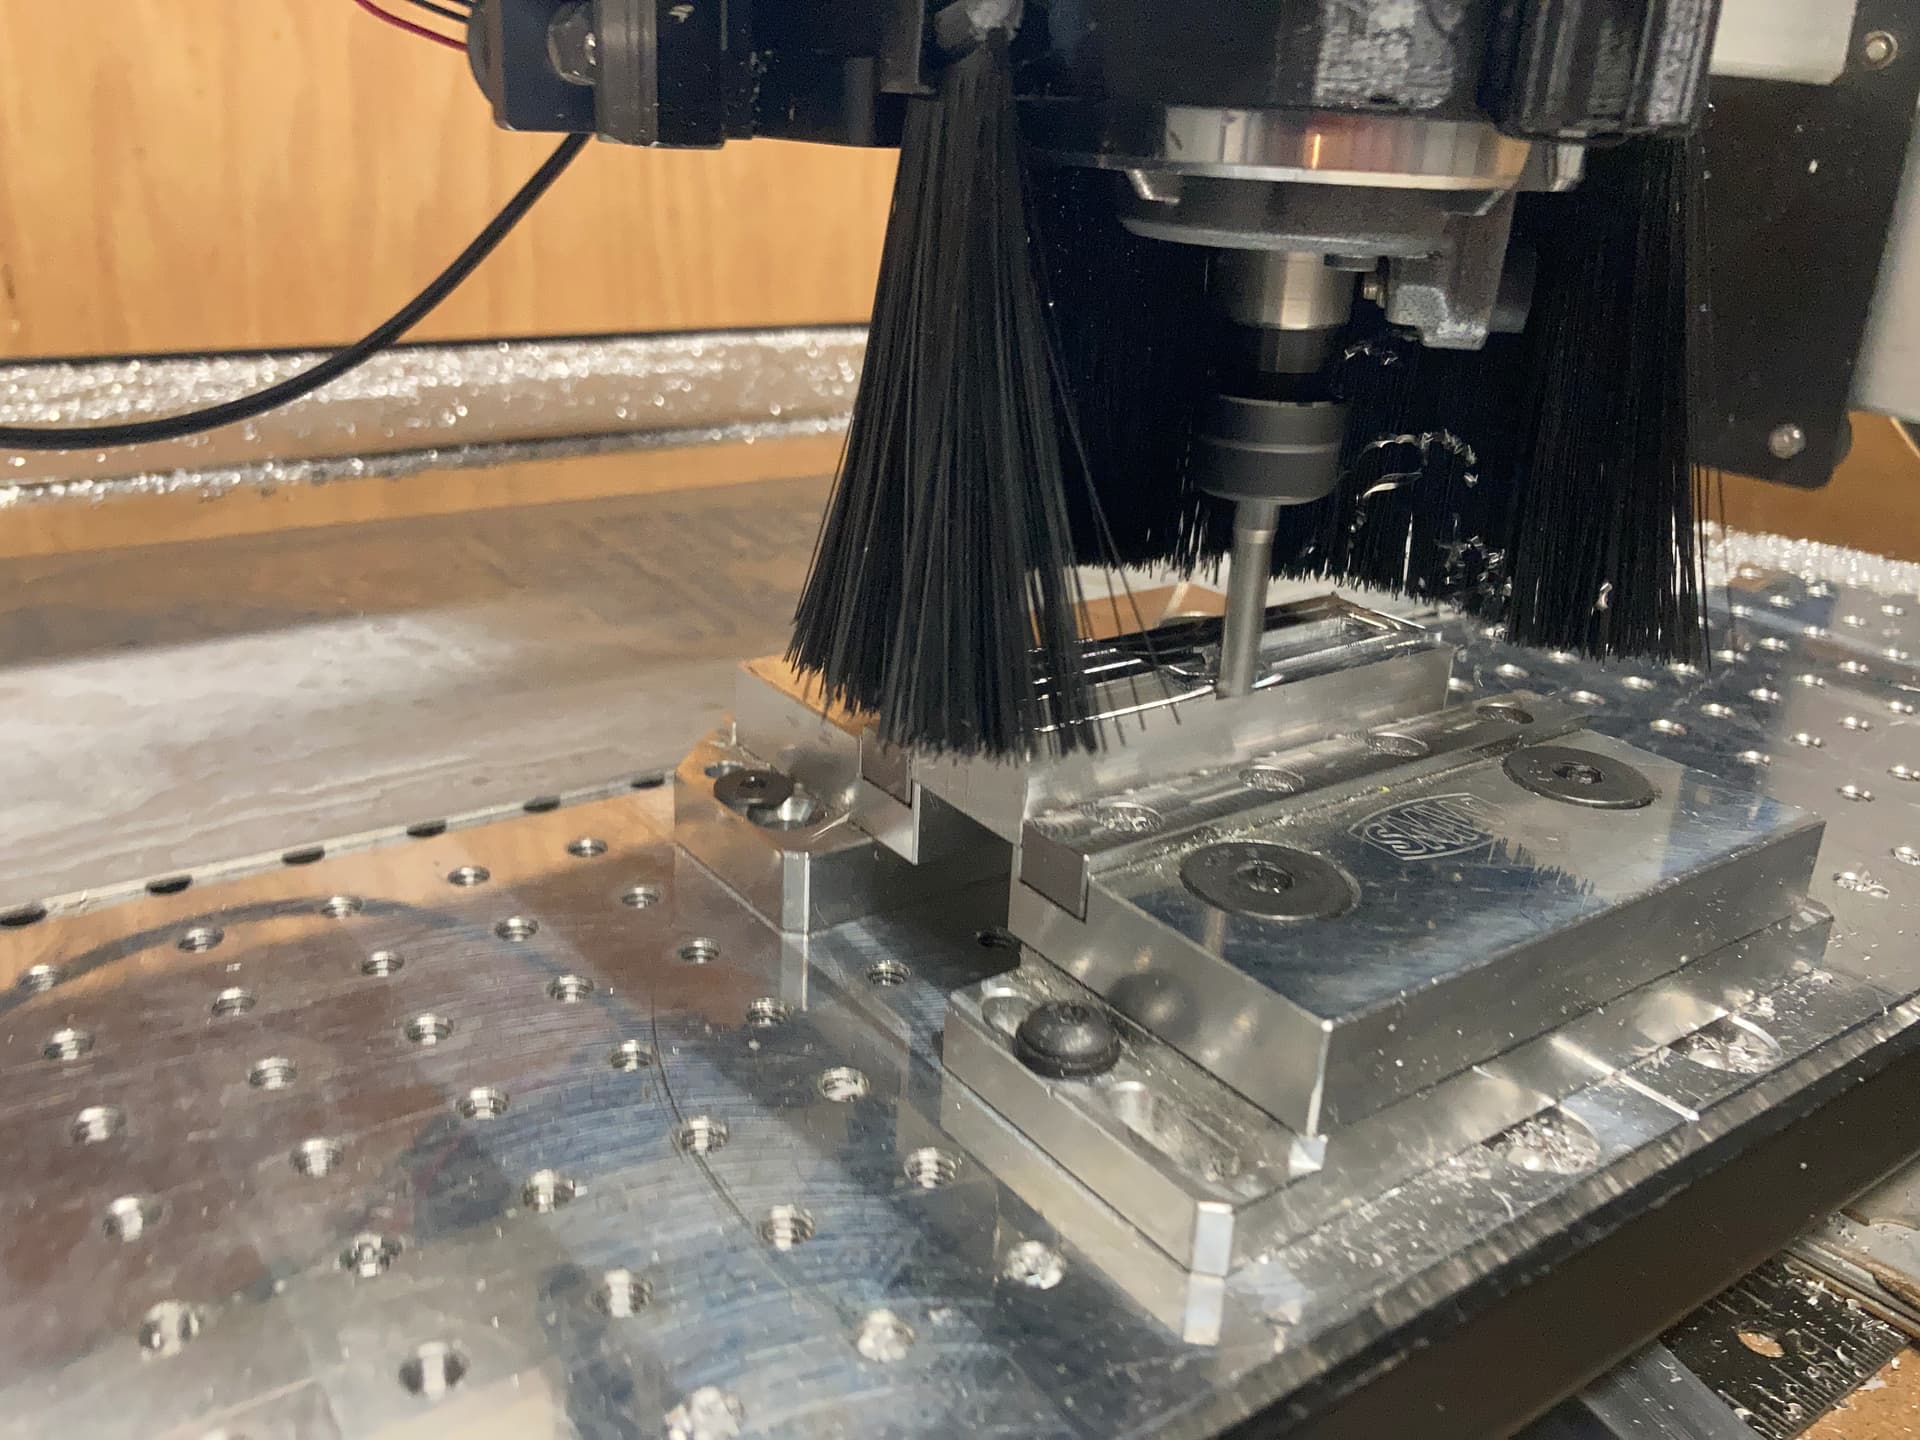
While I agree that tramming the spindle on a Shapeoko 3/4/Pro is not the easiest thing, you can still do it. I have trammed mine to within 0.002" over a 12" diameter using a spindle mounted indicator. Beyond tramming, here is what I have learned from my experience:
Go slower.
Be sure to keep your chipload high enough for the tool you are using though. A balanced single flute is great for helping you to slow down while keeping chipload high enough.
Keep tool engagement low and stable
Pretty straight forward. Your finishing pass should not be removing much material and sudden changes in tool load will show up in the finish.
Use a balanced endmill.
Vibration caused by an unbalanced single flute is quite easy to see in a floor finish. It is one of the reasons I no longer use Amana single flutes. Go to a Datron 4 in 1 or a 2 or more flute.
Keep endmill stickout as short as possible
The longer the stickout, the longer the moment arm on your tool, spindle and Z axis is. Keeping that whole stack as short as possible increases rigidity and decreases tool deflection therefore improving finishes. Raising your work as high as possible will help.
Avoid sharp changes in direction.
Our machines are desktop grade machines and vibration from direction changes can be pretty significant depending on speed and acceleration.
Reduce your acceleration values in GRBL (Optional)
I have reduced my acceleration values by 20% in my GRBL settings and found a decent improvement in finishes.
I think #4 is a good one. As my piece is very thin, raising it up an inch or two will reduce the moment that the router has over the gantry. I do also wonder if lowering acceleration is prudent. So do you mean you’ve gone from the default 400mm/sec ( Shapeoko 3 - Default GRBL Settings - Carbide 3D ) to 80mm/sec ?
The defaults for my standard size SO3 were 500mm/sec and I lowered it to 400. I only did it for X and Y which are parameters $120 and $121. Also, that link is very old and I would not trust any info from there. Open the log window from the settings panel in Carbide Motion and then go to the MDI tab and enter “$$” to see your current settings.
I think you’ve got a strong point on the reduced accelerations, even after my linear rails upgrade I see ringing in the edge finishes after sharp direction changes simply due to the moving mass and belt system.
I’ll have to double check my feeds after work but I get fantastic results with cheap 6mm single flute uncoated china carbide mills at 20-24k rpm. I always use climb milling with adaptive roughing followed by 5mm stepover final.
I have been using the carbide ER11 router as I was one of the lucky few to test one. I had to get use to the sound it makes compared to my dewalt but after that I began to like it and never swapped back. I do use a half brush chip guard that I designed and 3d printed to save my V-wheels from the flying chips. At 20-24k 1500-2400mm feeds it does spray chips across the machine like a mini gatlin gun.