Definitely, Guy! I really like having all my tools mobile, even if I don’t move them that often. I even welded wheels to my MInimax FS41 Elite j/p combo machine. That thing is about 1100 pounds, but I can easily roll it around. This outfeed table will be no different. It will have wheels of some sort, but most of the time will sit on the leveling feet.
I’m about 60% through modeling out what I need. Somewhat based on Mike’s link above, but bit less room for drawers, as I want to keep good head room above the spindle in case I decide to later upgrade to something larger.
I’m stoked to get building on this table. The faster it’s built, the faster I can order the XXL.
Yeah I think that’s a smart approach to maximize space for the CNC over drawers, I just bought an HDZ after a lot of measuring to figure out whether it was possible to add the necessary clearance with what I’ve already built - turns out I can do it, but just barely. If I were to rebuild my enclosure I’d make more room for the CNC in every dimension - right now I have just enough room to operate the CNC and perform most routine maintenance (v-wheels, belts, etc.) and it’s a little frustrating to not have more space.
I don’t think I could fit a spindle in my enclosure, based on the pictures I’ve seen with all the cabling extending out vertically. Table saws being around 3’ tall is the main constraint, but if your torsion box is short that could be reasonable.
So long as you strain relieve the cabling and hoses at the flex points there’s no reason not to put 90 degree elbows into the coolant pipes and one, fixed bend into the power cable out of of the router and then run the plumbing away horizontally from the top of the spindle and around to pick up on the drag chains.
Hit the order button last night! Got the XXL, BitSetter, BitZero and the previously ordered BitRunner, and the track and clamp kit. Also, snagged the starter end mill pack. I’ll be using my Makita router. Anything else you’d suggest?
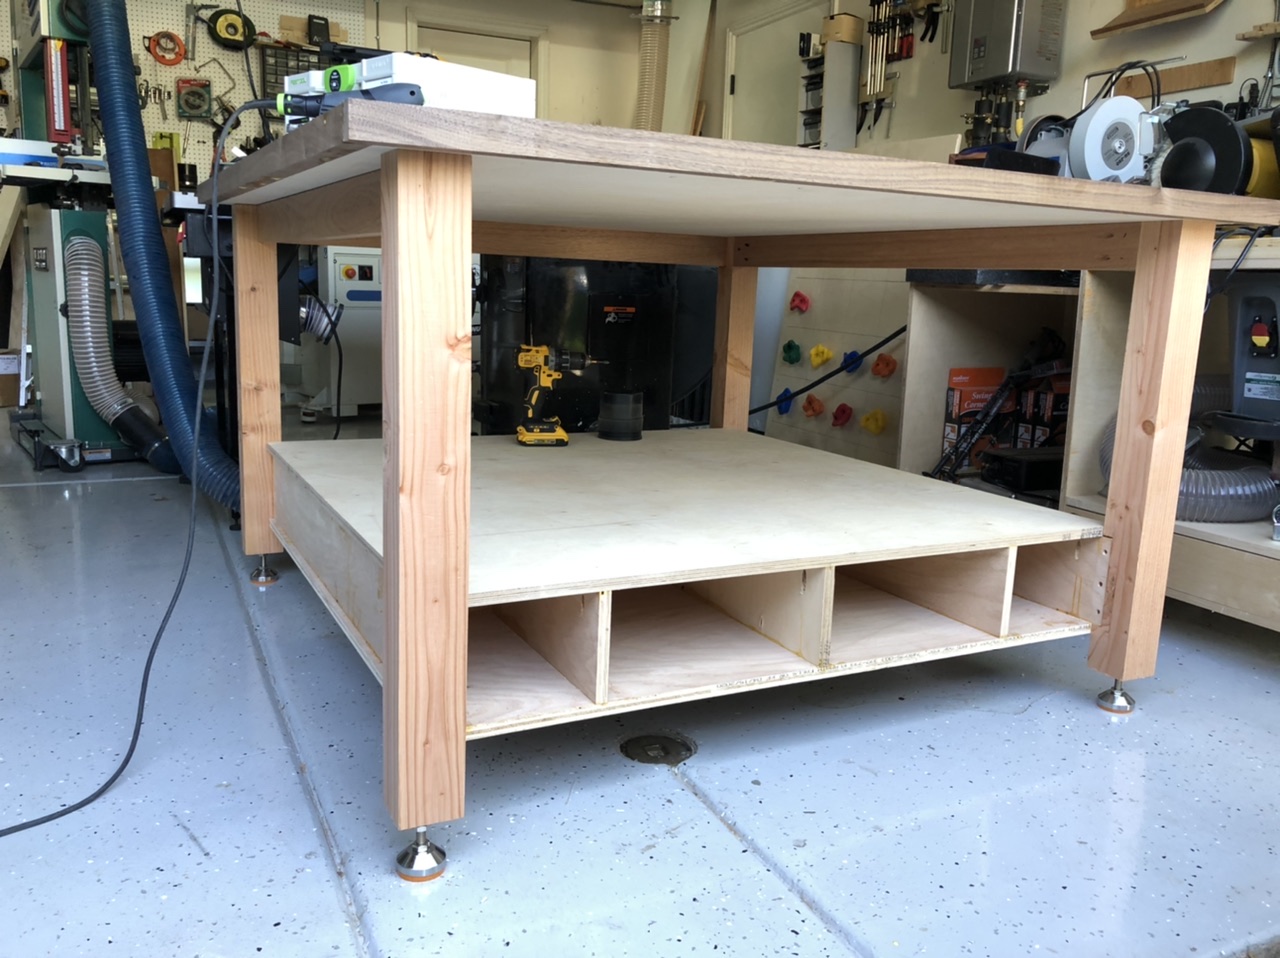
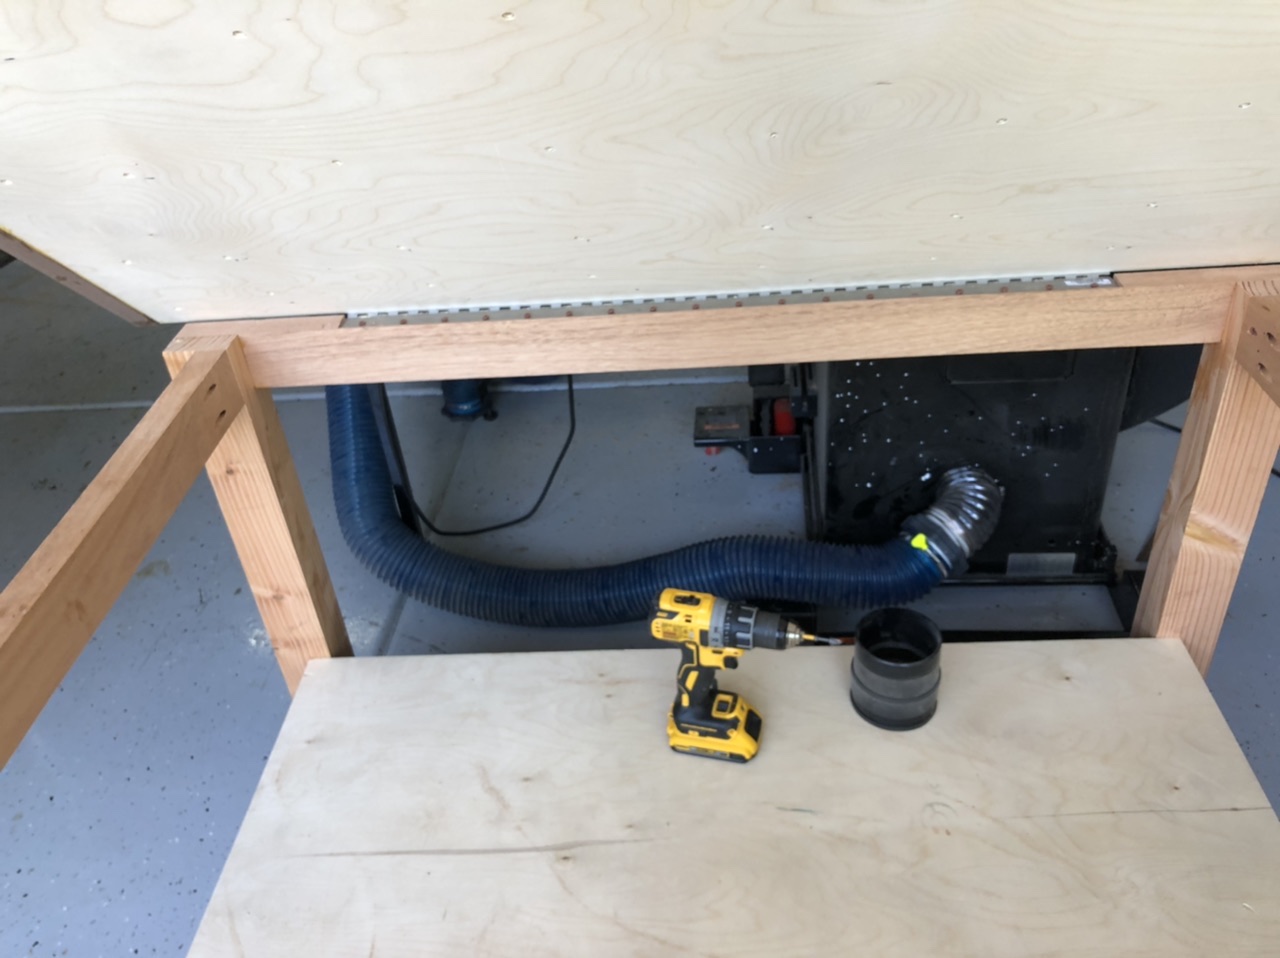
Finished up the torsion box / cabinet base last night and milled up the legs for the outfeed table, and the glue is drying. It’ll come together pretty quick now. My plan for enclosing it, will be with 3/8 or 1/2" window grade plexiglass, that will sit in a small rabbet around the outsides of the cabinet. My model looks like it will work, but reality likes to have a different plan sometimes, so I’ll keep that idea loose for the moment. Biggest design discision is how the plexiglass on the front of the cabinet will sit, as my upper table top will lift to expose the full bed of the XXL. I could have it sit proud of the legs to fill a rabbet in the top, and not seal it shut, so that its removable when I need access.
I’m excited to get this thing! Thanks again for all the guidance and words of encouragement! I think I’m going to like it around here
Being a woodworker, you might have these - But If you don’t have a dial or test indicator, these can be quite useful. Magnetic articulating base to make life simple. 123 blocks are also useful for many things. All of which can be helpful during initial setup of your new machine, maintaining your machine, zeroing stock, diagnosing issues ect. No practical need for anything but cheap examples for this machines purpose.
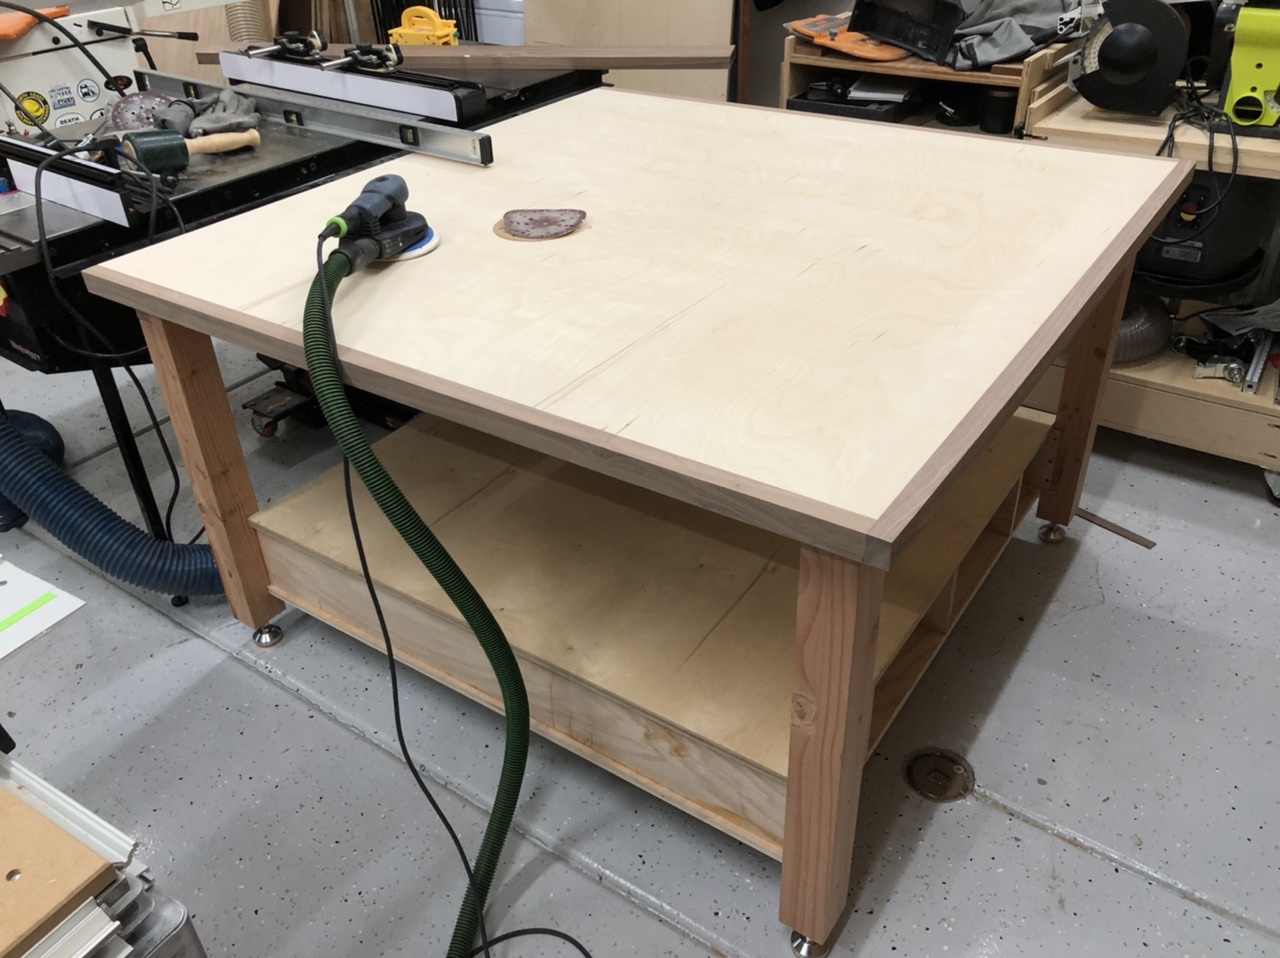
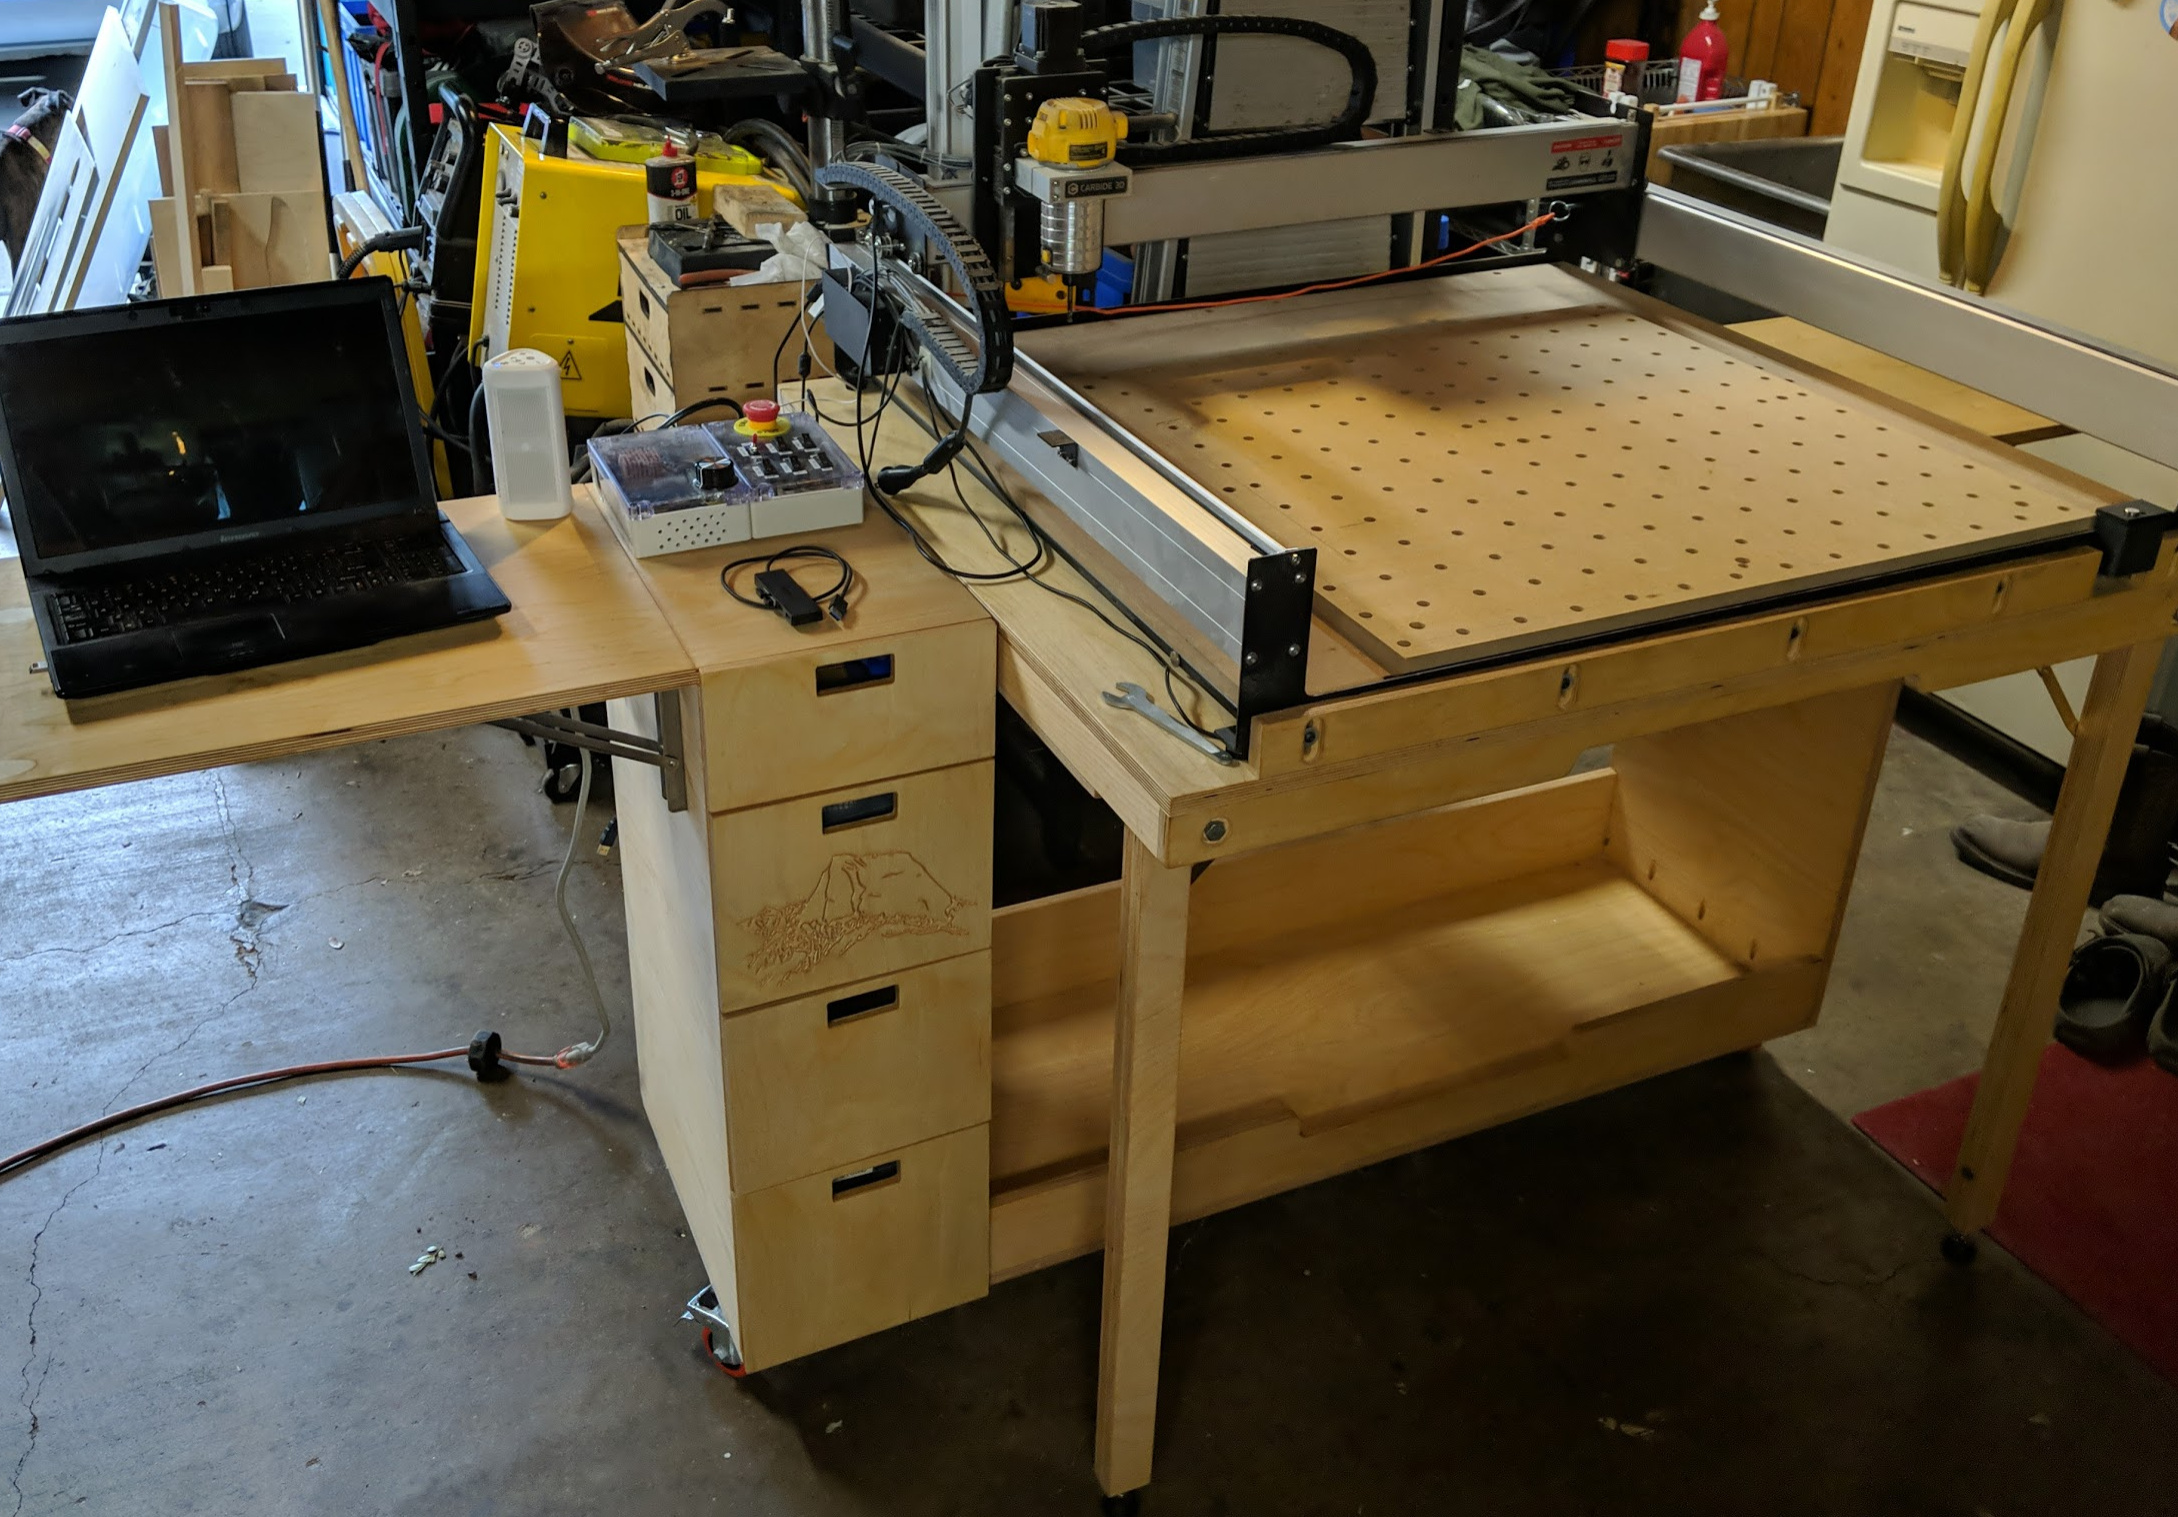
Got the outfeed table built and (mostly) ready for my XXLs arrival tomorrow. Slightly modified version of what Mike initially sent. I went with less drawer space and more headroom for the XXL and any future spindle upgrades.
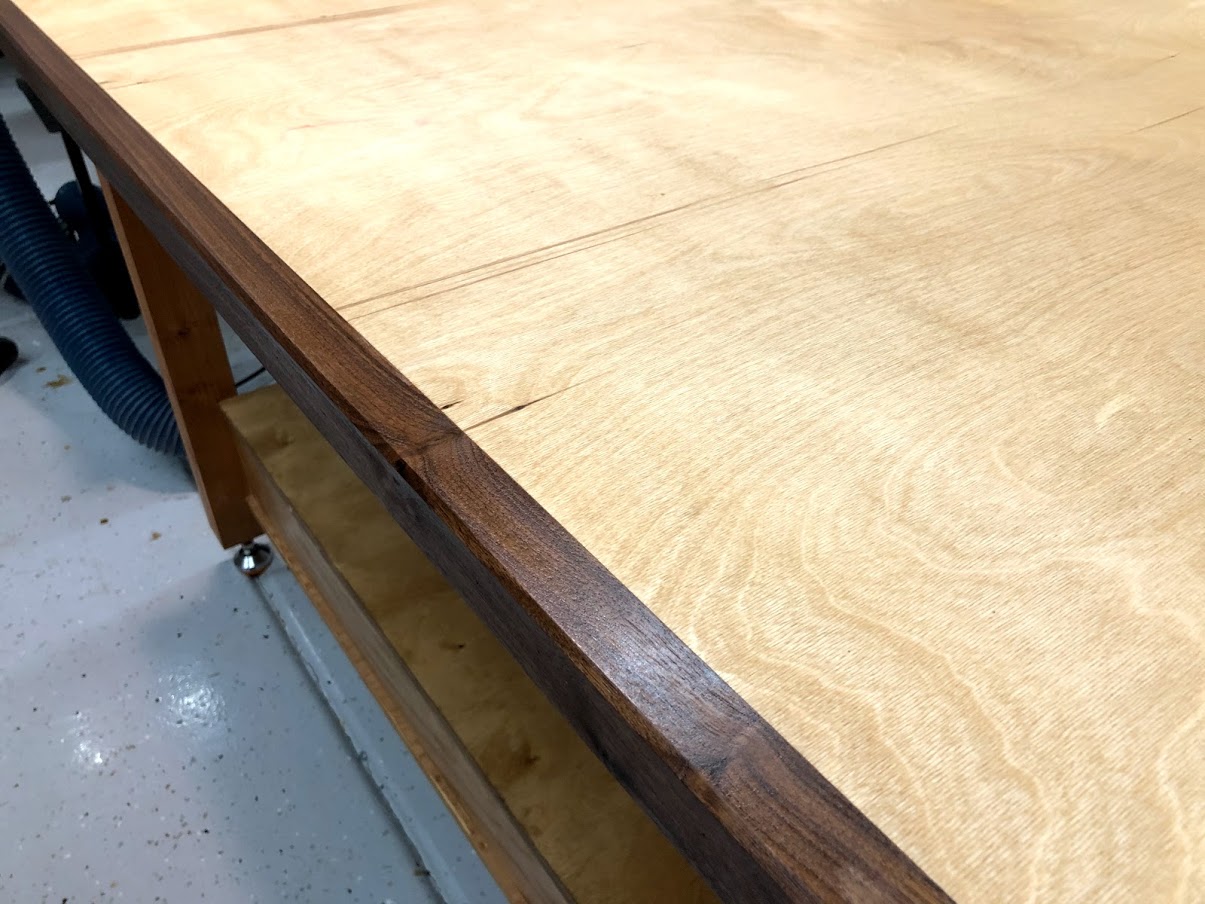
Matched it up to the rest of my shop furniture with a light stain to knock down the brightness of the birch ply. Pops out the walnut and mahogany bits too. Needs 1 more coat of poly and its fully ready to go!
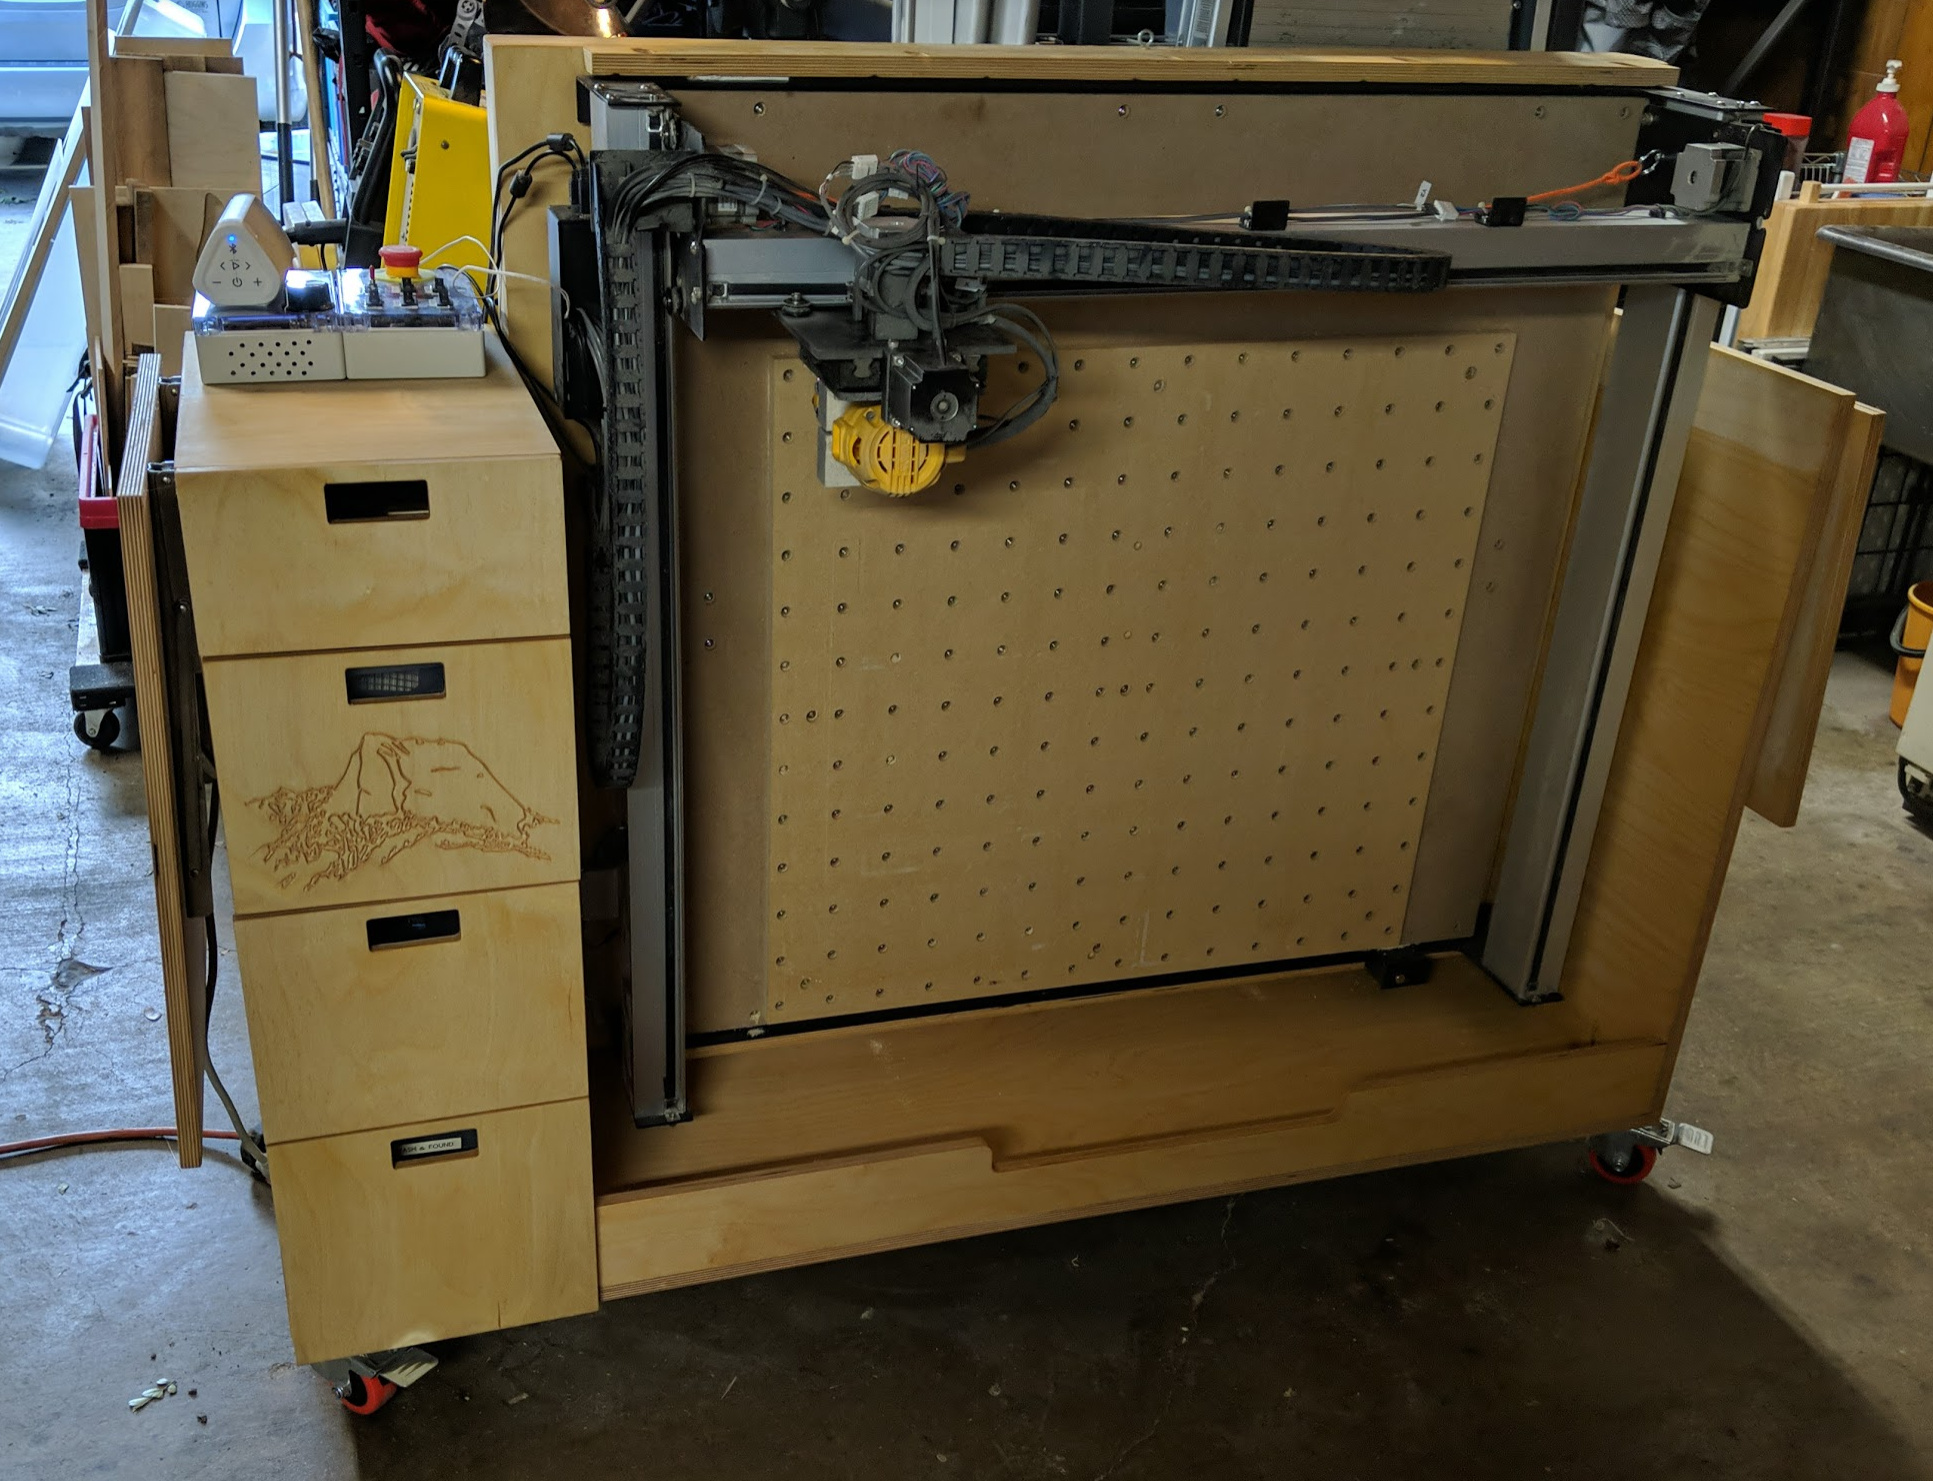
I built a folding torsion table. This was meant for a smaller machine, you can find some basic plans and variations searching for xcarve folding torsion table. Credit to Targ’s Workshop and his great video showing how it worked. Found some basic plans he posted that I modified for my set up.
The XXL is quite a bit heavier. I added front and rear rails I bolted the machine to them after it was square and level. This holds it in place. I’ve folded it up and down numerous times with no issues to “squareness” (is that word - lol) or tramming. Also added additional reinforcement on the pivot axis and shifted where the pivot was to make the rotation easier. It is heavy to lift, but not unreasonable.
Pulleys would have to have a heck of a system, it is really heavy. If you’ve ever used pulleys to hang a canoe or similar, it’s a lot of work. I’d estimate the torsion box and the CNC add up to 200lbs.
That’s a pretty sweet setup, Dan! That was my initial idea, was to wall mount it on a hinge, but I worried the weight of the machine would be too much on the rails and scraped the idea.
I’m really happy with how my outfeed table turned out. My old foldable Sawstop outfeed table just took up valuable space, with out any benefits of other use. Now I have a decent sized assembly table, drawers to store all the CNC bits, and a permanent home for the XXL, that has easy access to it.
Thanks! Your table is truly impressive and beautiful! I’m a hack that gets things really close with the tools I have and then fudge the rest.
If anyone builds a pivot table - note that the Y axis will want to slide to front/bottom since the steppers are not powered. You can see in the top right of my photo an orange cord. That’s attached to 1/4" cotter pins through each side rail to hold the Y rail in place and not fall to the front.
I didn’t think about this when I designed it, nearly cracked my head when I lowered the first time. I said a couple “oh craps” as I was juggling it all at the same time and had visions of pending doom as the router came crashing towards me. The problem is the router extends past the front of the CNC table, so it ended up resting on the base of the box when folded up and I didn’t like that.
Thought about dropping in a couple blocks and screwing to the threaded inserts in the table to hold the rail, but decided the cotter pins were the smallest, simplest solution. Cringed a little drilling holes through the rails, mostly since I had to do it freehand. Didn’t want to disassemble everything to put it on the drill press. But all worked out well and works great to hold in place.
Well, only the track add-on package made it today. For some reason, the XXL itself was delayed until tomorrow. Oh well, more time to prepare I guess. I was really looking forward to starting assembly.
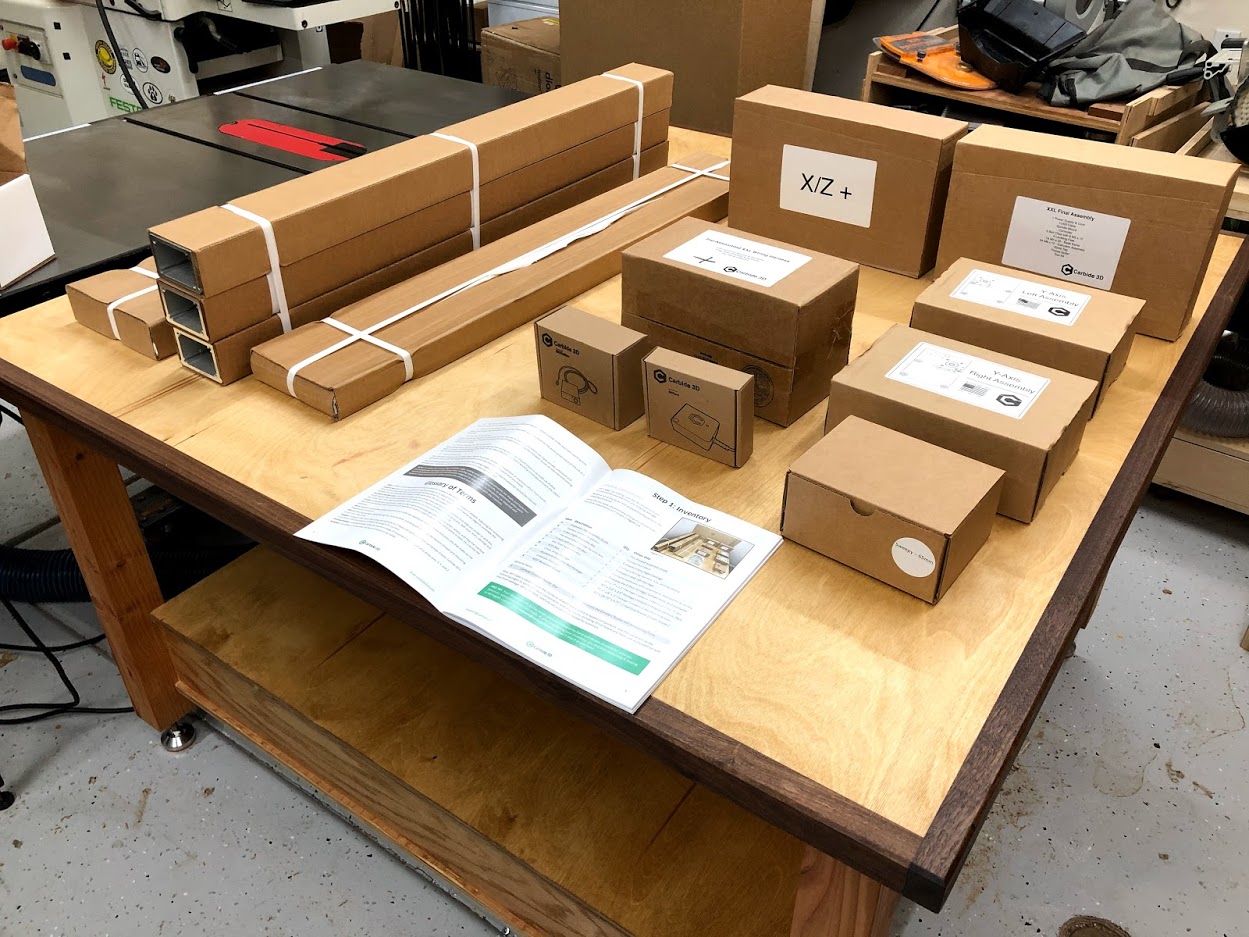
Everything arrived yesterday and in fantastic shape! I only had time to take inventory last night, so I’ll (slowly) start putting it together over the next several days. Ended up missing a couple small parts, but Carbide 3D has already shipped the missing parts out. Very much appreciate their quick response.
So far, the manual instruction has been great. Very reminiscent of Sawstop’s manuals, which are what I would consider, the best in the industry. Clean, clear and concise.
Seconded. I love their bolt packs. Such a great idea.
I’m surprised there were missing pieces…appreciate the quick response, but that really shouldn’t be necessary! Mine came perfectly and I agree, Carbide does a great job.
Is that the x-axis beam on top?
Looks rough on the ends.
You might want to get a pack of M5x20mm screws for the MDF board, the 25’s are a bit too long and protrude out the bottom. The heads of most of the Allen Screws are chrome dipped and no tool fits, S.A.E. or Metric. Replace the screws with a decent pack or file an allen down to fit…
The reason for the shorter M5 screws is that you will want to remove the 4 corner feet to stop the bed from flexing and the shorter screws will make it not “rest” on the ends of the bed screws…
just a couple things that can make the job easier.
The milling on the rails looks good to me. Nothing rough, at least where it matters. The included allens and tools fit like a glove, no worries there. I actually ordered a couple extra feet that will be placed in the center of the base cross members. It seems to fix any flexing issues. Hopefully they work!
I’m on the Step 9, clean up portion of the build! So close. Now I need to figure out where to route the power and additional cabling. Also, received the additional support feet today. It adds 6 additional points of contact, and there’s no visible flex when I put my weight down on the waste board. They fit right into the notch of the supports underneath. They work very well.
I have to say, the instructions are pretty much perfect. There was only one small thing I got a bit turned around on, but I caught it and was able to carry on. For something so complicated to assemble, it really didn’t feel like I expected. I expected some frustration and cursing, but none of that happened, haha. Slowly piecing it all together, you really get to know the machine. I am incredibly impressed with the whole experience thus far.