Looks good! What did you finish the MDF with? Maybe the stuff I got from home depot was a bad batch or something but a single drop of water will cause a 1-2m fuzzy raised spot after just a few seconds, dosent seem to happen with the stuff I got before ore the slats that the HDM came with. Maybe wd-40 wont disturb it as much but I’m planning on using an alcohol mister.
Does drilling with the endmill work well? I got a 4mm carbide drill but it may be of questionable quality and might be a bit small. I was going to just bore the hole out with a 5mm endmill hole afterwards anyways so it might not matter much.
Griff
(Well crap, my hypometric precursor device is blown…)
63
Spray shellac, 4 coats or so, dries fast.
Curious to see how your approach works out. I’ve got so many holes on 20mm spacing I’d hate to cut ‘em twice! Also, I think you’ll find alcohol is not much of a lube.
The end mill peck drilling is working well. Not ready to commit to a full plate yet though.
I think at this point I’m just going to skip boring and go straight to peck drill with an endmill like you did and go straight to threadmilling. I figured that the threadmilling is what decides the screw fitment, not so much the hole itself.
As for the jig, I want to use MDF because it’s cheap. I’m going to cut the aluminum plate to size and then drop it in to a recessed rectangle cut in to the mdf so I can easily repeat it for the second plate. I’m just worried about it warping from the mist and messing with the tolerances. The shellac shouldn’t affect the tolerances right? I’m 90% sure that it dosent matter but I tend to worry a bit too much.
As of now I’m just waiting for some endmills to arrive from 2L so I can start a model.
If you cut a bunch of material from one side of mdf it will warp. It will warp even more when you put finish on it. The mist will also cause it to warp unless your finish is completely waterproof which is very difficult to do. You can compensate for all that by having a lot of clamping to your hybrid table all the way around the edge and minimizing how much material you remove from the mdf. A bunch holes in the middle that line up with the t-slots for additional hold down would not hurt either. Also, depending on how accurate you are trying to be with this, the hole size before threadmilling will absolutely affect accuracy and thread fit.
The hole size matters due to the percentage of thread engagement. If your hole is too small, it will not fit obviously. However, if your hole is too large you’ll lose a lot of thread engagement which will weaken the holding power of your threads.
3 Likes
Griff
(Well crap, my hypometric precursor device is blown…)
67
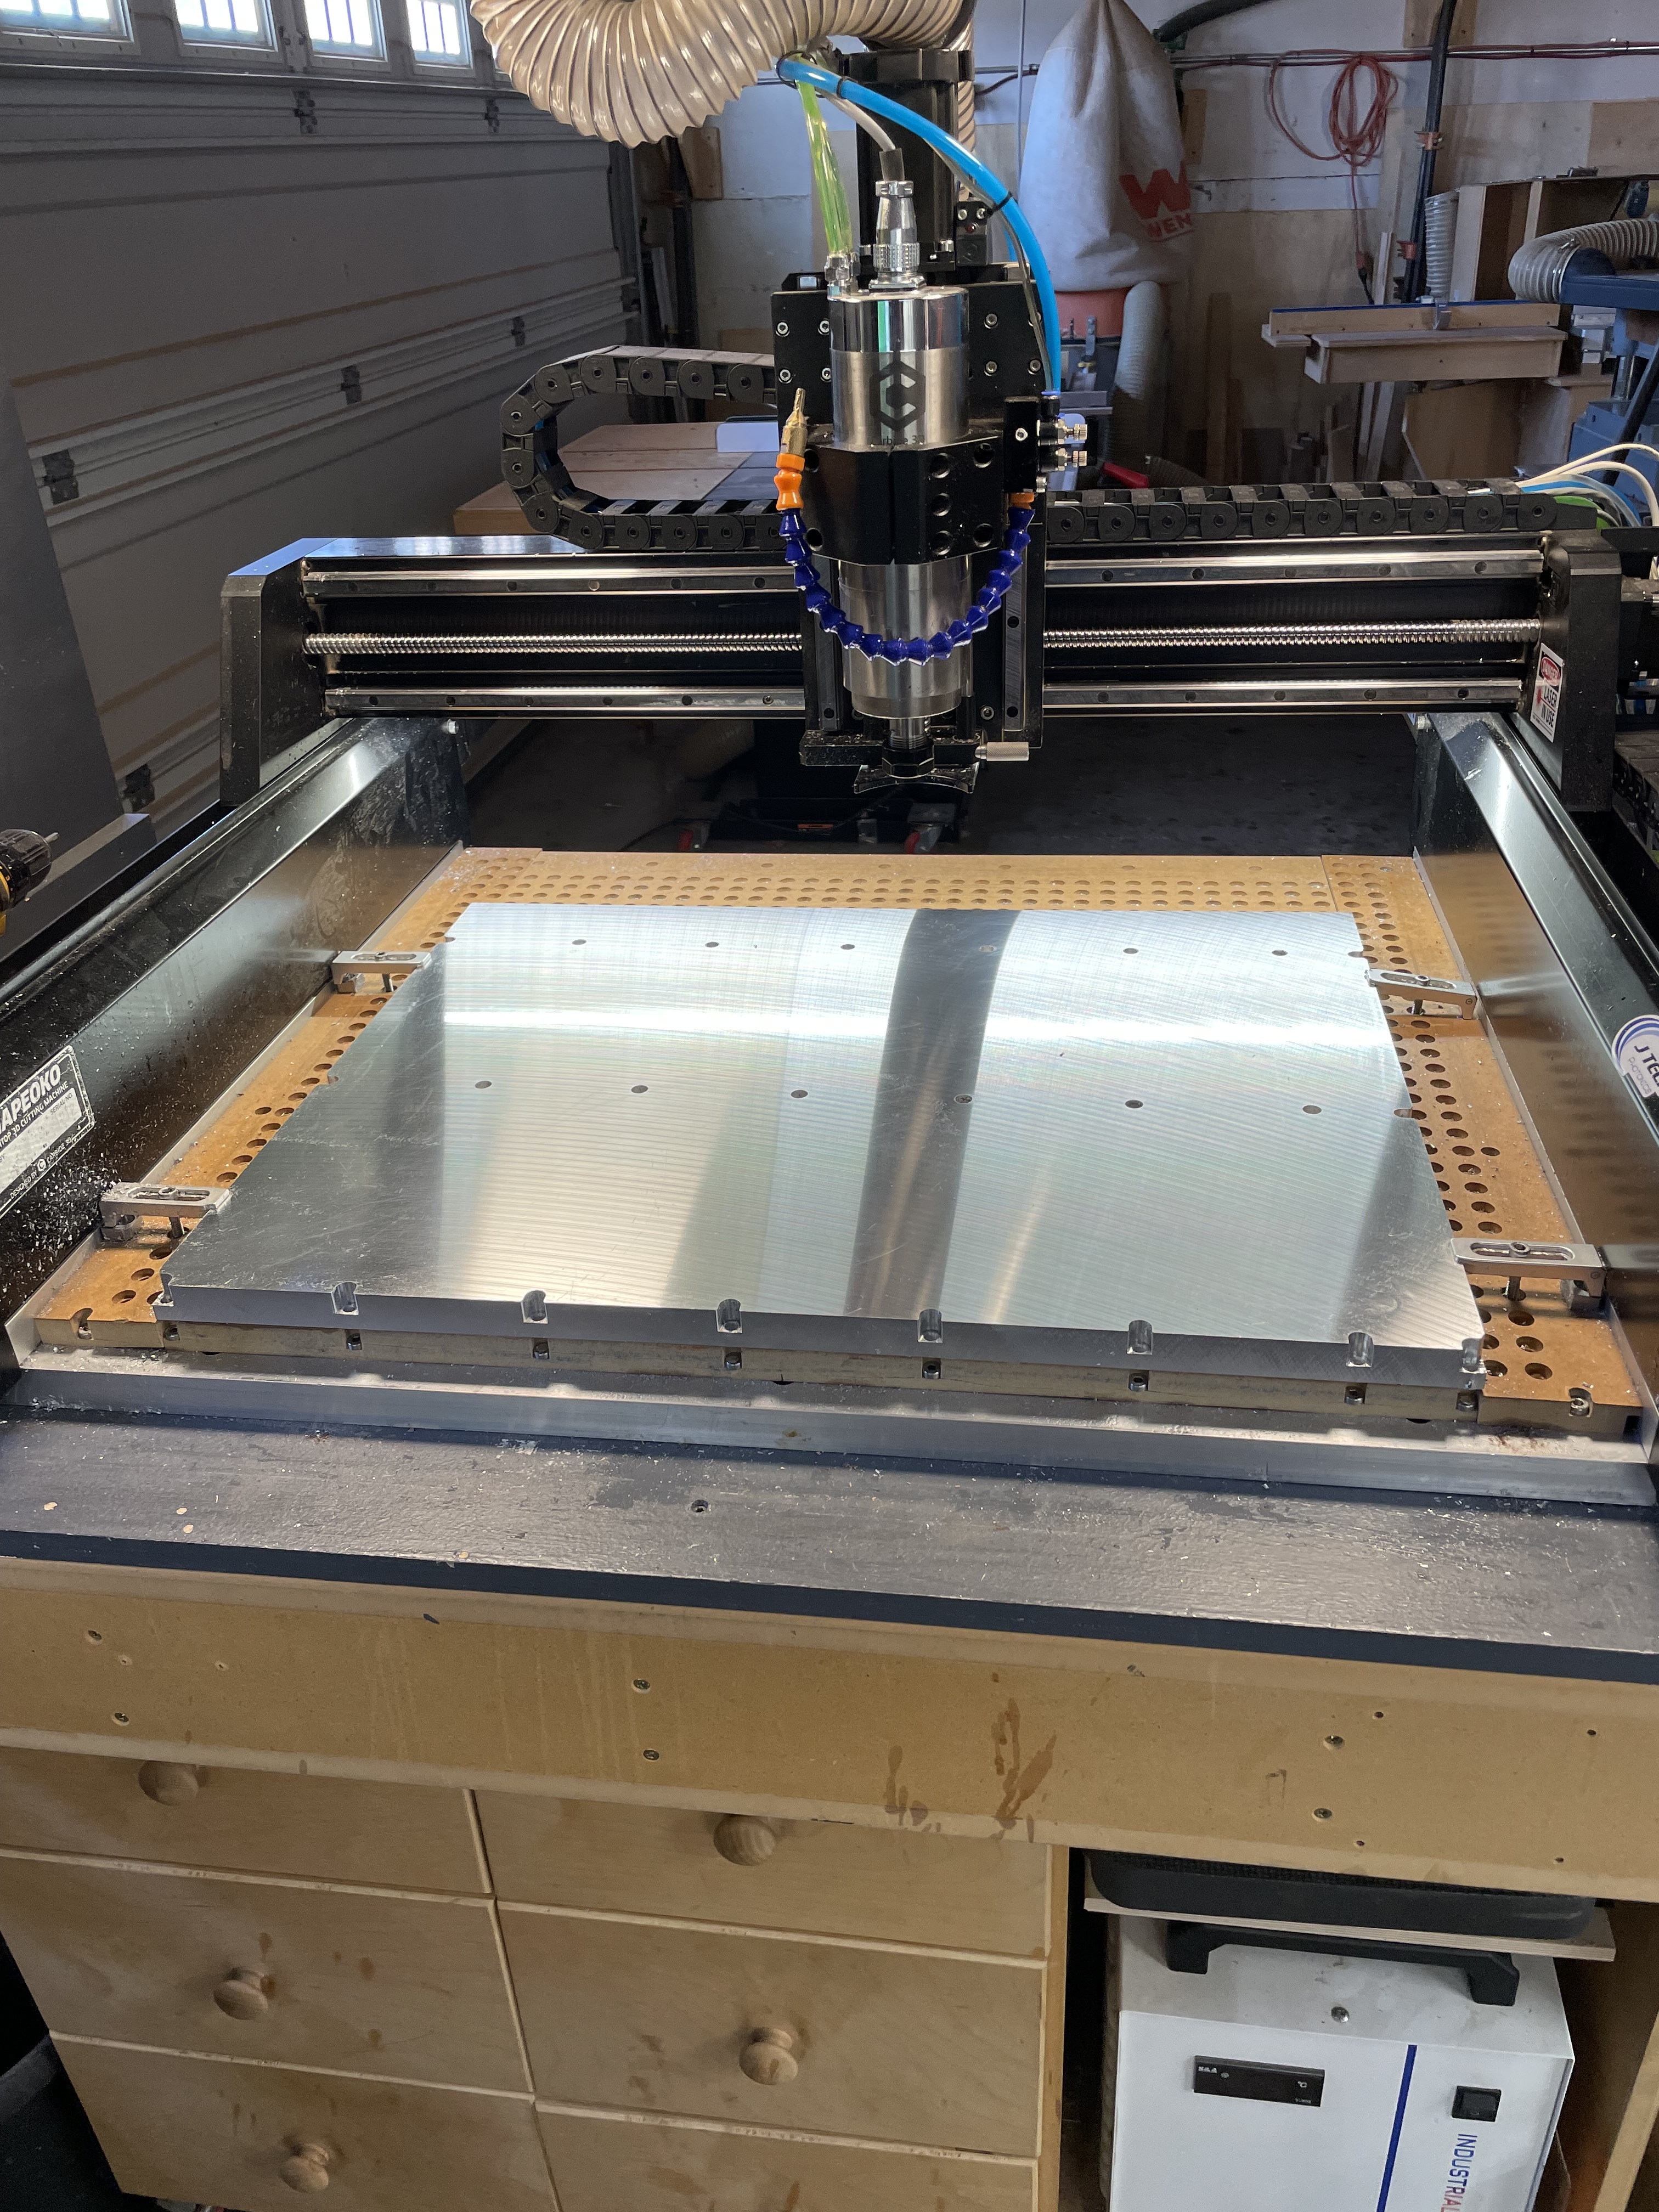
Okay, my 26x20 ATP5 plate arrives tomorrow.
My plan, as soon as I finish the 4 cabriolet legs I’m cutting now, is to align and clamp the plate to my MDF mock-up.
Then machine the anchor holes and countersinks.
Remove the plate, remove the MDF mock-up, align and bolt the plate down.
Check the plate for flatness, face if necessary.
Bore and thread the “million” holes.
Thanks for the info, learn more everyday. After looking it up a 5mm would be the appropriate size for a M6 thread right? I don’t think a .05mm different should affect it that much.
As for the MDF I may end up buying a thick sheet of plastic like HDPE and use that as a temporary jig. It’ll be more expensive but at least I won’t have to worry about warping as much.
Will you be boring with a 4.5mm endmill to get to a 5mm hole?
I plan on just drilling and threadmilling because a 4.5mm wouldn’t reach the full 1 inch. I could surface off 1/16 on each side to get the stock to 7/8 and use a 4.5mm 22.5mm reach endmill.
HDPE will also warp if you remove too much material because of internal stress. The same solution of lots of clamping can help. You can also get stress relieved HDPE that will warp less. The mist would not be a problem though.
When it comes to threadmilling, starting hole sizes are pretty important. If your minor hole diameter needs to be 5mm and you drill it with a 4.5mm end mill, there is enough material left to significantly complicate the threading op. Most threadmills are not designed to bring holes to size. They tend to be prone to tool deflection and you need to take pretty light passes. I bet that a hole diameter being off more that 0.1-0.2mm (0.004-0.008" for us imperial folk) either big or small is enough to cause real issues with cutting or thread strength. For a fixture plate that you are trying to make accurately with strong threads I would try to get within 0.05mm (0.002") of the diameter you need before threadmilling.
3 Likes
Griff
(Well crap, my hypometric precursor device is blown…)
71
Disclaimer: remember, I’m no machinist.
I’m using a 5mm single flute. Fusion tells me I should make a 5.035mm hole for 6mm threading. The end mill is 25mm long so it will cut through 7/8” plate with a bit to spare.
Yep, ran it on Fusion, it looks like 5.035 would be ideal. I assume that 5.05 is close enough of a difference to make good threads. I think Ideally I would use a 4mm endmill but I don’t want to have to buy more.
Griff
(Well crap, my hypometric precursor device is blown…)
73
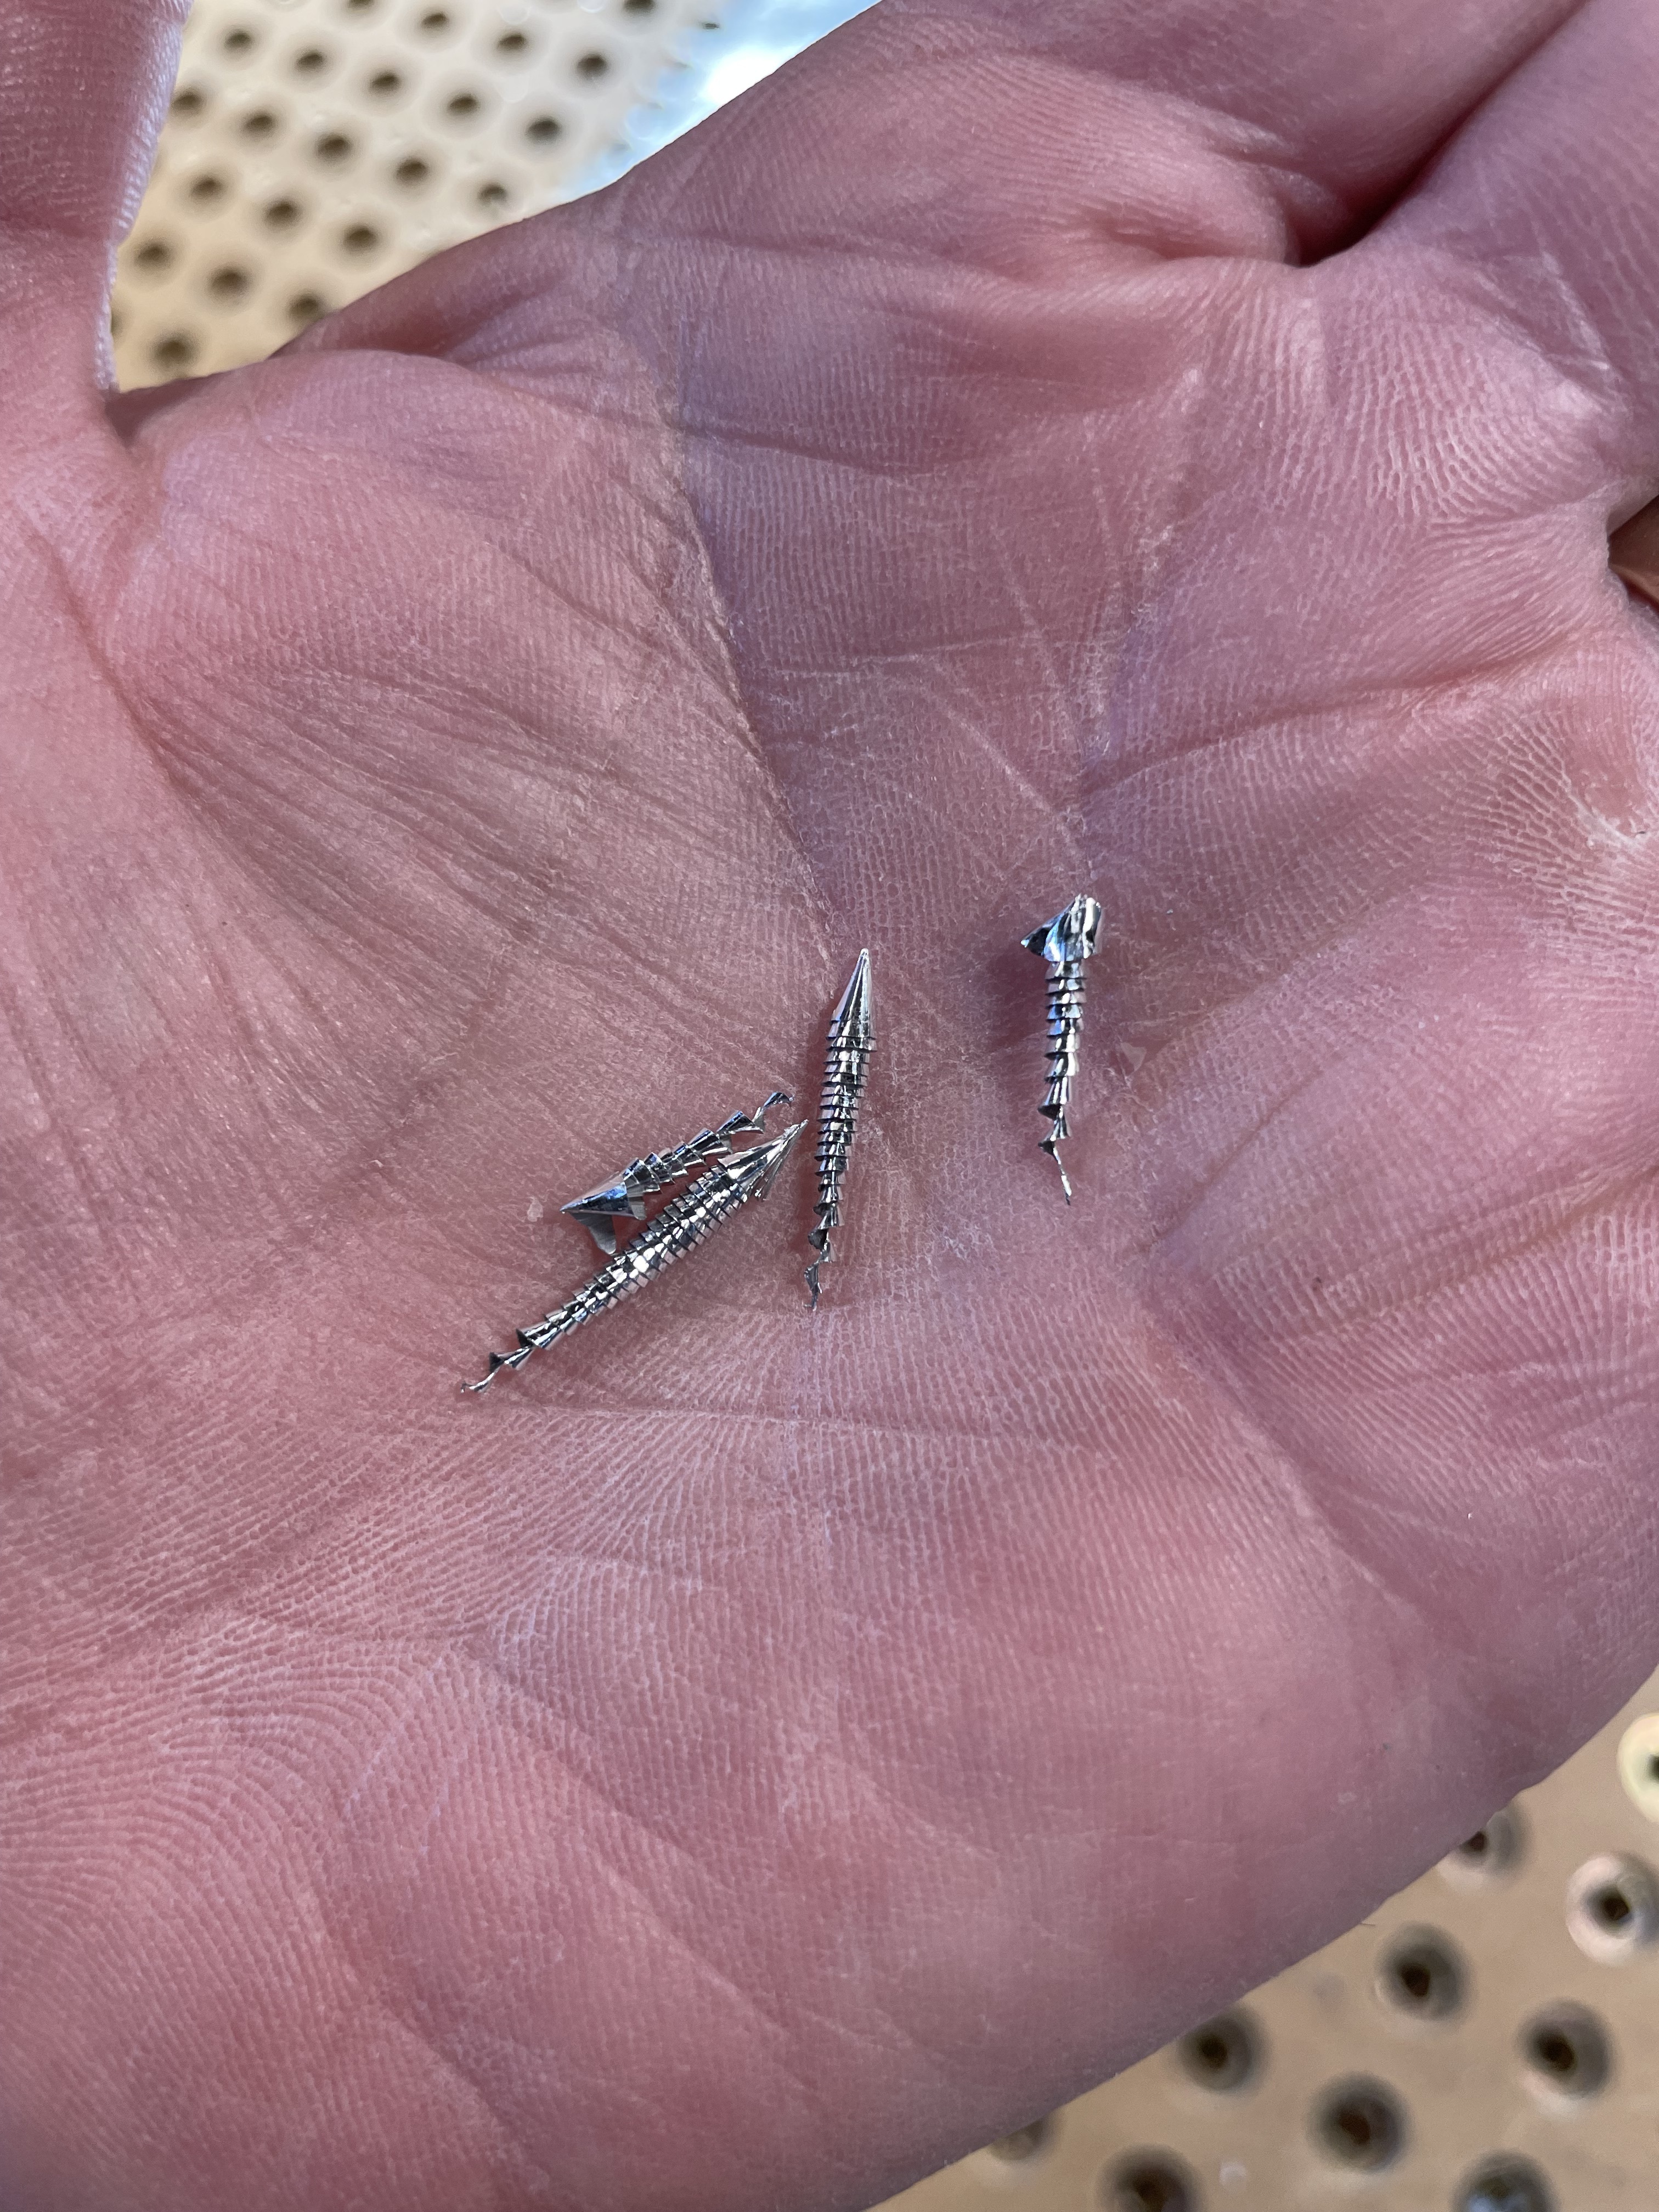
I peck drill with carbide stub drills sizes .043" all the way up to 1/4" using feeds from 15ipm to 40 ipm with ease on my HDM 10K RPM .05" peck full retract with air and cutting fluid .010" pecks on the micro drill. I drill .8" deep with zero issues 2.2kw HDM. For my deep 8mm bores I use a 6mm drill and then bore to final size with a 6mm single flute.
Thread milling I use multi form thread mills that are faster but wayyy more costly and so far 8-32 10-32 threads have come out great.
1 Like
Griff
(Well crap, my hypometric precursor device is blown…)
75
Really appreciate your insight, thanks.
With 1425 holes to drill/bore I’m hoping to limit each hole to a single operation. If I have to do two, so be it.
I’ve pecked a fair number of practice 0.875”/22.2mm deep holes with a 5mm single flute. Low air flow, WD40 drip. 0.2mm peck depth, chip break distance 0.1mm, full retract after 5mm accumulated depth. Low feed rate so far, 300mm/min, I will ramp up a bit as I go as I think 300 may produce more heat then me or the mill will like.
Griff
(Well crap, my hypometric precursor device is blown…)
76
So, I need to chamfer all these 1400+ holes, thought I’d try the spot drill method I’ve read about.
Semi blindly came up with this but I don’t like the sound of it. Concerned that it’ll hold up for 1400 ops.
Counterboring cycle, 0.25s dwell, 10k rpm, 500 mm/min plunge federate.
Spot drilling larger than required first followed by drilling and boring is a common practice for making a chamfered hole. I have never done it so I don’t know how it should sound but I know it can be done.
When I spot drilled deep like that before drilling it caused my drill to chatter at first because the tip angle on my spot drill was 90 and my drill 135. Try drilling first then running the spot drill or possibly use a countersink drill holder that does both.
Griff
(Well crap, my hypometric precursor device is blown…)
79
That makes sense. As I continue to re-think my strategy, doing the spot/chamfer step doesn’t make sense as it buys me nothing.
I’m committed to peck drilling with a single flute because I’ve come up with s&f that seem to work, spot drilling is not necessary and because I have a few 5mm end mills and 0 drills.
So, first op will be Drill-chip breaking cycle to cut holes. Second op will be Drill-counterboring-dwell and rapid out to cut chamfers.