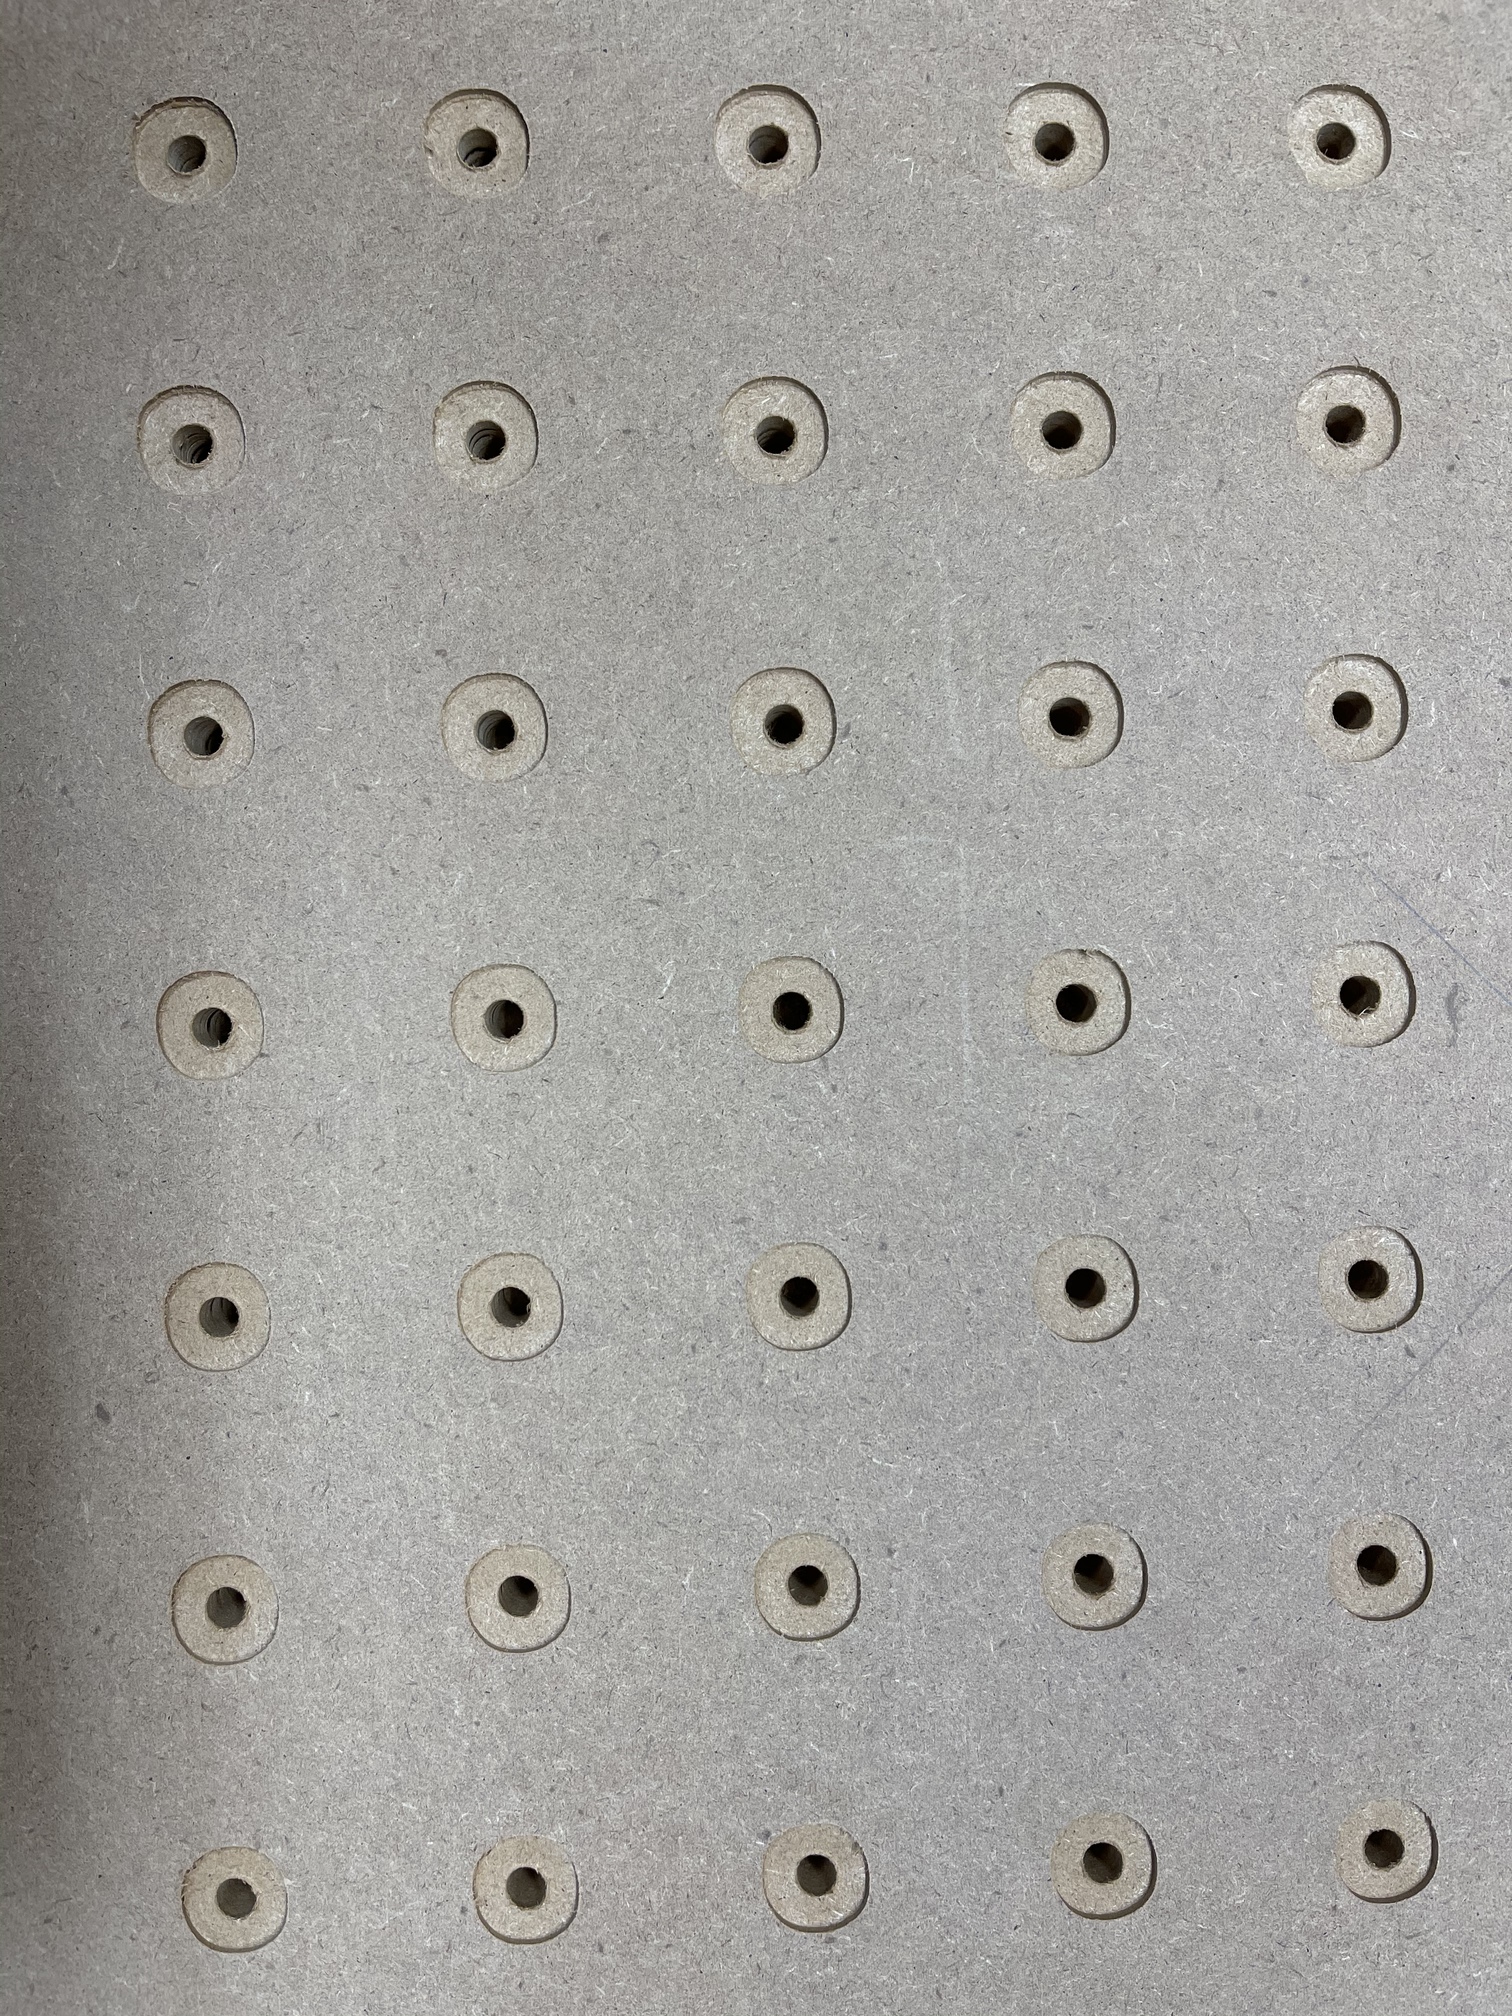
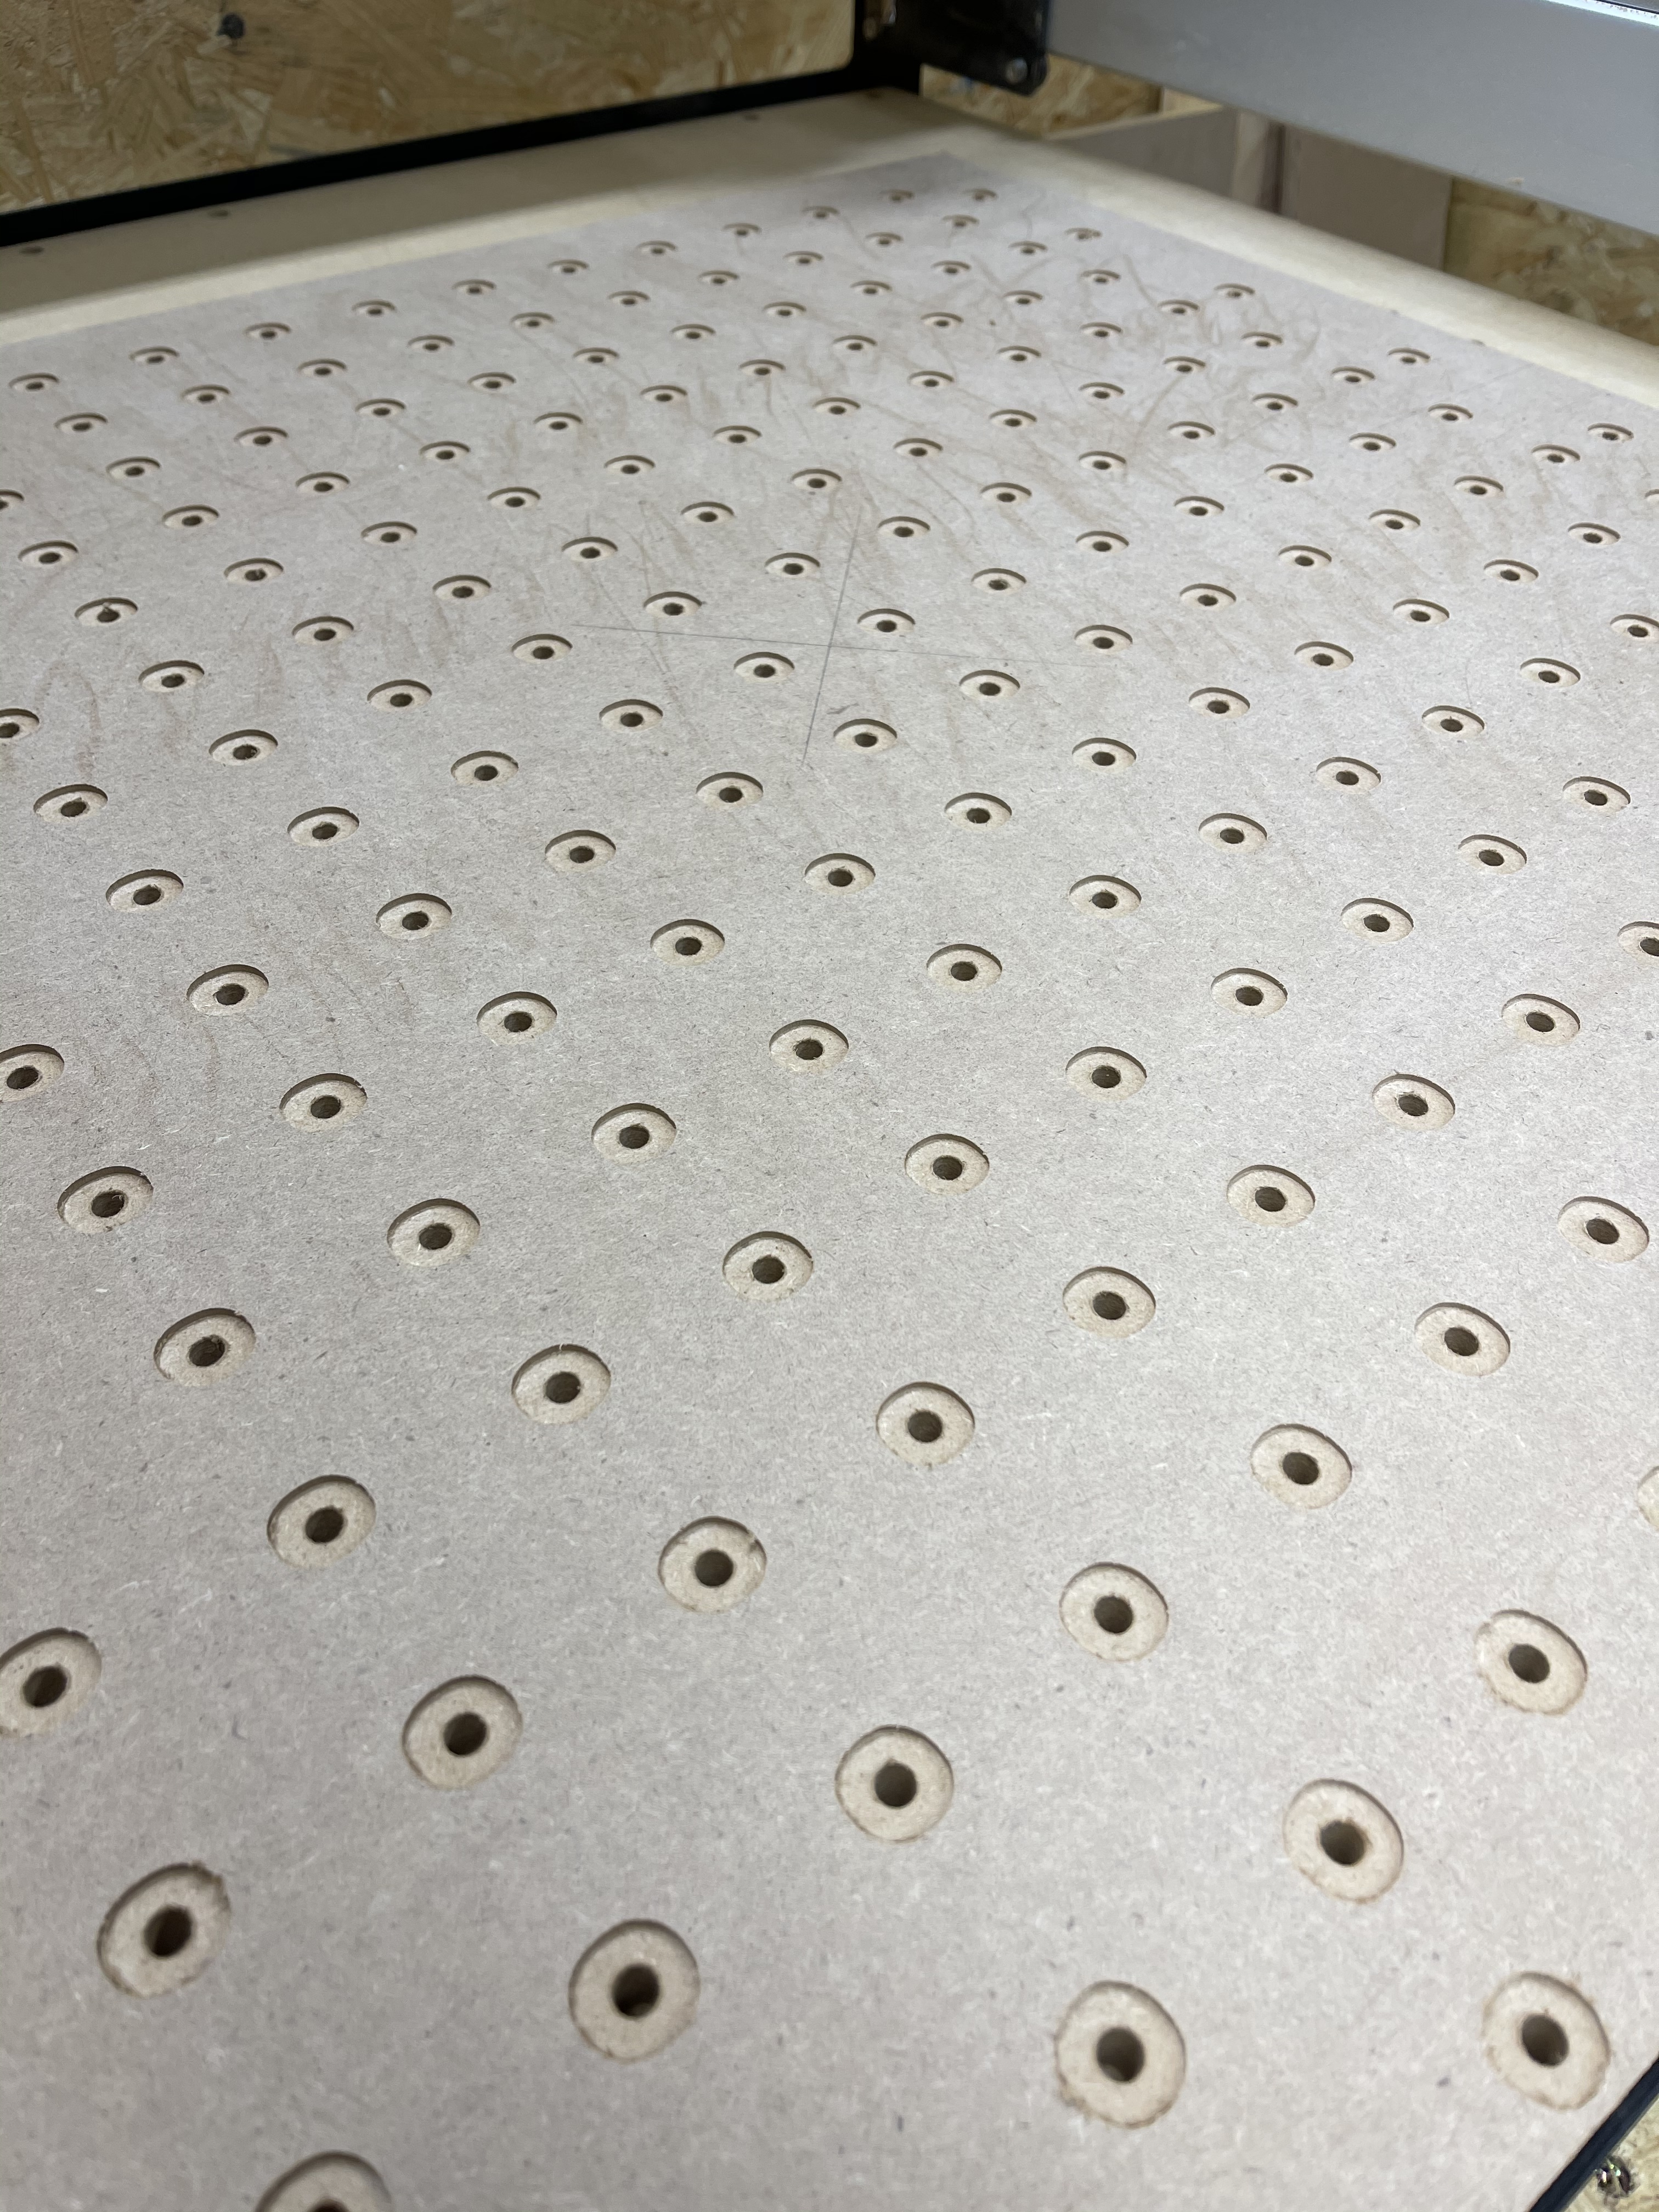
Life got busy with work and my first son born 2 weeks ago. I finally was able to get back out to my xxl. Ran the file for a supplementary wasteboard by Myers wood shop. The end result after the job completed was a lot of imperfect circles. Same issue I was having when I first received the machine. Literally EVERYTHING has been checked and rechecked. I have a buddy who is going on his 4th year with his shapeoko and he has checked everything for me and is completely stumped. I’ve taken every suggestion from everyone who commented and still the issues persist. Attached is pictures of the secondary wasteboard
I too had the problem of running out of Z when cutting holes in the waste board (for the Carbide corner square), when the belt Z over descended you could see it bend to the one side. Solution was to use a longer bit. Kodiak makes an extra long 1/8” bit. 3 inches long is plenty to cut anything ( great for slot cutting 1” thick foamular too). Just be careful with speeds to avoid deflection when cutting anything hard. https://www.amazon.com/gp/aw/d/B007BTQ4G2/ref=ya_aw_od_pi?ie=UTF8&psc=1
Congratulations on the baby, not sure if it’s your first, but if it is…don’t ever brag to anybody that your baby is a good sleeper. It backfires lol.
You mentioned your series of O’s got better on the right side of the machine, check and make sure both of your Y stepper motors are plugged in and powering up, and double check that their pulleys are lined up on the shaft flat, and set screws are indeed tight. Seems like this issue could be caused if one side of the gantry is dragging a bit.
@Lambo28806 — please try powering down and removing the belts for both Y-axis motors ---- put a bit of tape on them, then power up and initialize — do the two Y-axis motors rotate evenly and in synch?
What have you tried? If you provide an exhaustive list of things you have tried, we can maybe give you suggestions on what else to try? This will prevent us from suggesting things you have already tried.
Eccentric nuts are checked and correct.
Belt tension has been checked and correct.
Absolutely no slop or play anywhere
Machine is level and square
Plummed the machine
Checked, rechecked and checked again wires and connections all secure.
Do you or a friend have a multimeter to check the wiring for continuity?
Please make a simple file intended to be cut from an inexpensive easily sourced material such as MDF and send it in to us at support@carbide3d.com along with the generated G-Code, step-by-step notes on how you are securing your stock and setting zero relative to it, and a photo showing a failed attempt at cutting (ideally paired with a screen grab of the 3D preview which shows what the part ought to look like) and we will do our best to work this out with you.
What exactly do you want to see in the simple design? Is there something specific?
The picture before in this thread of the issue was 3/4”mdf and was secured to the wasteboard that came with the machine in all 4 corners with 1” brad nails
I zeroed out the z height using my touch probe in the direct center of the stock
So if you grab the collet of the (powered off) router and try to move it around, with the machine turned on, you cannot feel any play there ?
This may be silly, but considering you triple-checked everything else, could it be the router itself (failing bearings? I remember several cases reported here). Any chance you can borrow four friend’s trim router and test again ?
No play at all in the router itself or the mount on X axis when powered down. Everything is solid. My friends router Is different from the one I have to try swapping it
Also, you could try cutting a large (10"?) square shape and the same square rotated 45°, in a scrap piece of MDF, which could better show
whether straight lines come out as straight
whether the problem also happens on X-only / Y-only moves, or just in combined X+Y moves.
Just because it is harder to troubleshoot mechanical issues on small circles like that.
and just because I have to ask (sorry), can you back and inspect (again…) every single v-wheel (including the 4 ones on the Z axis if you have a belt-driven Z) and make sure none of them spin freely ?
Here are some troubleshooting concepts I’ve found useful when checking things.
To eliminate the software, please check it in a 3rd party previewer such as CAMotics: https://camotics.org/
Verify that you are using up-to-date software versions including the firmware (Grbl 0.9 originally, currently 1.1 and that the versions match, Carbide Motion 3 with Grbl 0.9, CM4 or later with Grbl 1.1).
which pushes/pulls on the belt — make sure that the belt tracks true through both the pulley and the idlers and is in good condition, secure at appropriate points and well tensioned (see the assembly instructions)
having an endmill properly installed in a clean and well-fitting collet properly tightened
being moved along by the toolpaths without running off the rails and running into a limit of motion along any axis or any workholding or physical obstruction such as a cord, dust collection, &c.
which matches the toolpaths in the G-Code (which brings us full circle)
For electronic accessories, check the connectors and the wiring along its entire length.