Hey yall Carbide 3D leaders ! I have great issues with my Carbide create program.
I would be providing my pictures to break this down a bit further.
Firstly- I am having issues with setting up my machine, I’m at my final stage before my cut atleast so far !
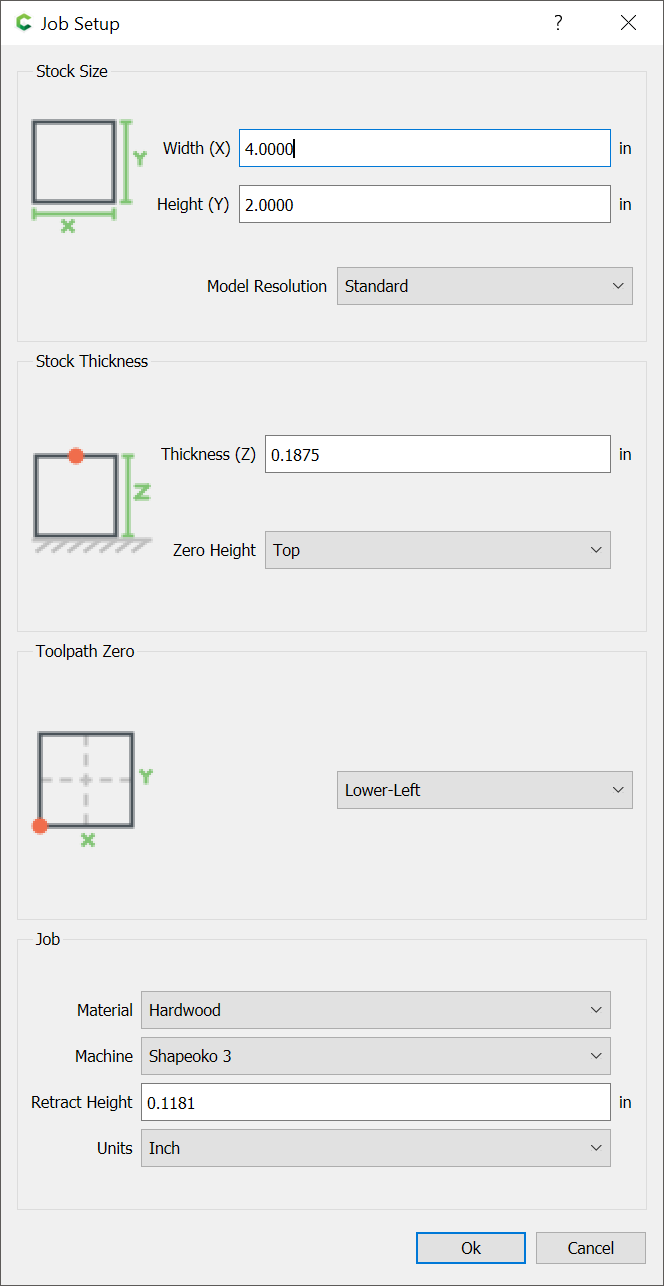
Needing help - What my major issues I think is understanding the terms like stock thickness. I have a wateboard @ 3/4" also my material @ .06 mm . Also do i necessarily need to purchase a tool for my bit to recognize the height?
My router plus bit - My tool is a 1/8 " cutting not @the shaft but @ the bottom . Lastly I really think that actually putting these last few touches should get this wheel rolling. Again looking for some broken down help, not anything like feedrate plunge rates etc. thank you again!!
Your material thickness (.06mm) is a sheet of paper. Don’t worry about the wasteboard thickness, it doesn’t matter. Once you ‘set zero’, the machine takes care of knowing how deep to cut, regardless of how thick your wasteboard is.
The stock thickness is just how thick the material on top of the wasteboard is. To match these settings, once the material is fixed down, you then ‘set zero’ so that the machine reads zero height when the tip of the bit is just touching the material.
You can use the ‘BitZero’ to help automate setting the Z height (and the X-Y, if you like), but it’s not necessary. You can easily set the Z Zero manually.
Thin sheet stock can be problematic in terms of workholding — what are you cutting? How are you holding it in place?
What tool are you using?
Would overcutting by 0.04mm be an issue? If it is, set the thickness to 0.1mm and use a feeler gauge to set the Z-axis zero 0.04mm above the stock surface — if not, set the thickness to 0.1mm and just overcut on Z.
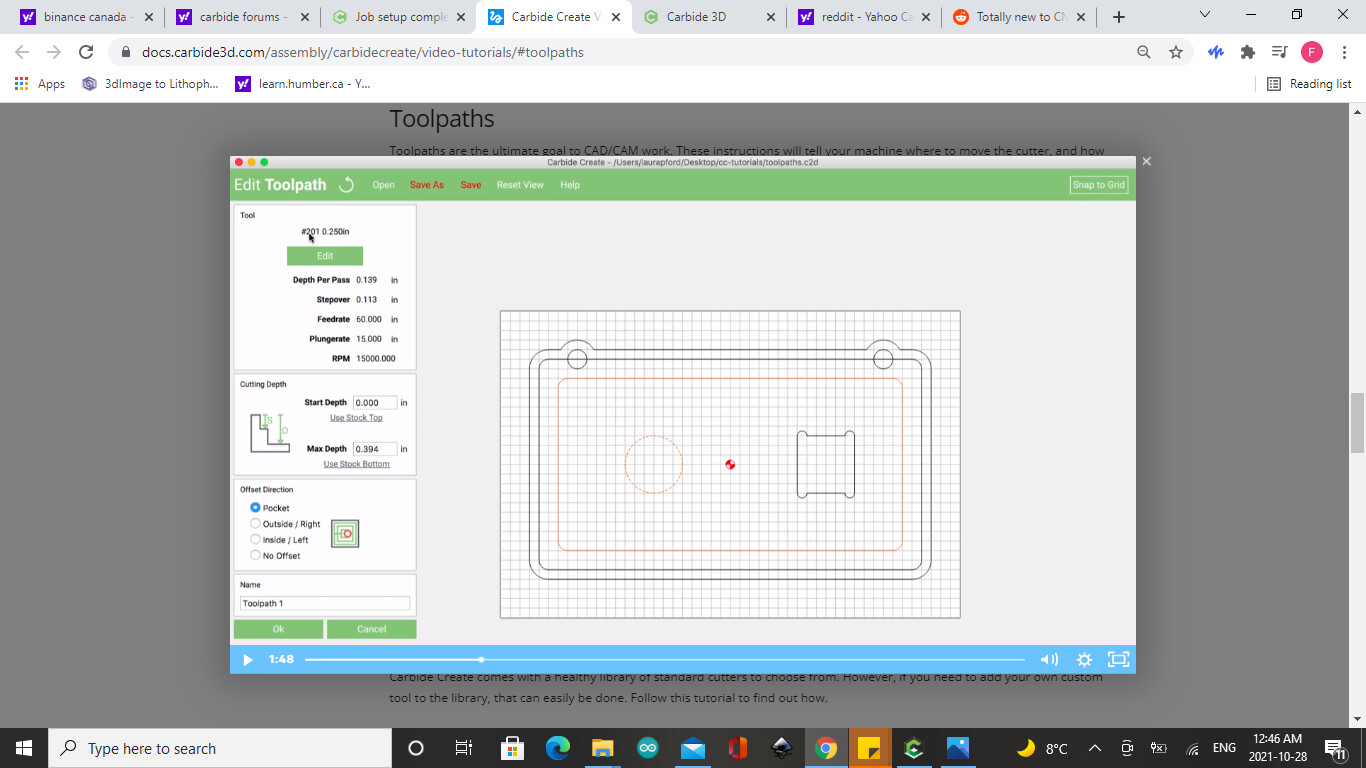
Correct, tools cut at their bottom and the zero is set at the bottom center of the currently loaded tool when it is placed at the origin, see:
I would rather set my zero manually. but yes my material is .06 mm but the issue is that im getting an error code every time i get my setup finished . Ultimately i’ll be looking into the other comments to see if there a correction about how to set up carefully because i need to understand what i’m doing at this crucial part THANK YOU A LOT !
That’s very thin stock. However, it doesn’t really matter what you put as your stock thickness. You can say it’s 10cm thick and then just cut 0.06mm deep into it.
The machine doesn’t know what you’ve got on your table.
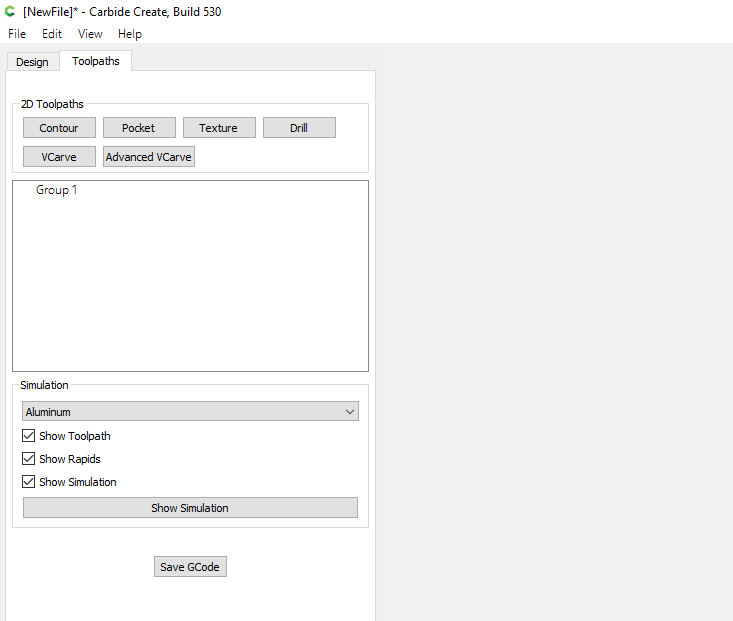
Which toolpath you use depends on what effect you wish to achieve — see:
You will be able to preview what each toolpath does in the 3D preview, so you should be able to determine what cut suits a specific aspect of a project — if you have difficulty with this, post the file and and a description of what you’re having difficulty doing and we’ll do our best to help you puzzle things out.
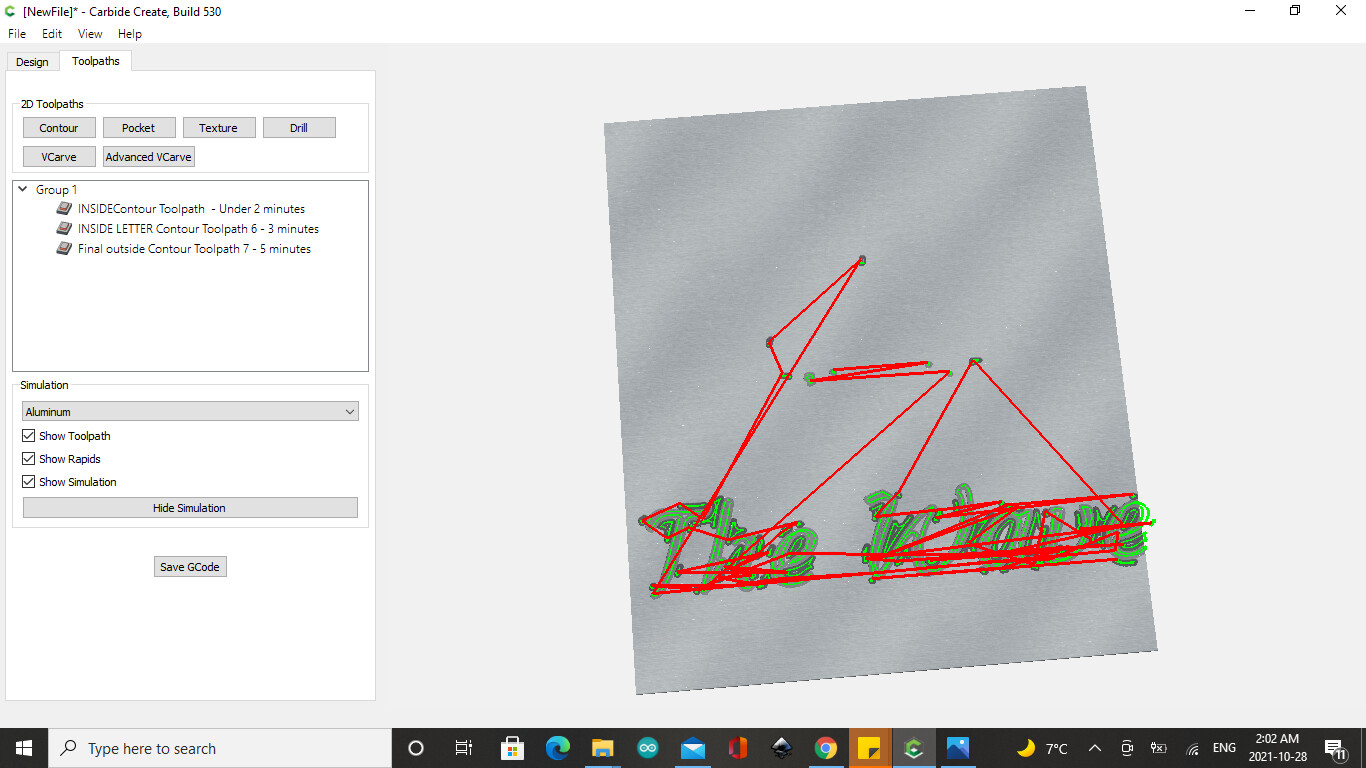
Thanks will this saved me a lot of time and over thinking it. i just wanted to share my image and see if this is normal when it come to the tool path that i have here im not TOO confident about it because i started with a image and words combined but now my image is lost completely , just wondering is this normal? Do i have to download a separate carbide motion to complete this G Code ? In addition what i was reading carbide motion was mentioned? How do i go about this isssue ?
It looks like the endmill size (diameter) you are using may be too big to fit into the small details of the vector above your text, and this is why it only cuts a few spots here and there (those are probably the only spots where the features are large enough that the endmill can fit). For the sake of verifying this, you may want to select a smaller endmill, regenerate your toolpaths, and see if the simulation looks better (by the way, you can uncheck “show toolpath” in that simulation window, to better see what the final piece will look like).
As was suggested on support — draw in the diameter of the endmill which you are using — it’s a useful check as @Julien noted to verify whether or no a tool will fit.
Thanks I didn’t expect it to work . How would I know what’s the minimum for a 1/8" tool? I’m currently using a makita rt0701c what’s my range with a smaller bit I’m really at this point unsure of what size O flute works for that ?
You can do as Will mentioned: draw a circle of diameter 1/8", and manually move it over the vectors you want to include in a toolpath: you will see very quickly where it fits and where it doesn’t.
At some point you will find out that a 1/8" is too large for fine details on small pieces, and then you have two main options:
go to smaller diameters (1/16", 1/32"), but those endmills are very fragile so it’s really not recommended for beginners.
go to v-carve toolpath with a vbit (for example 60° or 90° vbit), and then you can carve very small details with acute angles. Check out the tutorial video on v-carving. v-carving is an invaluable technique you will want to use sooner or later anyway
cool thanks i also have found a Bushing Adapters 1/4" to 1/8" this is as small as i would try for now. Any websites you can recommend for me, to get decent good quality bit for a good price im looking for a O flute 1 that fits a 1/8 collet