I hear you there brother!
FWIW, I’ve cut panels, 0.3” thick, very similar to that with this:
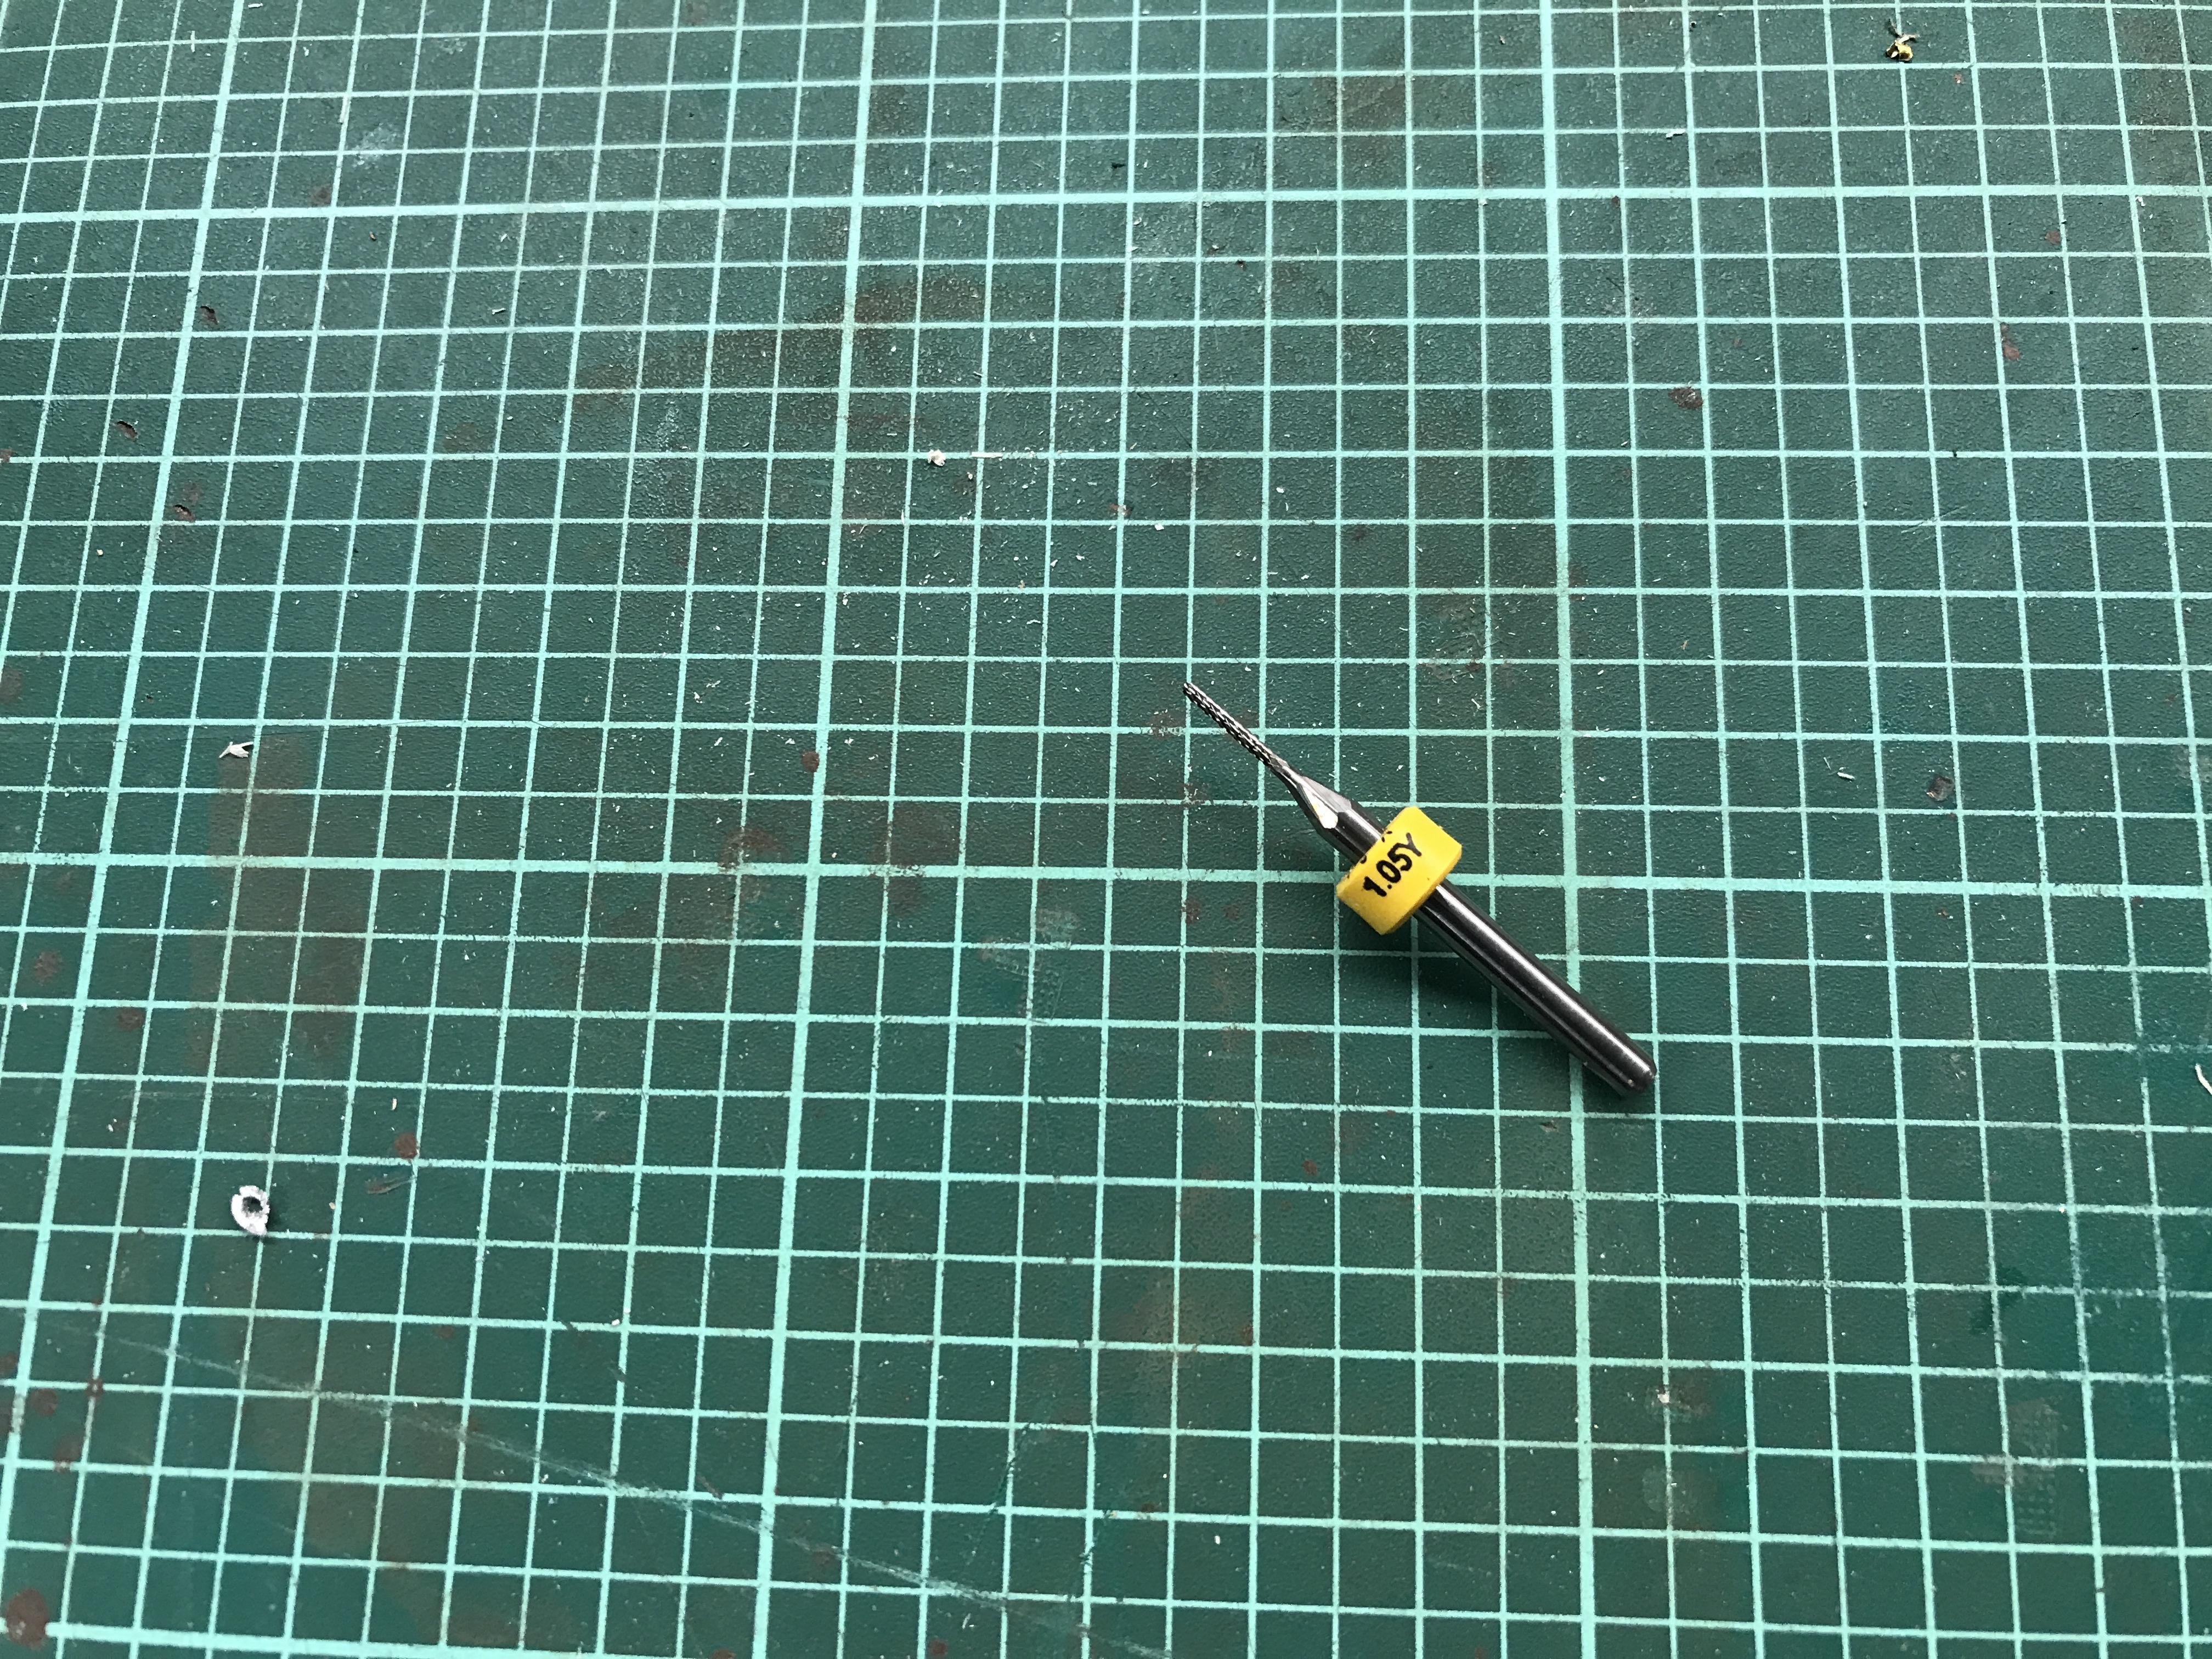
1.05mm/.0413” Drillman1 (now Oliver Tool) DOC 0.333, roughed with a 1/8”.
I hear you there brother!
FWIW, I’ve cut panels, 0.3” thick, very similar to that with this:
1.05mm/.0413” Drillman1 (now Oliver Tool) DOC 0.333, roughed with a 1/8”.
I found running at 80-85% power at higher feeds 300-600 mm/m using multiple passes greatly reduces the charred edges with air assist vs running slow at 100-150mm/m and cutting in 1 to 2 passes.
No you won’t be able to swap out a dead diode and the more beams you stack together into a single beam increases the beam width reducing the detail one can achieve. Also these high power multi-beam diode lasers can at low settings be too strong and burn through some materials instead of engraving.
Try not to get caught up in the raw power trap as tempting as it can be.
This is the results I get so far with the 4 diode 20w Atomstack and the thickest I cut was .75" pine with ease.
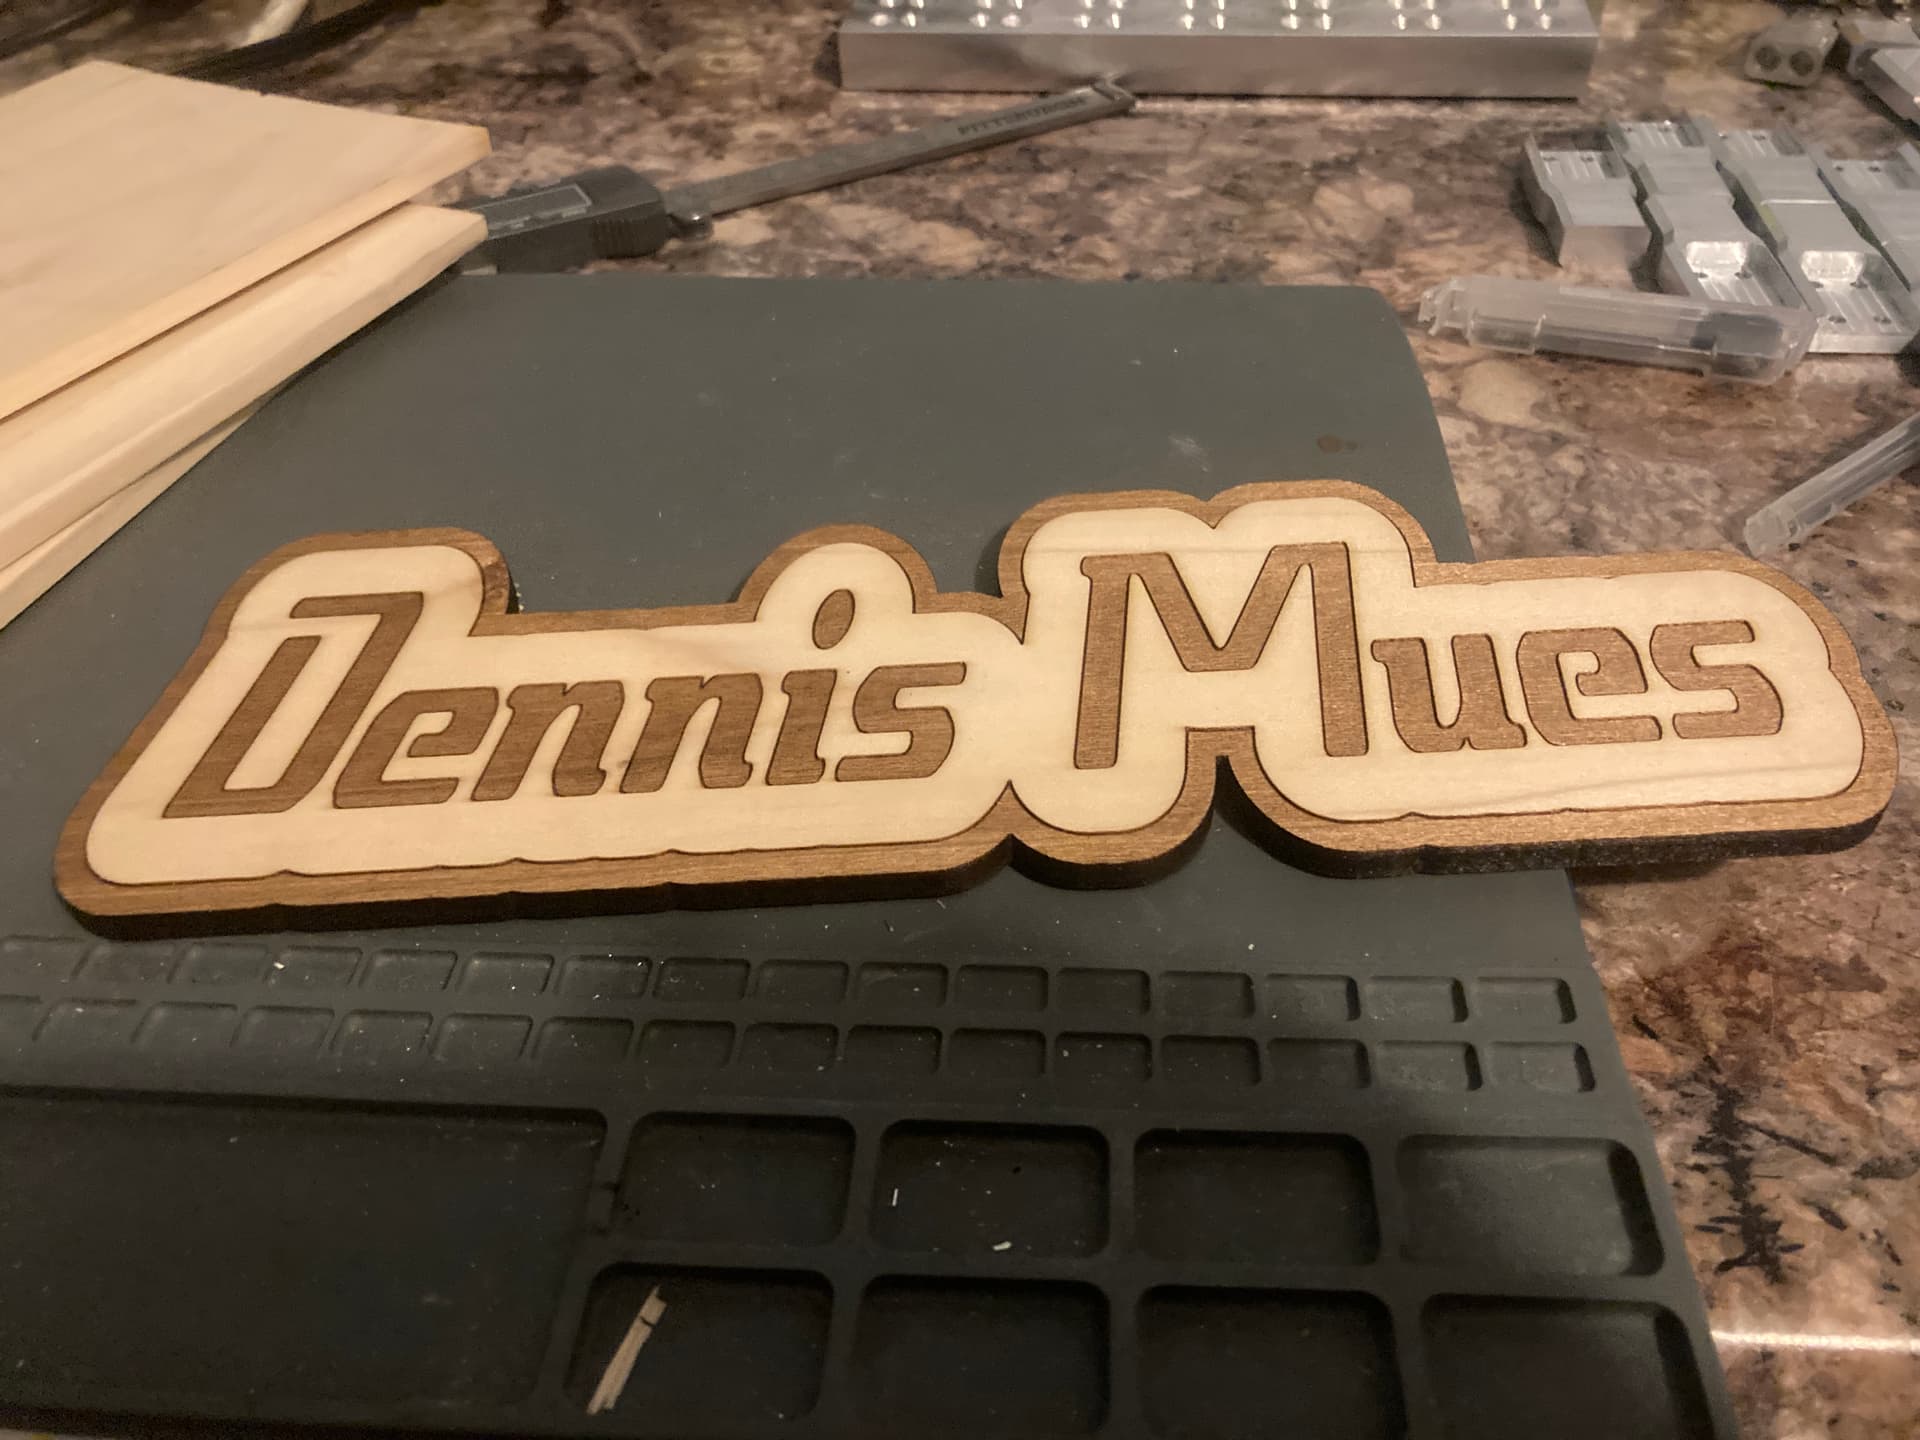
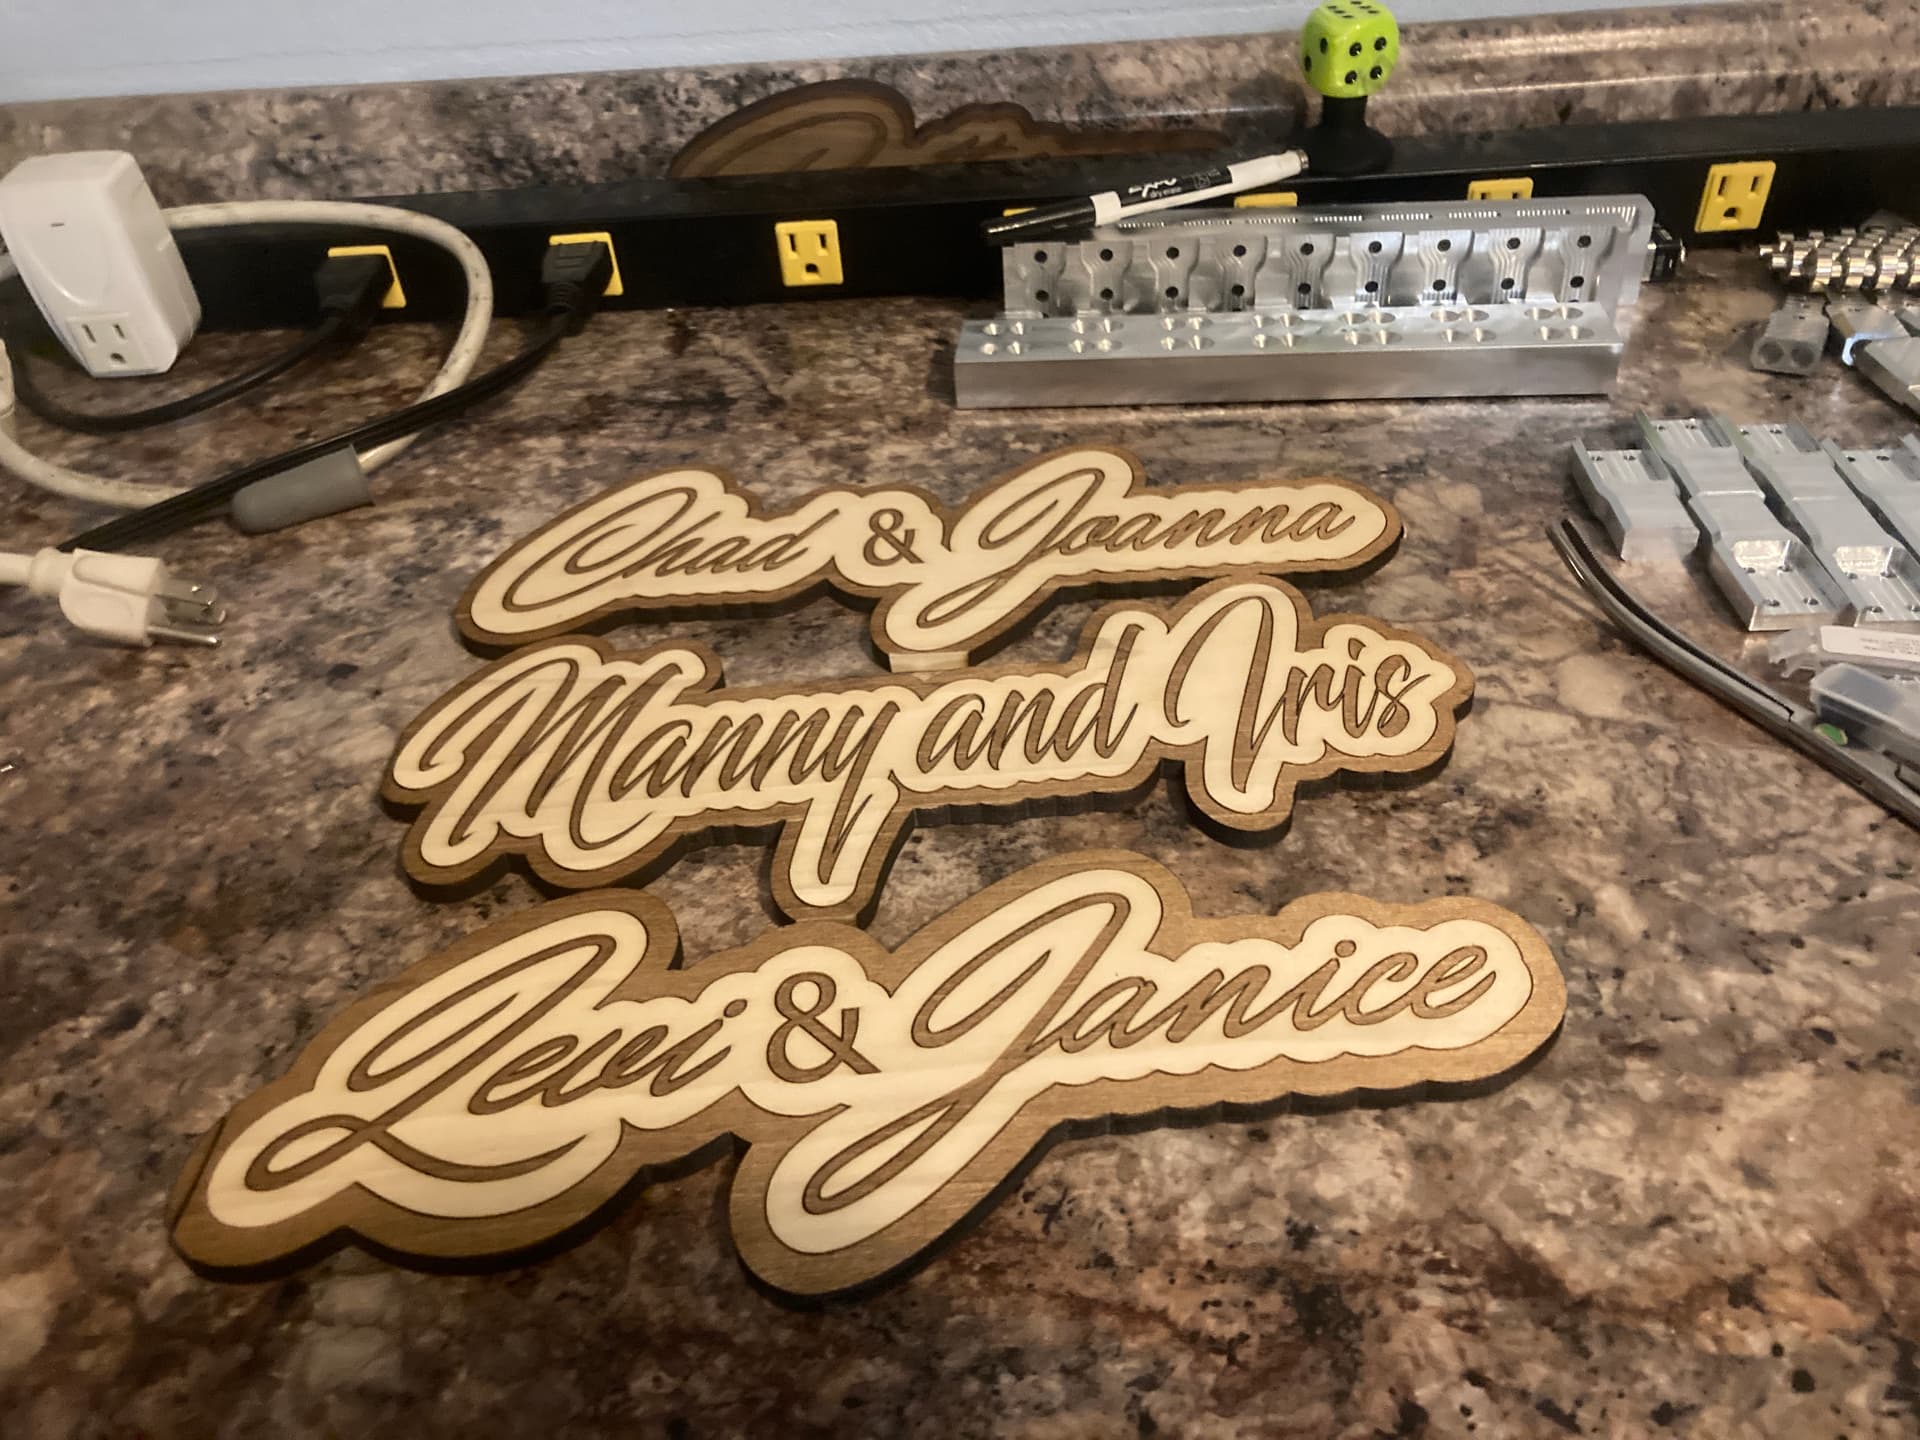
This is 100% laser with no stain or post processing all the name plates were .25" Poplar 2 pass cut. I do my laser fill then follow up with a contour pass to add definition to the edges of the lettering and it makes for a nice crisp look and improves the definition.
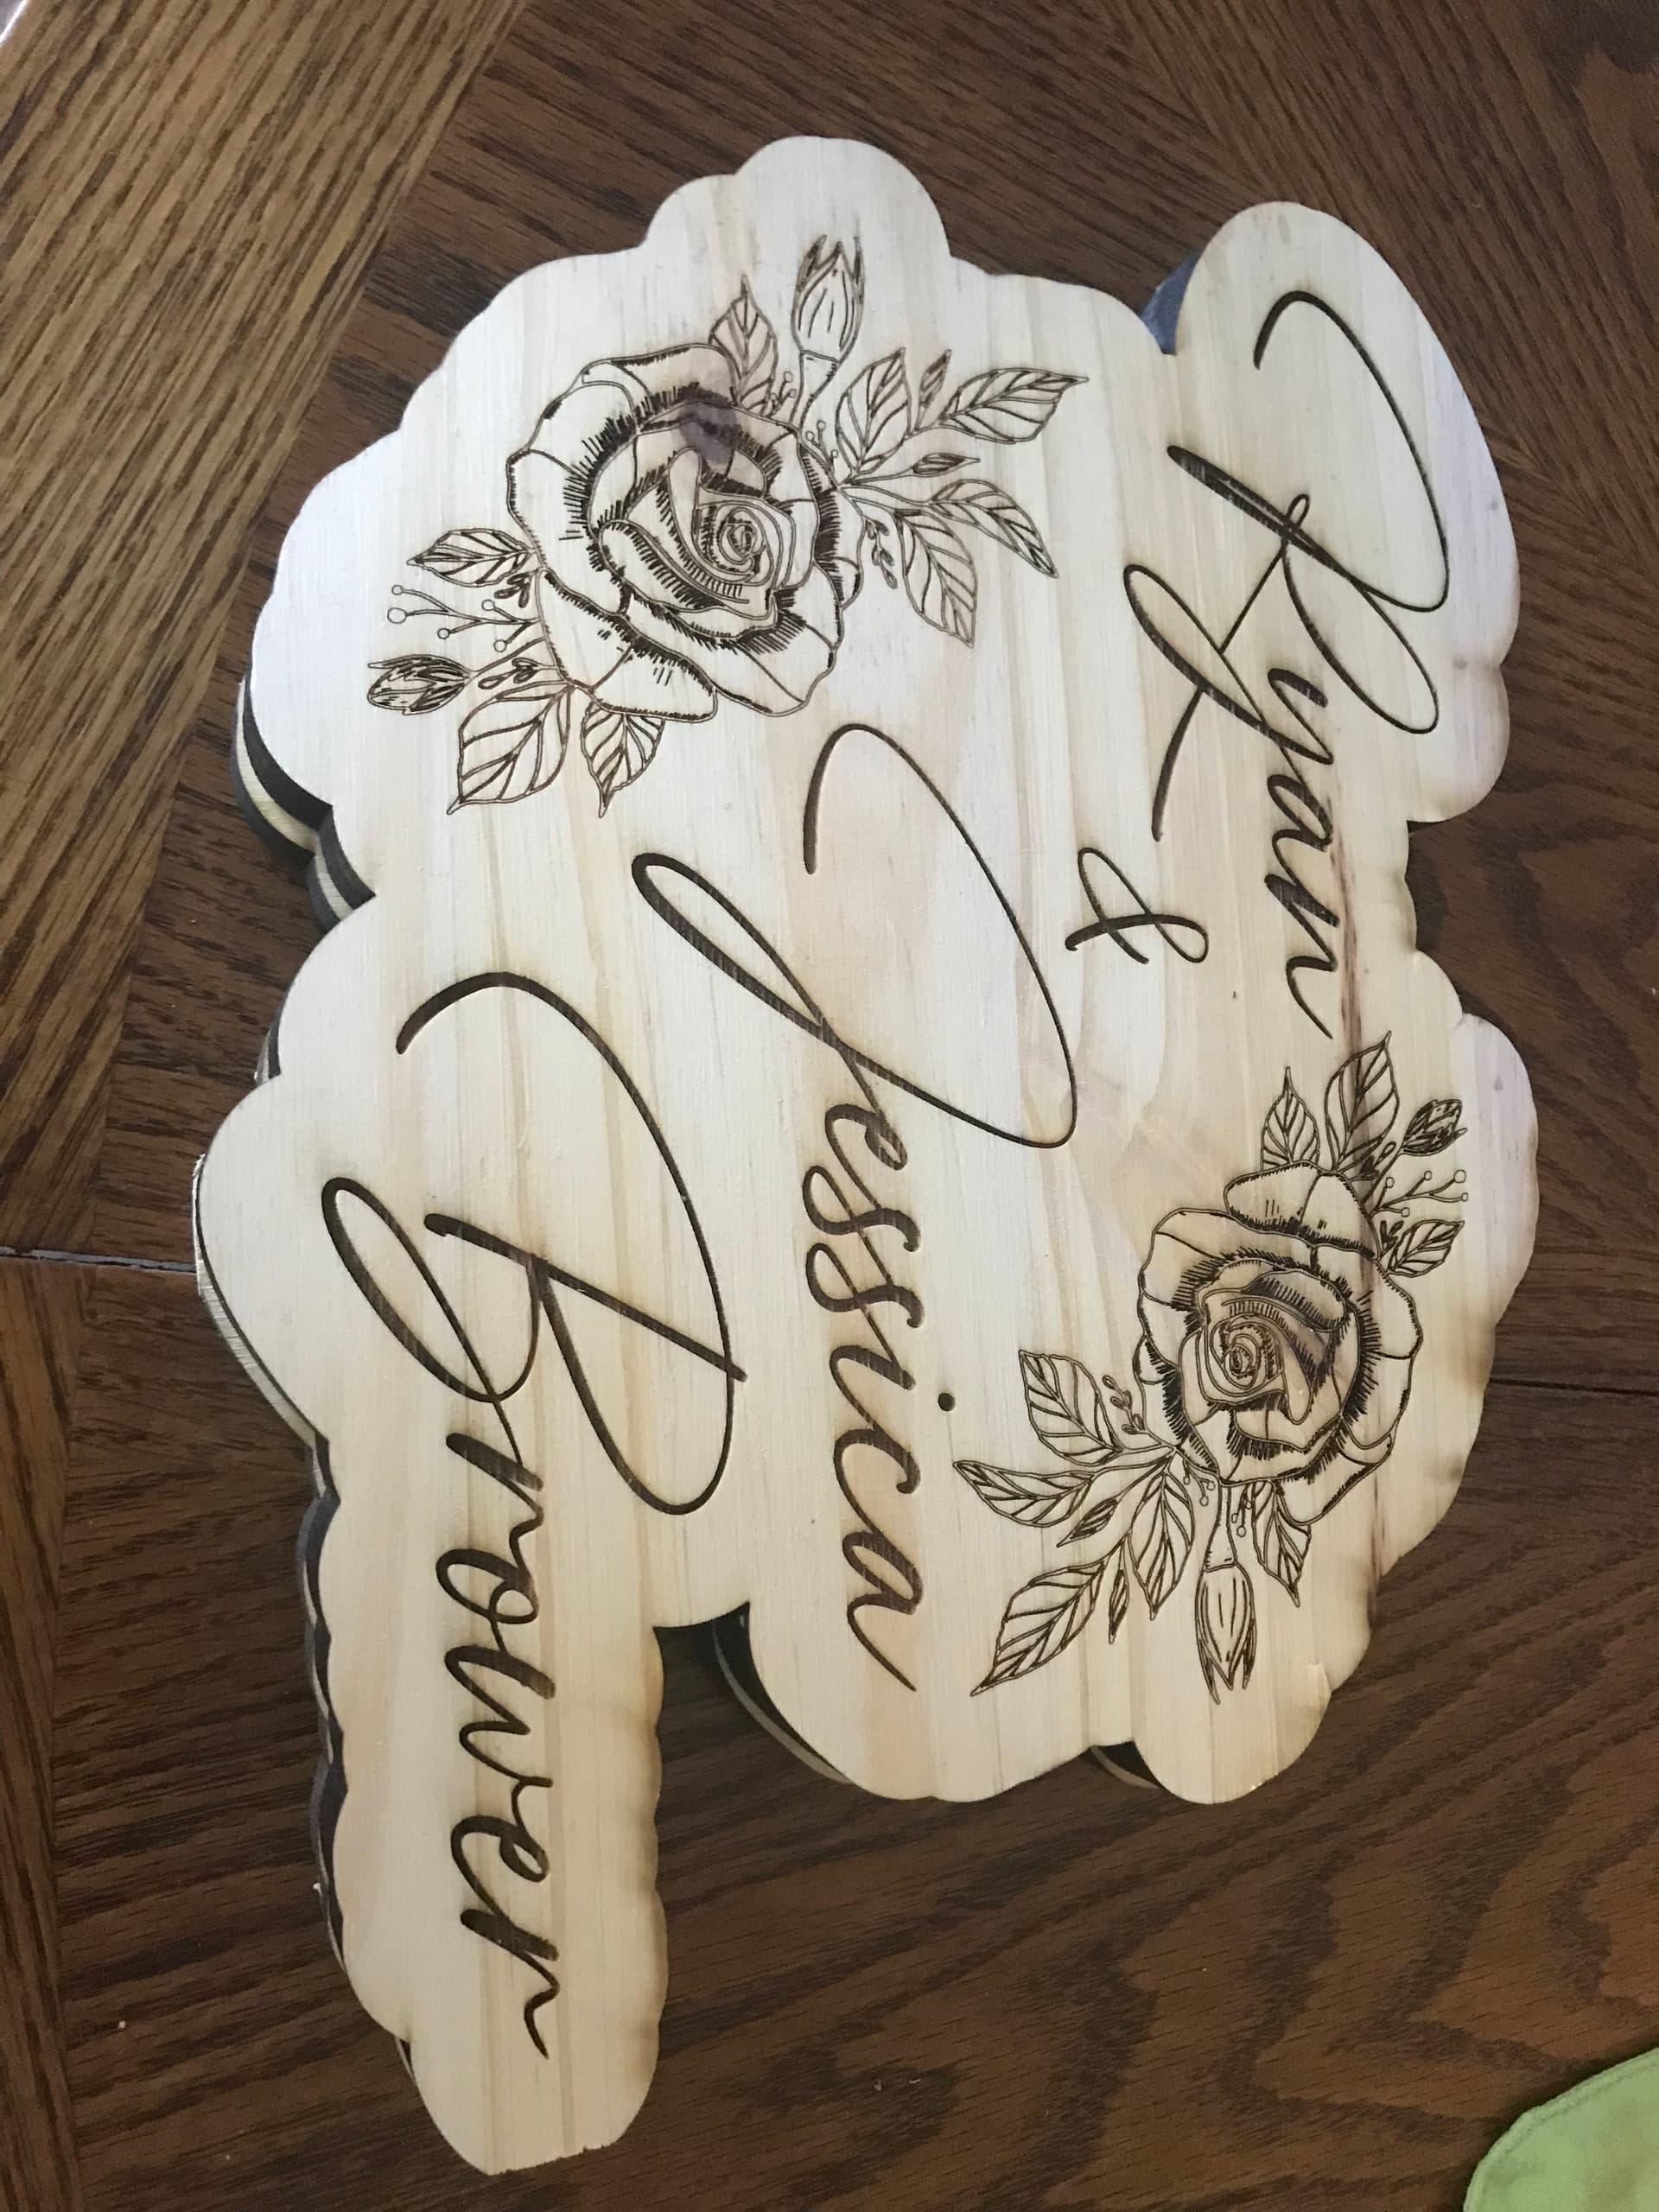
The flower sign was my first carve so it’s not great but I have since improved my settings and am happy with the results.
Fill 8000 mm/m 50% power 1 pass
outline after fill 1000 mm/m 45% power 1 pass
Cut 200 mm/m 85% power 2 passes
I just made a series of lanterns based on Frank Lloyd Wright stained glass with a 10w double-laser in 3mm plywood. I’ve also cut 5mm with just a couple passes. I did try up to half an inch, but no matter how many passes, it would not cut through.
One thing I found is that sometimes there were bits of material inside the plywood what was harder than the rest of it, and the laser simply would not cut through. Because the designs were bit intricate, when that happened, there was no way to save the job–failure rate was about 1 out 5 I making about 30 panels, all told.
Picture of one of them:
Those look great Alex!
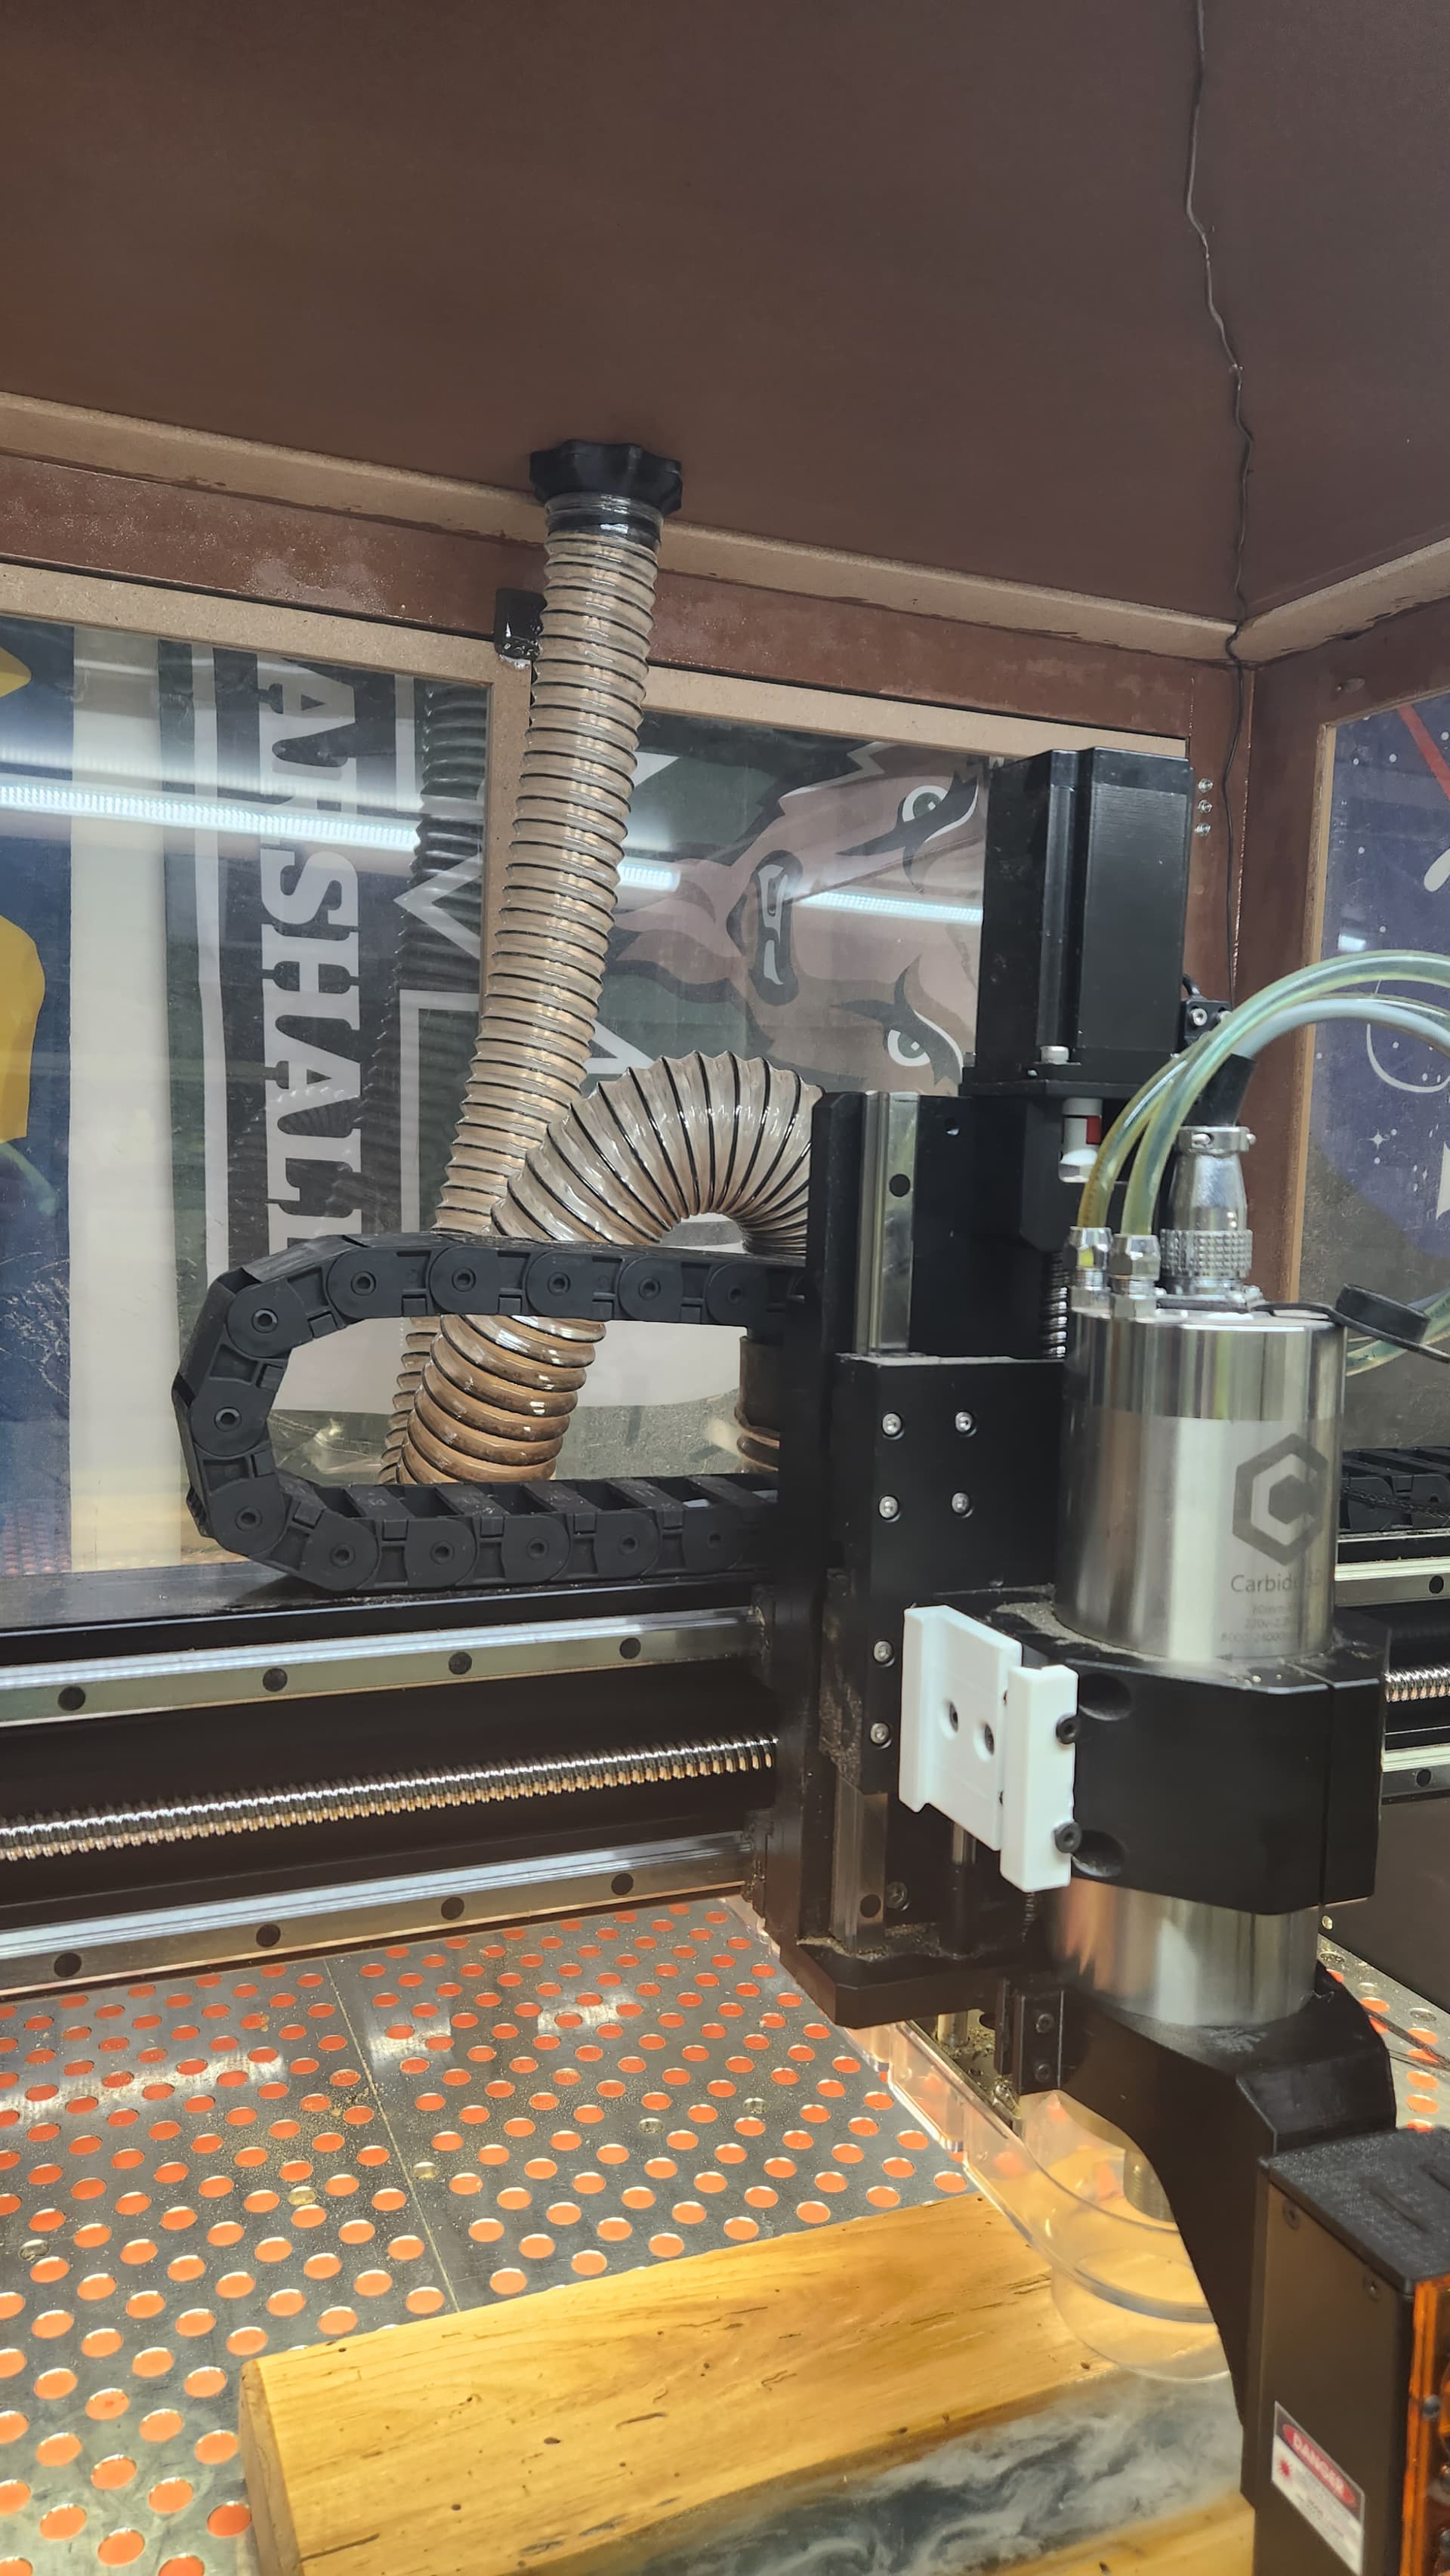
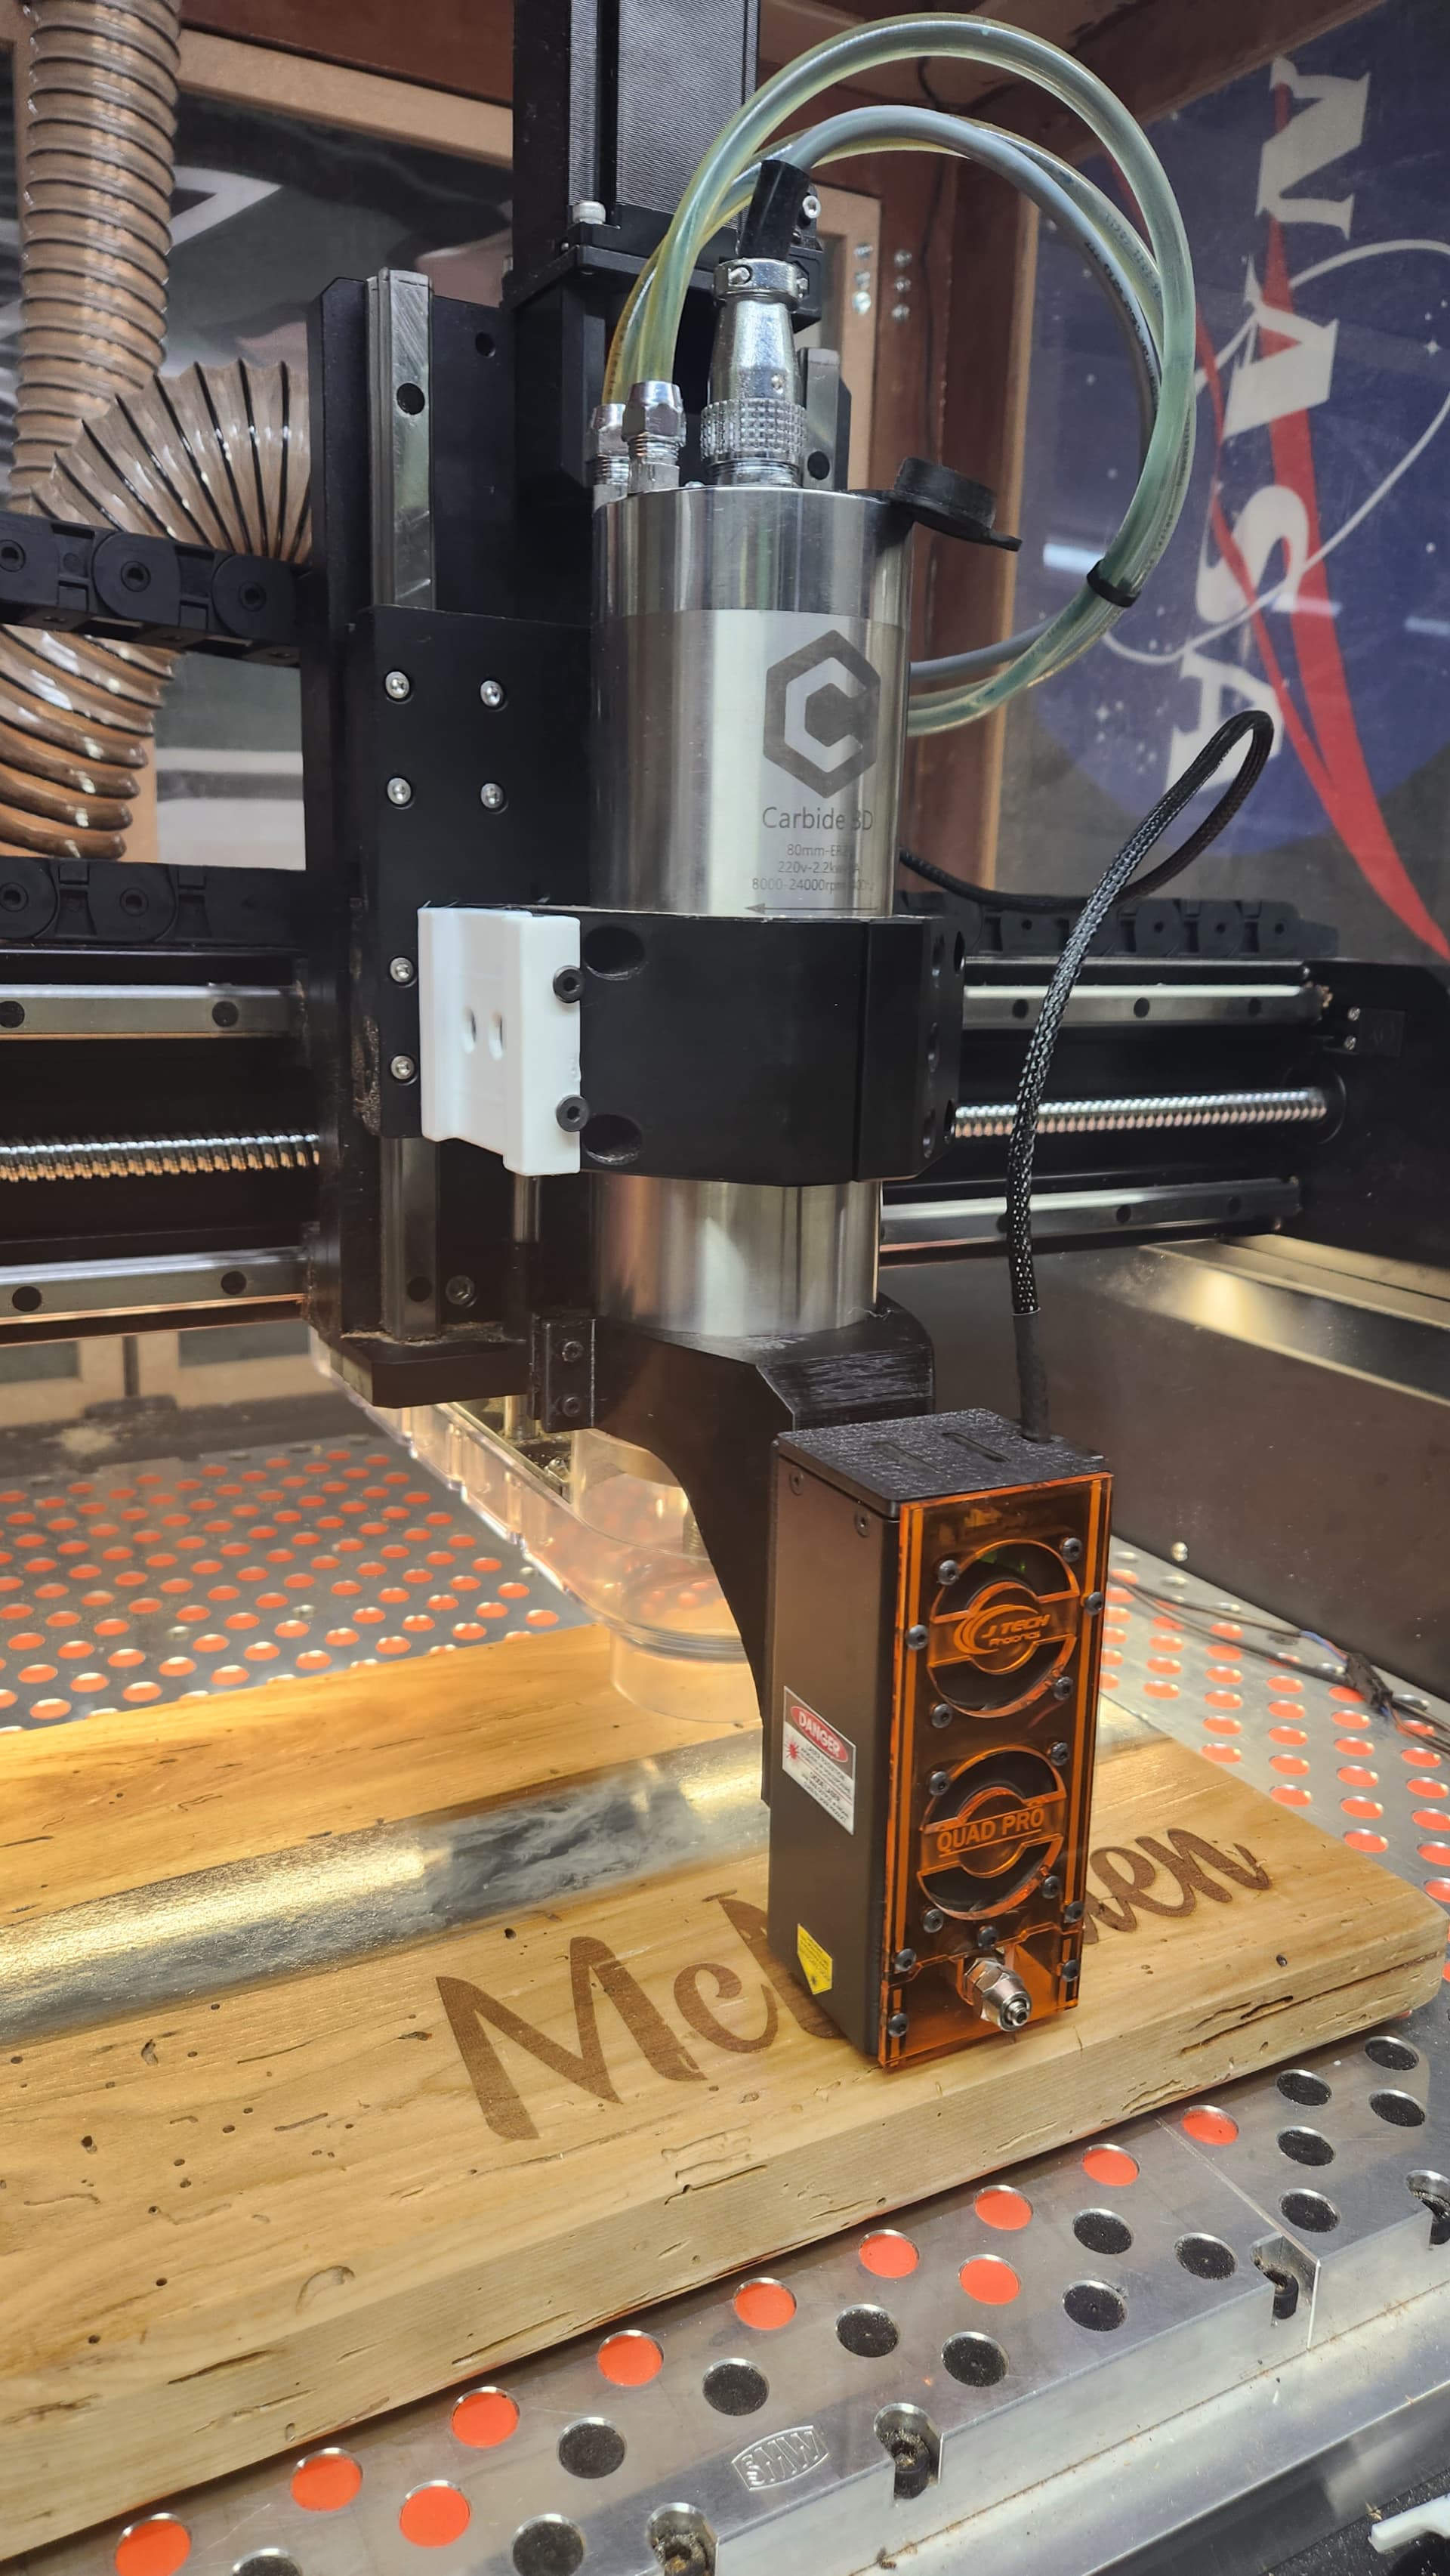
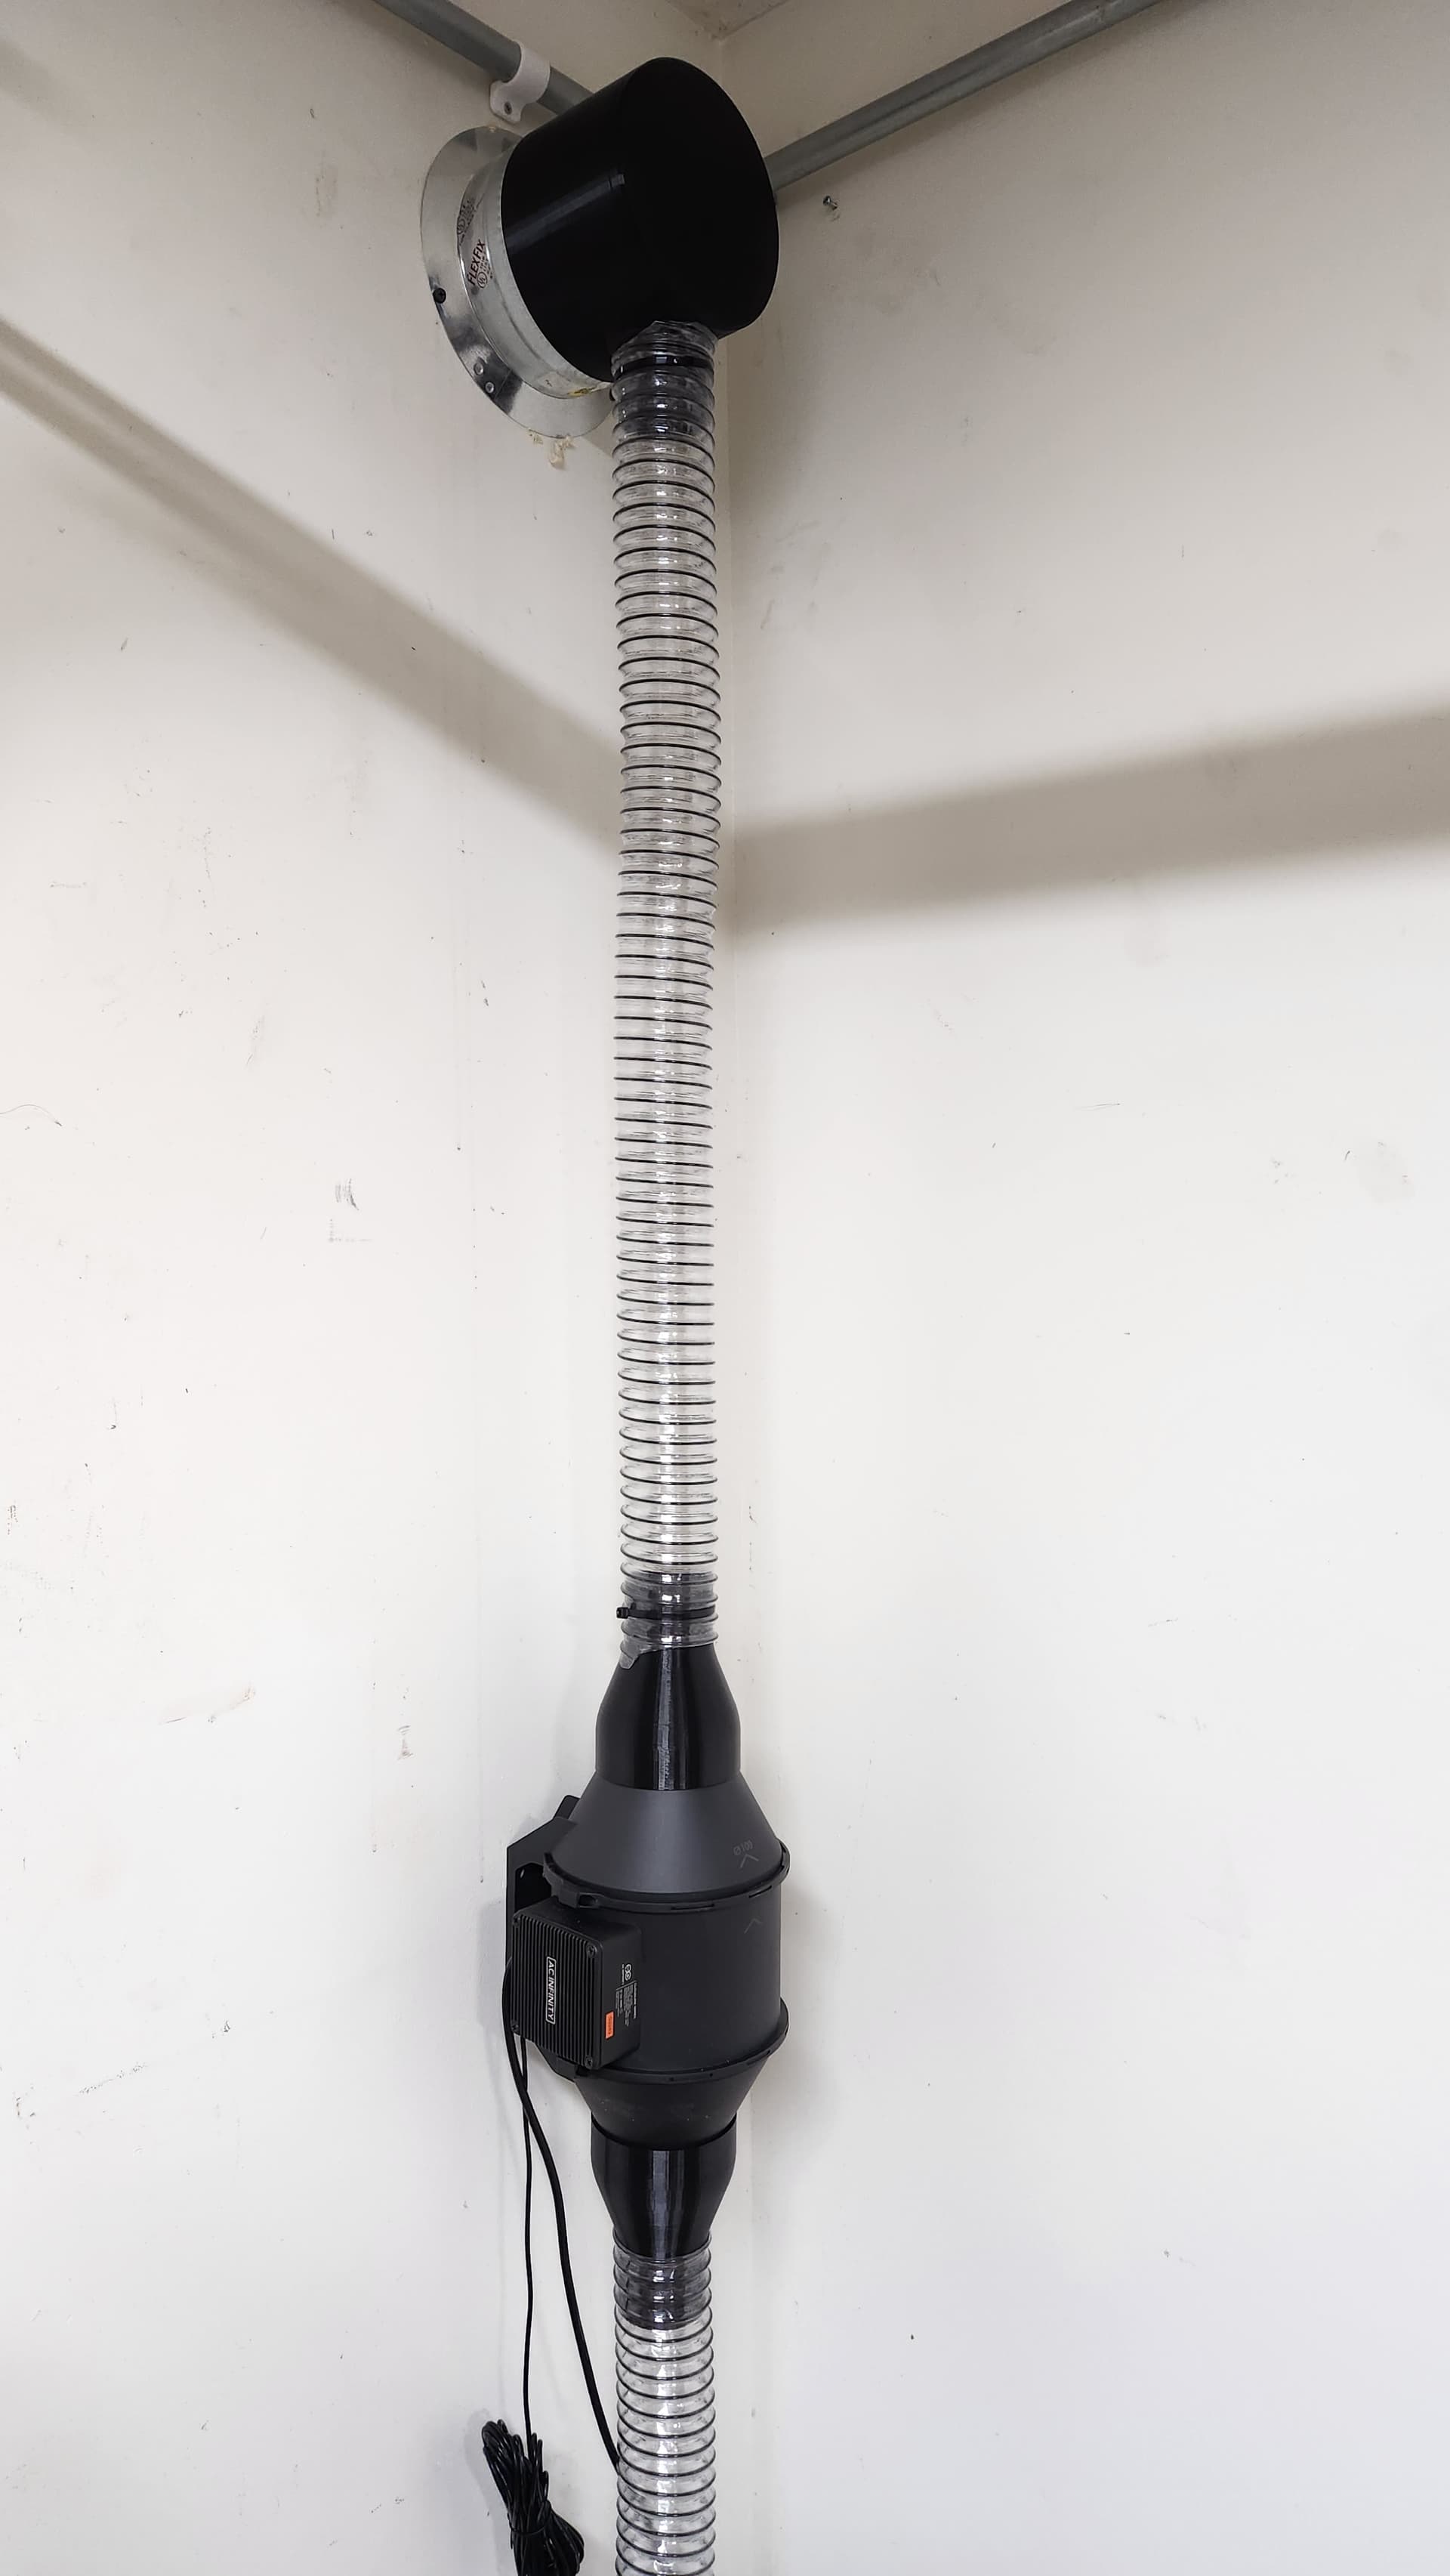
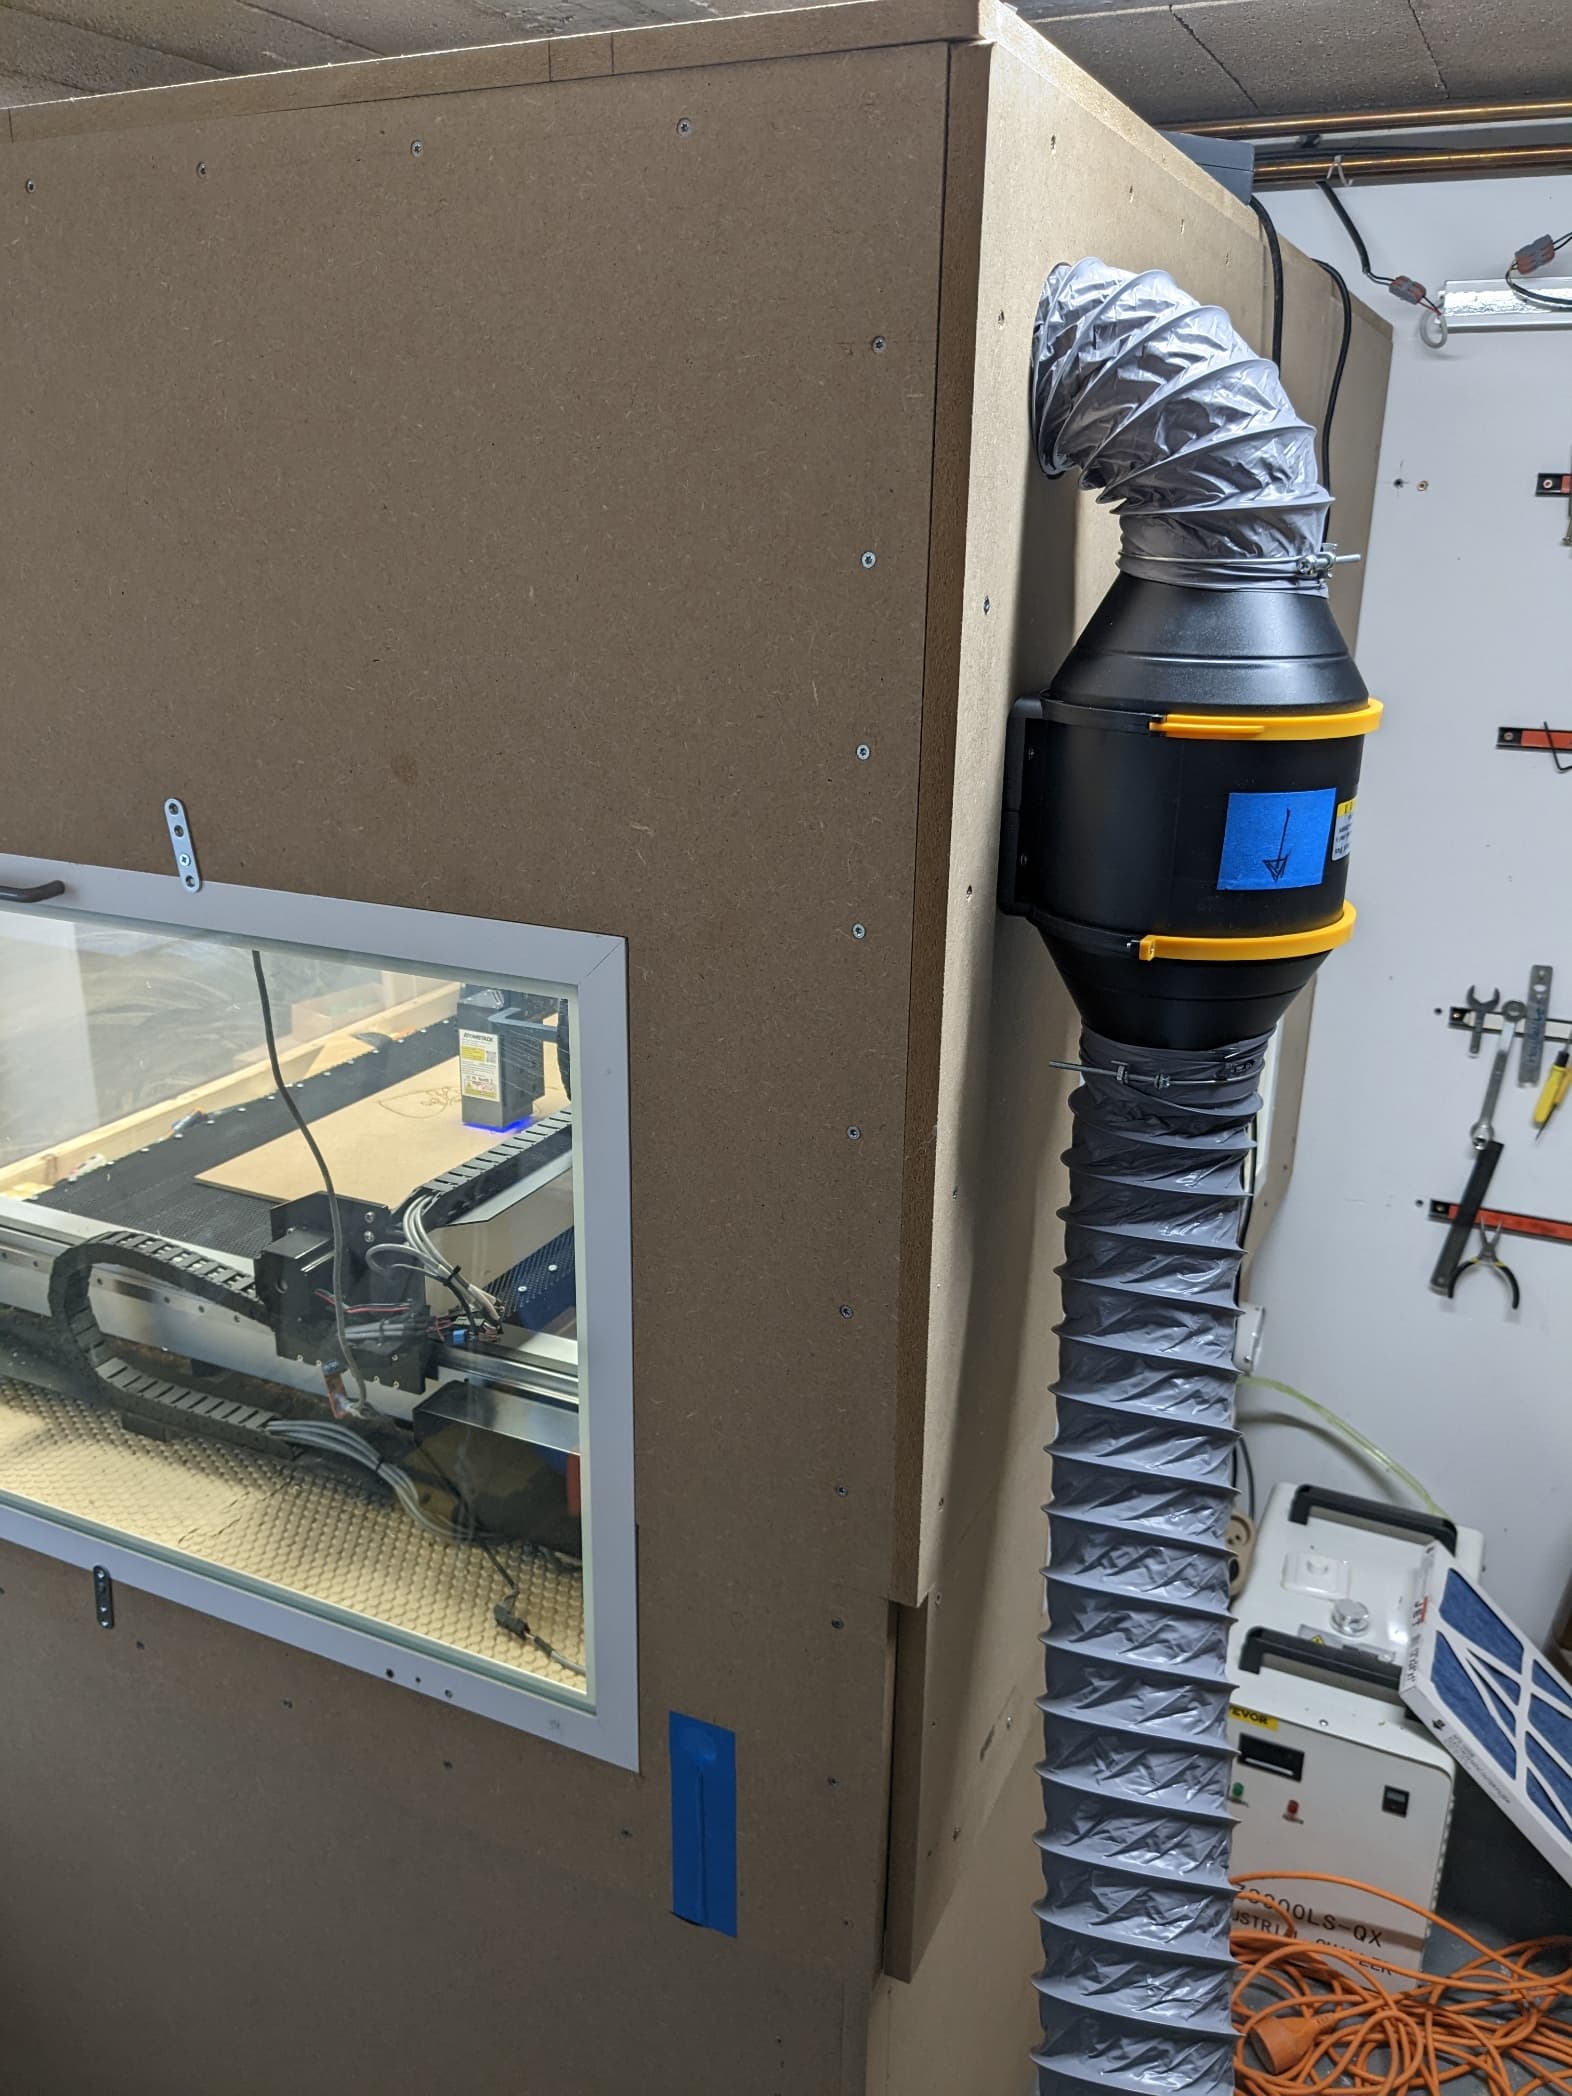
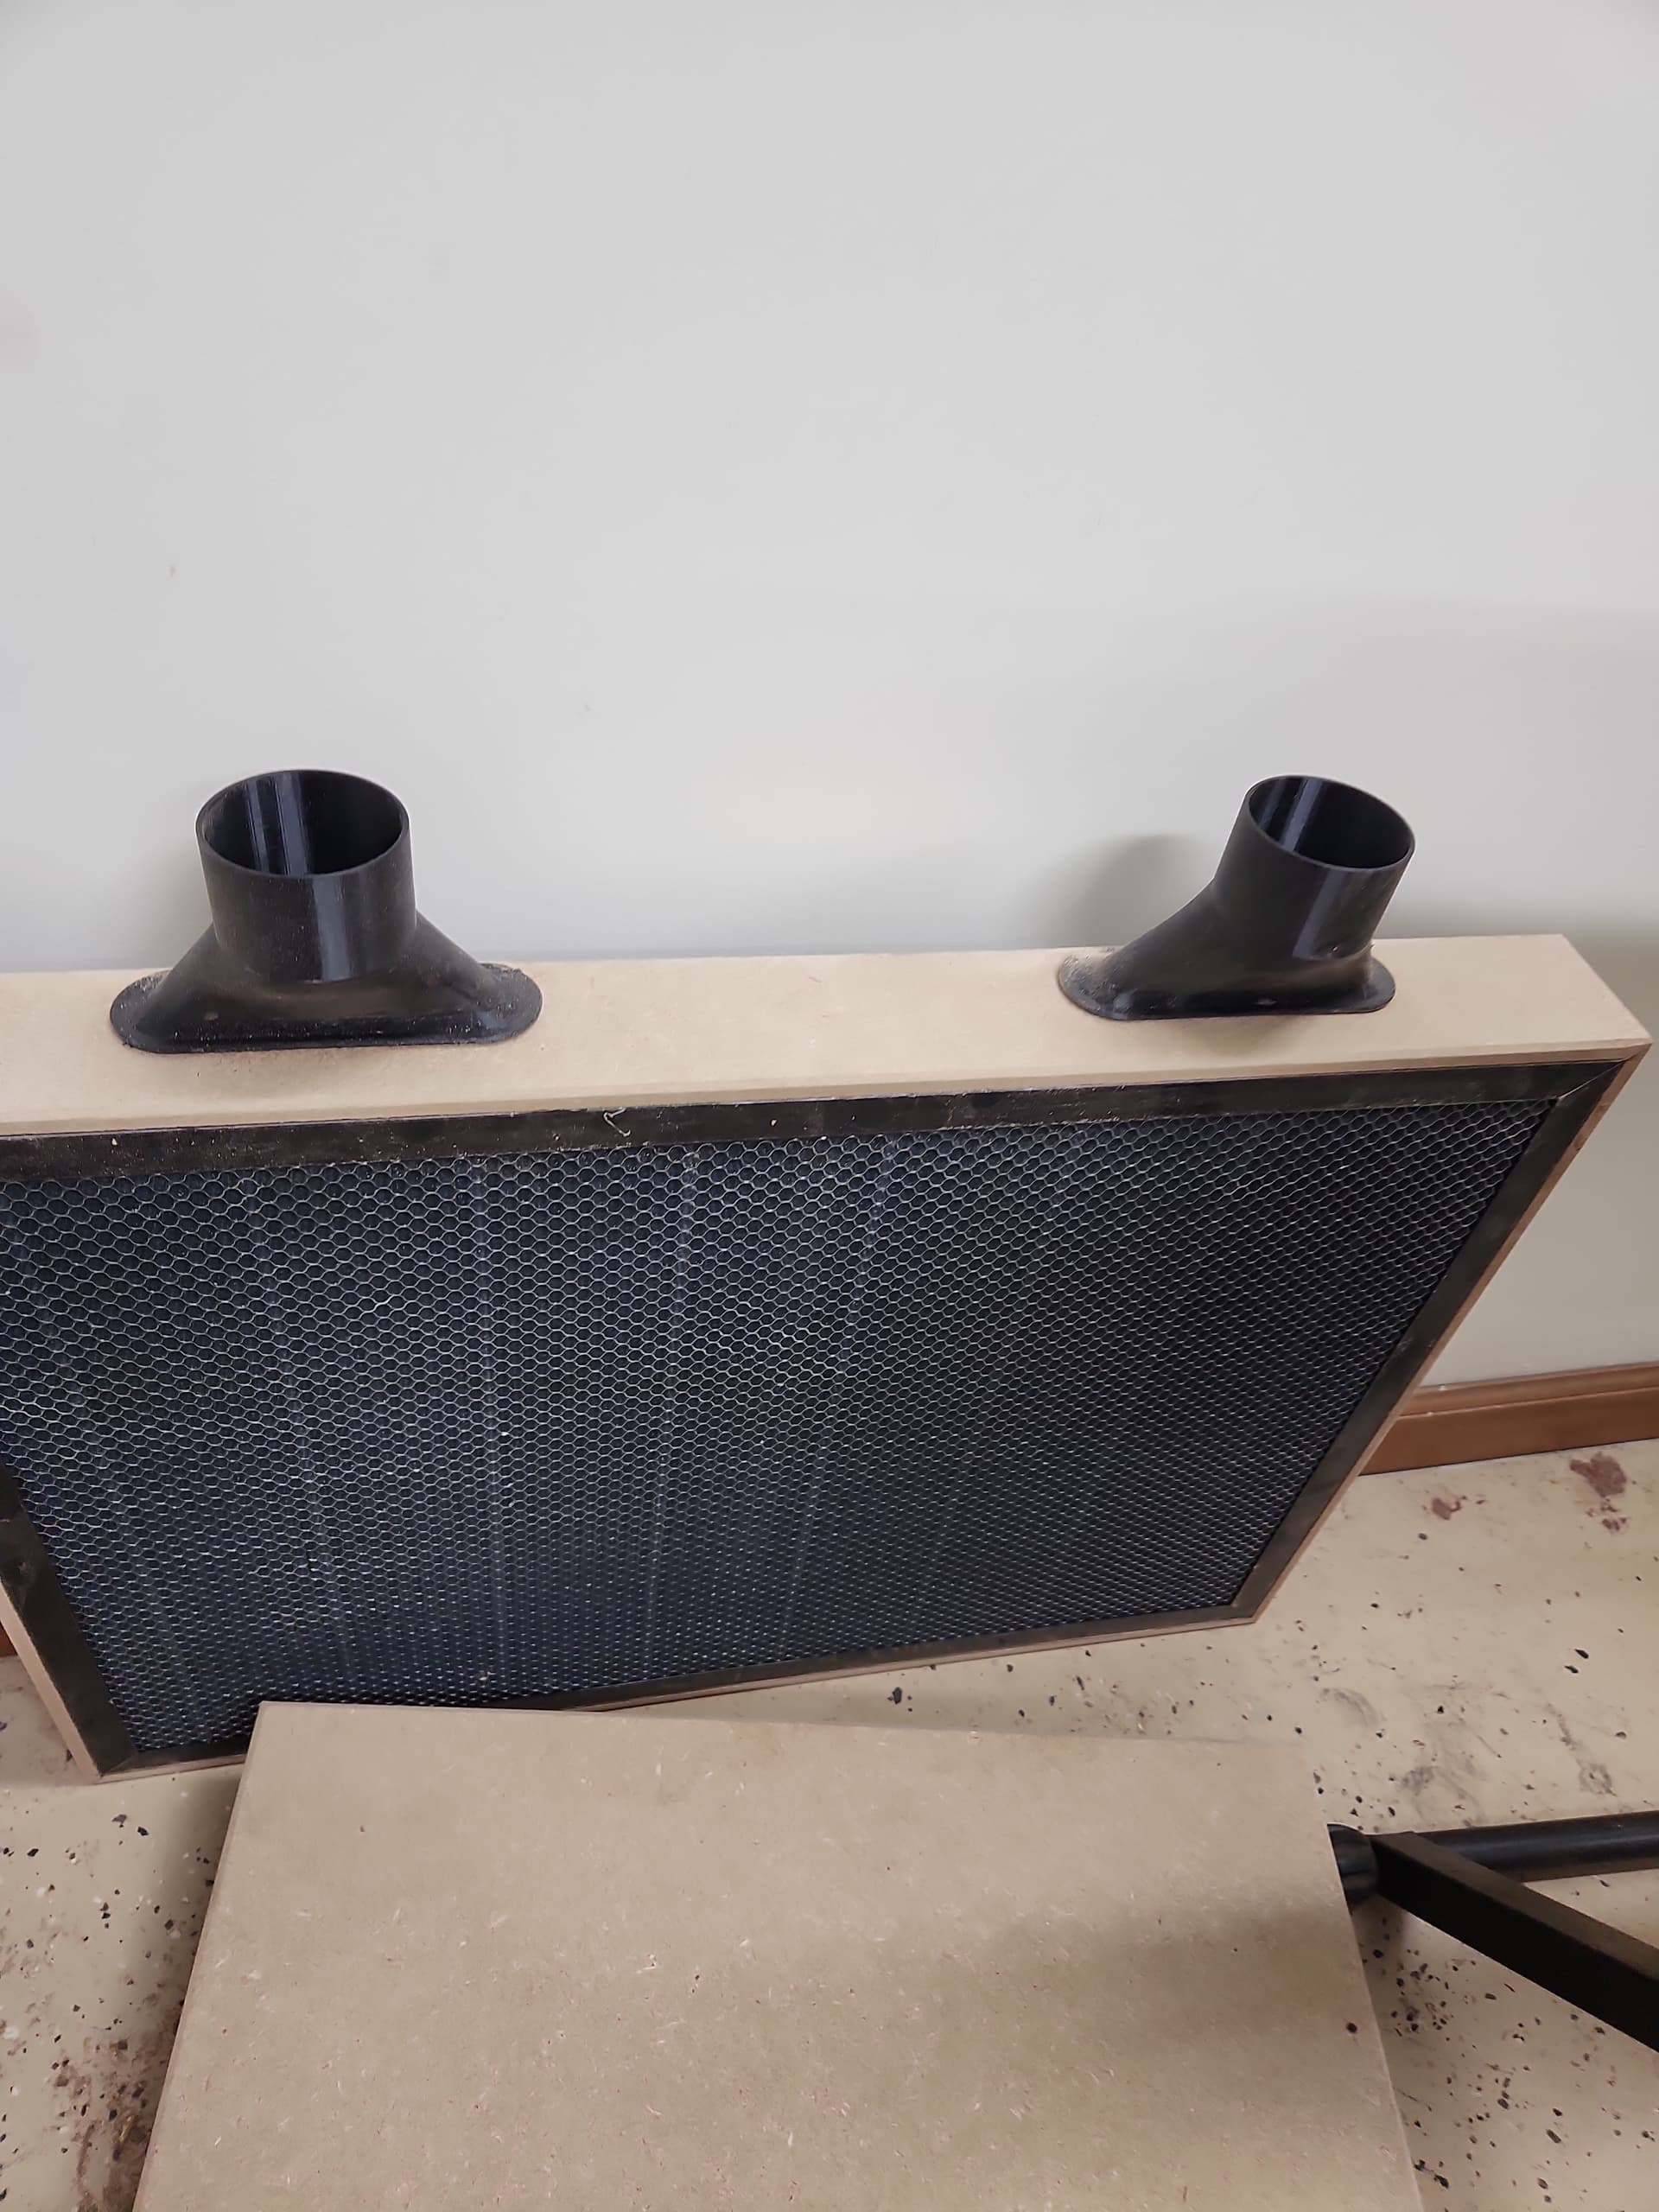
Few shots of my current setup. I’m changing the smoke extraction from 2.5 to 4 inch as it’s too restricted with a single 2.5 inch line. I’ll be using 2 or 3 2.5 inch hoses from the cabinet into a 3 into 1 manifold, then 4" hose out of the room.
I don’t leave anything unattended if that’s what you mean.
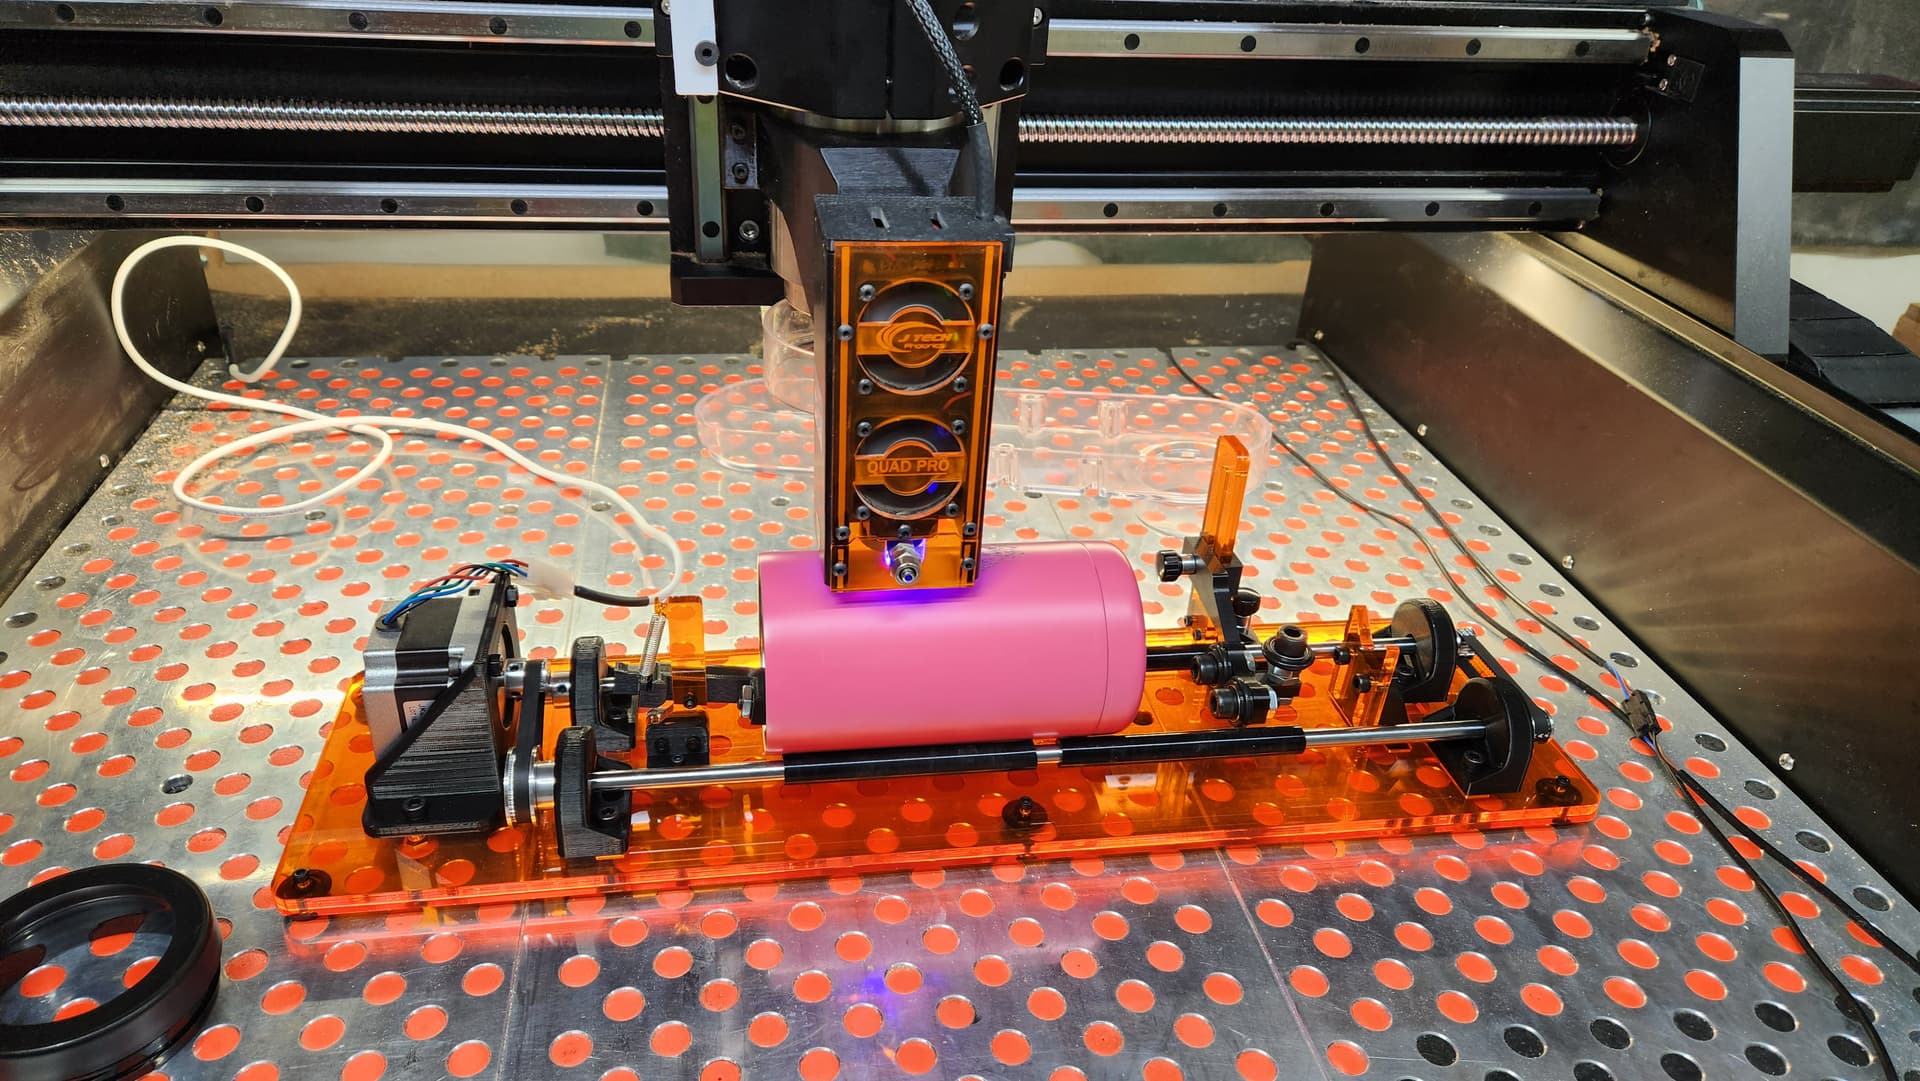
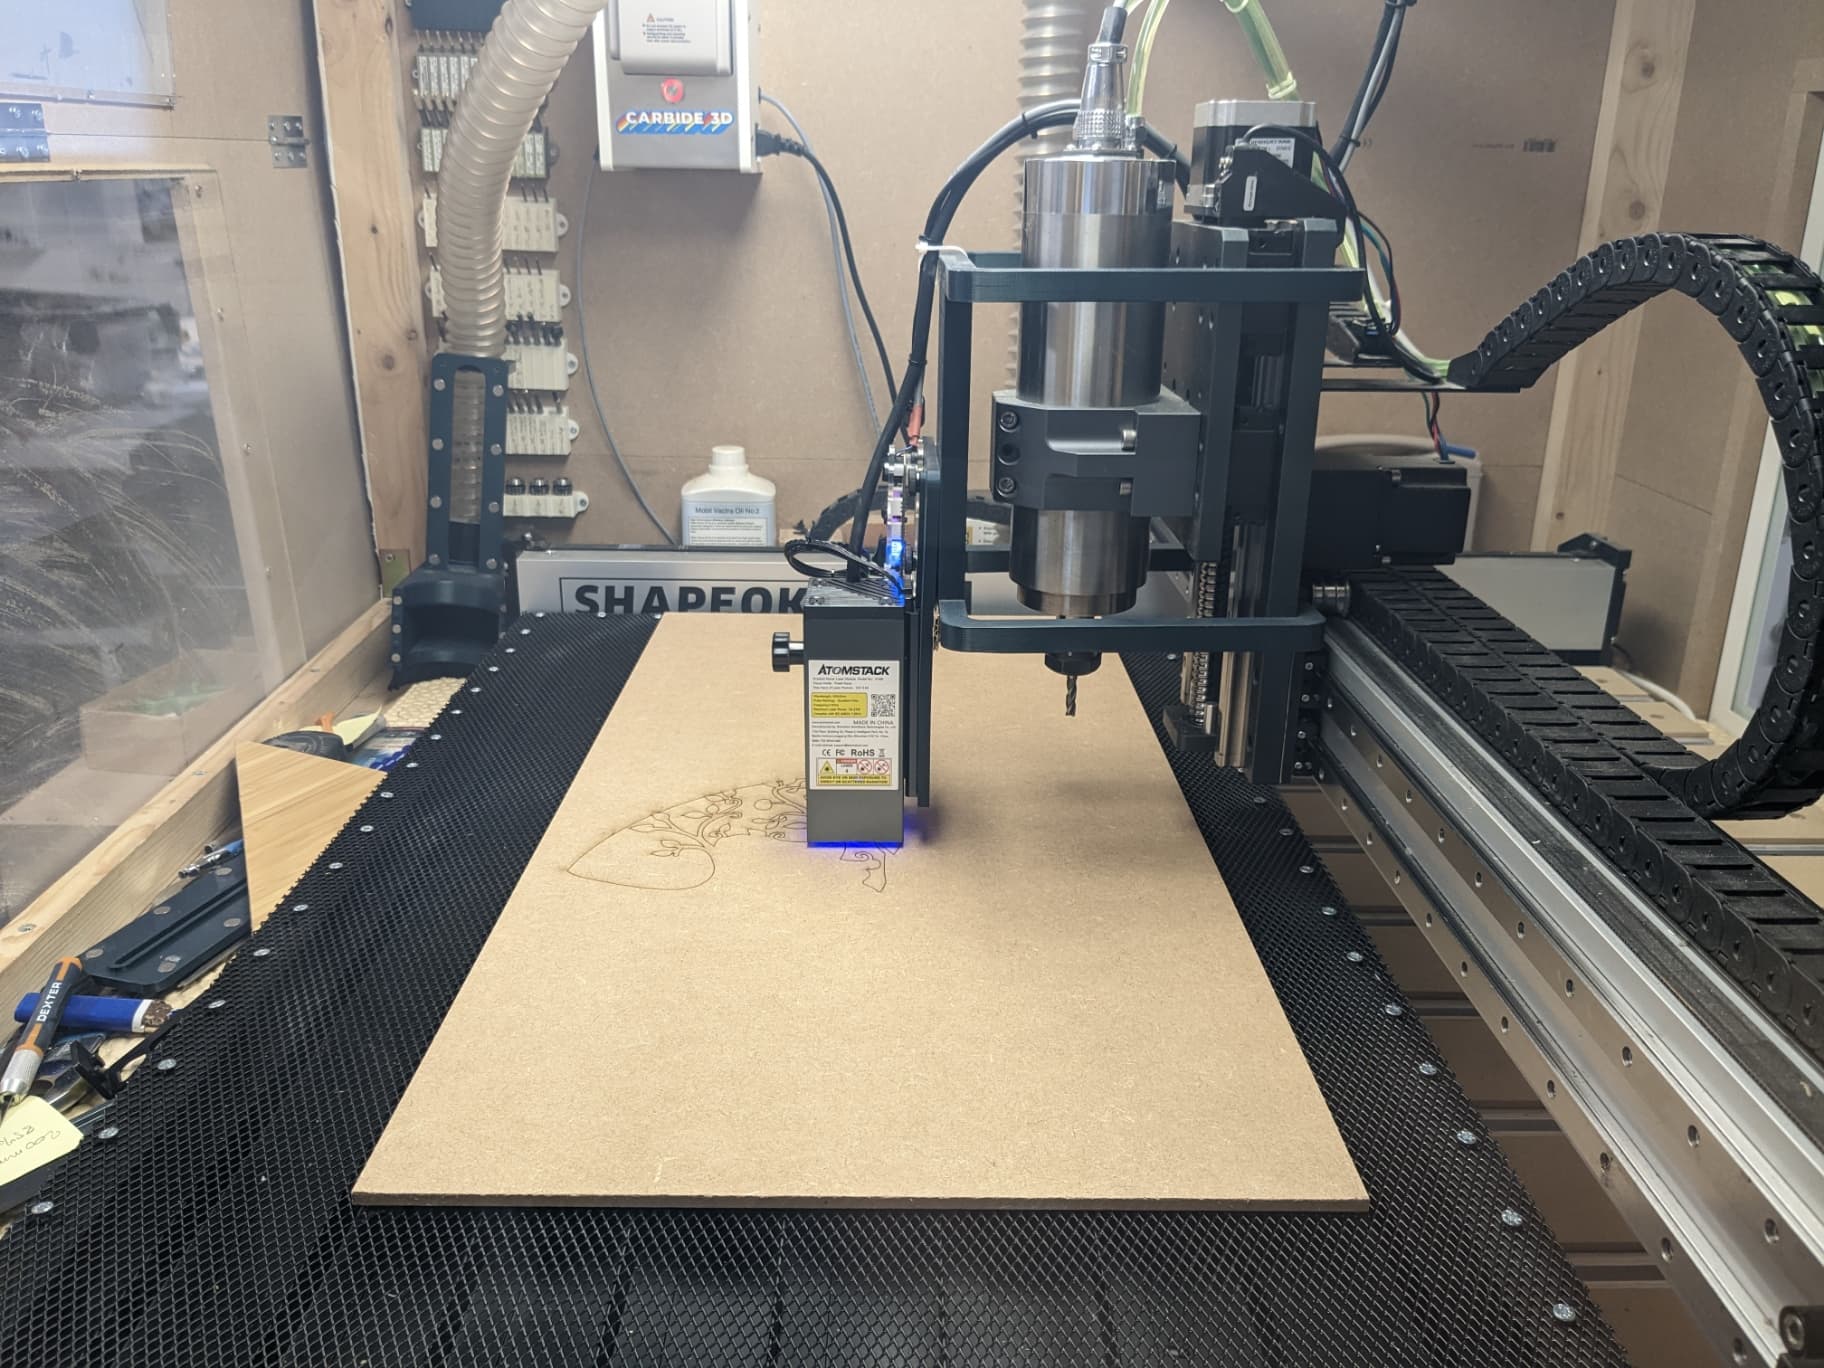
So I ended up getting a 20W diode laser module from Atomstack
Installed the inline fan that sucks out the smoky air from the Shapeoko enclosure and pushes it out the window,
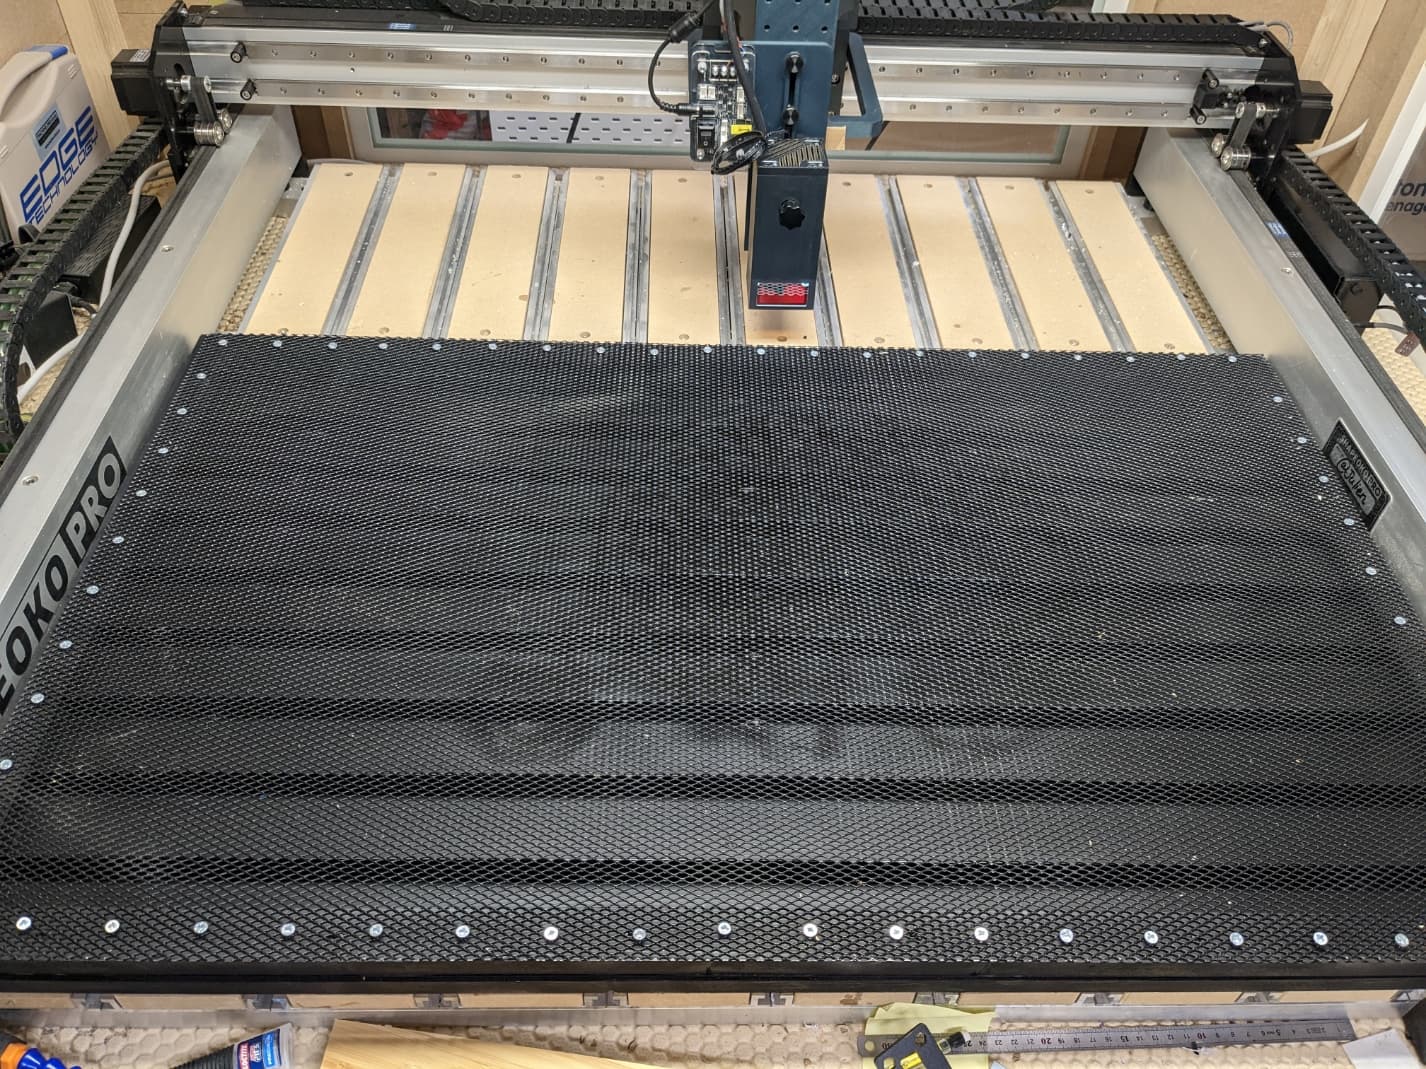
Finished the cheapo support bed,
3D-printed a custom plate to attach the module to my existing dust collection frame, put my laser goggles on, and got to cutting:
Literally my first cut beyond testing a couple of shapes to determine laser power/speed:
The air assist works fairly well,
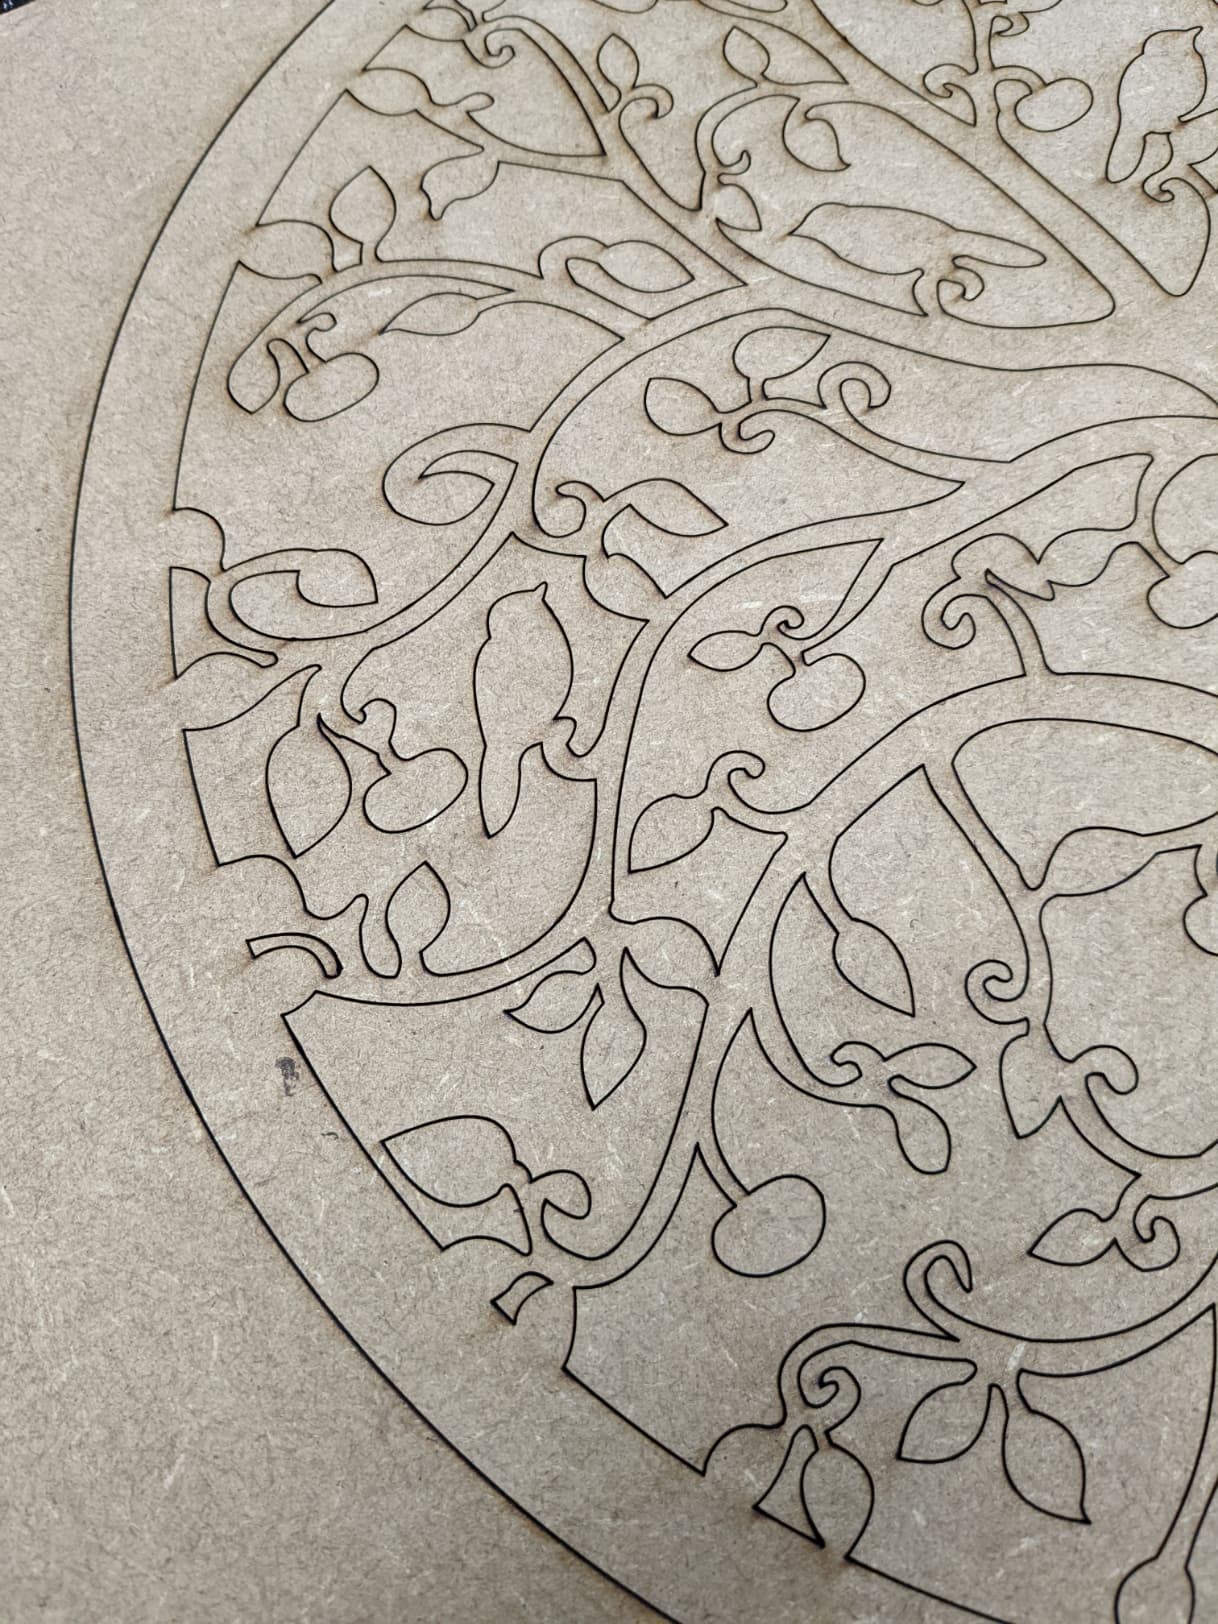
The metal grid leaves ugly burn marks on the backside, I may remove it altogether after all. They went away with a light sanding though
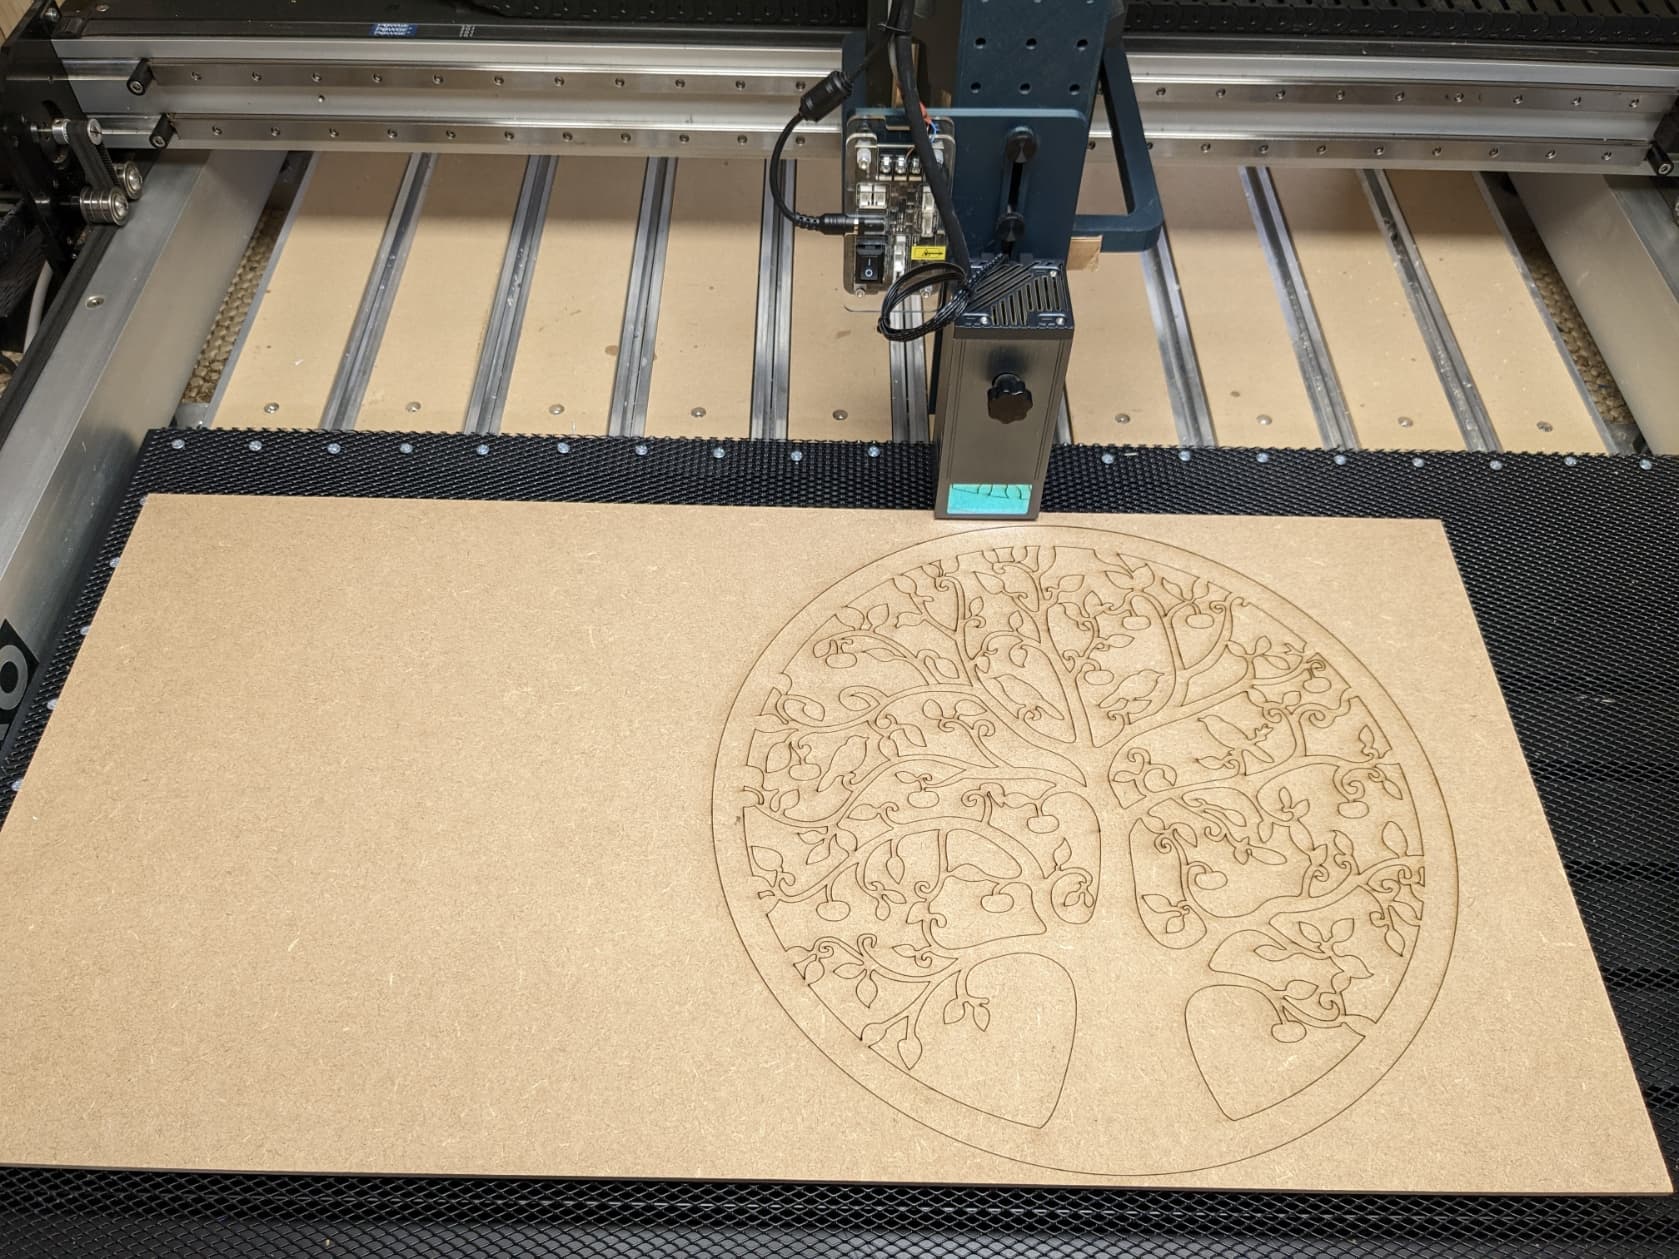
And boom, my first ~15" cut:
I have a feeling this will turn out to be wonderfully complementary to my Shapeoko.
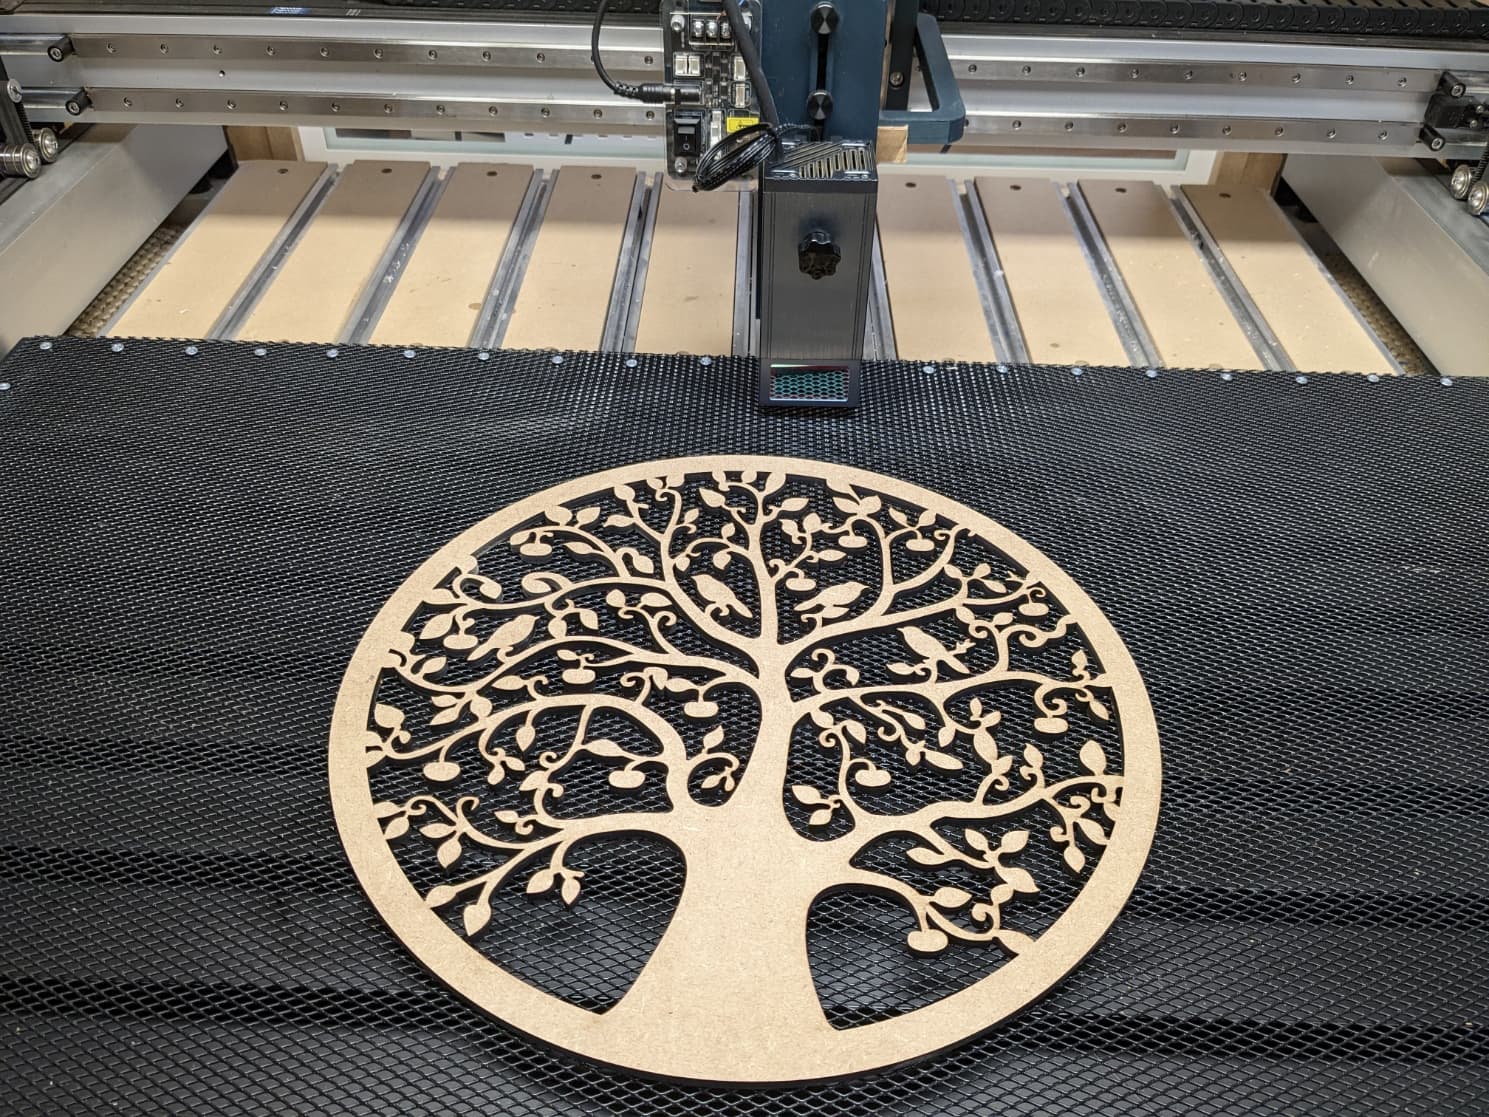
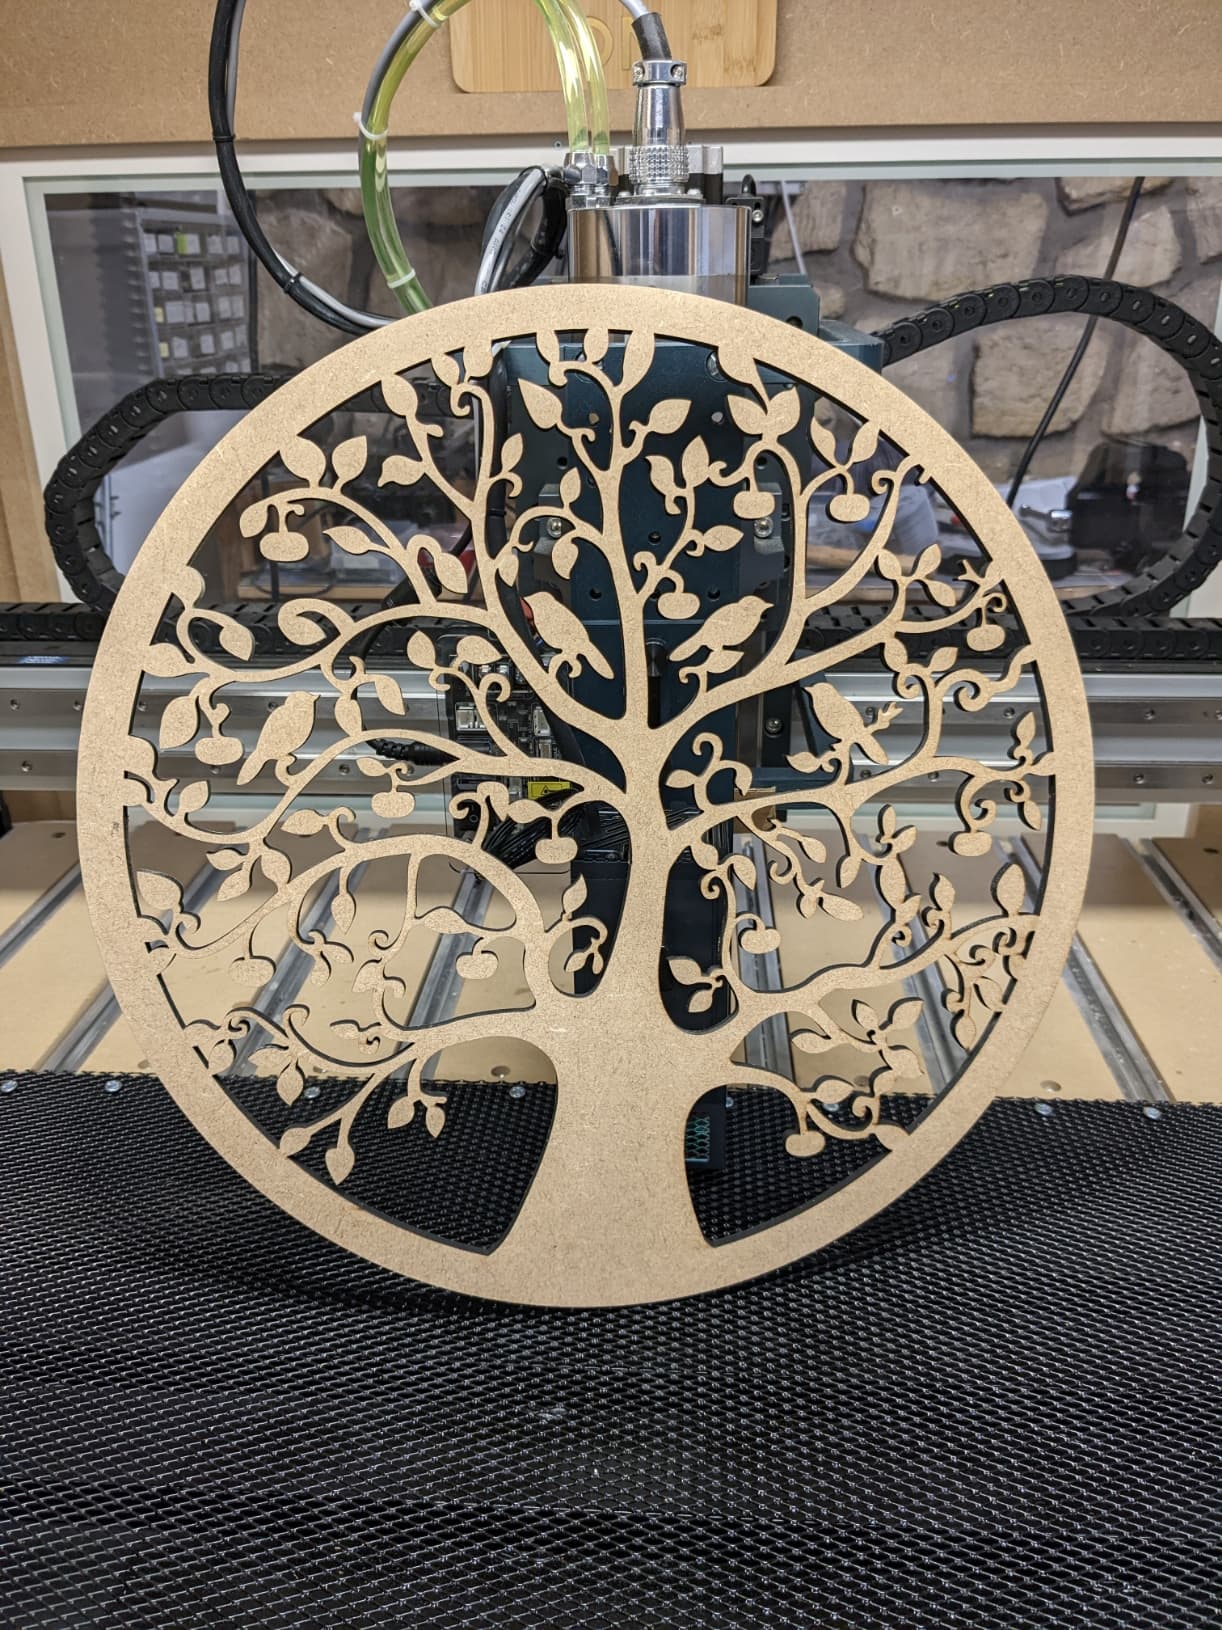
Julien, how thick is that material? Looks like about 0.125", but in one place it looks thicker (0.250".)
It’s 1/4" MDF (well actually 6mm)
One pass? What was your feedrate?
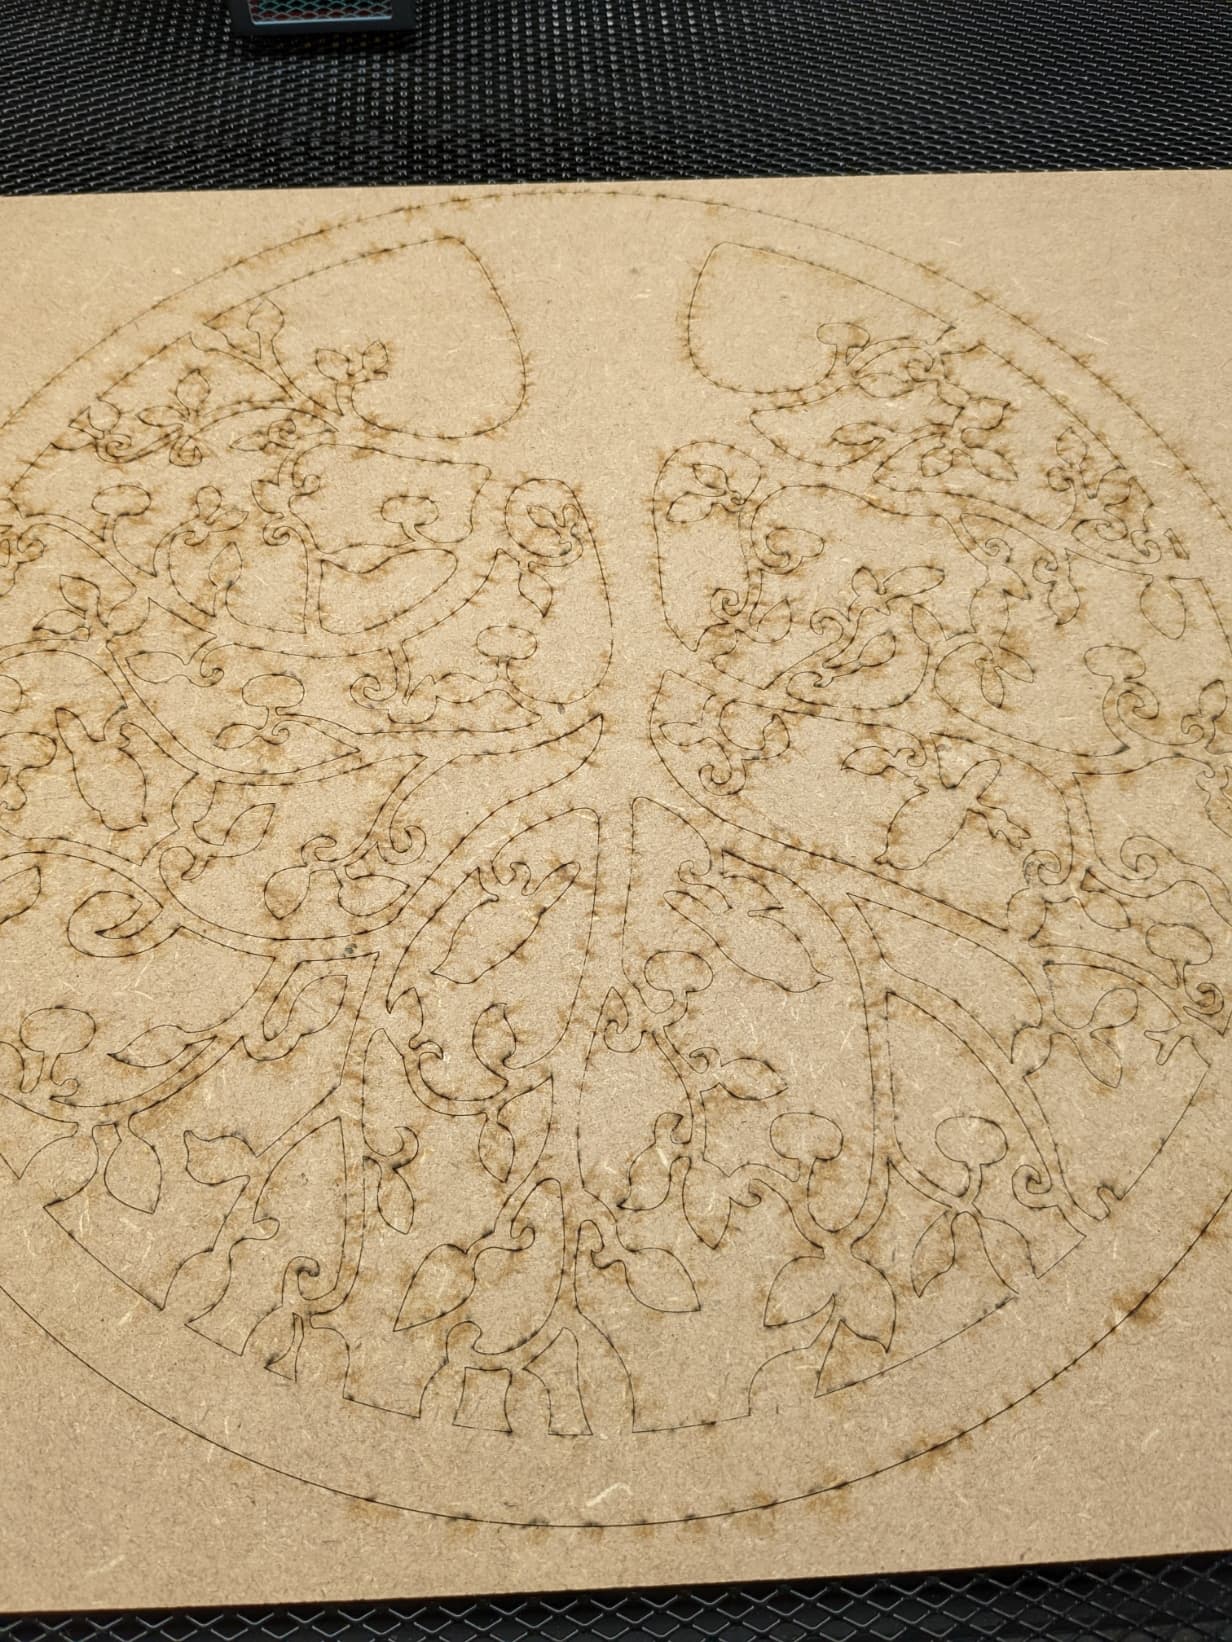
For now I followed @Able’s advice and went for 2 passes (300mm/min, 80% power, but to be honest I did not take the time yet to test various settings and slice the material to see how deep 1 pass goes, at various speed and power values)
What I did confirm is that after an hour of cutting, and despite the constant air evacuation, there is a lingering burnt smell around my machine. Not very strong, but it’s there. I may try and work on an actual smoke shoe. Or rework the supporting bed downdraft-style like @DiscoJon did.
You can also try creating creating a cross draft. Slightly open the door to let more air draw through the enclosure.
That’s actually what I did (slightly opening the front door, while the air vent is in the upper right back corner), but it still allows smoke to linger around the machine/enclosure before it gets sucked out by the 100CFM fan. I observed that 99% of the smoke is created underneath the material (since the air assist tends to push it there), so sucking the air from under the stock seems like the most efficient approach.
How strong is the smell outside the final exhaust? Is it something a neighbor would notice?
A few feet away from the vent I could not smell anything (I did check, for that reason), and it’s much less noticeable that when you have a BBQ party ![]()
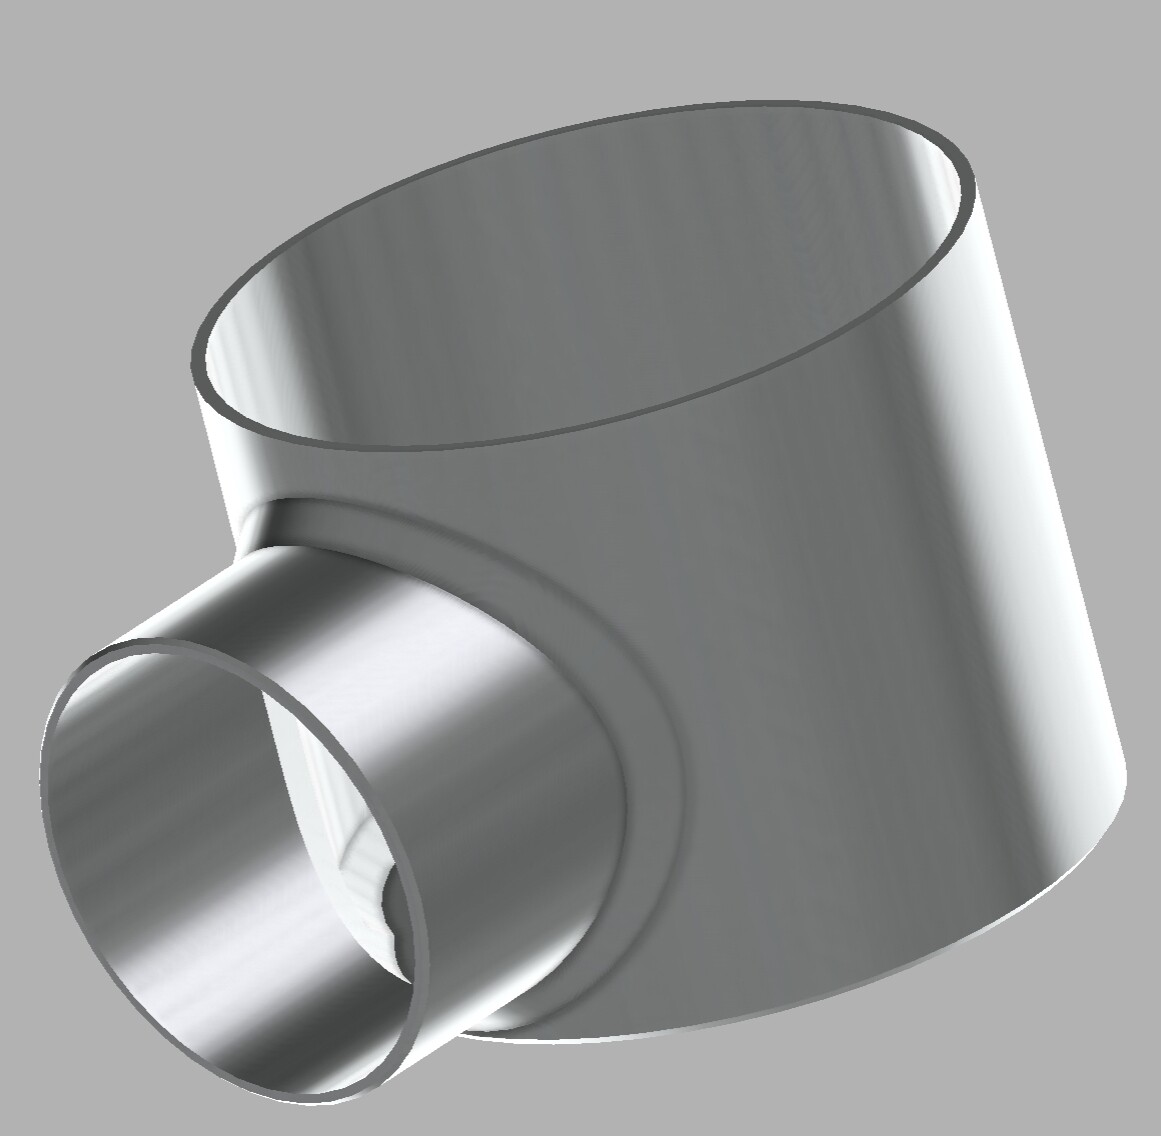
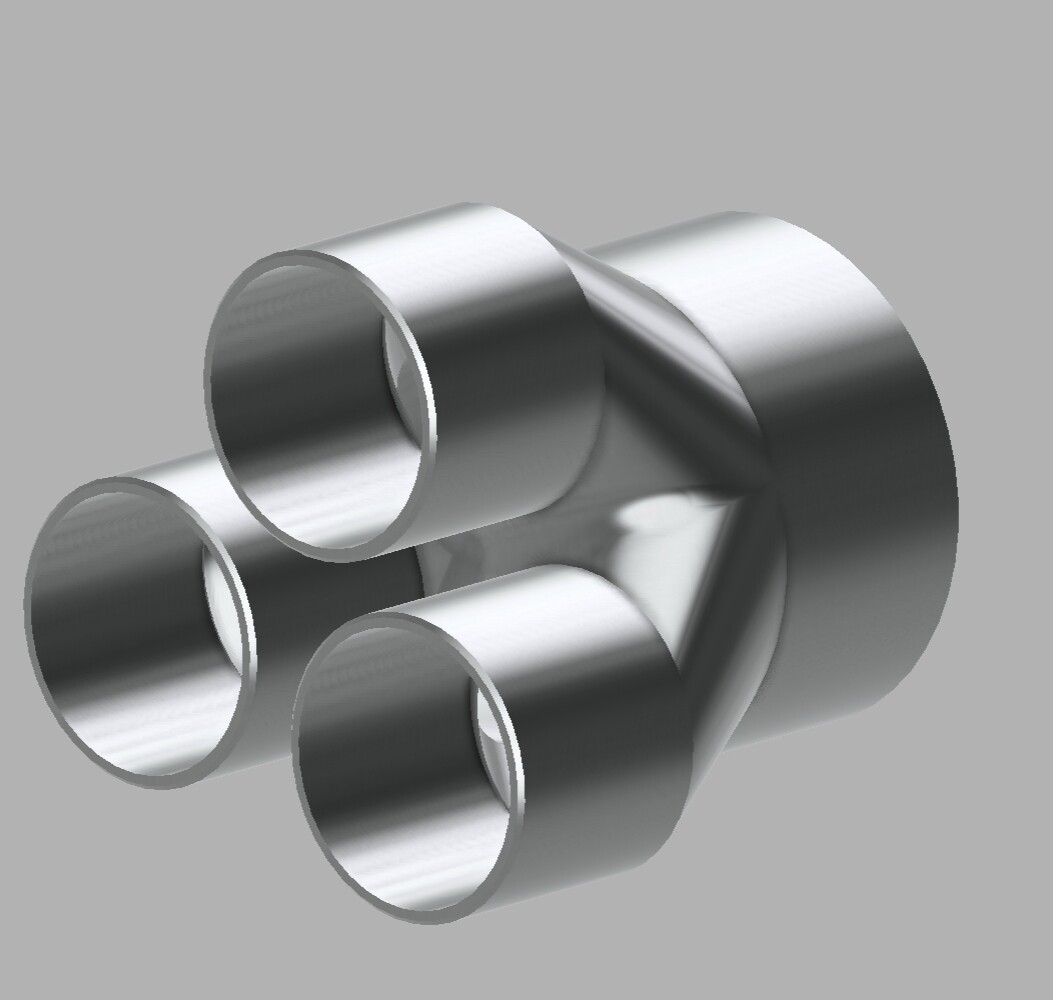
Sounds like a winner IF you create a Y and use two suction hoses.
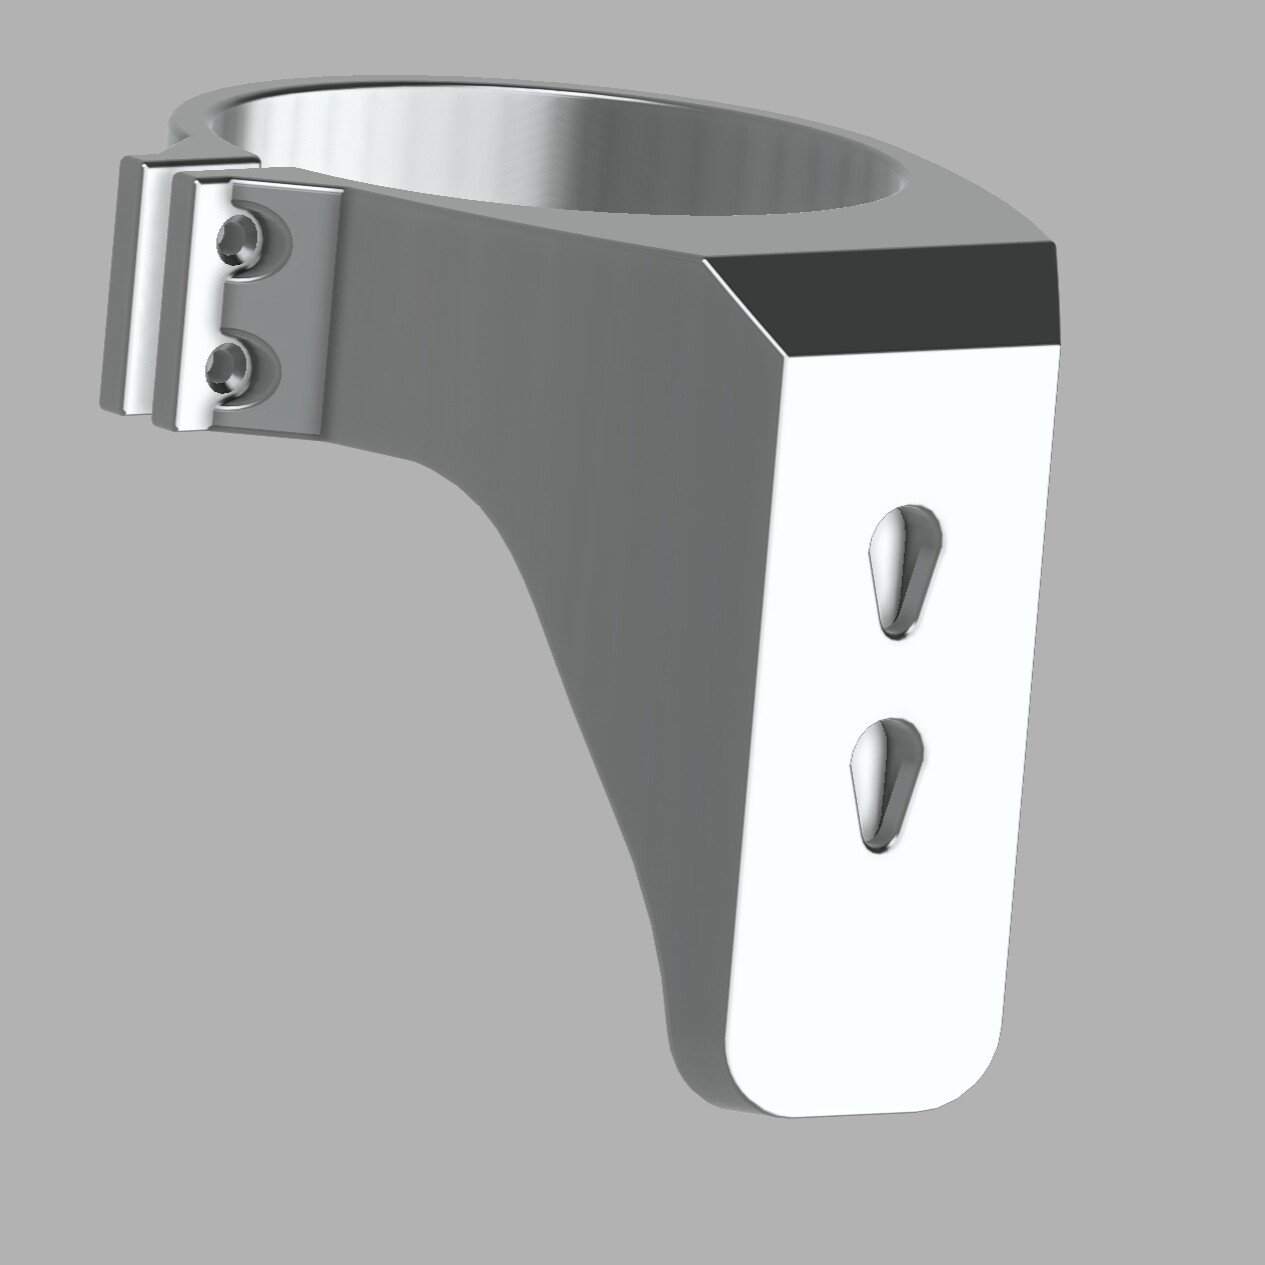
@Julien do you want my design file for these?
Yes please, I won’t be able to procure the honeycomb grid, but the 3D-printed parts are interesting to avoid re-drawing them myself in Fusion