Mini-lathe + shapeoko?

Interesting…I could indeed use something like this for a prototype.

2 Likes

I like the direction @neilferreri is suggesting.

either build from scratch or find an old lathe for the ways.
create a steady rest with a pulley and chuck on one end, live center on the opposing.
motor with a pulley and v belt. done.
nice because you really only need the ways to be solid, steady rests should repeat pretty well if taken down.

full lathe works but is bulky. trim the fat and have it easy to add and remove as necessary in various pieces for ease. could use a decent drill too, they got some torque to them.

3 Likes

A 5C spin fixture with tailstock is also an option.

4 Likes

This topic was automatically closed 30 days after the last reply. New replies are no longer allowed.

So I did what one should usually not do: ignore @neilferreri’s advice, and proceed with my initial idea :slight_smile: (seriously though, the reason for not going to the Dremel-on-a-custom-jig option is that I want to learn turning small objects anyway, so I invested in something that would be a bit less awkward to use and hopefully more precise)

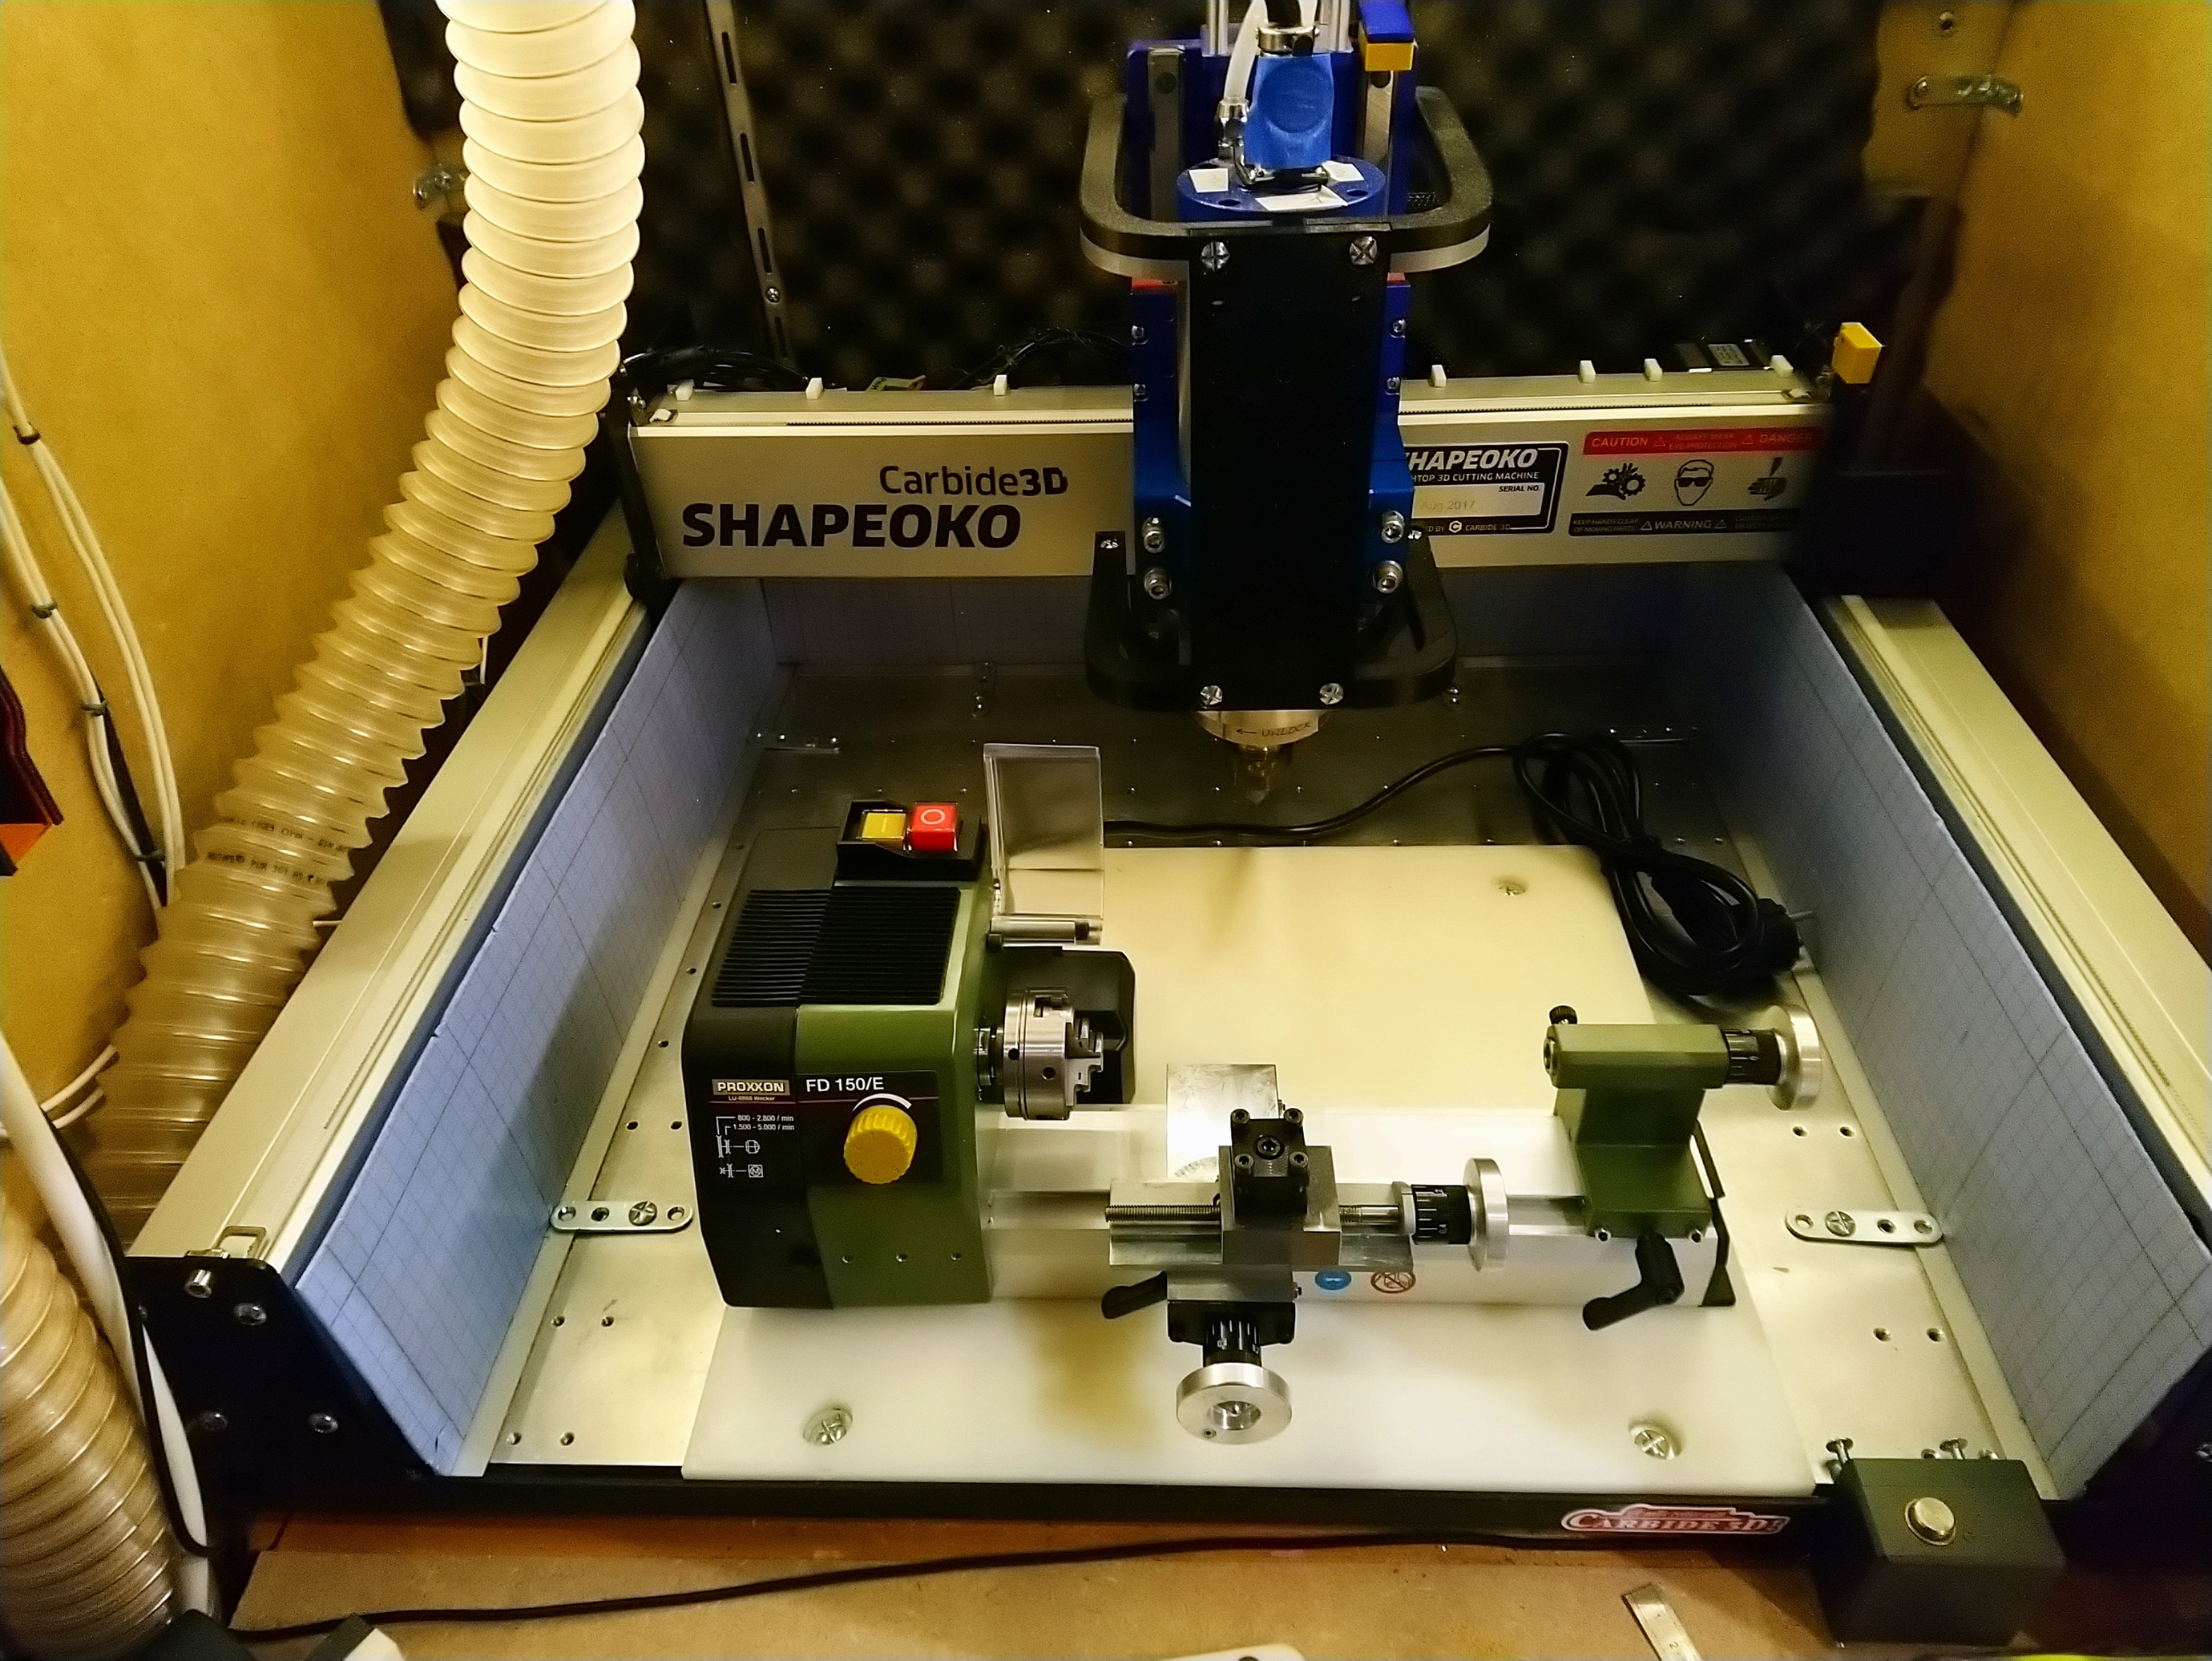
It’s like this mini-lathe and the SO3 were meant to work together.
I’ll update this thread as I progress towards my custom CNC lathe. And then I can rings to rule them all !

By the way, if anyone has advice on good resources/tutorials on turning, I’m all ears.

8 Likes

Here I am worried about running my Shapeoko into a clamp or two. :smiley:

Are you planning on syncing the rotating axis with the CNC?

1 Like

Nope, I don’t want to get into the “interesting” world of managing a 4th axis just yet, my intent is only to drive the tools in the X/Y plane, while the lathe is turning at constant RPM.

4 Likes

Nice little lathe, I wonder if the motor will have enough power for anything but the smallest and softest material. At the moment, if I wanted to implement a 4th axis, I would consider the roller Y axis method but I would have to find plans or do my own design with all the pitfalls. I never seriously considered implementing a 4th axis since the stock Z of the Shapeoko does not give much clearance but now with the HDZ, it is something I may try at some point.

2 Likes

Would be interesting to do like I do with my laser, disconnect my Y axis and use it to turn the rotary. You would still have the x and the z. (which is what you normally use with 4th axis.) the Y would be center line of the lathe. The only issue is how to control the Y functioning as the rotary. Software allows you to change the steps and the diameter.

1 Like

Hi there,

it’s been a long time, but I have not given up on this project. Minor progress today, which I thought I would share.

I grabbed this 2017A aluminium plate I had,

run a little surfacing op,

then started cutting,

ended up with this,

and a whole lot of chips to clean-up,

I tapped the front hole (M5), drilled a hole from the side to insert a bolt+nut for tightening the piece…

… around the lip/recessed part at the bottom of my spindle,

(and by that I mean the “dustproof cover” below)

image

and finally I was able to attach the little turning tool holder that came with my proxxon mini-lathe:

which hopefully should allow me to do this (soon!)

Yes, I have a clearance issue with my 3D-printed frame (usually supports my dust shoe), I’ll have to remove it when turning stuff.

Next on my list: look into attaching the mini-lathe to the aluminium baseboard. And then start looking into generating 2D (XY) toolpath to have the shapeoko move the turning tool. It will either be fun or a total disaster, either way I can’t stop now :slight_smile:

13 Likes

hahaah you wild. i like it.

does the chuck thread on? may want to run it fwd and flip the tool upside down to ensure it won’t back off - if threaded.

looking forward to seeing how well that holds up. i’m working on a solid mount to replace the compound on my lathe.

2 Likes

That’s an excellent point !

Yeah I dug a trench in my garage, to hide there when I hit the “run” button for the first time :man_factory_worker:

2 Likes

so you’re not considering using an endmill to carve patterns?
(sort of a round version of 3D carving)

I need to survive step1 first :slight_smile:
Joking aside, that would be an interesting possiblity, but I would then probably have a significant Z clearance issue to address.

1 Like

So, having cleared up my todo list a bit, I’m restarting this.

Nice surprise, the two fixing points on the mini-lathe are spaced by exactly 350mm, and my aluminium bed has holes every 50mm \o/

I needed short M5 bolts, and the only ones I had on hand were salvaged from my original stock Z axis, so it’s like it was meant to be.

Potential disaster ahead, take cover!..

6 Likes

Well, it’s alive, and I’m still alive too.

(lousy quality because it was captured from behind my acrylic front window, I’m not taking any chances)

It’s a good thing I reread the thread before launching the job, because I had my tool facing up (oops…it must be flipped since I’m coming from “behind” and the rotation is counterclosewise) so @PaulAlfaro literally saved me from a very silly crash on first try with his comment above.

I have no idea what I’m doing yet, so I semi-randomly chose 2000 RPM, 350mm/min feedrate (13ipm), cutting 0.5mm (0.02")

Conclusion for today:

  • I feel like a newbie again, I need to go and learn about CNC turning feeds and speeds and the different kinds of cutters and when to use them, etc…does anybody have a recommendation about a specific site or book to learn turning basics ? (but which would be CNC-friendly, I have gone through a few videos already and the “you have to feel it” comments don’t help me much for a CNC lathe…)
  • I will add a new power switch for the lathe on my control panel outside the enclosure, it feels a lot safer to have the front door closed when I start this thing.
  • I need to look into what my CAM workflow should be. I can probably use CC and X/Y contour profiles with no Z depth as a hack, I think VCarve supports turning toolpaths to so I’ll check that, and there’s always Fusion360.
8 Likes

I haven’t thought about how you were going to hold that milling cutter. I’m surprised that that is stiff enough without giving you a bunch of chatter. I guess that will show when you “overfeed” the cut.

Looks really neat! +1

2 Likes

Ok, Fusion360 it is, for generating turning toolpaths.

Since Fusion insists on the rotary axis being “Z”, for now I’m cheating, opening the G-code file and replacing “X” by “Y” and “Z” by “X”.

which then gives me a nice toolpath in the X/Y plane

image

Now to take a peek inside the turning post-proc and see where to hack to do the X/Y swap

4 Likes

I wonder if this is something where you want to just feed it an STL file and then make a flattened depthmap…

1 Like