The Mystery File Challenge Awards have been shipped
Congrats to @Design_Make_Test @orlrobinson and @FlatBaller
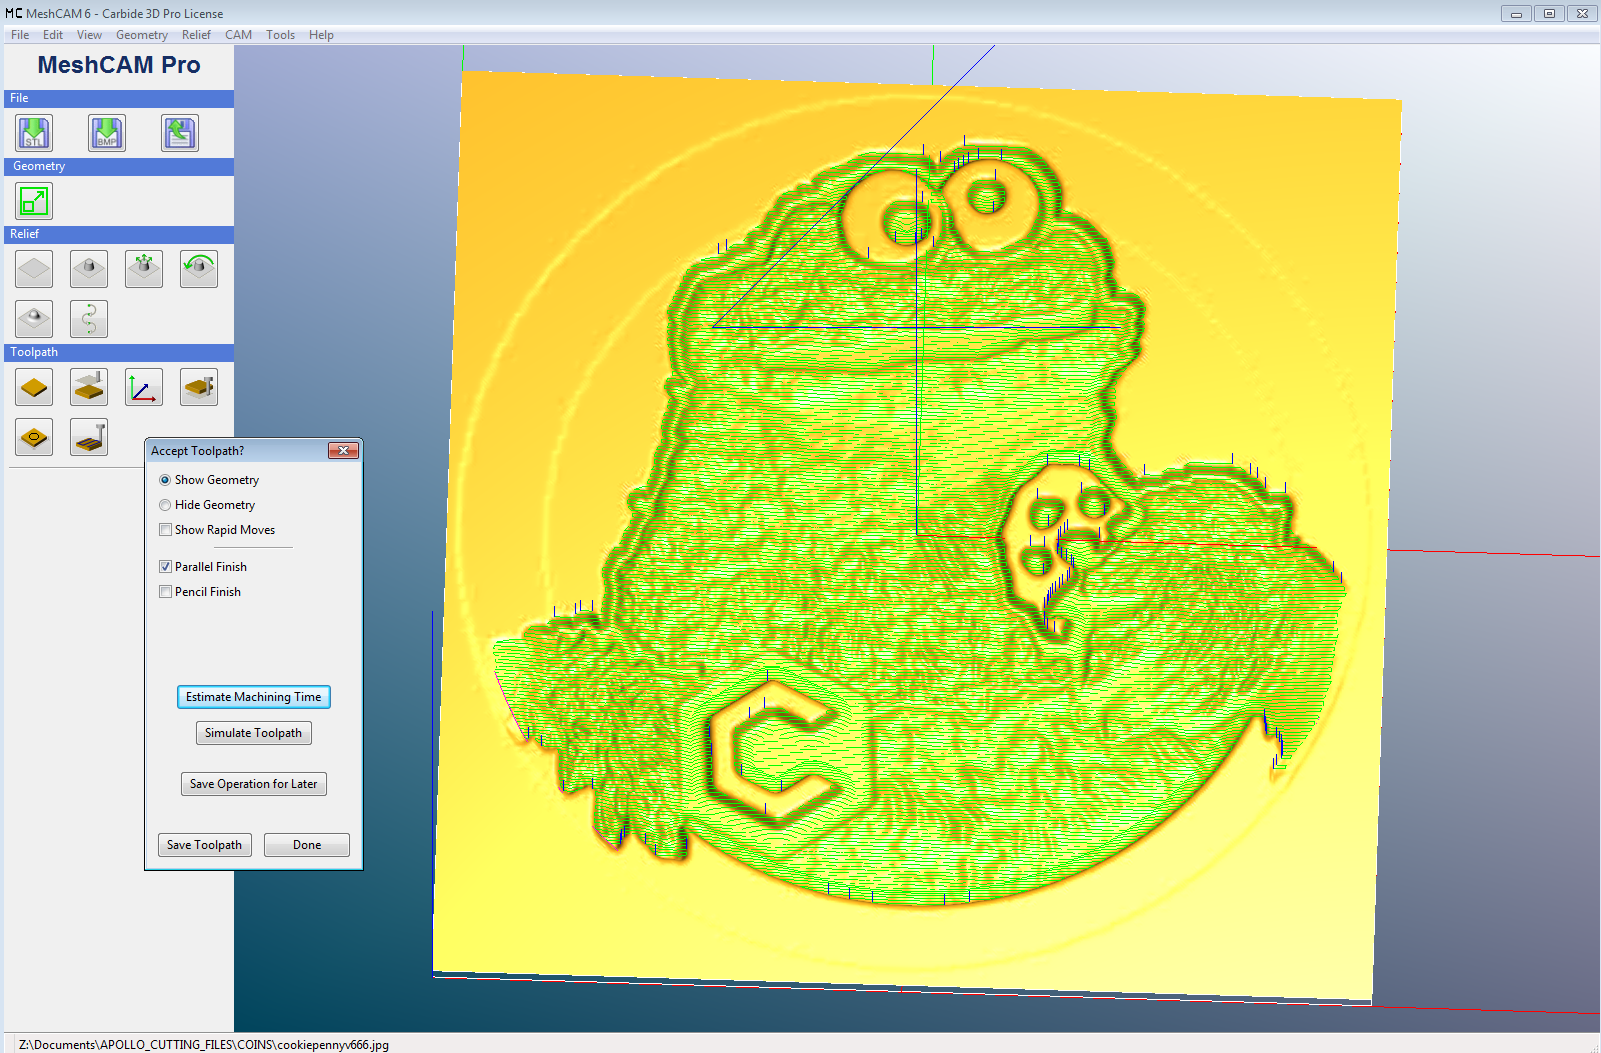
I have updated the Cookie Monster file and added the Carbide Logo.
ChipsAHOY 031 v4 CTZ.nc (1.5 MB)
Here is how to set up your own Penny Engraving.
STEP 1: 2D art
:

This is the JPEG file I opened in MeshCAM
I have done some editing in photoshop to get the image to read at a small scale by adding the black and white outlines for example.
Note, I added a white transparency layer on top of the image, I found this helps blend the tones and levels.
Step 2: Scale the Art
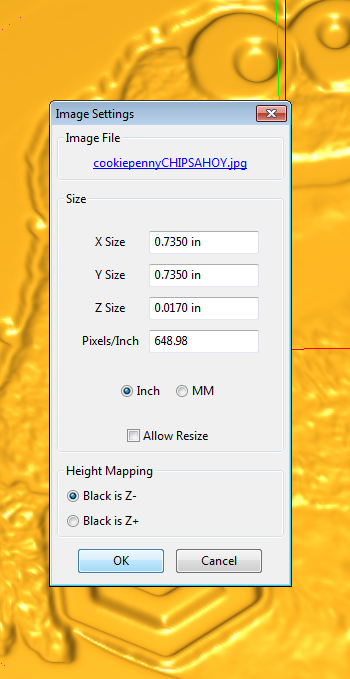
Upon opening a JPEG or PNG file in MeshCAM you will have to define the XYZ dimensions and choose Z + or Z- direction to pull the image. Here are the settings that worked for this job:
X .735"
Y .735"
Z .017"
Black = -Z
Step 3: Smooth

In the Relief Controls you will see the Smooth option, I turn it all the way down to 1 becuase i dont want to lose detail, i just need less spikes in the Fur for this peice in particular. Its a very cool feature, check it out with some black and white art, you will be amazed!
Step 4 Define Stock
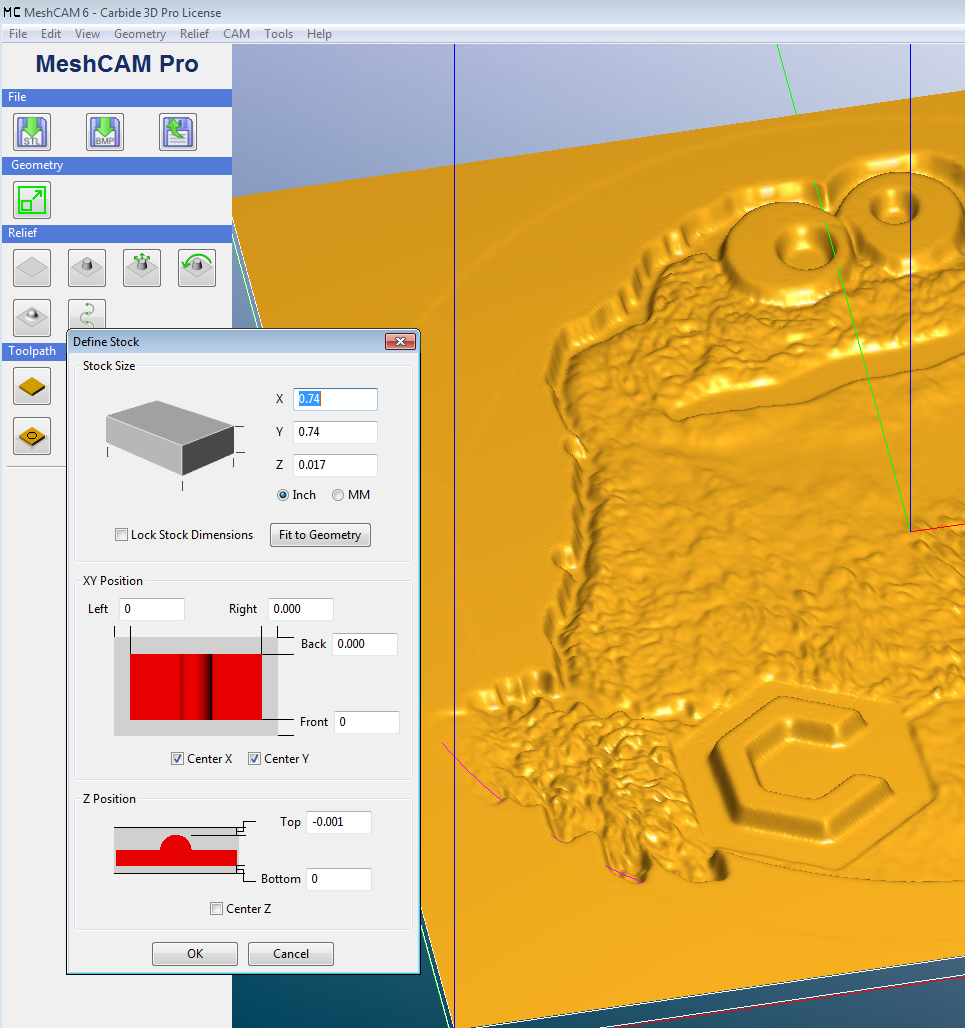
Engraving Tip!
When defining the stock size on an engraving job you can set your Z position to -.001(!)
Since I dont want to engrave the top of the surface, I pull the art work above the bounding box by .001",
This way the top surface of the Art is not read by MeshCAM.
Only the parts that are below the top surface will have a tool path created.
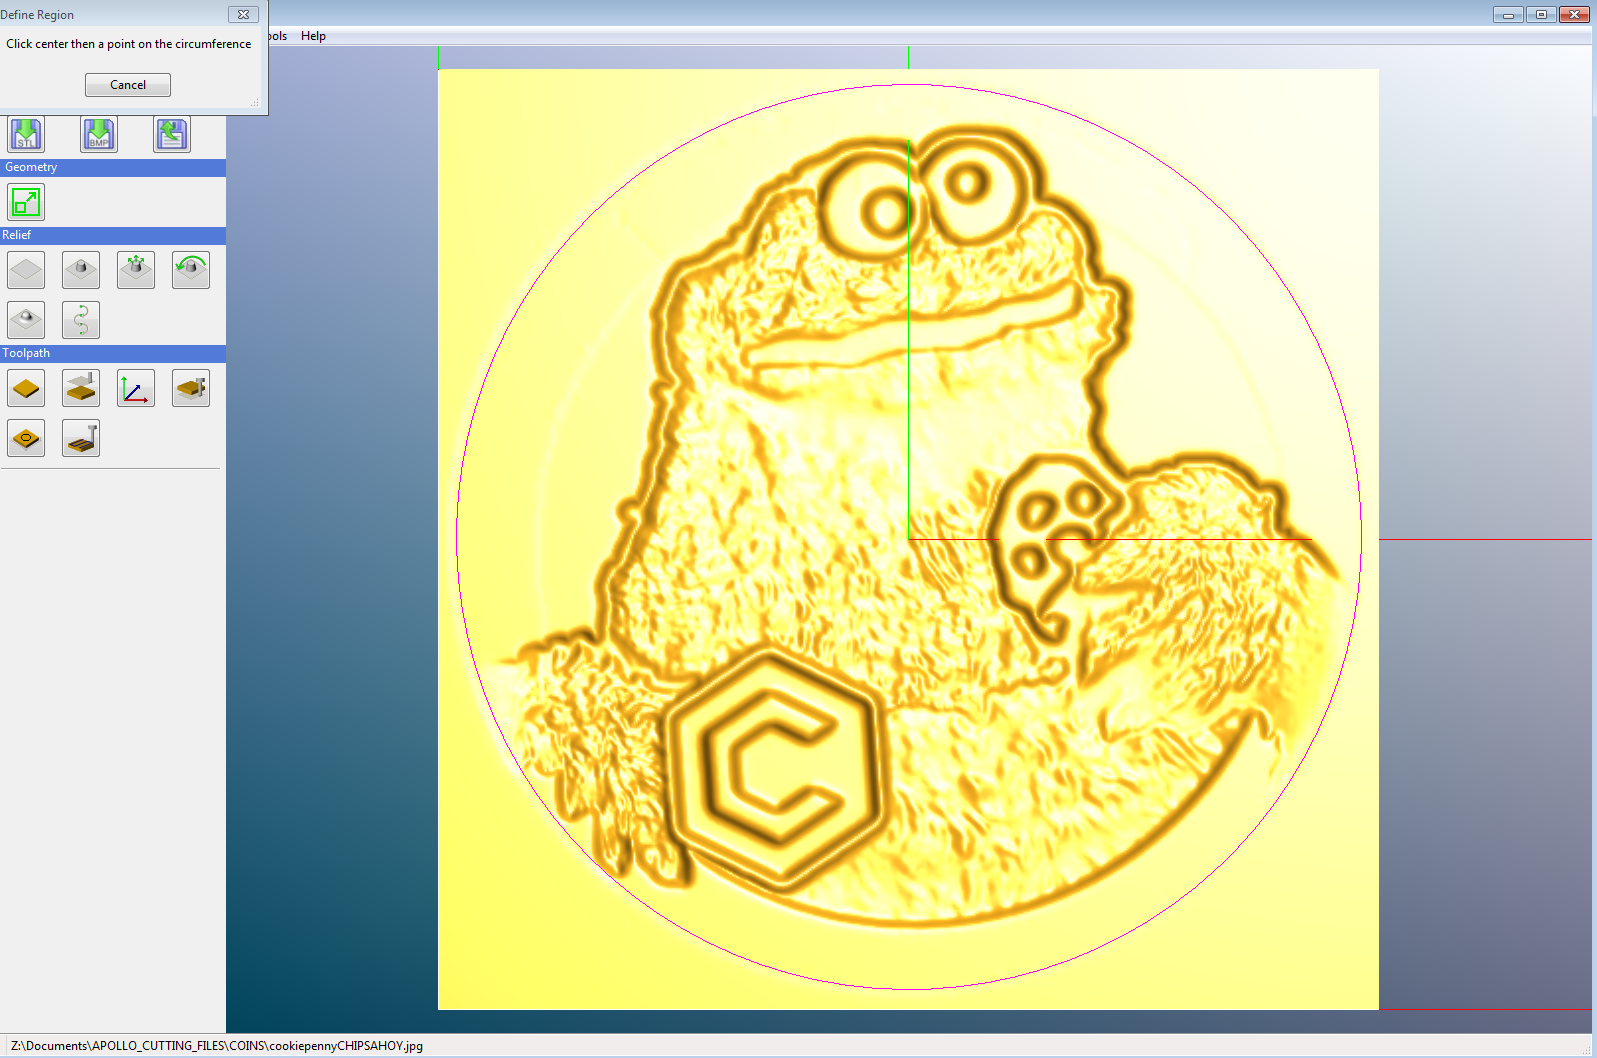
Step 5 Set Your Zero

Round objects get center Zeros in my book, especially if you need it to be concentric with the pocket fixture you are using to hold it.
Step 6 Define Region
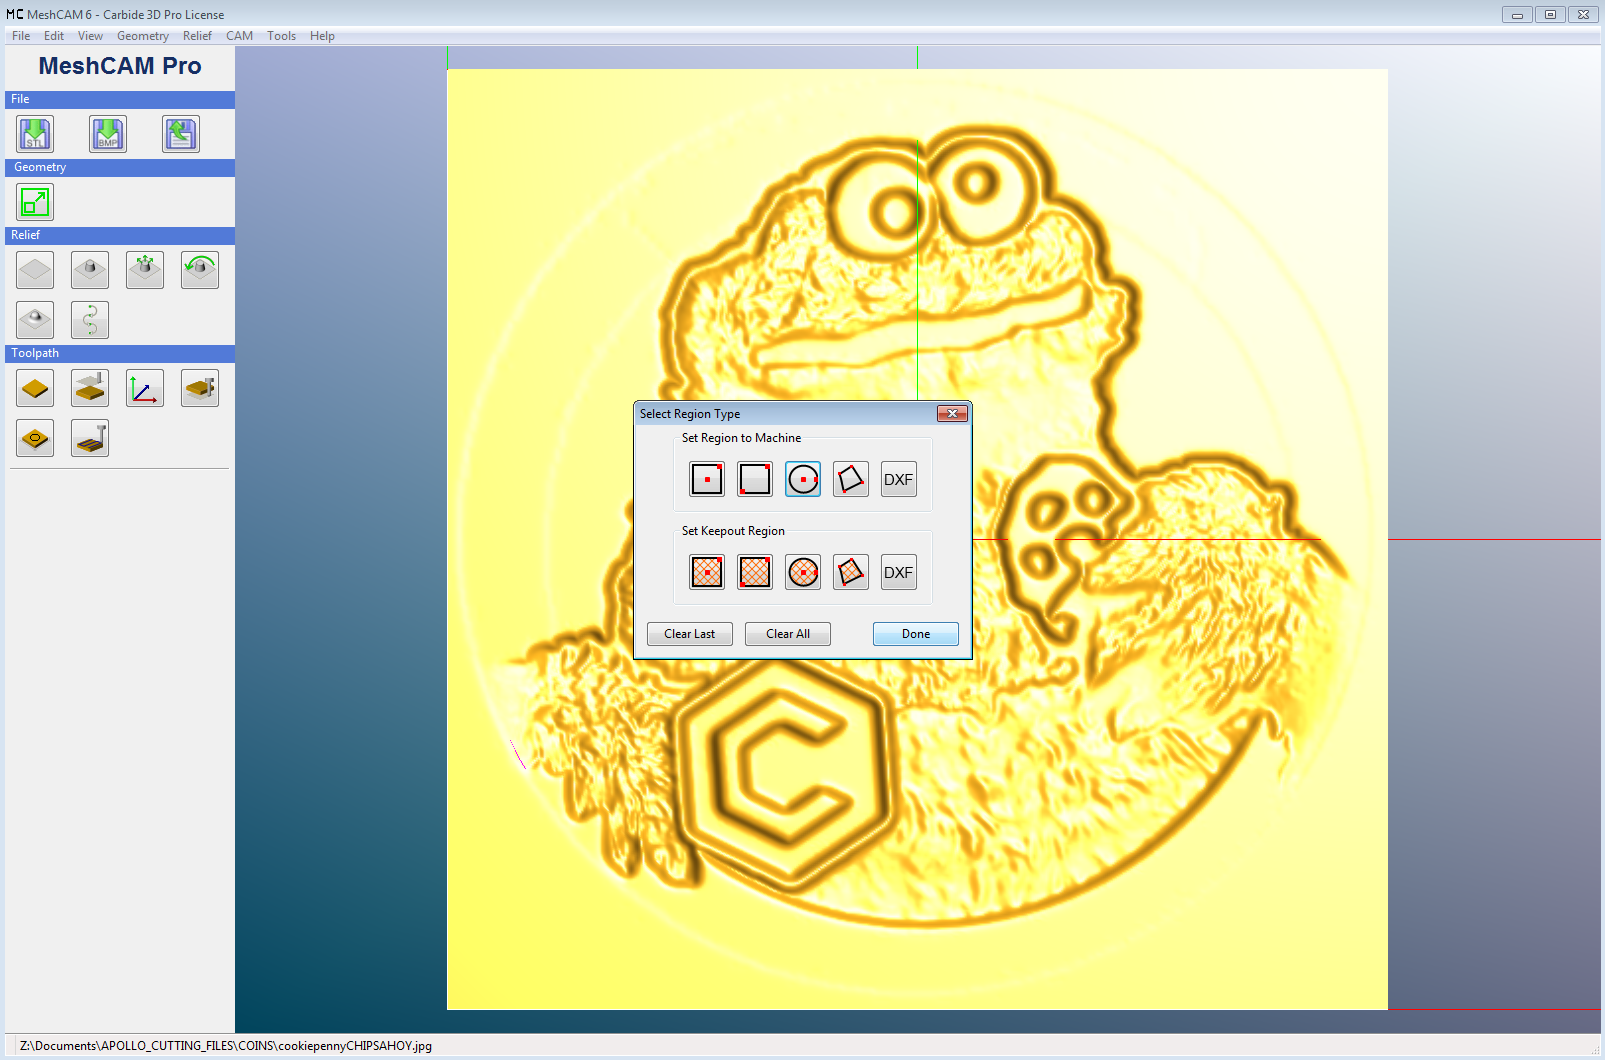
If it doesn’t need to be machined, then MeshCAM doesnt need to process it, so I use the circle tool to define the area to machine within.
Delicious.
Step 7 Tool path
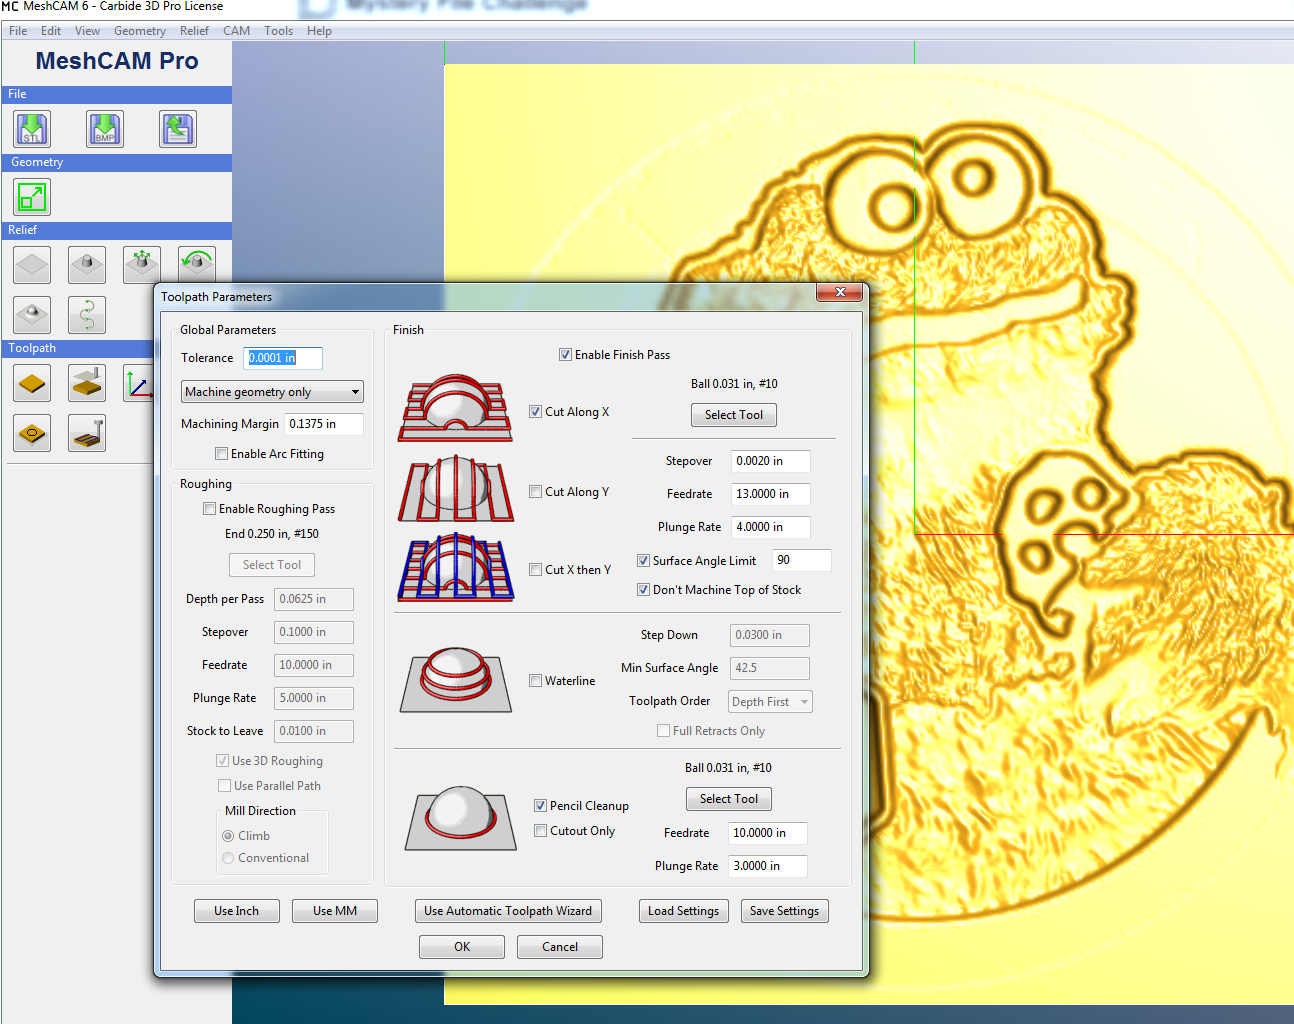
In this case the material and program is shallow enough to not need a roughing pass.
The very fine stepover of .002" lets the cut be as deep as .016" in places and move at 13 ipm with the tiny 1/32" cutter.
Some time can be saved by eliminating the pencil pass, but I think the extra details are worth the 2-3 minutes it adds.
Heres the TPS file for engraving with the #121 ( 1/32" ballend) on Copper and Zinc pennies.
cookie penny settings.tps (2.1 KB)
Chips Ahoy!