I am new to cnc. had my shapeoko 5 pro 4x2 for just over a couple weeks. and am having a problem with depths using bit zero. outcome does not look like “simulation” . I have made others without bitzero that came out fine. I copied tool paths from the previous project that cam out great. but these, not sure what went wrong.
The BitZero has a lip around 2 sides. If probing X Y and Z you have that lip hanging over the corner of the material. If only setting Z then you have the lip on top of t he material and not hanging over the edge.
This is how I set it up but still get deep cuts.
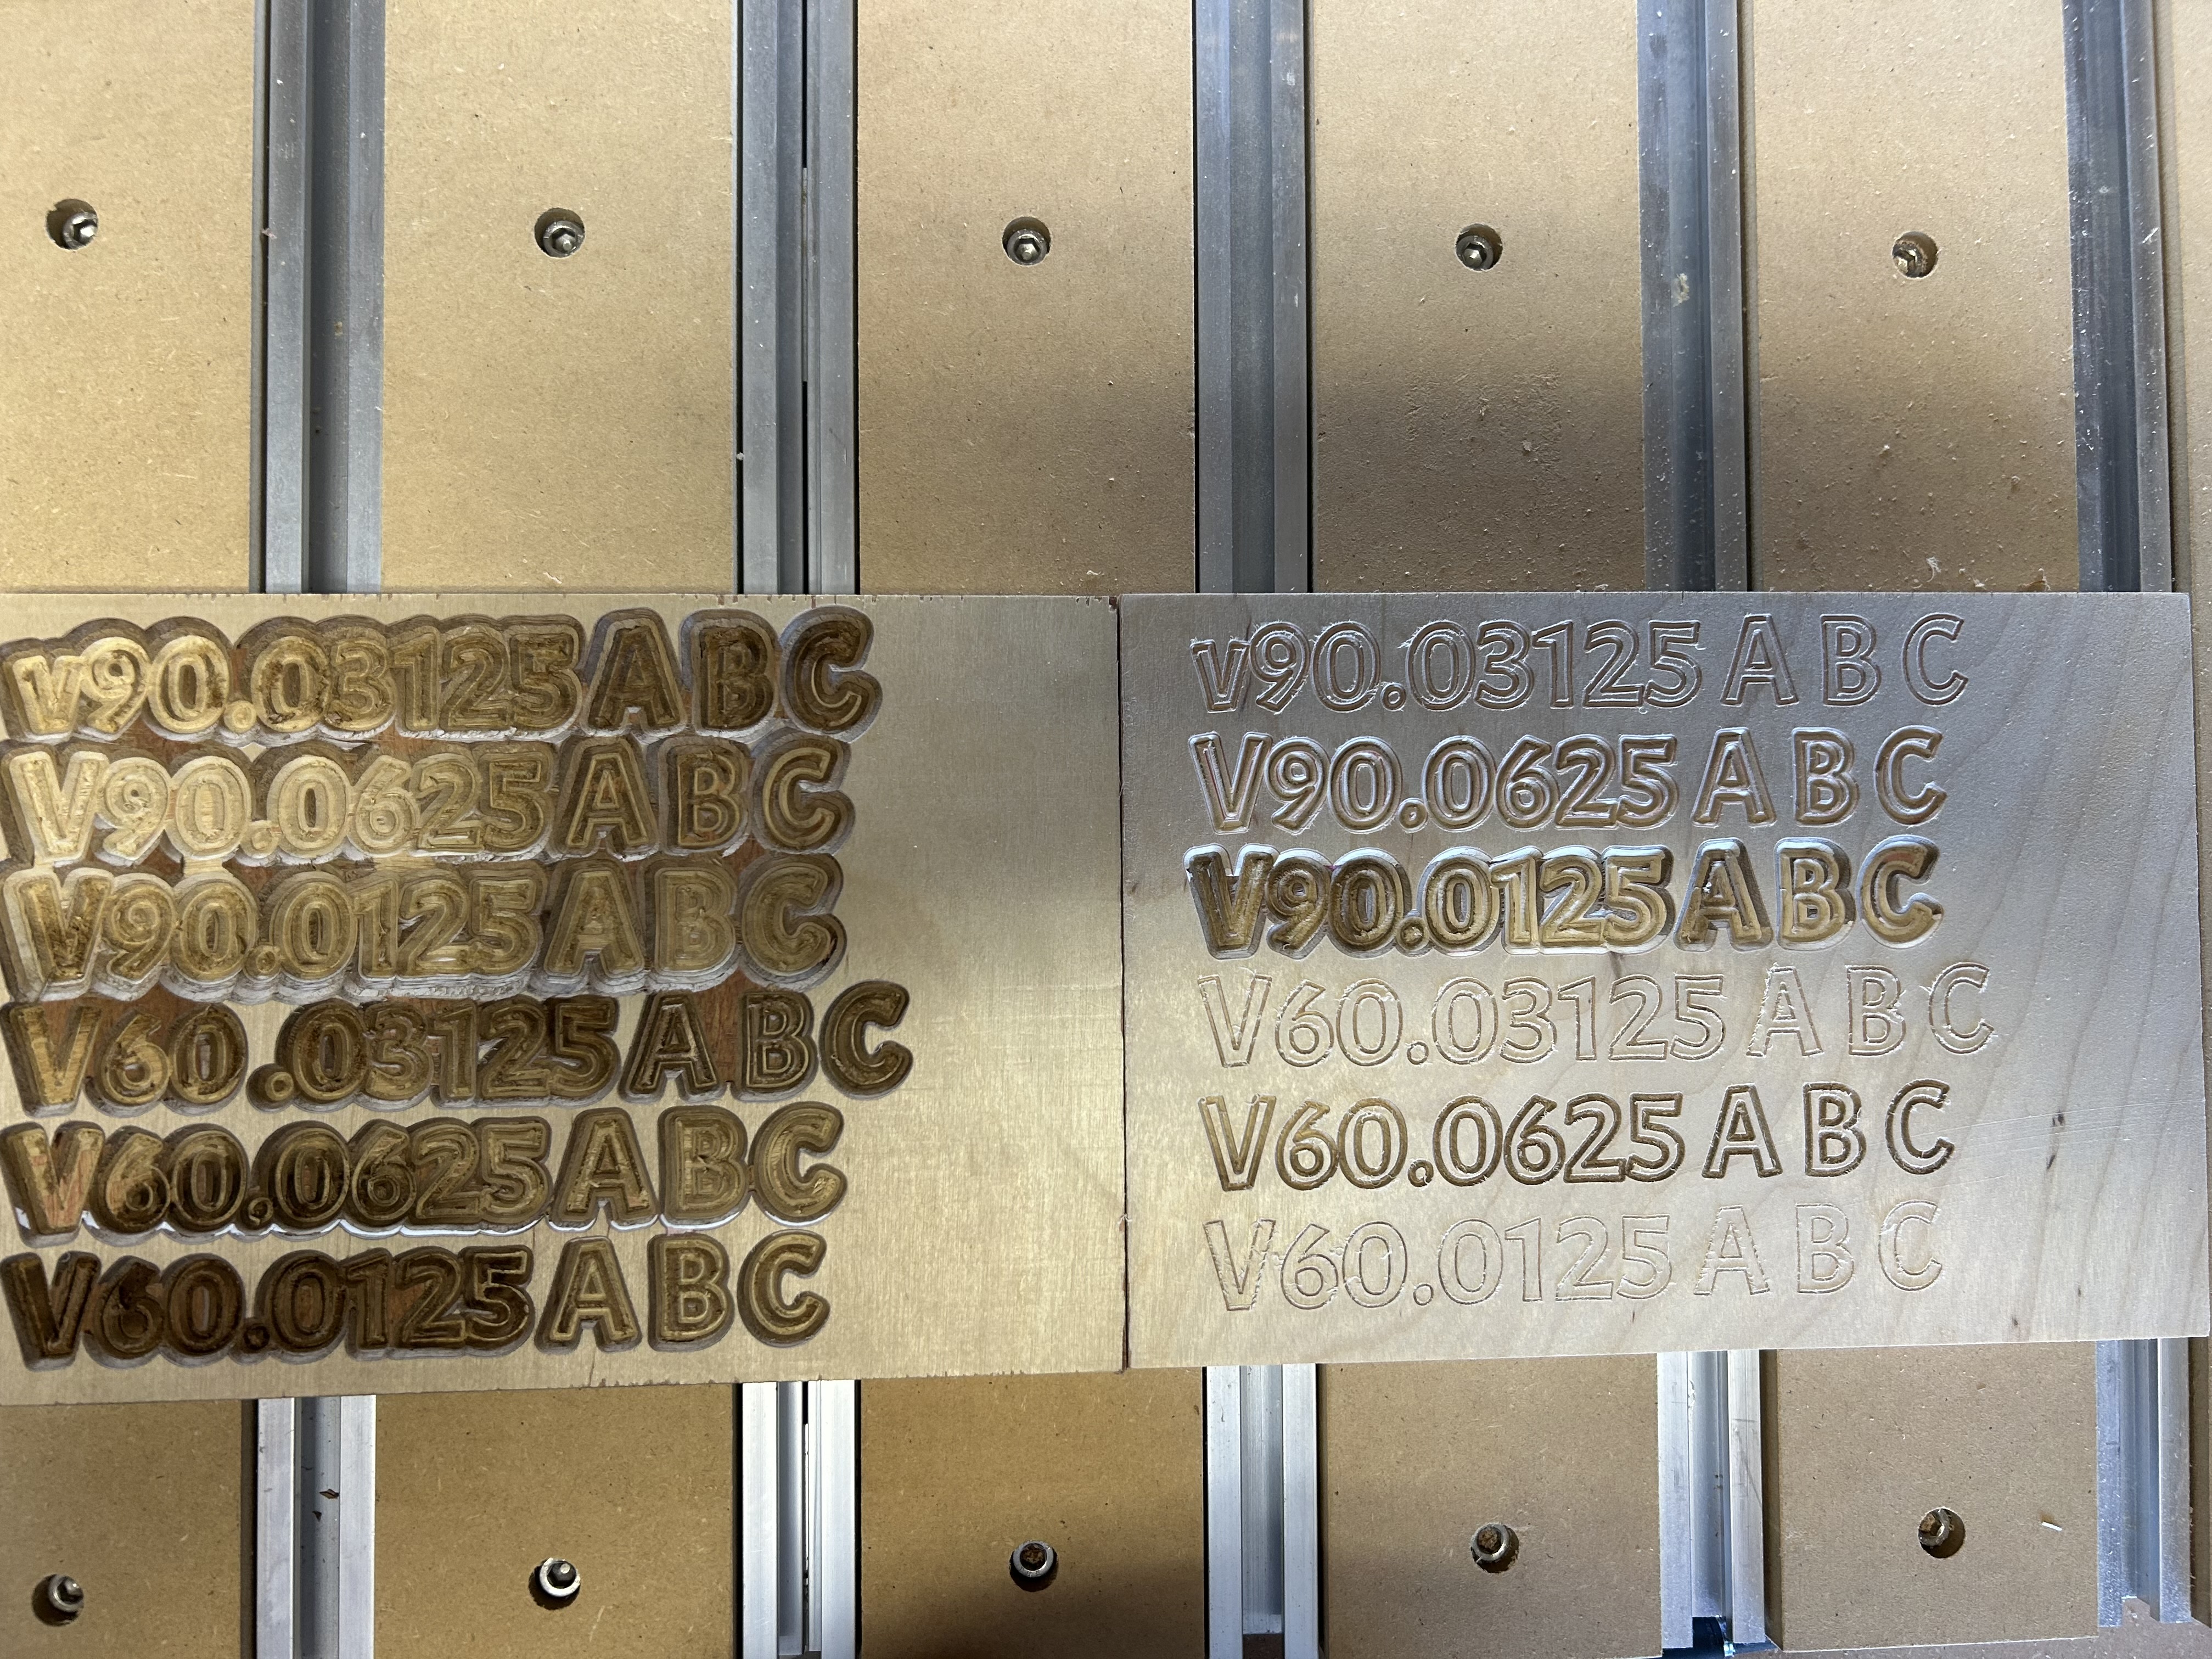
I ran test with out using bit zero and the results were much better. With bit zero on the left and without in the right. Ignore the third line that was user error on the depth.
Post your .c2d file, step-by-step notes on how you are securing your stock and setting zero relative to it and managing all tool changes and a photo showing an attempt at cutting still in place on the machine with the machine at the origin or a specified offset from it and we will try to look into this with you.
I am using carbide motion 618.
Today the machine with bit zero seems to be performing better.
process is as follows
clamp down work piece with double sided tape and clamps
initialize
insert bit zero probe (1/4)
connect bit zero to shapeoko set on lower left corner of piece
run probe, remove bit zero
load file, insert bit, run program.
see attached file and pictures.
there is video in the link as well.
You may have omitted and may be doing but when changing bits only do it when you are prompted. If you are manually changing bits without being prompted that causes depth issues. Carbide Motion keeps the last zeros in a file and is repeatable after power cycles.
When you initialize the router comes to the front and prompts for a bit. You can put in any bit you want or leave one that is already in the router/spindle. Then the bit travels to the BitSetter and is measured. That measurement is setting the bit to the Z zero that was last set either with the paper method or a BitZero probe. Then the bit comes back and rests. Then put your material down and clamp/secure it. Then do your X Y and Z probe on the corner to set a new X Y and Z zero. If at anytime you want to change the bit use the “Change Bit” button in CM otherwise your Z zero is lost. You will have a z zero set but the synchronization with the BitSetter is lost and you would have to set the Z zero again.
When the machine homes an internal coordinate system is set based on the triggering of the X Y and z proximity switches. Then when you set the X Y and Z zero on the material an offset is created and that offset is what the BitSetter uses to set your Z zero to the same spot that you last set the Z zero with either the paper method or with the BitZero probe. So anytime you manually change a bit that coordinate system for the offset is lost because any bit you manually replace will likely not be at the same stickout as when setting Z zero manually with paper or by probing the BitSetter.
So never change a bit manually without a software prompt or by using CM to replace a bit.