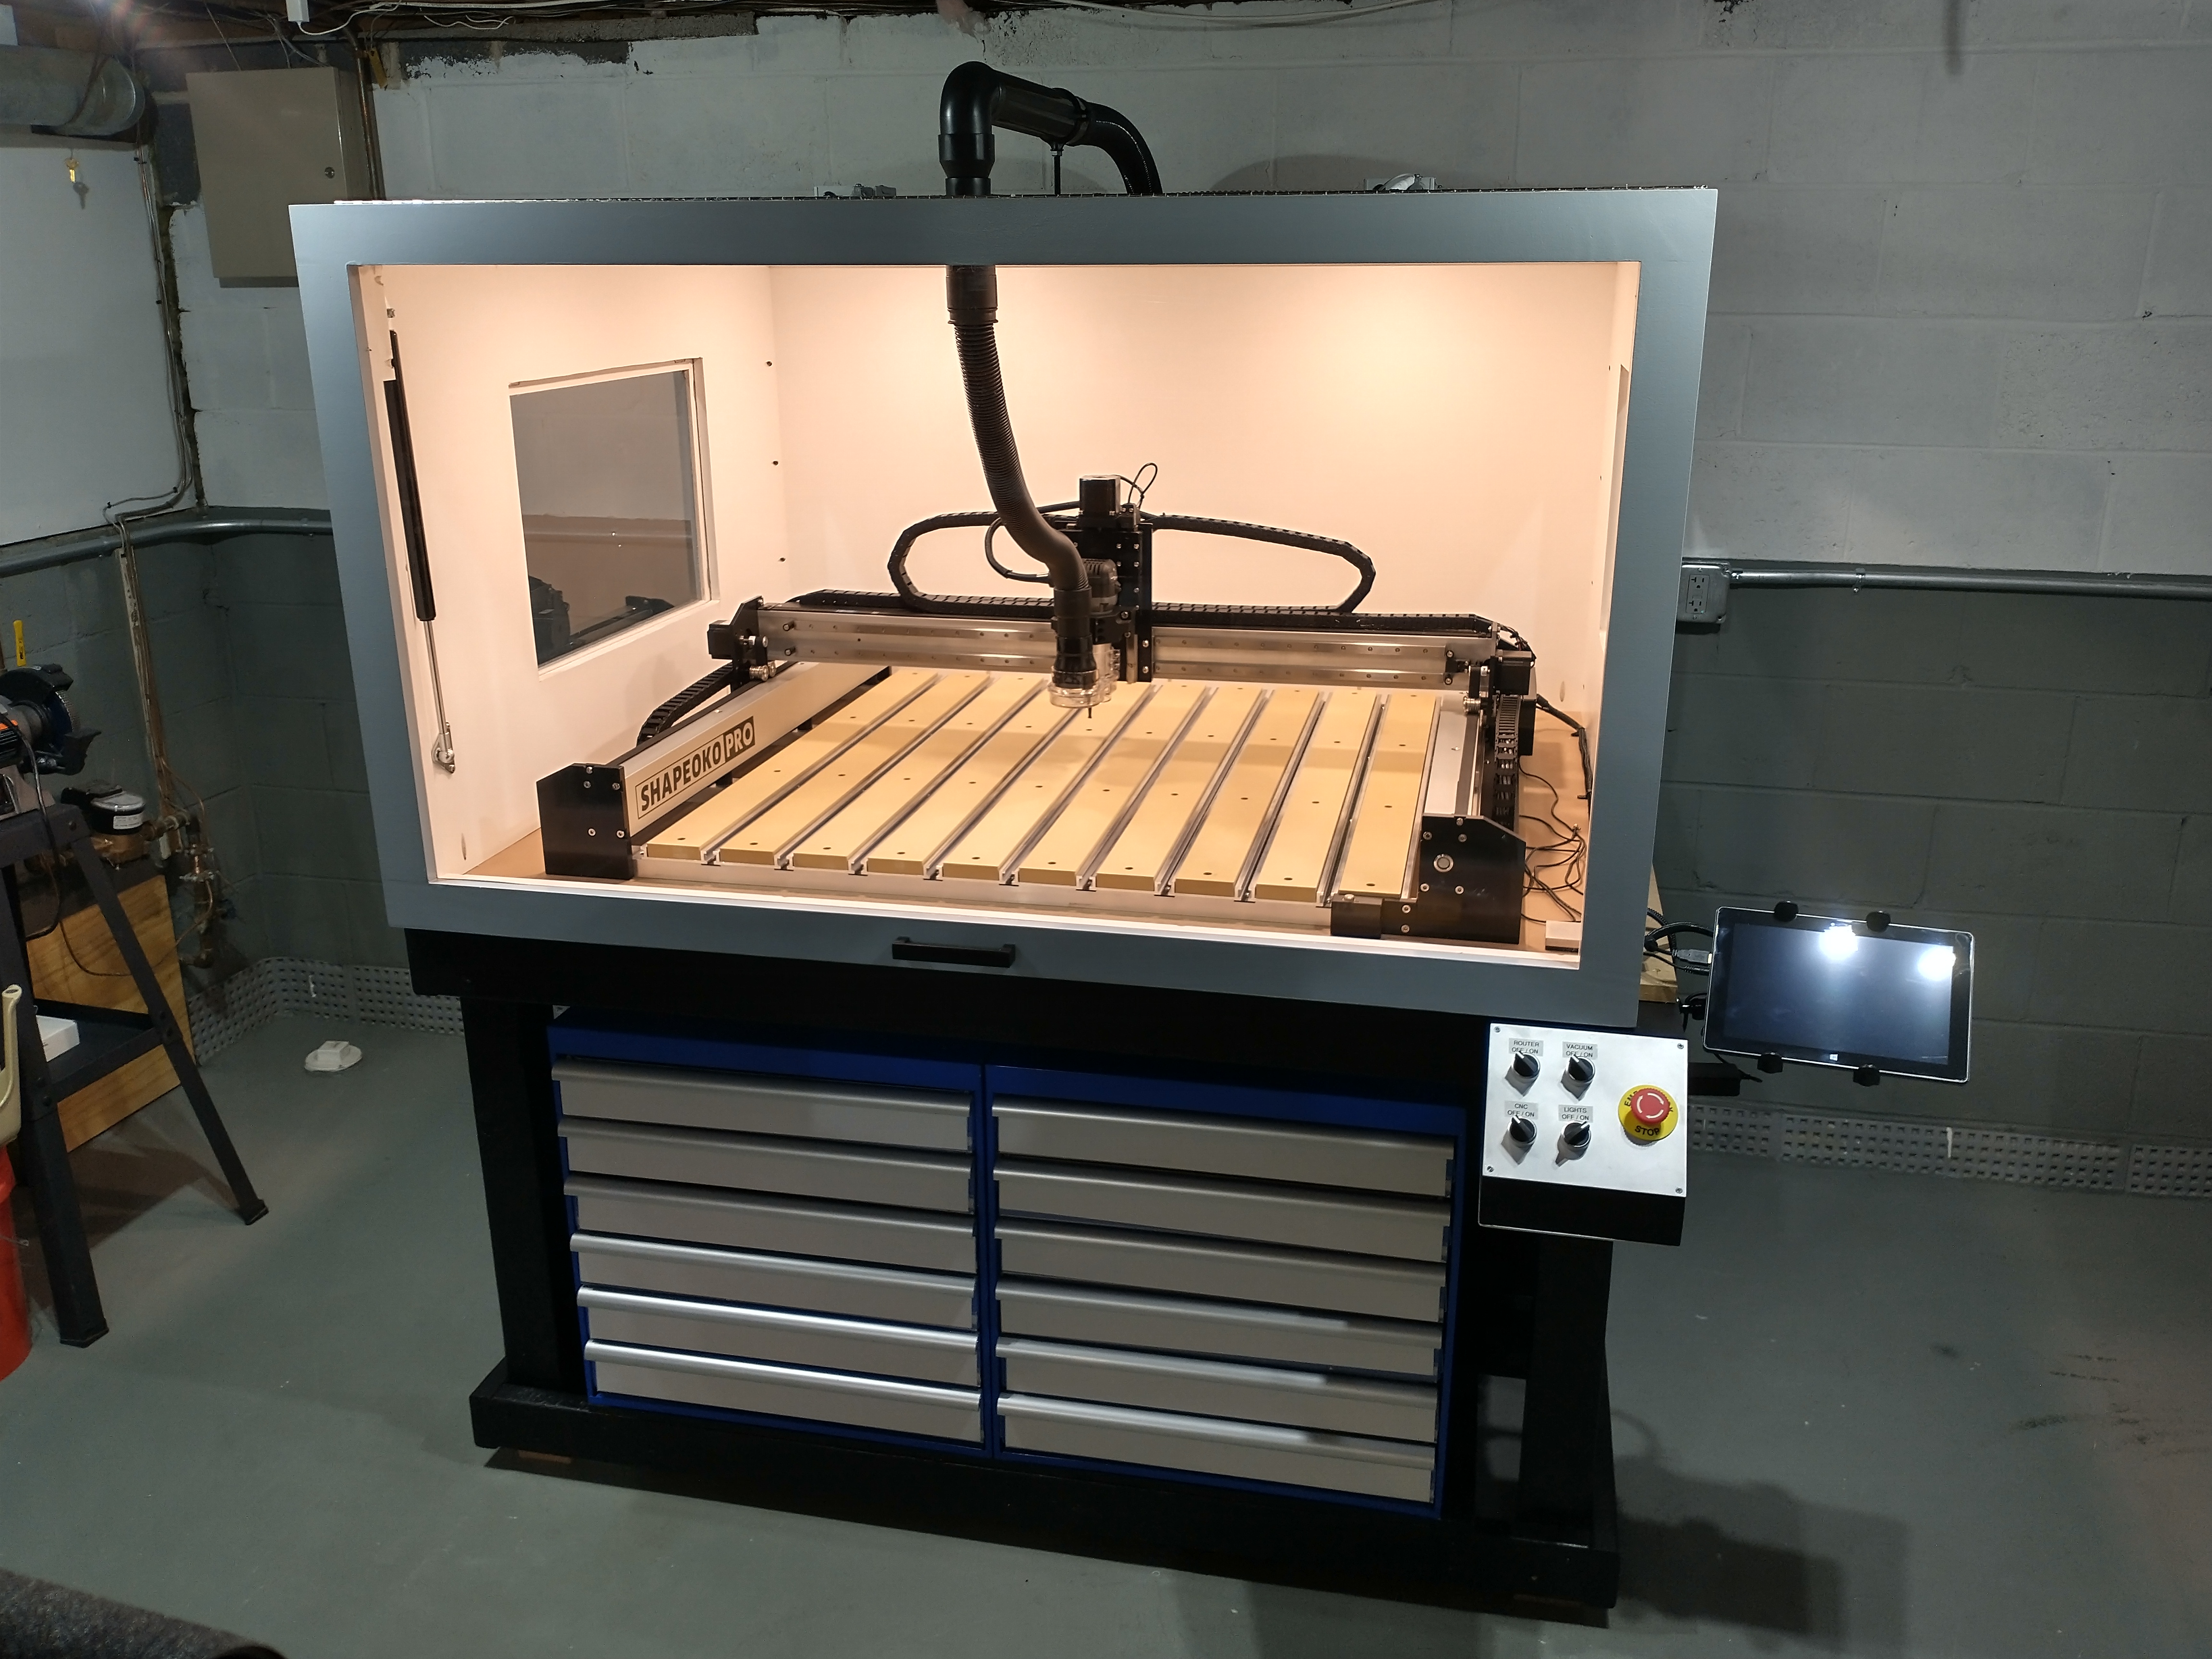
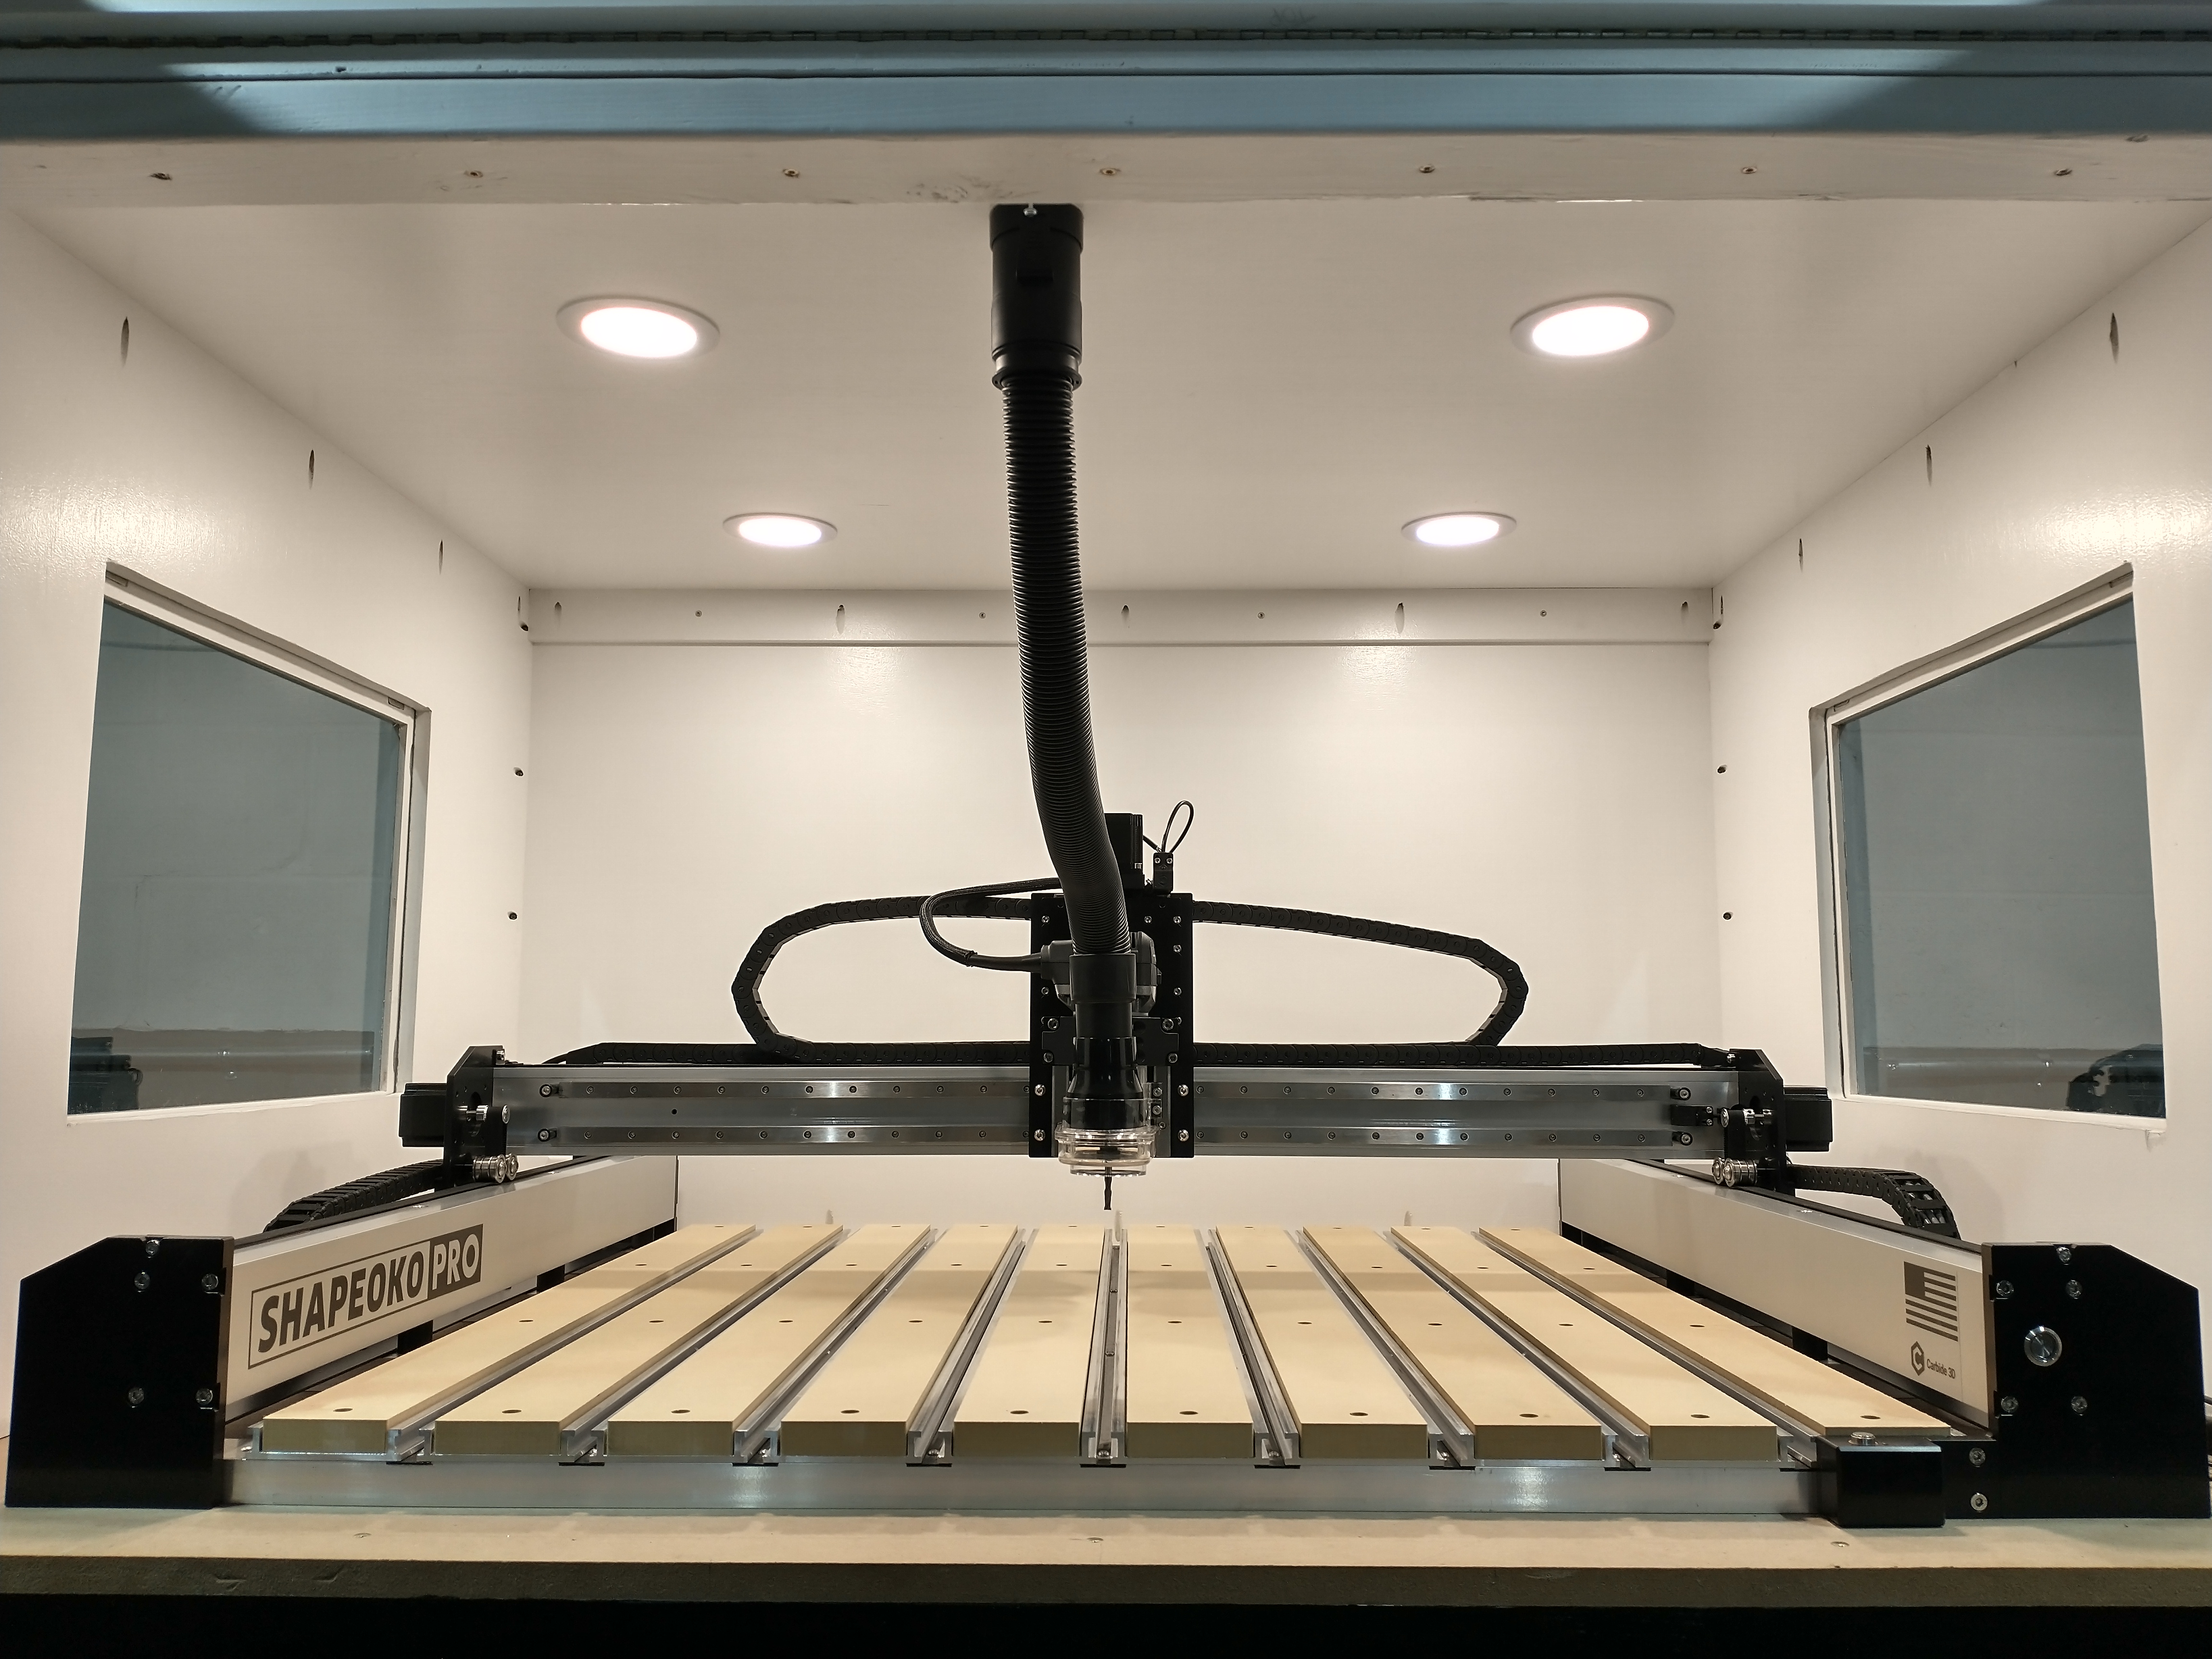
Today, I finally completed my Shapeoko Pro Enclosure. Since I will be working from my very small basement I thought it would be important to minimize the dust and noise as much as possible. I am by no means a professional wood worker or engineer just a simple man trying my best and maybe help inspire others to do the same. I researched countless websites for some inspiration and ideas on building a CNC enclosure and collectively this is what I felt would best suit me.

37 Likes
That looks awesome, great fit and finish! What materials did you use?
Giant front window FTW. I’m still painting mine off and on - should have finished before it was in use.
9 Likes
Dan, Thank you
It’s mostly made up of 3/4" plywood and lexan. I like what you did with yours. Is that drop ceiling material used inside for sound denting?
Yes, 2x4’ sheets, doubled up for absorption and reflection. The intent was to drywall the outside for additional blocking and easy finishing, but as is this knocks down enough for my needs. The panels on the side are just glued into the frame, but I had to use drop ceiling channels for the top.
Looks like you did, but make sure to use as long of screws as you can for the gas spring attachment. Mine popped out of the wood a few times until I changed them out.
3 Likes
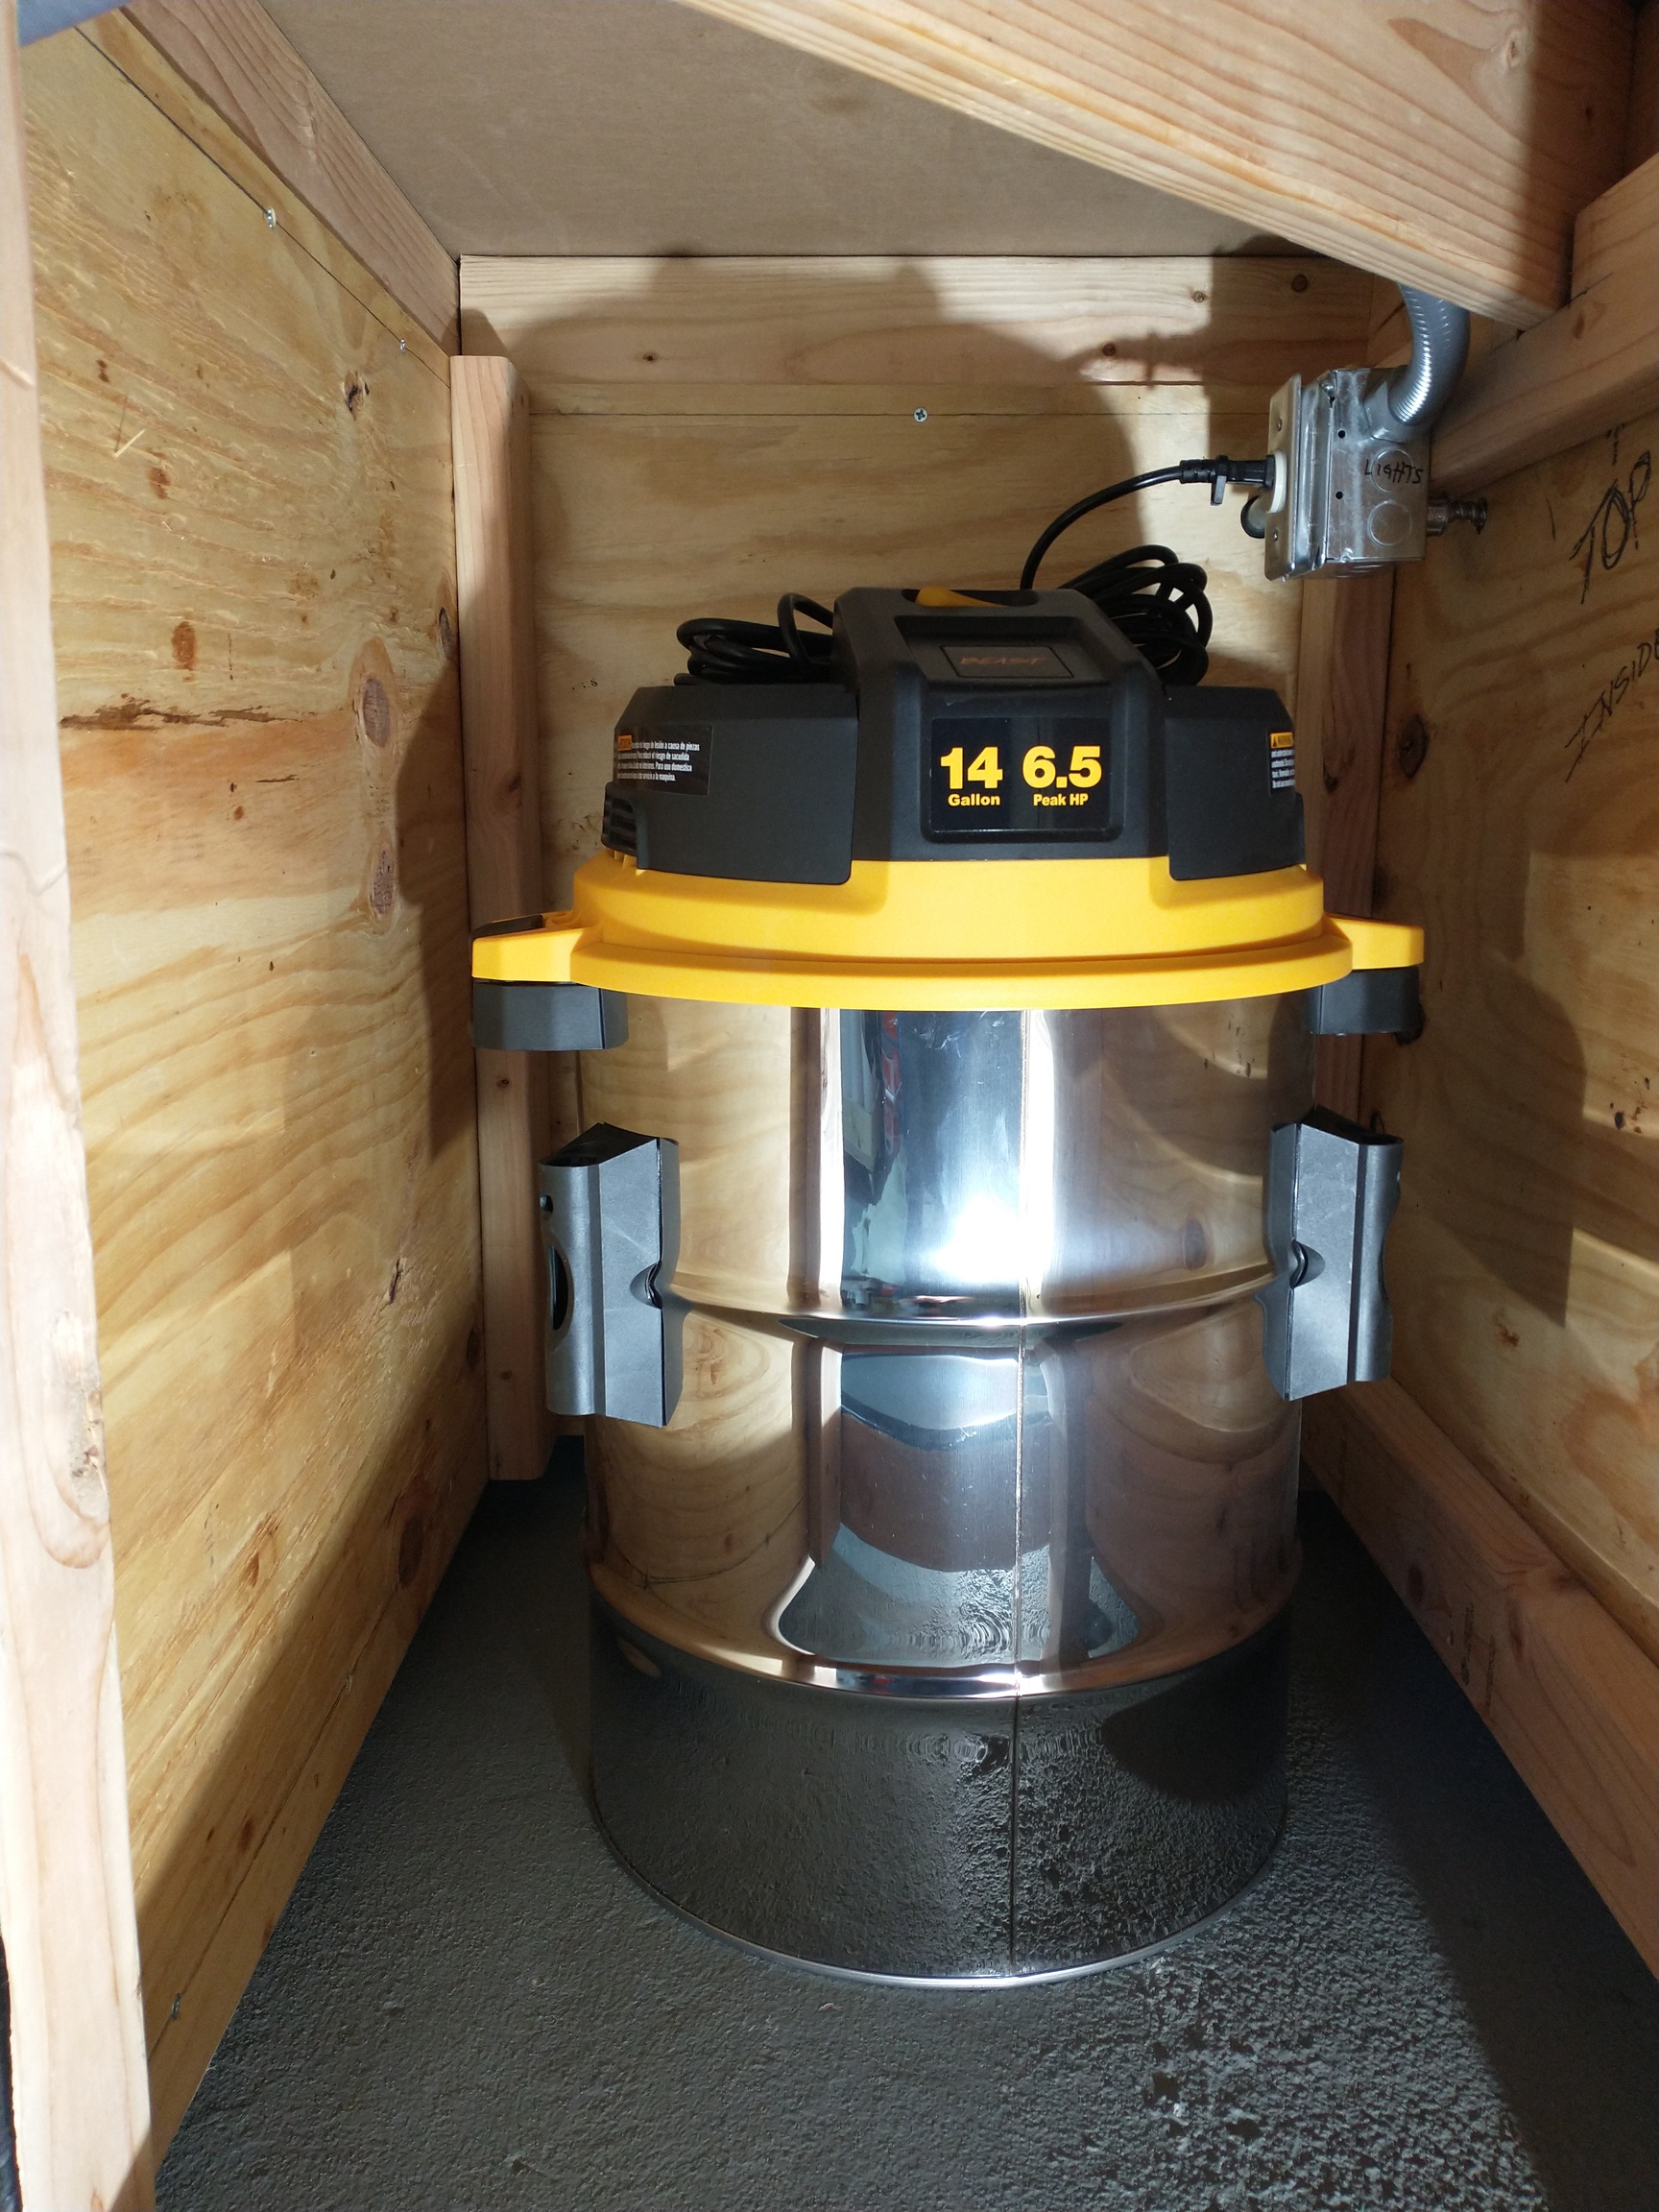
Your enclosure looks great. I do not see a cyclone separator where your shop vac is. The cyclone separator will keep your vacuum from getting clogged quickly. Onieda sells the dust deputy and there are plans for a Thien type that you can make on your cnc.
Take a look at this: https://woodgears.ca/dust_collector/separator.html
This guy makes most of all his own machines. I guess guys in Canada have an excess of time on their hands but he makes some incredible stuff.
2 Likes
“I am by no means a professional.”
Proceeds to build a pro enclosure. Great job. 
10 Likes
Guy, Thank you for the kind words and helpful tips. I should have posted the picture but I do have a cyclone separator installed in the system. I placed it on the other side of the bench. I ran out of hose length and had to put it to the other side…lol. hopefully when the finance God’s bless me with some money I can purchase a longer hose.
Thanks again!
2 Likes
Thank you very much for the kind words!
1 Like
What a beautiful job!
The only thing I guess you could add to it would be trap doors at the level of the spoilboard, to allow long pieces to stick out.
Very, very nice!
What, no laser?
4 Likes
To Boss302,
Nice enclosure. Very cleanly done. Are you a previous SO 3 user or is the Pro you first Shapeoko? If you are a previous owner of SO3 are you noticing a significant performance improvement? Does your enclosure help with sound suppression?
Terry
1 Like
The question that comes to mind when I see these enclosures is how do you gain access to the machine if you need to do maintenance ?
Are these covers designed to be lifted off and set aside ?
Thanks, Bill
1 Like
a) build the enclosure wide enough that you have access to both sides and can slide it to the side to increase access on left or right.
b) step up on a stool to reach the back
c) worst case scenario opening the front allows access to slide the machine out onto a cart or another table.
2 Likes
Terry, Thank You
To answer your question this is my first CNC machine. When researching what manufacturer of machines to go with my original decision was to go with the Shapeoko XXL and days before I was going to purchase Carbide 3D announced the Shapeoko Pro. I decided to go big or go home…lol
Also as far as sound…yes it does help with dampening some of the sound but it would help to install some type of sound proofing material such as insulation, foam, or as in Dan’s case drop ceiling panels (clever idea).
1 Like
Bill, Great question
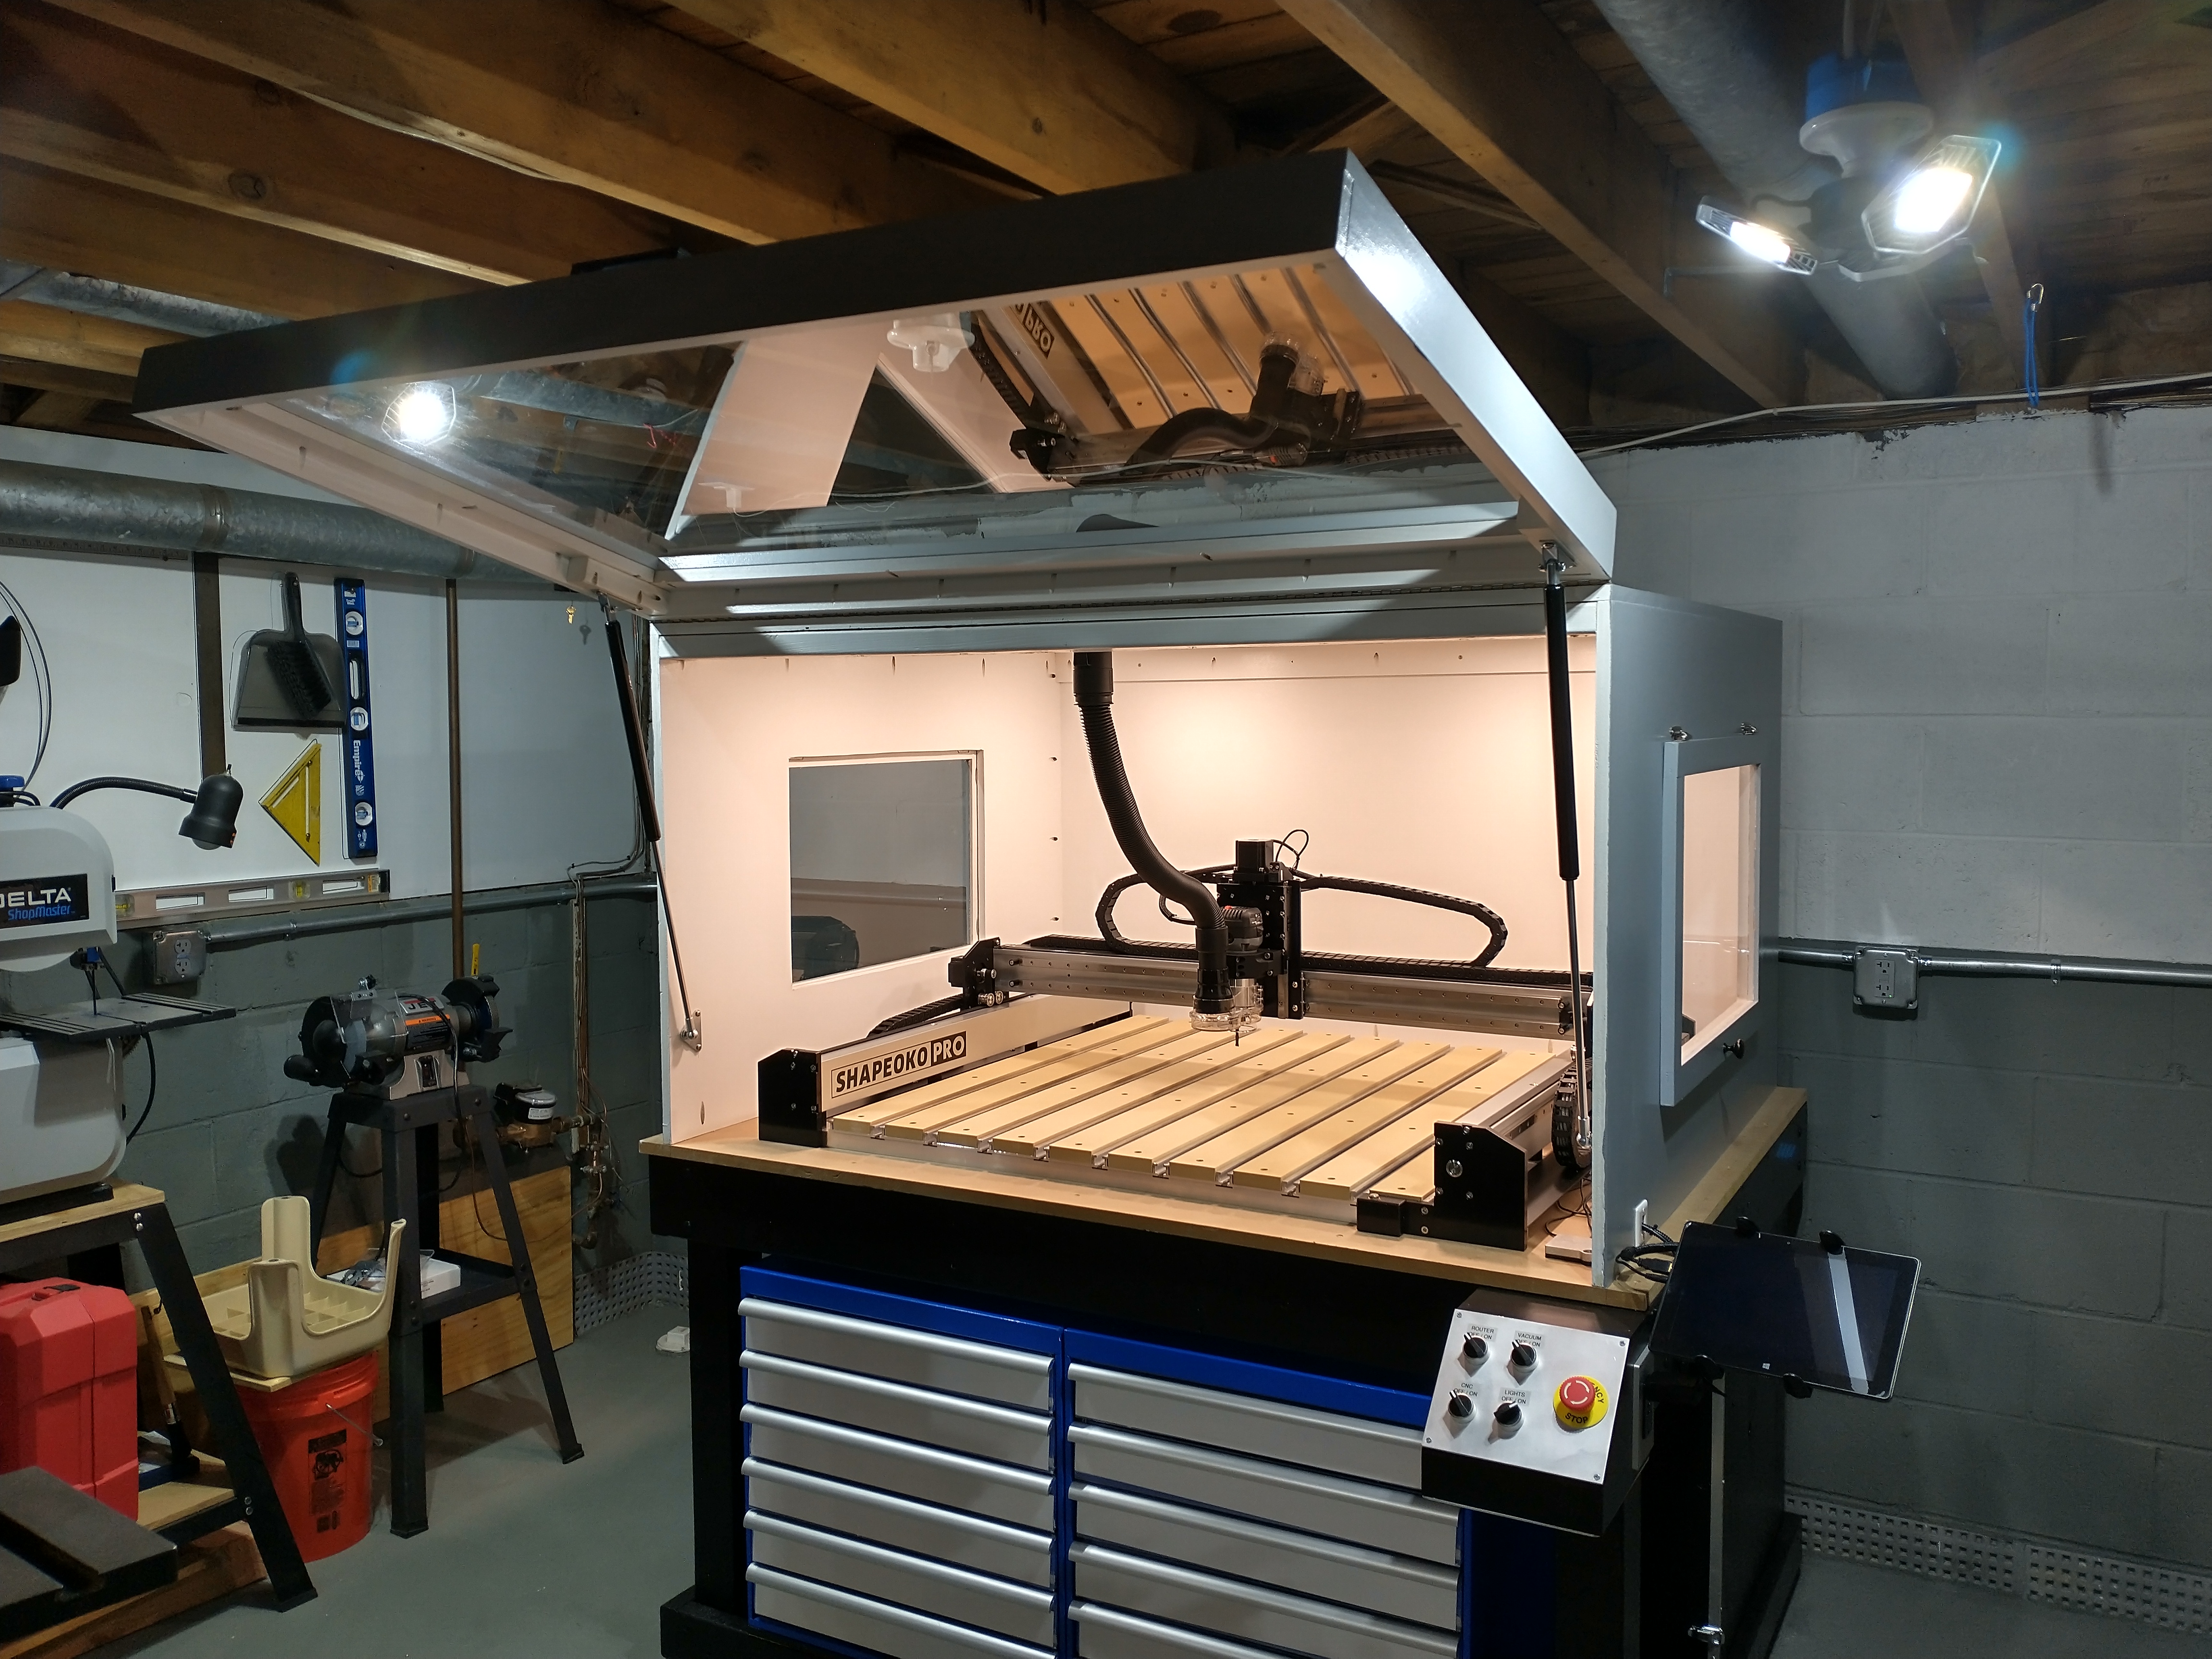
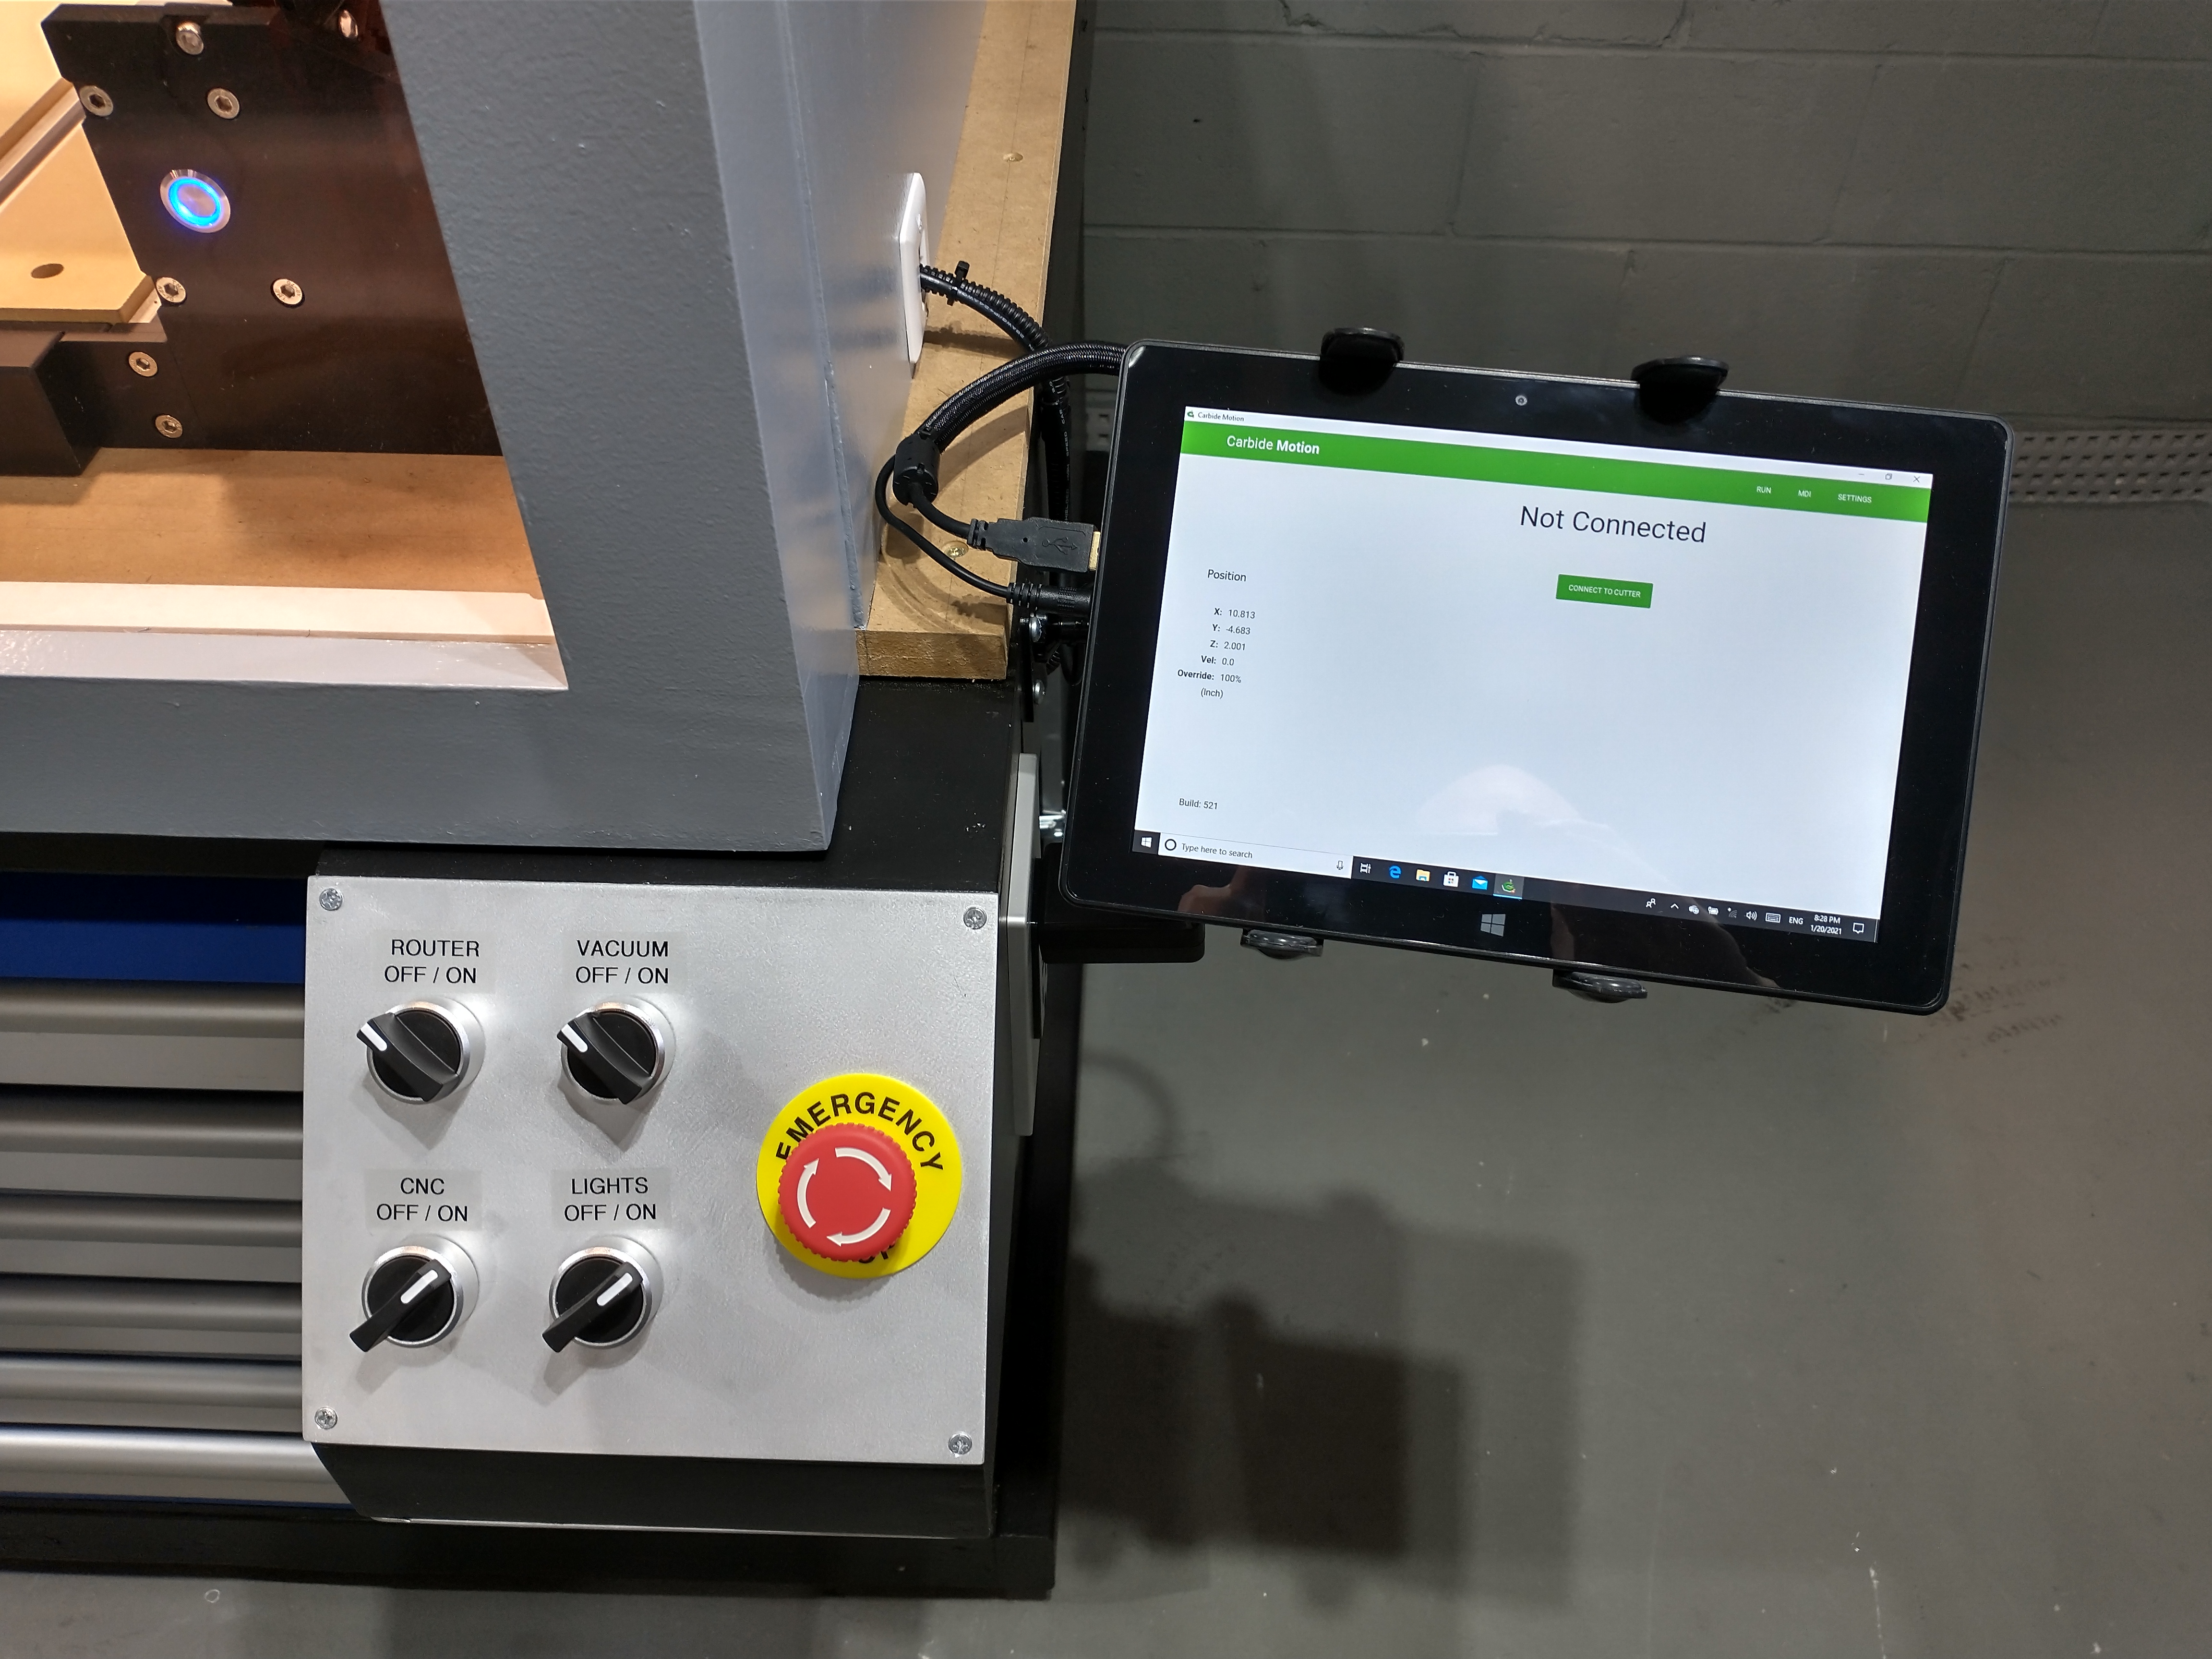
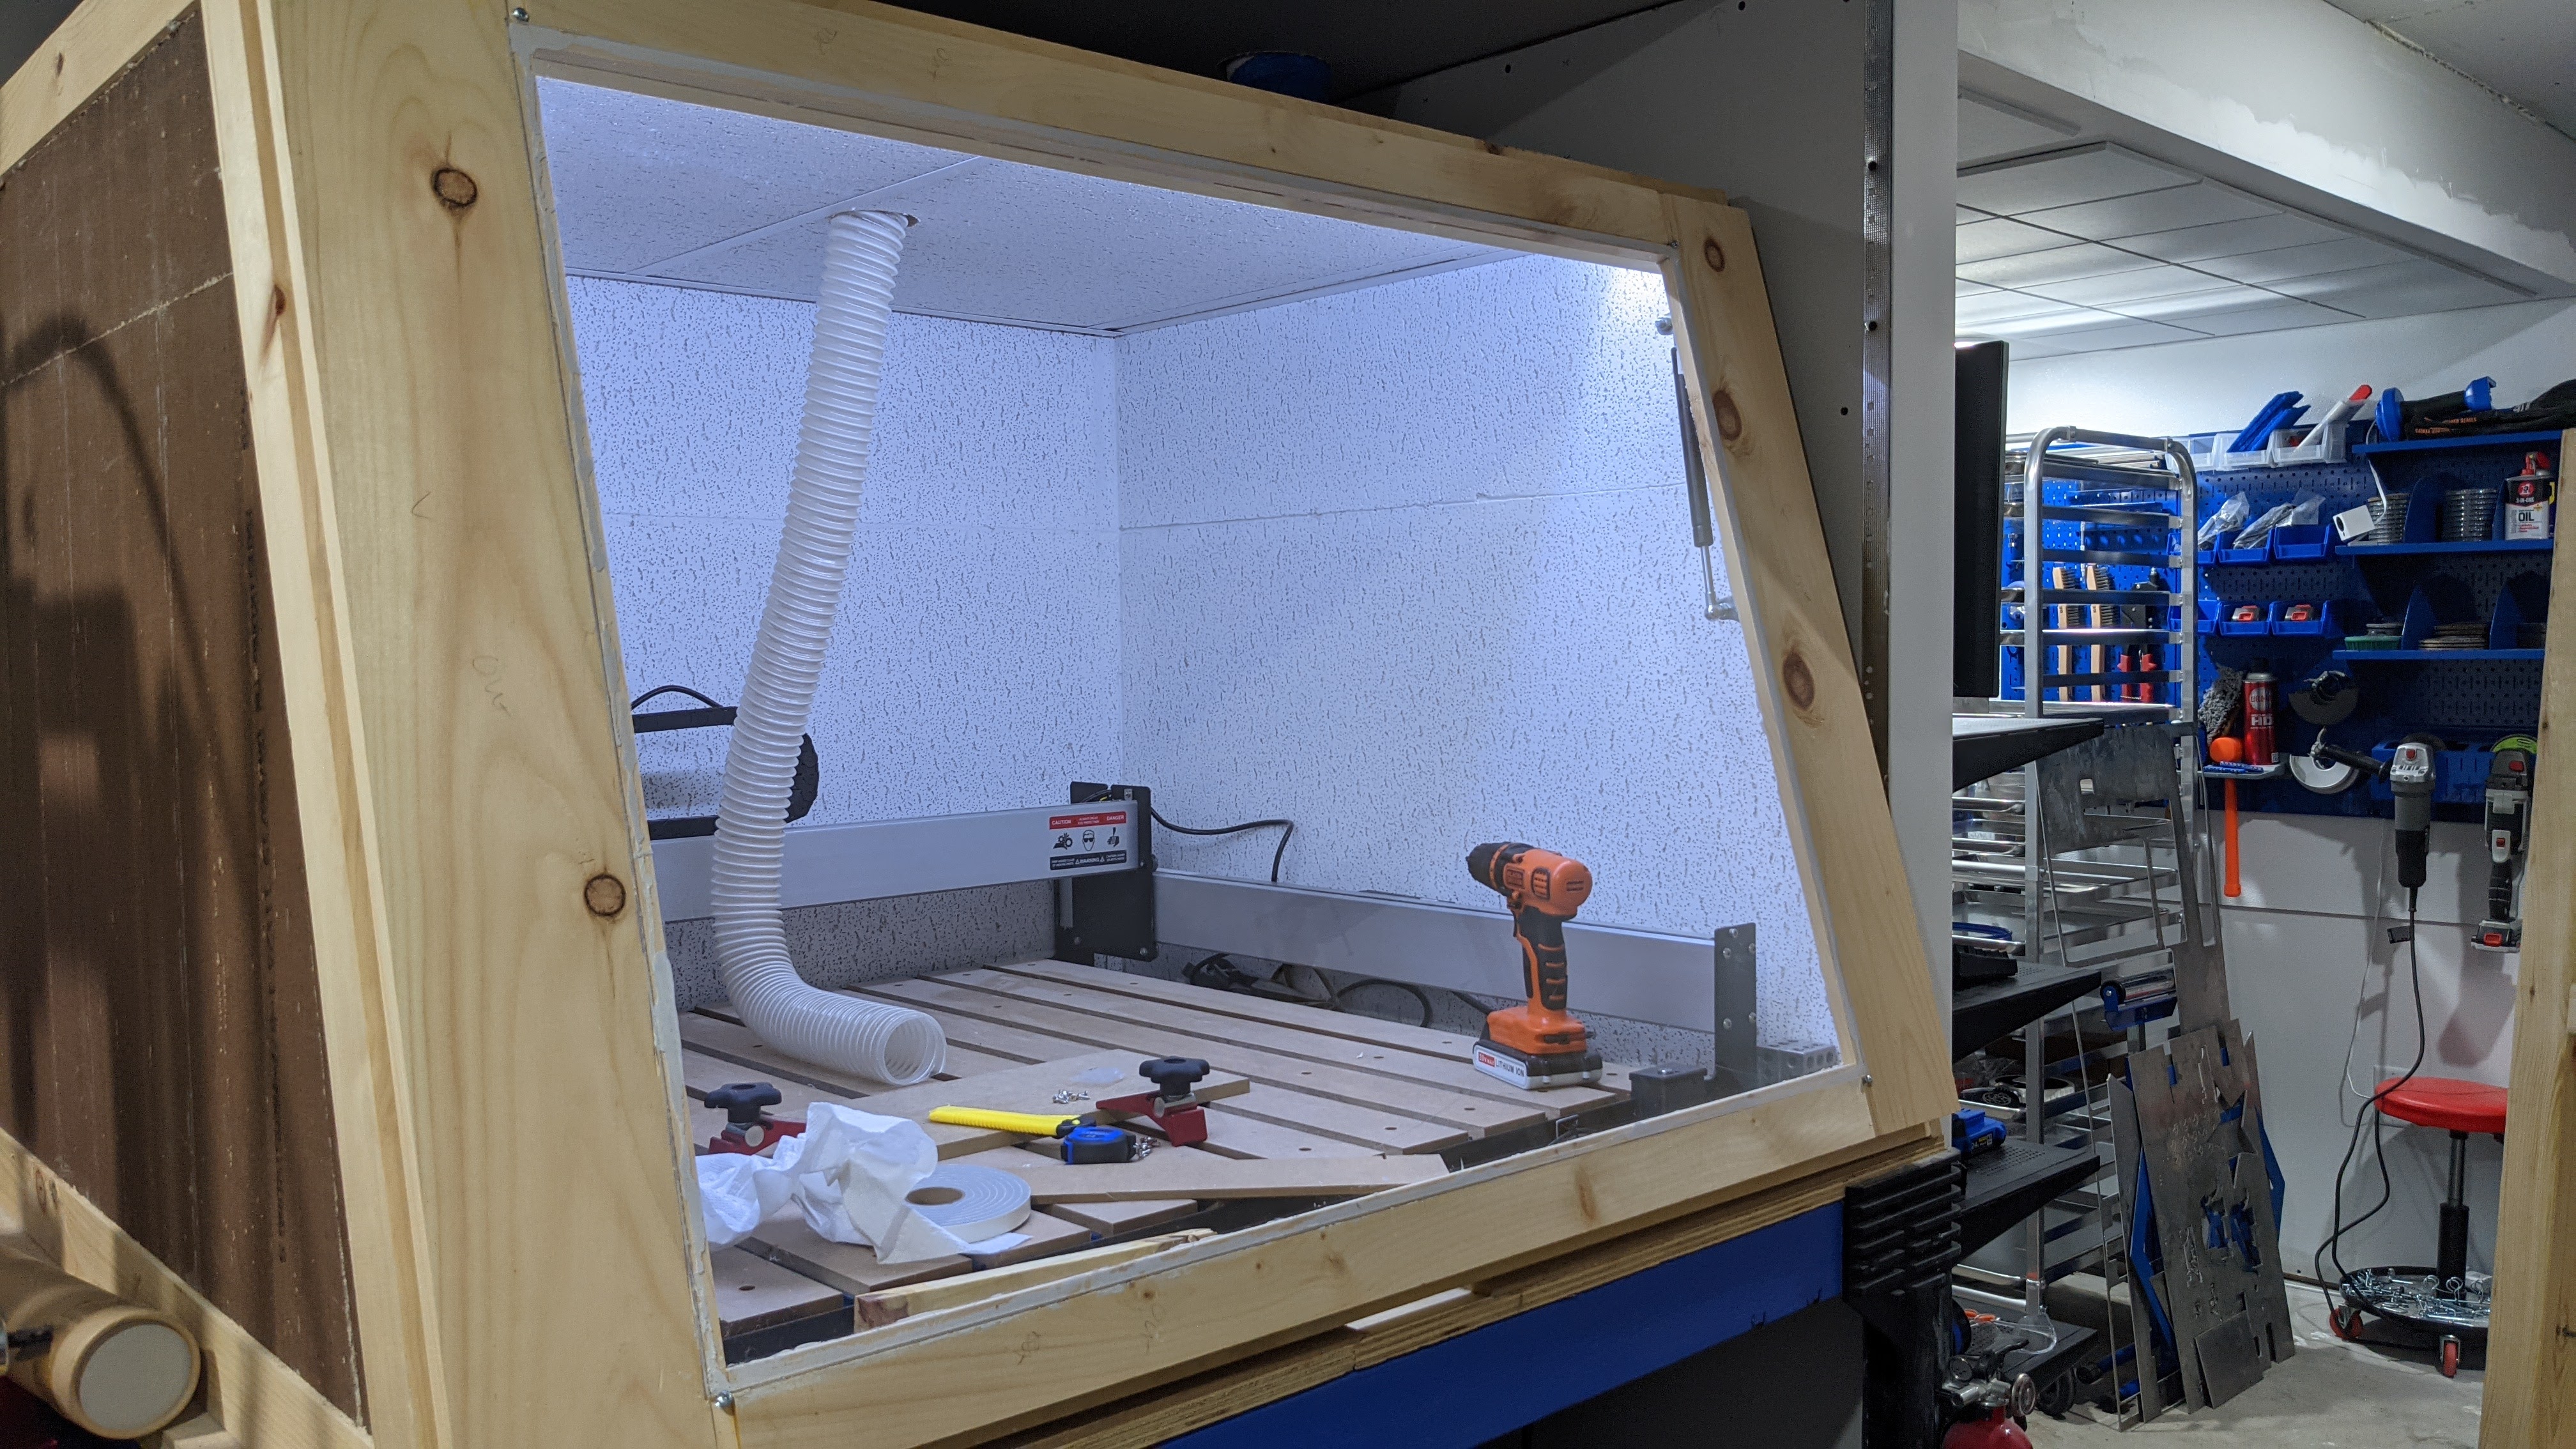
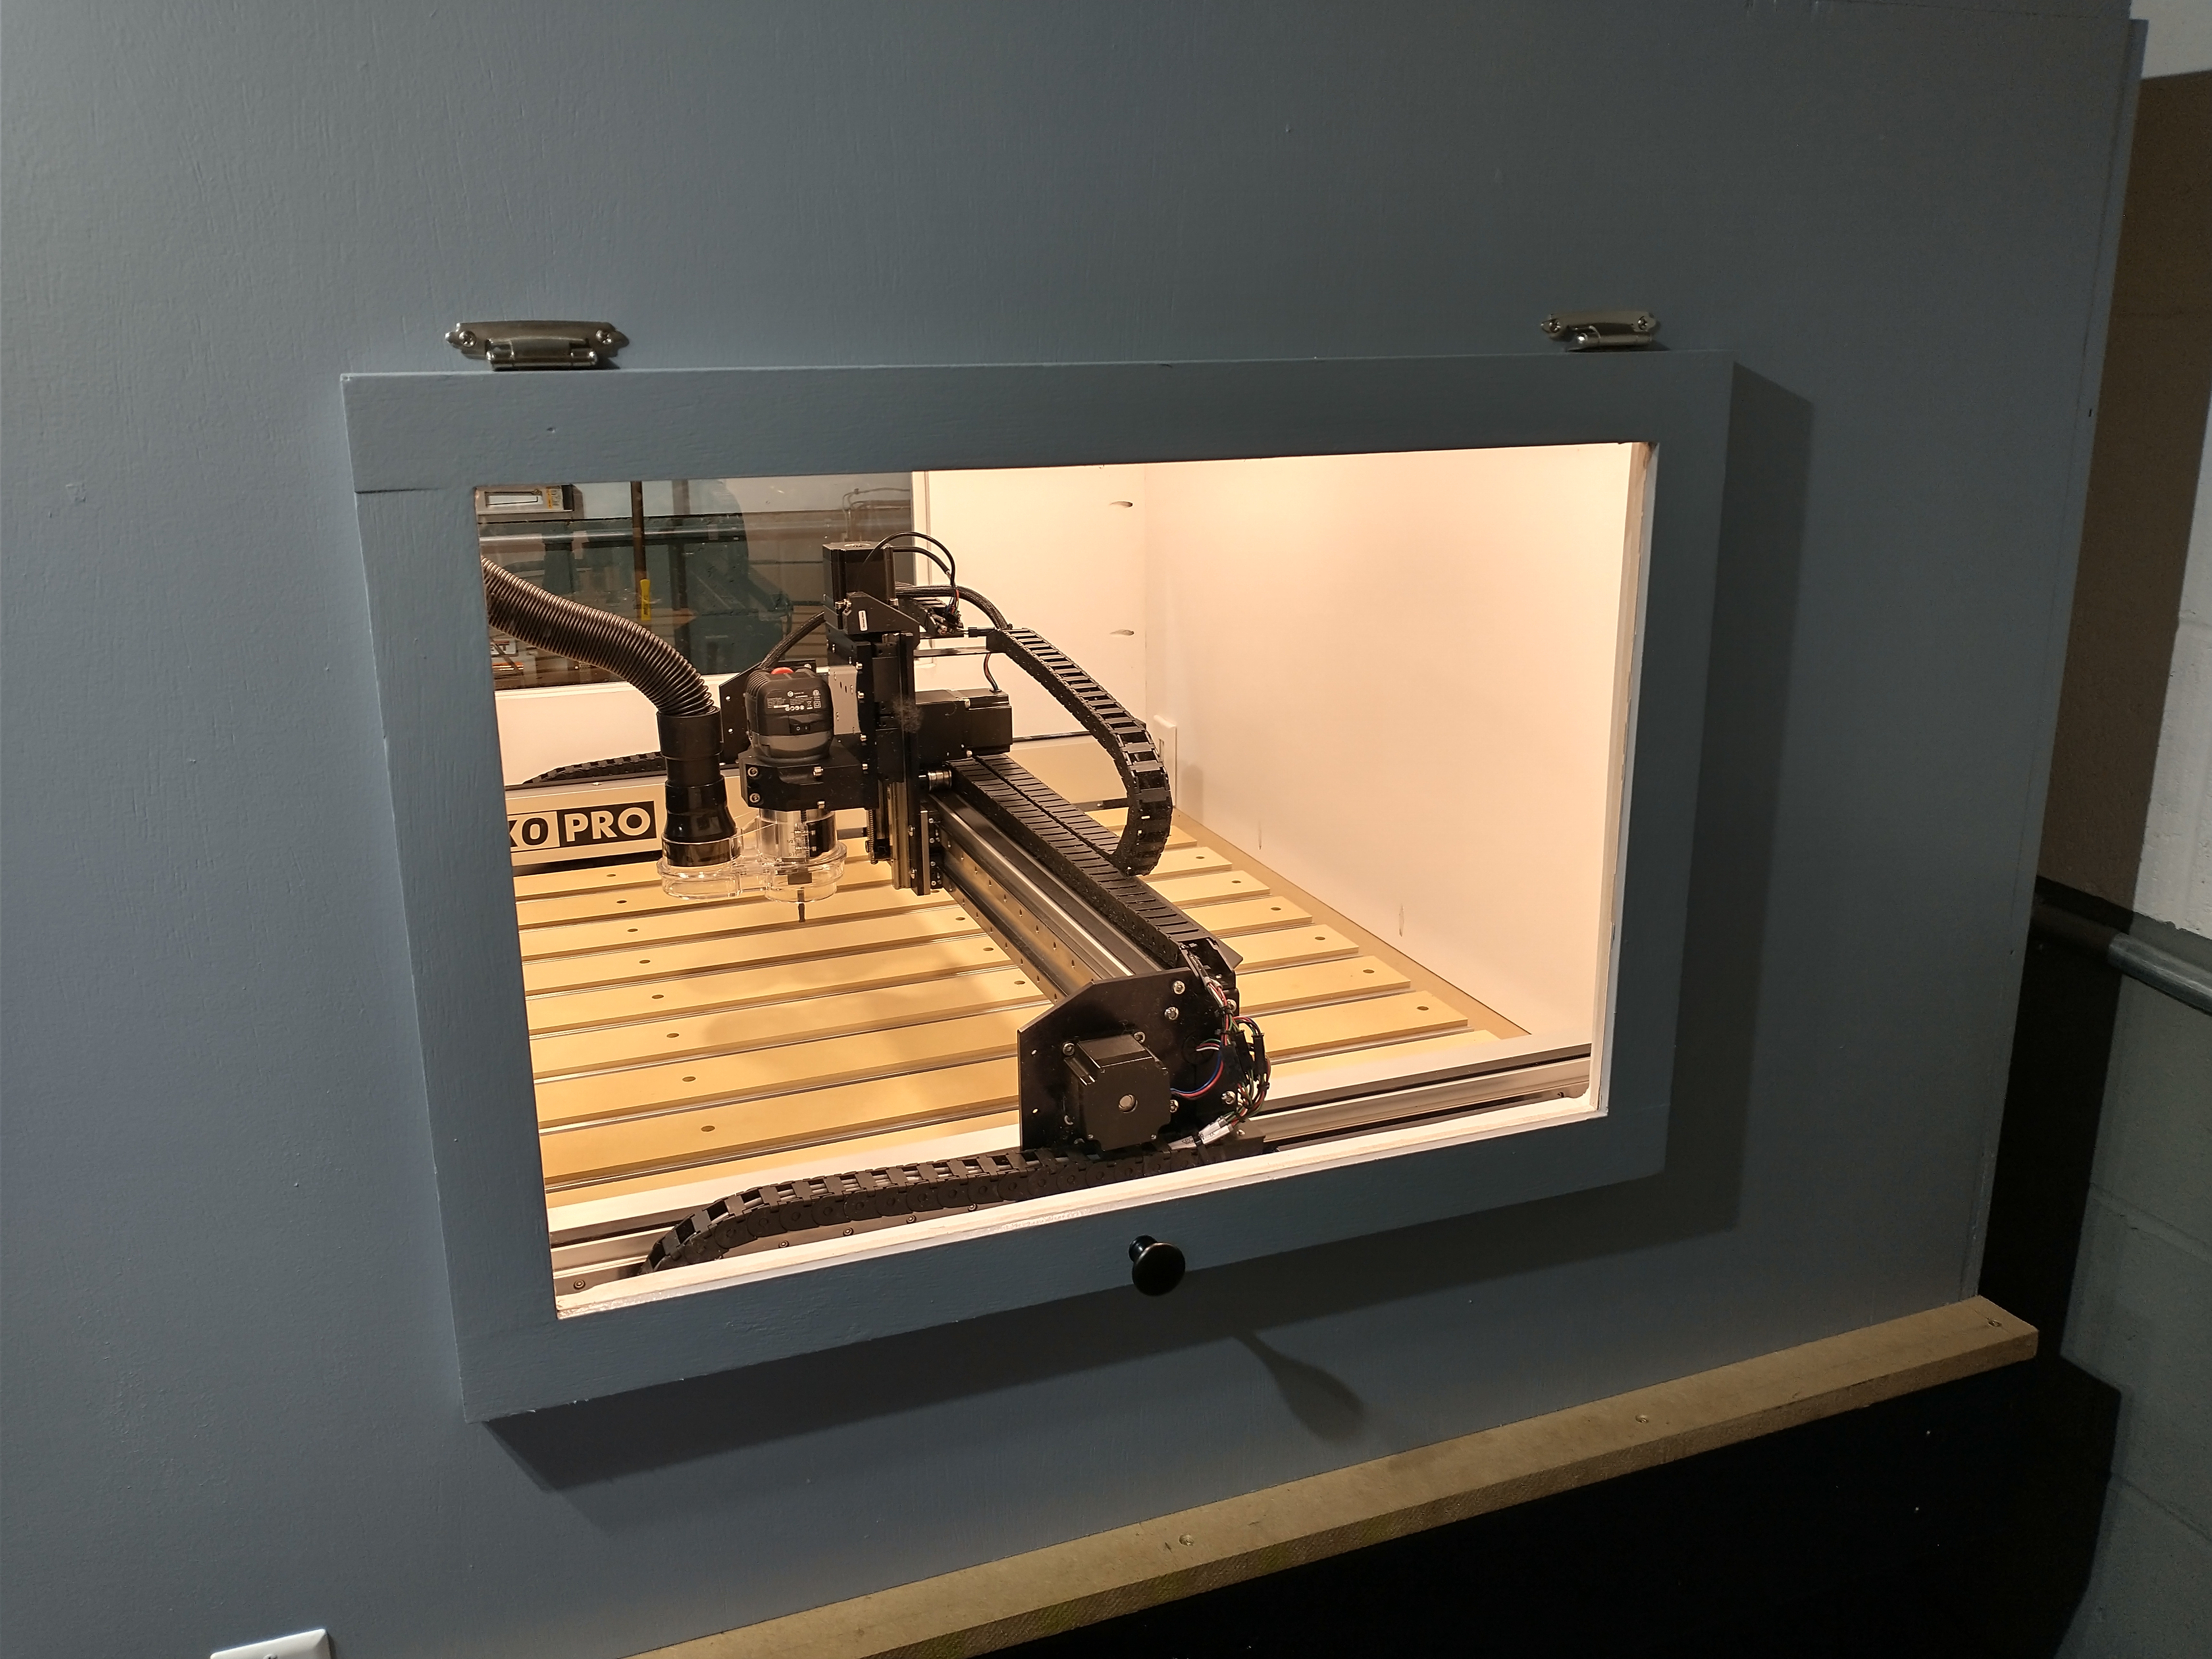
Yes, with keeping in mind of maintenance access I made both side windows hinged. As far as the front as you can see I made the front opening the entire width and height of the enclosure. I would have no problems removing the machine if need be.IMG_20210125_142239988_HDR|666x500

2 Likes
Gary, Thank you
That is actually a great idea! I will keep that in mind about a rear trap door that could be opened in the event the piece you are cutting is to large for the enclosure and this would allow you to pass it straight through. In my case it wouldn’t work only because I have very limited work space and my enclosure is right up against the basement wall.
Darren that is a fantastic enclosure, it looks great. The addition of the control switches and arm for your tablet are great too, very professional!
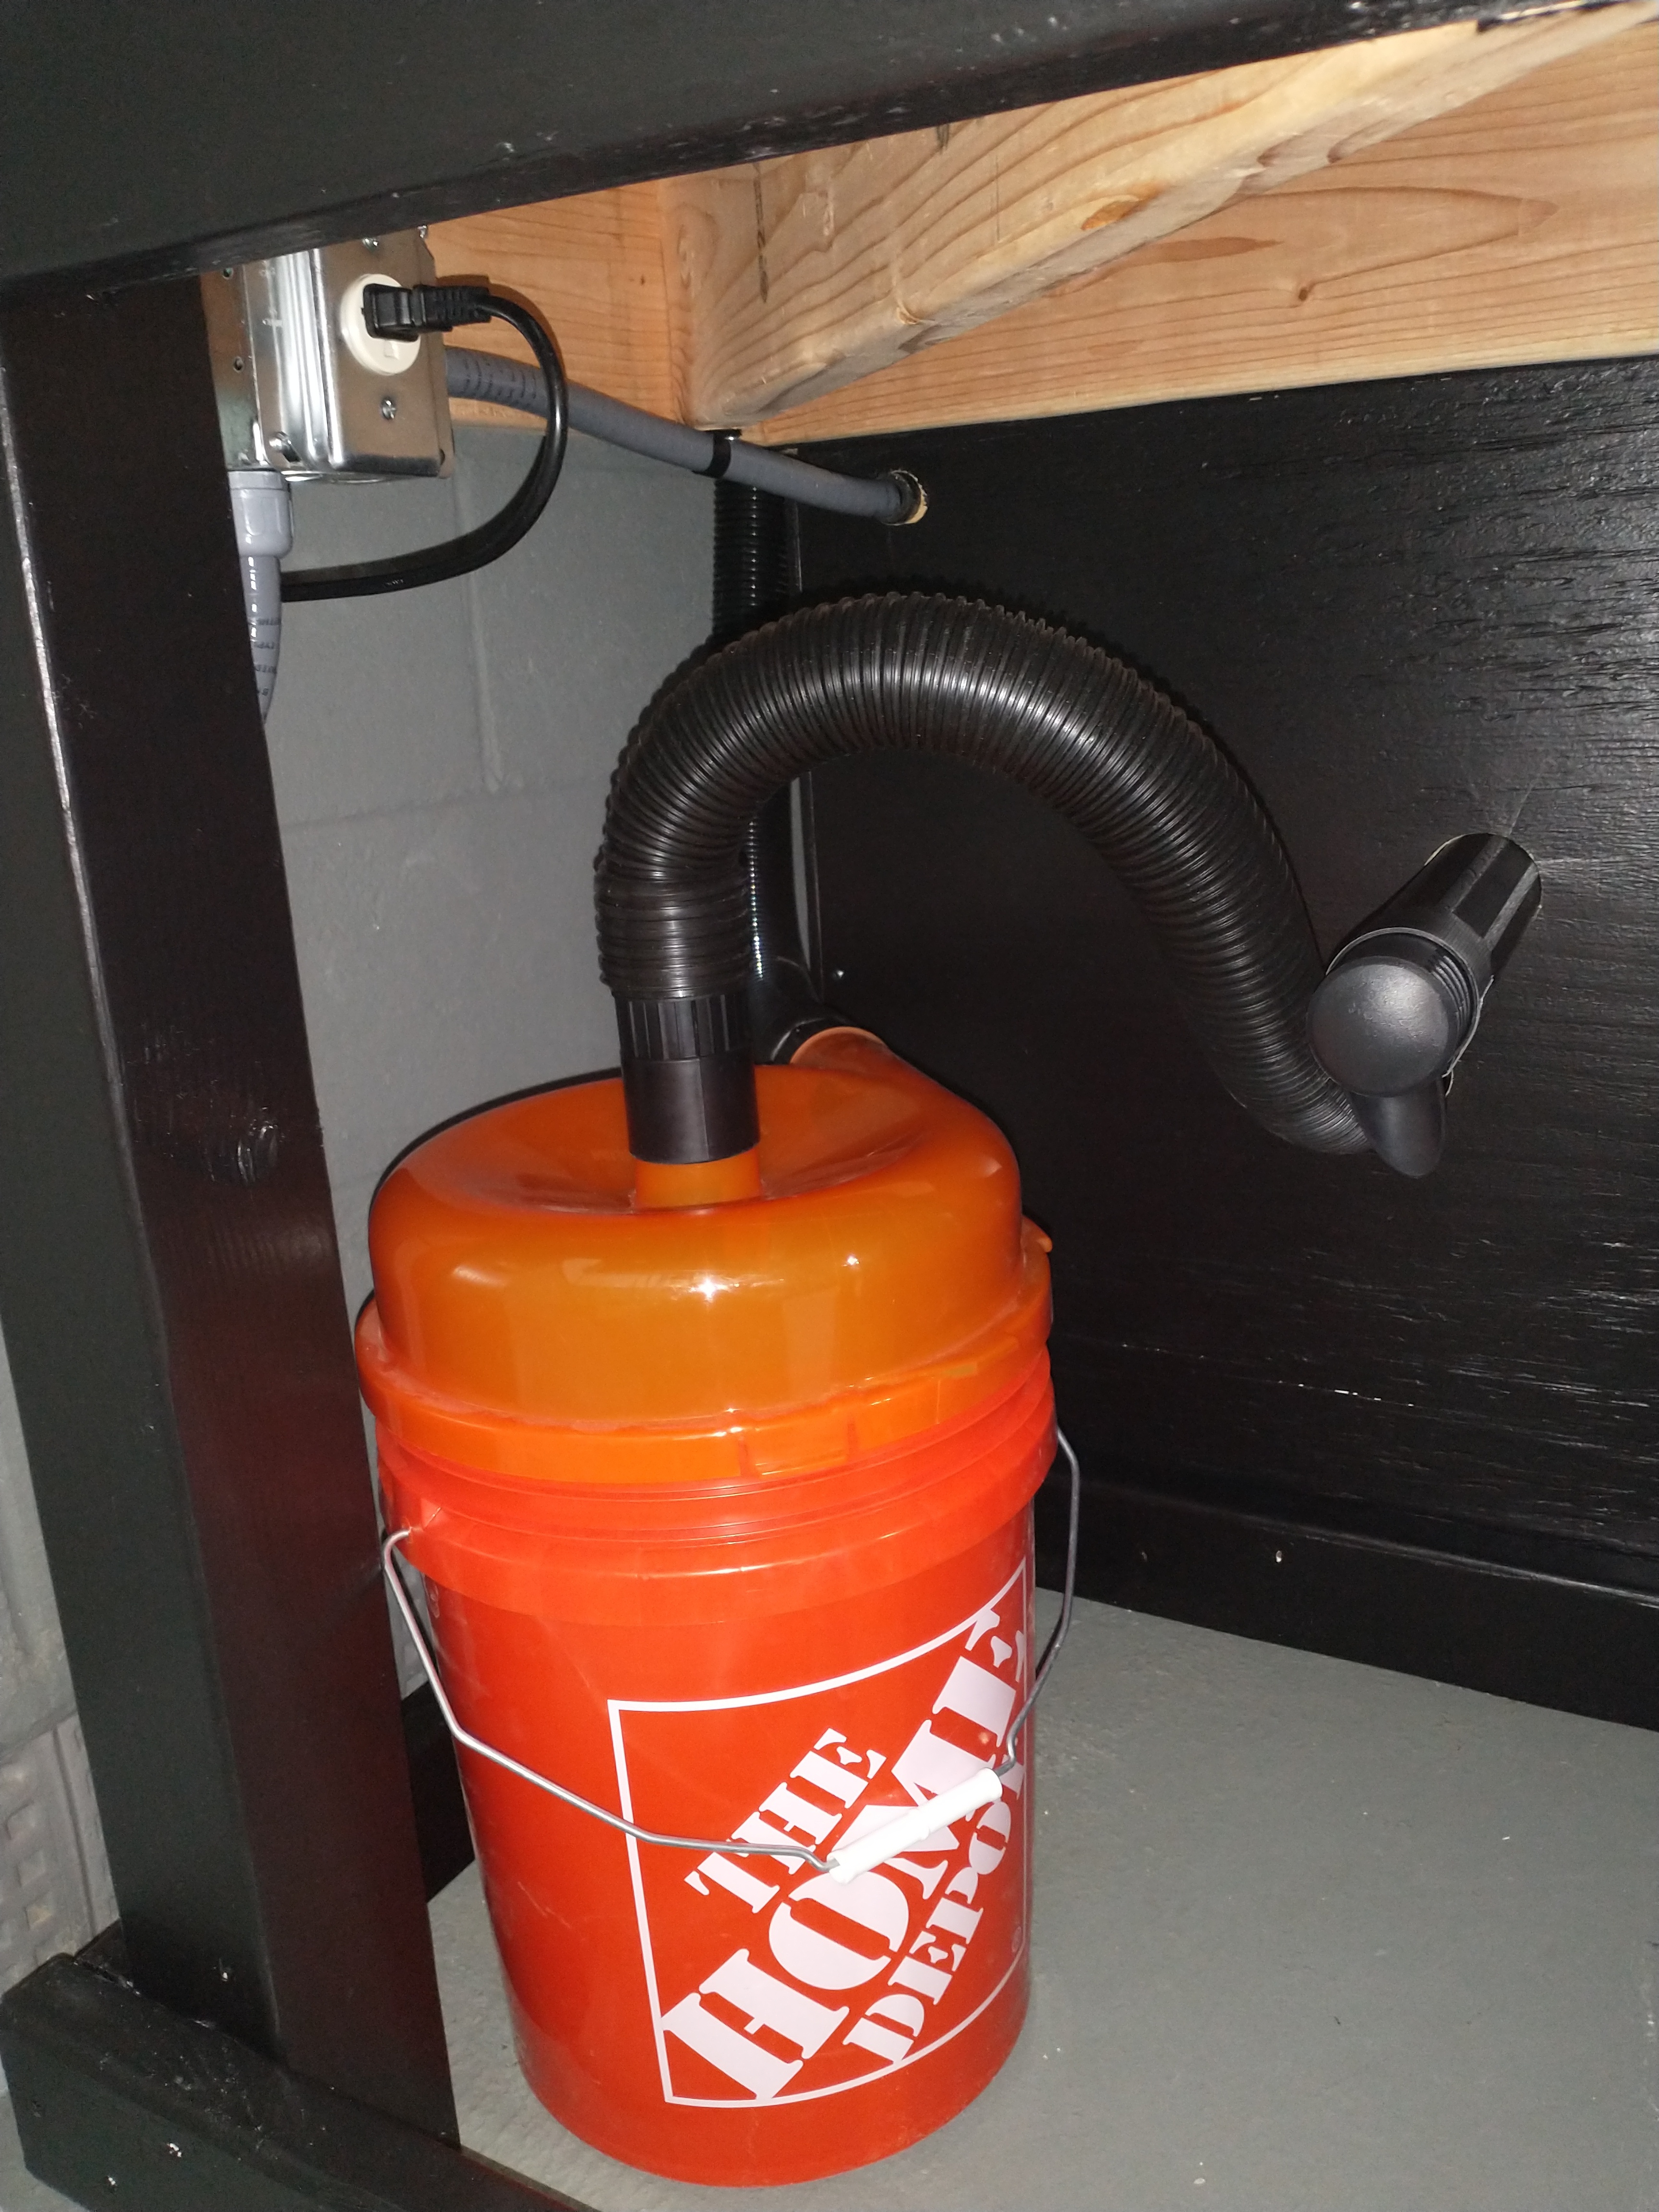
One thing I will note is that if you find you don’t quite have enough suction from your vac, replacing the hose in your enclosure with 2” PVC pipe will help, you lose a lot of suction through that flexible hose
2 Likes
Also make sure there is an appropriately sized gap or dedicated air inlet somewhere so that you don’t starve it. If you create a sealed box and then try to suck air out of it - doesn’t work so well.
1 Like
Stutaylo
Thank you for the compliments and suggestions. Right now I believe I have enough suction even with the reduction in hose size. In the event this doesn’t work out I will absolutely revert back to 2 or 2 1/2" suction hose.
Dan,
It’s funny you say that. The first time testing out the vac system I had a hard time trying to open the front door…lol
Right now I have been cracking open the side windows to allow plenty of air flow. My plan is to install a filtered air intake to the enclosure.
1 Like
The ribbed hose causes a lot of turblance and reduces efficiency. Since a shop vac is not the most efficient it exasterbates the air flow problems. For anyone with an enclosure you need it vented. A perfect vacumn chamber does not pull dust after max vacumn is achived. Put vent in front lower if possible. You will have a place for air to be sucked increasing air flow. You want maximum air flow on any dust collection system.
2 Likes