I searched the forums for a plans for the waste board of the Nomad but only found ones for the Shapeoko, maybe I didn’t search hard enough. It was easy enough to recreate.
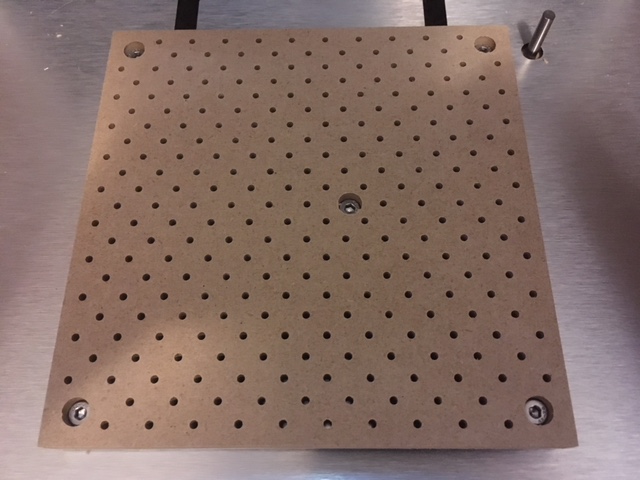
Anyway I was also wanting a way to align things easier if they were not square but at least had a parallel top and bottom especially for two sided milling. I read some other posts about using pegs as alignment tools and thought I would make a pegboard to help me with a future 2 sided milling project. Which also led me to create just the regular waste board and a resurfacing file as well. The peg holes are just slightly over 1/8 inch to make getting a 1/8 dowel easier to insert or remove time will tell if I made the holes slightly too large.
Anyway I thought I would share my Nomad waste board plans, and hopefully they can be helpful for someone. The linked Zip file has the following files:
NomadWasteboard.c2d
NomadWasteboard.nc
NomadWasteboardResurface.nc
NomadWastepegboard.nc
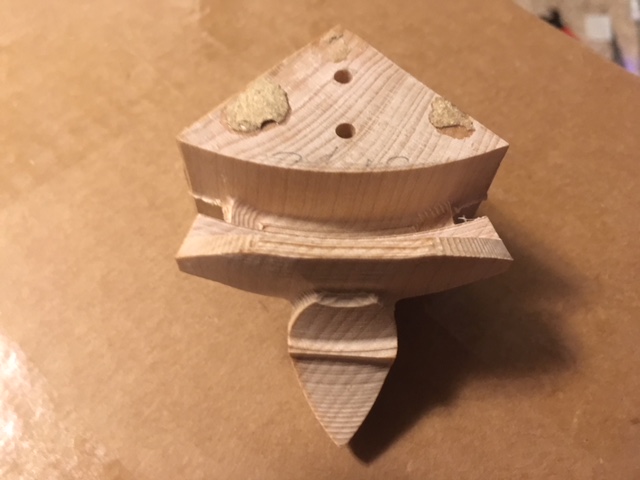
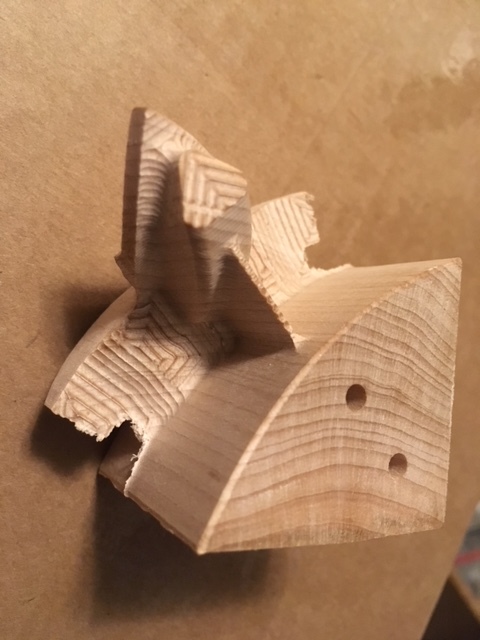
So just as an update here is a couple images of my 2 sided runs with the peg board. It aligned quite nicely using a couple steel 1/8 pegs in one corner of the block for alignment purposes when I had to turn it over. All I need to do is remove the supports that hold the part to the rest of the block and sand it smooth.
I kinda need longer bits which I have on order but don’t have them yet. I also learned that it aligned best if 1) I jogged the bit to the X Y zero in the center of one of the peg holes, 2) raised the bit up to place the block on the peg board, 3) lowered the bit to the Z zero, 4) Zero X, Y, and Z axis (for center top as the zero), 5) Drill 1/8 holes for pegs that align with the peg board, 6) start milling the first side and flip over the X axis for the second side milling.
Also Super Glue really helps secure small stock much better than 2 sided tape even though it makes resurfacing of the waste board a requirement at some point to keep it in working order.