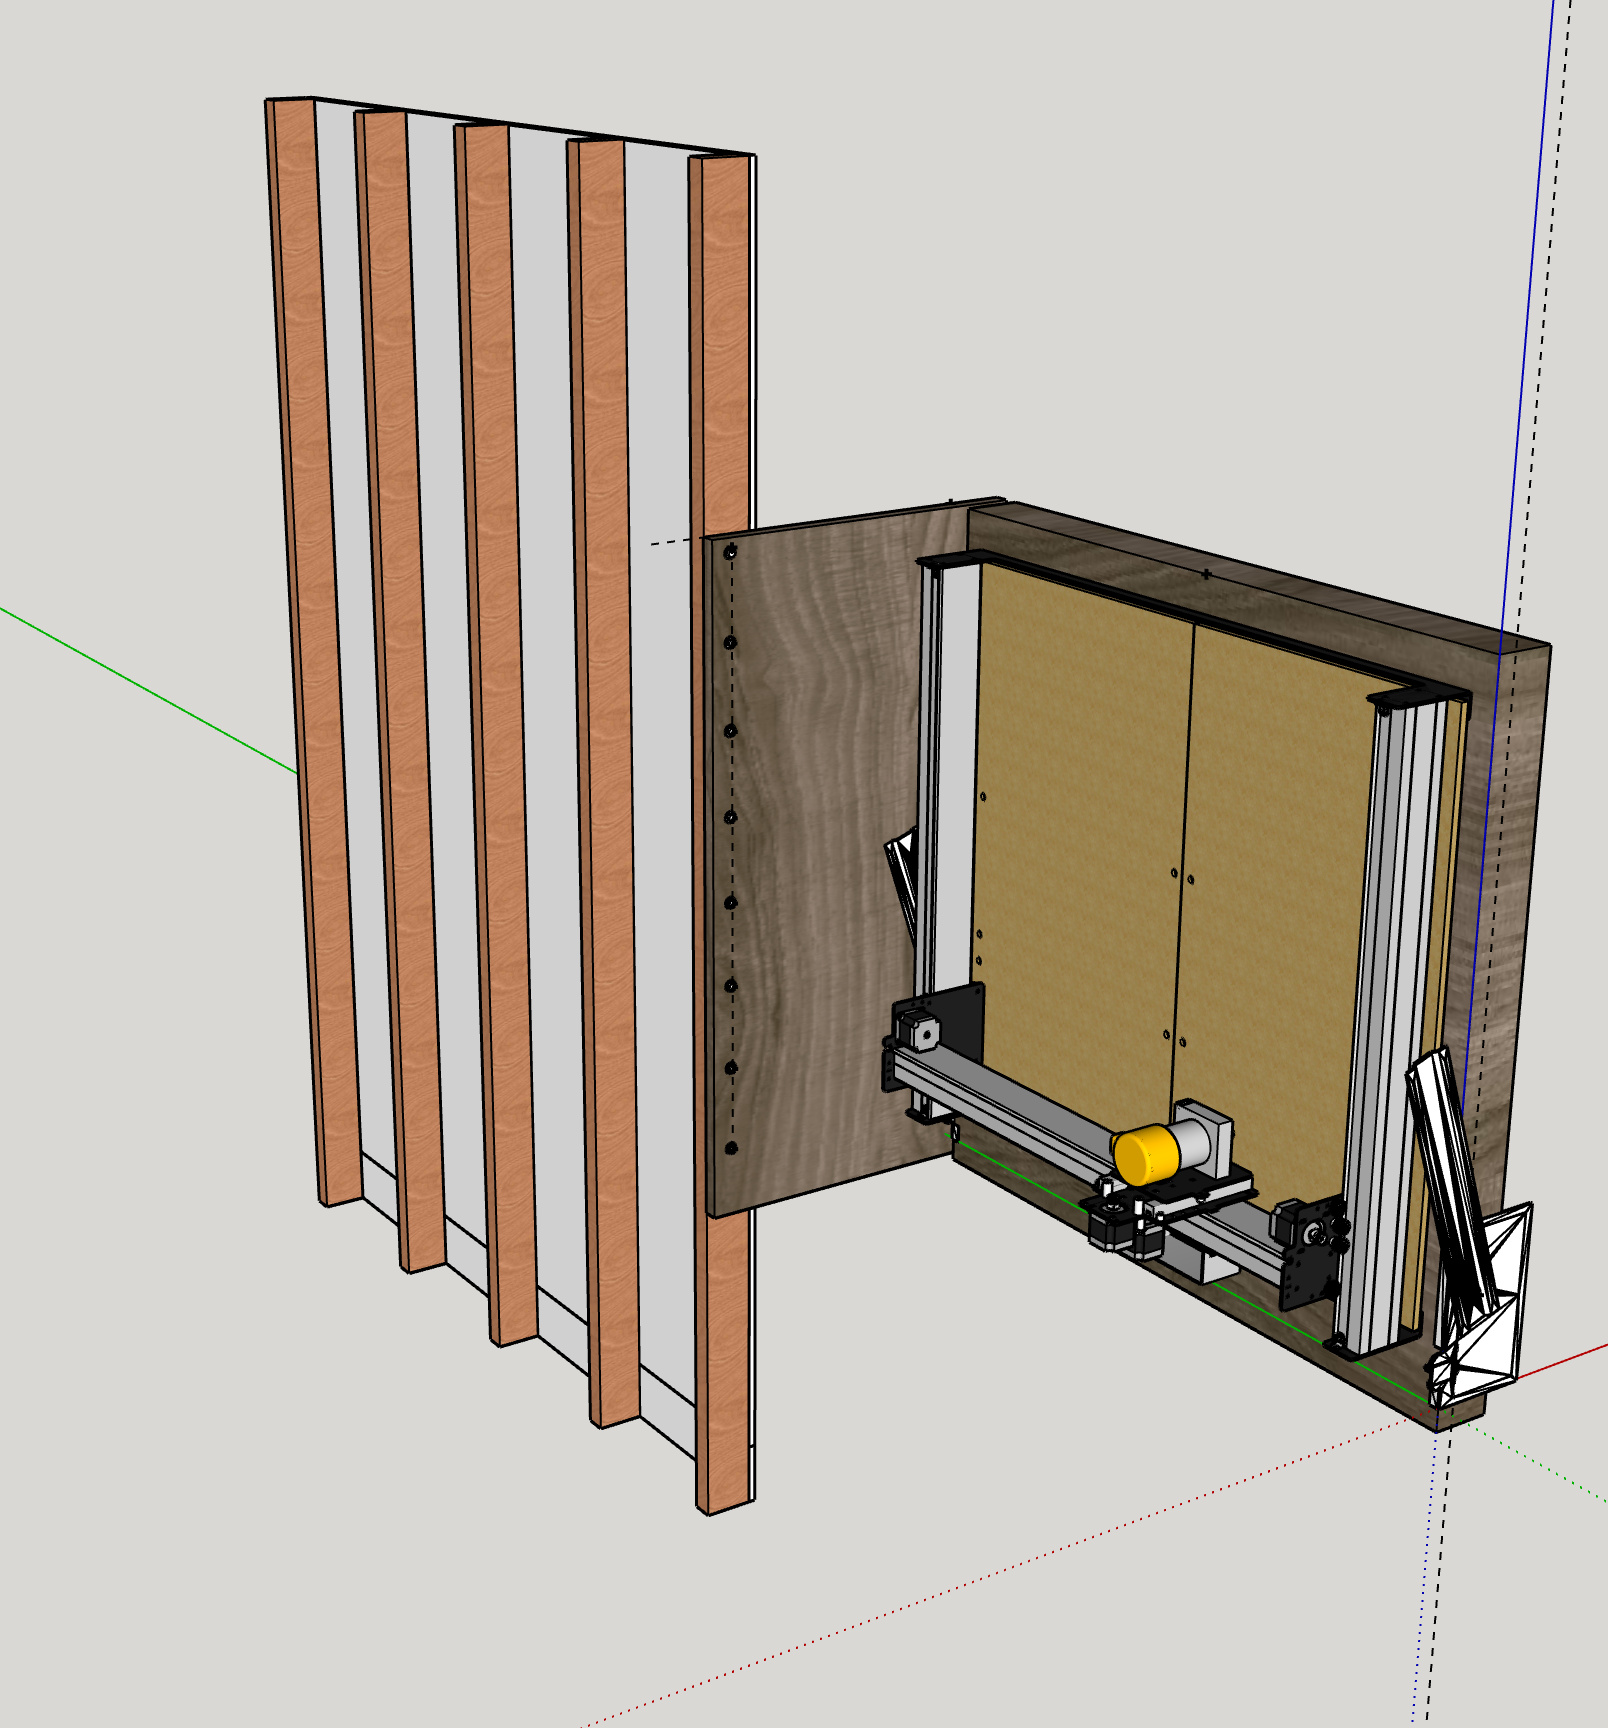
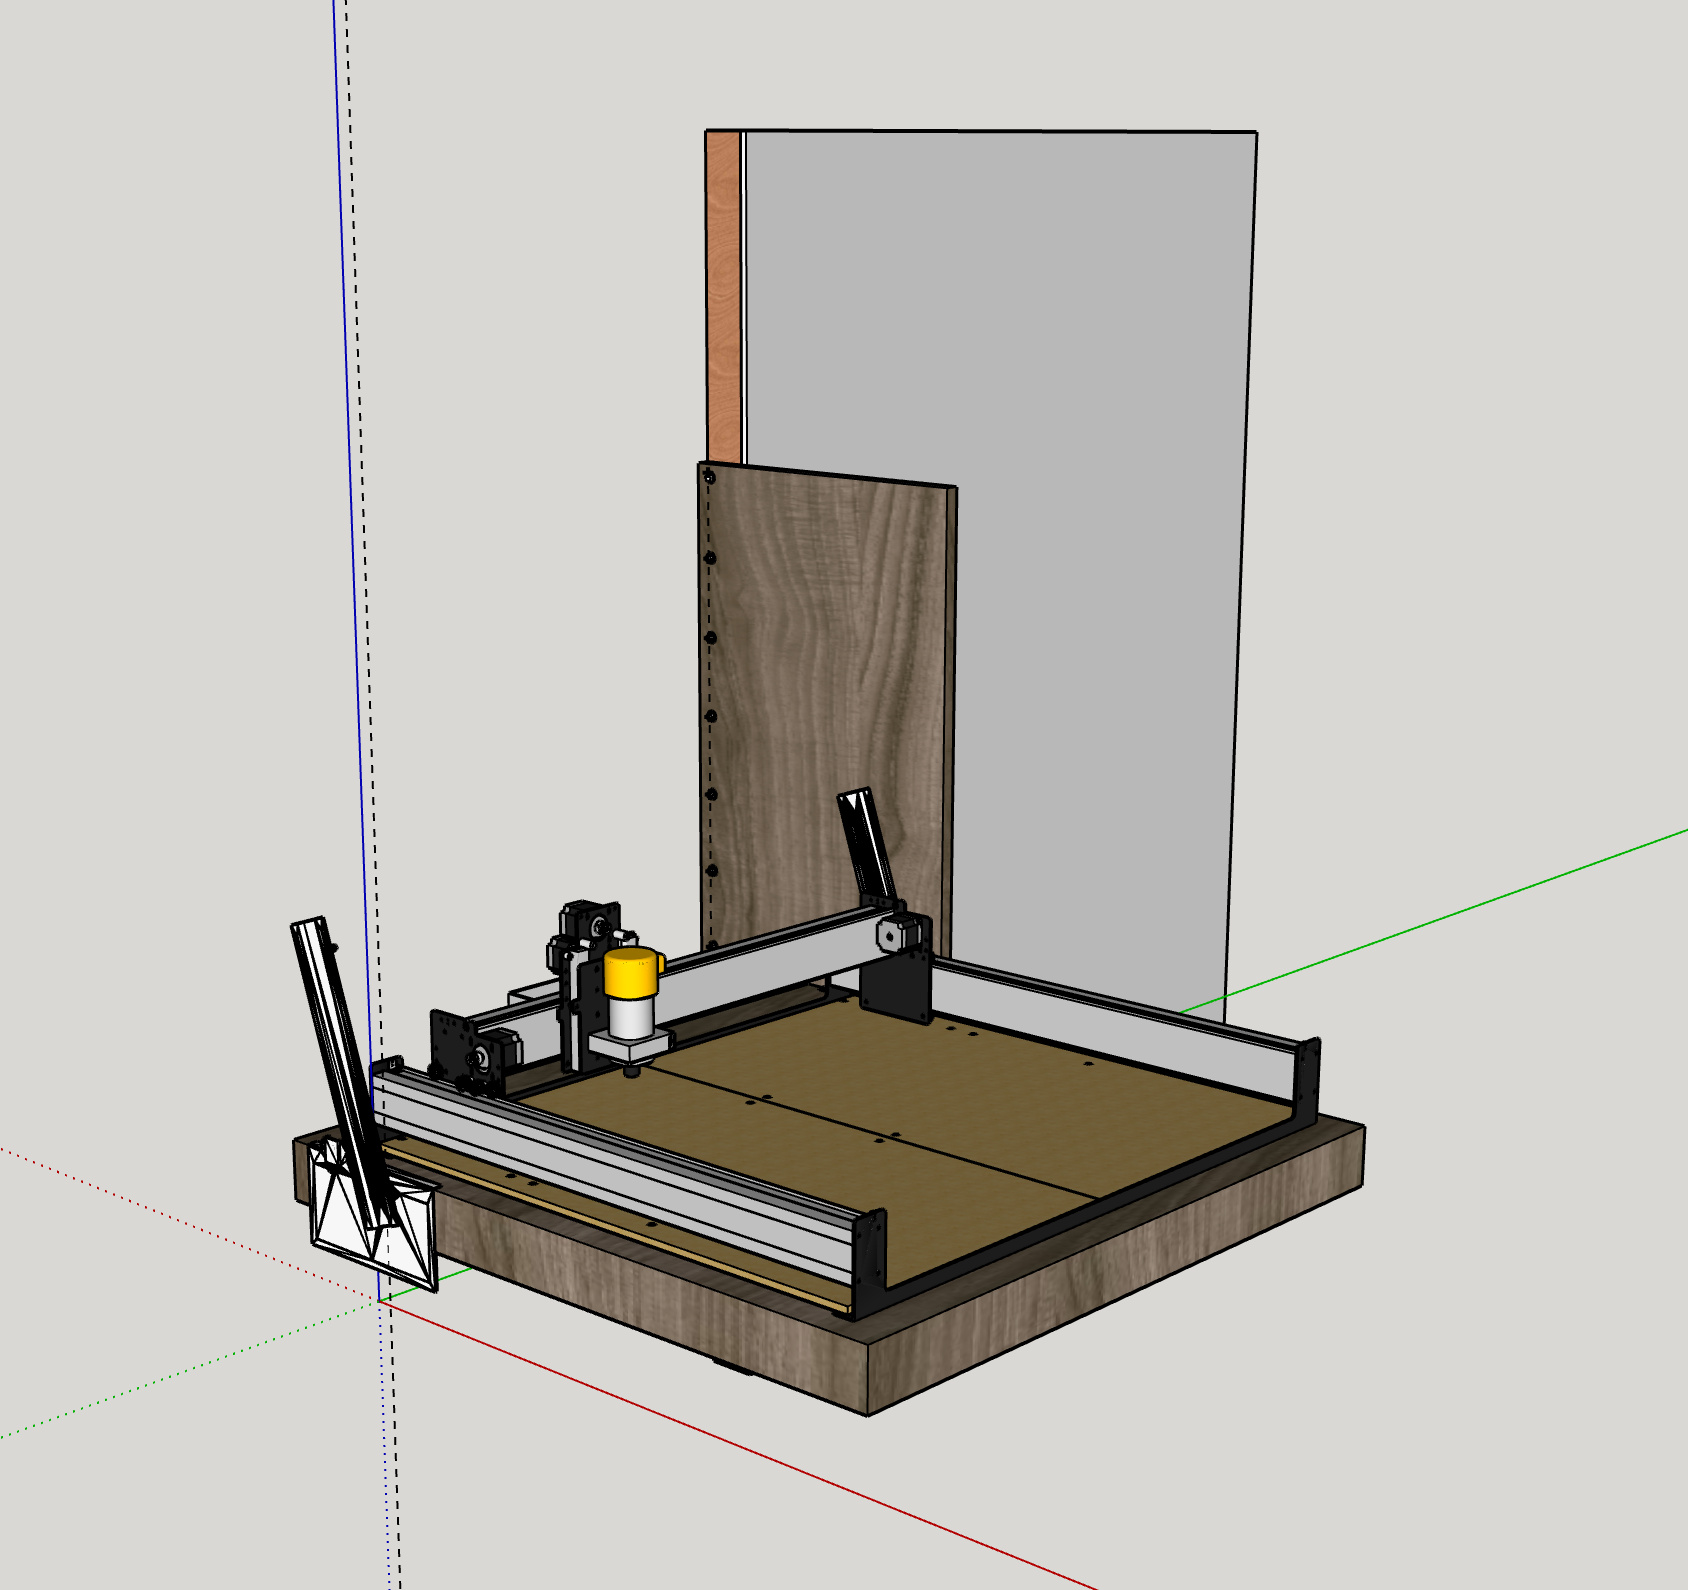
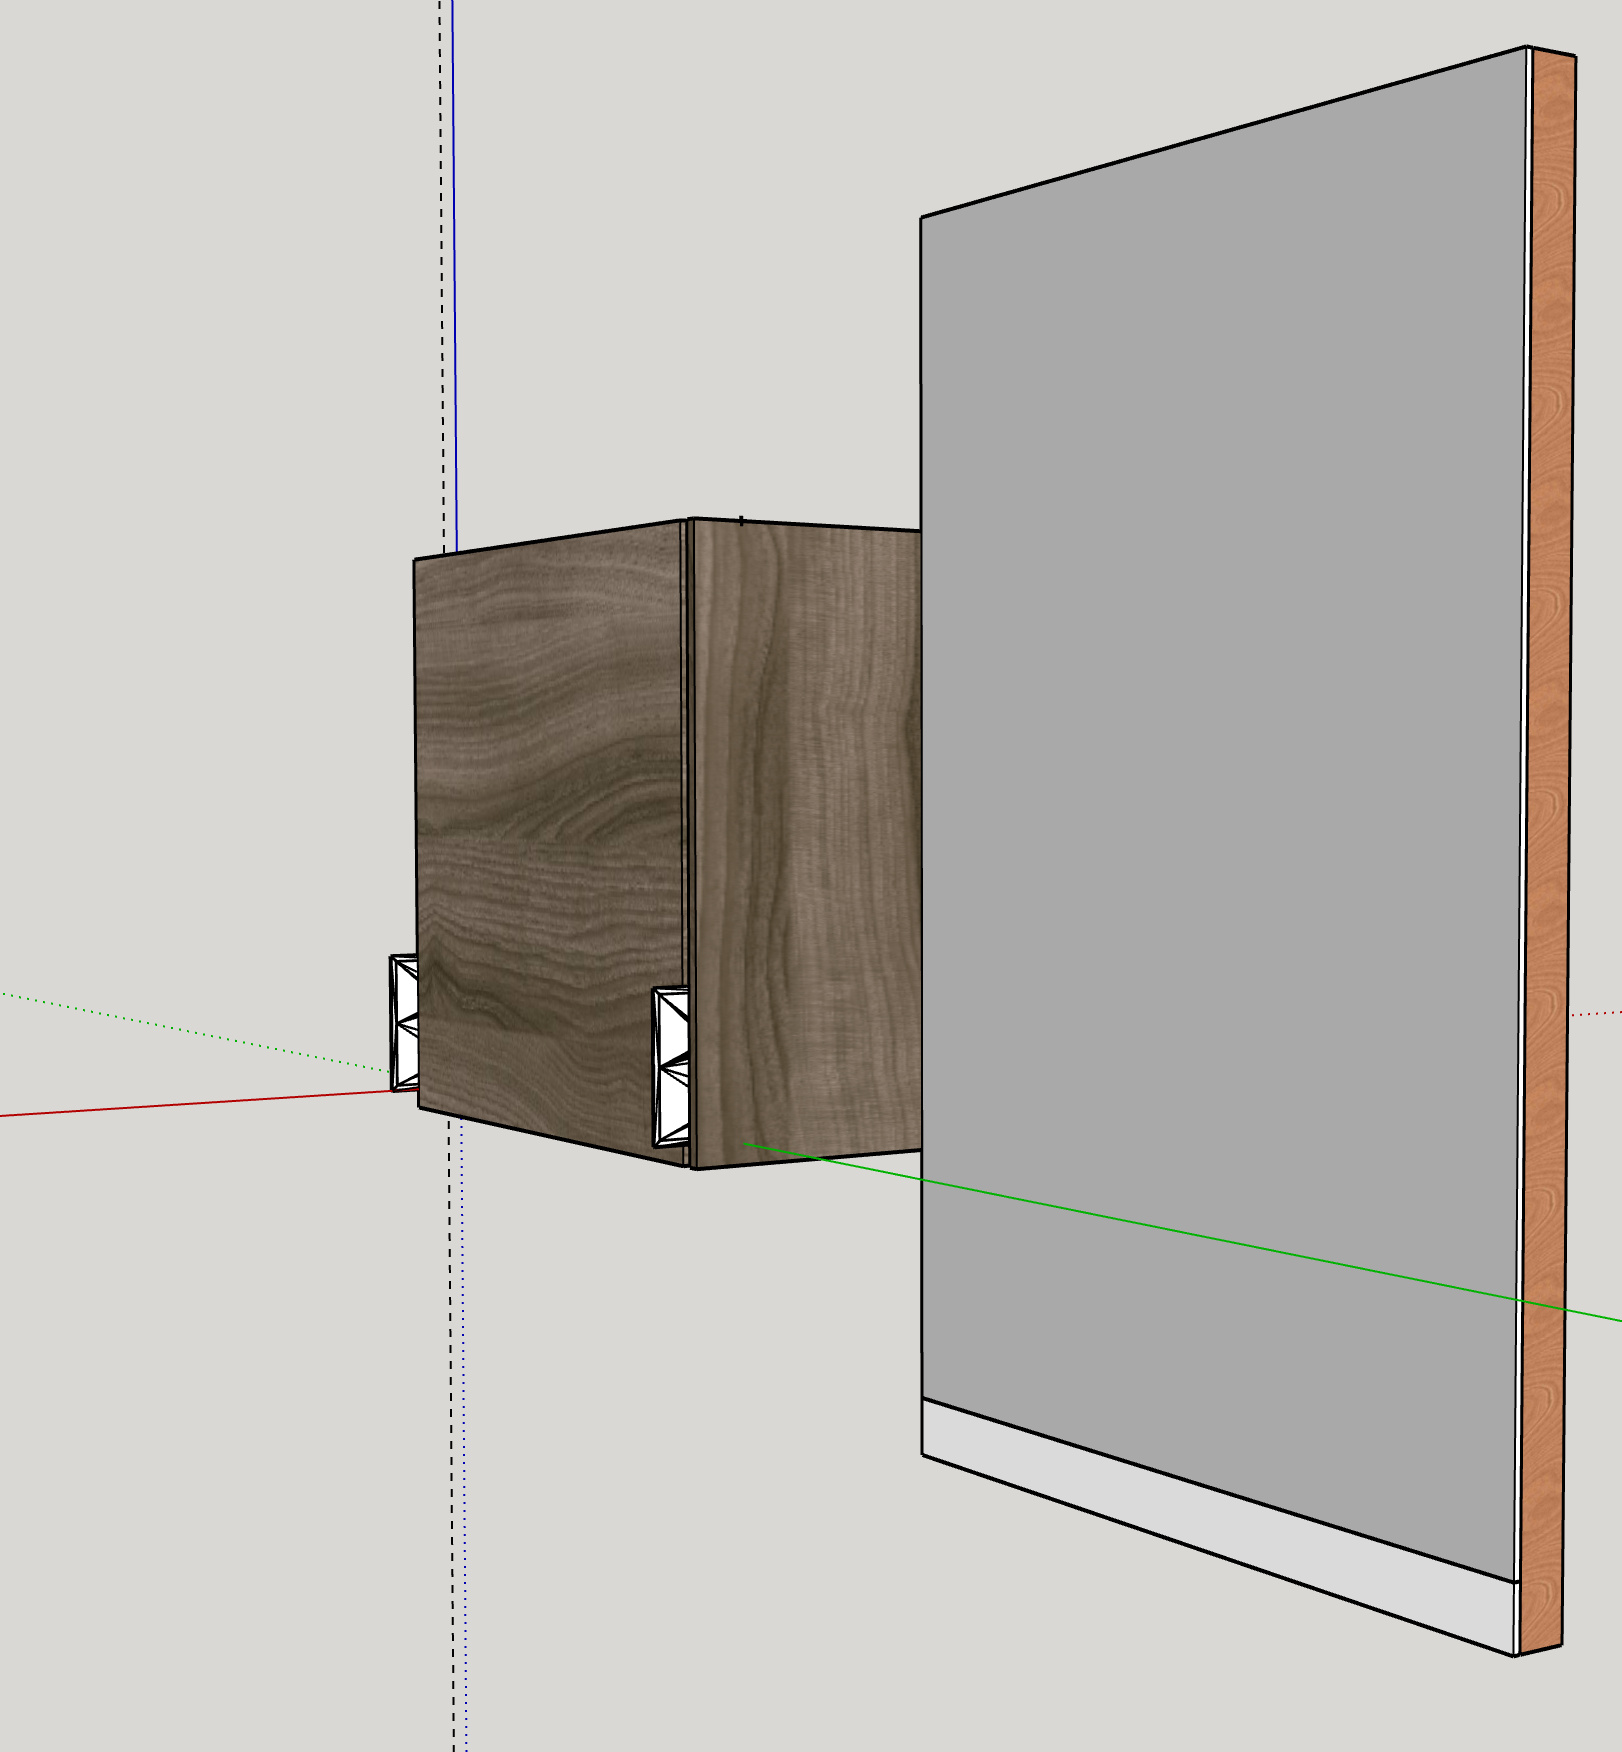
Been marinating on this idea for the last month or so and I’ve started thinking pretty heavily about what it would take to wall mount an XXL and have the surrounding enclosure be both attractive, in the home office, and okay with the wife.
Here is the general idea (view from behind the wall):
So far what I do have worked out is a lightweight solution for a torsion box that shouldn’t compress, deflect, sheer, etc… with the estimated weight. and a clever solution for legs on the bottom side of the table.
But I admit I’m a little out of my depth when it comes to Gas Shocks/pistons, pushing and pulling forces, force exerted on 1/8" steel pivoting hardware, what does hanging up to 350lbs (S3XXL, torsion box, misc, additional enclosure, whatever your stock is) off of a conventional wall and 4’ lever do to studs, will 4/4 laminated cabinet verticals withstand the forces or should I look at 1"+ thick plywood and veneer the outside.
etc… Also, I’m not proficient enough in Fusion 360 to utilize its Generative Design functionality so I’m left with a lot of “will this work” questions. Hoping someone on here can help.
Mark, no matter what you do make sure the foundation is stable. You don’t want to be thinking about realigning every time you start a job.
While I was thinking about tables and enclosures, I came to the realization that it wasn’t the storage space that was important; it was the space for me, the user, that was important all the way around the machine itself.
Then I came to the realization that “home office” and sawdust are not compatible in any way. (You can’t collect all of the dust.)
Really excited to share what I come up with here, if it works .
I’m a big believer that the maker / add/sub manufacturing revolution needs the affluence of and participation of urban dwellers in small living spaces to really be a “revolution”. Much of what I plan to make, share, and manufacture will be aimed at getting these machines in the hands of those that don’t have a 2 car garage to use them in.
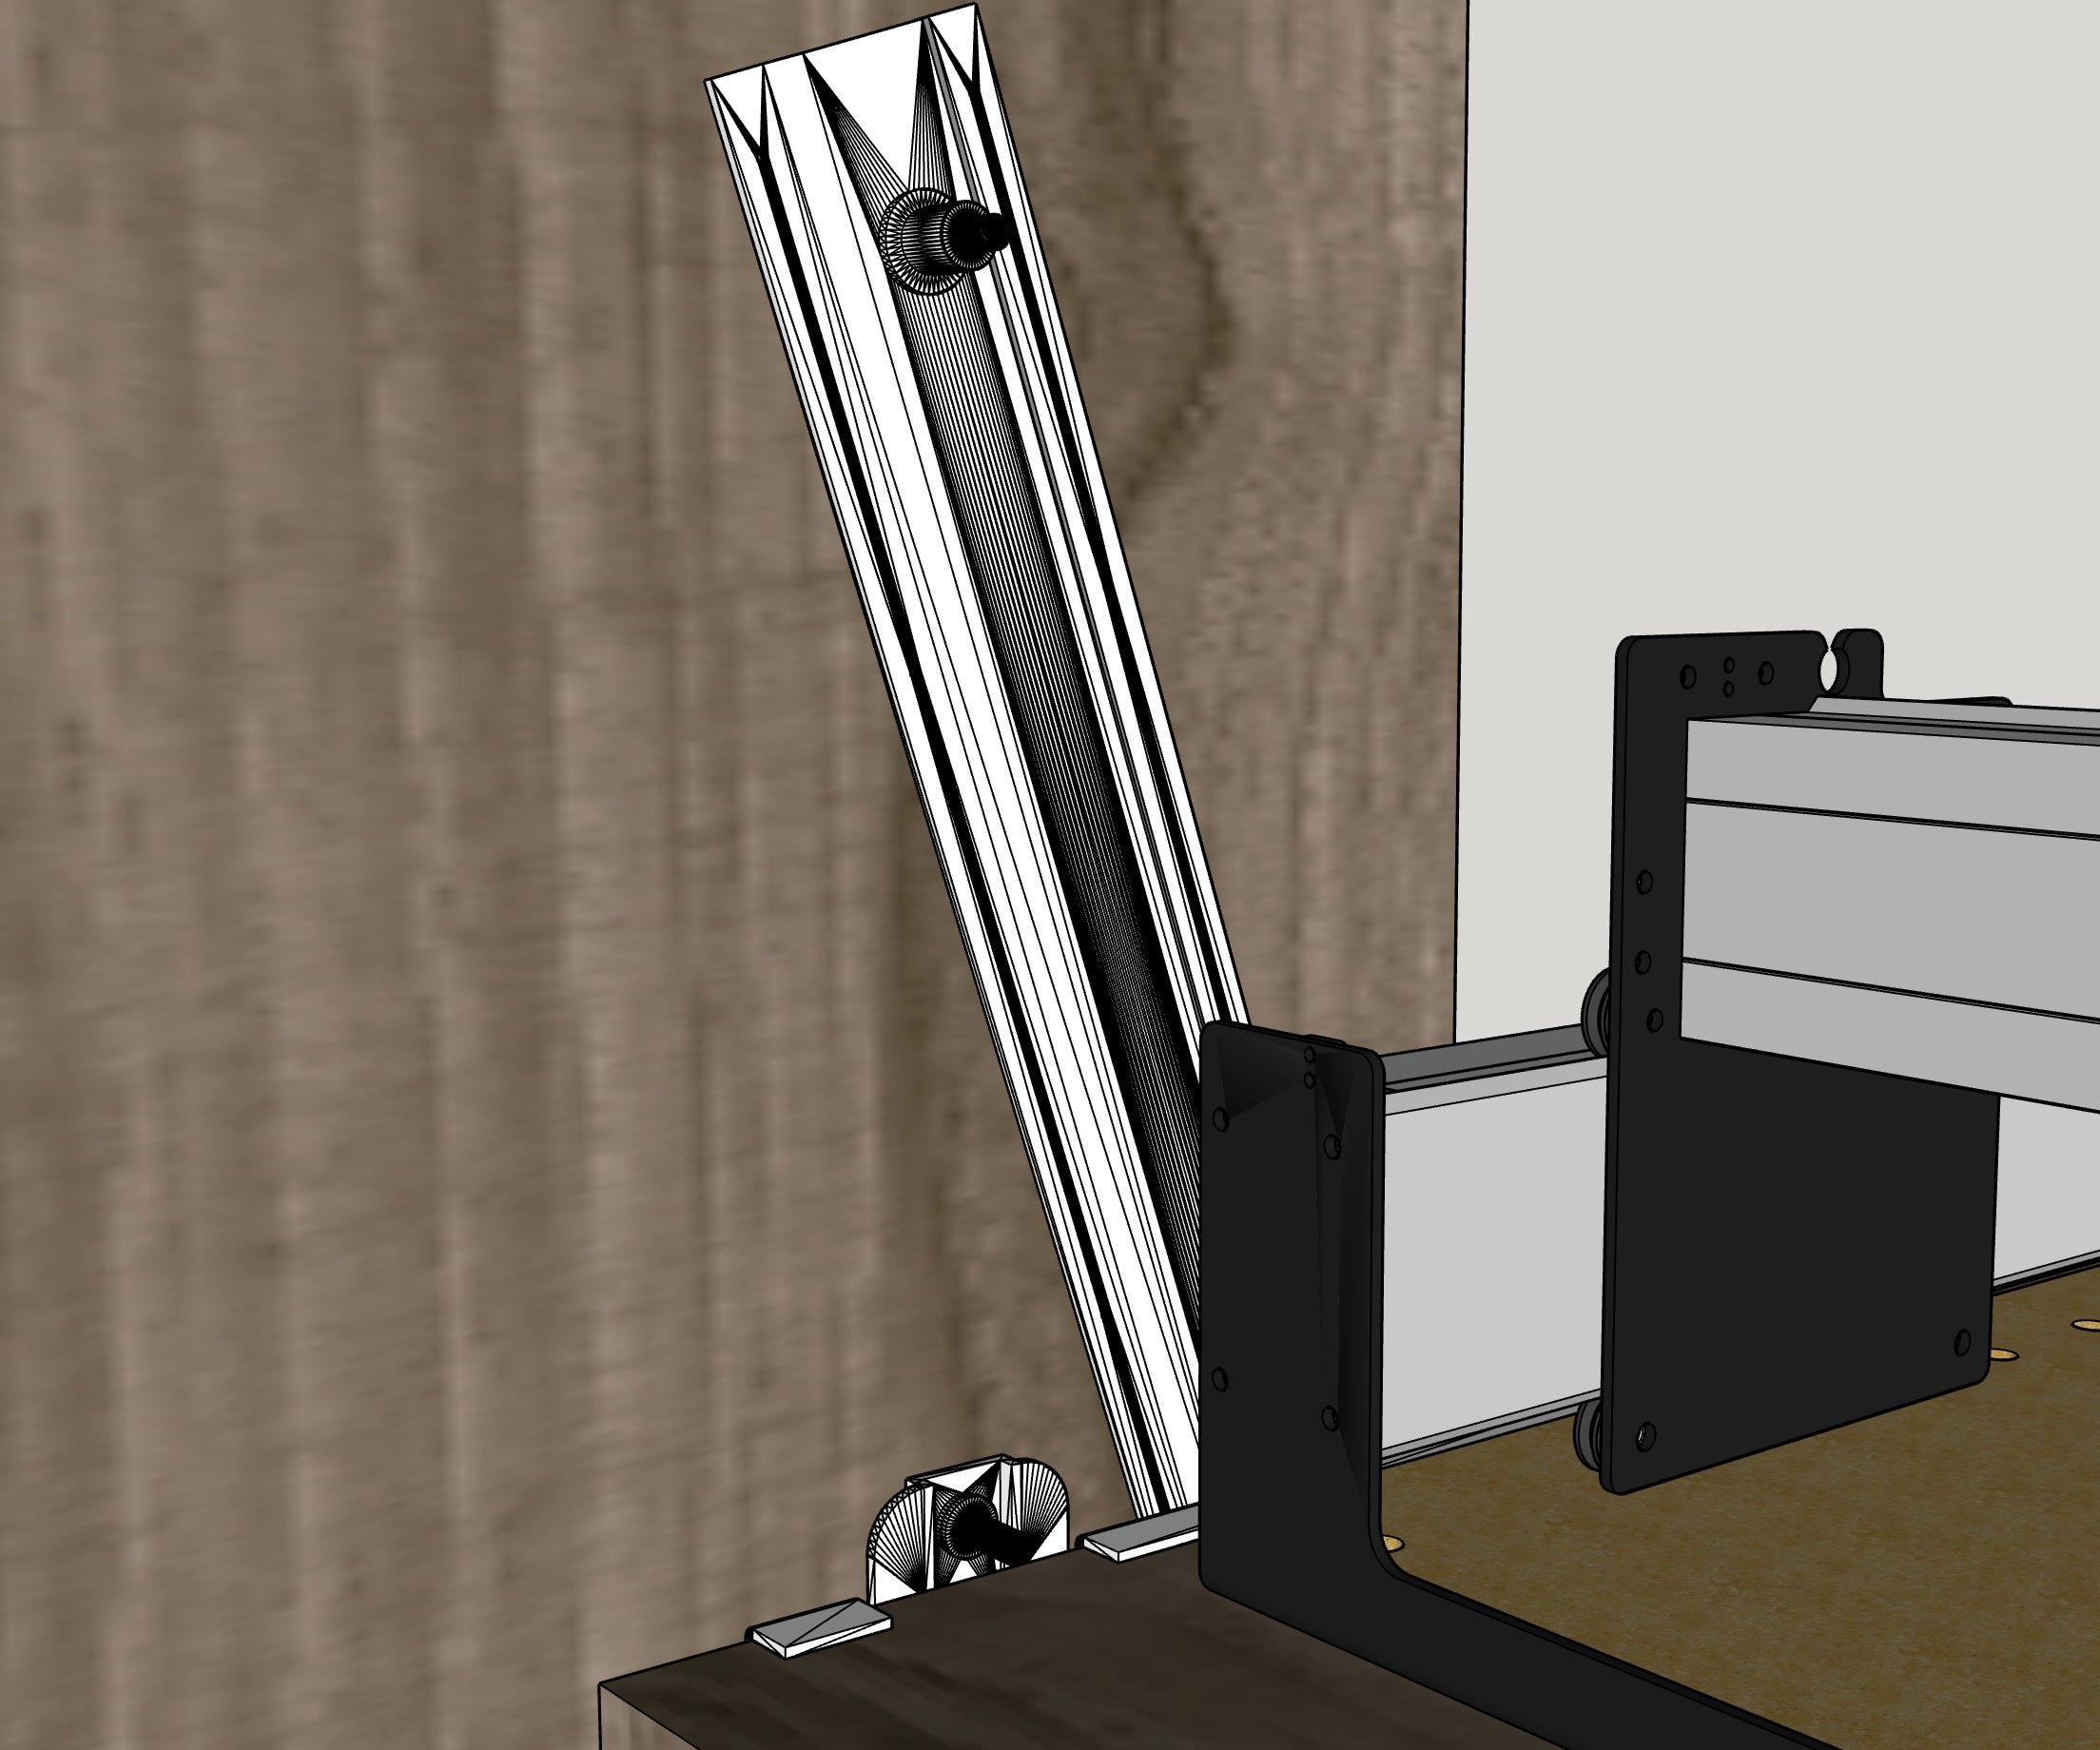
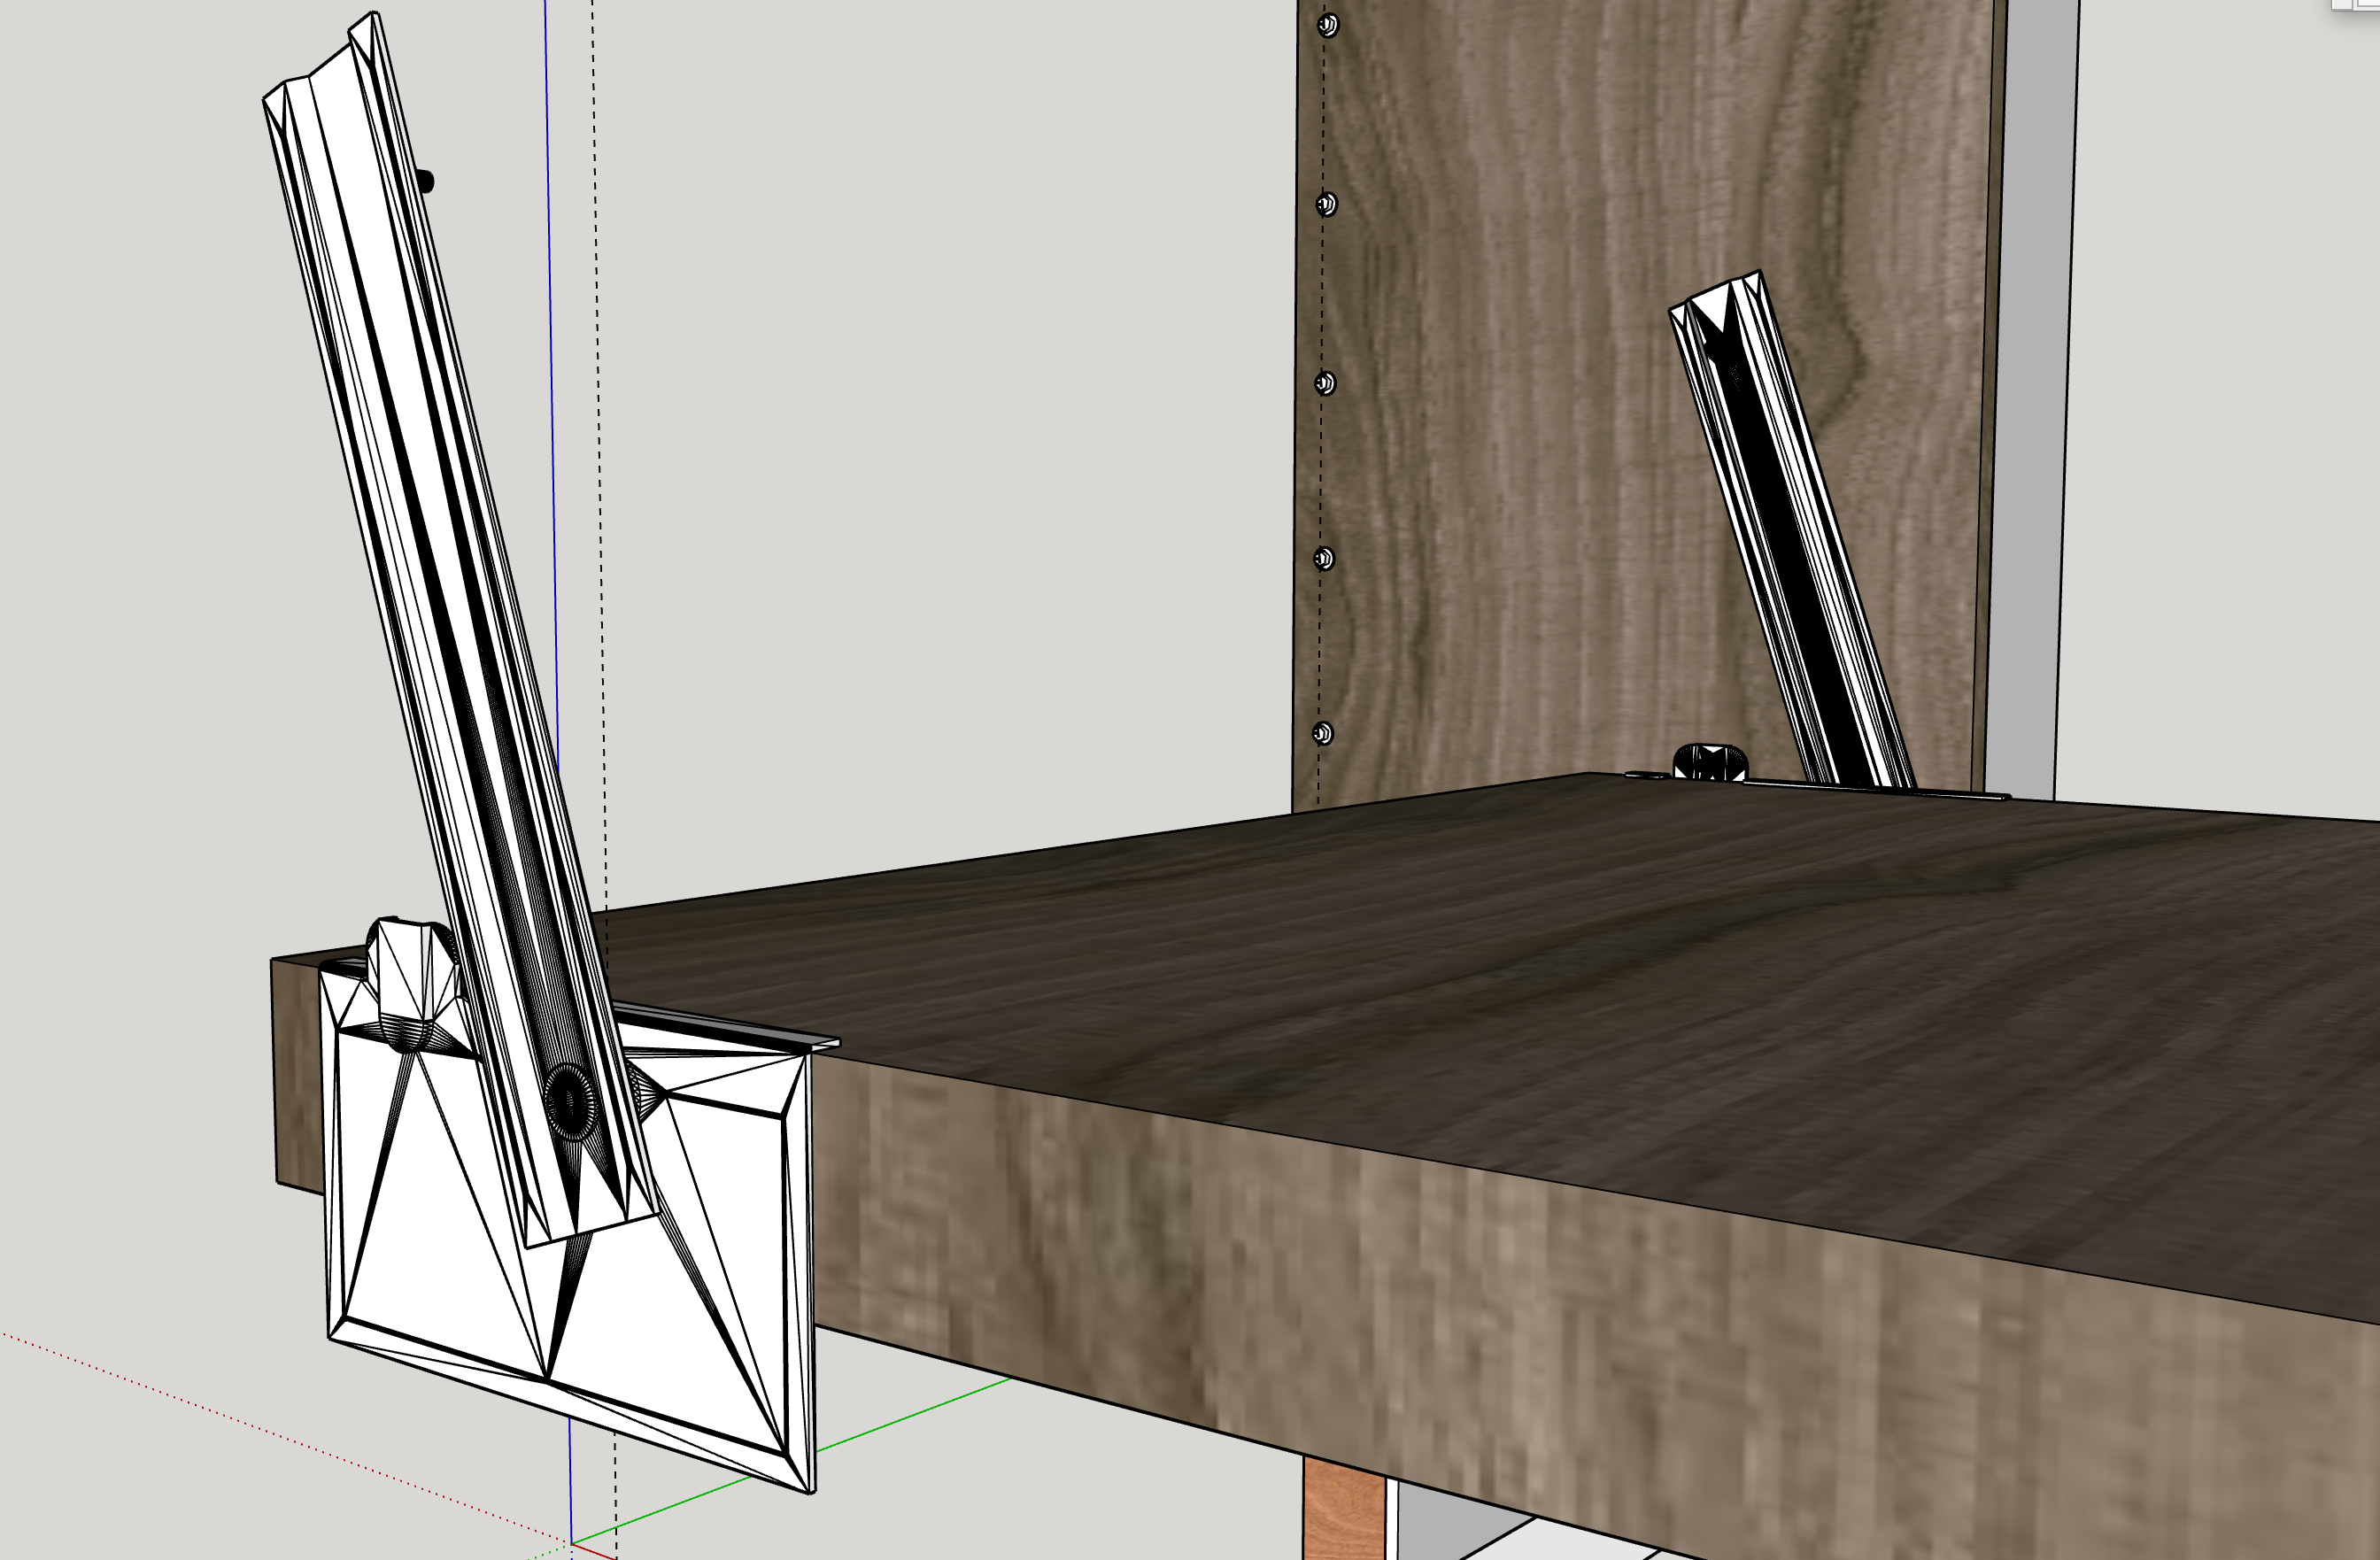
I like the idea of a foldable table/shelf but I would add foldable legs on the outside to reduce the stress on the wall brackets and to add rigidity when in use. It would not add much wall space, at most 2in on each side.
Floor space in my workshop was an issue for me and this is why I went with the XL but I really wanted an XXL or larger. One thing you have to realize is that the size of the CNC is one thing but you need space for tools, accessories, computer/monitor, shopvac/dust extraction and noise and dust may also be issues. You cannot solve all this with your design but it is important to keep in mind.
I’m going to use a 3 floating shelf design that folds down!
I’ve designed the cabinet with 21” of clearance from the table top side… this should allow for a low profile enclosure to be built on top and route hoses in the wall cavity if desired. How tall is the S3 with HDZ, and how tall should enclosures be for S3’s with the HDZ? I might want to future-proof for that as well.
Griff
(Well crap, my hypometric precursor device is blown…)
6
I like where you are going with this.
Here’s a pic of my DIY HDZ, it’s taller then the current design though. I like extra room all around, don’t forget about room to maneuver on the sides to replace v-wheels etc.
The HDZ is 20in from the table but as @griff said, you need room to work around inside the enclosure. I built mine 26in from the table I thought would be enough but @Griff warned me about the room for sticking your head inside and he was right, I will soon add 6in on the height. The other thing you need to be aware of is that the use of a dust boot like the SuckIt, requires additional room in front plus if you want to use the 2in or so in front of the frame for some projects, you will need to operate with your enclosure opened, especially if you have stock that is taking up the vertical space like milling table legs vertically.
I would suggest that you make a torsion box base for the Shapeoko to sit on. After bolting the Shapeoko to the base that eliminate any flexing of the base. I replied earlier to a post about someone making a steel torsion box. The Wood Whisperer on youtube.com has a good video about making a torsion box. The folding platform has been kicked around by many. It is a good idea but only if you have a solid base and support legs to put in place when deployed. You dont want the Shapeoko bounding around when cutting.
I have a very clever solution that uses the idea of a torsion box but inside of a manufacture panel. It’s very similar to how they construct hollow foam-core doors or honeycomb panels. Benefit to this approach will be that it’s lighter-weight then a DIY torsion box and resist compression forces better than MDF.
What are the typical methods people use to affix an S3 on top of a torsion box? I ask becuase it’s not really a good idea to screw or bolt into a skin of a torsion box as screws will pull up the MDF and bolts will compress it a bit.
Mine just rests on it but in your case, you will require attaching to the torsion box in order to lift it however, the method you use should take into consideration that you may need to take it off to service your machine at times. Screwing into MDF several times would damage the MDF. Maybe you should install T-nuts under the MDF and use bolts. This will not damage the MDF unless you over torque them significantly.
My suggestion would be to use the holes for the leveling feet to attach as a first connection, but to use some sort of clamp which mechanically grabs the frame of the machine as well if you’re not putting the bolt in through the top of the machine/PEM nut or putting a washer and nut at the machine end if putting the bolt in from the bottom.
1 Like
Griff
(Well crap, my hypometric precursor device is blown…)
13
When I built my torsion box several years ago after upgrading my SO3 to an XL I knocked the PEM nuts off the frame. Placed T-nuts appropriately in the bottom of the top of the box, finished the box then bolted the machine to it. Never looked back.
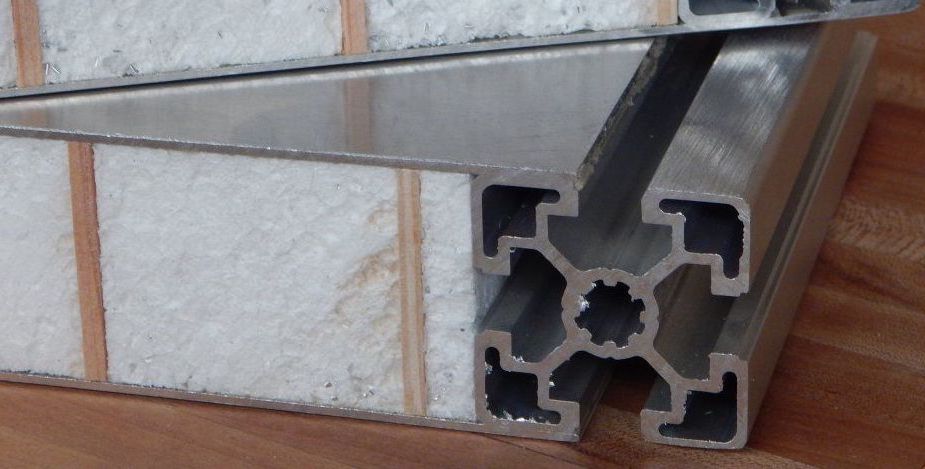
Thanks good ideas there… here’s another that would add a bit of cost … I’ve seen torsion panels made with Aluminum extrusions mounted inside and on the outer parameter of panels. Aside from providing a very nice fixation point to mechanically “clamp” as @WillAdams points out do you all think it would be a “worth-it” feature to have these somewhere on the torsion table? If so, why and where?!
EDIT: for me I could see a see a use for mounting the S3 close to the front edge of the table and using the T-Track for clamping something vertically… say if you had to mill some very deep mortises trough the end-grain of some stock.
If you make an mdf torsion box and pre plan the placement of the Shapeoko you could place a reinforcement blocks at the attachment points inside the top/bottom sandwich and insert threaded inserts to hold down the Shapeoko.
I dont have a garage, and do my work in my finished Chicago basement.
I could not imagine this machine in my home office. (a nomad? sure) .
the big show stopper would probably be the dust collection. the shop vac is the loudest part, and it’;s stupid loud, and there is another big bucket dust separator rolling around beside that.
I am sure you CAN do it, but dude I bet it is gonna end up being “the shapeoko room” and not a home office in the traditional sense.
next time you’re in the market try one of these, you’re ears will thank you immensely the spindle is far louder… https://amzn.to/2SfLGpI
(yes, I know its a lot for a vacuum, but it’s your hearing, if youre a festool addict there’s is quite good too I own both)
Once I enclose the unit, for my specific application I might blow instead of stuck all the dust into a receptacle in the wall cavity behind the table… install a dust port and then wheel over this guy from my workshop to empty it.
Theres lots of ways to get around it… different philosophies I suppose, but i stand by what I said on making these kinds of tools accessible to a broader market.
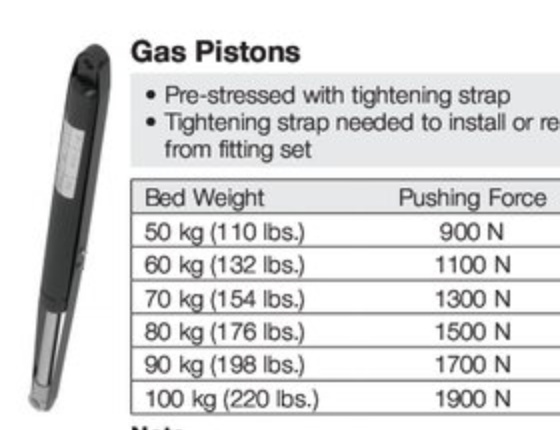
Build update: I’ve purchased the speciality hardware (1/8" Steel bracket as pictured in the OP) and Gas Pistons today… specs on the pistons were 220lbs of pneumatic counter-balance and 430lbs of Pushing Force. Fingers crossed thats the right combo.
Another issue that would be a concern that has not been mentioned with an indoor CNC set up that may have been inferred indirectly but needs to mentioned is air filtration.
I concur with @robrob , even as you mentioned our ears will thank us with respect to the items regarding dust collection. I can say from own experience with my set up - which is using a HEPA filter on my vacuum/dust collection and suckit boot works great - but I dont trust it completely with my health. Yes it makes a world of difference and time wasted on clean up is now saved! It was really remarkable how much material is collected but ultimately it will not get 100 % of the fine dust that is in the air floating around after jobs are completed. So then we enter the realm of air filtration for the garage/shop/ or house in your case. Without it I would close the door to the soon to be “shapeoko room” and seal the air vents before that air mixed with my air ducts and to the rest of my livable space.
reminds me of second hand smoke analogy…its not just your lungs but also who ever lives in the home with you, as they are also exposed to any dust particles in the whole house from any material you cut - regardless of dust collection or how quiet it is.
@MarkDGaal Very interested to see how your Pneumatics work out. Trying to solve this exact dilemma. Have had great success in a flowing version of a Shapeoko table I came up with. Had two big concerns initially. Weight of table and maintaining a square and level table with repeated movement. Currently takes two people to fold table up to wall but does return square to floor when unfolded every time. I have Shapeoko bolted to table with shims under it and levelers on bottom legs/ tool storage panel. Current thoughts are to use an electric type winch to pull up or your process of pneumatics to assist with load transfer.