Hello all, I am new at all of this but gaining quickly thanks to the expert advice on this forum.
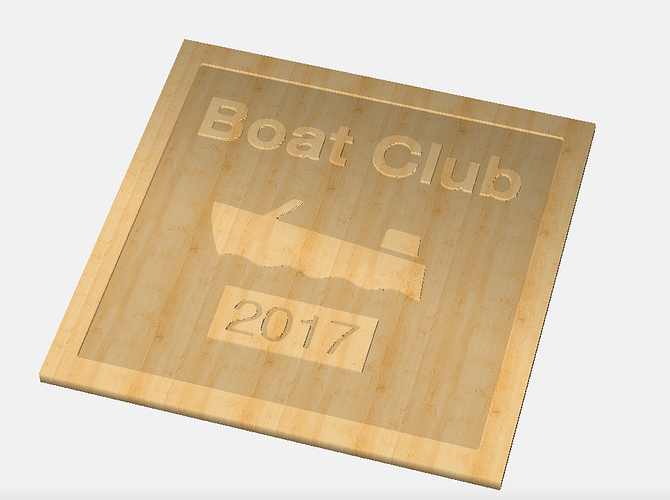
My quest for today is to learn how to create this effect on HDU or similar material.
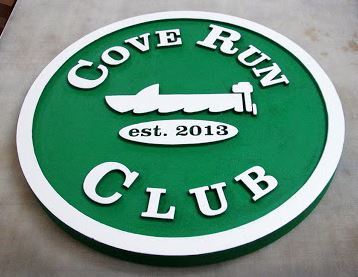
I would like to have a raised border & graphics on a recessed background. And, then to make matters even more complicated, is it possible to shape the raised graphics with a V bit?
Please reference a tutorial if possible.
Thank you!
Don
We have an incomplete one which touches on the simple aspect of this using Carbide Create:
as the above notes, the difficulty is that Carbide Create won’t depth limit.
This image illustrates the difficulty:
Of course, if one has a drawing program which will offset paths, this is handled quite simply. Hang on, let me draw something up…
Okay, one wants an original more-or-less like the dark parts of this:

original on the wiki at: file soc3d.svg
Then you have to select some paths and inset them by twice the distance which the center of the endmill would be from an edge when cutting as deeply as you wish to allow it (the grey lines).
Then, you import it into Carbide Create:

Will, this looks perfect… exactly what I am looking for.
However I don’t understand: "Then you have to select some paths and inset them by twice the distance which the center of the endmill would be from an edge when cutting as deeply as you wish to allow it (the grey lines)."
This appears to be an SVG file but I cannot import it into Carbide Create?
If you follow the wiki file link you’ll be able to d/l an SVG — the problem is, it doesn’t seem to work in Carbide Create — trying to sort that out now.
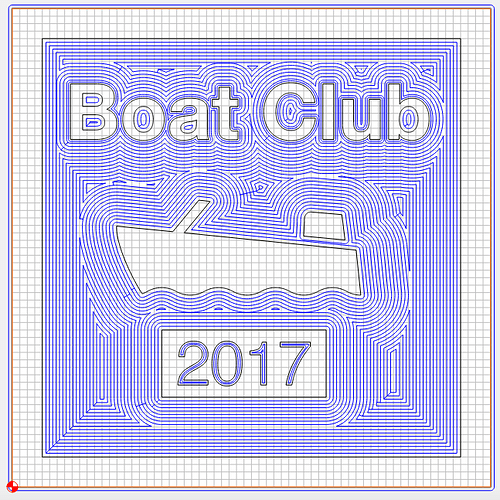
You can get an output that matches your example photo by utilizing the pocket feature.
boat_club_example.c2d (1015.2 KB)
Now - if you wanted to v-carve those raised letters - it gets more difficult:
You would need to offset them to the inside first - that’s not something you can do in carbide create, so using another software would be required (like inkscape or illustrator or graphic). Once you have an offset made, then you could apply a v-carving operation to the offset.
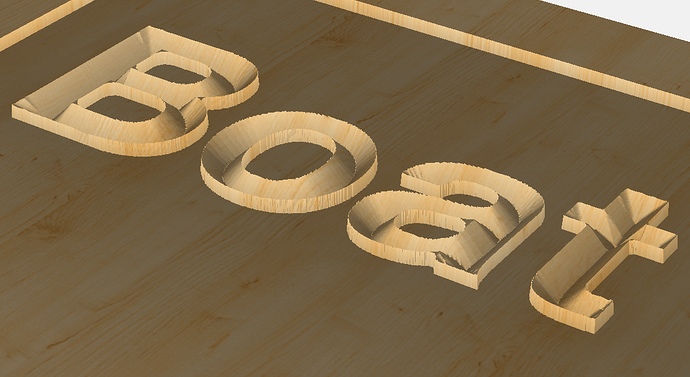
Why? Because if you tried to vcarve the raised letters (without offsetting to the inside first) - the vcutter would go all the way to the wall and the top of the letters would collapse. Here’s a screenshot of the simulation to show you what I mean.
Note that the preview shows a wall on the outside, but it is it would be too thin (IMO) to support the feature. More than likely pieces would break out and the sign would be ruined.
However with an offset, you could safely move the vcarving inward from the wall.
-Edward
To @WillAdams points though: adding geometry around the features to allow v-carving will give you better (crisper, sharper, more detailed) results.
it looks like a bug in CC has been uncovered trying to work up an example for comparison. We’ll get that addressed in the next release.
-Edward
Edward, this looks great but when I try the pocket approach, it wipes out the text & graphic. How do I get the pocket to leave those details?
If you get that working, would you post here?
Don
To get a pocket to leave islands you have to select the outer geometry and the geometry which you want raised and assign a single toolpath to it.
This should be addressed in at least one of the tutorials at: Getting Started with Carbide Create
It is discussed / mentioned in the V-carving tutorial at: Shapeoko CNC Router, Rigid, Accurate, Reliable, and Affordable
Using the opening screen for Carbide Create as an example, it seems obvious (to me) that one would want to cut the pocket perimeters first with the smallest possible tool to produce sharp corners and then switch to a larger diameter tool. In this example, there appears to be an extraordinary amount of paths, is there a tutorial that addresses this technique?
Thank you.
Don
Turns out a bit of patience and trying again w/ Inkscape — this time sending in a properly composite path as I usually advocate for works:
Apparently I used too large an offset — should’ve been half what is shown. Fixing this is left as an exercise for the reader.
Soc3d.c2d (2.4 MB) — the Carbide Create file is provided only for reference, there’s no reasonable way to offset the paths in it. Go back to the SVG at: file: Soc3d.svg
Thanks Will… I’m muddling my way forward with this stuff.
Don
Soc3d.c2d opens only as a blank screen… did I miss something
You can’t open files into Carbide Create by double-clicking on them (though that will launch the program) you have to manually invoke the “Open” menu and manually navigate to the file location (or paste the path in in Windows, or drag the icon into the dialog box using a Mac) to open things.
Move everything which is not involved in the V-carve out of the way, select everything and apply a V carve toolpath:

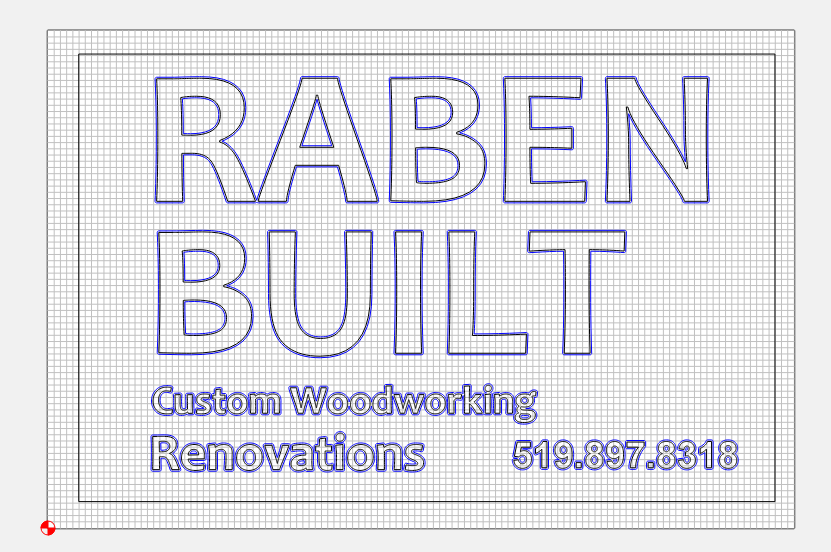
Sorry I am trying the same thing with a sign. But I cannot get my letters to be “islands”. How did you get that to be “islands” ?
They need to have the proper winding (be opposite of the other paths in the selection) and have to be selected with the other paths. Please see: https://www.shapeoko.com/wiki/index.php/Carbide_Create_V-carving_(advanced) for the specifics. If that doesn’t help, post your file here and we’ll gladly look into it.
Anyway, eventually you arrive at something like:
Which previews as:
Note the small uncarved space near the “C” which is too small to remove w/ a 1/8" square endmill in a pocketing path.
Zipped version attached here: so3cd.zip (310.6 KB)
