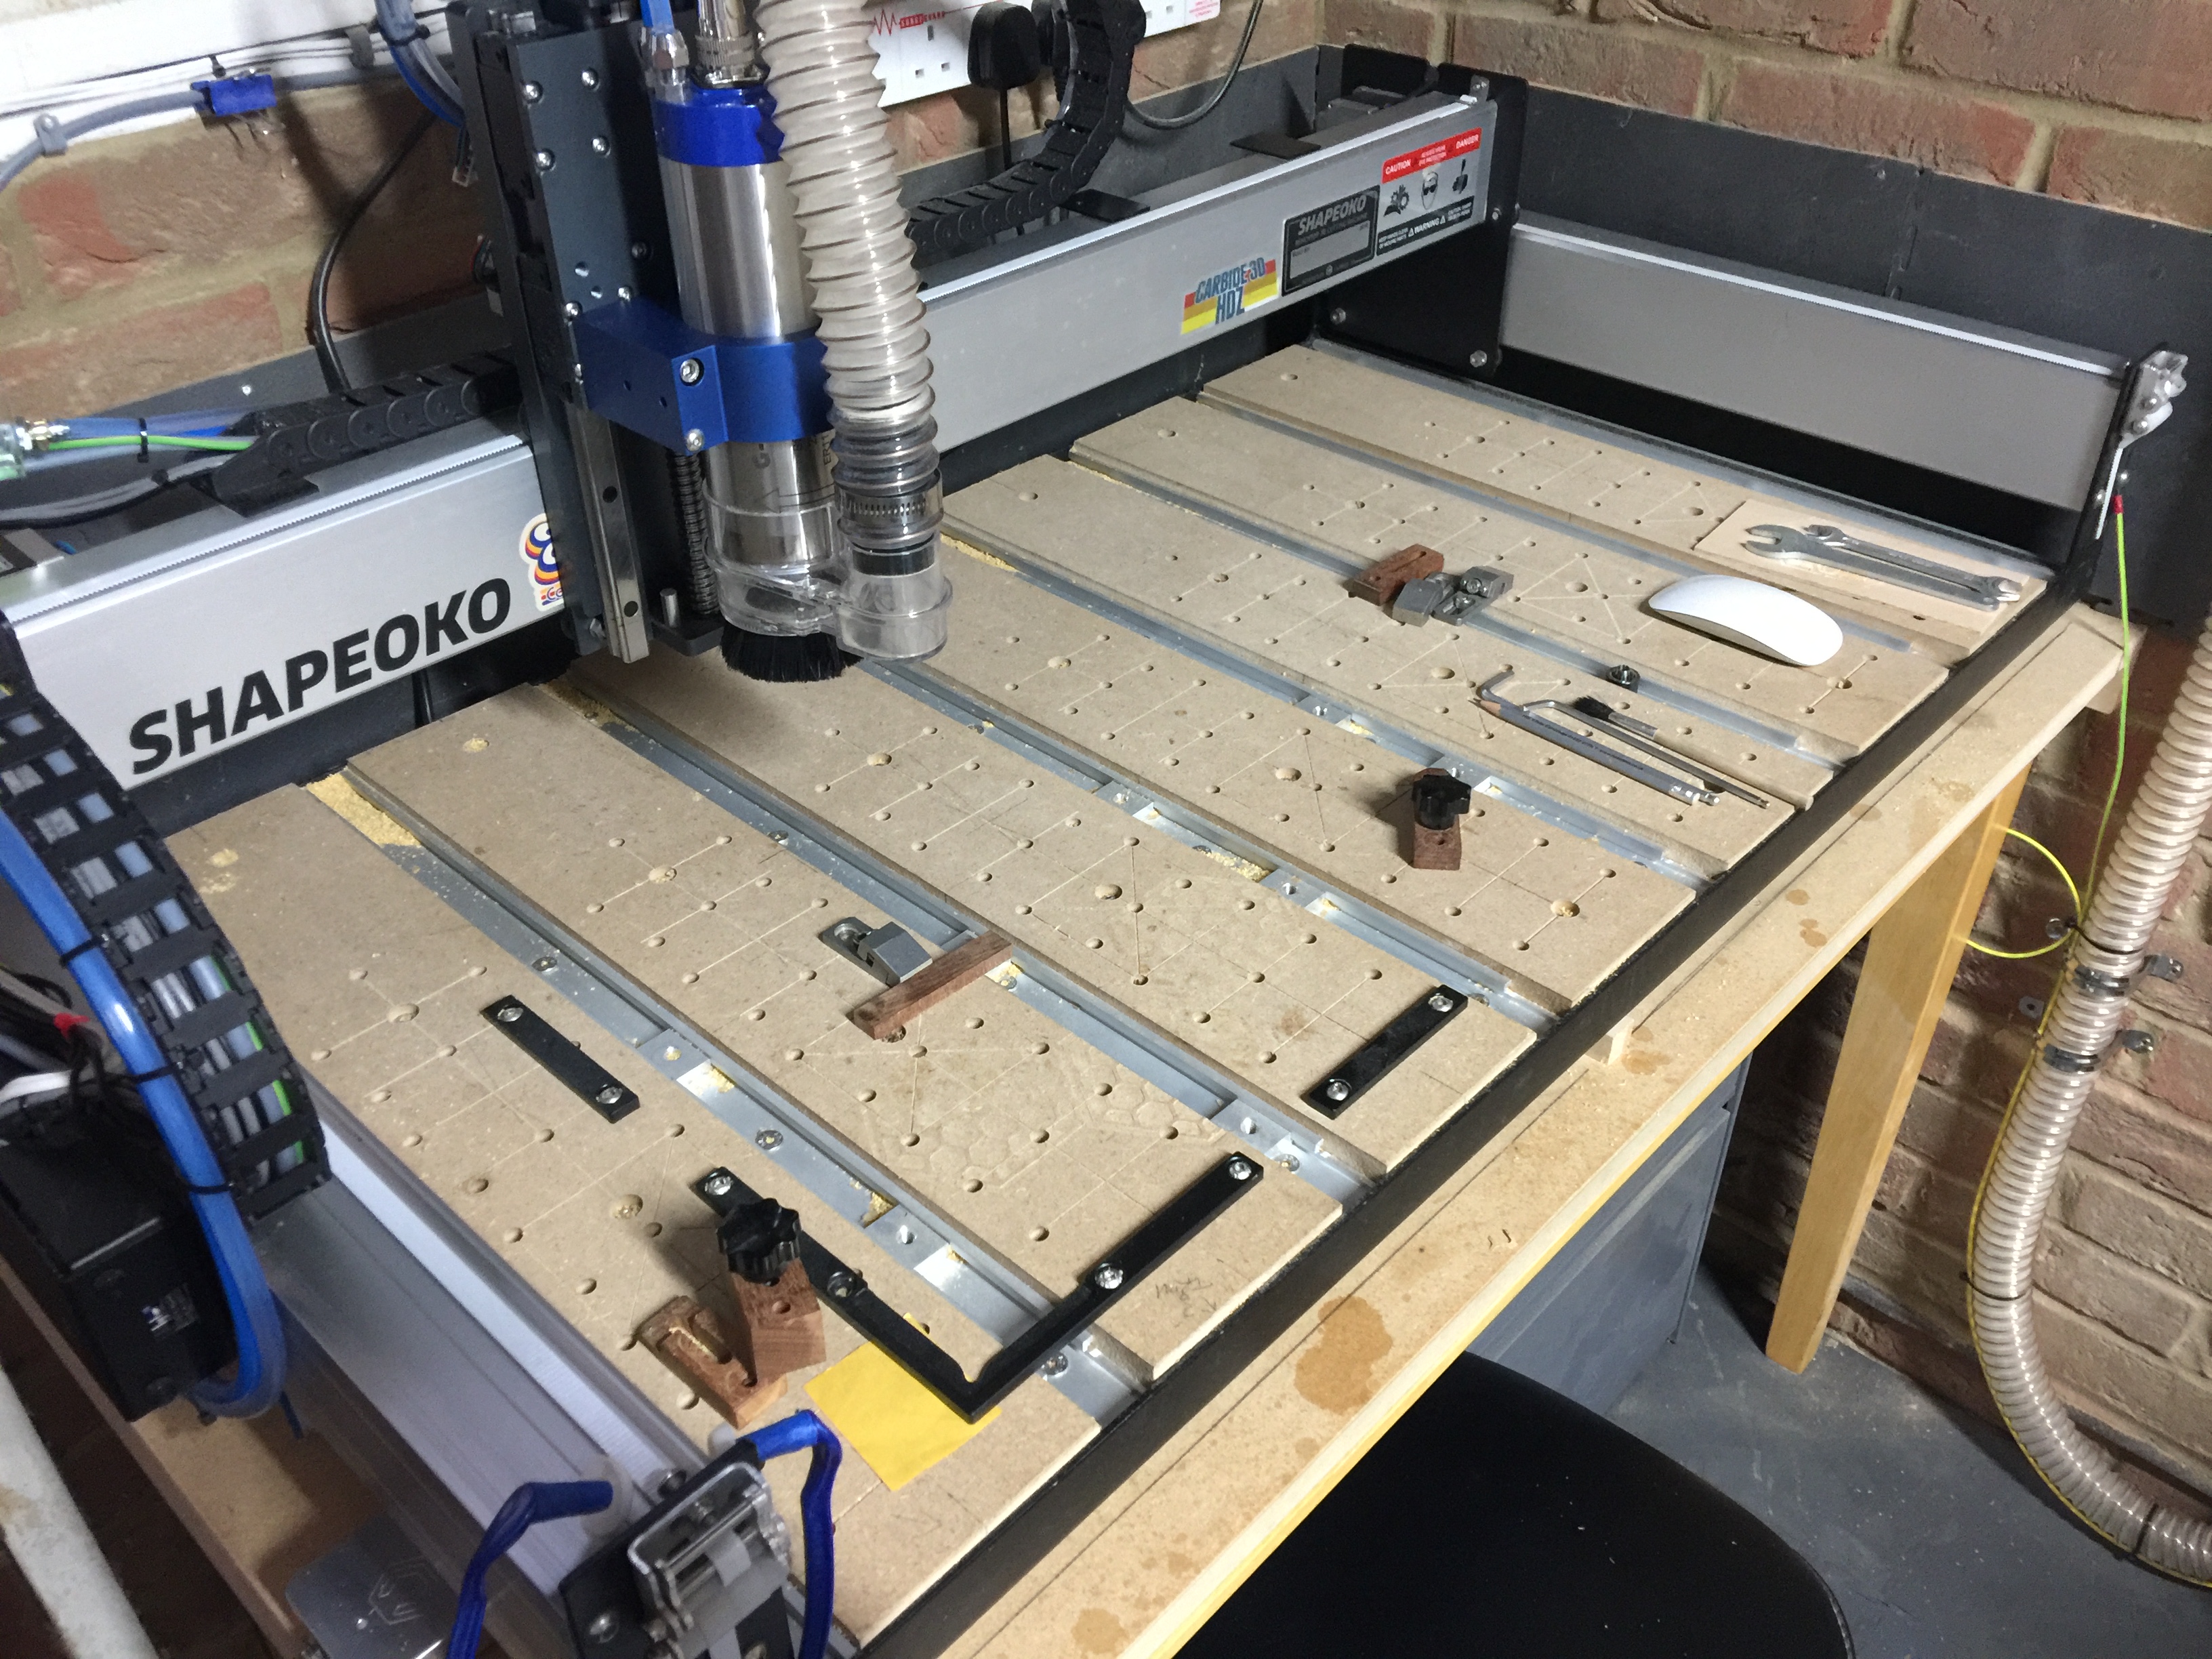
I am currently in the process of replacing my MDF bed with a piece of .25" steel plate. I already have the steel drilled, countersunk and ready to install. For my waste board I have a couple of 16"×16"×1/2" thick corian countertop cutoffs. My old mdf waste board had the winged nuts underneath and I bolt projects down thru those holes from the top. Just curious if this is still the best option? Obviously I will no longer be able to screw anything down to an MDF surface. Just trying to cover all bases before I install. Any pictures or links to bed upgrades would be appreciated. Thanks, Brandon
1 Like
I put a threaded insert/spoilboard on my machine:
That technique might work for you.
1 Like
Thank you for your input. Much appreciated.
I’ll be interested to see / hear how that works out, I’ve also been eyeing up steel sheet.
You could drill and tap a pattern for hold-downs in the steel plate and then drill clearance holes through the corian?
1 Like
I think it really depends on what you make.
My current wasteboard uses threaded inserts, just a basic rectangular pattern at some spacing I thought reasonable for my purpose. I used it initially, but have since abandon the practice of using clamps. The time required to plan out stock and clamp location, tabs, material that is not flat and cannot be surfaced ect all add additional complication for me. When I surface my wasteboard, I machine the perimeter down additionally, I use this as a quick reference or with 123 blocks as a fence to set stock. As much as I hate it, I use glue and tape. I buy the widest tape I can, and big bottles of glue. Adds a certain degree of labor, but its quite simple and effective. I’ve built some vacuum fixtures at this point, but rarely use them outside of repetitive tasks.
I too have a small bit of steel to put on the xxl when I have time. Atop this I plan to put a sheet of HDPE which I can surface, then just fixture holes where needed. An additional large piece for tape and glue, the vacuum fixtures ect. Kind of expensive, but much cheaper than aluminum.
2 Likes
And one more additional thought. Should you want to go to town on the holes in the steel, one real nice bonus is that you can use a MagDrill. Scribe it all out, punch it, lock magdrill in for square holes.
1 Like
I think I am leaning towards the threaded inserts again. Like I had before. Seems to be an easy option and it worked well for my uses before.
I make turkey calls and it is similar to making a musical instrument. Once you have the internal sound chamber nailed down you want to be able to replicate that over and over within a 1 or 2 hundredths or atleast that’s what I’m shooting for. My shop isn’t climate controlled and I live in Alabama. So 100 degrees in summer 20s right now in winter. Constant humidity swings. The MDF is just not desirable. So I think the steel bed and Corian will eliminate those issues. Once I have it done I’ll come back and post pics.
1 Like
The big thing for me with threaded inserts is the next time I do them, I’m going to set up a master file, and only install them as-needed/where-needed — that way I’ll know each one got used at least once.
2 Likes
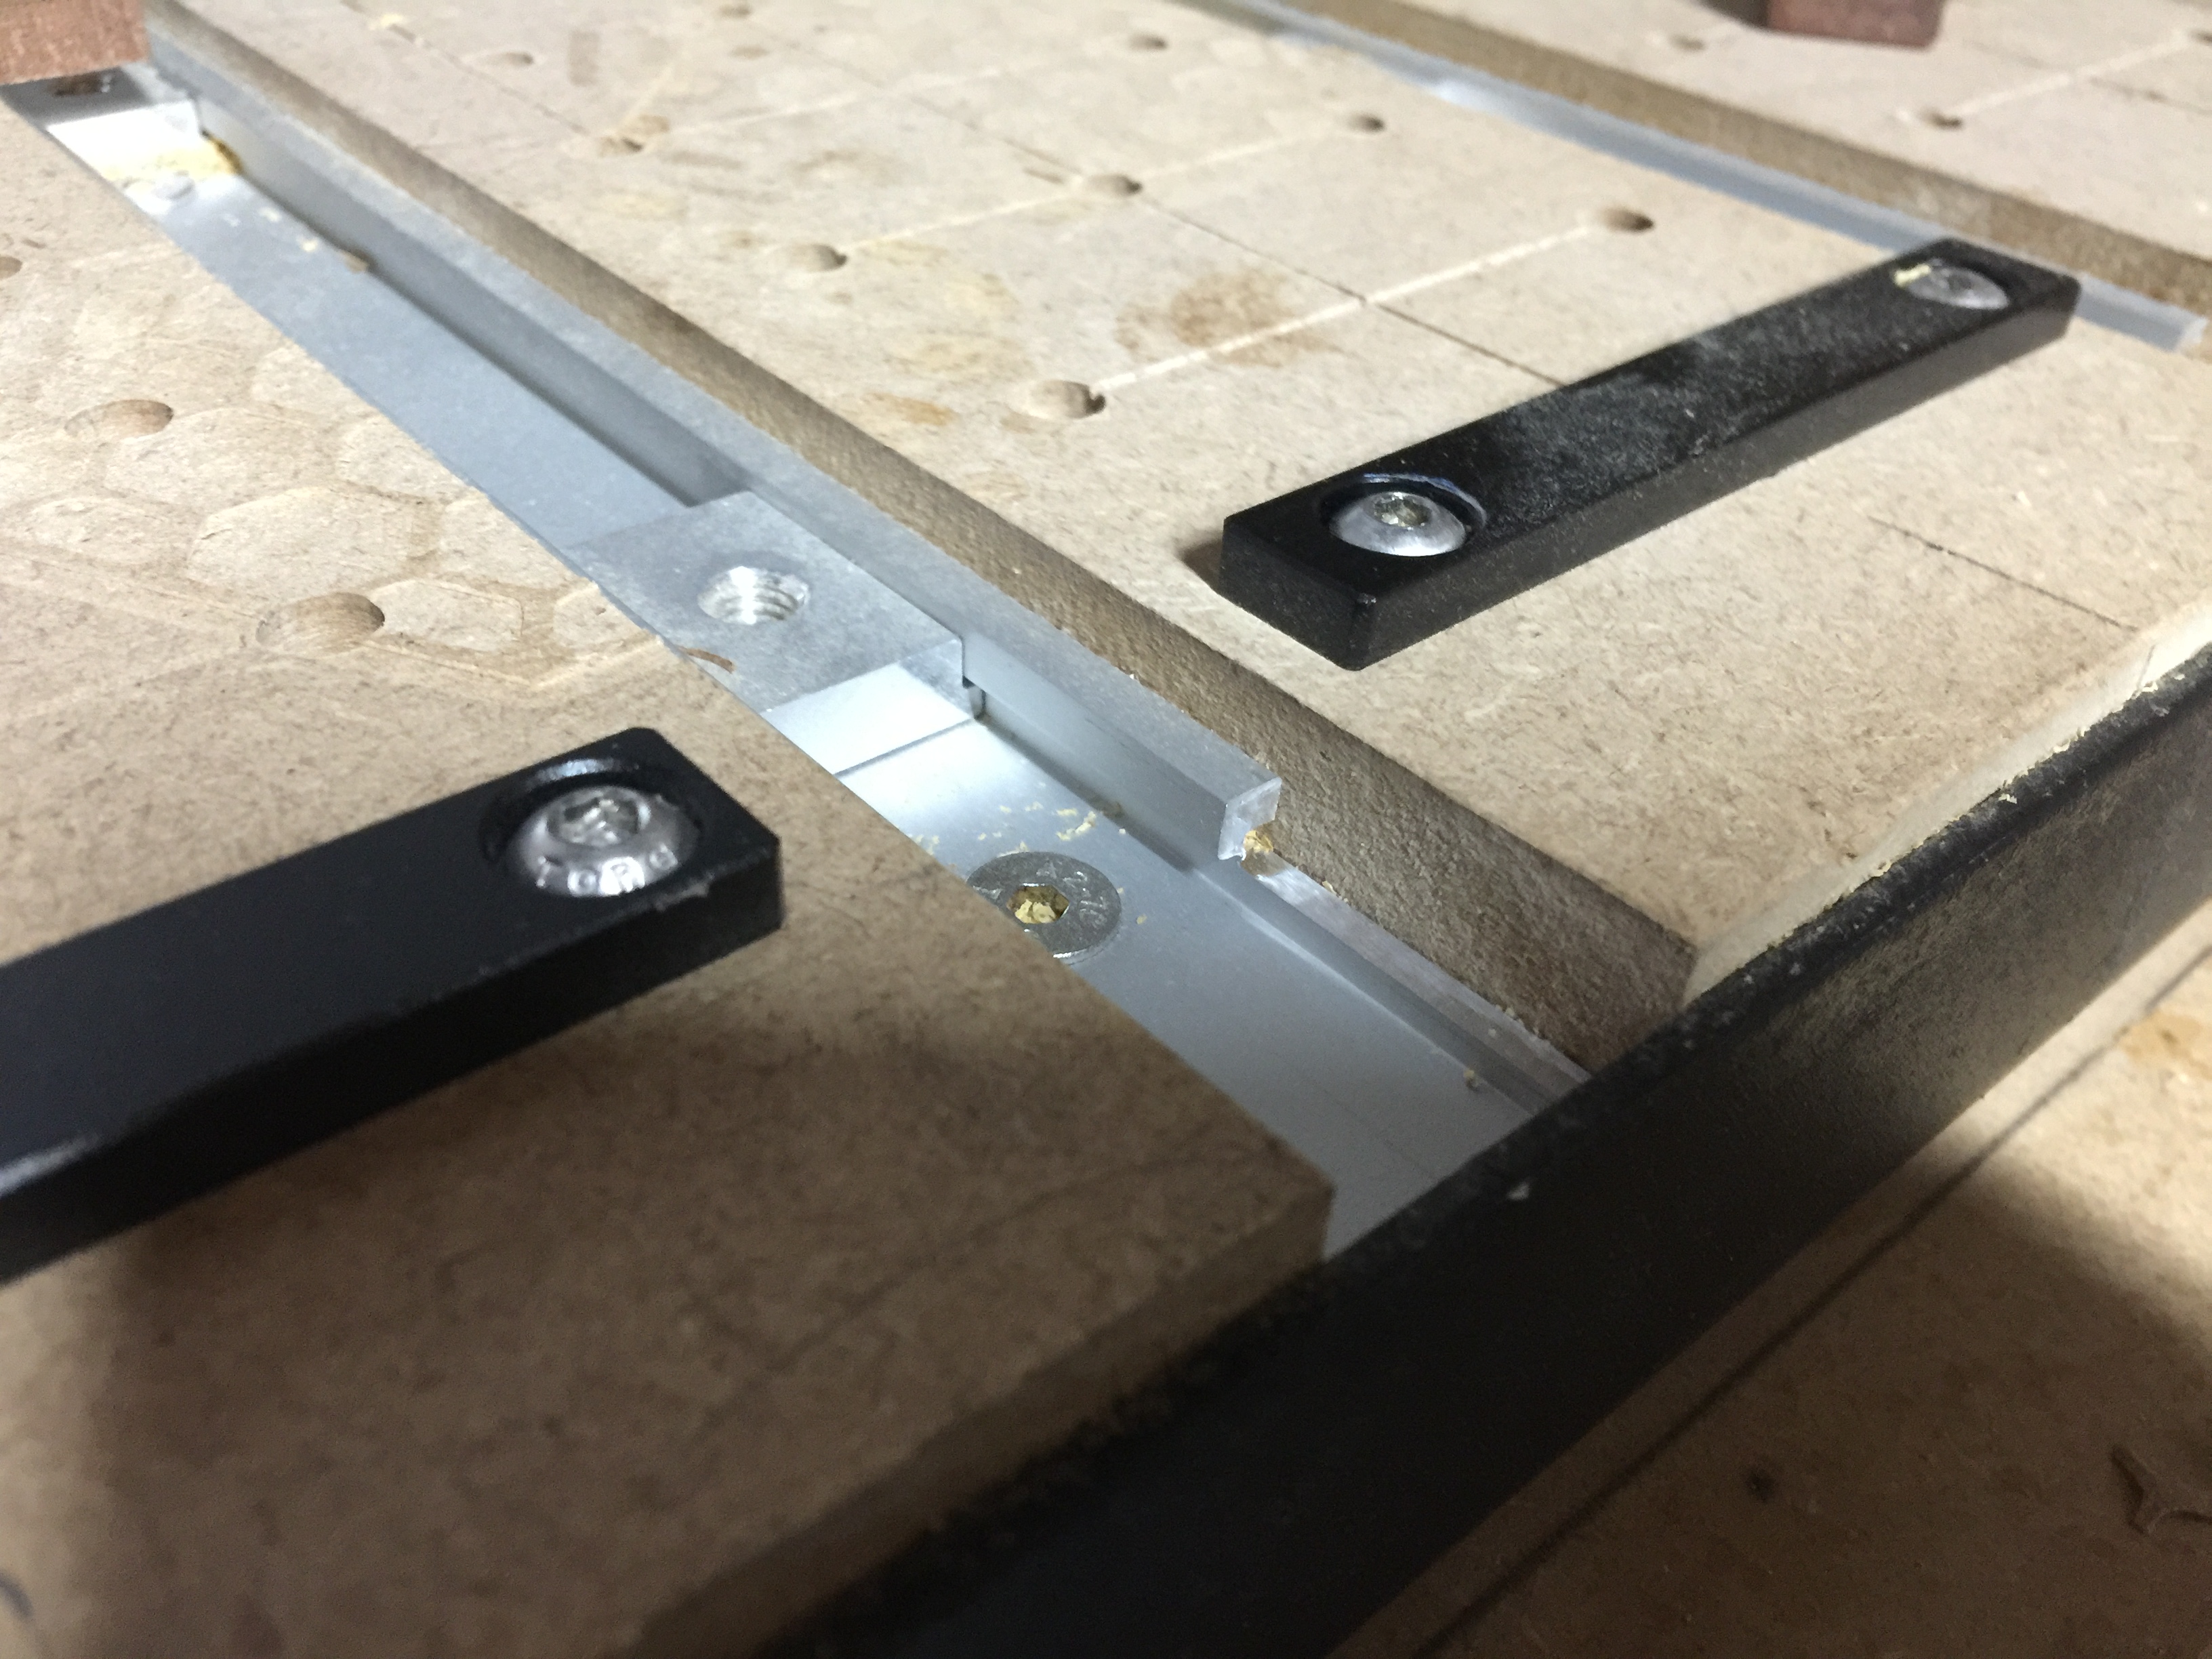
I’ve pondered this whole threaded inserts or T-Track, or both. I’ve just replaced my spoil board with a hybrid, a little like what I can see the ShapeOKO Pro bed looks like - but with the original MDF base board.
I have 7 T-Track extrusions equally spaced, laying front to back on the base board and securely fixed down to threaded inserts in the base board. Because access to the t-track is needed (obviously), I milled away the first 35mm of the ‘lips’ on the t-track so the nuts can easily drop in then slide along to where they are wanted.
Between these extrusions I have 6 identical MDF 19mm (3/4") spoil boards, and a pattern of insert threads that means I can position the Carbide Corner Square and straight guides in any combination of positions, including spanning between adjacent spoil boards.
If any board gets damaged, or if levelling/tramming means they are too thin, I can replace one or more and even have spares ready should I be that well planned. Vectrics file for the individual piece attached, should anyone find it helpful (sized for the 3XL). JPG of the general arrangement of the board laid as they are on the machine.
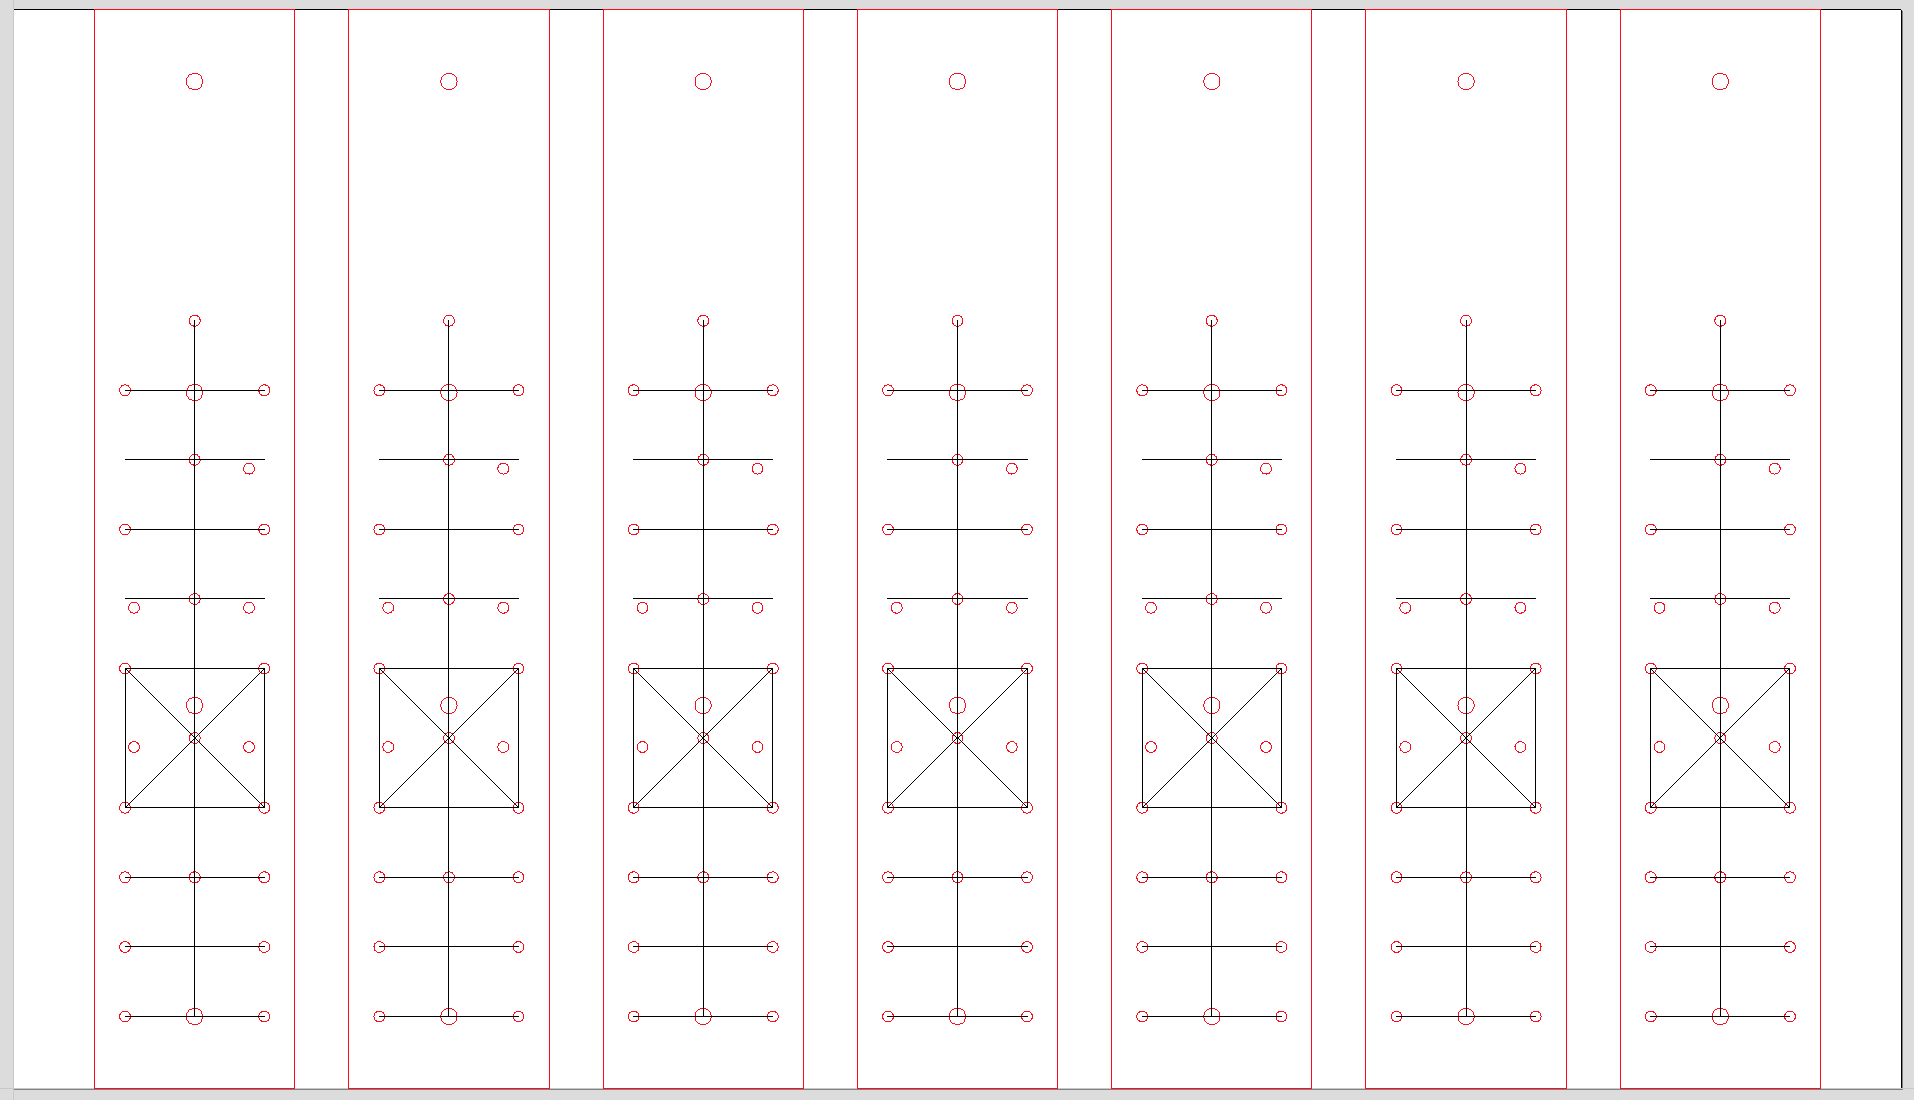
Insert Piece 600x111.428x19 CL-Top Rev-1c.crv.zip (475.8 KB)
2 Likes
Curious why you didn’t put the drop ins for the sliding workholding pieces at the back where you can’t cut. Would it be possible to flip the extrusions end-for-end?
1 Like
Good point. Sometimes you’ve just got to try something - you learn what is good, and you learn other things too!!
1 Like
So I slid everything in and I may remove the feet or shim the underside. The 1/4" steel is flexing some in the middle when you press on it with your finger. I would like to sturdy that up some. Still working and tweaking it…
This topic was automatically closed 30 days after the last reply. New replies are no longer allowed.