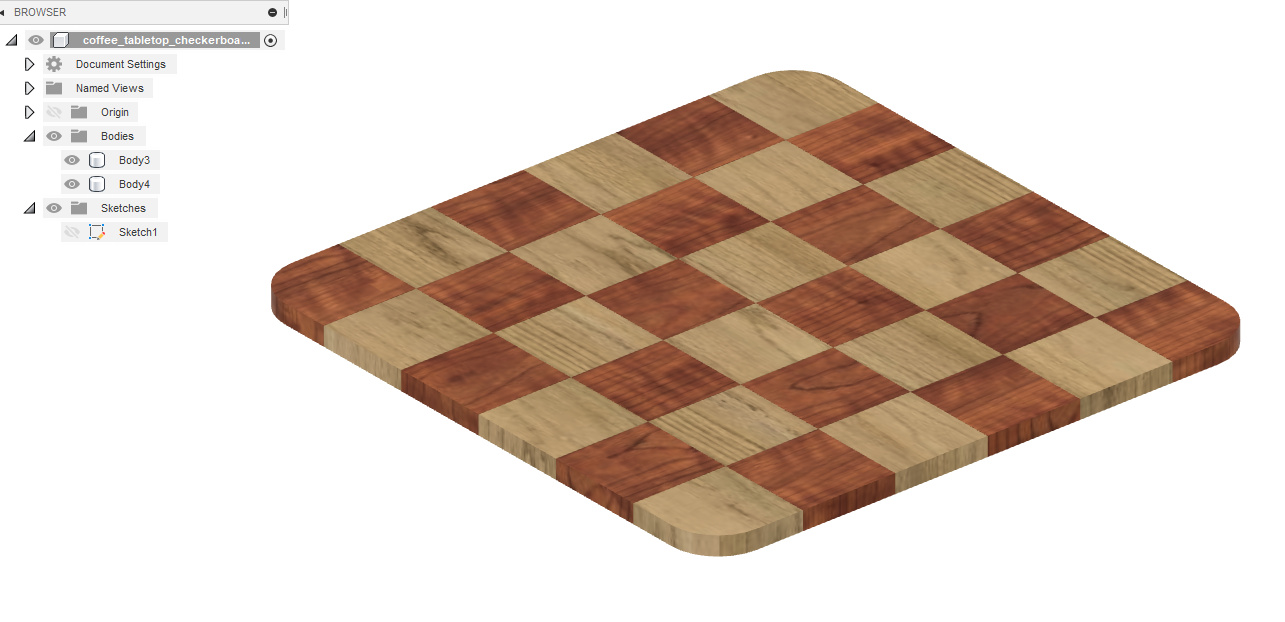
I was tasked with making a wooden table top that will go on top of a coffee table metal frame that is about 22" x 22".
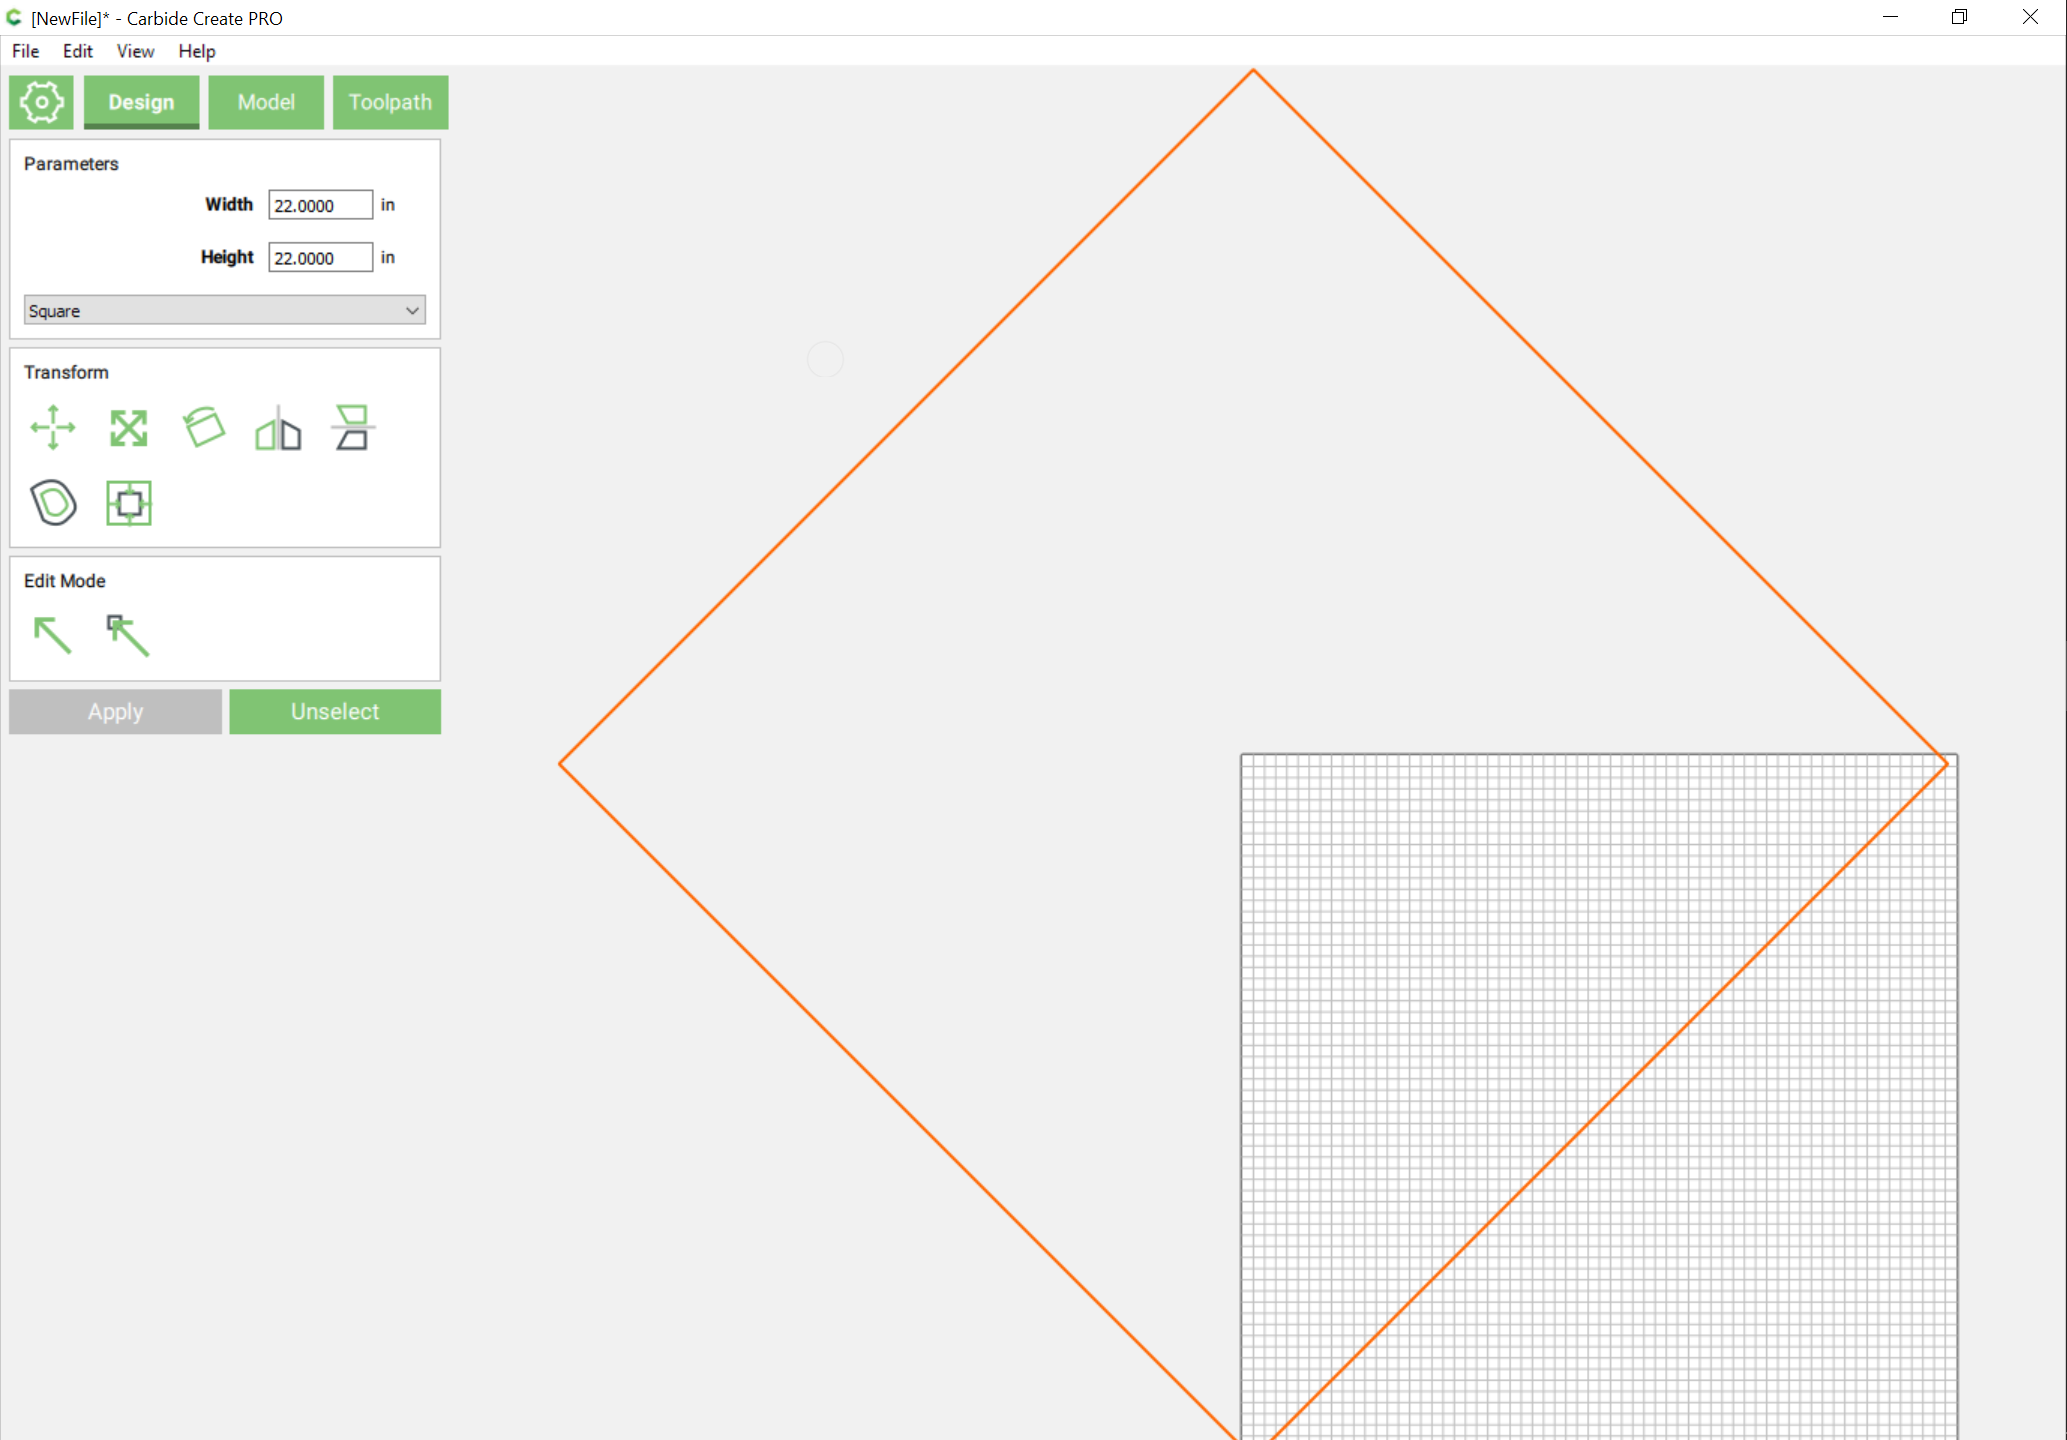
The thing is, I have a standard SO3 so I’m limited to about 16"x16" cutting area. I figured I would cut 4 quadrants of 11"x11", and assemble them. I can think of a few symmetrical designs that would look good to either hide or highlight the junctions of the 4 quadrants, but I’m not a woodworker so I have no clue how to go about assembling the 4 pieces in a nice and sturdy way.
I will be using 0.8" oak for the parts. For a 22"x22" piece, I guess I will have to add some kind of a frame underneath the 4 quadrants to hold everything.
Do you guys have an advice about the type of joinery I could be using to assemble the four quadrants ?
I’m leaning towards making the junctions really visible, possibly doing some kind of a jigsaw piece design where each quadrant locks into its neighbor.
Is there going to be someone standing on top of this table? If not, then a basic glued butt joint would easily hold it together. I would be tempted to put dowels or biscuits in the joint to get the carving aligned with how you cut it.
It’s not going to have to support any significant weight, so I guess glued butt joint would work. I rummaged through my stock of wood and found a large piece of ash that is quite dark as the wood as been heated (or whatever the appropriate word is ?), it would contrast very nicely with the light oak. I wonder if I could come up with an inlay design that would cover the quadrant junctions completely…
Something different would be like what was mentioned above- using some sort of key- a butterfly or bowtie key that usually is installed to hold a crack from splitting any farther. You could use the same idea and use them on all four seams and quite possibly not use any glue especially if you are planning to put a another piece under all of them - you could go as far as making a 2/4 way spline for them as well.(like a cross)You could also use aluminum or brass as well. Make them nice and tight and hammer them home. Fasten from underneath or put the glue underneath on the sub board.
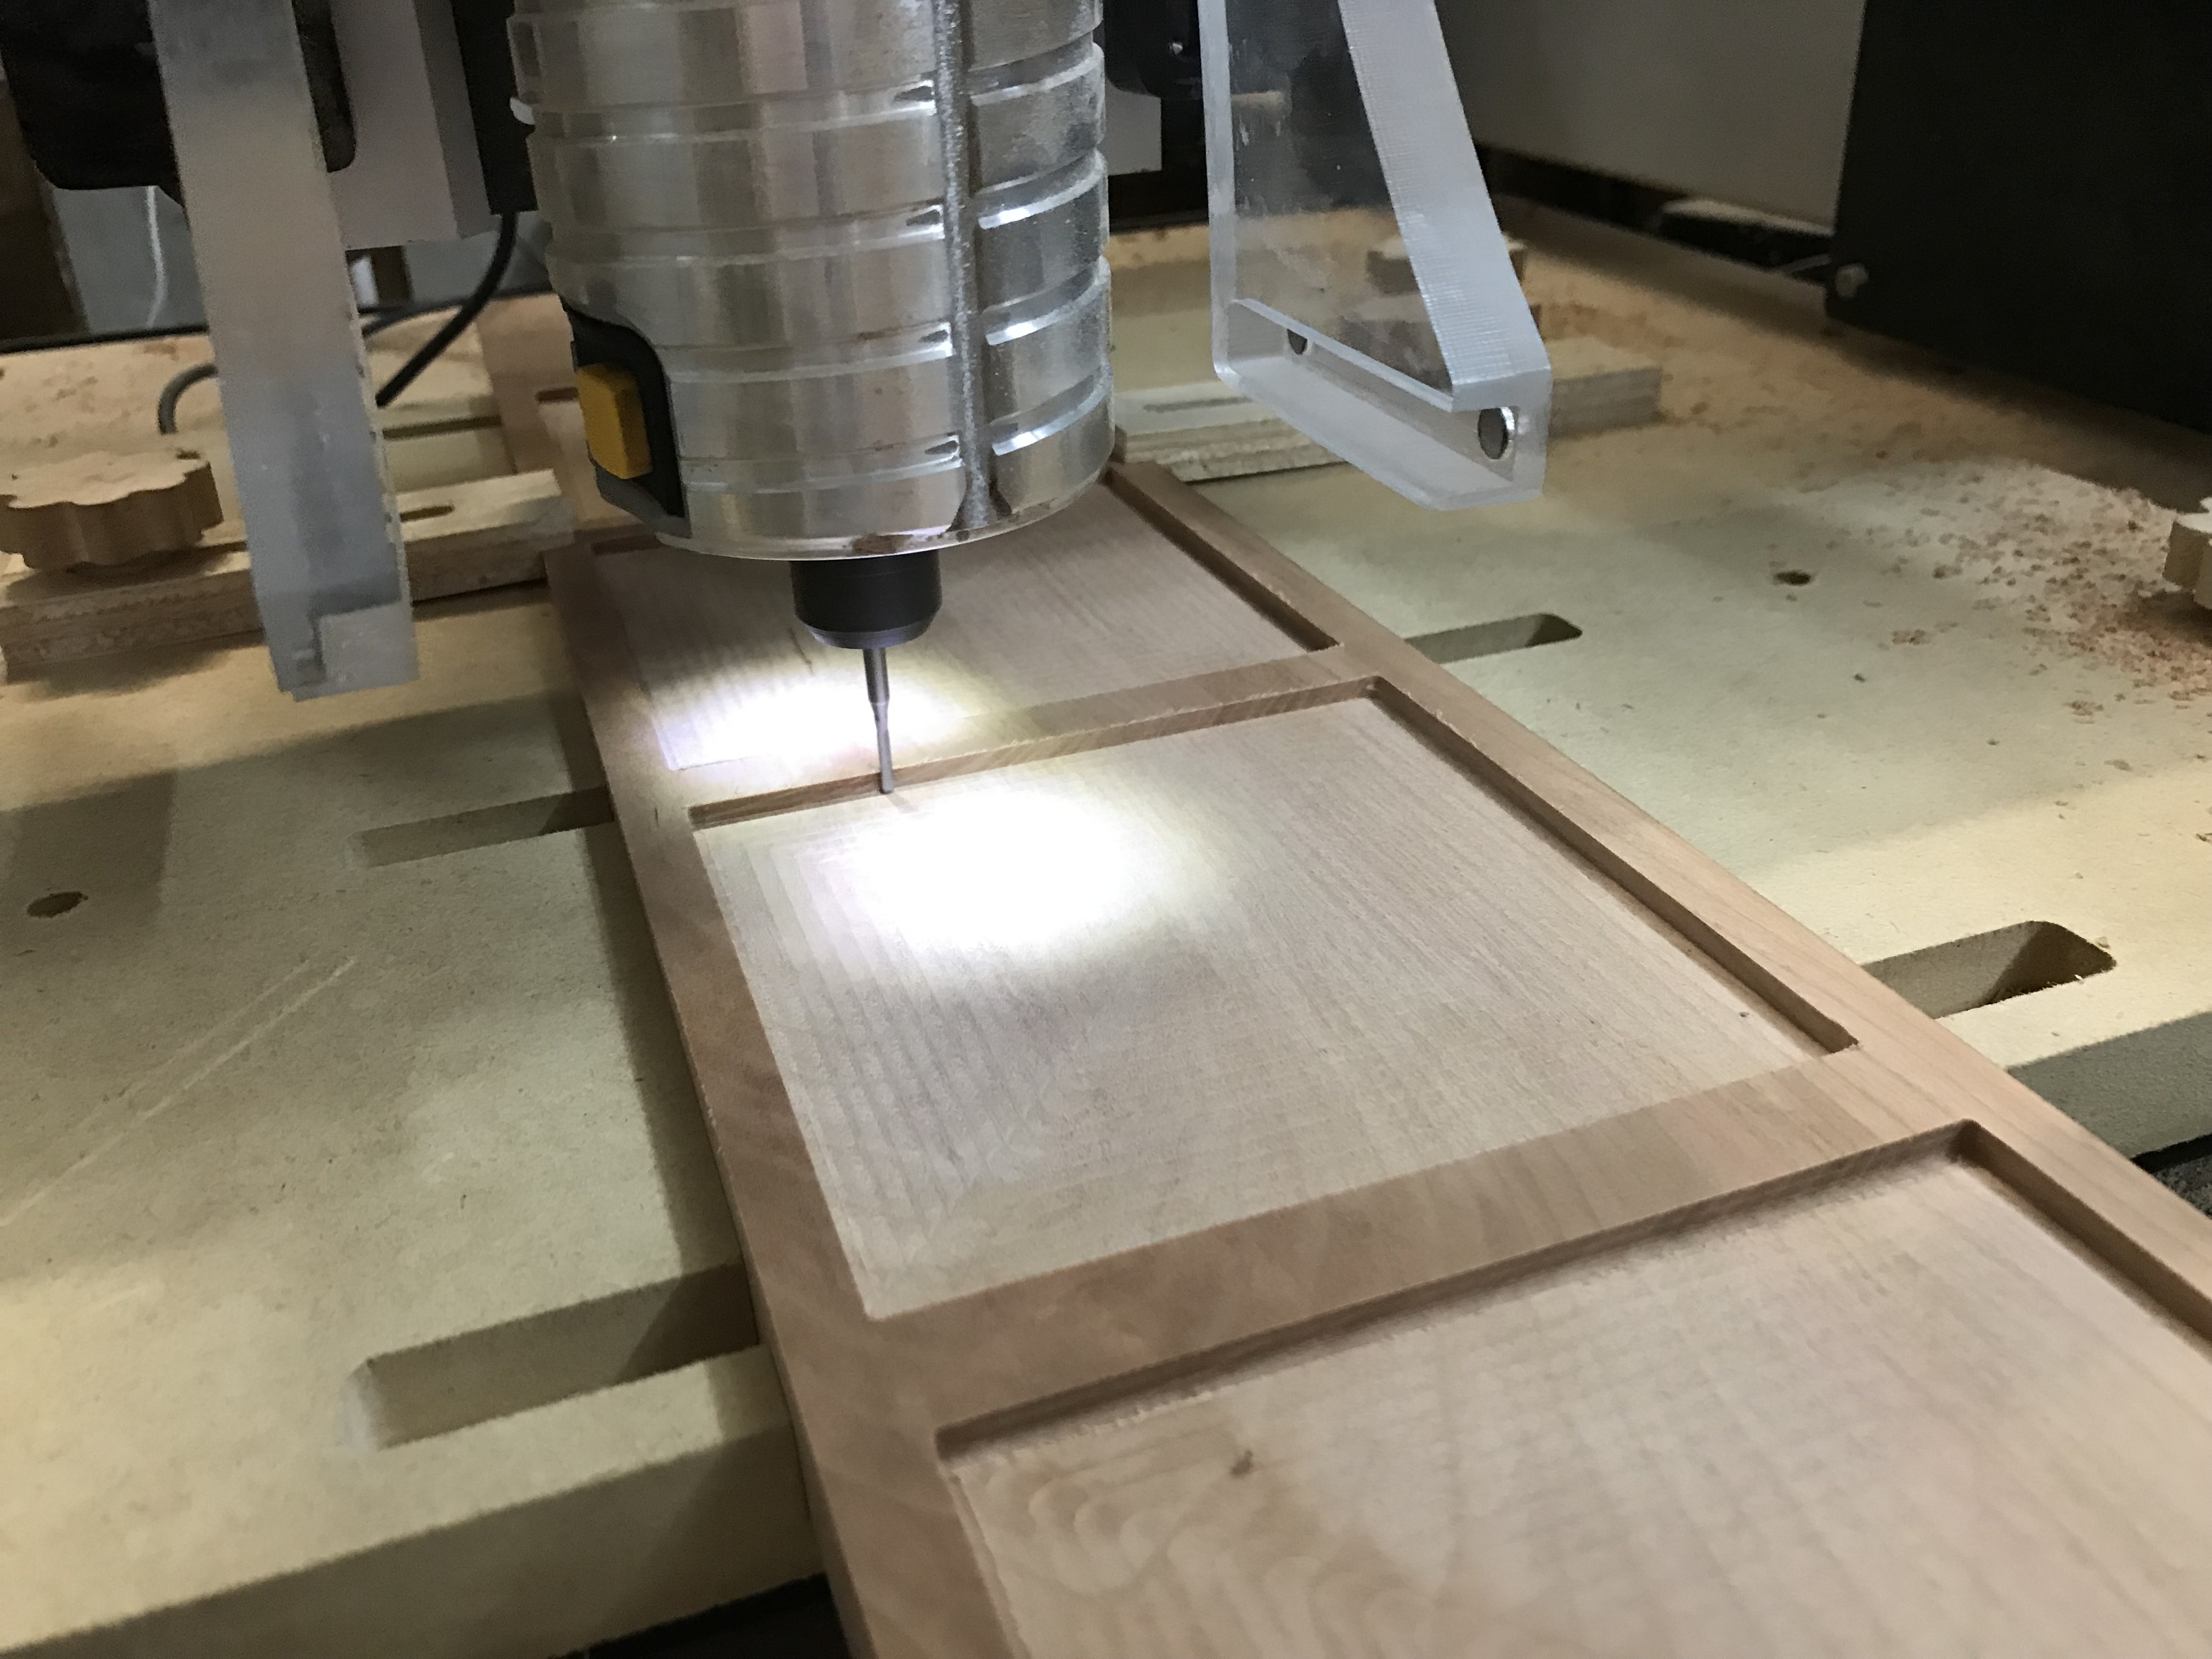
you also have like 3 inches to spare, so you could machine it such that on one side of your “corner piece” you have a 2 (or 3) inch lip where you cut the top half thickness off, and the matching other side (adjacent side) you cut a receiving cavity… that way there’s a 2" x 10" or so glue surface and you can puzzle the pieces together
and yes totally do something decorative on the edges where the pieces come together, as well as for the center point
Man, stop stealing my thoughts, this is uncanny
This is tempting, especially since I have been dying to find an excuse to do a large epoxy river table. What’s holding me is:
I really hate using my orbital sander, and have been using the Shapeoko itself to surface my epoxied pieces so far. Once assembled this piece would be too large to do that.
the table top will go in an environment that does not lend itself well to a “modern/stylish” look, so I’m thinking, wood only.
Ages ago, I was working on a box lid design where the lid was made up of diagonal 1/4 panels cut with a 90 degree endmill (they flipped, so the edge was angled up on the top/bottom pieces, and down for the left/right — this way the glue joint area was increased.
The center was designed as a circular part which had a very challenging geometry to machine — was planning on 3D printing it, but having a center medallion and pouring epoxy around it would be far easier.
I believe I still have the OpenSCAD files somewhere — this is typical for my projects, I come up with an idea, then hit an implementation roadblock because I want to do things which the CNC programs I use simply don’t make feasible (and I’m not willing to learn Autodesk Fusion 360, and haven’t found time to learn FreeCAD, and I object to taking the time to cut out what I see as a rough approximation using a tiny ball end mill).
EDIT: this is why I really want scripting/plug-ins/extensions for Carbide Create.
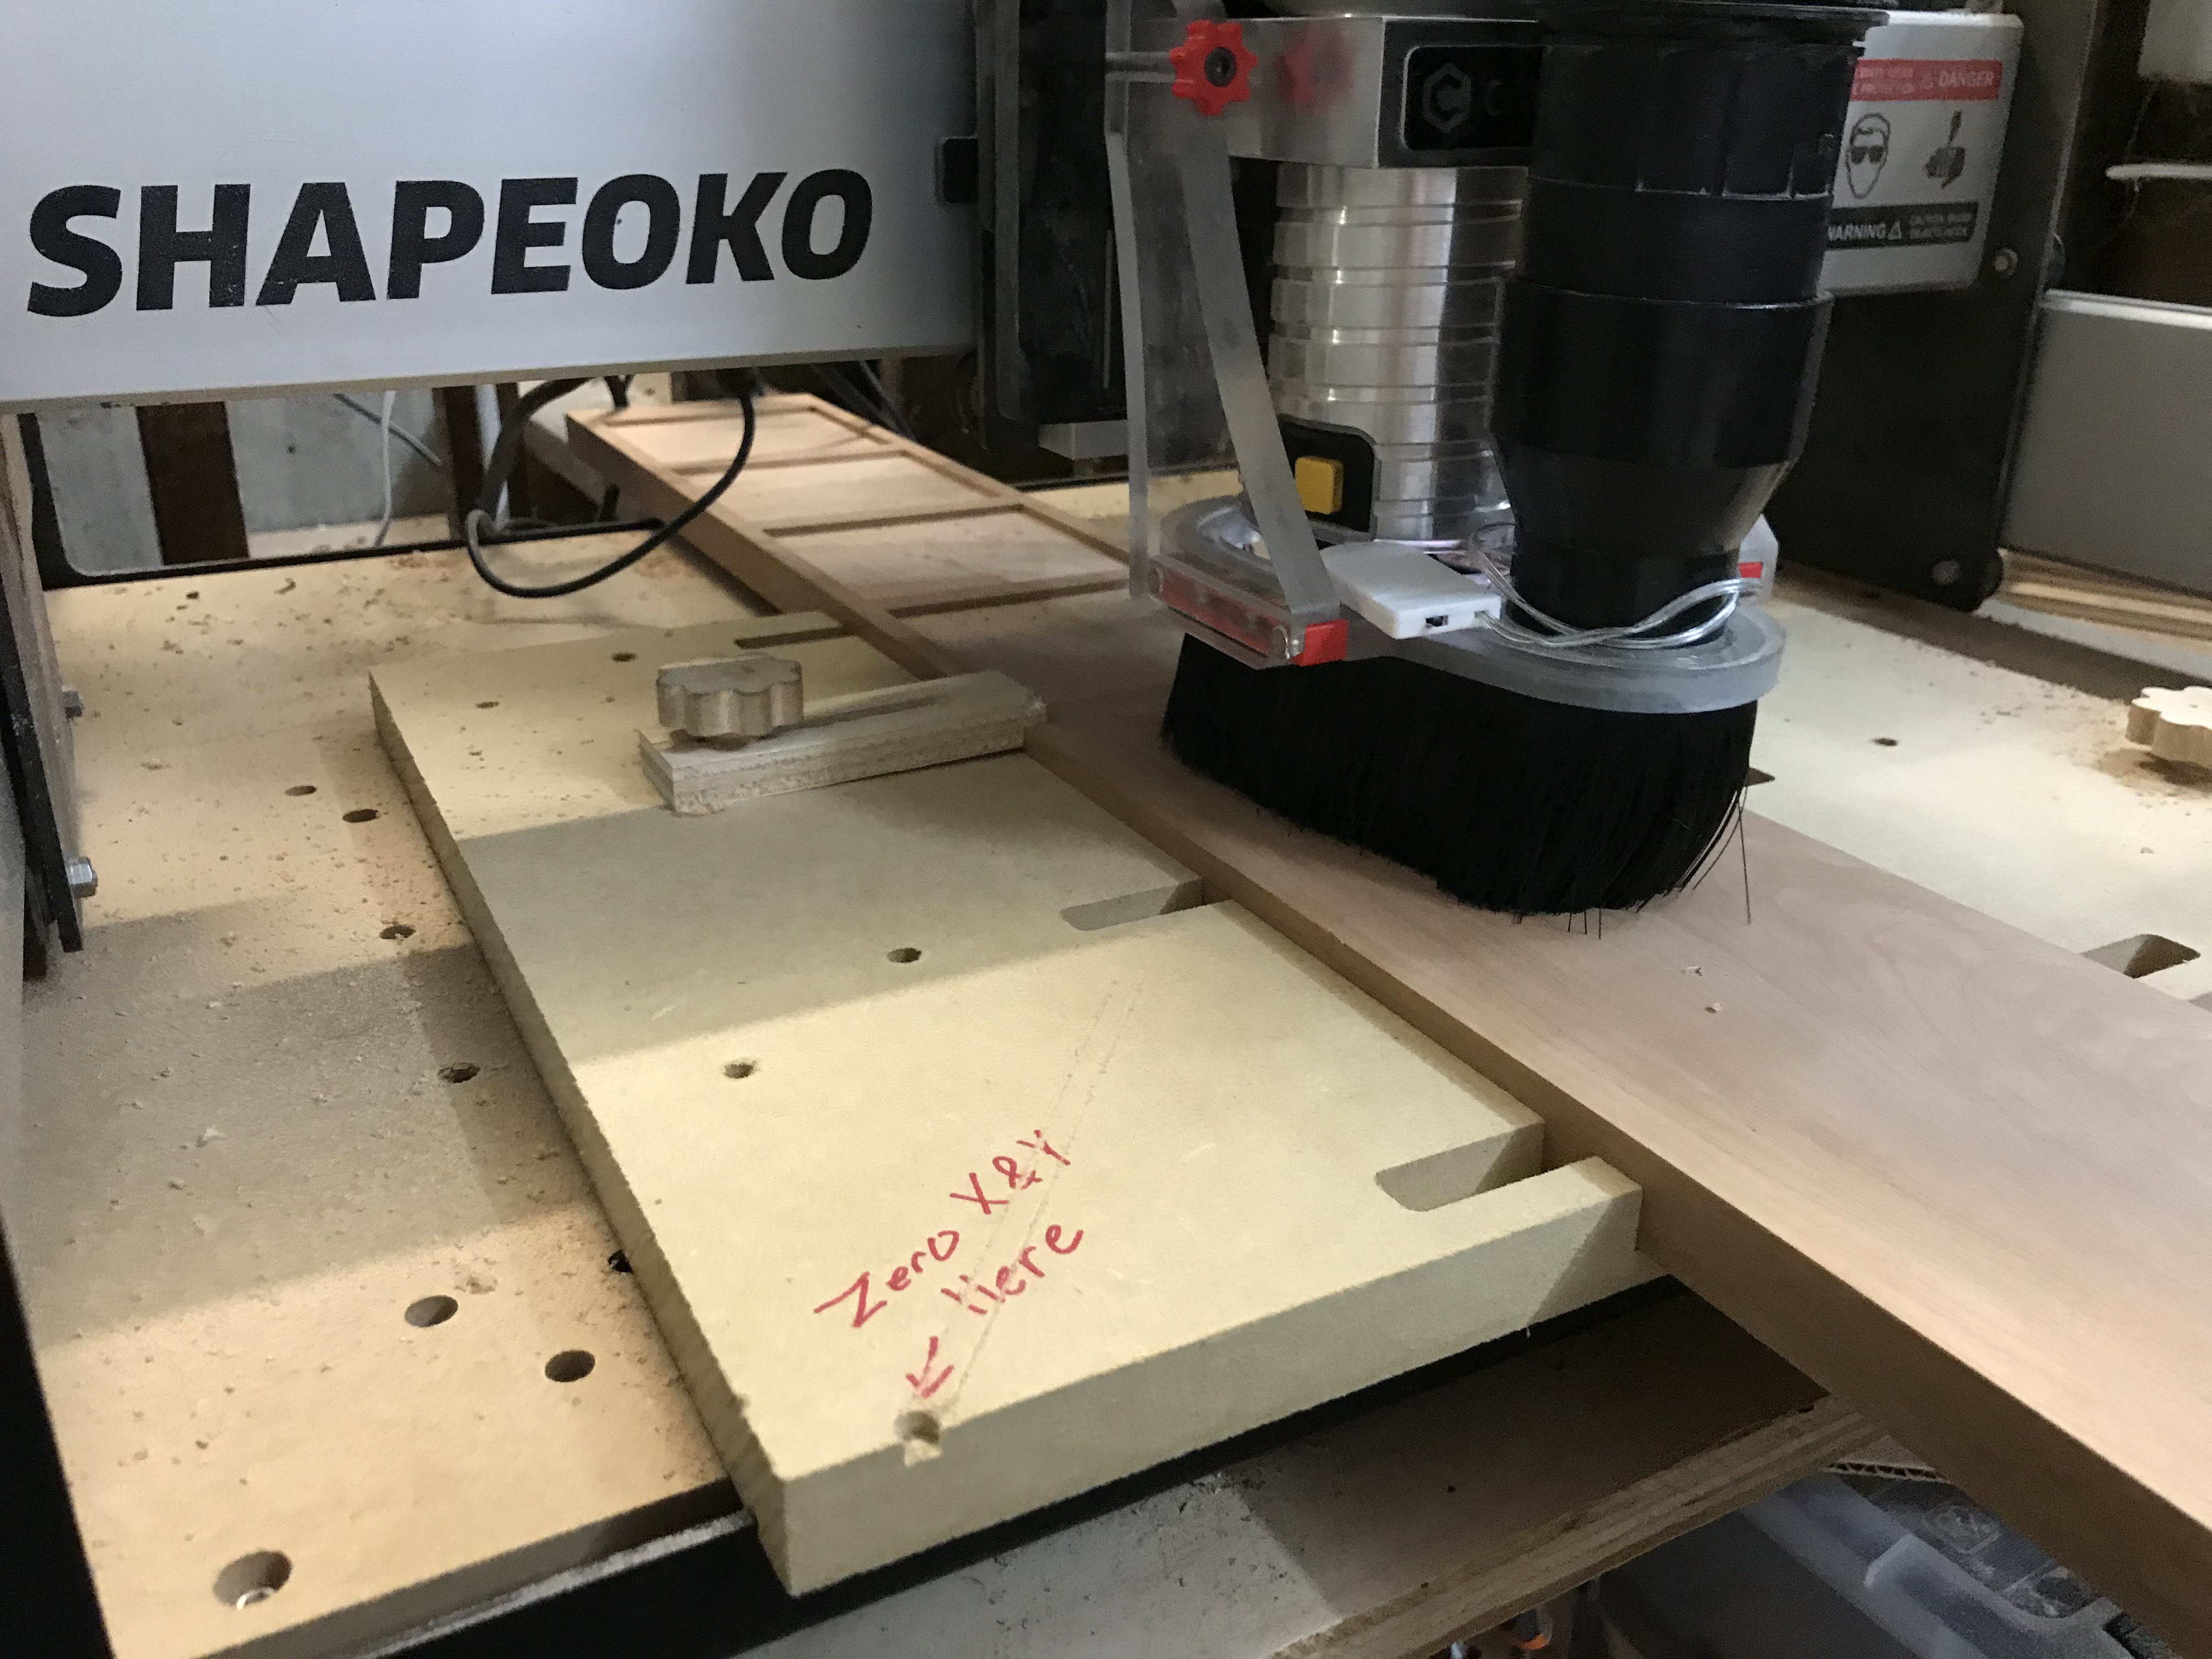
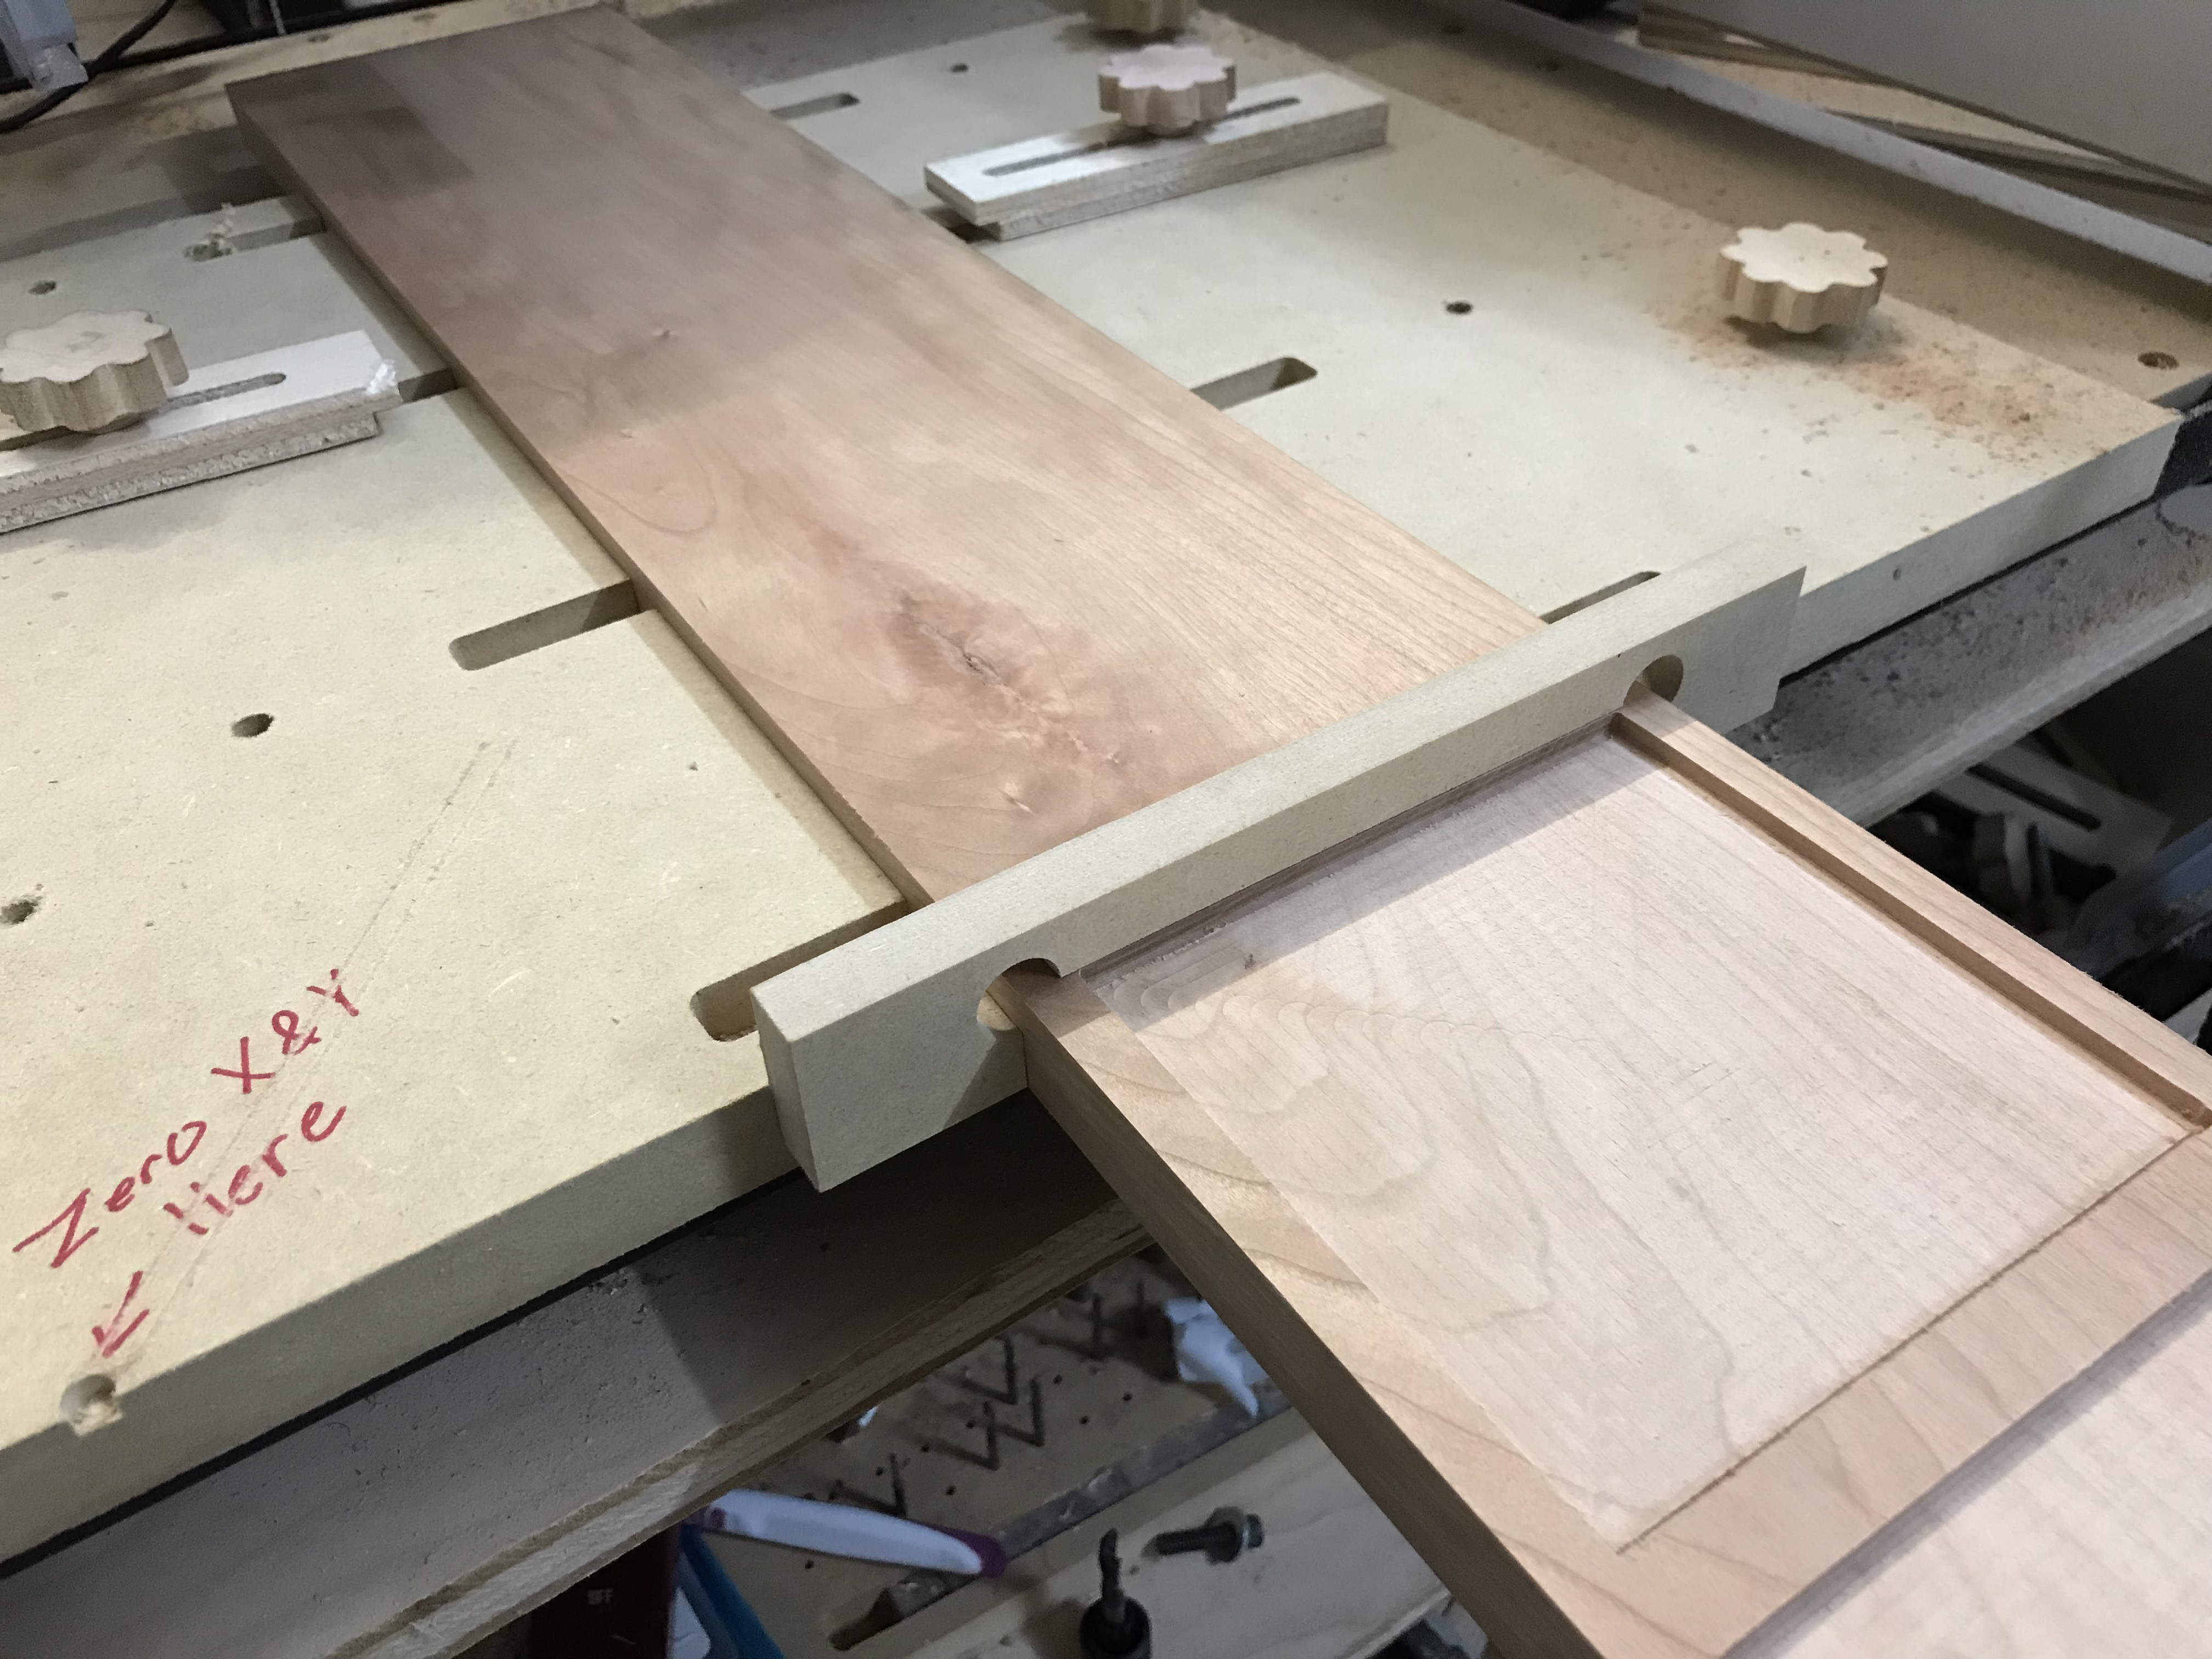
When I did my coffee table build I slide the long pieces through the back of the machine in order to cut the pockets I needed. You might be able to do something similar for joinery while keeping the length of your wood.
More like Ikea Mansion and the Manor of Home Depot
Oak, pine, beech come from my local hardware store, my bamboo supplier is Ikea, and I manage to find olive wood, mango tree wood and a few other types by buying trivets in home improvment stores nearby
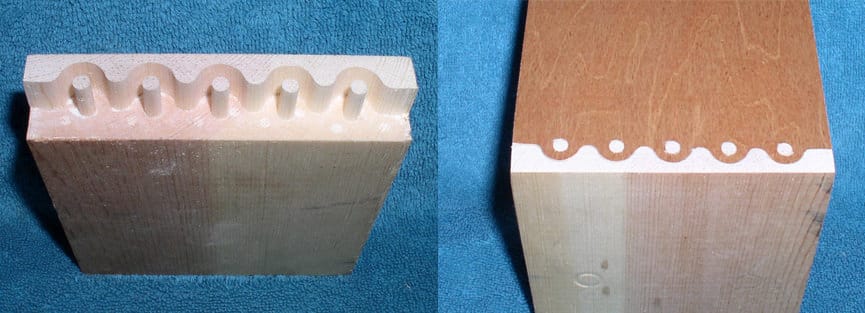
Unless I am mistaken, finger joints require vertical workholding in front of the machine, and unfortunately my setup does not allow it. I need to fix that someday, it can be quite useful.
 ⠀⠀⠀⠀⠀⠀⠀⠀⠀⠀⠀⠀⠀⠀⠀⠀⠀⠀