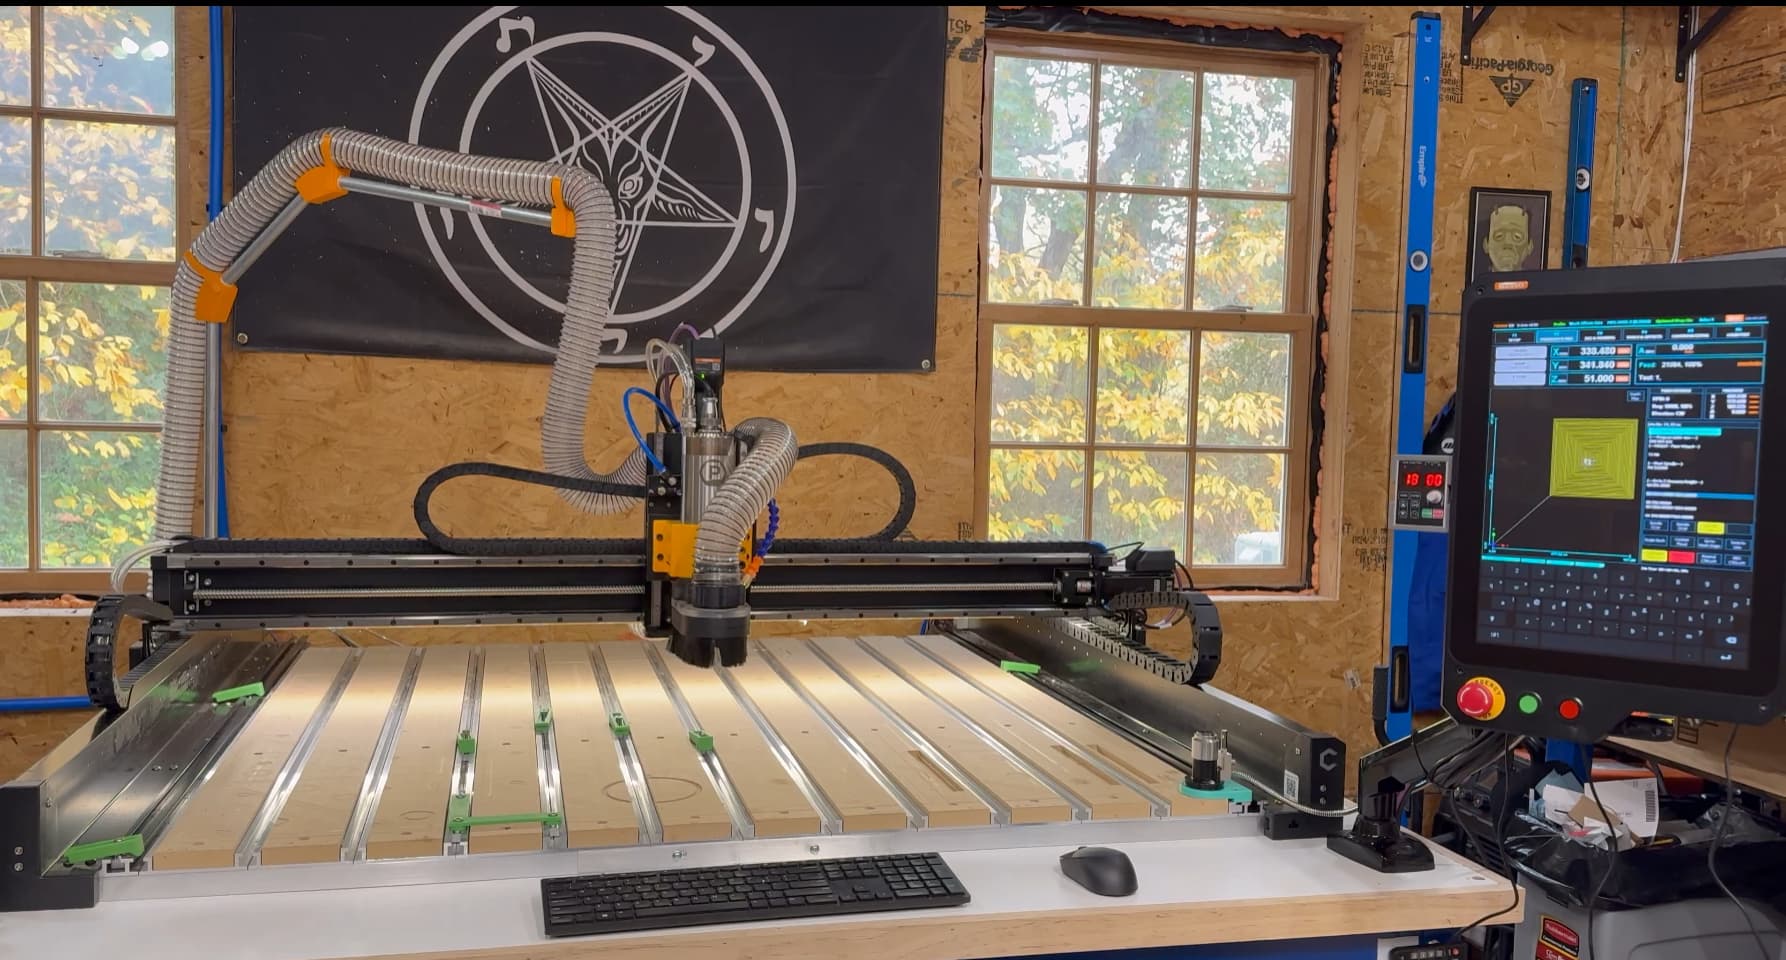
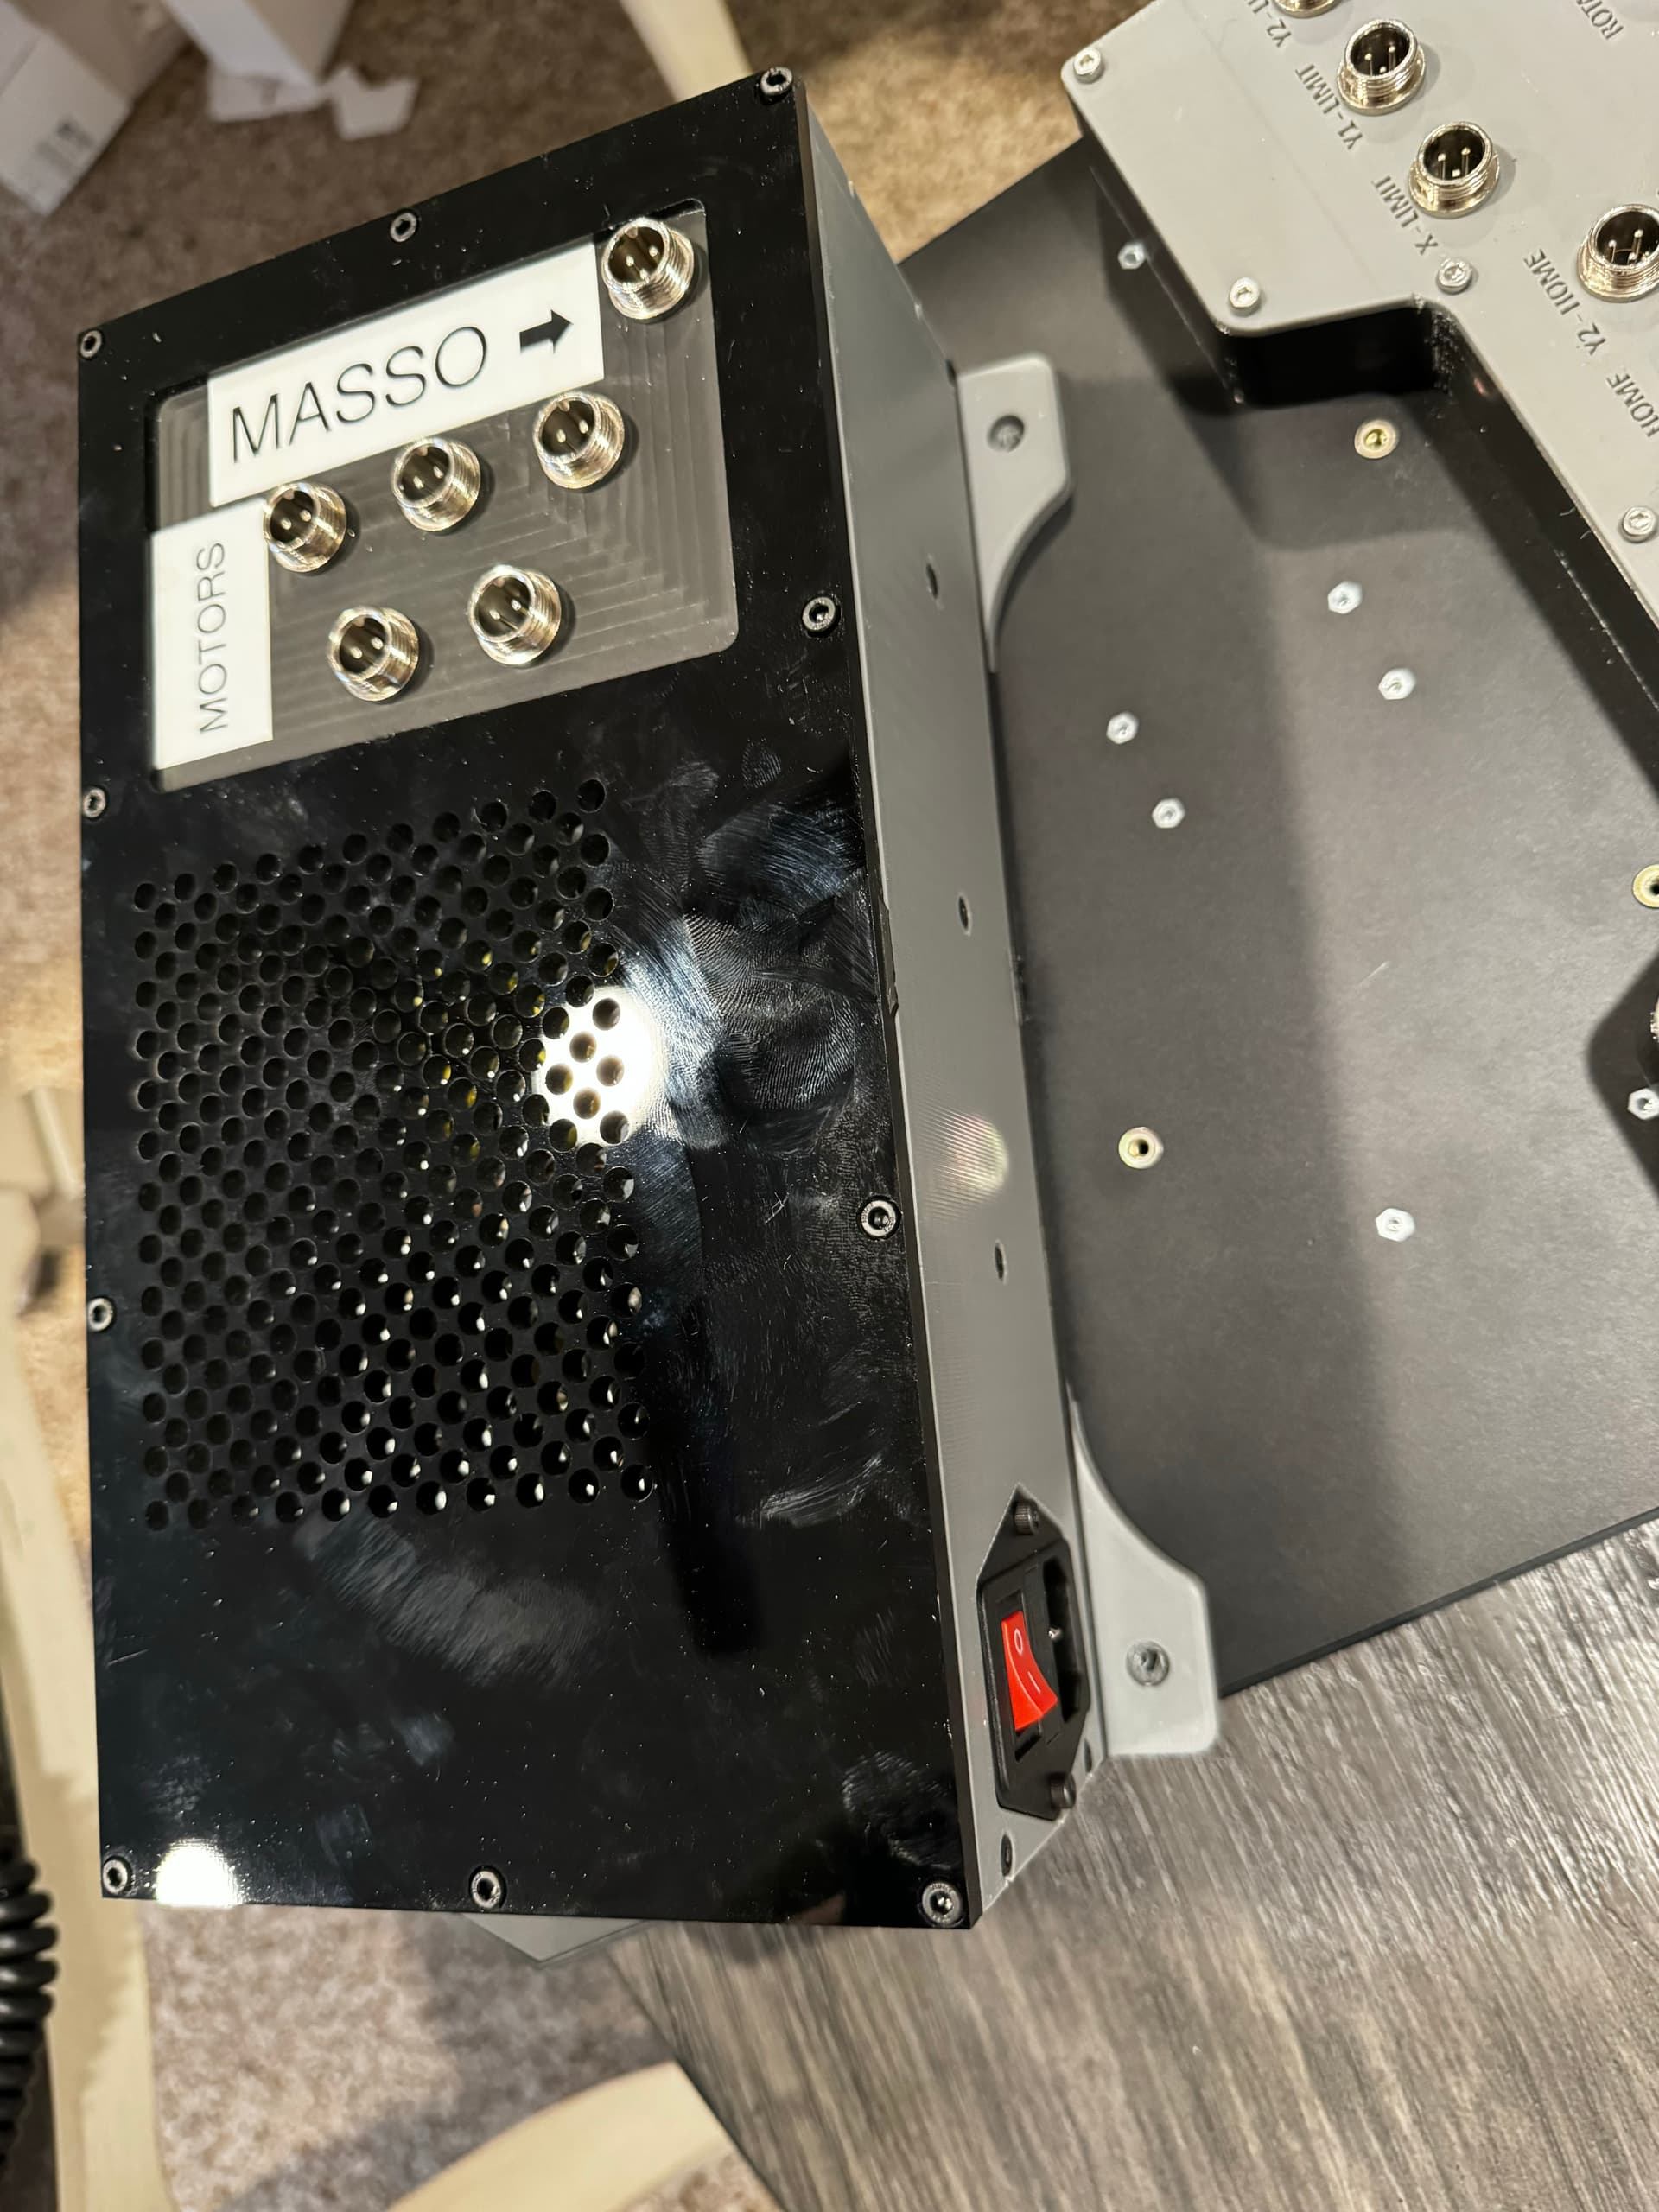
Just finished a Shapeoko 5 pro MASSO conversion. New steppers, sensors, pendent, cables, chains, and custom breakout panel and power supply. So far only have done some ghost cutting, but really like the increase power and controller options. I still need to figure out post processing and fine tune the lead screws. I am toying with the idea of putting together an upgrade kit to make it easy for others to do the conversion.
Is it cost effective? Is there enough of the machine left that you aren’t better off building the whole thing from scratch?
Cost is not for the faint of heart, but I think the Shapeoko frame and build quality is pretty great, I just wanted more power and control. In the couple months I have used the machine before the upgrade I found it more than capable for almost any job, but was missing some key things I wanted, like closed looped steppers. Also I had a few USB disconnects with the original Warthog controller that comes with the 5 Pro, that really bothered me. Another complaint I have about the Warthog, is that the PWM signal is extremely dirty and made it hard to control spindle speeds below 11000 RPM.
I would say if you have the machine already and you are looking for more power, stability, and overall control, the cost to upgrade is worth it. If you are looking to purchase or build a new machine from scratch, then this would not be the way to go. I am sure I could have cut costs dramatically if I went with cheaper stepper drivers and cables but felt like they were a worthy upgrade for my use case. I went with the 3NM closed loop steppers from MASSO, which are crazy fast on this frame. I probably over engineered my build when it came to shielding and proper grounding but I wanted to make sure everything was protected from EMI. The cabling that came from Shapeoko was pretty bog standard and didn’t have any shielding/protection.
My rough costs were about ~$2500 for the upgrade not including 3d printed parts I designed. Essentially $2k for the controller, steppers, relays, and pendent; $250 in IGUS shielded cables (not required), $20 in connectors, $25 in new home sensors, $30 in new cable tracks (not required), $100 for a new probe and bit setter (not required), $90 in new PSU’s.
I would say if I went with cheaper stepper drivers and kept everything else stock, it probably would of had a cost of about $1500. If I was to build a kit I would probably include the 3d printed connector panel, a custom PSU case, new proximity sensors, and machine specific cables. I might also look into a custom PCB to make the MASSO side of wiring easier.
9 Likes
What steppers and drivers are you using?
While this is super cool, I’m not sure the cost to performance/feature ratio is there for most users. But that could just be ignorance on my part with not knowing all the features you would gain with the masso controller.
Agree this not budget conscious. I will say the MASSO opens up a tons of possibilities when it comes to other add ons. I plan on installing an automatic tool changer next and also some pneumatic controls for the air assist but that’s just scratching the surface of what the controller can handle.
3 Likes
This is sick. Pretty close to what I’d put together for my “dream” small business machine.
$2500 is a lot, but tbh not THAT awful, that’s less than I’d have guessed.
1 Like
I know C3D are mostly about selling turnkey solutions but if they sold the SO5 hardware without electronics I would snap it up in a heartbeat (even with a paper slip in the package saying you don’t get support). As it is, I have been sitting on the fence whether to get one or not.
5 Likes
I’m doing this same conversion on my HDM soon with an ATC would you mind sharing your wiring diagram and Masso settings? What made you use different proximity sensors for homing?
I would be interested in a upgrade kit if it were in my price range.
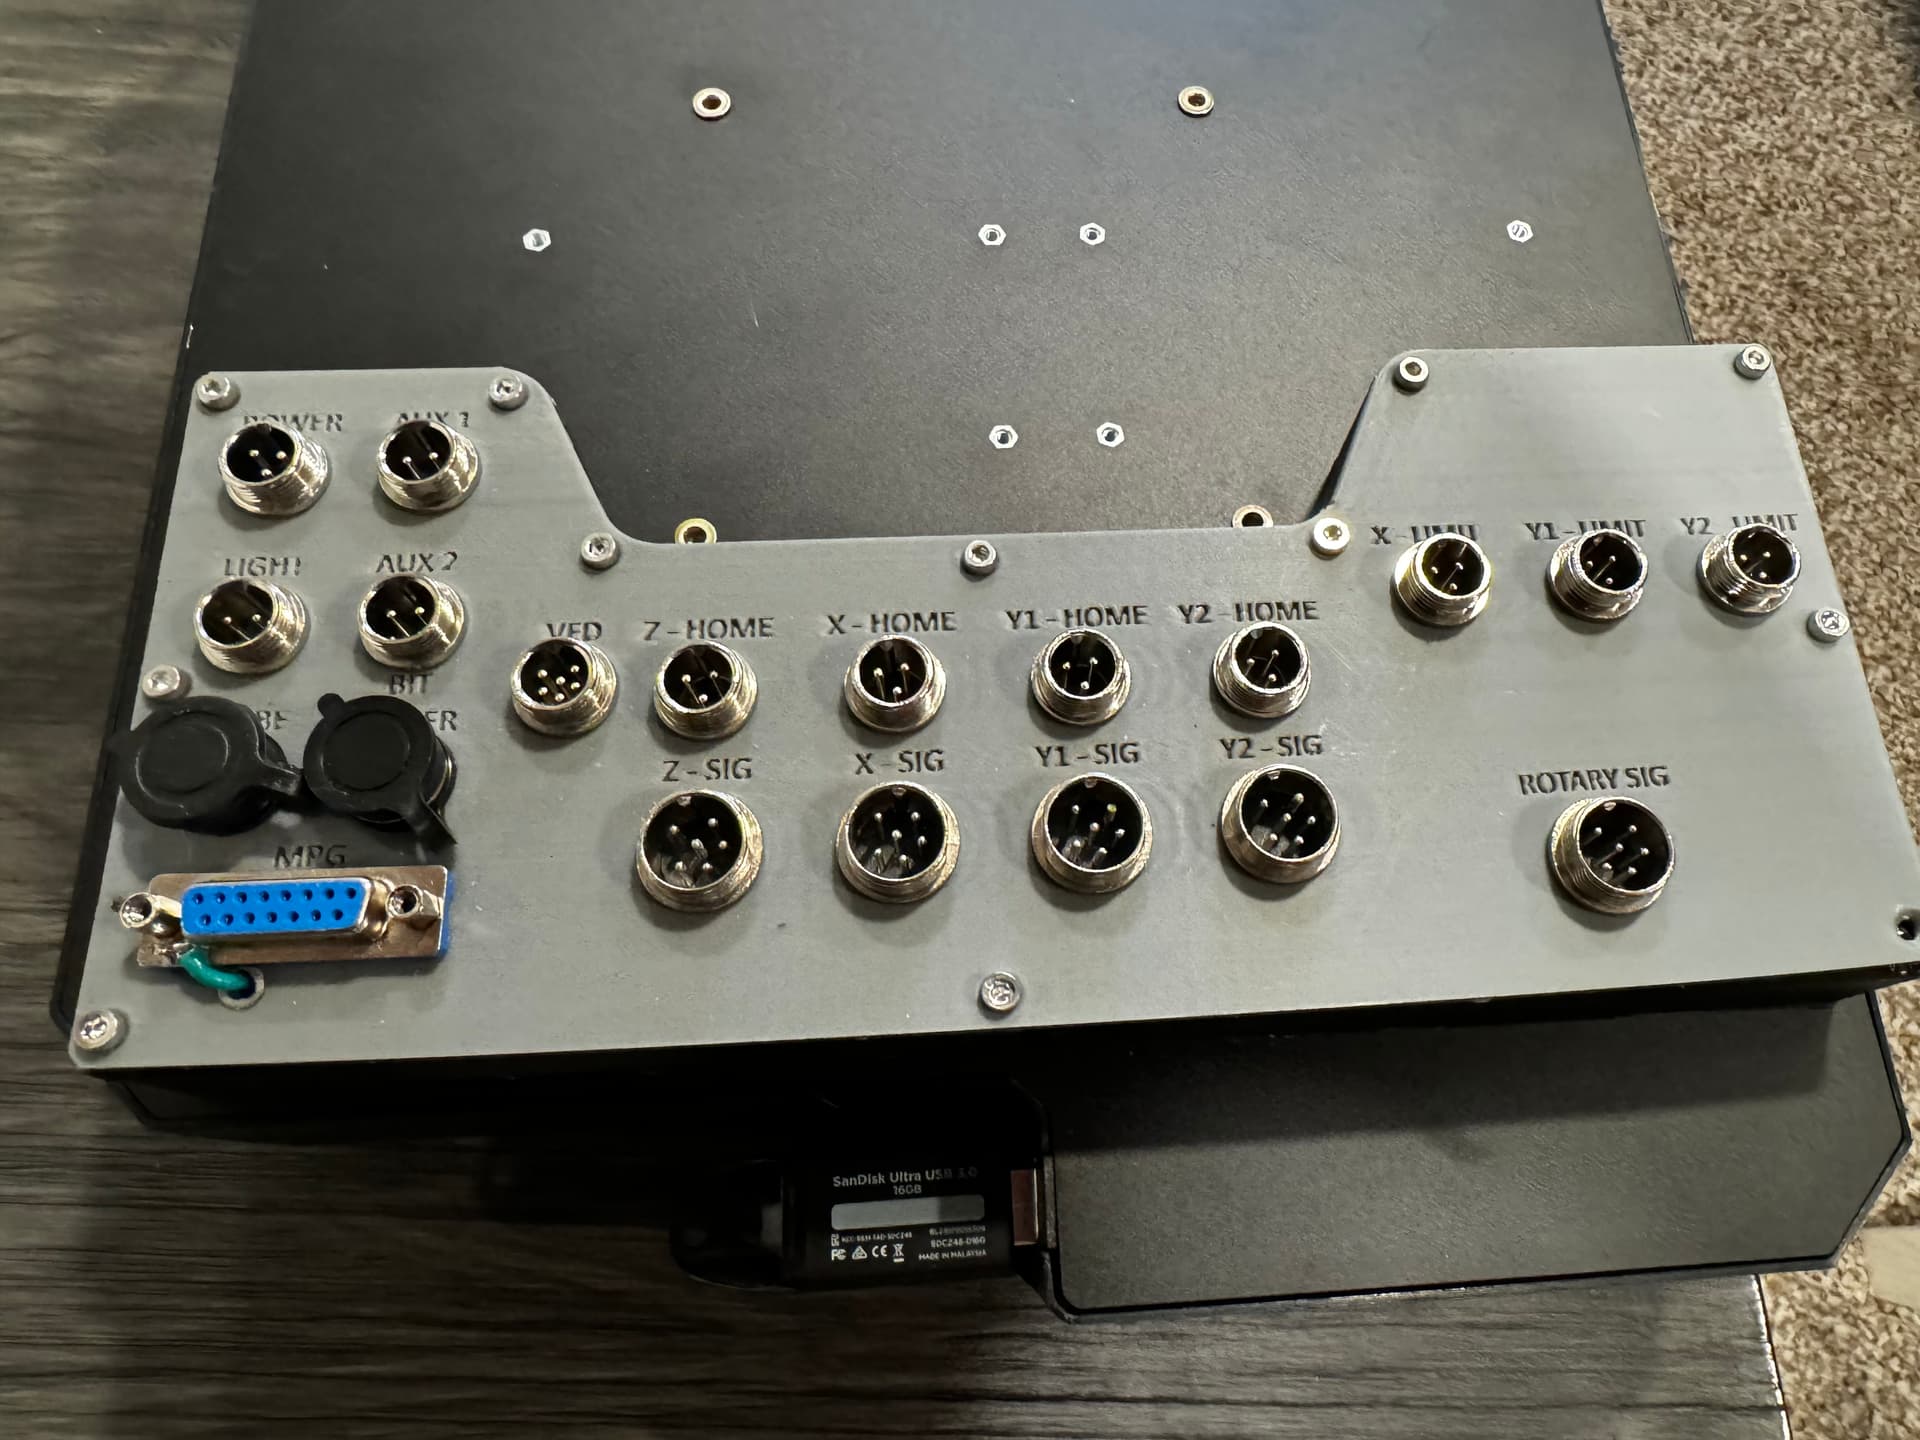
I don’t have a comprehensive wiring diagram, I essentially followed MASSOs documentation per component and terminated to aviation connectors for each circuit. Since I wanted to keep everything in the controllers case, my wiring is very cluttered. If I do make a kit I likely would design some custom PCBs and make it so you would only need short jumpers inside the MASSo. The only reason I didn’t go that way with the initial build was because I was having problems finding pcb mounted gx12 and gx16 connectors. Everything I could find was panel mount. If I went with Molex style I could probably make it work, but lose out on the EMI protection. I realize for most folks they probably don’t care about EMI as much.
I originally was planing on using independent stepper drivers and then making a wiring harness that went from the MASSO to a drive enclosure that the original Shapeoko harness would plug into. After evaluating the complexity, lack of EMI, and the fact that I would need to create a second set of pigtails connections I decided to bite the bullet and upgrade the steppers and all of the wiring.
The reason I swapped the sensors was because the carbide3d ones seemed to be custom and went low when triggered instead of high. In my testing with MASSO I couldn’t get them to register. New generic sensors were only about $20 for a bag of 6 and have the exact same form factor. So rather than trying to troubleshoot them further I just swapped them out.
2 Likes
That may be because one set is NPN (active low) and the other is PNP (active high), it’s common for a sensor interface board to be set up for one type.
1 Like
Can you post a link to the PnP sensors you used. I was going to use some of the factory parts like the VFD, power supply, and sensors but now I think I will just leave them fully assembled and just make a completely new motion control enclosure setup and possibly sell the whole plug and play C3d motion system with the 2.2kw spindle to offset some of the costs.
Thanks for sharing your build I look forward to seeing it fully decked out with the ATC. I got the JGL 2.2KW 24k ATC sitting on my work bench just waiting for the rest of my components to get going.
What 36v power supply did you go with? 4 3nm steppers can pull 4 amps each maxed out so I’m looking at running 2 9.7 amp Meanwells because they are more affordable compared to a single larger 16amp supply.
I went with these sensors, but I no longer see the 6 pack listed only individual ones.
I went with one 9.7 Meanwell, my thinking was that most carves are really only accelerated at full tilt for a few seconds at a time and seldomly engage all 4 steppers. So far so good, but if I start getting drops I’ll probably get a second PSU.
I’m super interested in your ATC, would love to know how you go about it.
There are not only NPN vs. PNP sensor types, but each of those types is available in NC (nomally closed) and NO (normally open) variants.
When conventionally wired (NO) NPN transistors pull the output low (toward ground) when active, PNP sensors pull the output high (toward their positive supply) when active (imagine NPN as a switch to ground, PNP as a switch to positive supply).
NC variants still pull in the same direction (toward ground for NPN, toward + supply for PNP), but have an extra stage that inverts the logic (so NPN NC is grounded when inactive, PNP NC is pulled to the + rail when inactive),
1 Like
I am aiming for a 12 tool retracting rack similar to Diy Engineering’s setup. I like the retracting tool rack and already have some MGN rails with slider blocks on hand from another project that I can use.
1 Like
This is a great build! (just saw your post on FB).
I guess you’re planning on doing the PWNCnc ATC set up they’ve been working on which is why you started down this path or you just wanted the extra power and control?
1 Like
What did you design in for the 3-D printed parts?
I was always planning on an ATC and have some ideas for other additions, like a rotary. Still not 100% sure if I am going with PwnCNC, since I did some custom connections I would have to probably make more cables. Also when I factor in the costs of the upgrade kit, it starts getting close to the CNCDepot FM30C costs, just would need to setup my own pneumatics.
Mainly Fusion 360, but I did end up using vcarve for the psu plates.
May I ask what resolution you get with this controller/steppers?
Thanks