I spent a few hours last night with an offline version making notes on some of the details I thought may improve the overall doc.
There really is a lot of amazing work here, I am presenting this with all the best and I hope this does not come across as nit picky and is taken as constructive feed back. also I only made it about halfway before my eyes when cross and the time was late.
the margins top and bottom can be shrunk way down. imho. there is gobs of paper that is not getting used. I like the idea of 3 ring binding it, or some other way of printing and binding that I can do myself. so keeping the inside margin largish is nice and the outside of the page is nice to have some room for personal notes.
many of the hand drawn images are showing up too small to read on the printed page. eg. the first image in the GRBL Motion Control section. just before “first there is a reception buffer”. This is a shame as there is some really good info in those pics.
“Runout / TIR” page 41 - chapter head does not, as far as I can tell, explain that TIR is Total Indicated Runout maybe it is somewhere else. the other chapters that you are using initials you have indicated what it stands for right after the chapter heading. oh I see it shows up in the chapter on “Managing Runout” near the end page 155…
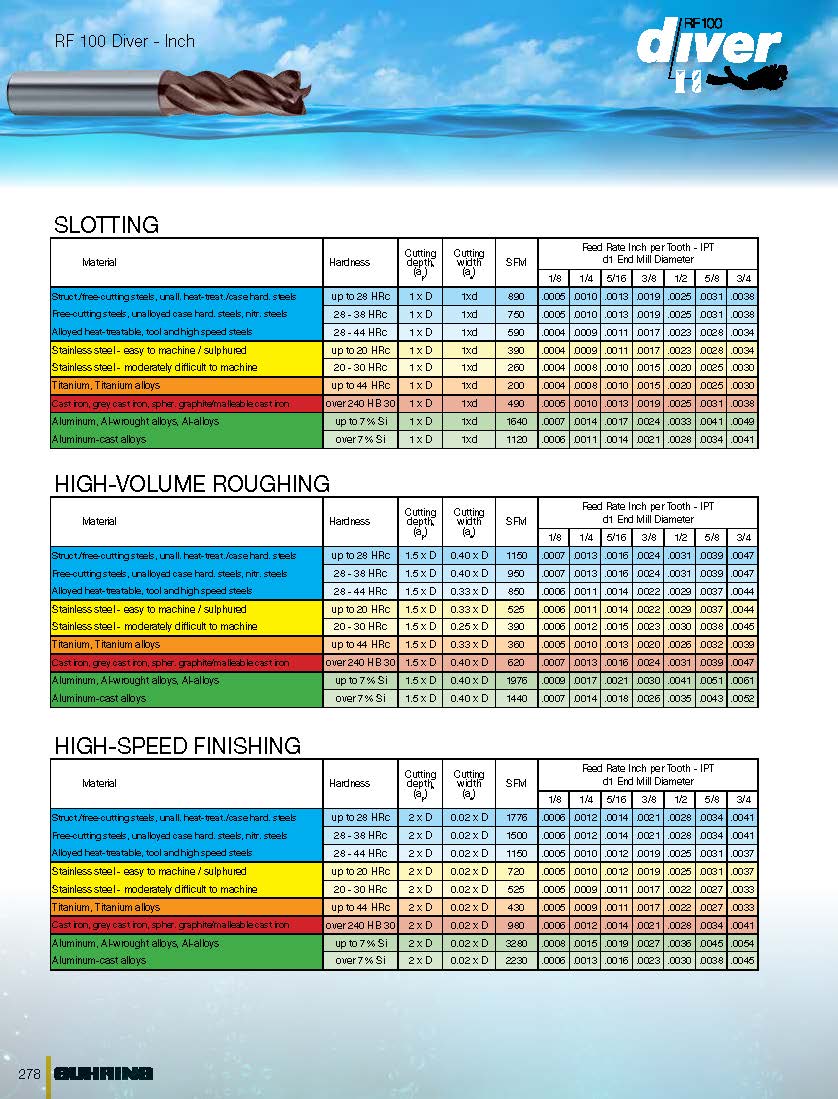
Shapeoko chiploads guideline - I’m guessing that there is a table of chiploads, however it is just showing up as a big list of numbers, and is nearly unusable.
Tramming the router / spindle - this section uses larger images and are pushing all the text to the next page so the larger margins should fix this, however slightly smaller images would fix this as well…
Safety considerations - Now this is getting a little into style but hear me out… I think the bolded sub headers of mechanical injury: respiratory hazard: and fire hazard: should be title case eg. Fire Hazard: for that mater there is a number of places that this could apply, I think it helps the eye scan quickly across the page and pick out the key points and help your eye get foot holds on things that are important
I think people with a cnc’s that is running a 1/4 shank router’s need to stop looking for chips and start looking at the results of your cuts. And slow down your speed rate and depth of cut until you are getting nice cuts with out the chatter marks of your wood. then you have found the sweet spot for you speeds.
That is the nice thing about CM that you can speed things up .
Jeff
You mean slow down your feed rate (IPM) rather than spindle speed (RPM) - right? High speeds are good because they reduce cutting torque - and hence forces on the machine and workpiece. Reducing feed rate also reduces forces, as does reducing depth of cut (DOC) and/or width of cut (WOC) per pass. But, IMO, its better to reduce WOC than DOC whenever possible to utilize more of the endmill’s cutting length to reduce wear.
I also agree that people shouldn’t be trying to make wood chips rather than sawdust with either routers or HF spindles on hobbyist machines. Handheld and table mounted routers have been making sawdust for decades, and the required operator/machine force levels are pretty comparable.
Minimizing the overall cutter stick-out from the spindle’s load bearing supports (V-Wheels, linear guides, etc.) reduce the detrimental effects (vibration and deflection) of the cutting forces.
You have to look at the cut and if you are getting burning on your cut it could be contributed to rpms of your spindle,and moving to slow, not all bits should run a full rpms. In my opinion this is something that is learned by listening while your cutter is cutting and make adjustments for chatter and burning by stepping up the feed rate and changing the rpms.
When you say WOC are you talking about the stepover of the tool.
Jeff
What bits do you run at speeds less than what they’re rated for? I think of WOC (ae) as the radial (horizontal) engagement (depth) of the cutter in the material and DOC (ap) as it’s axial (vertical) engagement. So WOC is the result of the stepover process.
I’m working on v3 of the e-book, and I would appreciate if someone was willing to share a couple of pics for me to use in the book (I’ll give due credit) to illustrate:
the Z-plus upgrade/option
vertical workholding fixtures in front of the machine (I’m looking at you @luc.onthego )
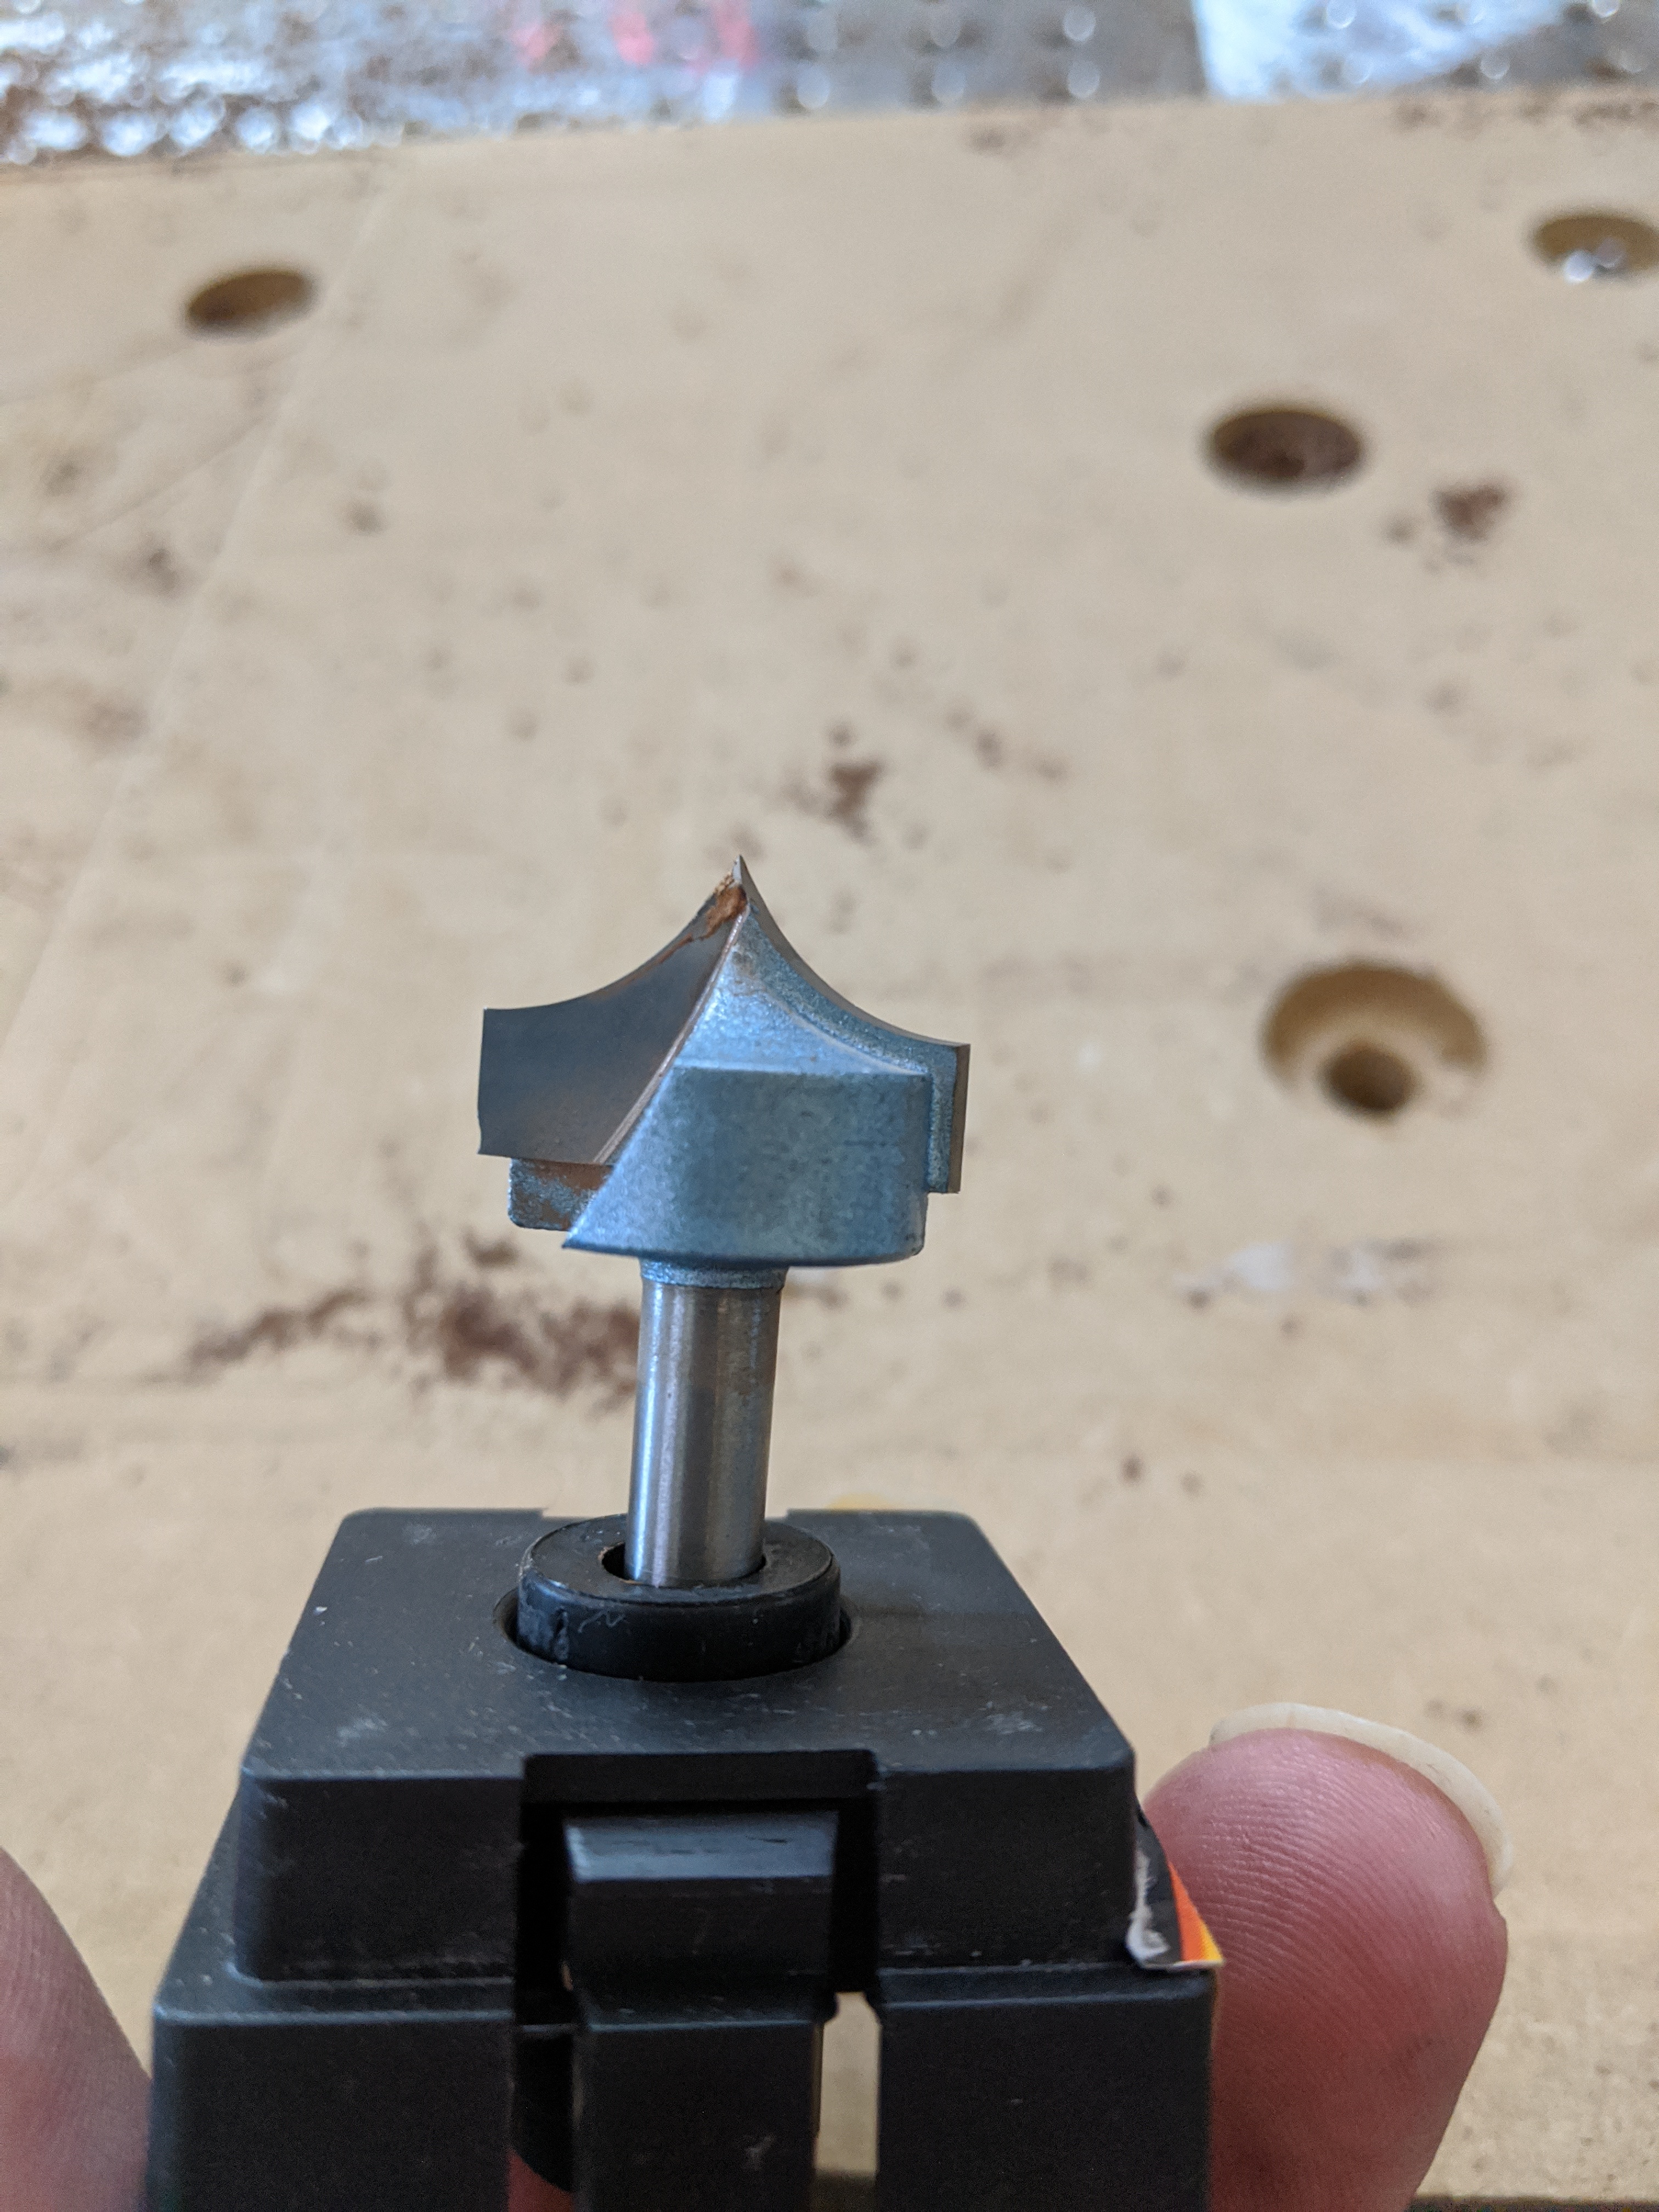
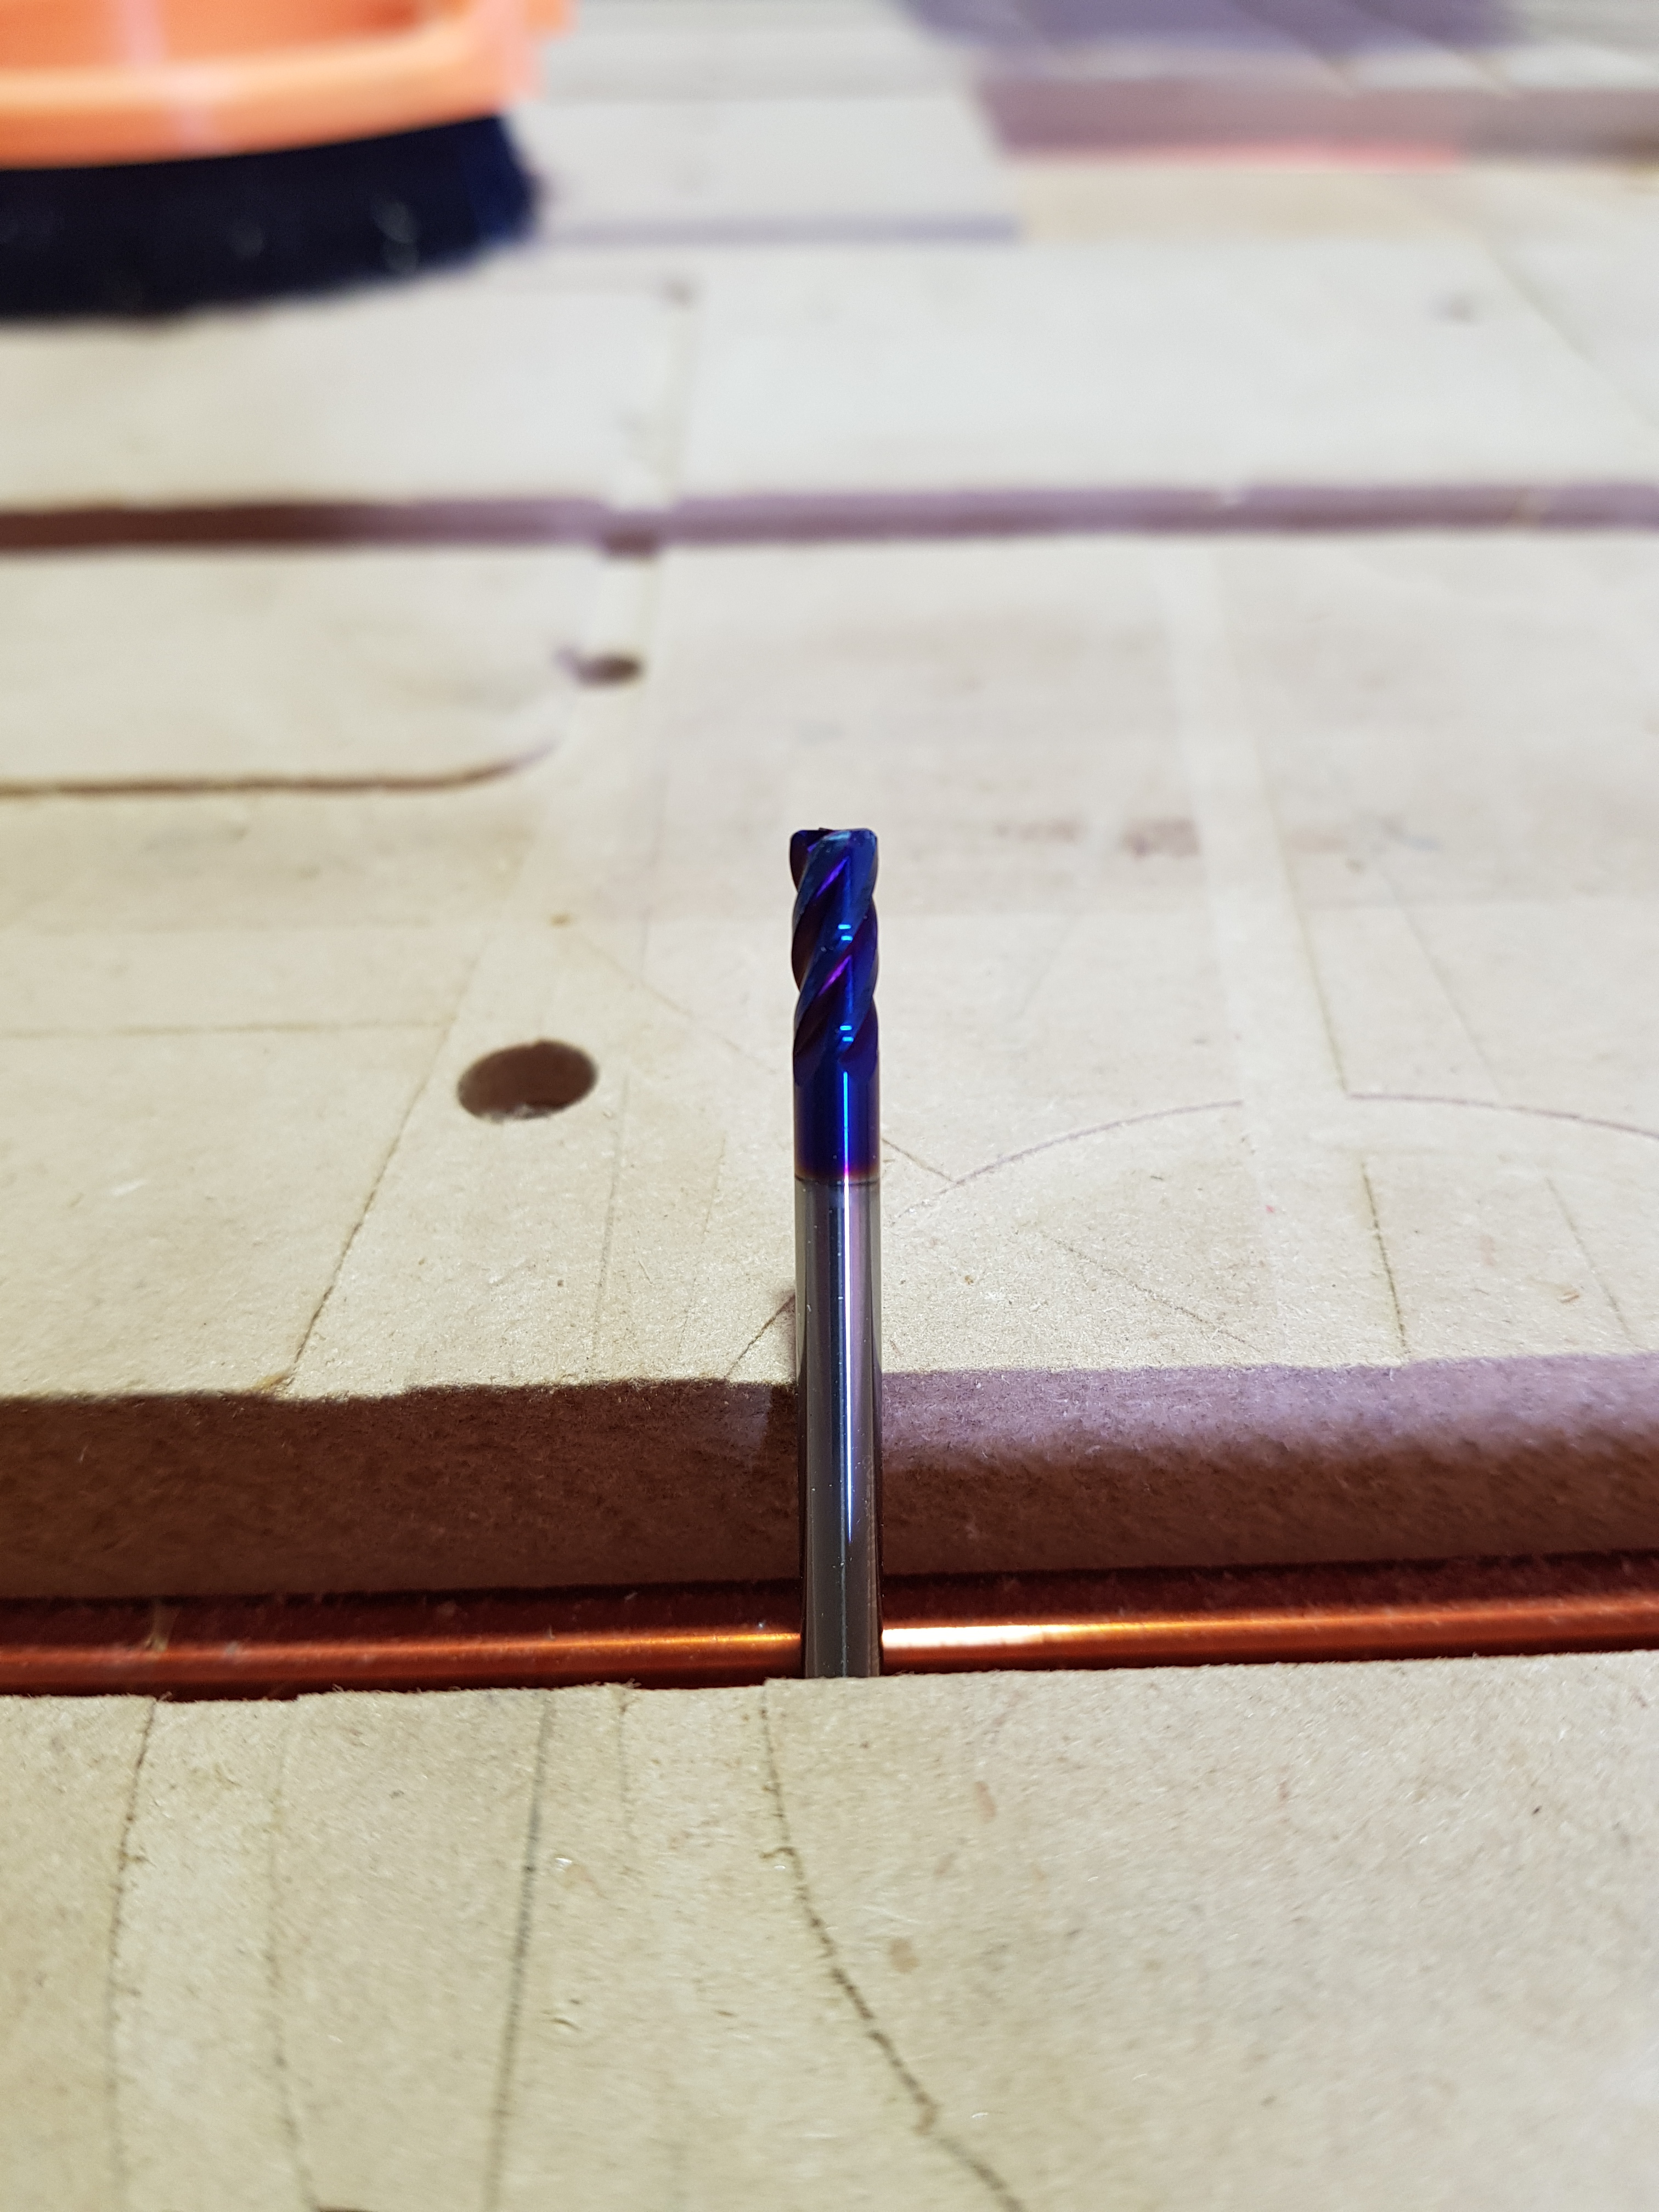
close-up shot of a corner radius endmill
If so, can you please PM me said pics (or just post them here and confirm that you are ok with me using them in the e-book) ?
What I had in mind is kinda like of the first one, but smaller, basically a square endmill with a small radius. Halfway between a square endmill and a ballnose. But I’ll take those router bit illustration too !
first one is a ‘bowl bit’ … @wmoy has various videos with those in it, and they’re really great for making the insides of boxes/trays/etc … a ballnose would leave ridges, but this one will (with reasonable stepover settings) have a perfectly flat bottom while having the edges of the pocket rounded
Honestly I haven’t had time to test it, my wedding is coming up and I’m in full production mode on the shapeoko and the laser, it’s all timber, nothing aluminium that I can use it on