Wondering if shapeoko will offer a Shapeoko HDZ and 80MM Spindle Mount.
5 Likes
I was hoping it would be arriving any day now…
3 Likes
The plan is to have an adapter plate for the Pro units which allows fitting the HDZ which will then allow the use of the 80mm spindle mount.
Please contact sales@carbide3d.com for any information which can be shared.
4 Likes
Any idea when the adapter plate will be available? Also dose the pro come with Carbide Create Pro?
Please ask the folks at sales@carbide3d.com
Carbide Create Pro is a separate product and not bundled:
2 Likes
I wonder how many emails sales got to ask this question… I’m also very interested in this option.
1 Like
It’s likely Carbide will make a new HDZ specifically for the Pro and Shapeoko 4. The new HDZ ia probably a month or two out right now.
2 Likes
We’re working on it. We tried a couple of solutions to adapt the current model 4, but it wasn’t an ideal solution. We’re working on a specific 4 and pro model now.
5 Likes
Ken
In a way they do… They don’t make it easy nor was it helpful for me to buy a Pro and the HDZ and then find they don’t go together. I wrote Carbide 3D and the legendary support wasn’t there. I was offered a refund for the HDZ if i returned it.
Given that I’m in the UK, have paid shipping, duty and VAT tax on top, and would have to pay shipping again and try to reclaim the taxes and then spend all over again in the lottery to get a working solution, I decided to give it a miss and do my own thing.
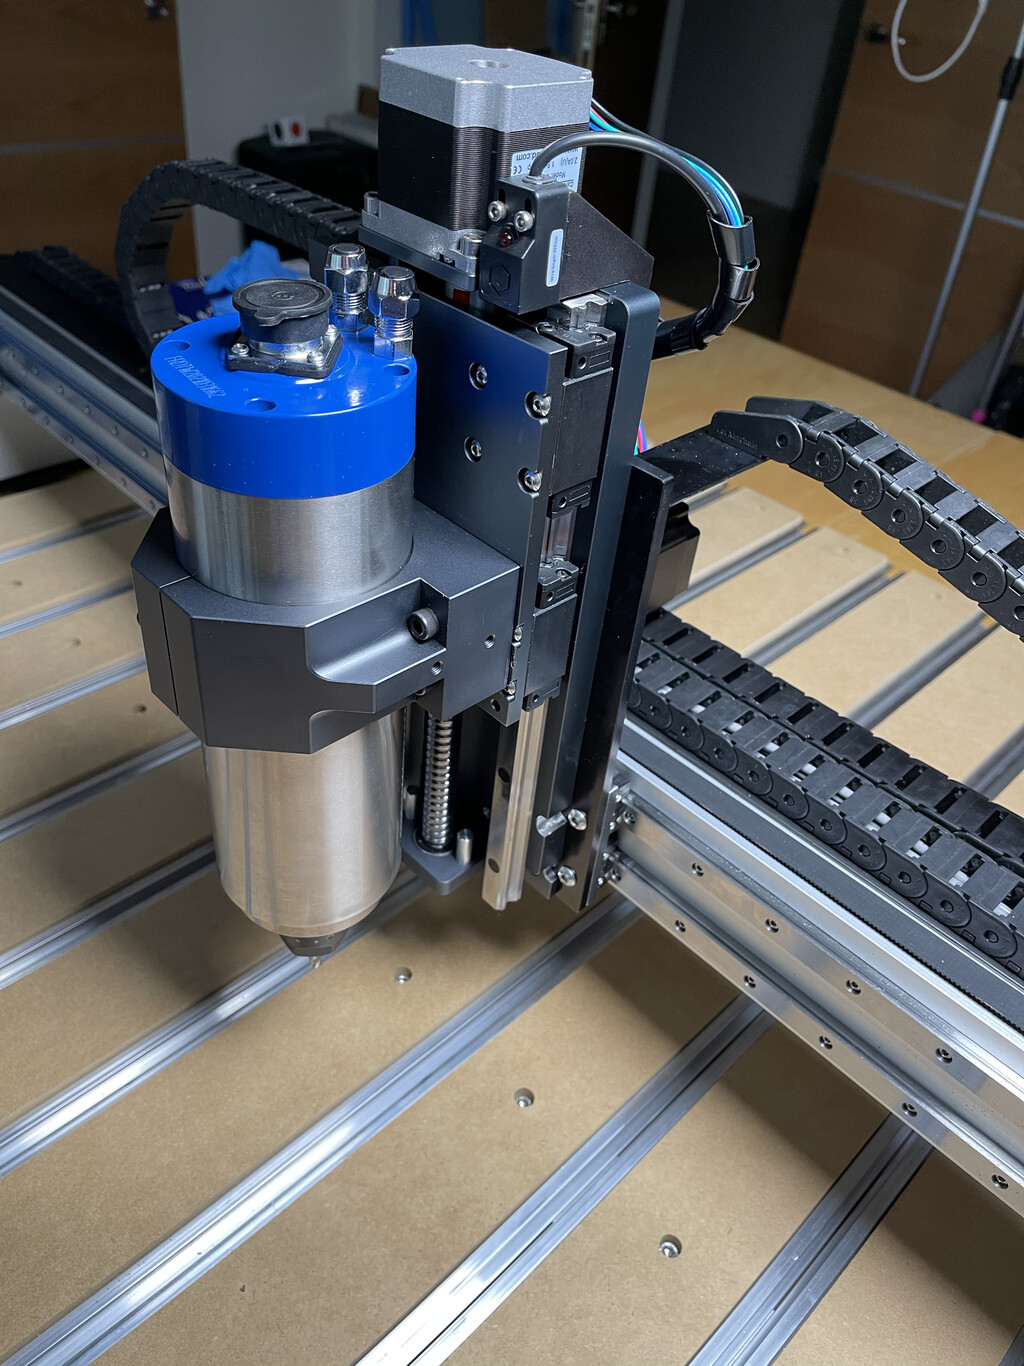
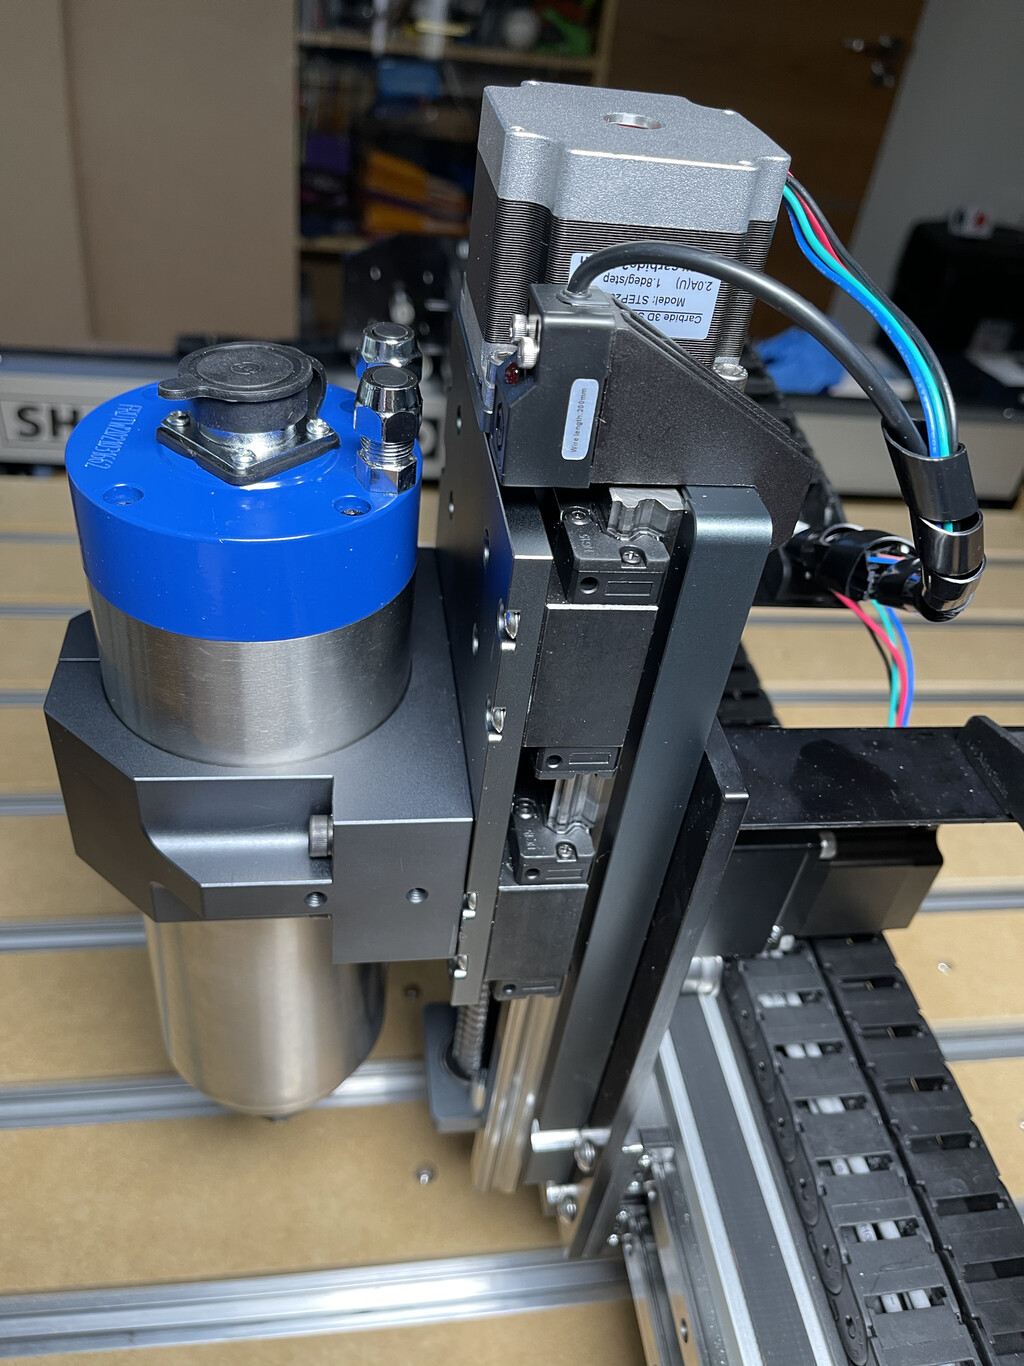
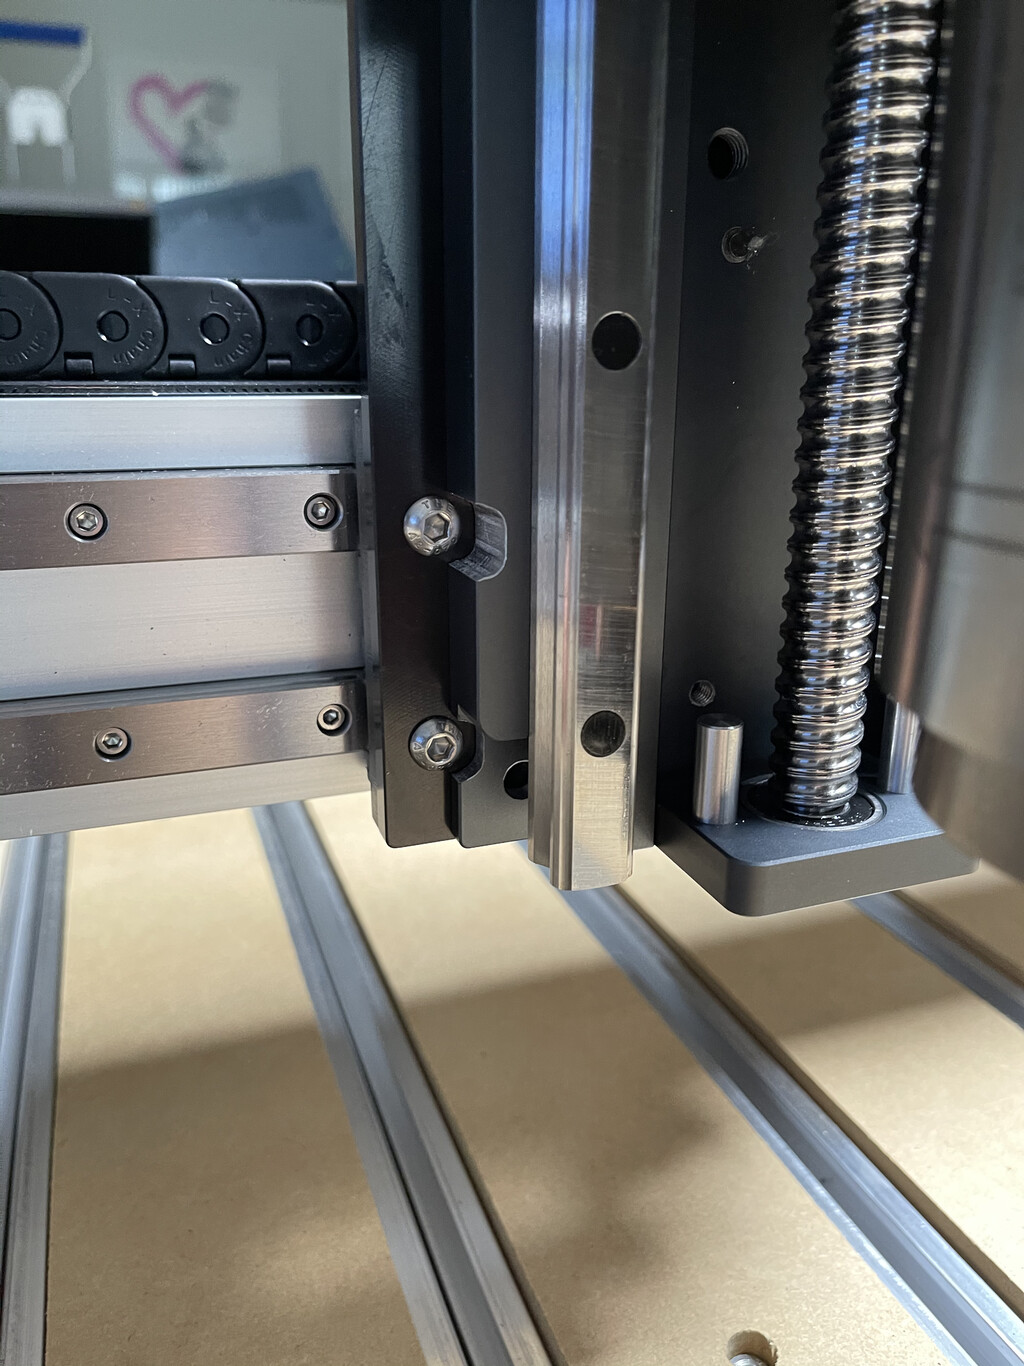
Given the Pro ships with a Z-Plus so we have our mounting solution and the rest is relatively simple. I stripped the Z-Plus of its servo and lead-screw mechanics. I then used a pillar drill, tap and a mill at a friends place (Thanks Greg and Gary) to make mechanically strategically placed holes in the Z-Plus adapter plate and the HDZ adapter plate (I really mean the back plate).
A handful of correctly sized M6 Pan Head bolts to bind them together with fulcrum calculations made and I was happy that the torsion stresses will never exceed the binding force.
The HDZ requires no real mechanical modifications except the tapped holes into the rear of the mounting plate and some minor cutaways to allow clear access to the original Z-Plus bolts to reassemble the unit.
I did need to steal the stepper motor connector from the original Z-Plus since I couldn’t wait for a new one from my component supplier but its easy to re-crimp one when it arrives.
The next issue is with Carbide Motion since its config defaults don’t include a Pro and HDZ. The simplest solution is to select a 3 XXL and send the config data to the controller. Then use the MDI panel to change a few parameters which the controller stores in Non Volatile Memory and you’re all set.
I just need a Z-Plus replacement back panel from Carbide 3D to rebuild the Z-Plus and I have a spare unit. I also have a 3 XXL so spares are useful.
I’ll publish a more detailed write up if people are interested but the work can be done in 2 hours.
Now to connect up the spindle…


11 Likes
If you would consider to mill some of these adapter plates I would happily buy one from you.
I also bought a spare HDZ thinking I would be able to purchase a adapter plate from C3D.
4 Likes
Ken
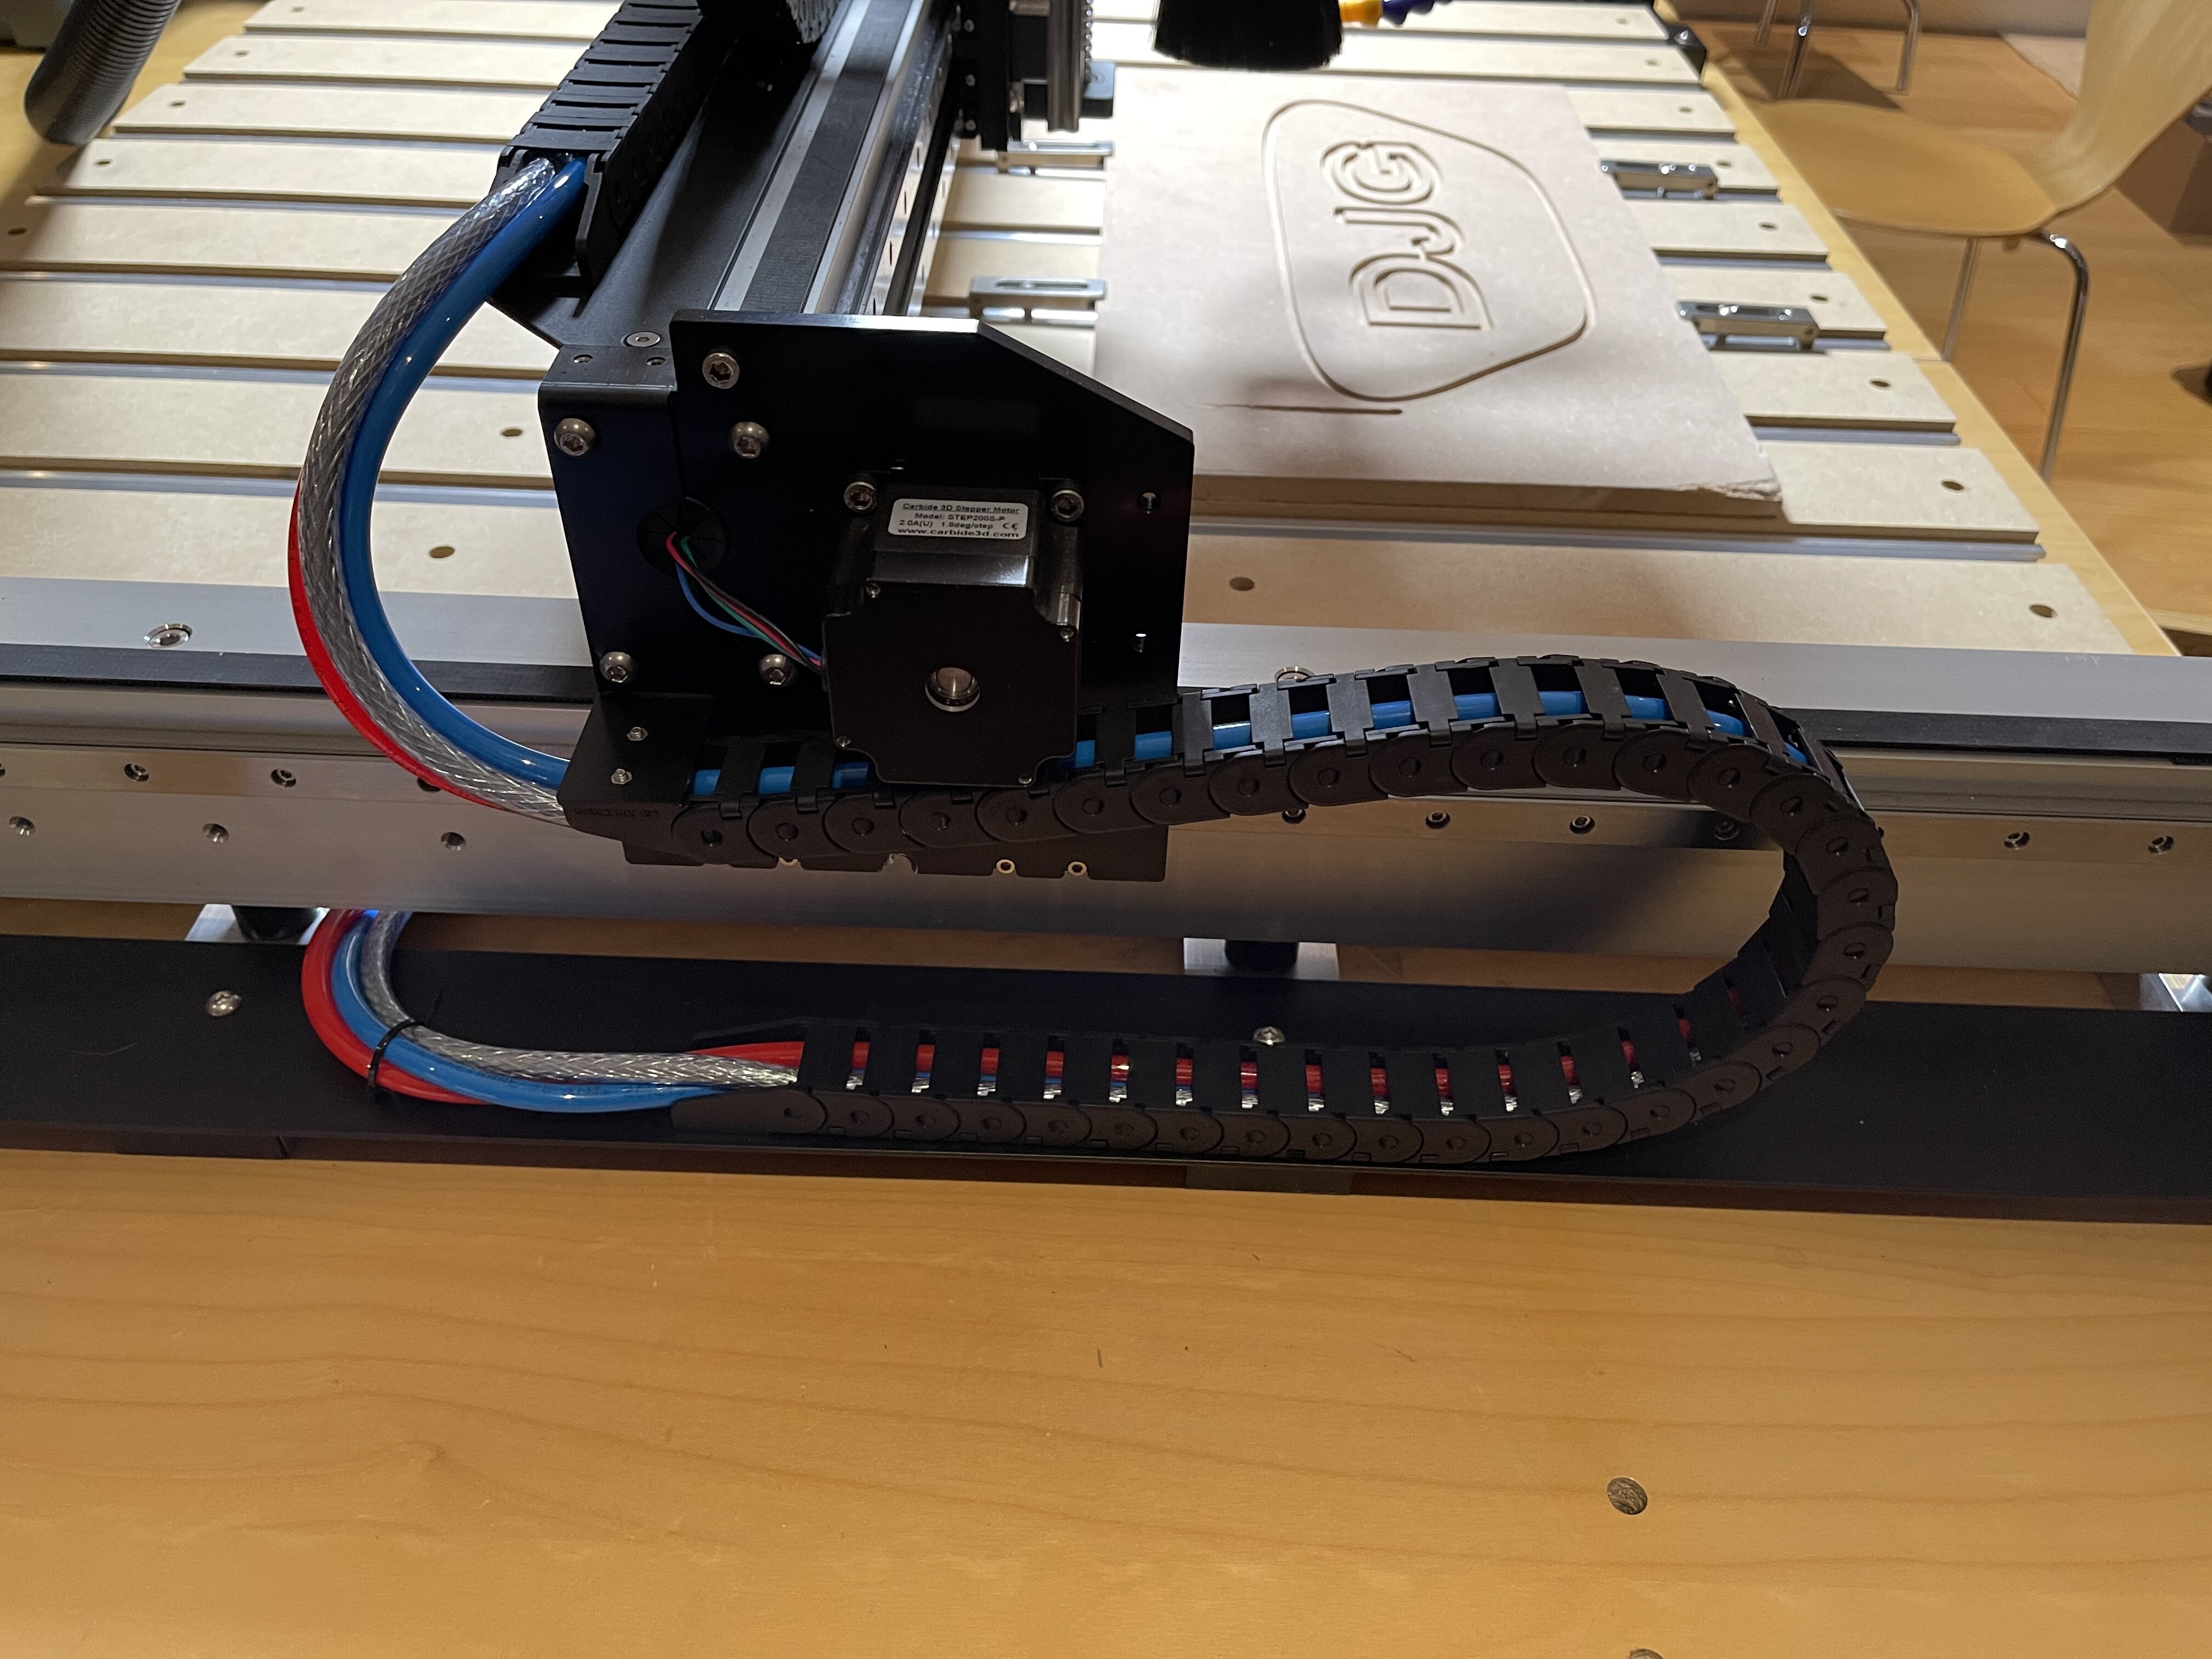
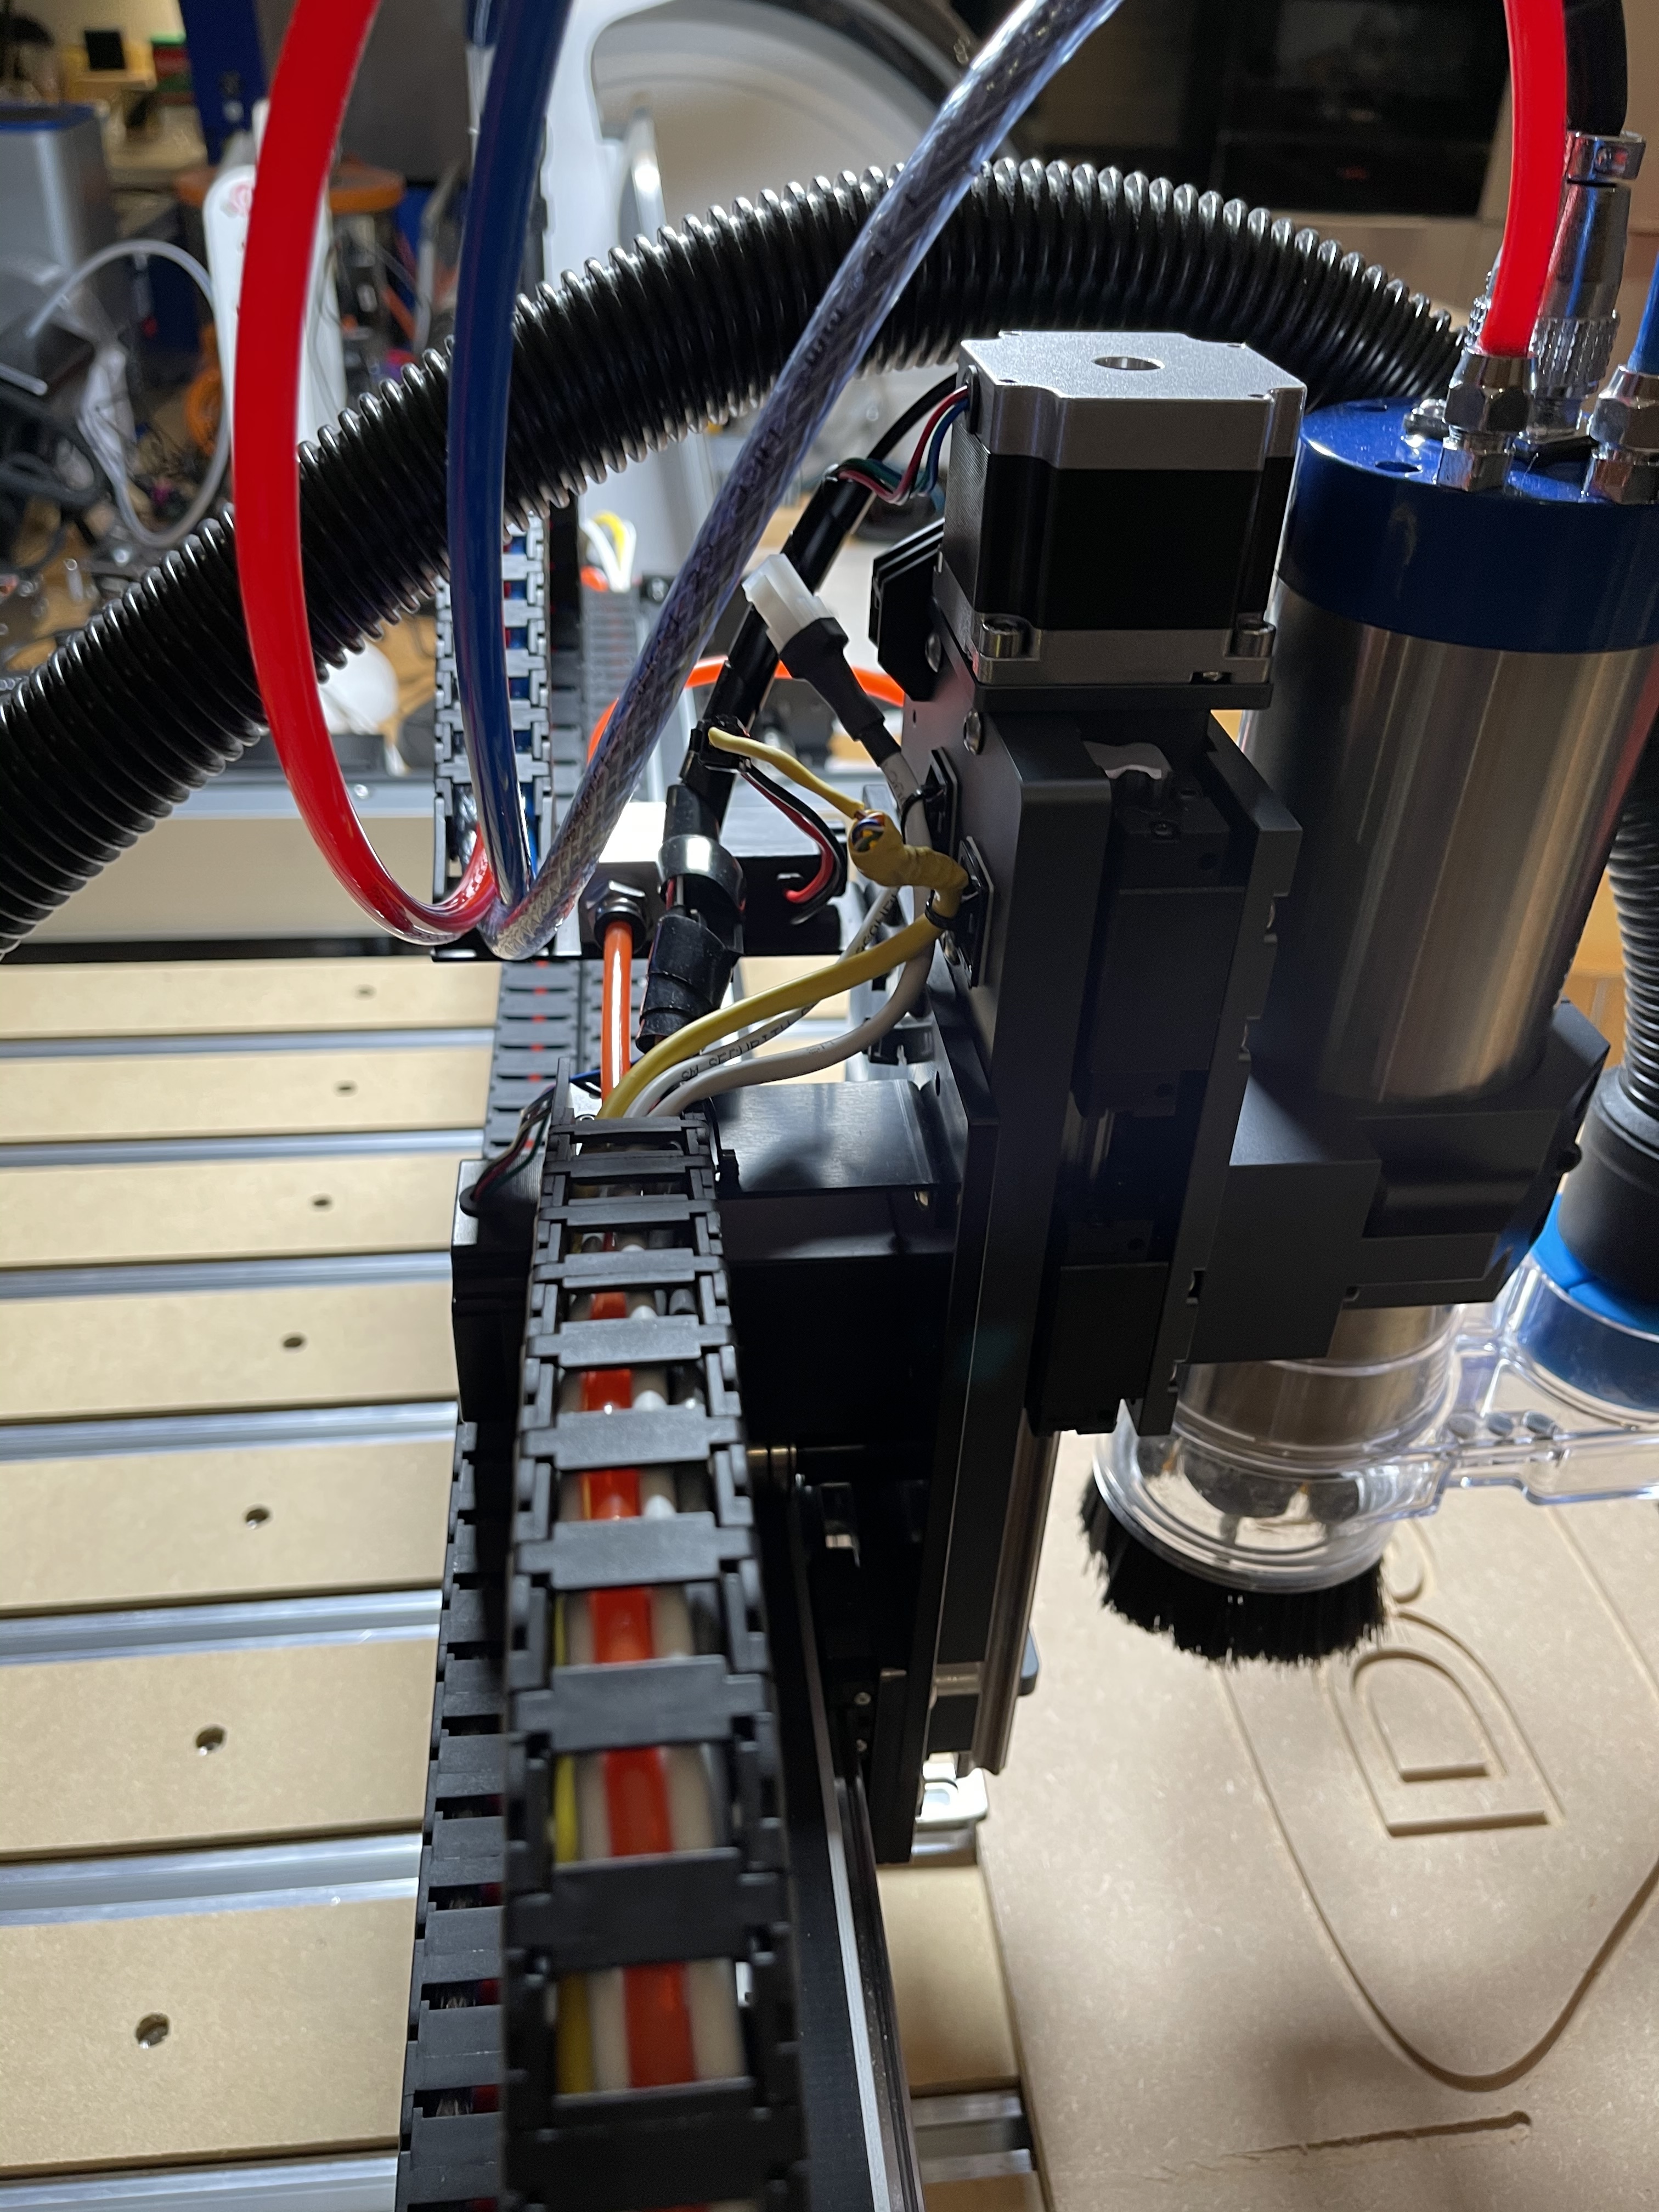
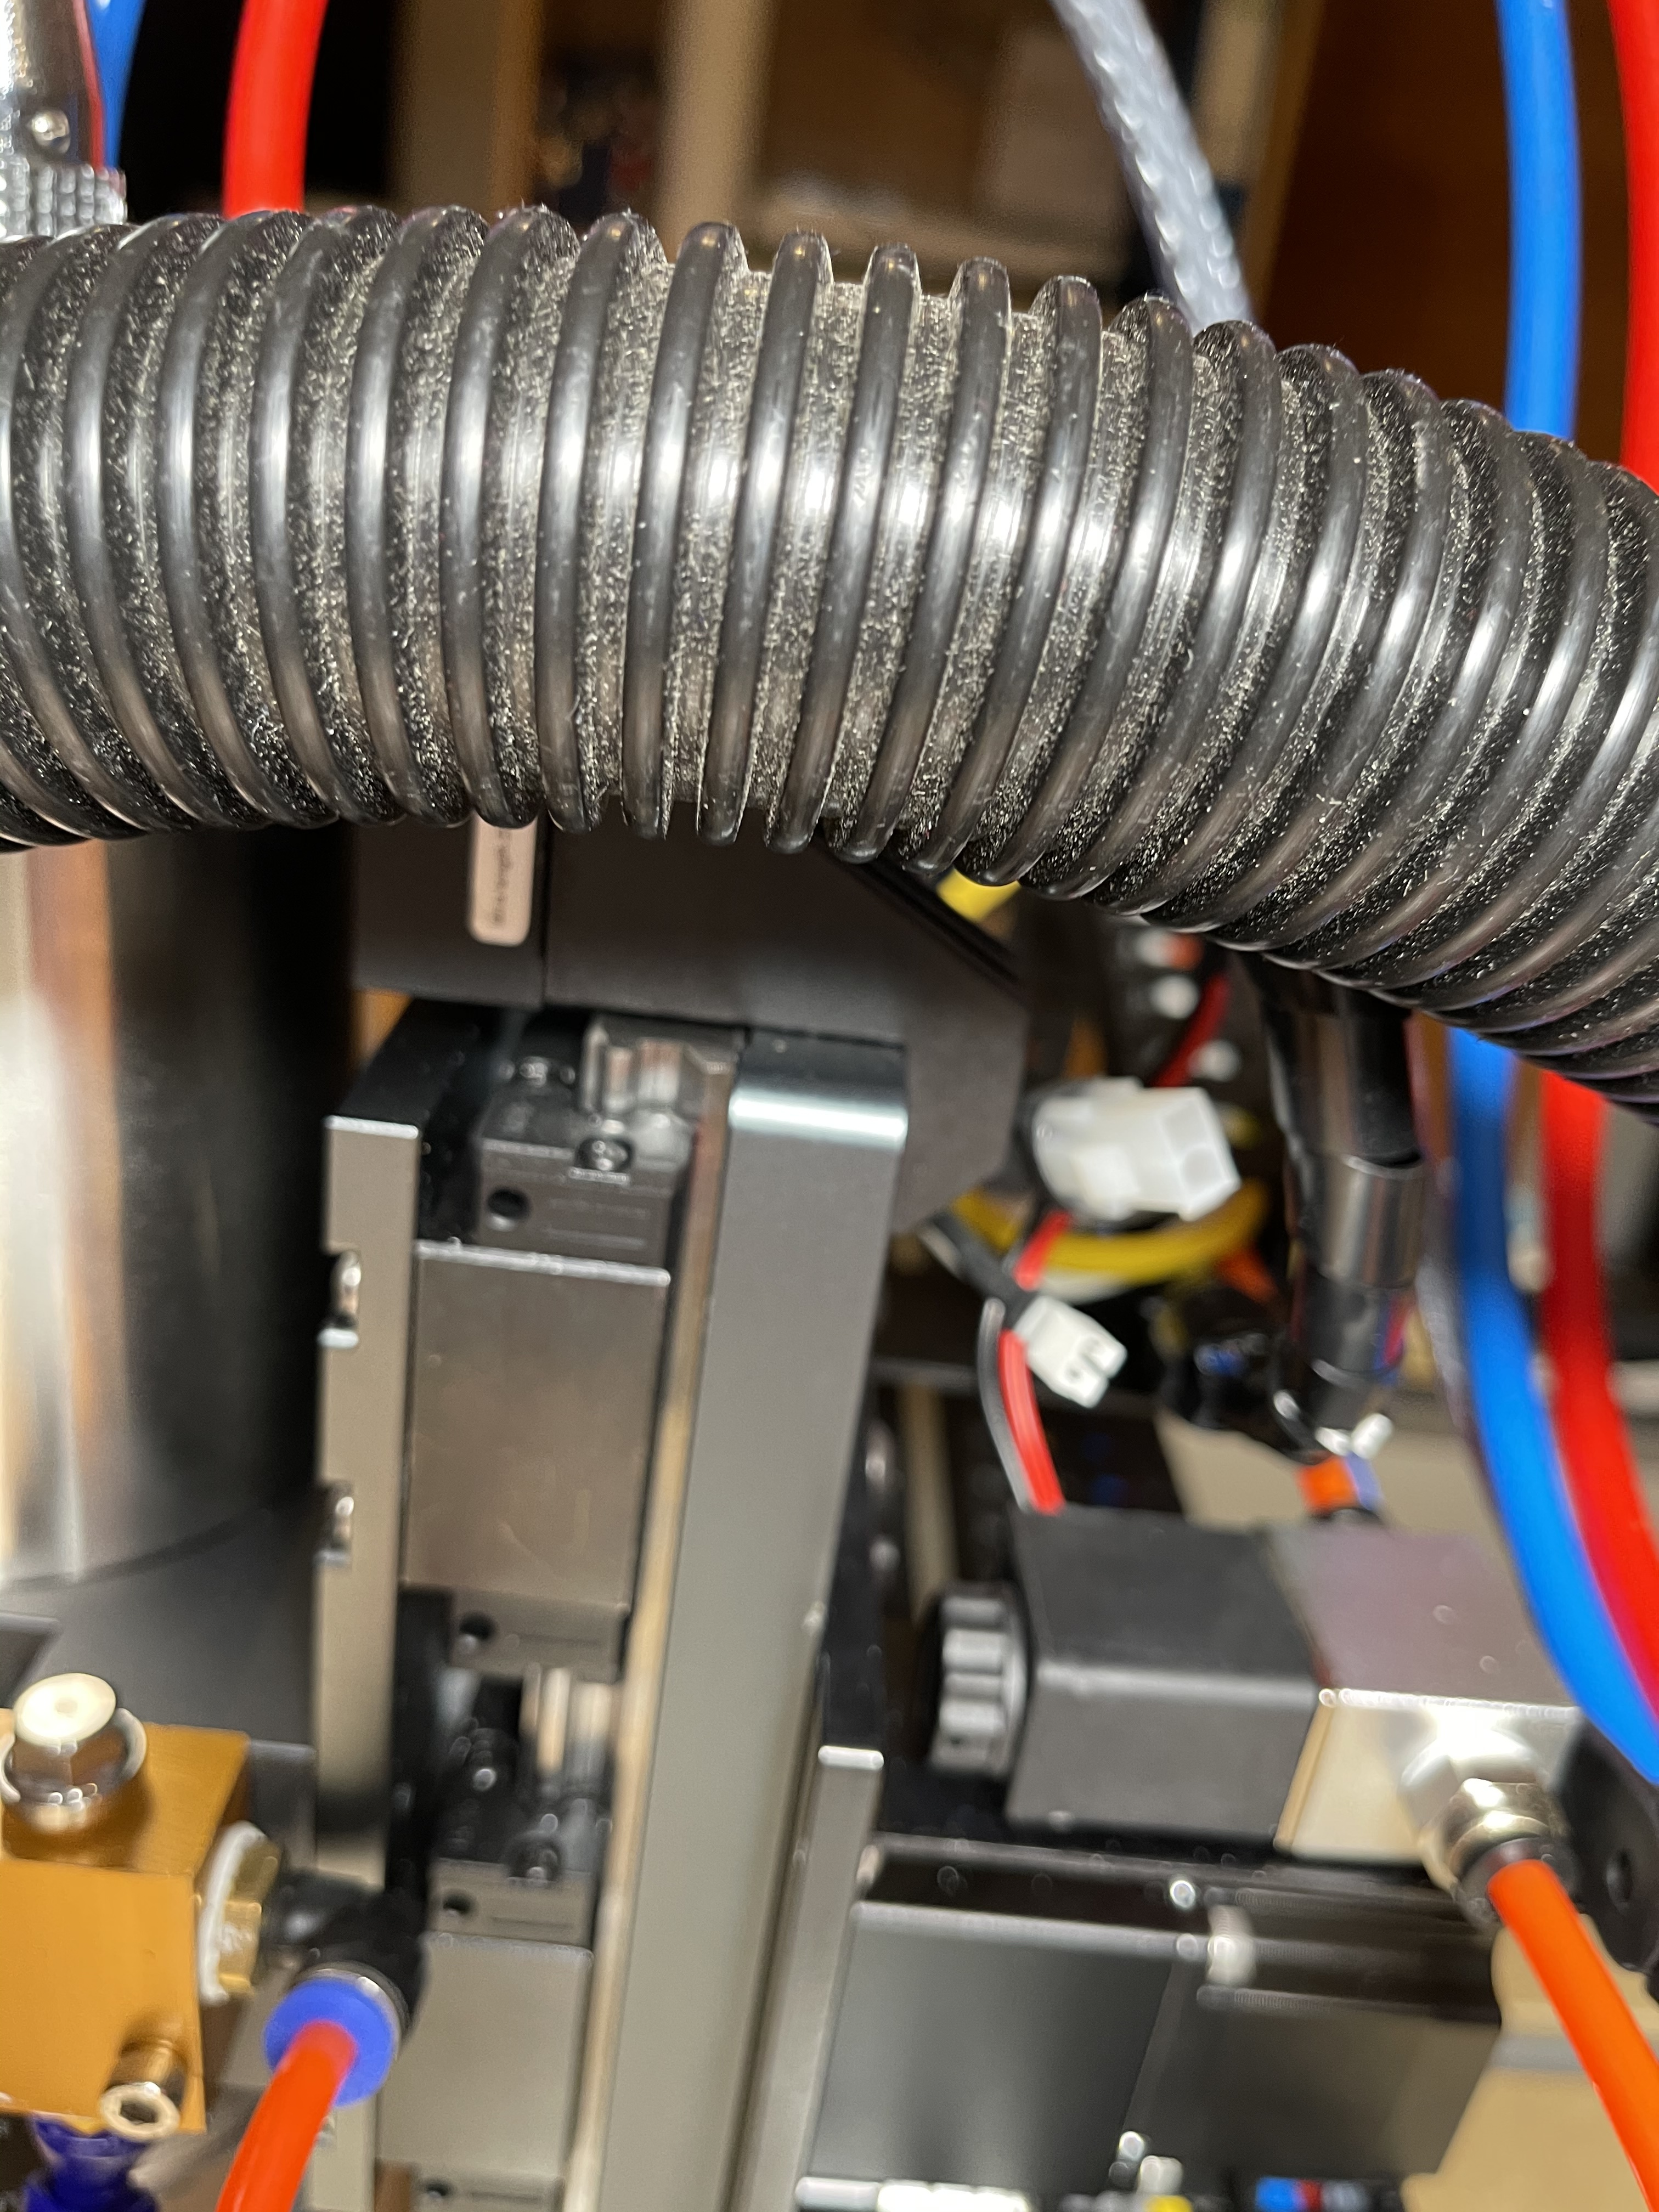
I have finished my machine and I’m delighted with it. The Shapeoko Pro chassis is solid and the HDZ works well with the simple mods.
I’ve included various shots
Birds eye view
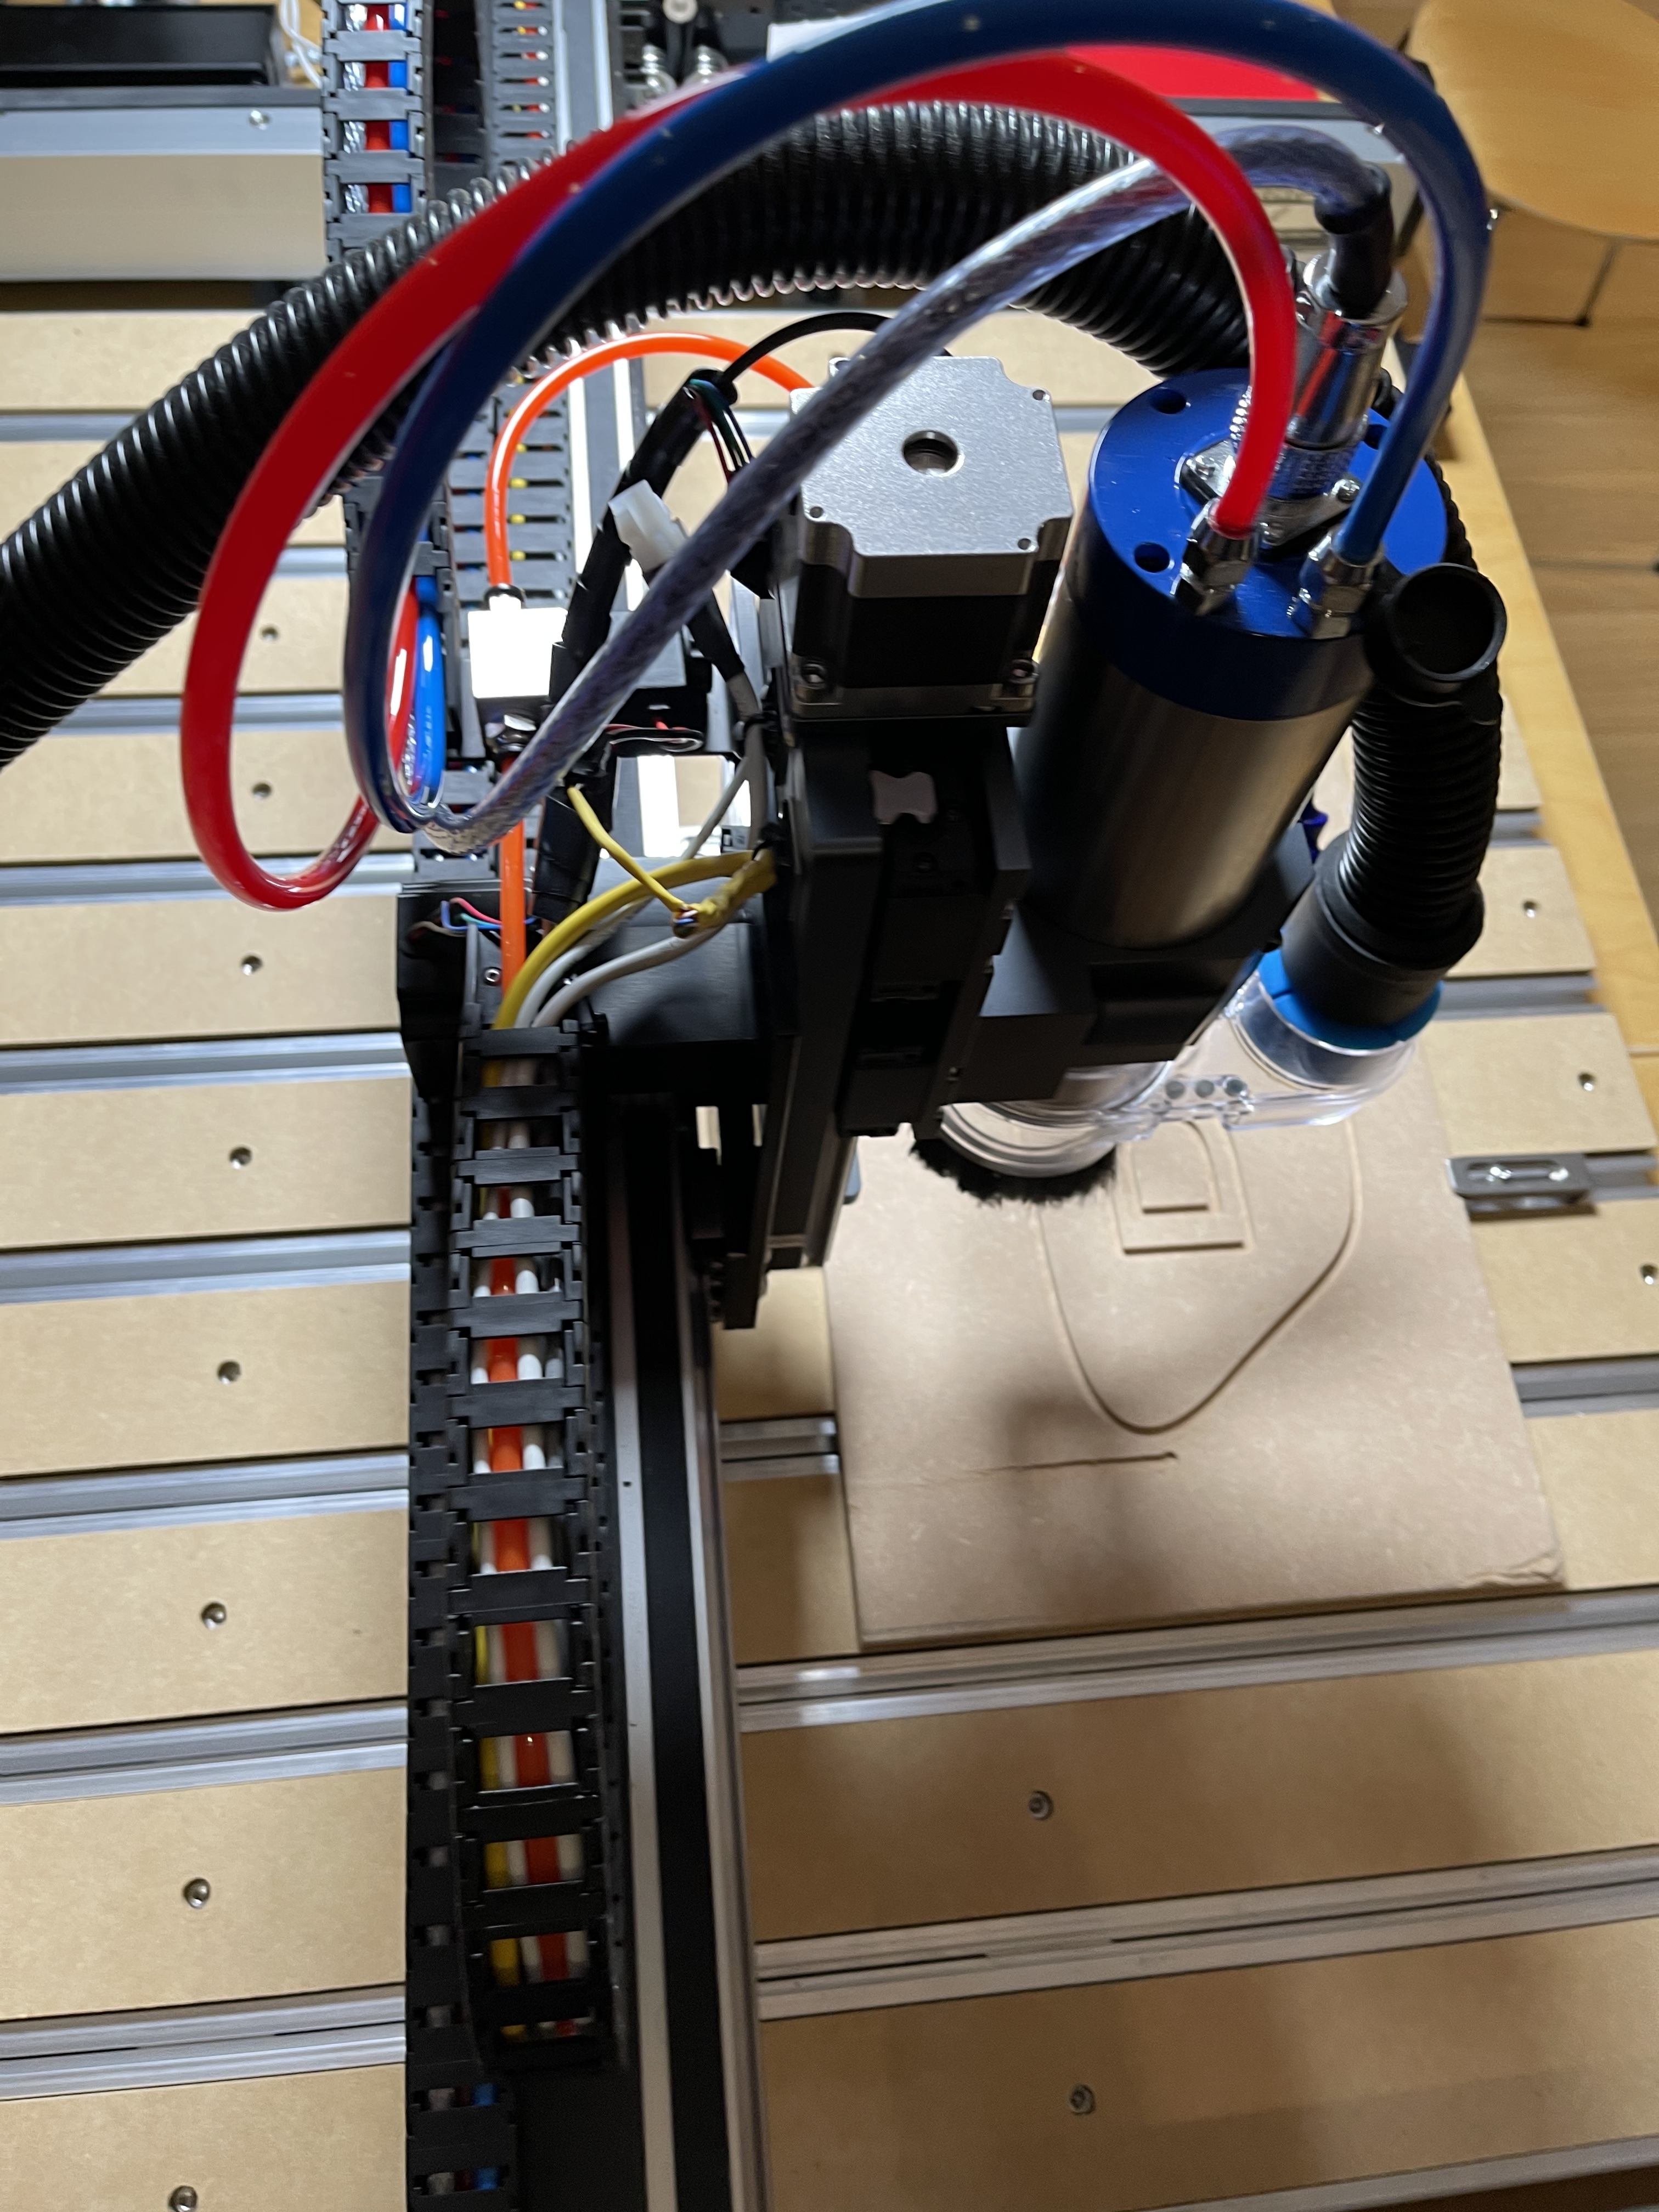
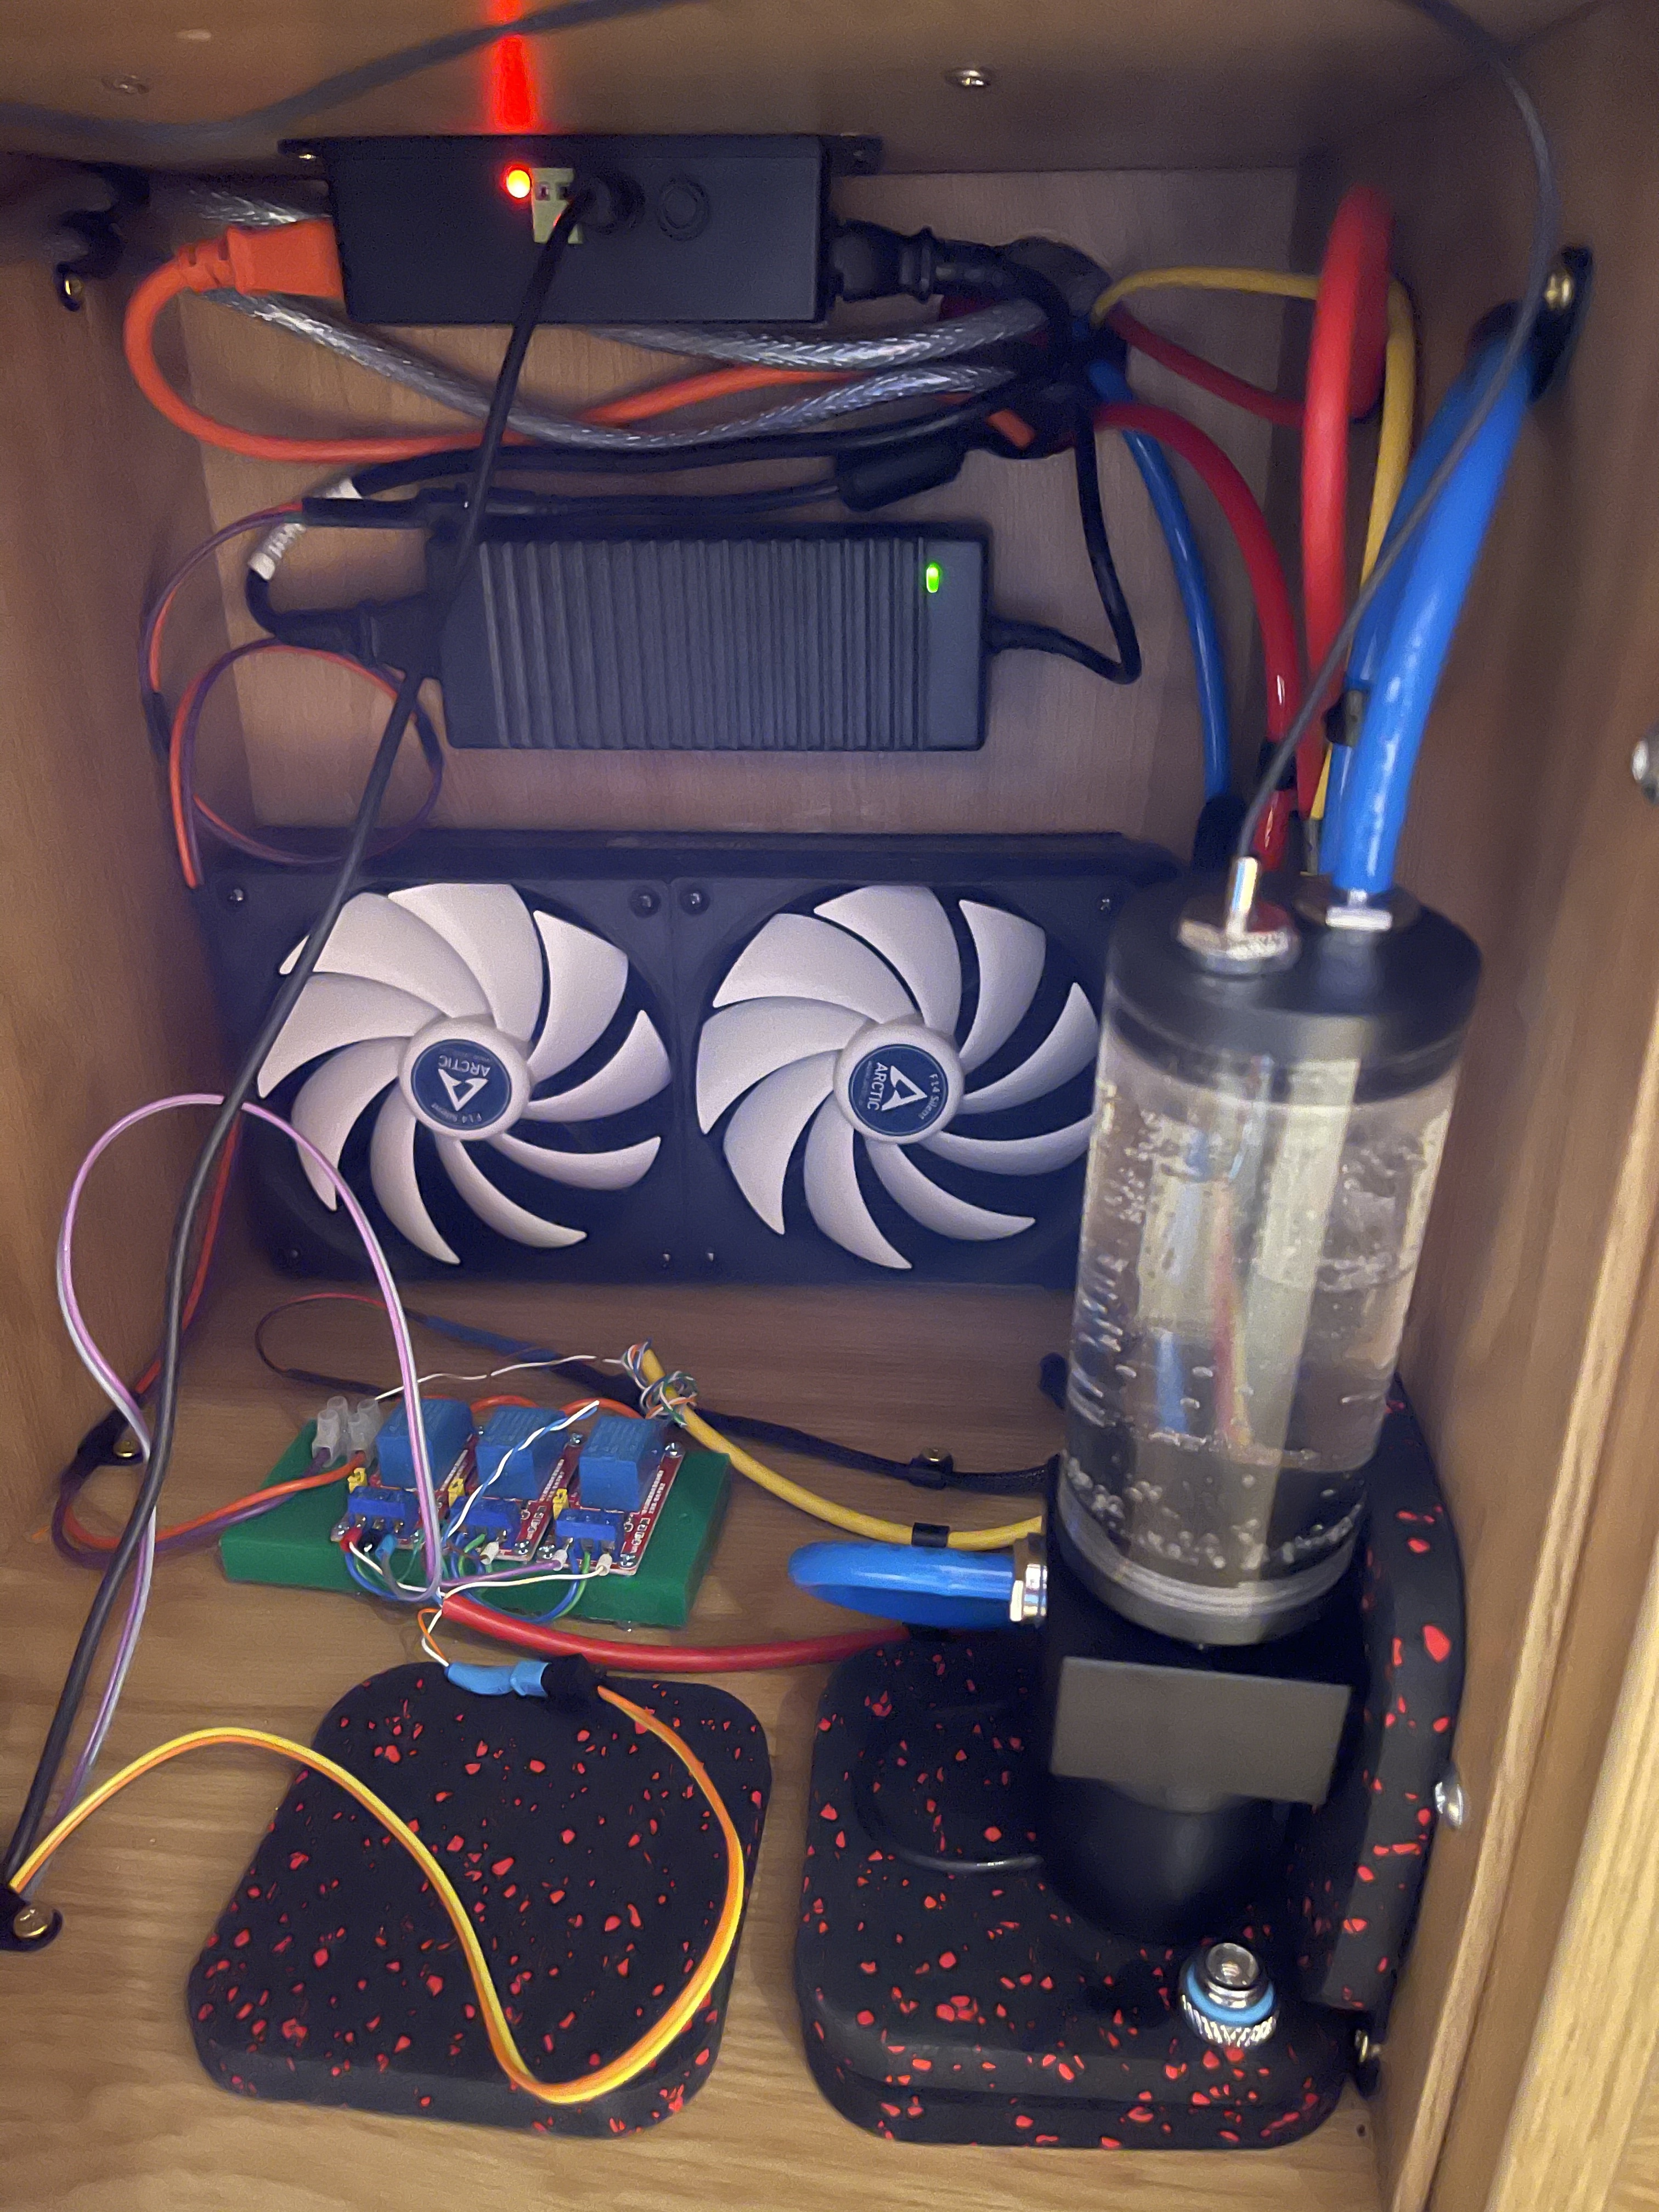
Plenty of room for cooling pipes and screened power cable from the VFD
Air assist with powered solenoid connected to A3
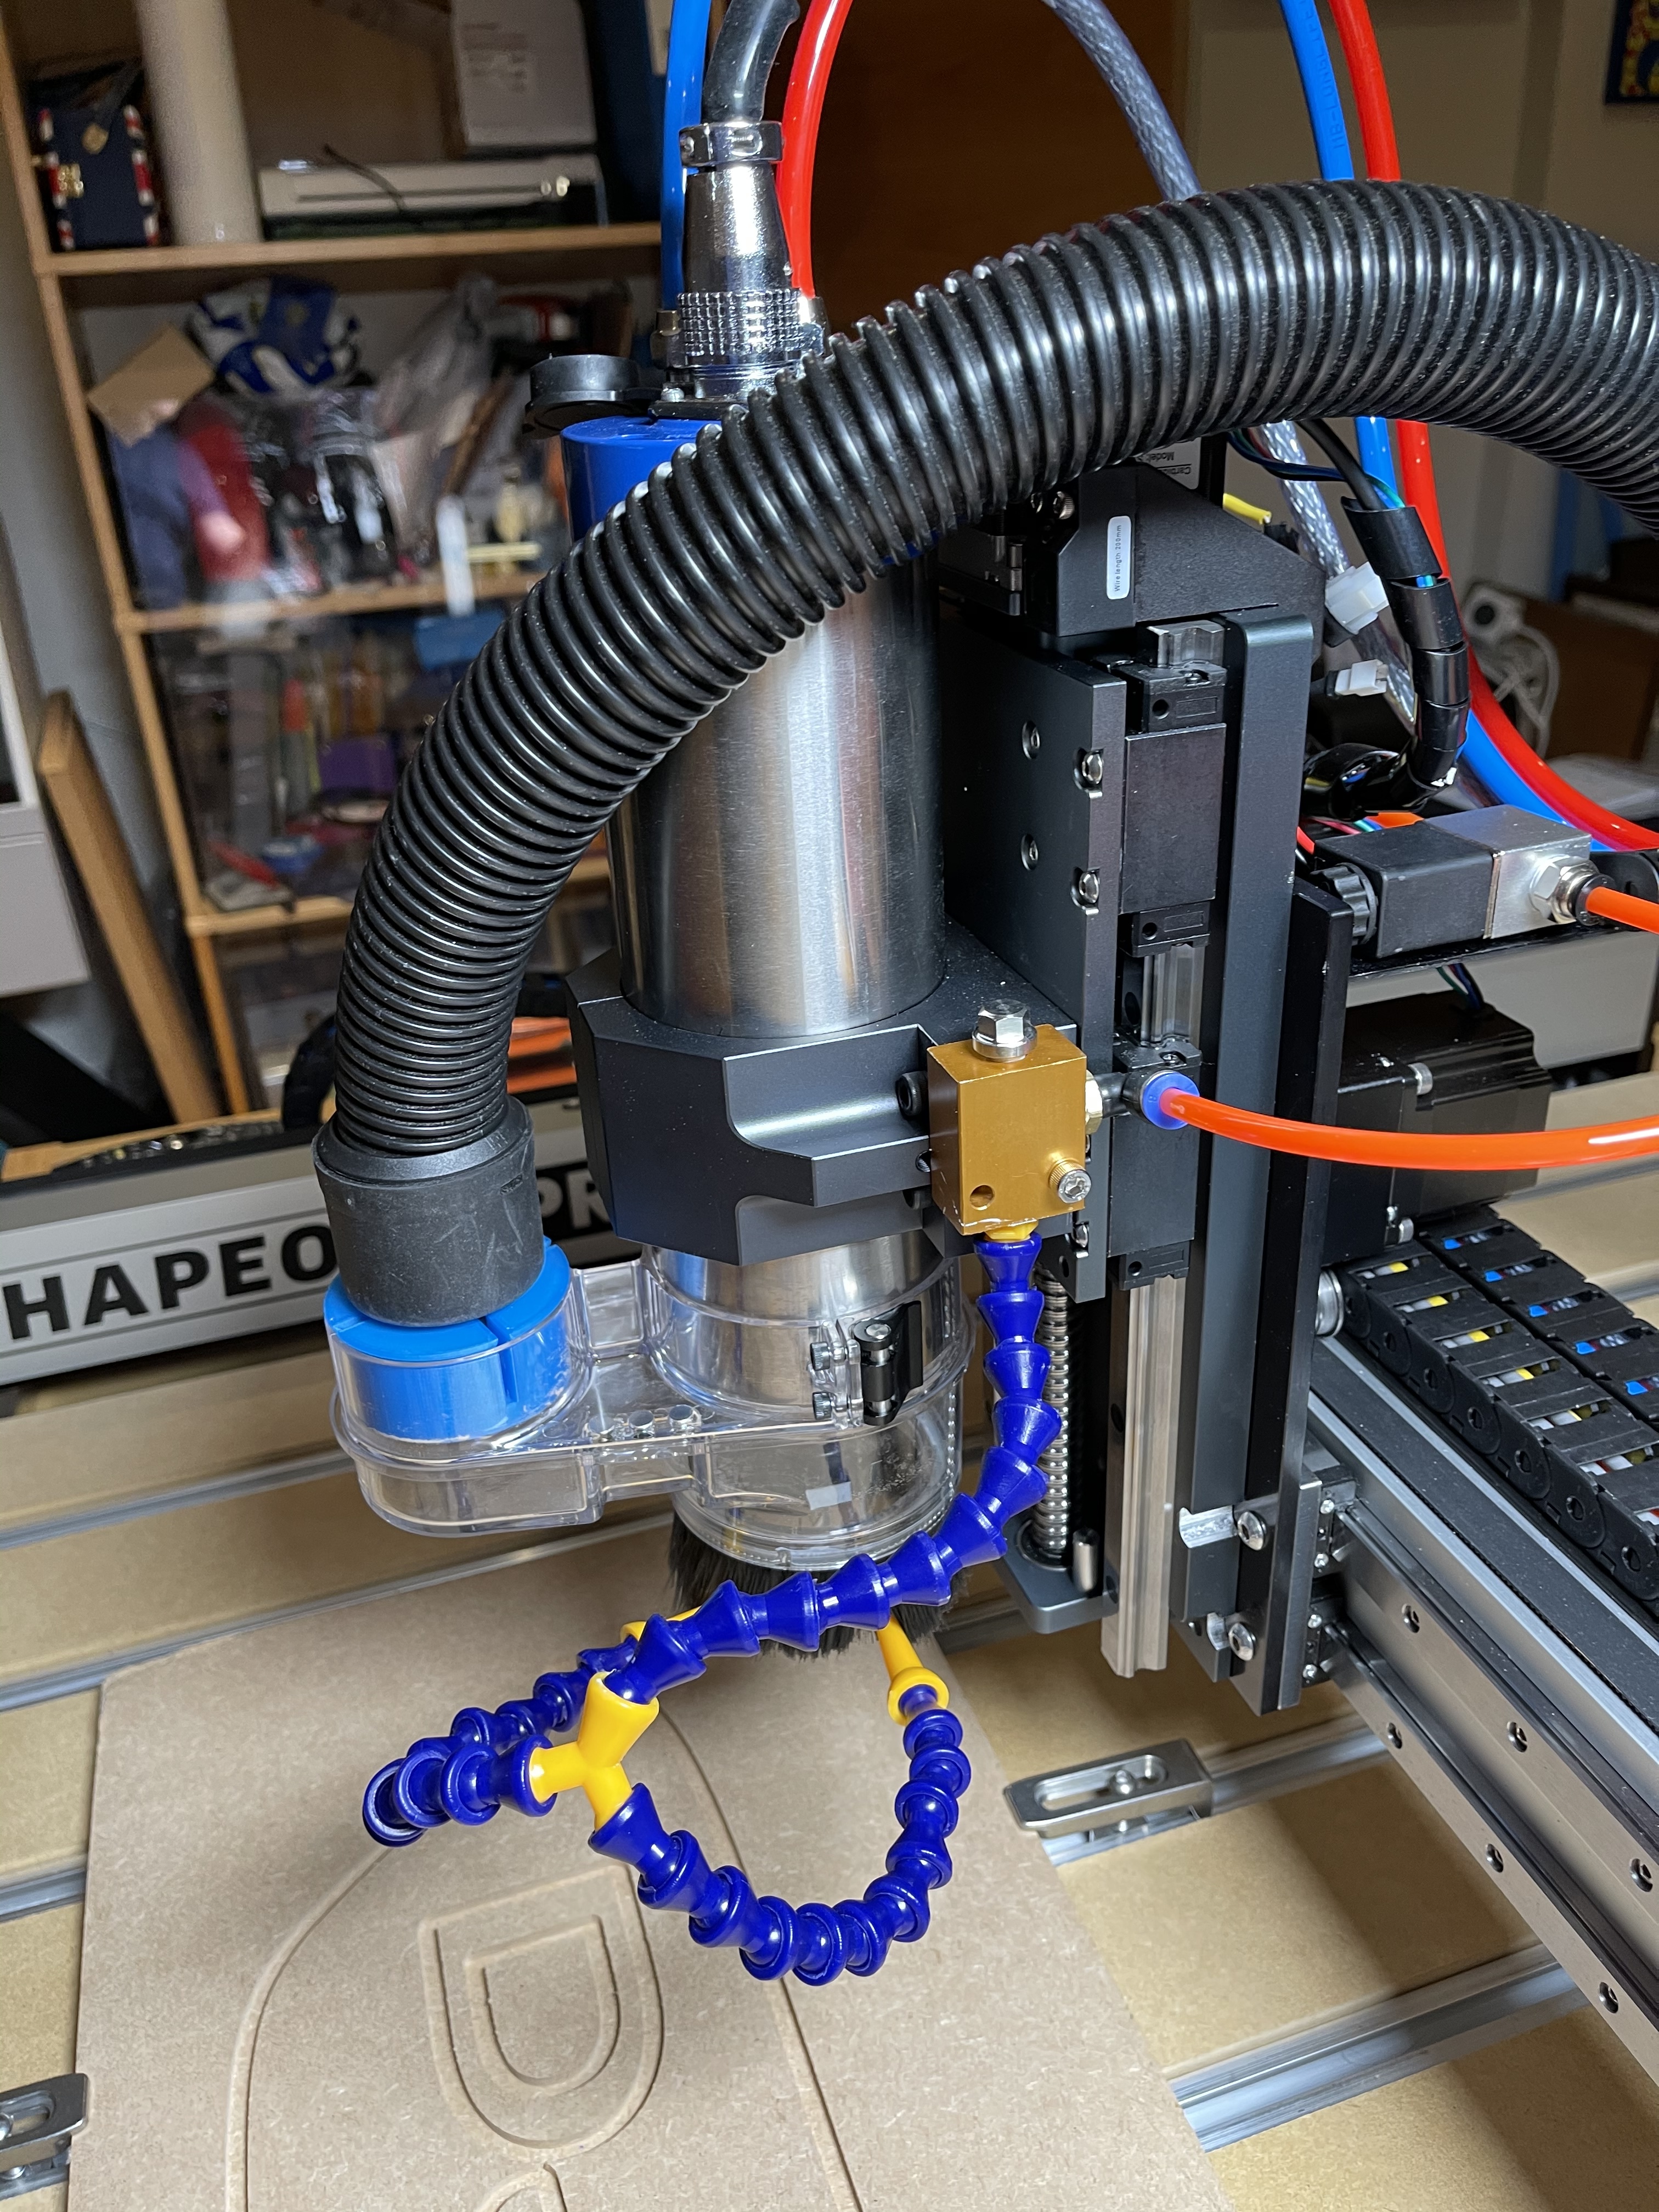
Air solenoid fixes to bracket perfectly

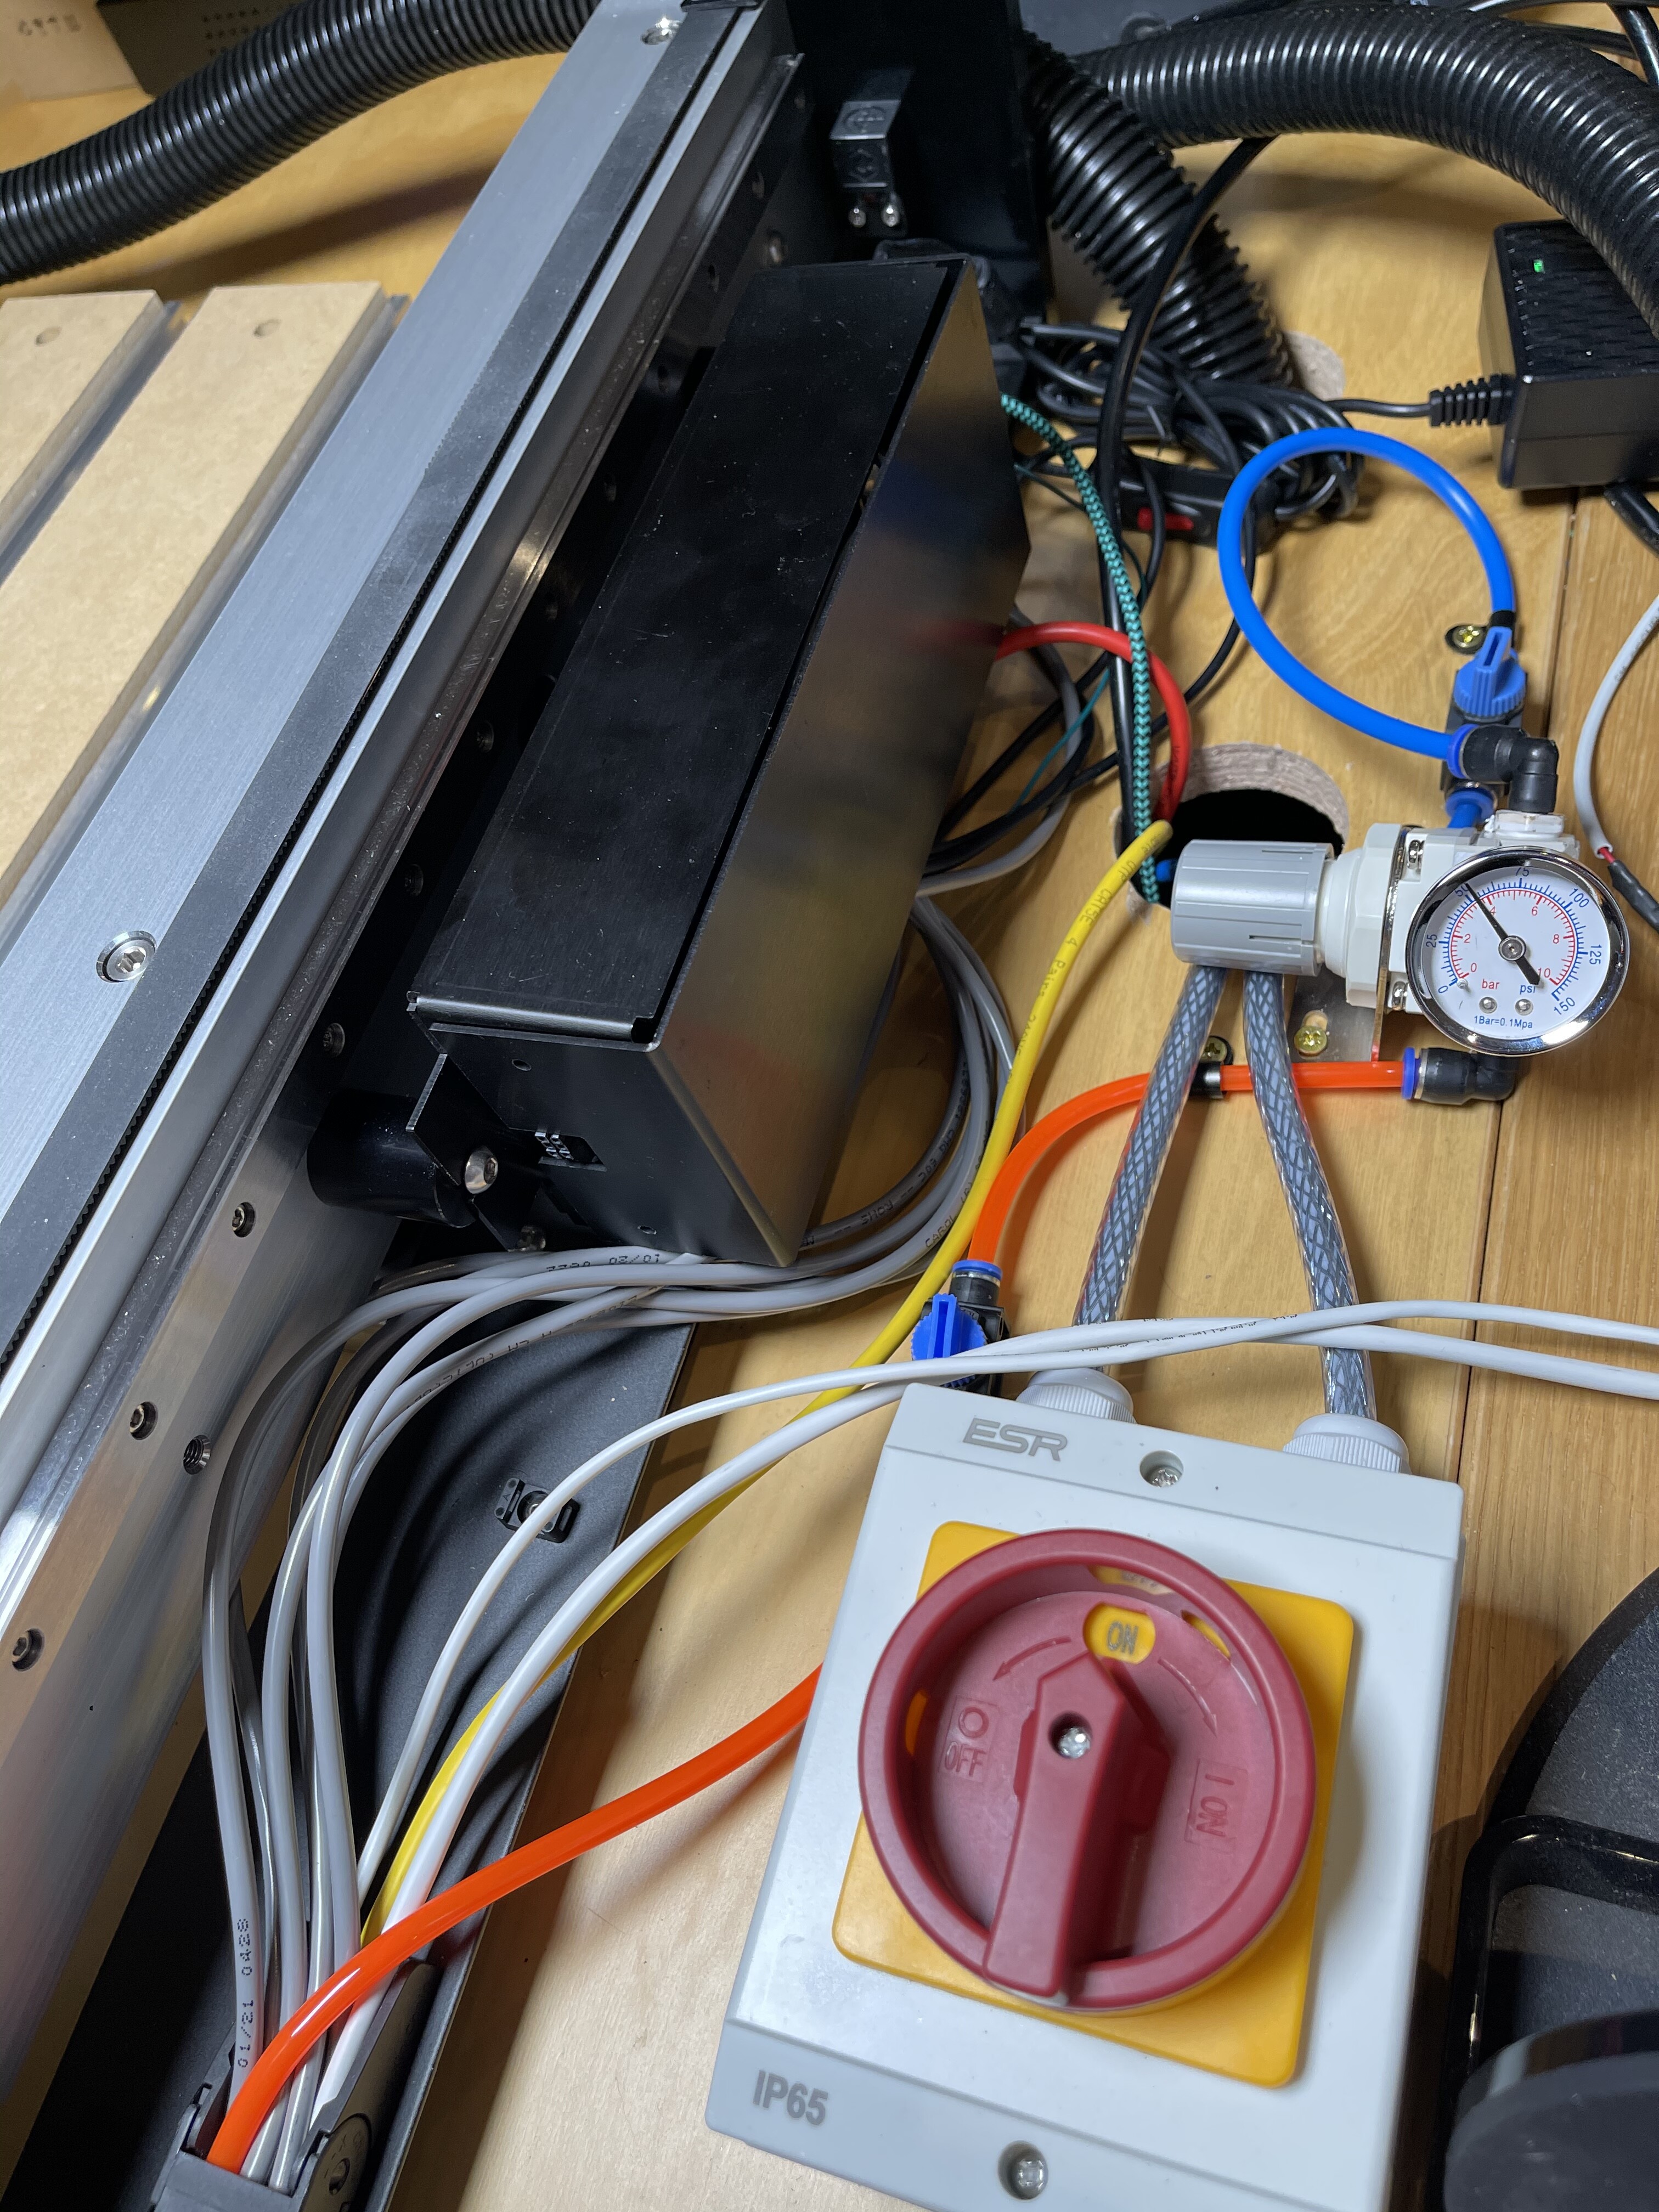
Cabling including JTech Laser cables and Ethernet cable with spare core capacity fixed to rear plate
Laser extension cables ready for use
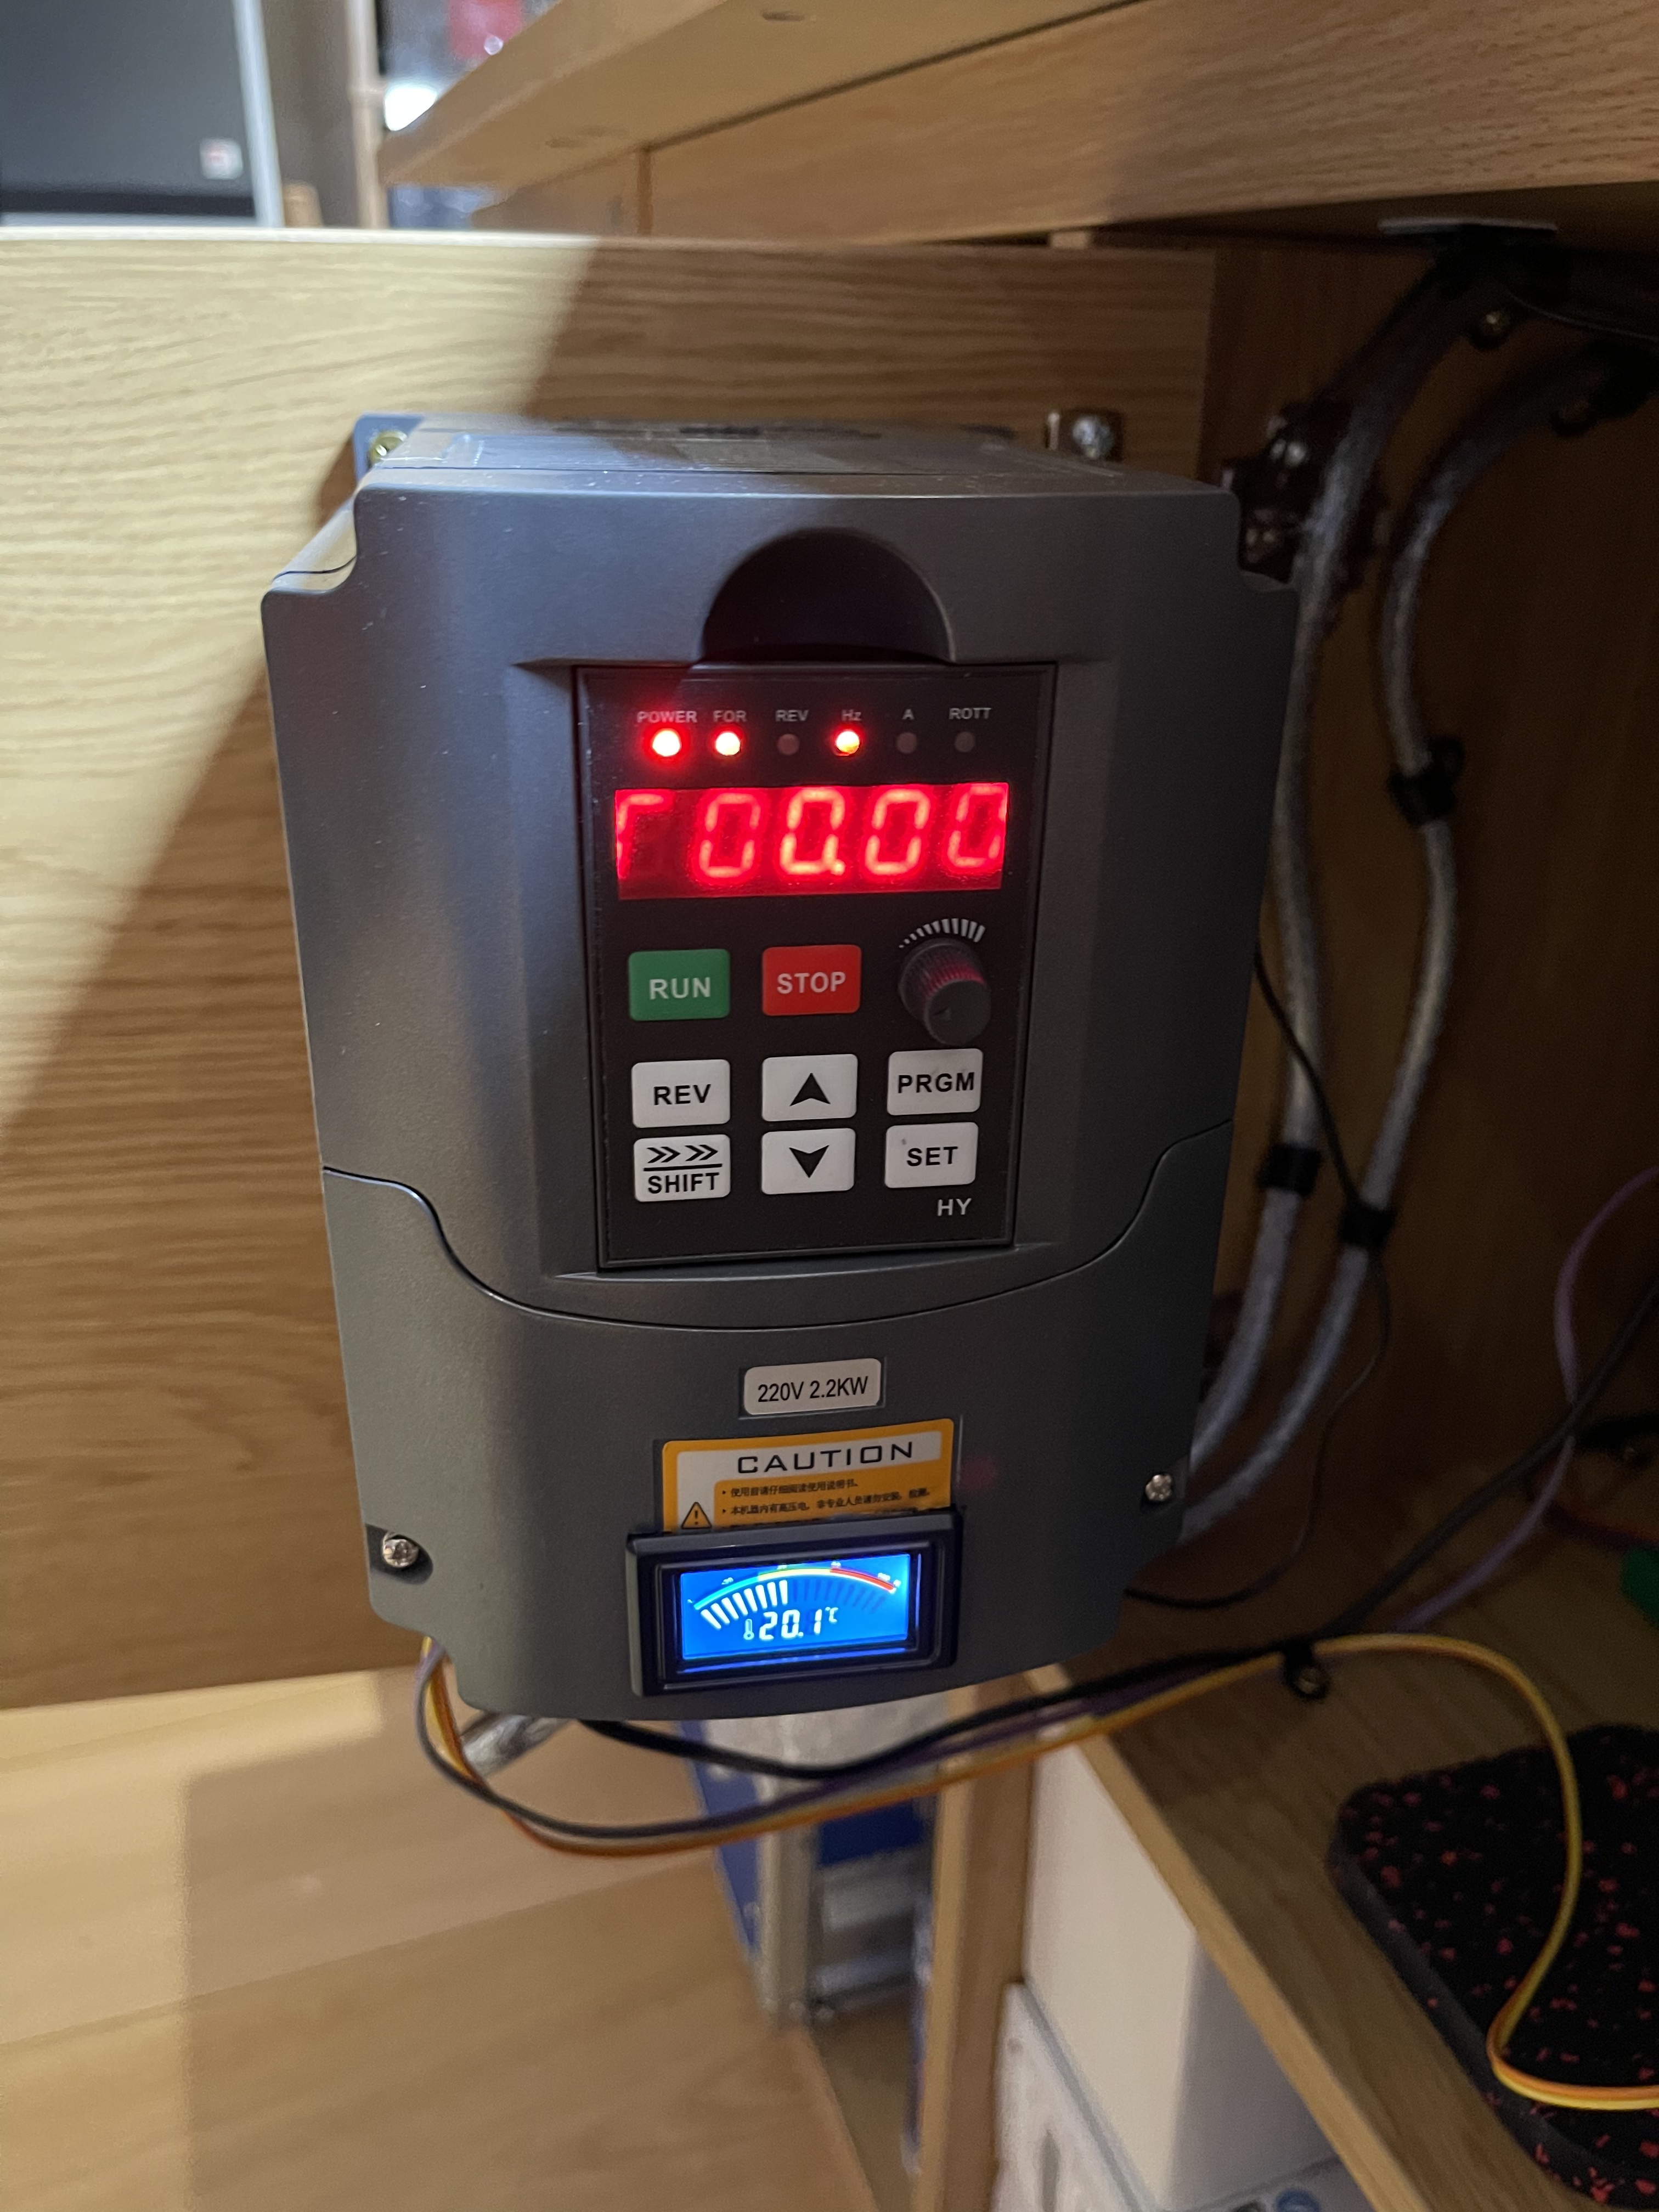
HY VFD inverter with added temperature gauge for the water cooling system cut into from cover
Cooling system, relay controls and extraction system power switch (bitrunner alternative) installed in ventilated area
Air assist source pressure regulator and gauge. VFD power isolator in place
9 Likes
Wow this is amazing, such a awesome setup! Nice to see the water lines fit in the cable chains!
1 Like
Much wow, you even added a GPU card in there for extra processing power 
2 Likes
@Madboy Do you have dimensions for the hdz modifications? also interested in the solenoid wiring. Awesome work!
2 Likes
Not to be too much of a squeaky wheel, but are there any updates on the HDZs for Shapeoko Pros?
2 Likes
Write in to sales@carbide3d.com to see what we can share on that.
2 Likes
Are you controlling the MAC solenoid via the carbide motion board
We’re now in production or parts. Test units are on my machines and looking/feeling great.
10 Likes
Luke,
Thanks for the update. Can you share if the HDZ Pro will change the Z footprint? I’m building a new enclosure and want to make sure I leave enough head room for the HDZ Pro and Vac Boom.
It’s slightly thicker than the Z plus - maybe 1cm but other than that it mounts in the same way.
8 Likes