I am sure this has been asked, but I cannot find a straight answer. I am about to buy a Shapeoko Pro and would also like to buy two major upgrades, a 4th axis system and a laser.
I want to be able to carve 3D rotary columns and figures with the 4th axis and separately, I want to be able to attach a laser to the Shapeoko Pro to laser cut and engrave pieces. Obviously I want this to be plug-n-play with the Shapeoko Pro and not have to jerry-rig it to work.
Can someone please give me some product recommendations and maybe their evaluation of the pro’s and con’s of what I want to set up? Also, if you have any pics or videos of a working system that would be great to see.
Jtech laser which has been recommended I previous forum posts is probably your best bet. I pinged them and they said that they are currently testing the laser with the new Pro and should be ready in a couple of weeks to sell it to consumers.
Other posts talk about it being more expensive than separate machine ($750 vs $300) but this is US supported higher quality product (according to others on this forum)
JTECH makes a unit that is designed to mount to the Shapeoko. For some applications a stand alone unit is better, They can be quicker, and a dust free environment never hurts. Also, more high powered options are available. However, if you are looking to laser engrave on to carved items, as opposed to flat surfaces, the Z axis on the CNC is a major plus.
As for the 4th axis, I haven’t found a good solution yet. I keep hoping that they will come up with a native solution for both by the time I am ready to upgrade. Maybe for the Pro II.
I am looking at the JTech lasers now on their site, reviews and of course YouTube. I am trying to figure out an offset solution so I don’t have to reposition the workpiece after it is carved.
My understanding is that you will just rezero the machine with the laser (which you would do anyway) and therefore don’t need to reposition the workpiece unless you have something really large (33”x33”)
@Intohouse That is my understanding also, I am just wanting to verify everything and see how other people have done it before I drop the $5K I have budgeted for this purchase. I am thinking that is a realistic budget for what I want.
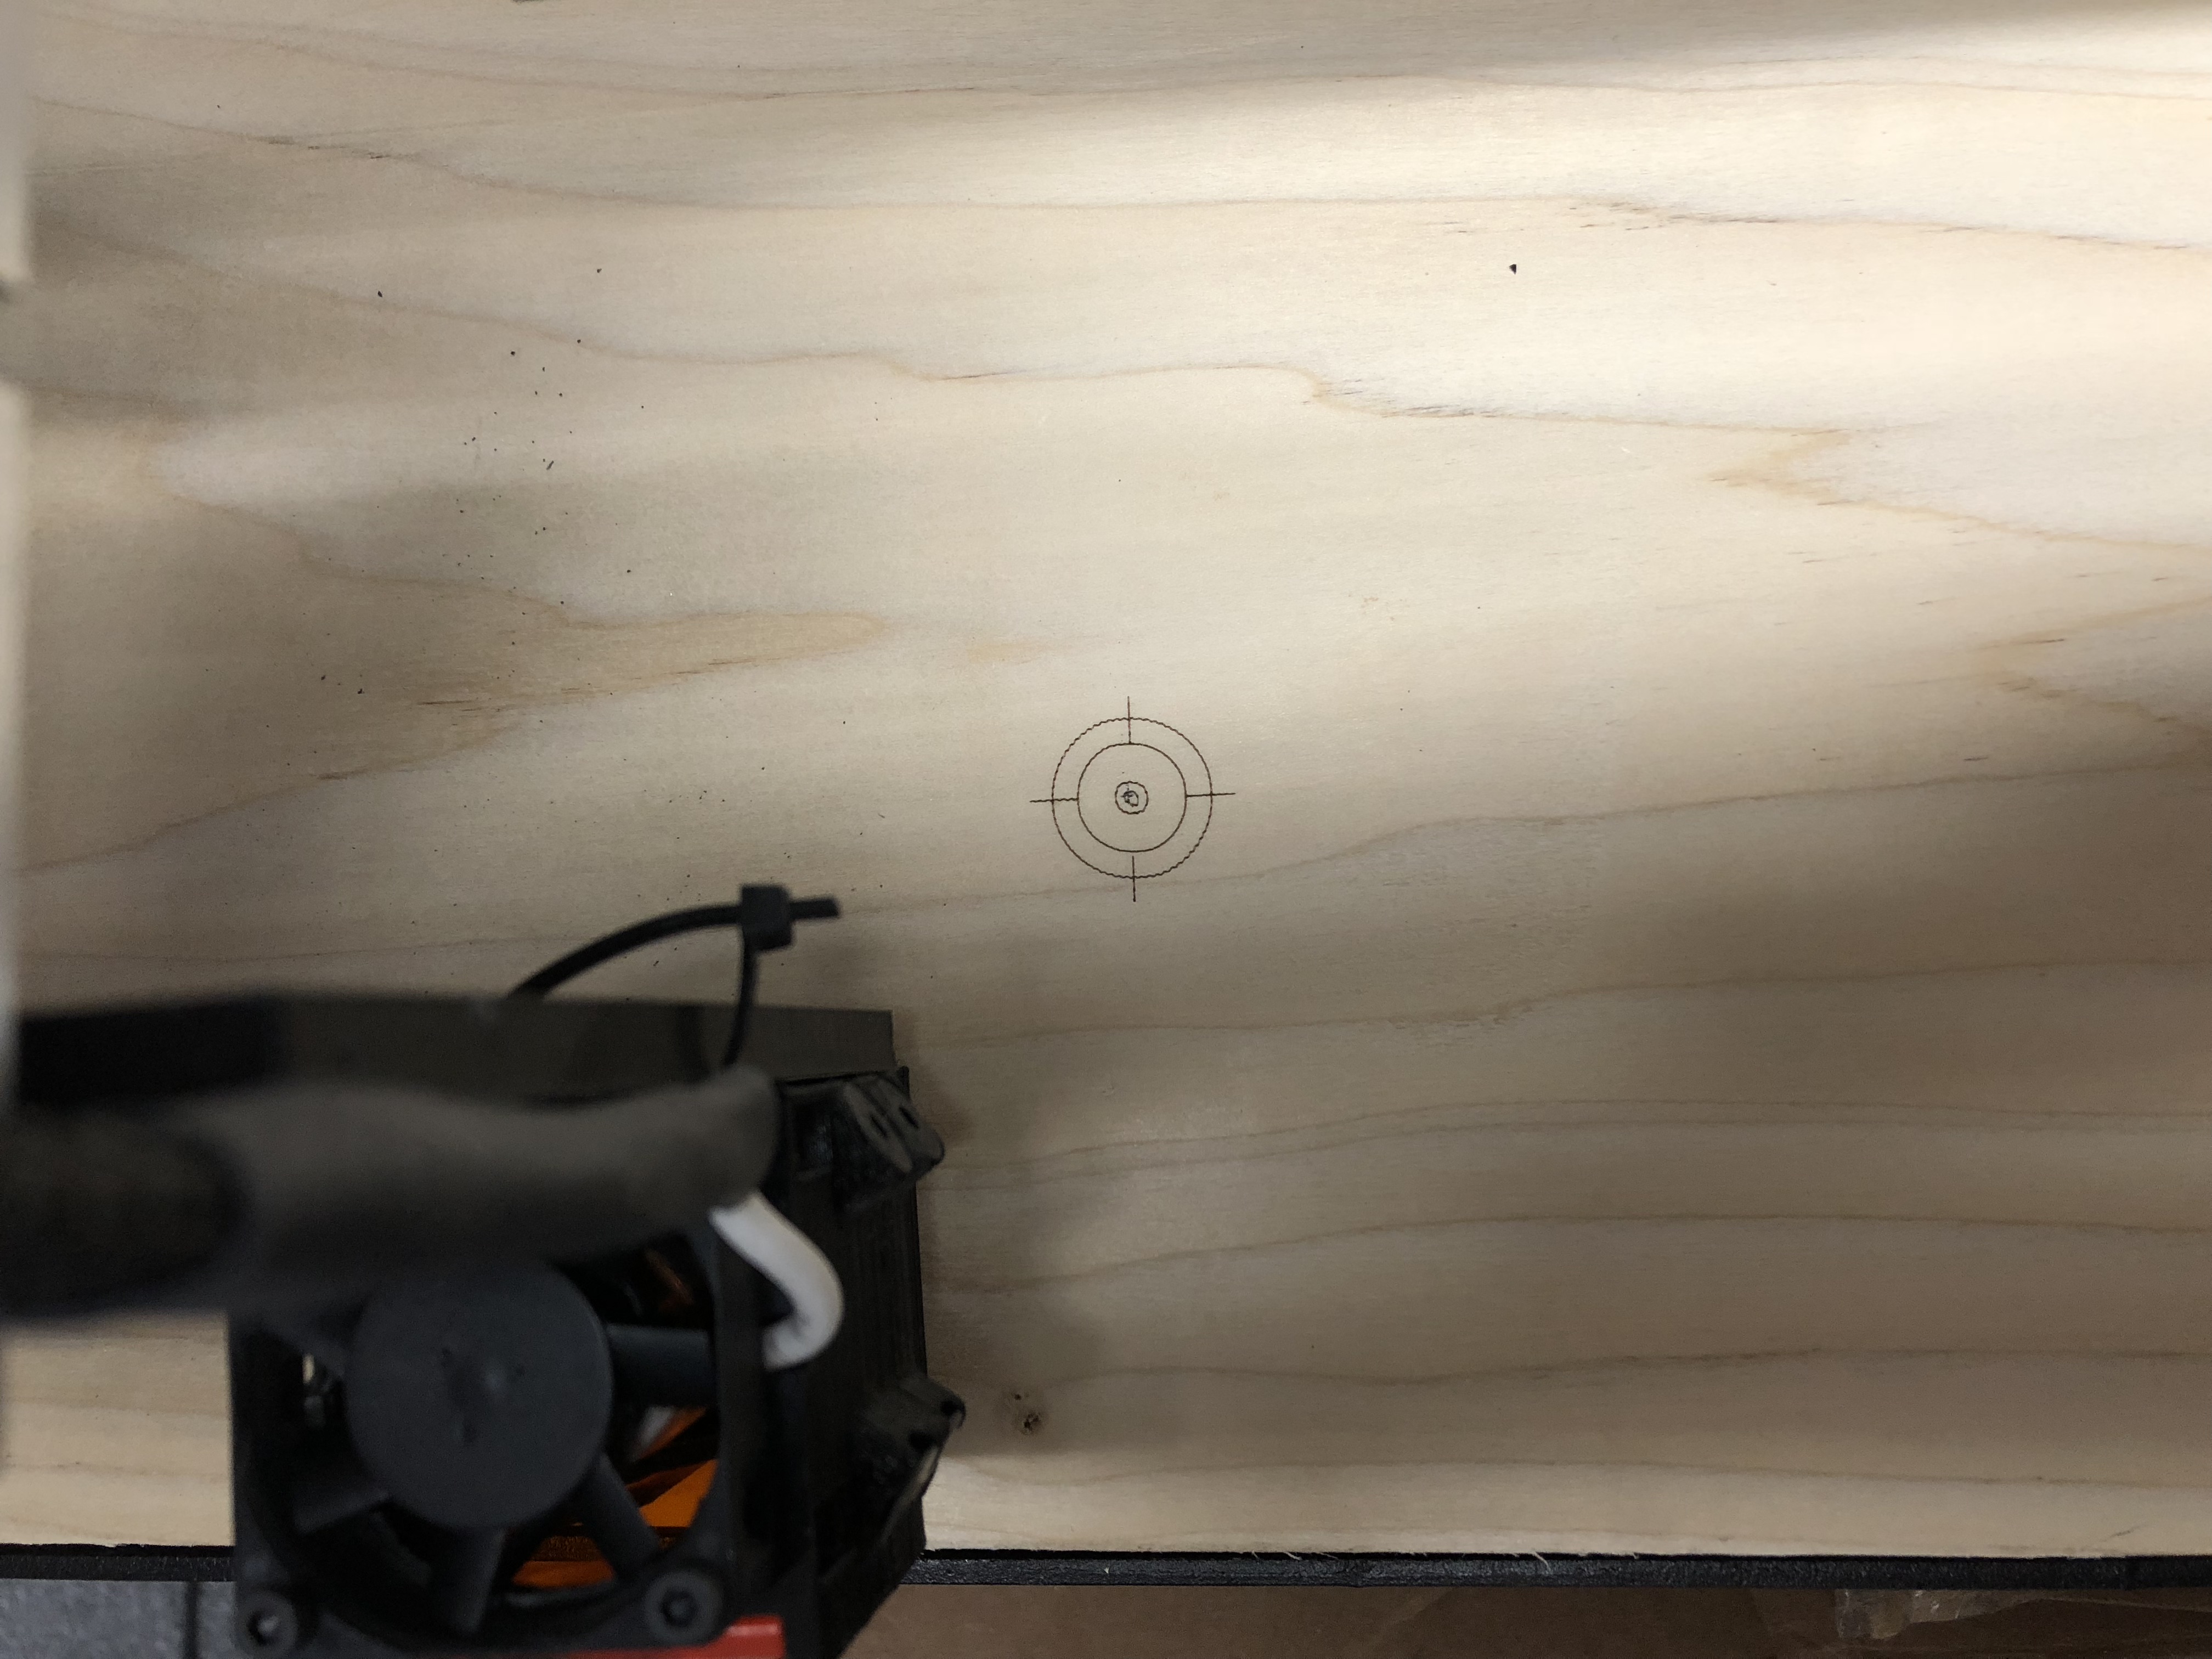
For those who may be interested in how to offset the laser and router so they work together in a combined project, I found this great example on the JTech website.
You must create a zero location on your board. This must be done whenever you have multiple tools offset from one another. In this case, you have both the router and the laser at different locations, so you must create a physical mark on the location that your toolpaths will start from. We utilized the laser and created a mark that resembled a hunter’s sight, because coolness counts.
Make sure that you place your origin mark in a location that provides ample room for your gantry to travel in the positive X and Y direction with both the laser and the router equipped. Remember that your laser is not positioned in the same location as your router, so you need to verify that both your router and laser are able to travel over the entire job area.
To further support the fact that there is no real issue with matching the zeroes for laser and CNC jobs, you can check out the little G-code macros I used in this thread. I use it to zero with a laser and then bring the cutter to that point, but the opposite would work the same.