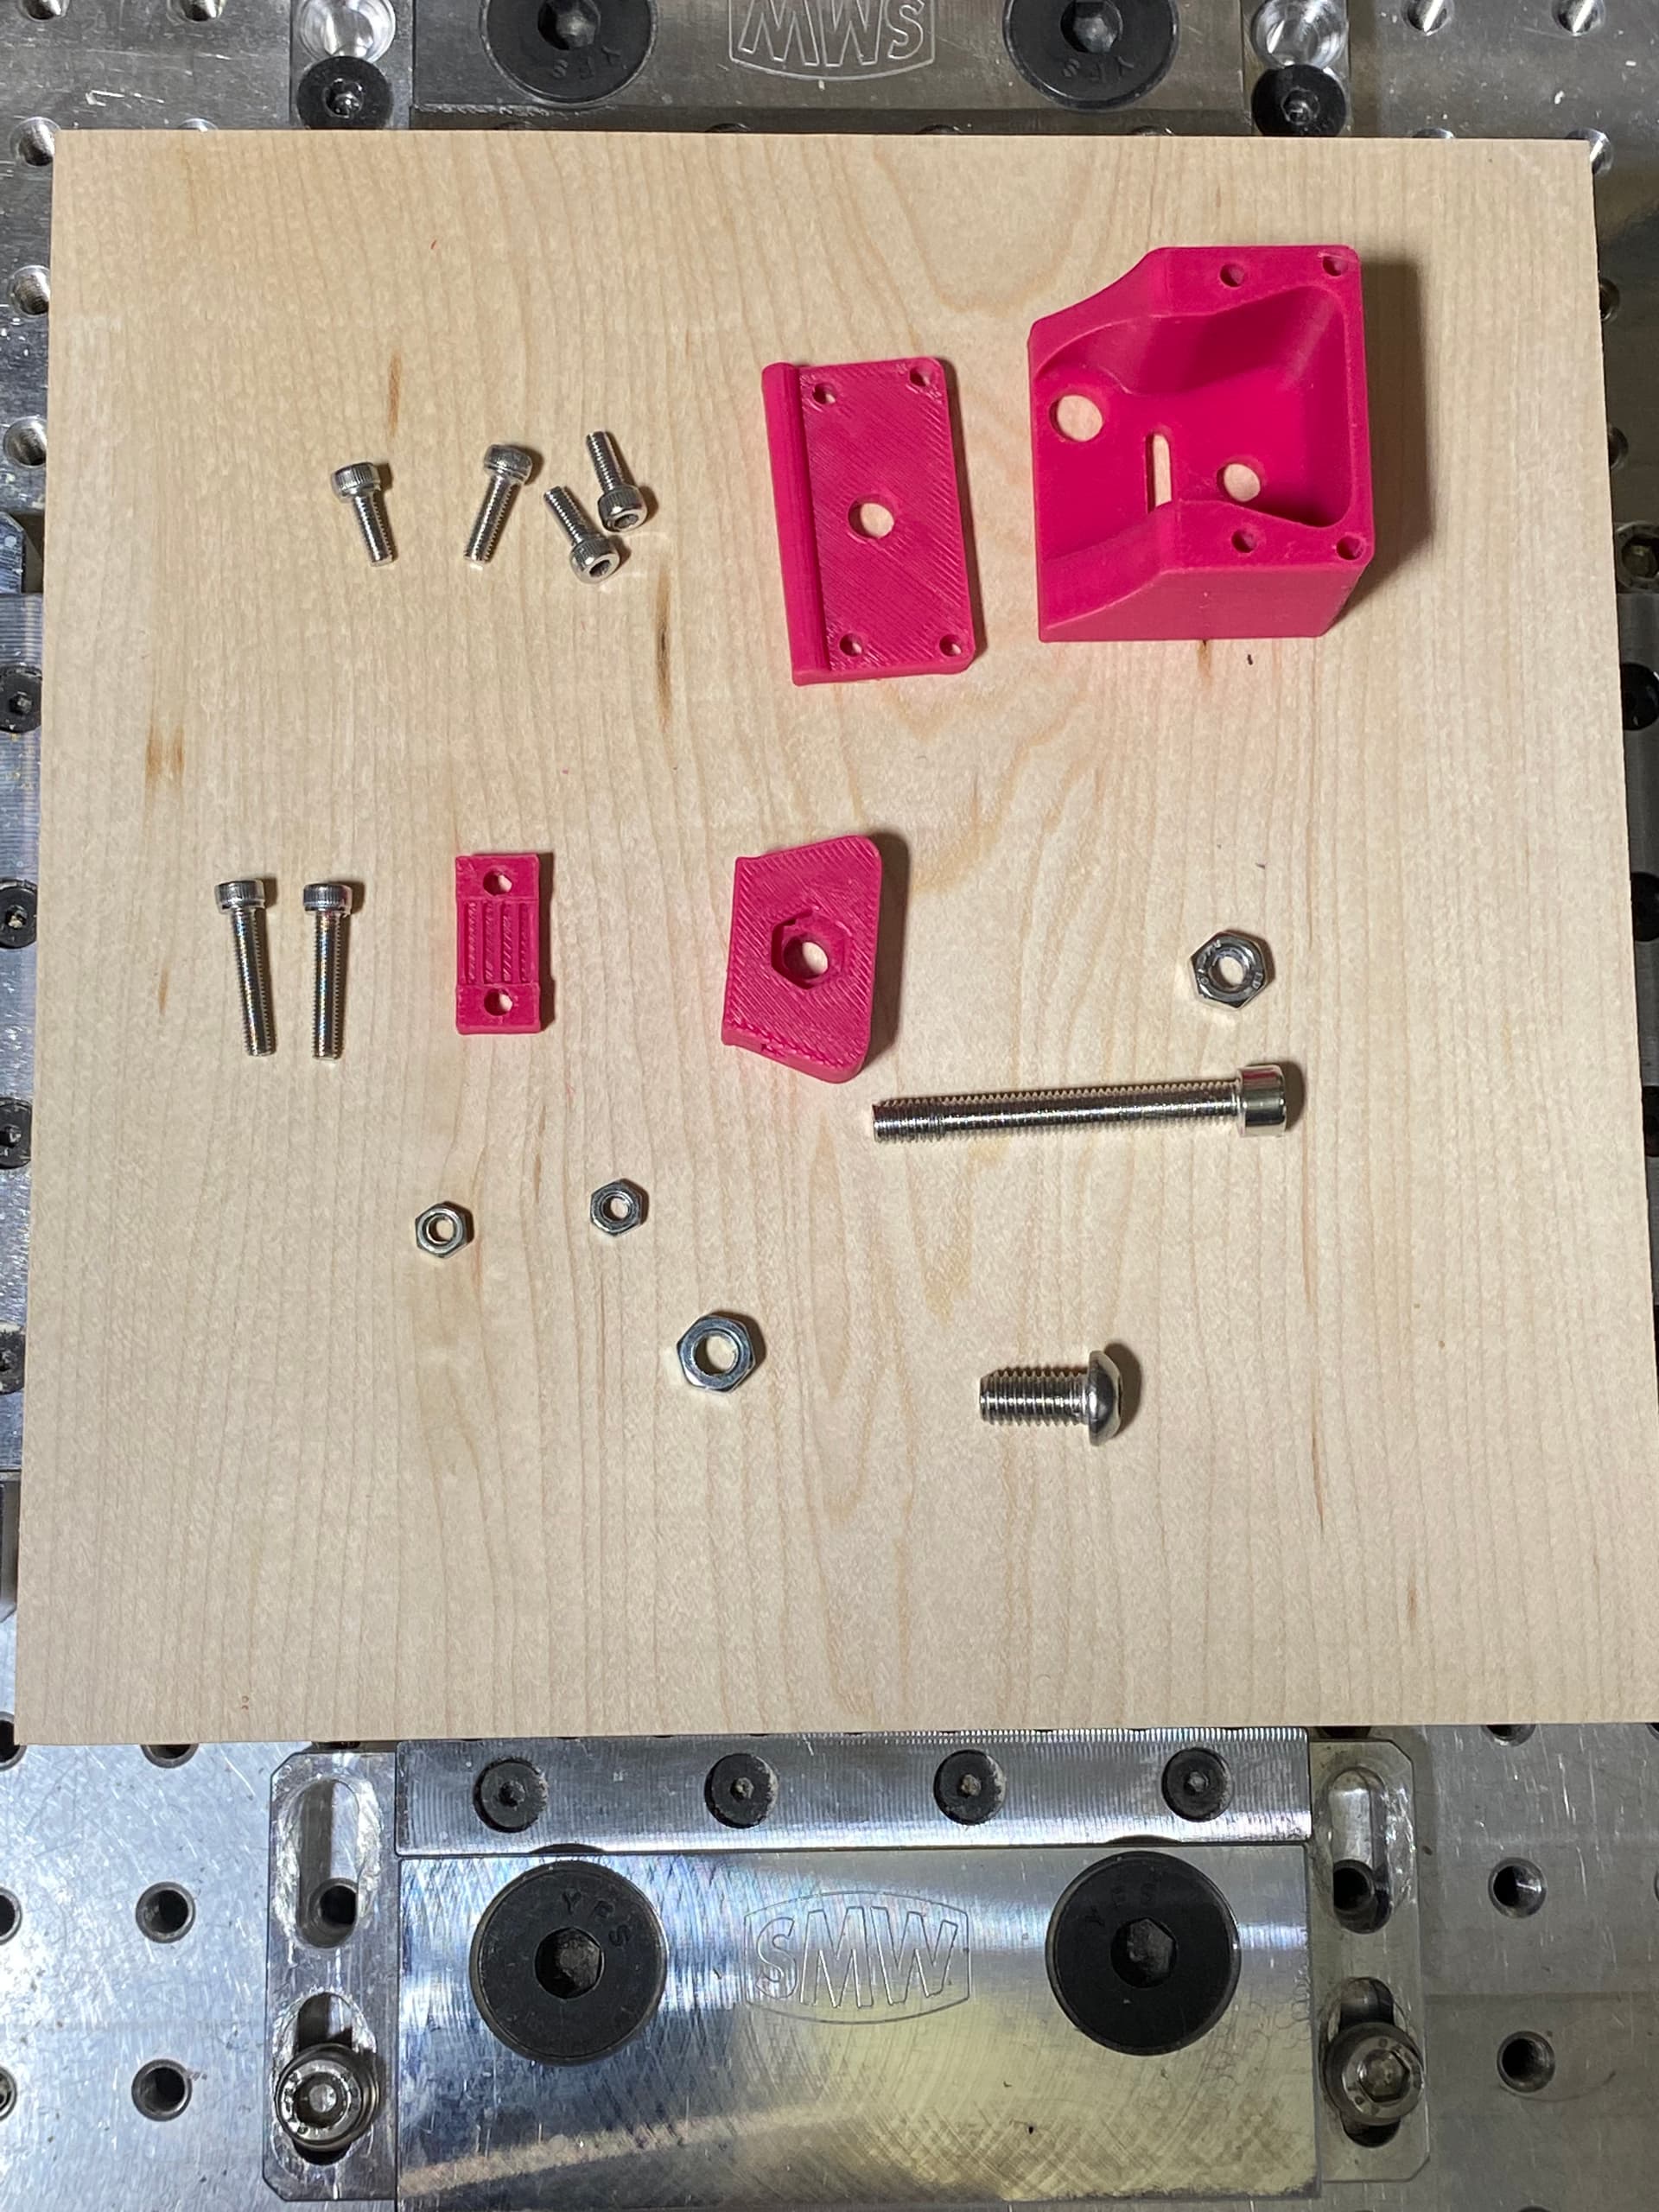
I have mentioned the belt tensioning on my standard sized SO3 in my recent post and thought it worth detailing the modified belt tension system based upon @neilferreri’s design. The components are printed from Neil’s files on Thingiverse.
Pictures.
The design comprises four 3D printed parts and I printed six groups of four parts. (2 groups for each end of the X, Y1 and Y2 rails)
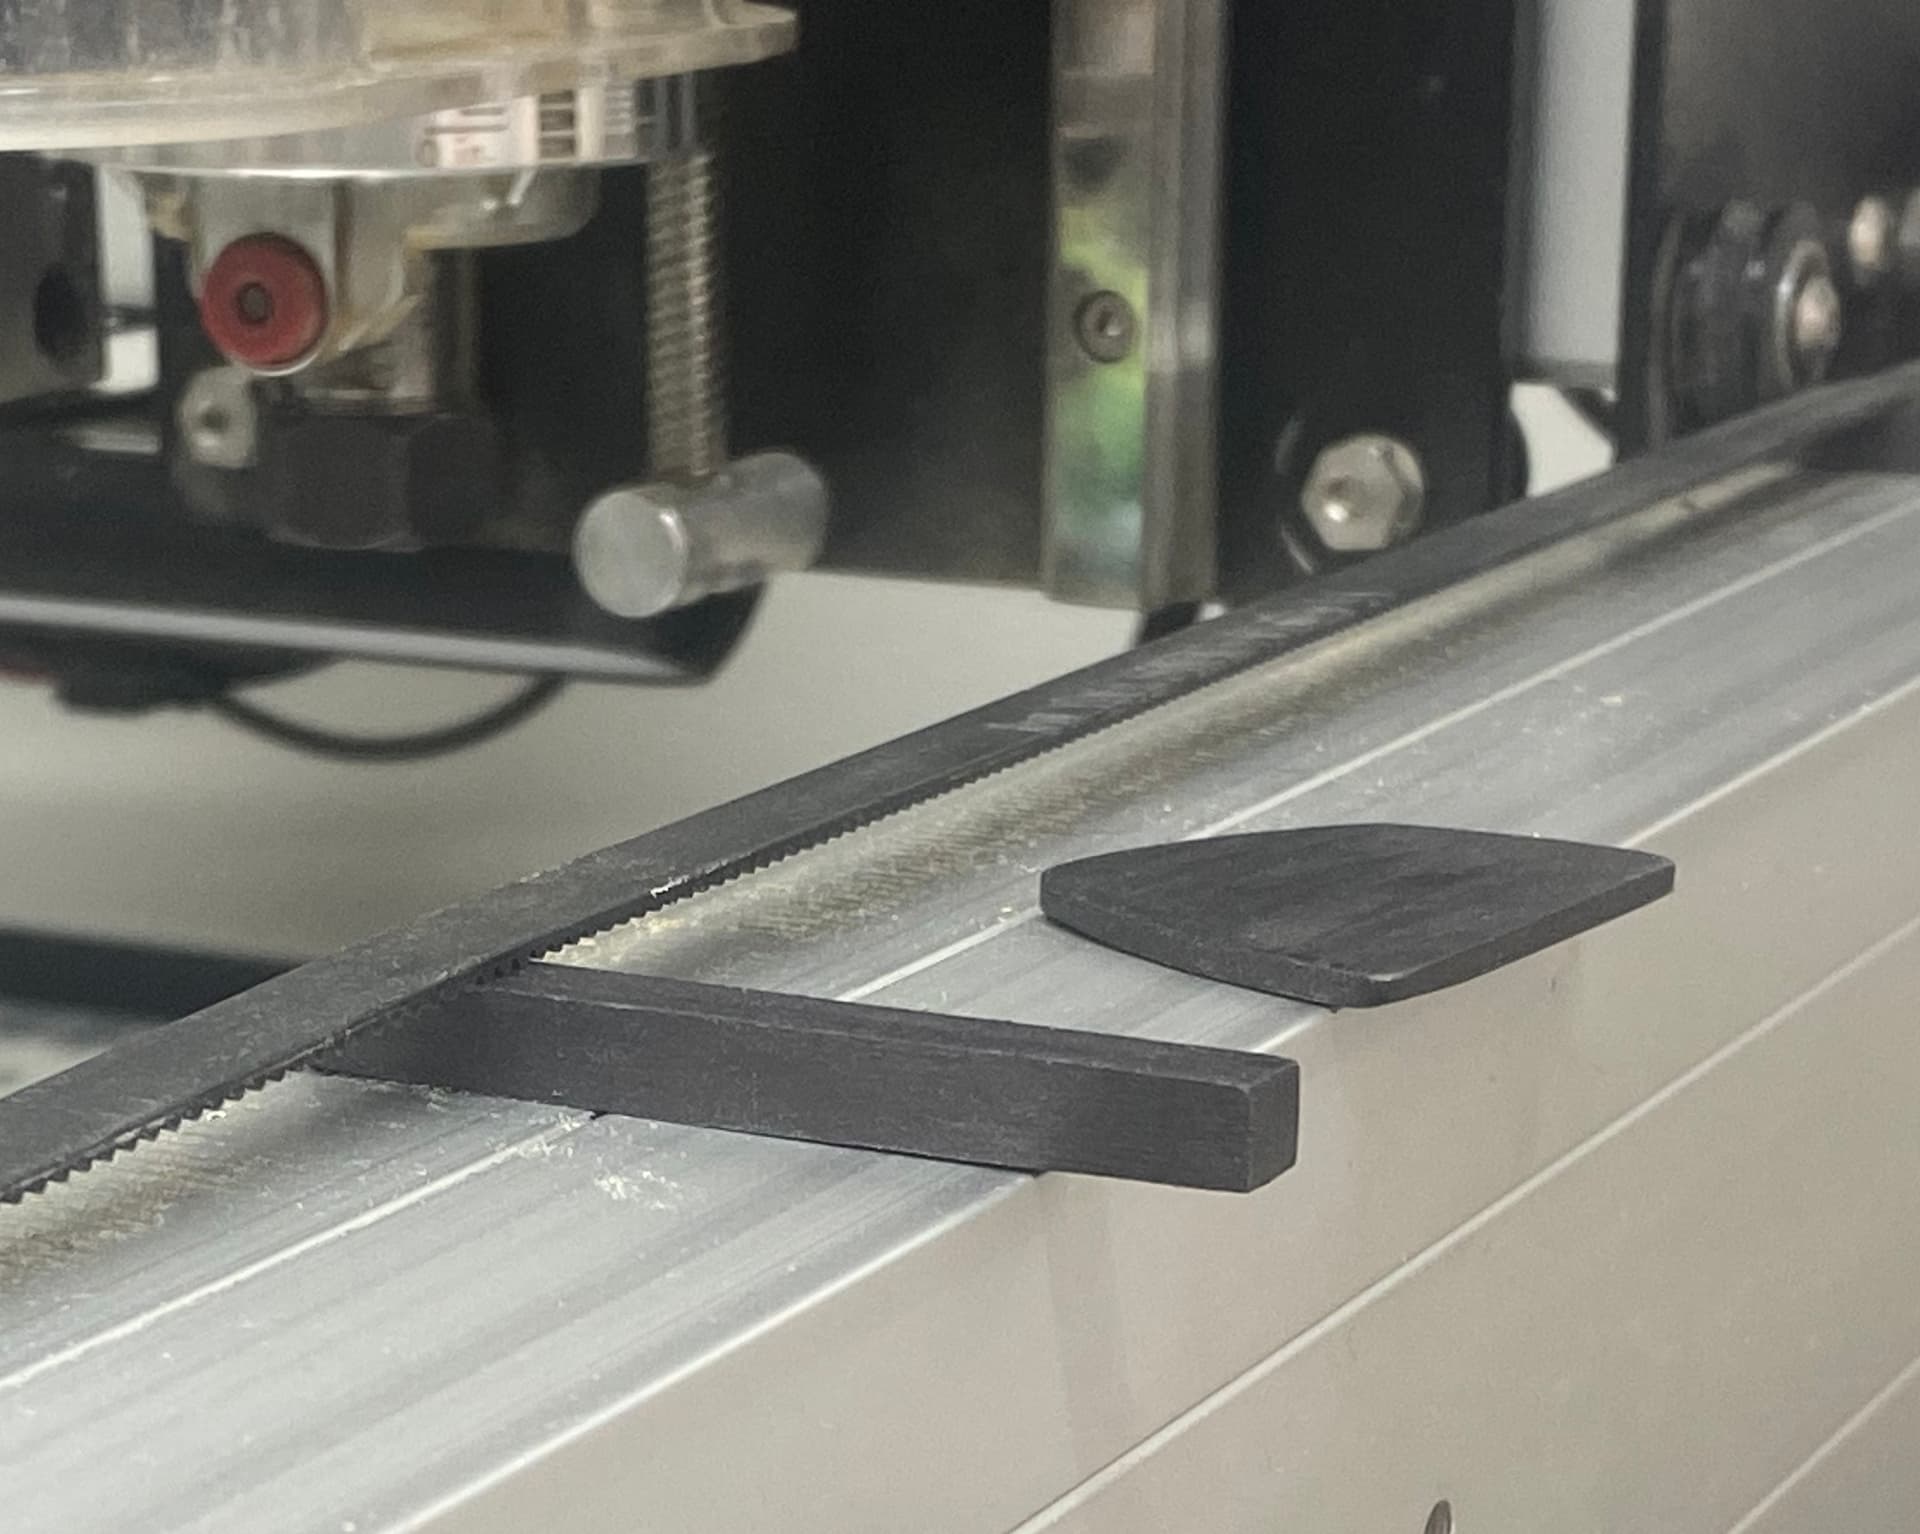
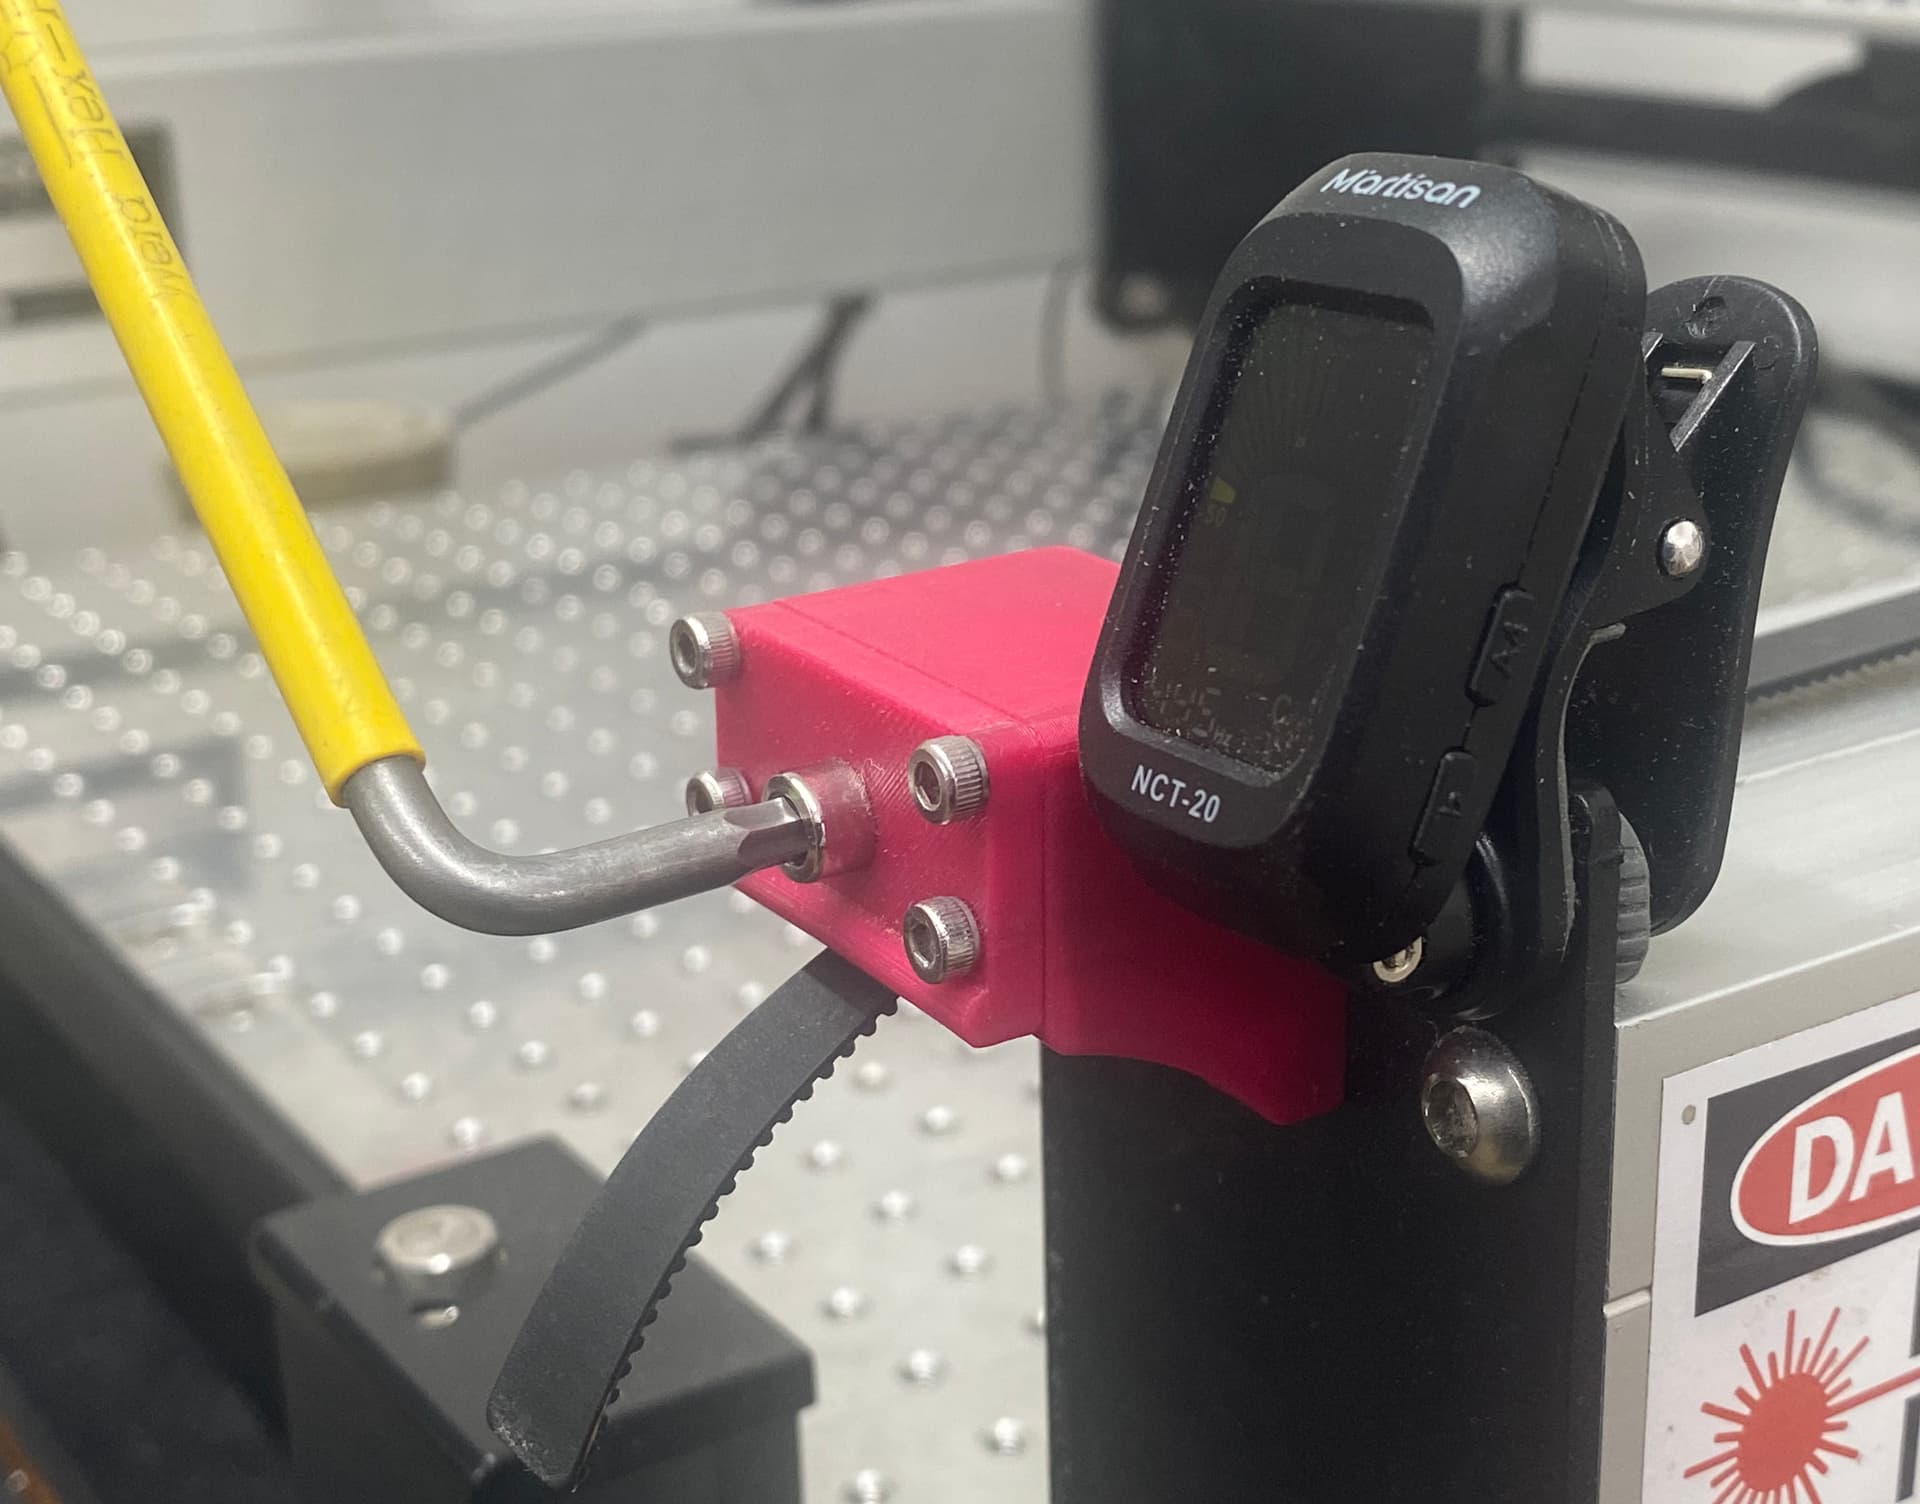
This image shows the height the belts are elevated from the rail (¼") using supports which hold the belt away from the rail to permit tuning. In this picture also is the wooden plectrum used to get the sound as pure as possible from the belt without the sound being affected/dulled by a finger plucking the belt.
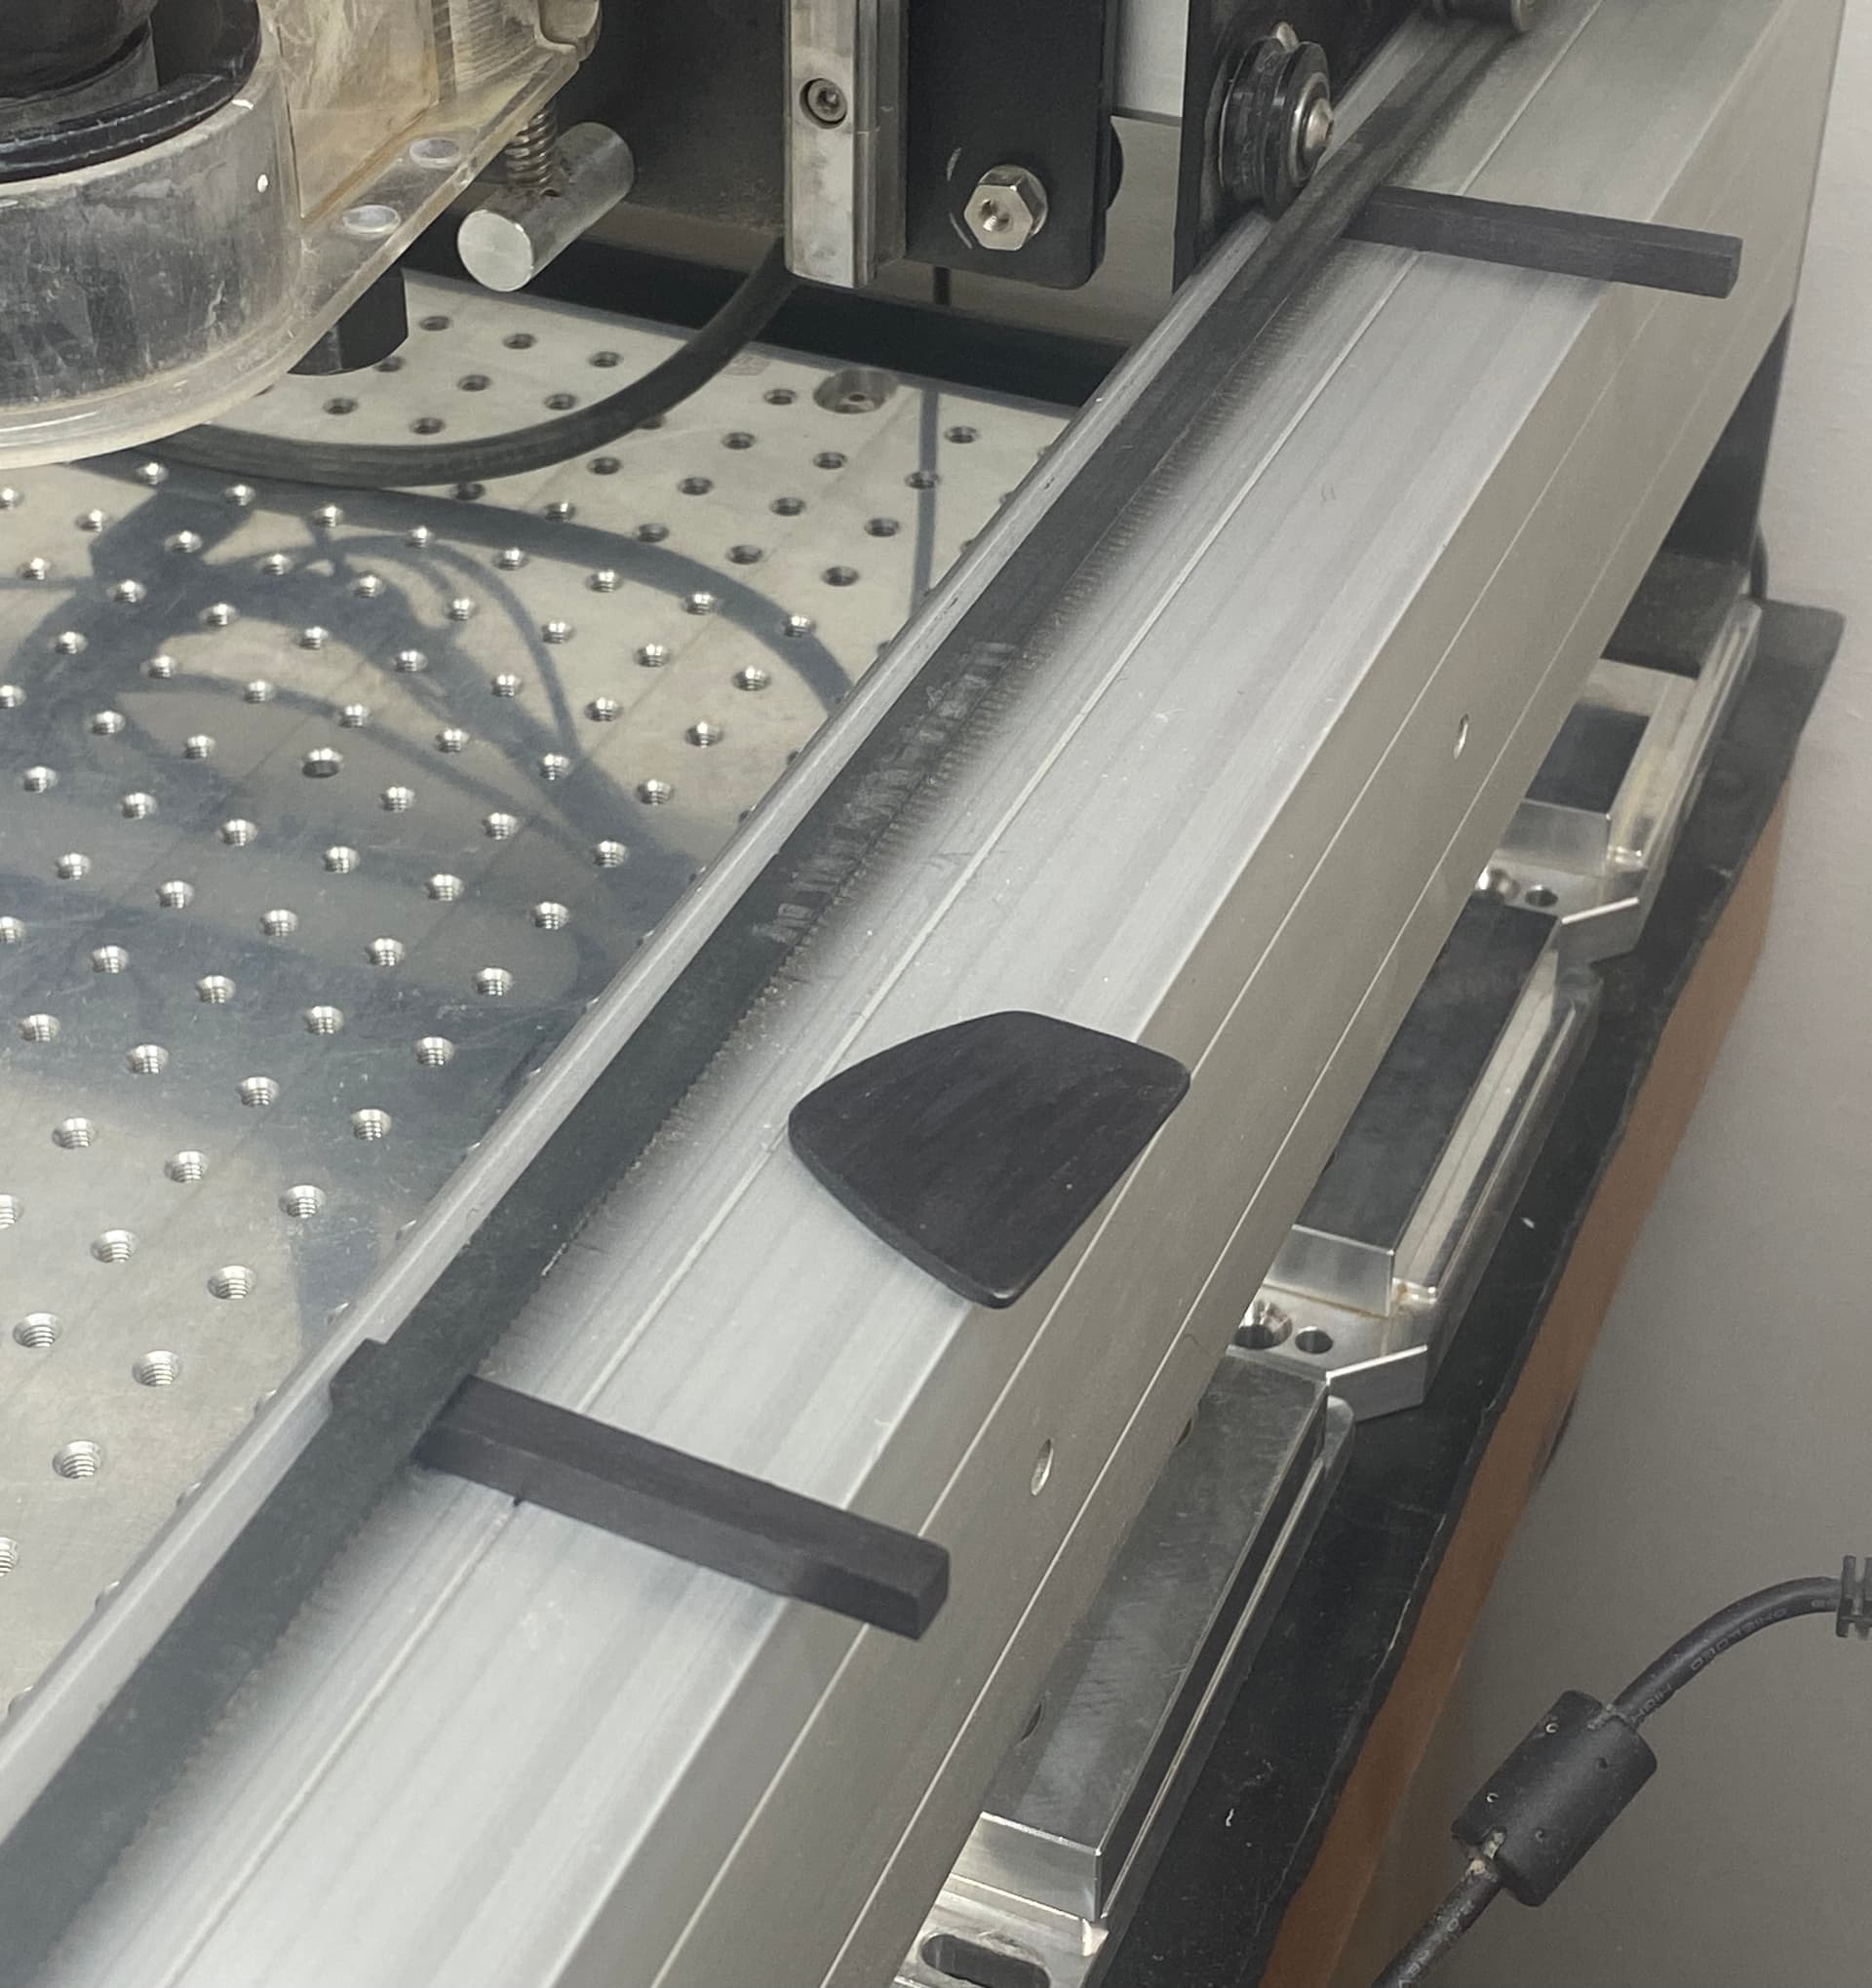
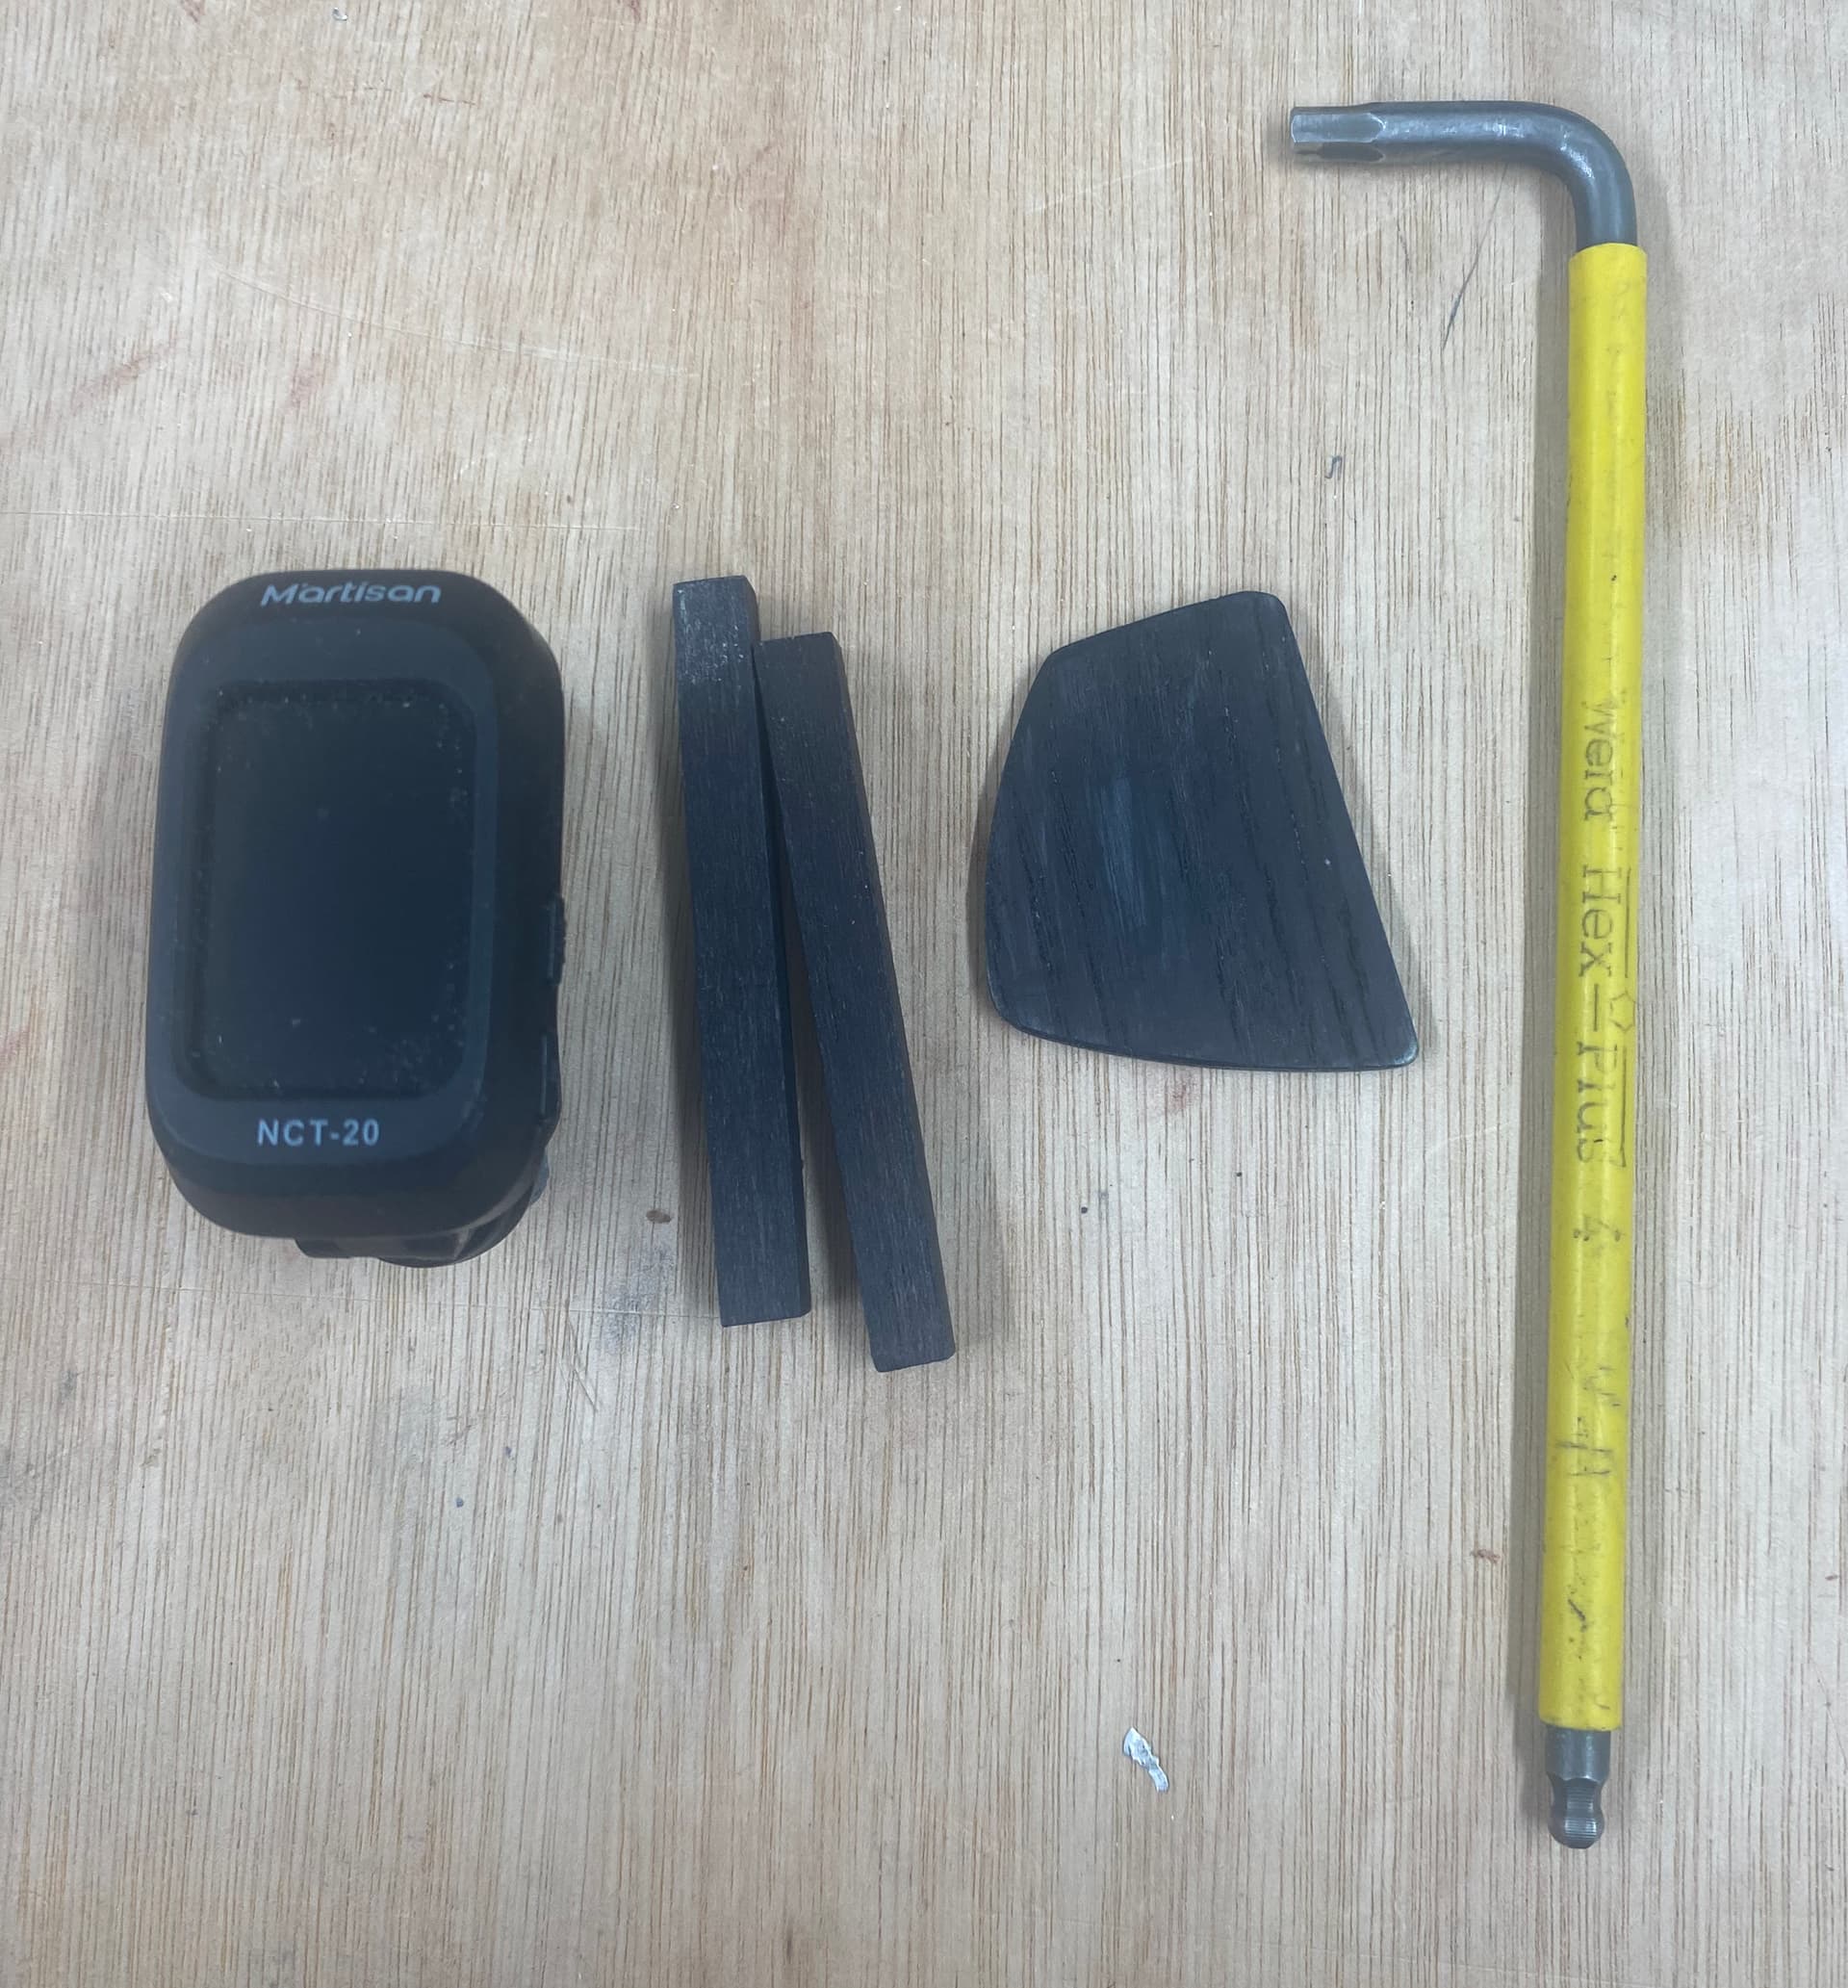
This image shows the kit used to tune each belt. It consists of the belt elevation supports, the plectrum to pluck the belt, the guitar tuner which senses vibration and a 4mm Allen key to turn the single bolt that reduces or increases the belt tension.
This picture shows the tuner in situ. It is clamped onto the endplate next to the belt tensioner and the Allen key sits in the single bolt required to tension the belts. Average tensioning time is 20 seconds per belt.
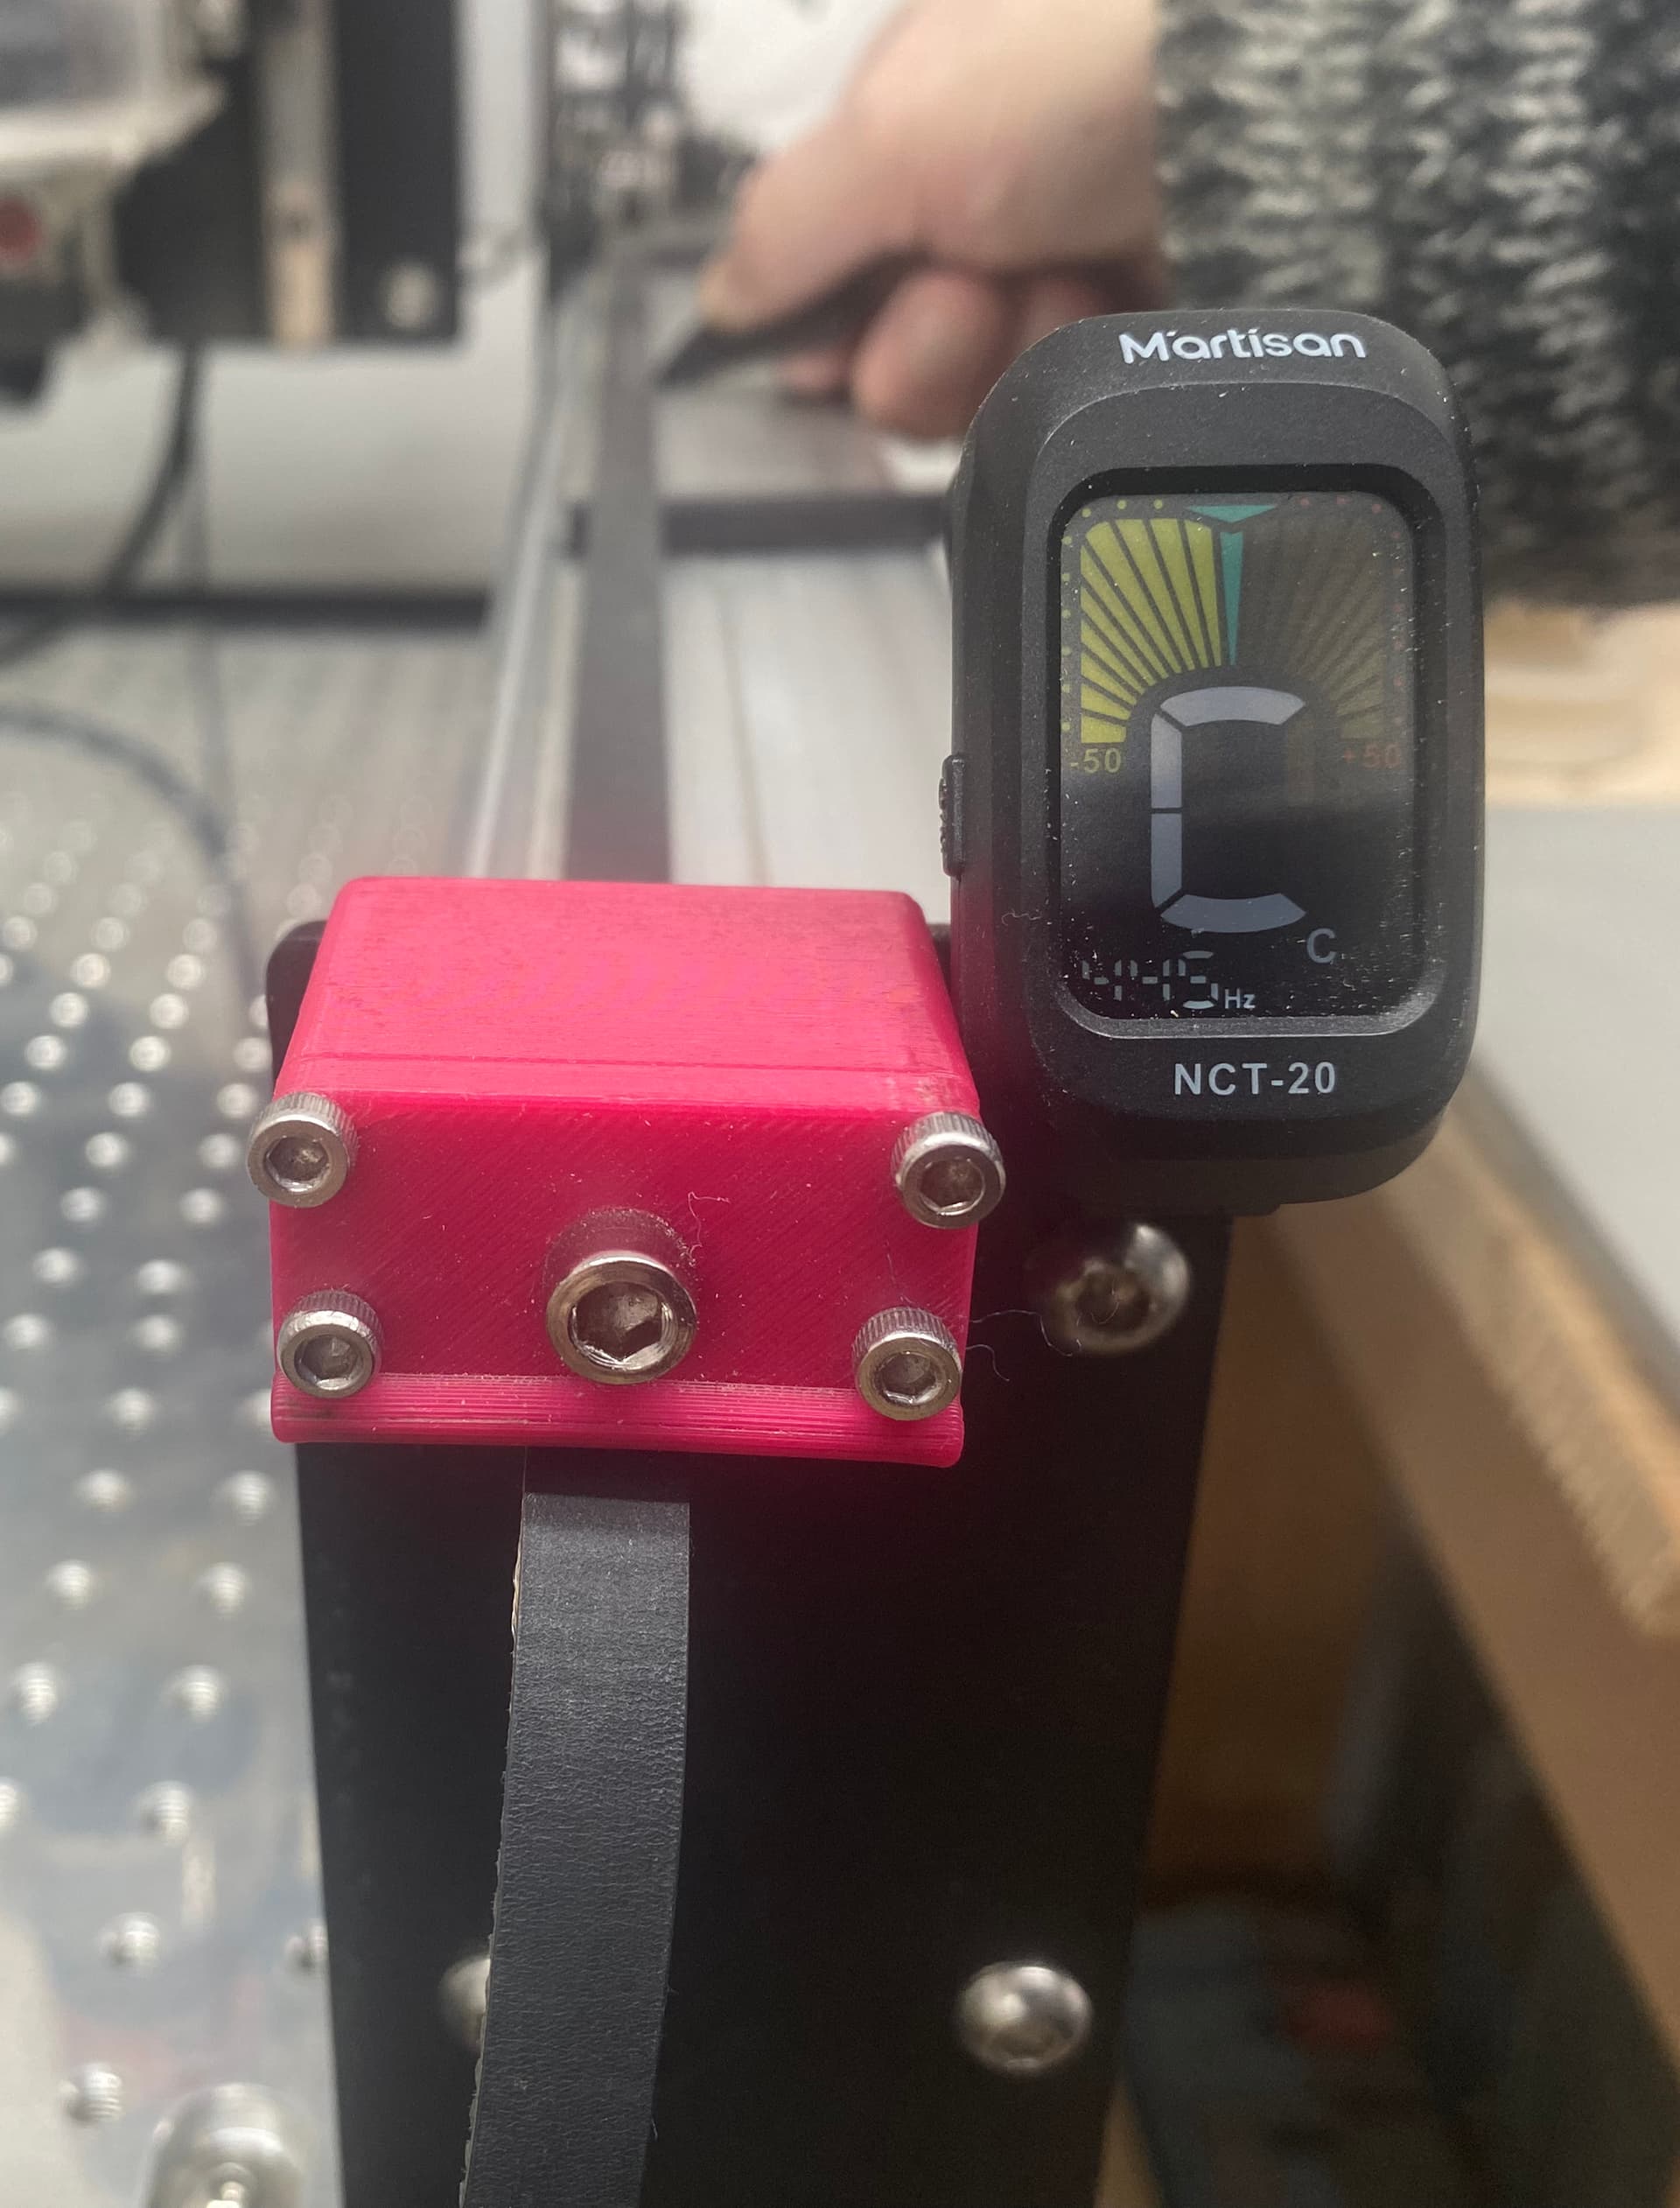
I tune my belts to 130.8128Hz which equates to the note, C3. The image shows the belt tuned to C3 as denoted by the green bar signifying that the note was precisely in tune.
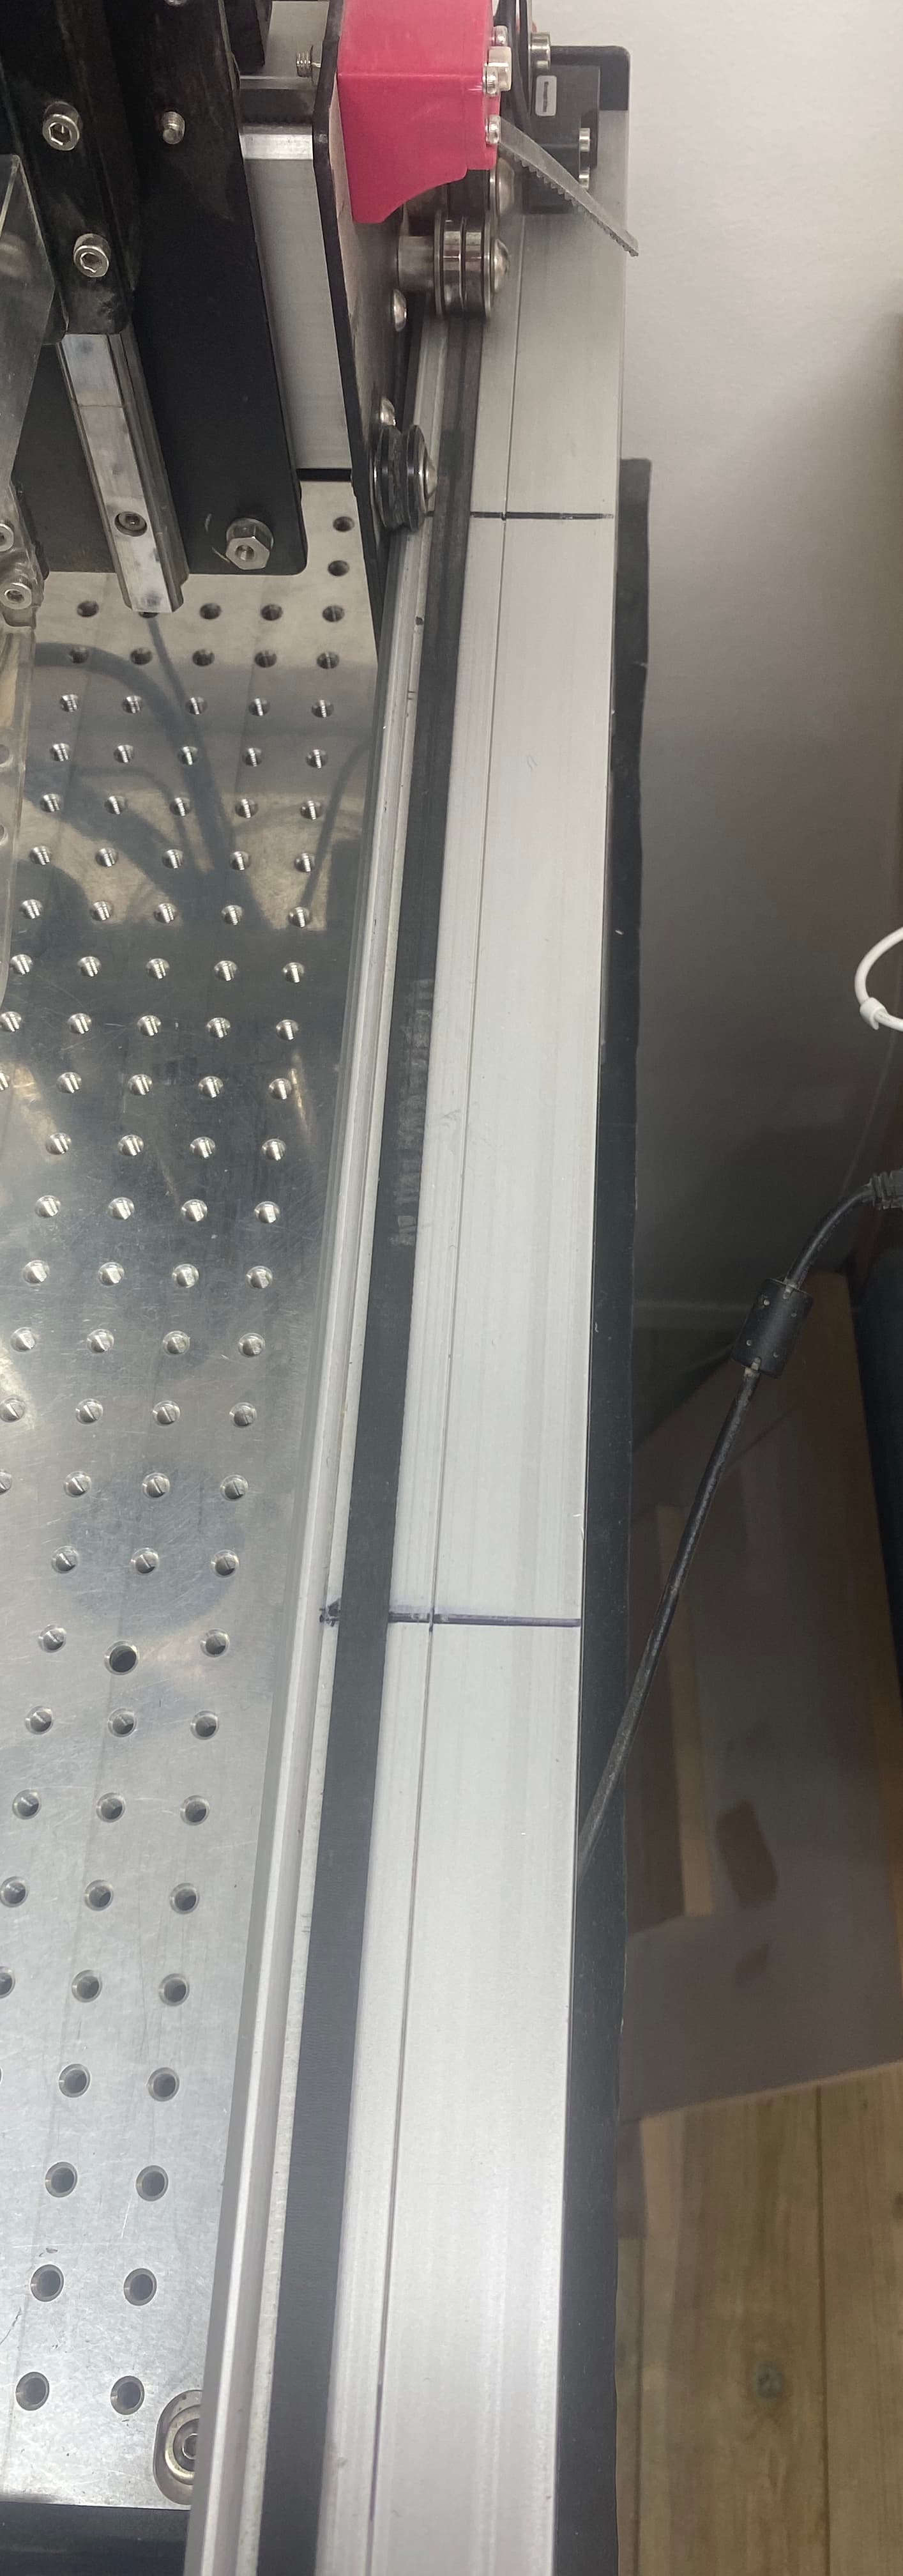
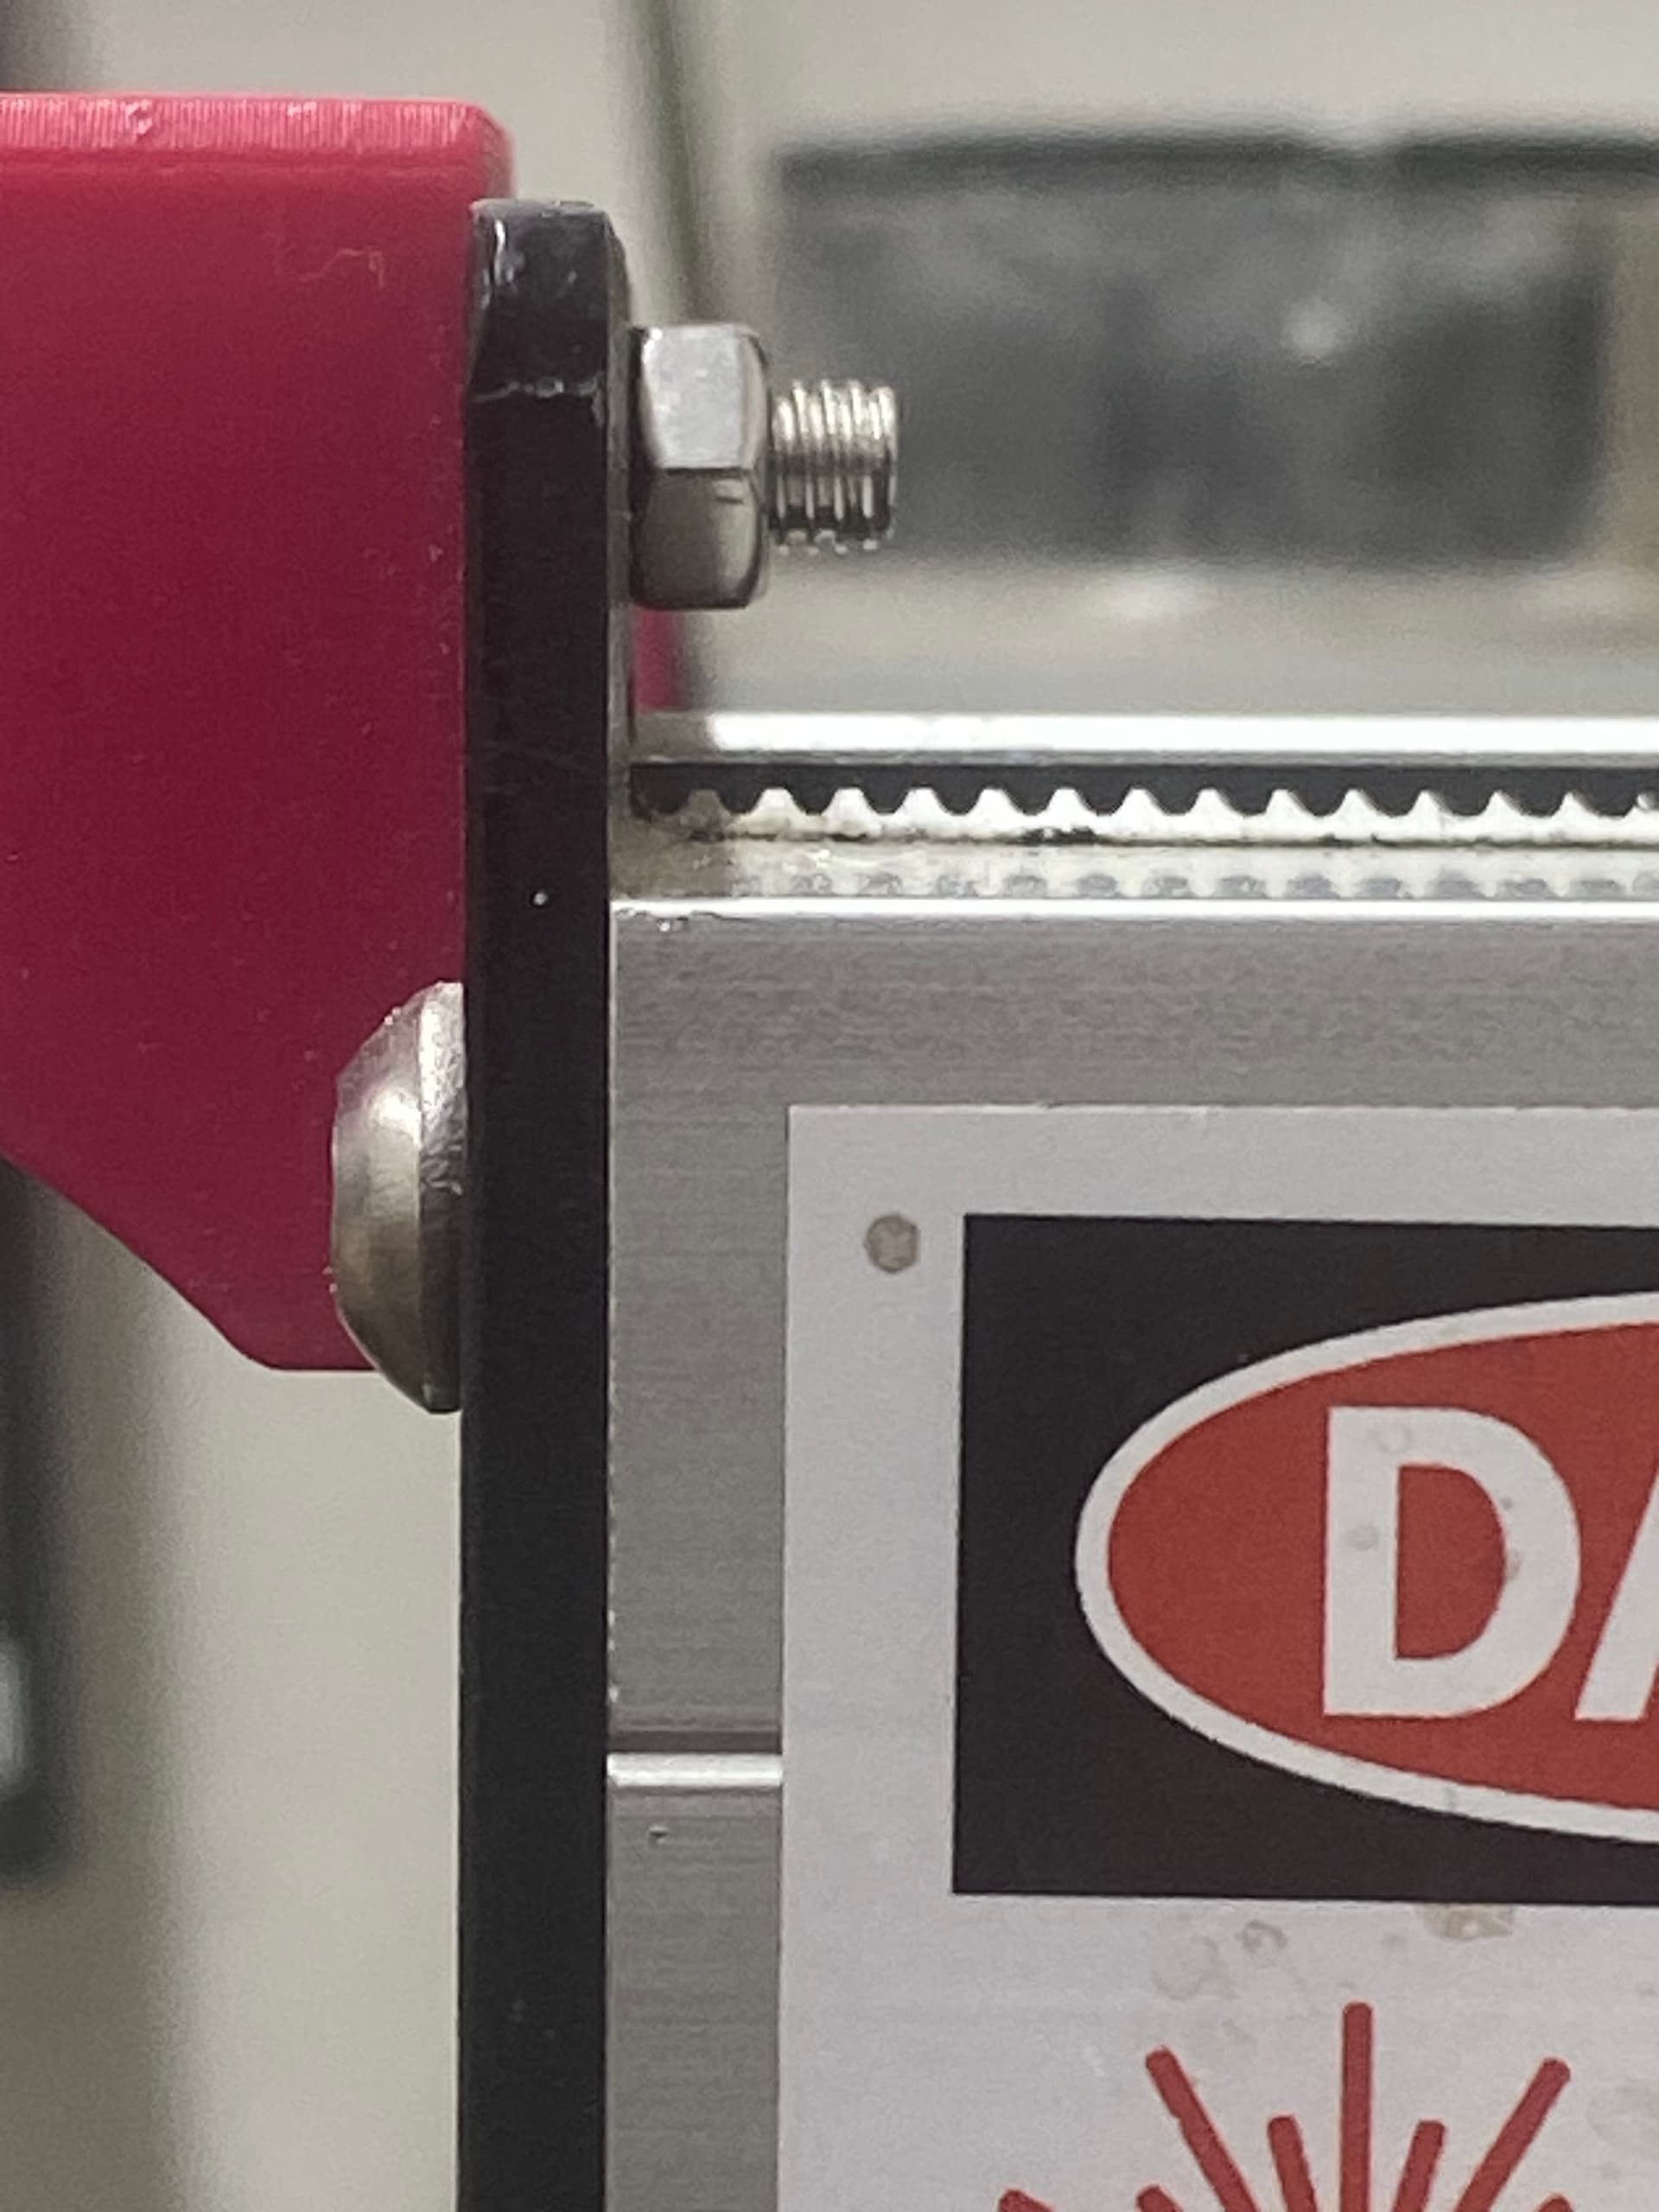
The flat path of the belt using this modified belt tensioning system instead of the originally supplied right angled bracket. It saves much of the time I used to expend tensioning the belts somewhat inaccurately and the tension obtained is trivially reproducible.
Once I have installed my new HDZ and cylinder, my first project will be to attempt to cut these tensioners from a non-ferrous metal such as phosphor bronze.
Very nice. Luckily my 2016 SO3 XXL has the original belts and I have never had to re tension them. The SO3 is a solid machine with a lot of time and projects under its belts.
I replaced the tensioners on my SO3 with these as well and they are fantastic. Honestly think that C3D should really switch to a similar design on any belted CNCs they offer in the future. The only drawback with @neilferreri’s design is that it is easier to over tighten the belts and bend the stepper motor shafts than the stock design.
I guess that may be an issue. Following @LiamN’s article on measuring belt tension, squaring and calibration, it was clear that any tension from 100 to 150Hz would be within an acceptable range. My guitar tuner is providing me with an accurate C3 note frequency which only equates to 130 Hz. This is well inside the recommendation and I have used this system for several years now and do not see any signs of bending the stepper motor shafts.
In truth, any misapplication of knowledge can damage the machinery and it is (IMO) up to us as users to ensure we are not doing damage to the machinery. I think there is sufficient knowledge available but as new users we have to gather it from all of the trusted sources and repositories. I agree with you and think that C3D should offer this kind of arrangement for tensioning belts. The costs are likely to outweigh the benefits of providing a robust tensioning system on low cost machinery, despite the critical importance of belt tensioning or tramming. It would significantly raise the cost of entry to new users and they would be unlikely to want that.
Wow! That is impressive. I thought the XXL used the same width belts as the standard SO3. That is the 9mm Gates GT2 as far as I can recall. How are you getting such great life out of your belts? I agree the SO3 is a solid machine and for me it was a great starting point. My intention is to upgrade it with the HDZ (which I have sitting here) once my spindle has arrived.
Apart from the belts, the other really worthwhile (I would say essential after using it extensively) upgrade for me was the aluminium fixture plate, stiffener rails and the modular vices from Saunders Machine Works in Zanesville, Ohio.
The change in rigidity has been astonising and while I understand that desktop CNC machines are much more suited to the hobbyist, there is a compelling case to be made for using the super rigid SO3 to make a few production quality items. I can easily machine aluminium within a ±0.001" tolerance and with careful machining practice and a new cutter, I was able to achieve a tolerance of ±0.0004" on one occasion.
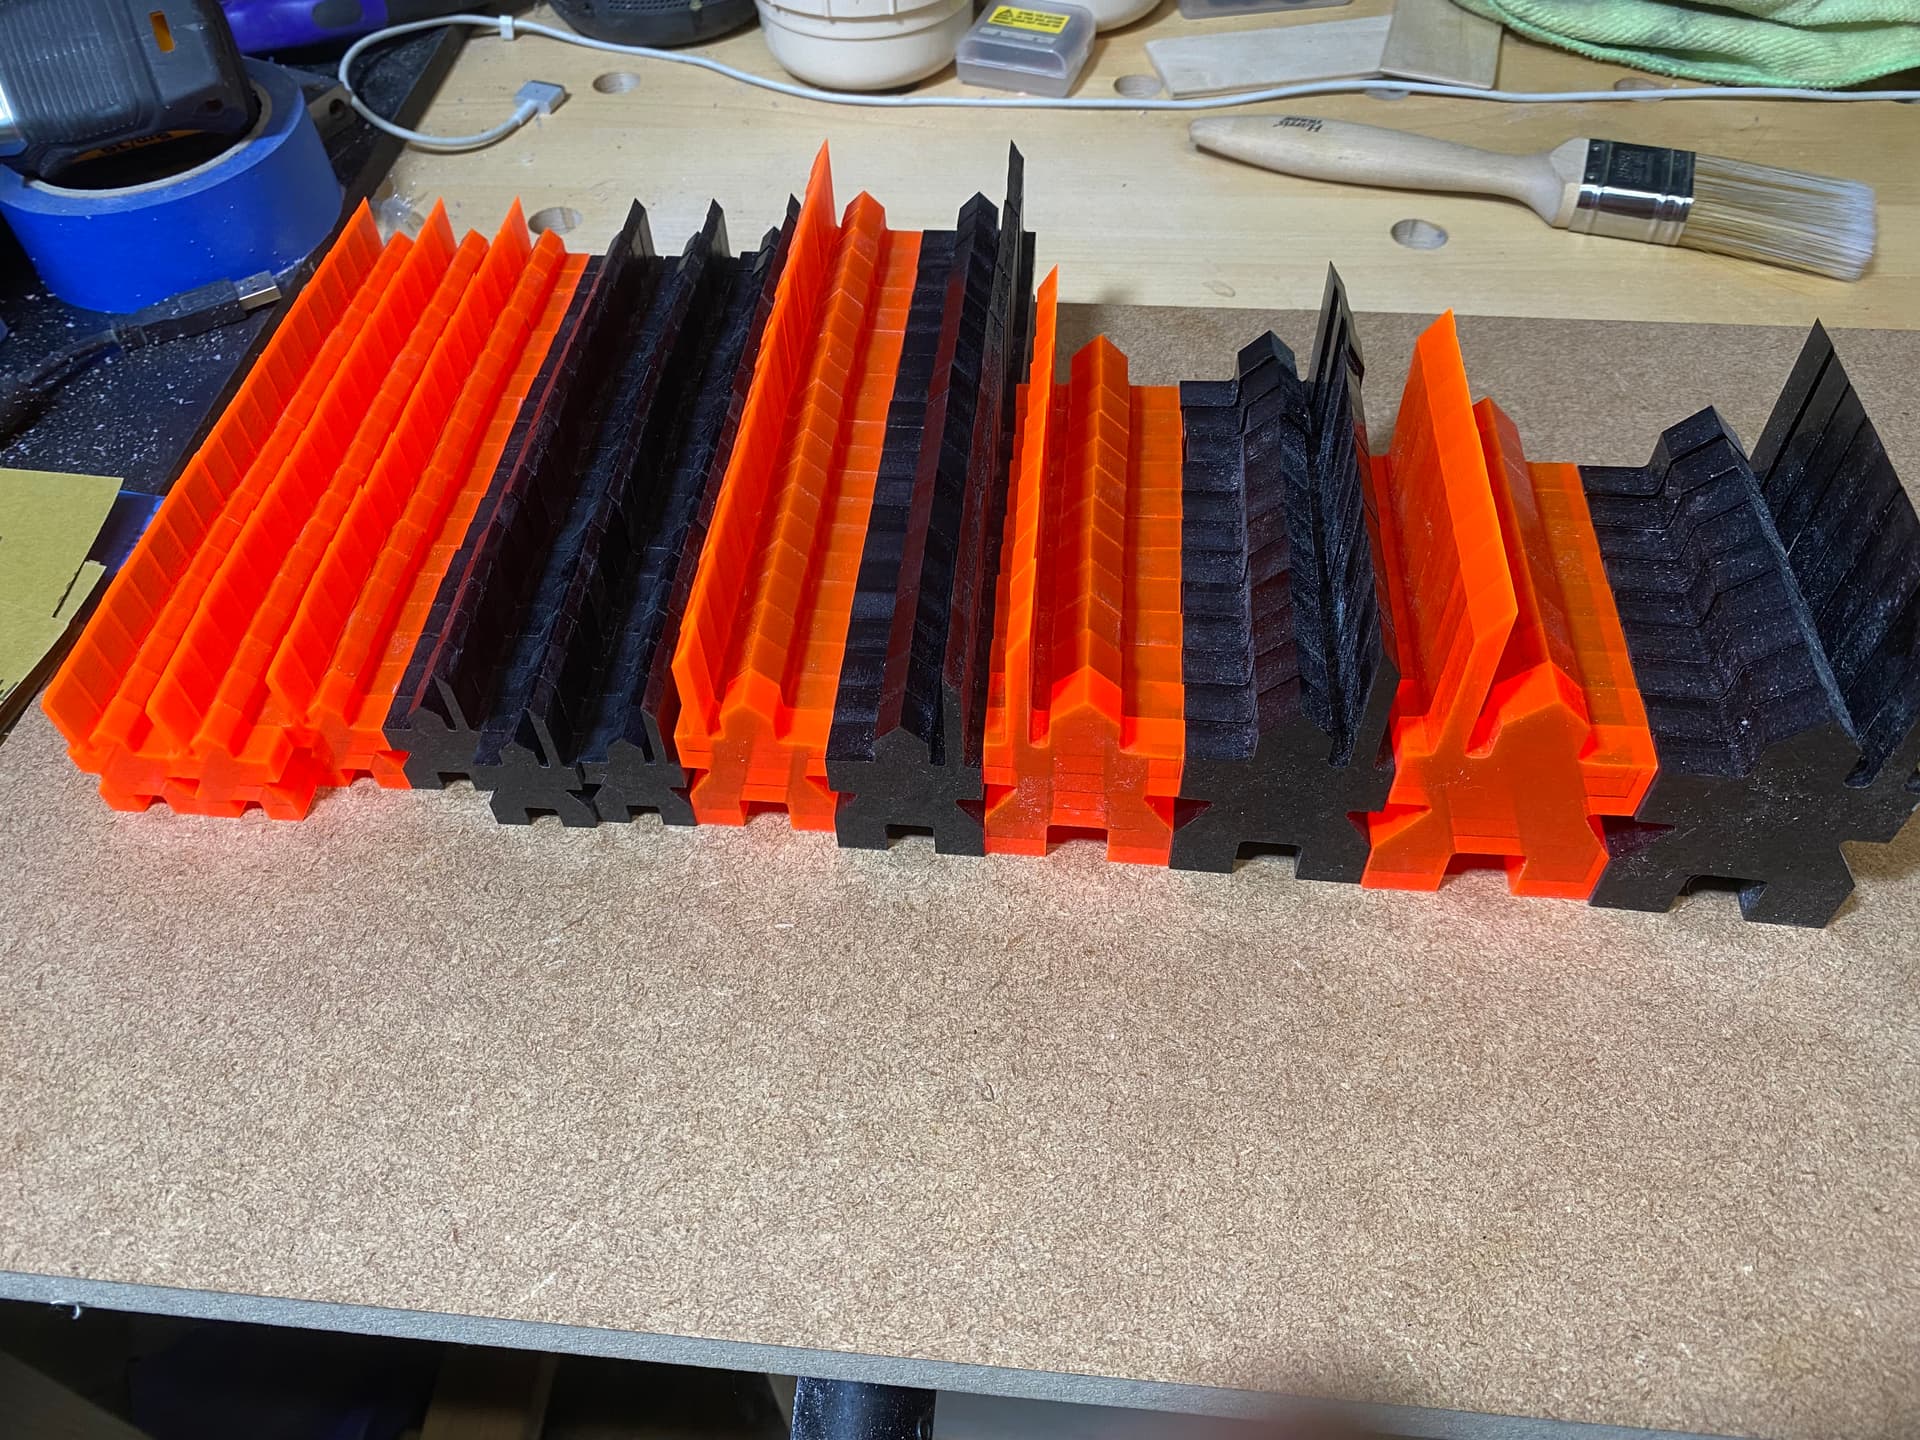
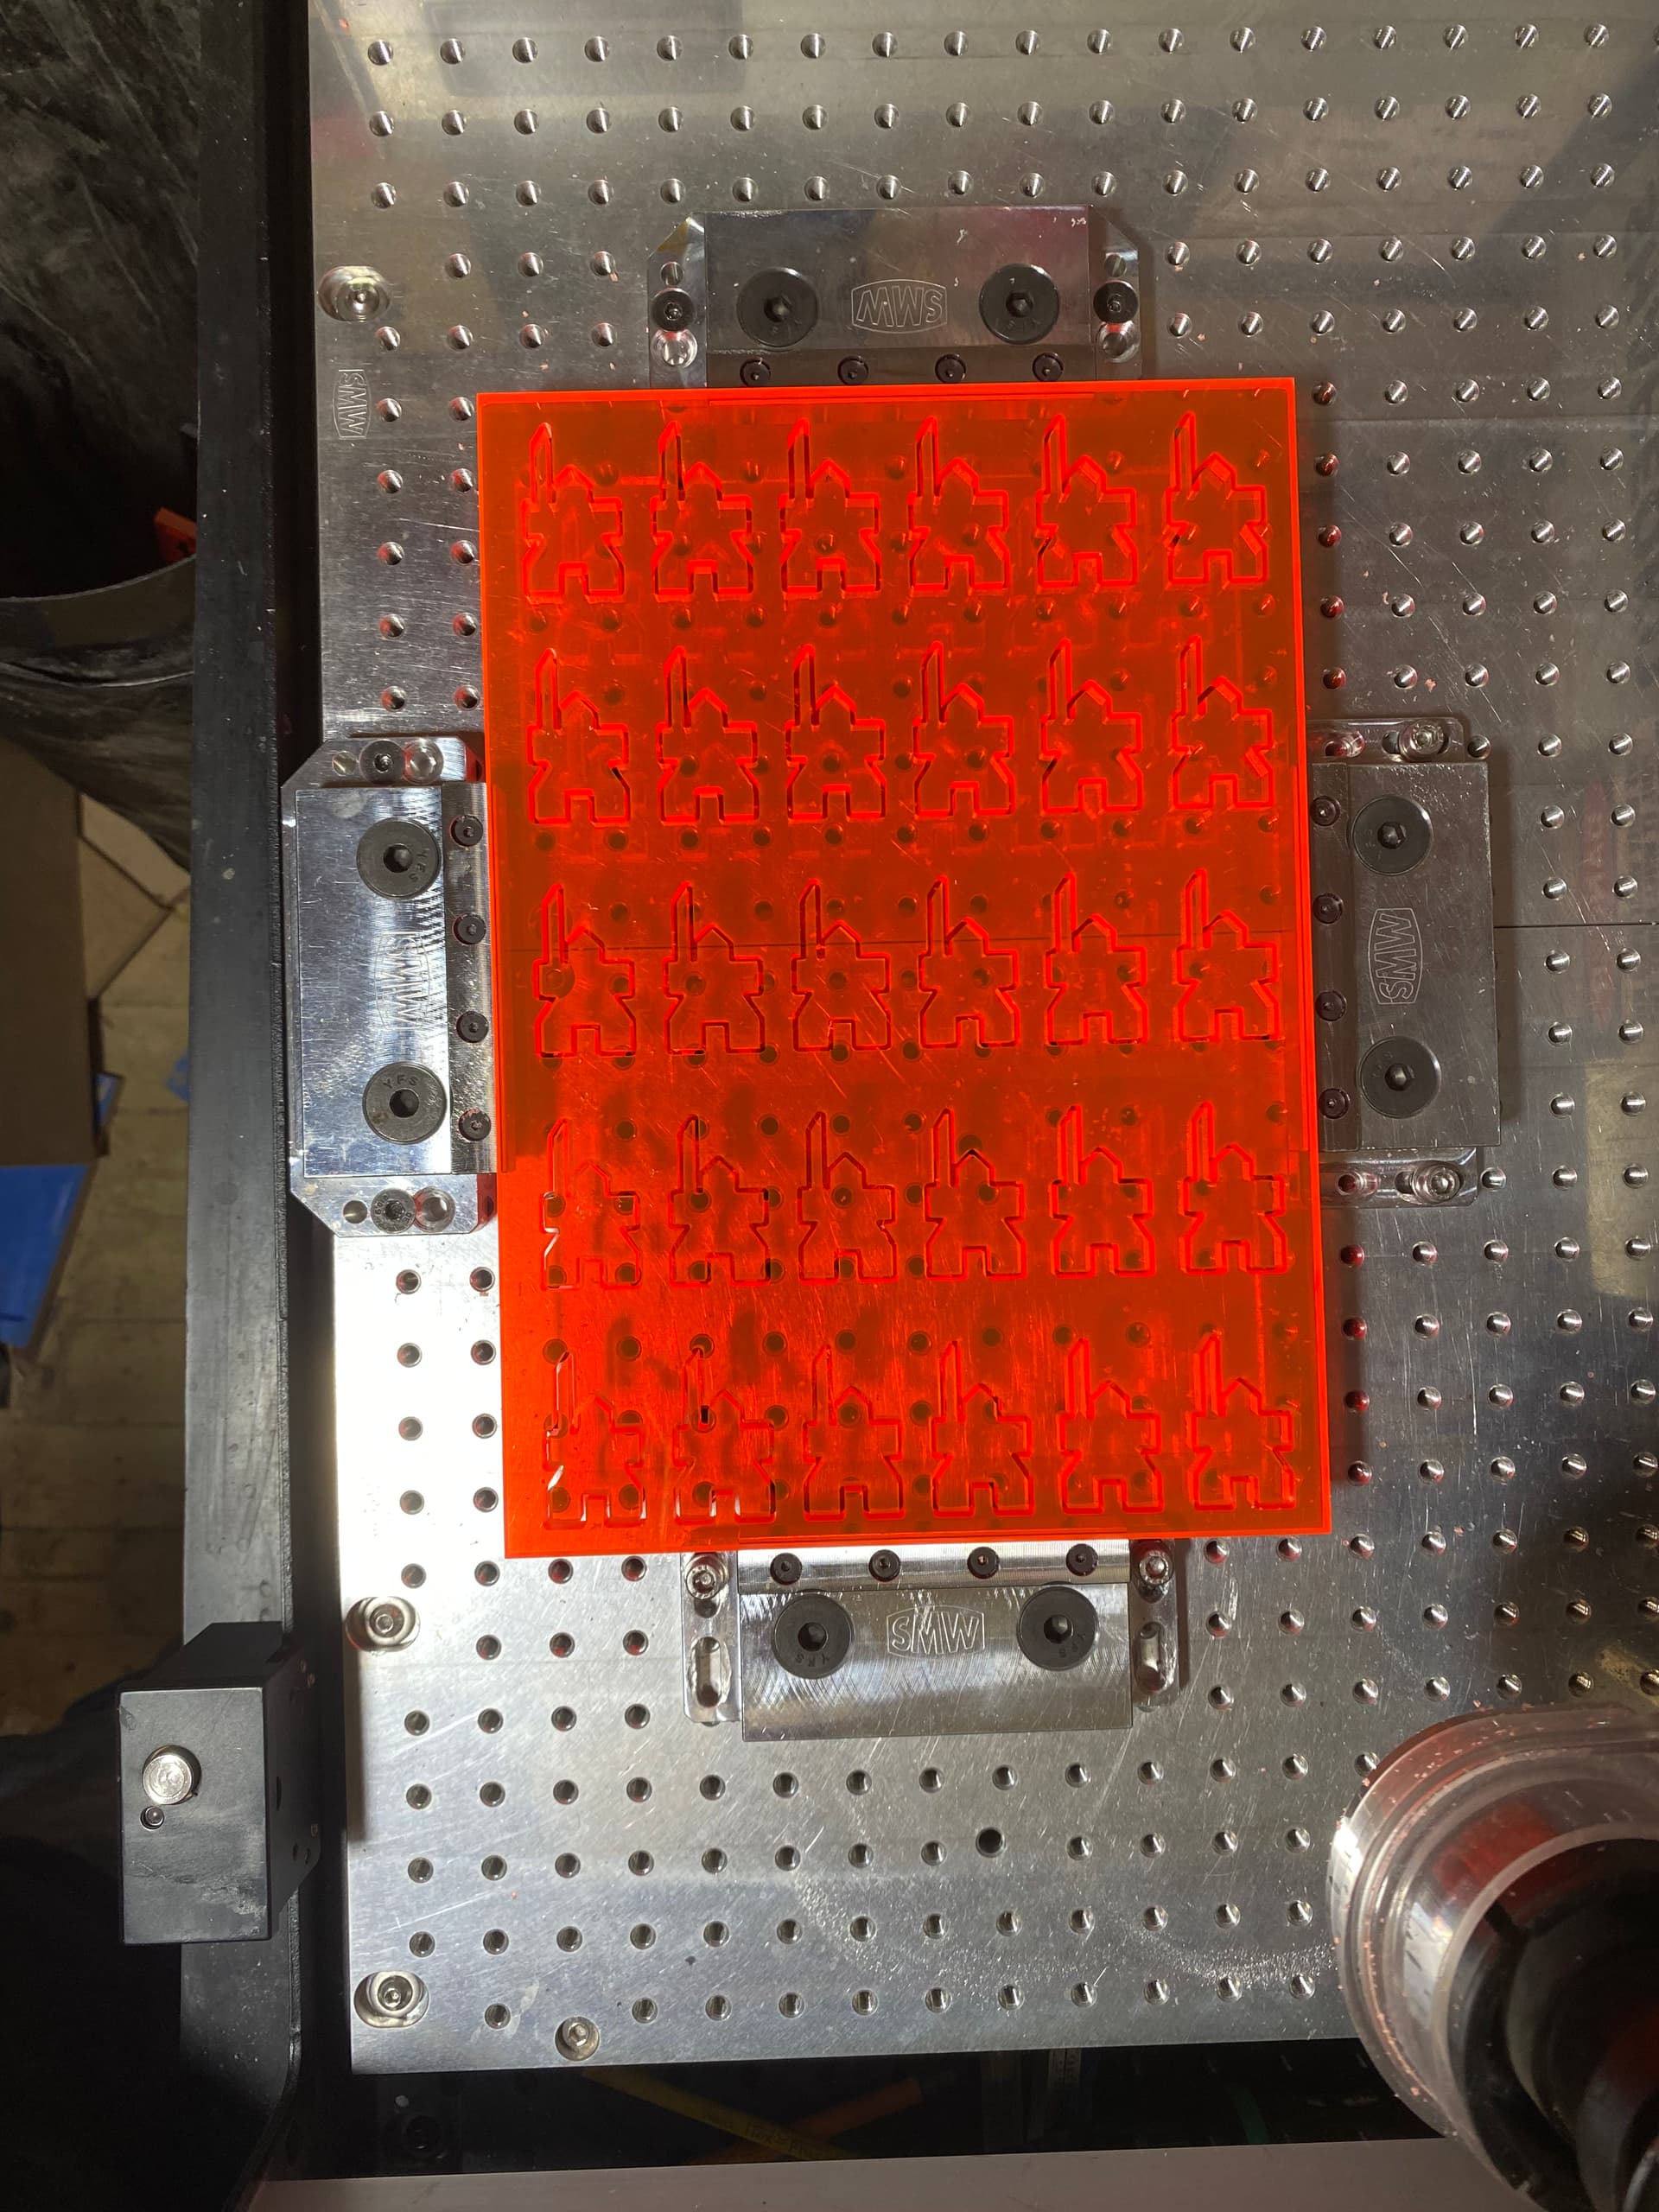
Pictures showing several different size objects in 10mm thick acrylic. I produced more than 1200 in 4 different sizes and two different colours. The client was delighted. If you look really closely at the pieces in the first picture, you will not find any reason to reject the SO3 for this kind of one off production use. I used a 2mm uncoated single flute cutter at 18,000 rpm with a 50% stepover and a 1mm stepdown for cutting this acrylic sheet.
This image demonstrates three of the different sizes and two colours