I tried passing it through the top right side and then connect it to the suckit dustboot, but all the hoses I’ve tried are never going to be flexible enough such that it can reach the point closest to hose. I’d need to add like half a meter to the height of the enclosure so the hose’s entry point is much higher.
Look back through this thread and you will see several approaches.
I used a hose off of a yardsale upright vacuum cleaner. It has a steel wire wrapped inside that makes it strong and able to stretch 5x its compressed length. I posted pictures of how its routed.
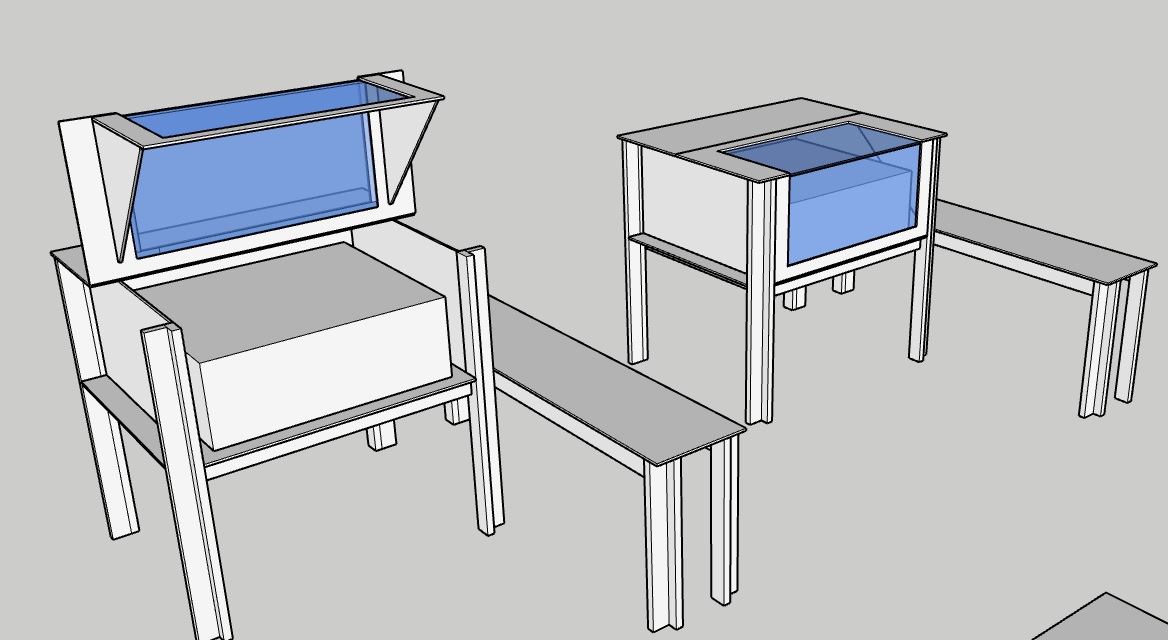
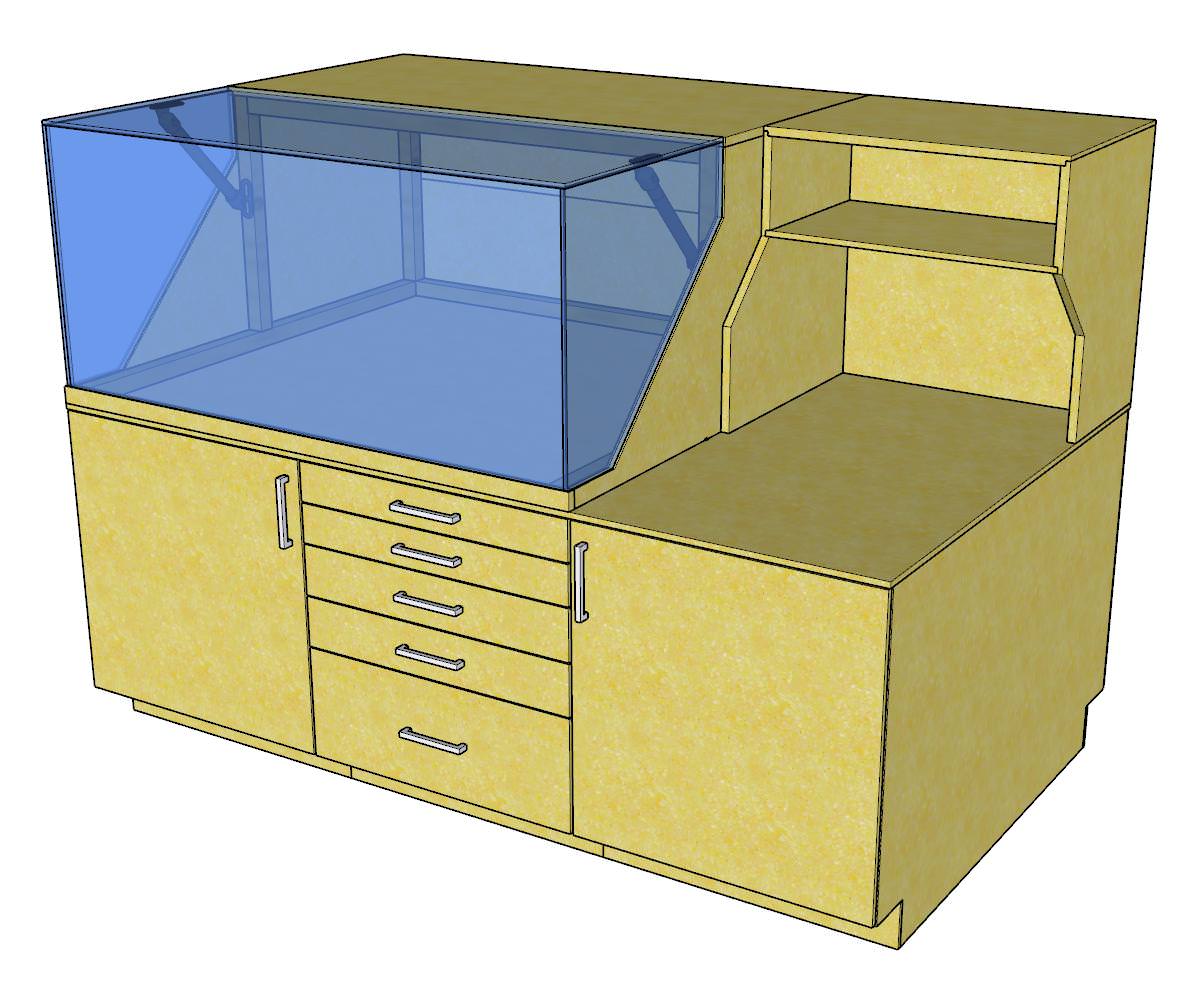
So I think this is the design I’m going with. I have some thick foam insulation laying around that I think I’ll tack on the left, right and back to help conceal some of the noise. Will probably build and enclosure for the vacuum for the noise as well, since this will be in my basement. Thinking I’ll add a shelf or more support for the long desk area next to it, where the computer will sit. The side of the enclosure dimensions are 45 deep x 51 wide x 24 tall.
Any suggested changes?
Have you done anything to deal with static electricity? Whenever I have a job running with the box closed and then open it, there’s an unusual amount of discharge that I’m getting.
I pulled it through a hole in the hose and tied a knot so it doesnt pull through. You have to leave enough slack to allow the hose to extend to the full travel of the machine.
There are probably better ways to do it but that worked the first try so I never thought about it again.
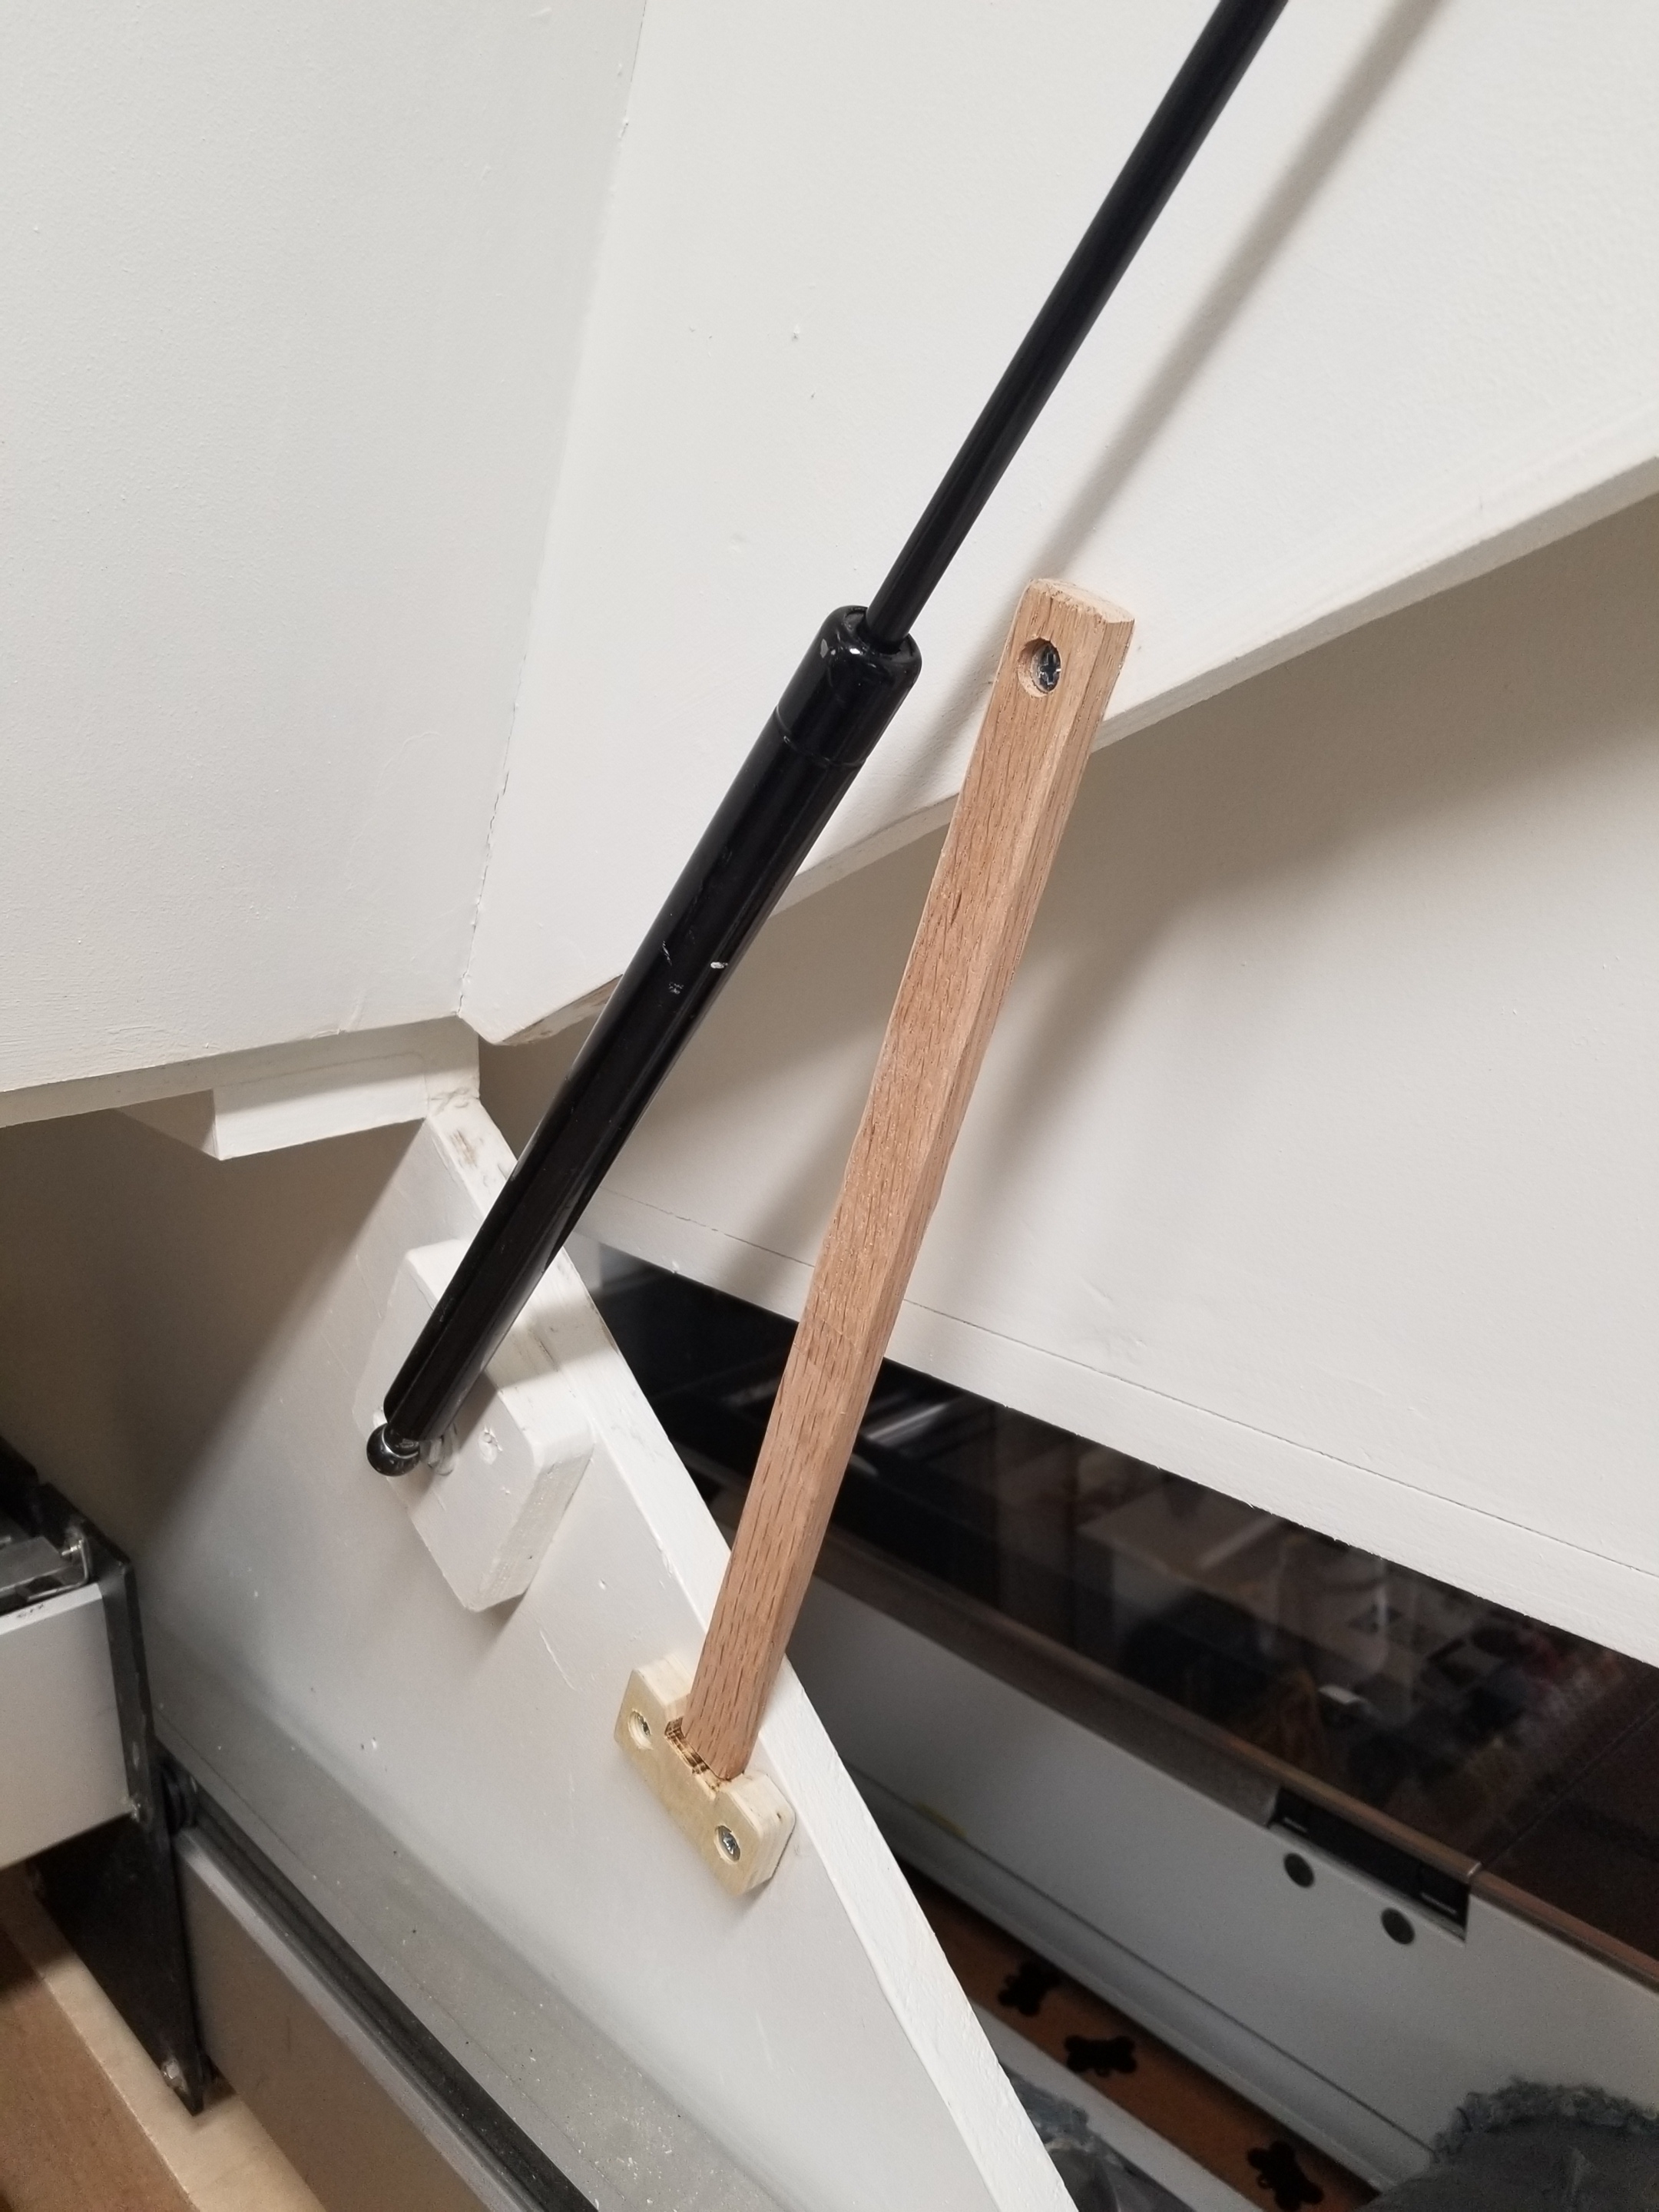
I was having trouble with the gas springs not holding the door up when it got cool in the shop. I think they also leak some gas over time so they are weaker than when I first installed them. So, I just added this little prop stick to hold it up. I suppose a beefier version of this would be completely adequate to hold the door open even without the gas springs. It would just be a little harder to open.
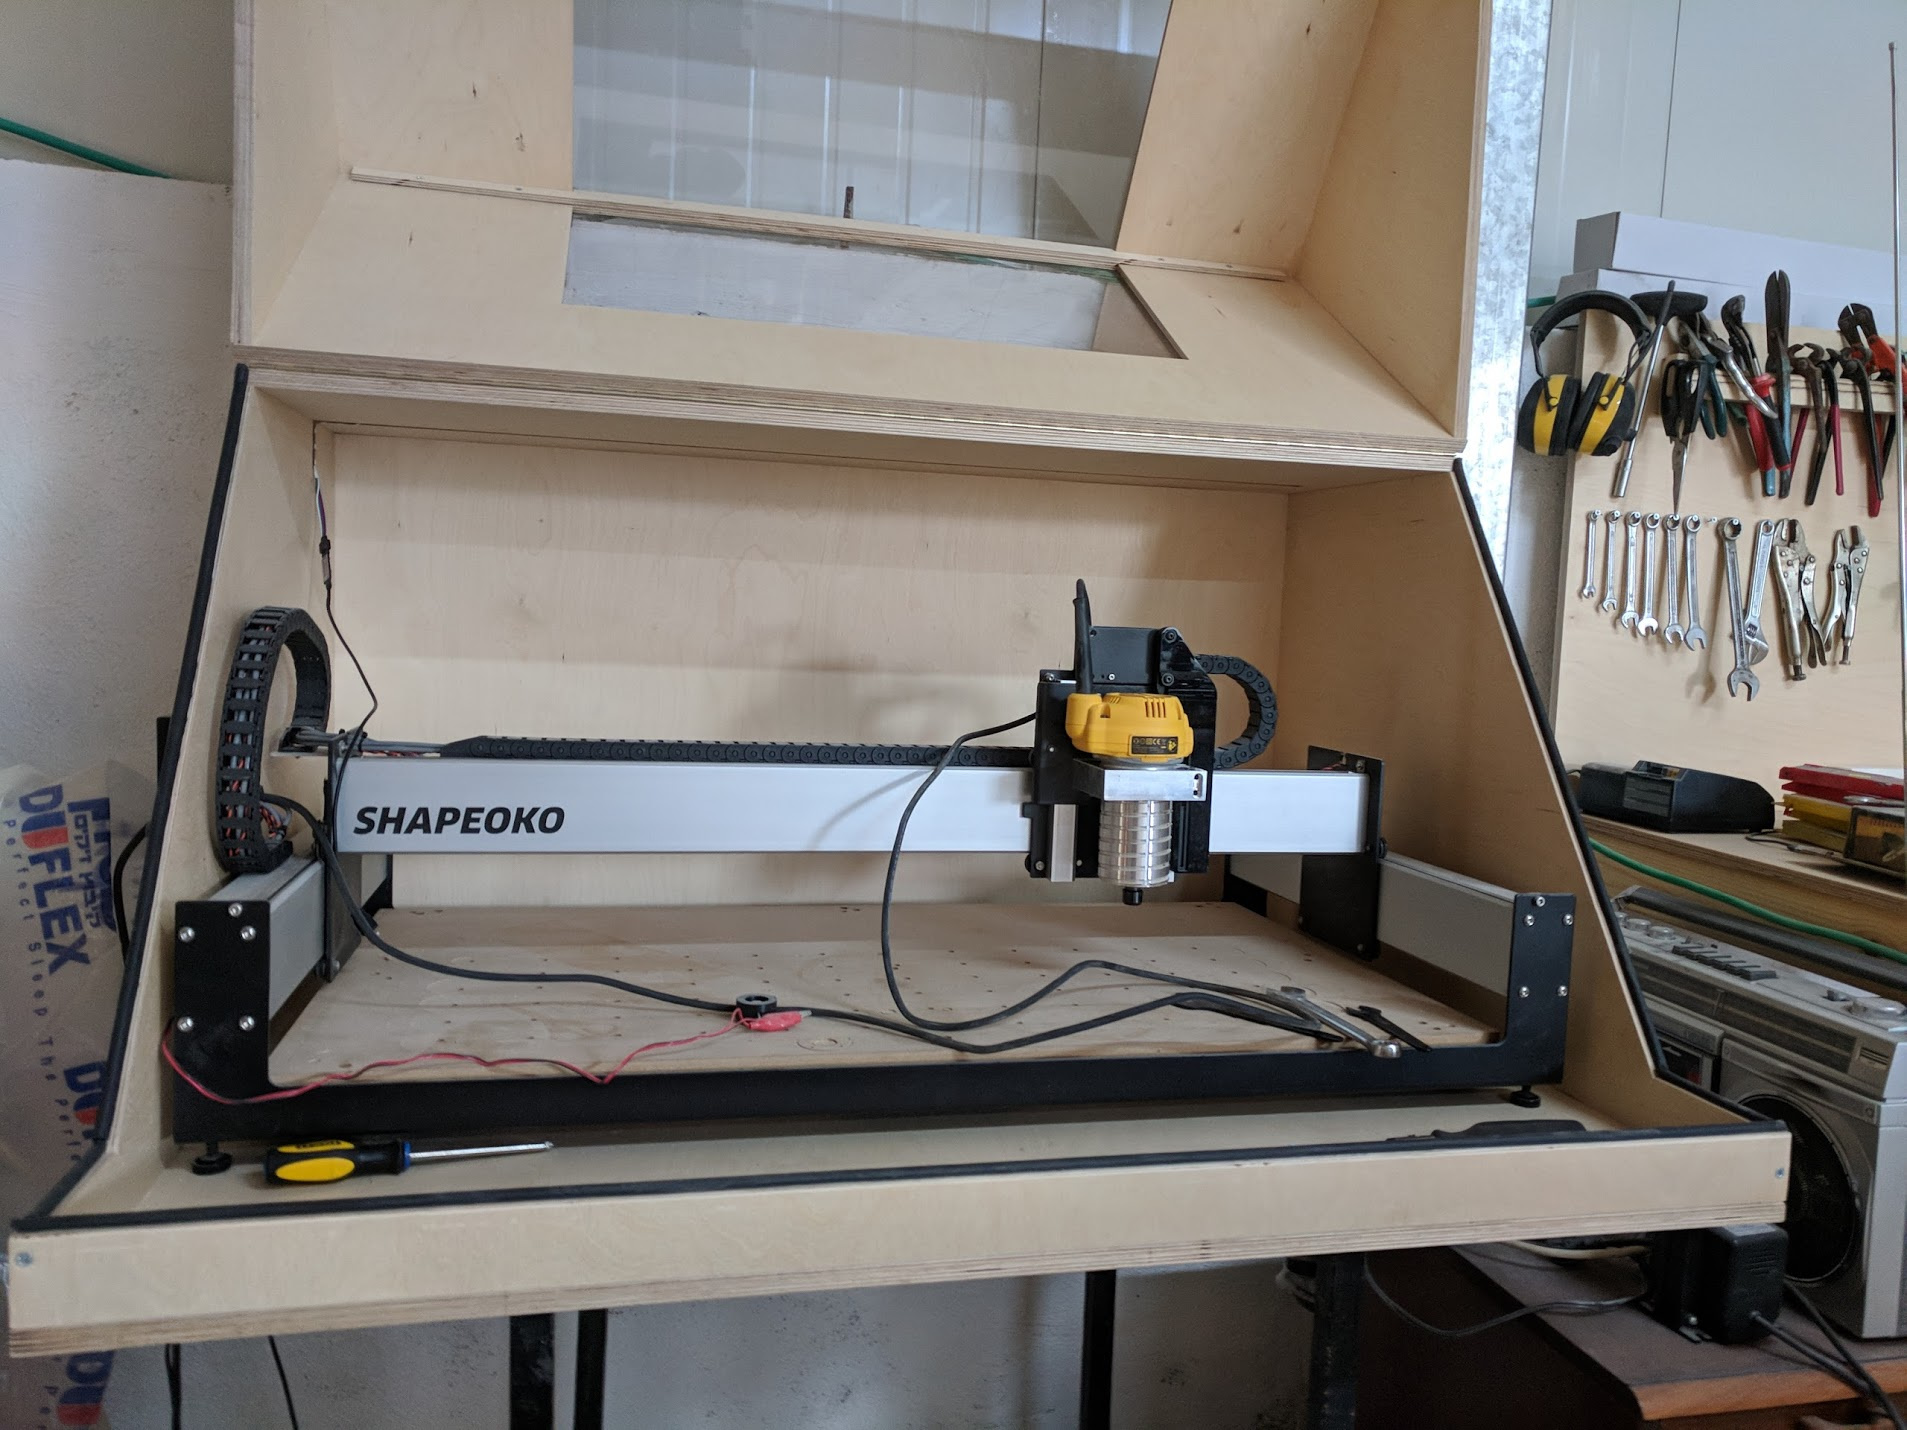
This is my plan for a enclosure/workbench for my new Shapeoko XXL CNC router based on Tony’s design (and incorporating the large acrylic window I saw elsewhere in this thread).
The cabinet portion is roughly modelled after the Dead-Flat Assembly Table from “The Wood Whisperer” (new users are only allowed to include two links apparently, so you’ll have to google to find it) with the most significant modifications made to enable it to break down into components small enough to fit through the very cramped hallway area at the top of my basement stairs. At the moment the ceiling height in the space I have to work with is also insufficient to permit building the enclosure as tall as I want it (at least 6" taller than the Shapeoko based on Tony’s feedback) AND incorporate a torsion box, so I am planning to make that upgrade at a later date.
I have a few questions that I haven’t been able to find answers to on my own though. This is my first real foray into furniture building so I’m in unfamiliar territory and could use some help.
I’ve planned to use 3/4" plywood for the bulk of the construction, however, I’m unclear what kind of plywood exactly. I’m looking for the most economical option that’s still sturdy enough to take some abuse. I’m not overly concerned about appearance but don’t want the corners splintering or panels warping. Would this do the trick or should I be looking at something a step up like this?
Are the big box stores (Home Depot, Lowe’s, Rona) a reasonable place (price wise) to buy my materials or is there a potential to save a lot of money elsewhere? The big three all offer delivery or cargo van rentals which is a plus for me considering my daily driver is a Mazda Miata.
That’s all for now, but I’m sure I’ll have bunch more questions very soon. Thanks for the inspiration everyone!
Either of those plywood choices will work just fine. I think I used 3/4" birch ply from HD but any of their veneer plywoods will be smooth and flat. I used rabbet joints however, butt joints and pocket hole joinery would work fine and would be easier.
You could use melamine, pocket hole joints and edge banding if you want the most economical durable, good looking option. Melamine is even more stable and flat than plywood and its cheaper.
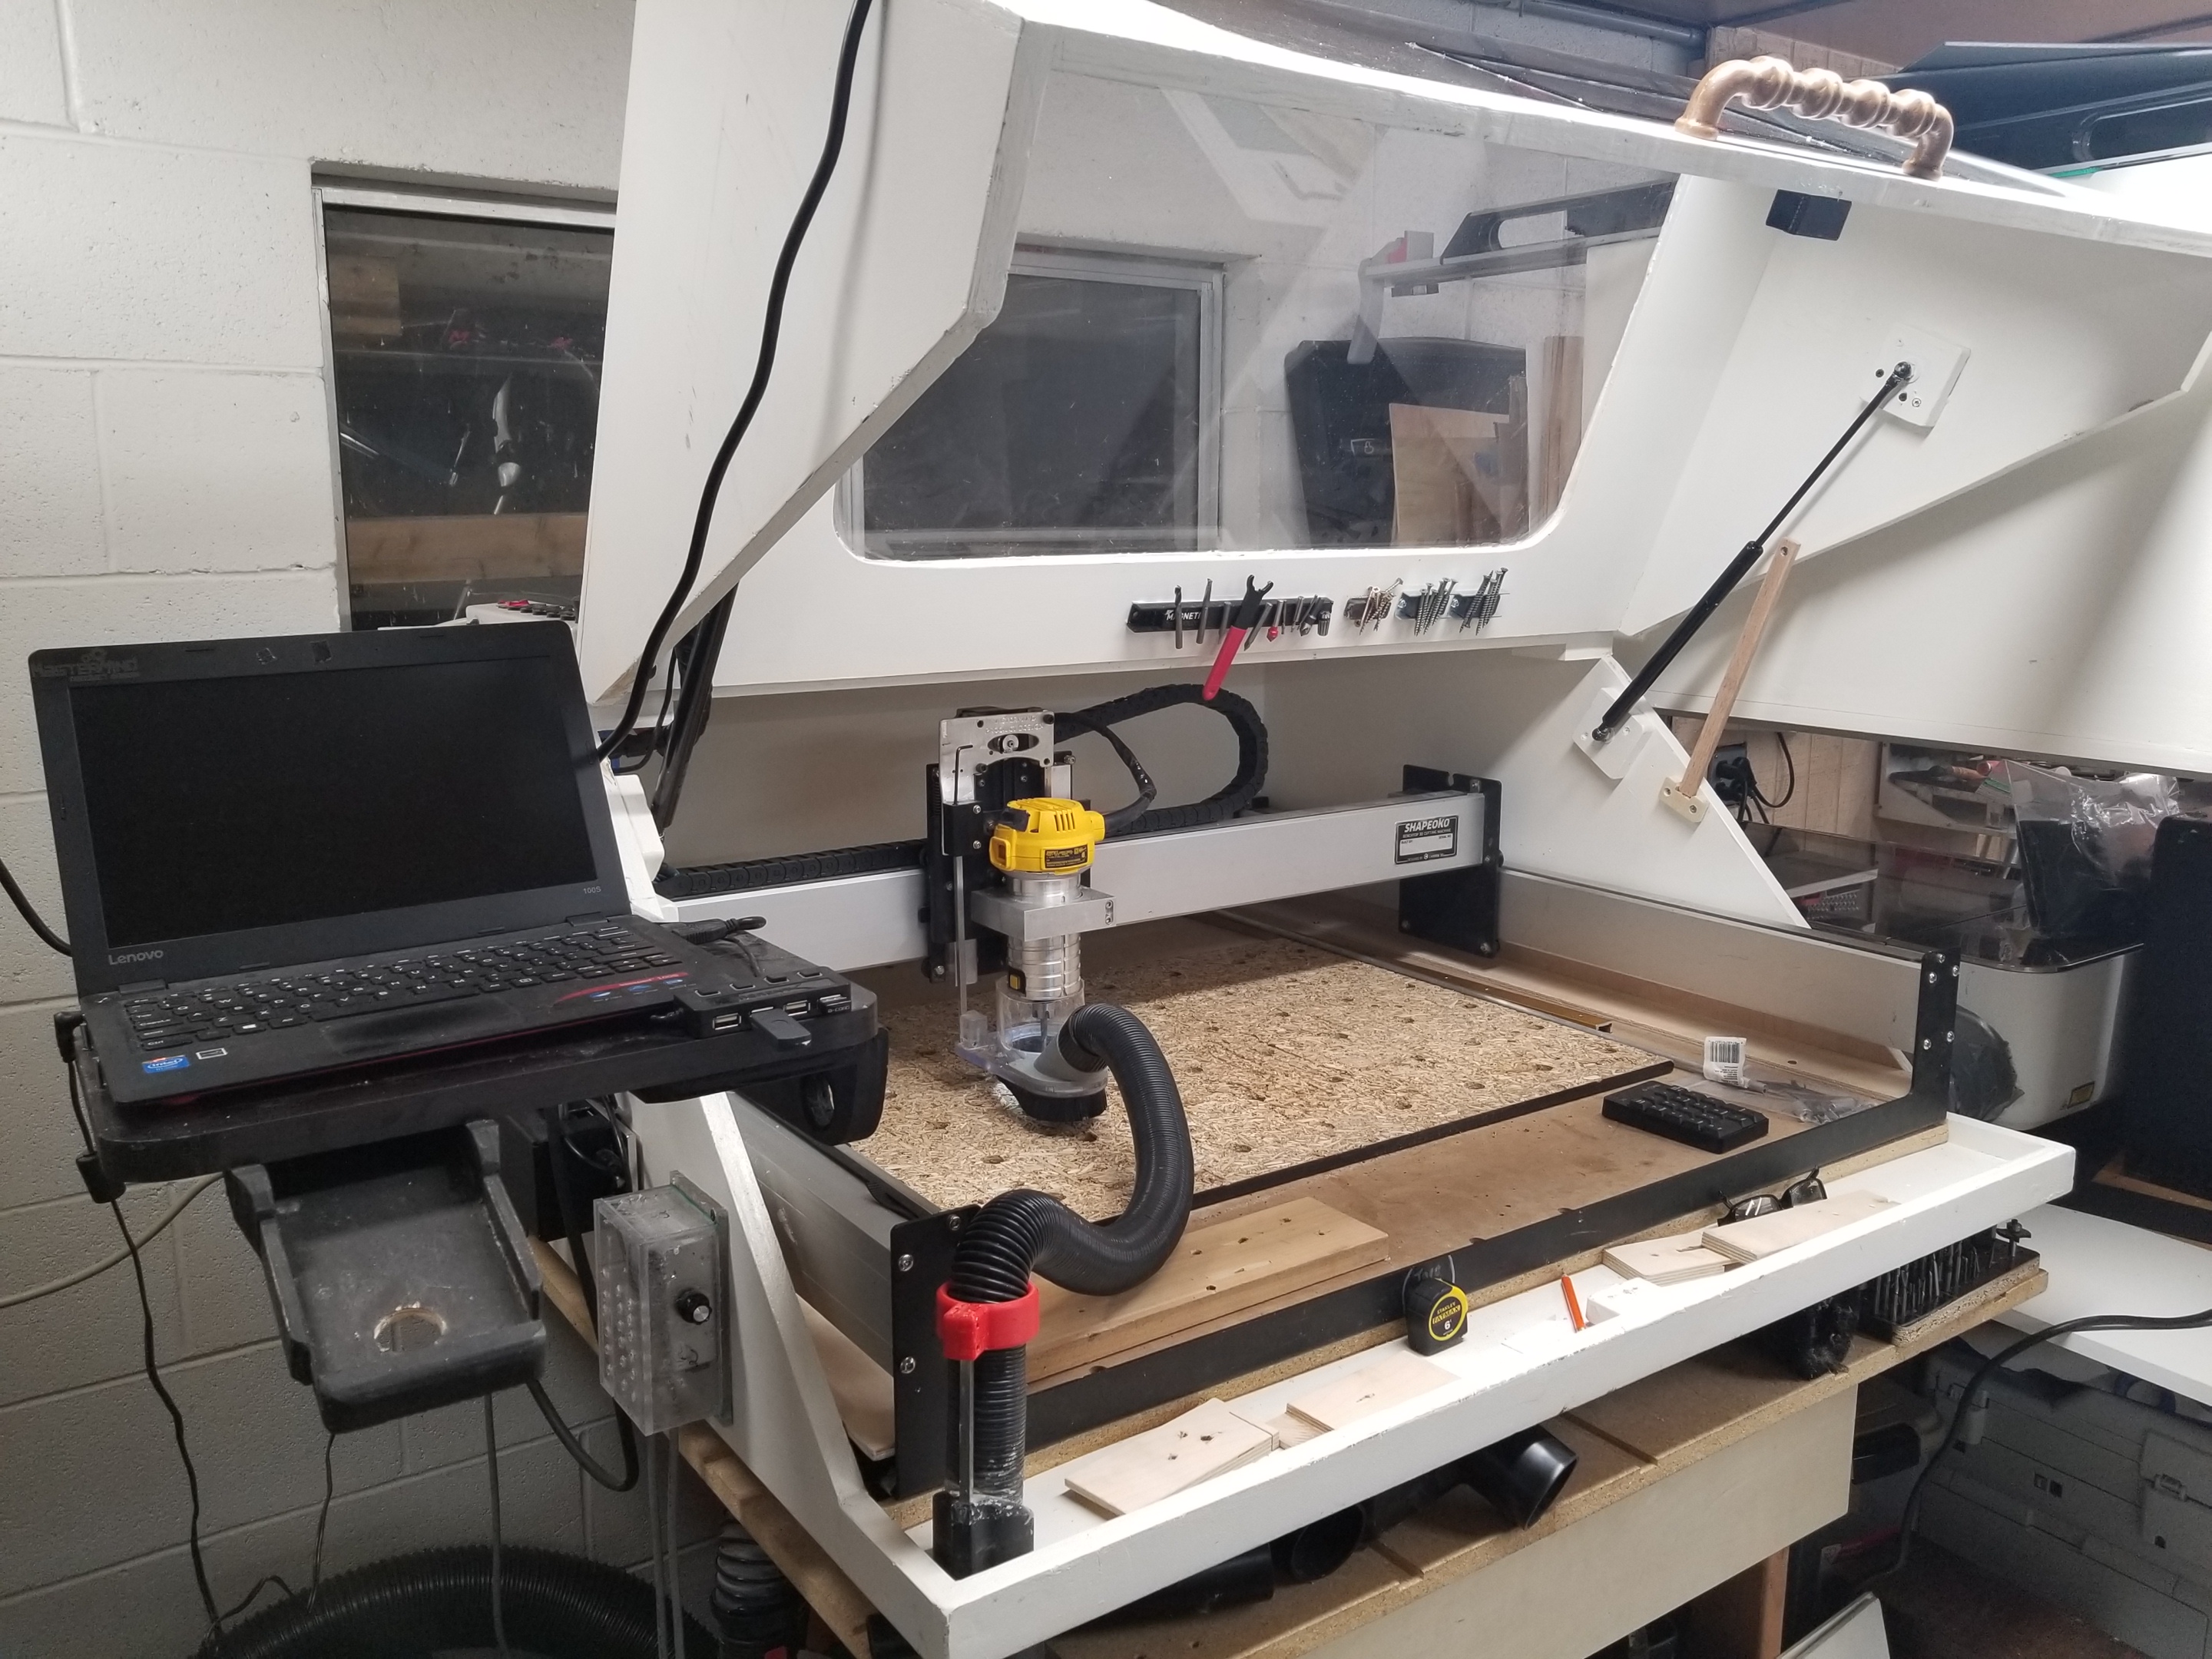
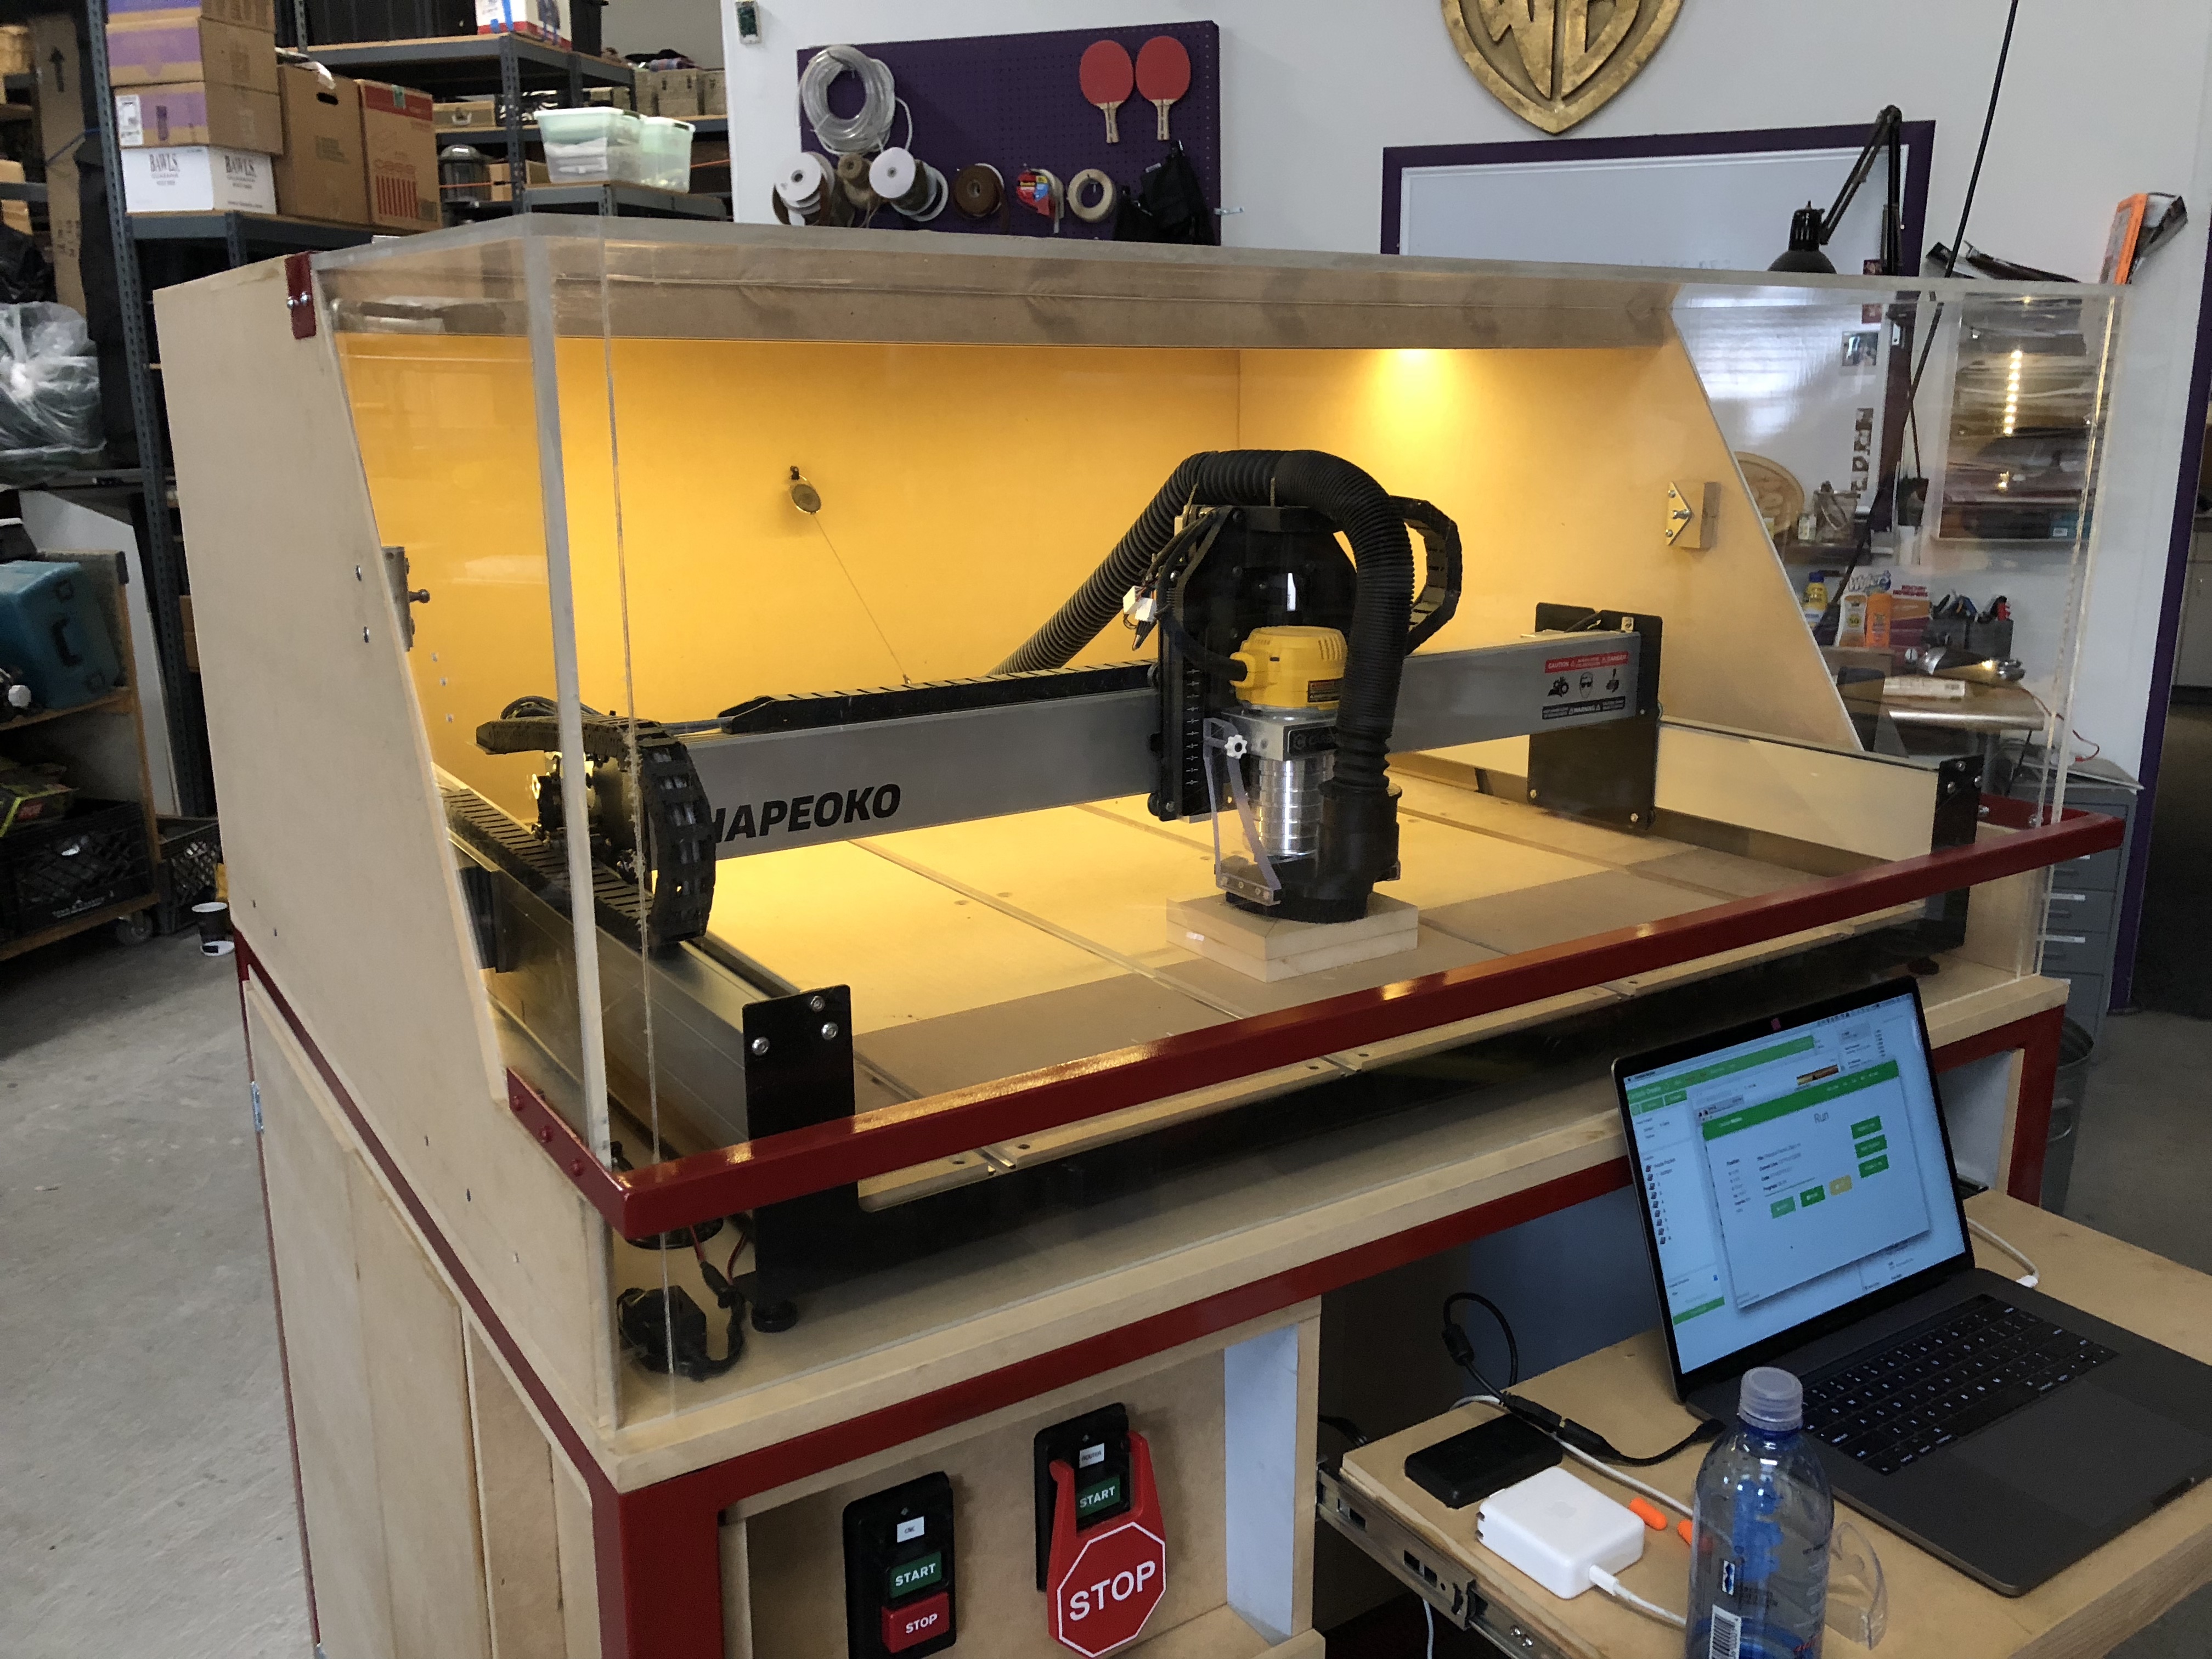
Something I added on my new enclosure is a “back flap”. Basically a 6" high slit along the Back of the enclosure, the width of the bed, on hinges. It allows me to open it and then pass LONG stock through the machine for tiled cut jobs
Hi Tony! Newbie here and first wanted to say that I have taken a lot of inspiration from your enclosure as well as a few others on this thread. Thank you for including us in the process! I will have to post some pictures here once I finish to continue passing it forward.
I had a question / looking for advise on what gas struts to use. I have a 3/8 in acrylic lid that for an XXL is pretty large and heavy. I cant really weigh it so I thought I would get REALLY strong gas struts that are rated 100 lbs per strut. I should mention its my first time using them and that I have no idea what I am doing. Of course the struts were to strong and prevent the lid from being closed. This failure was compounded as I have ordered another smaller set that just never had a chance of working either. DOUBLE FAIL!
So I was curious what type you are using for your lid? I know they don’t always work to hold it up on its on depending on the weather, so I would probably do a kickstand as well. Sorry if you have already answered this previously and I missed it! Appreciate your time Tony, thanks!
Oh this is great, thanks a lot Craig! Great setup btw, really like the contour shape you got with your lid. I think I will try the 50lb struts and see how that works out.
I just saw your question… my springs are 50 lbs each and I use a strong magnet to hold the lid closed. Every enclosure will need something slightly different because of weight and geometry differences but that should get you close.