Sounds suppression, XXL bed flatness, and other musings

What happened to the "Motor Cycle Display Area ??? But congratulations on the dedication anyways.

1 Like

Now I’m questioning the need for end plate shims and padding… thanks Dan.

I’ve had the notion to formalize my vac system primarily for sound suppression for awhile, so you’re not implicated for spawning that additional machine tweaking project.

I’m hoping to complete my first calibration run this weekend. Carbide support was nice enough to send over the tensioning screw and some machine sticker SWAG. I think my XXL has earned it’s decals.

3 Likes

I’m very happy with the lack of flex in the waste board after sandwiching a layer of hard board between the waste board and the new base board. There is no “air gaps” in the supporting of the waste board.caused by the supporting structure of the machine. I think my recent v carving success demonstrates that my system is rigid and fairly flat and the flex of the waste board is officially gone. Added a picture cus “everyone likes pictures”. But there must be more tweaking as my thoughts keep migrating towards the beyond of my thinking.

4 Likes

you have the xxl jude?

1 Like

No I have the SO3 regular, the short one that’s not as big as the XL or the XXL. I uploaded a picture just for you Mark, it is noted in the picture, just ribbing you now… cus “everyone likes a picture”…but it did remove the flex under the waste board cus there’s something under the waste board besides air. My next problem is when cutting patterns out of thin plywood (14" width) the ply raises in the center, my fix… assign a drill hole in the drawing in a waste area and assign that the 1st tool path, change bits and while I do I can screw a screw into the drill hole which will than become a screw hole (it’s like magic). Anyways…

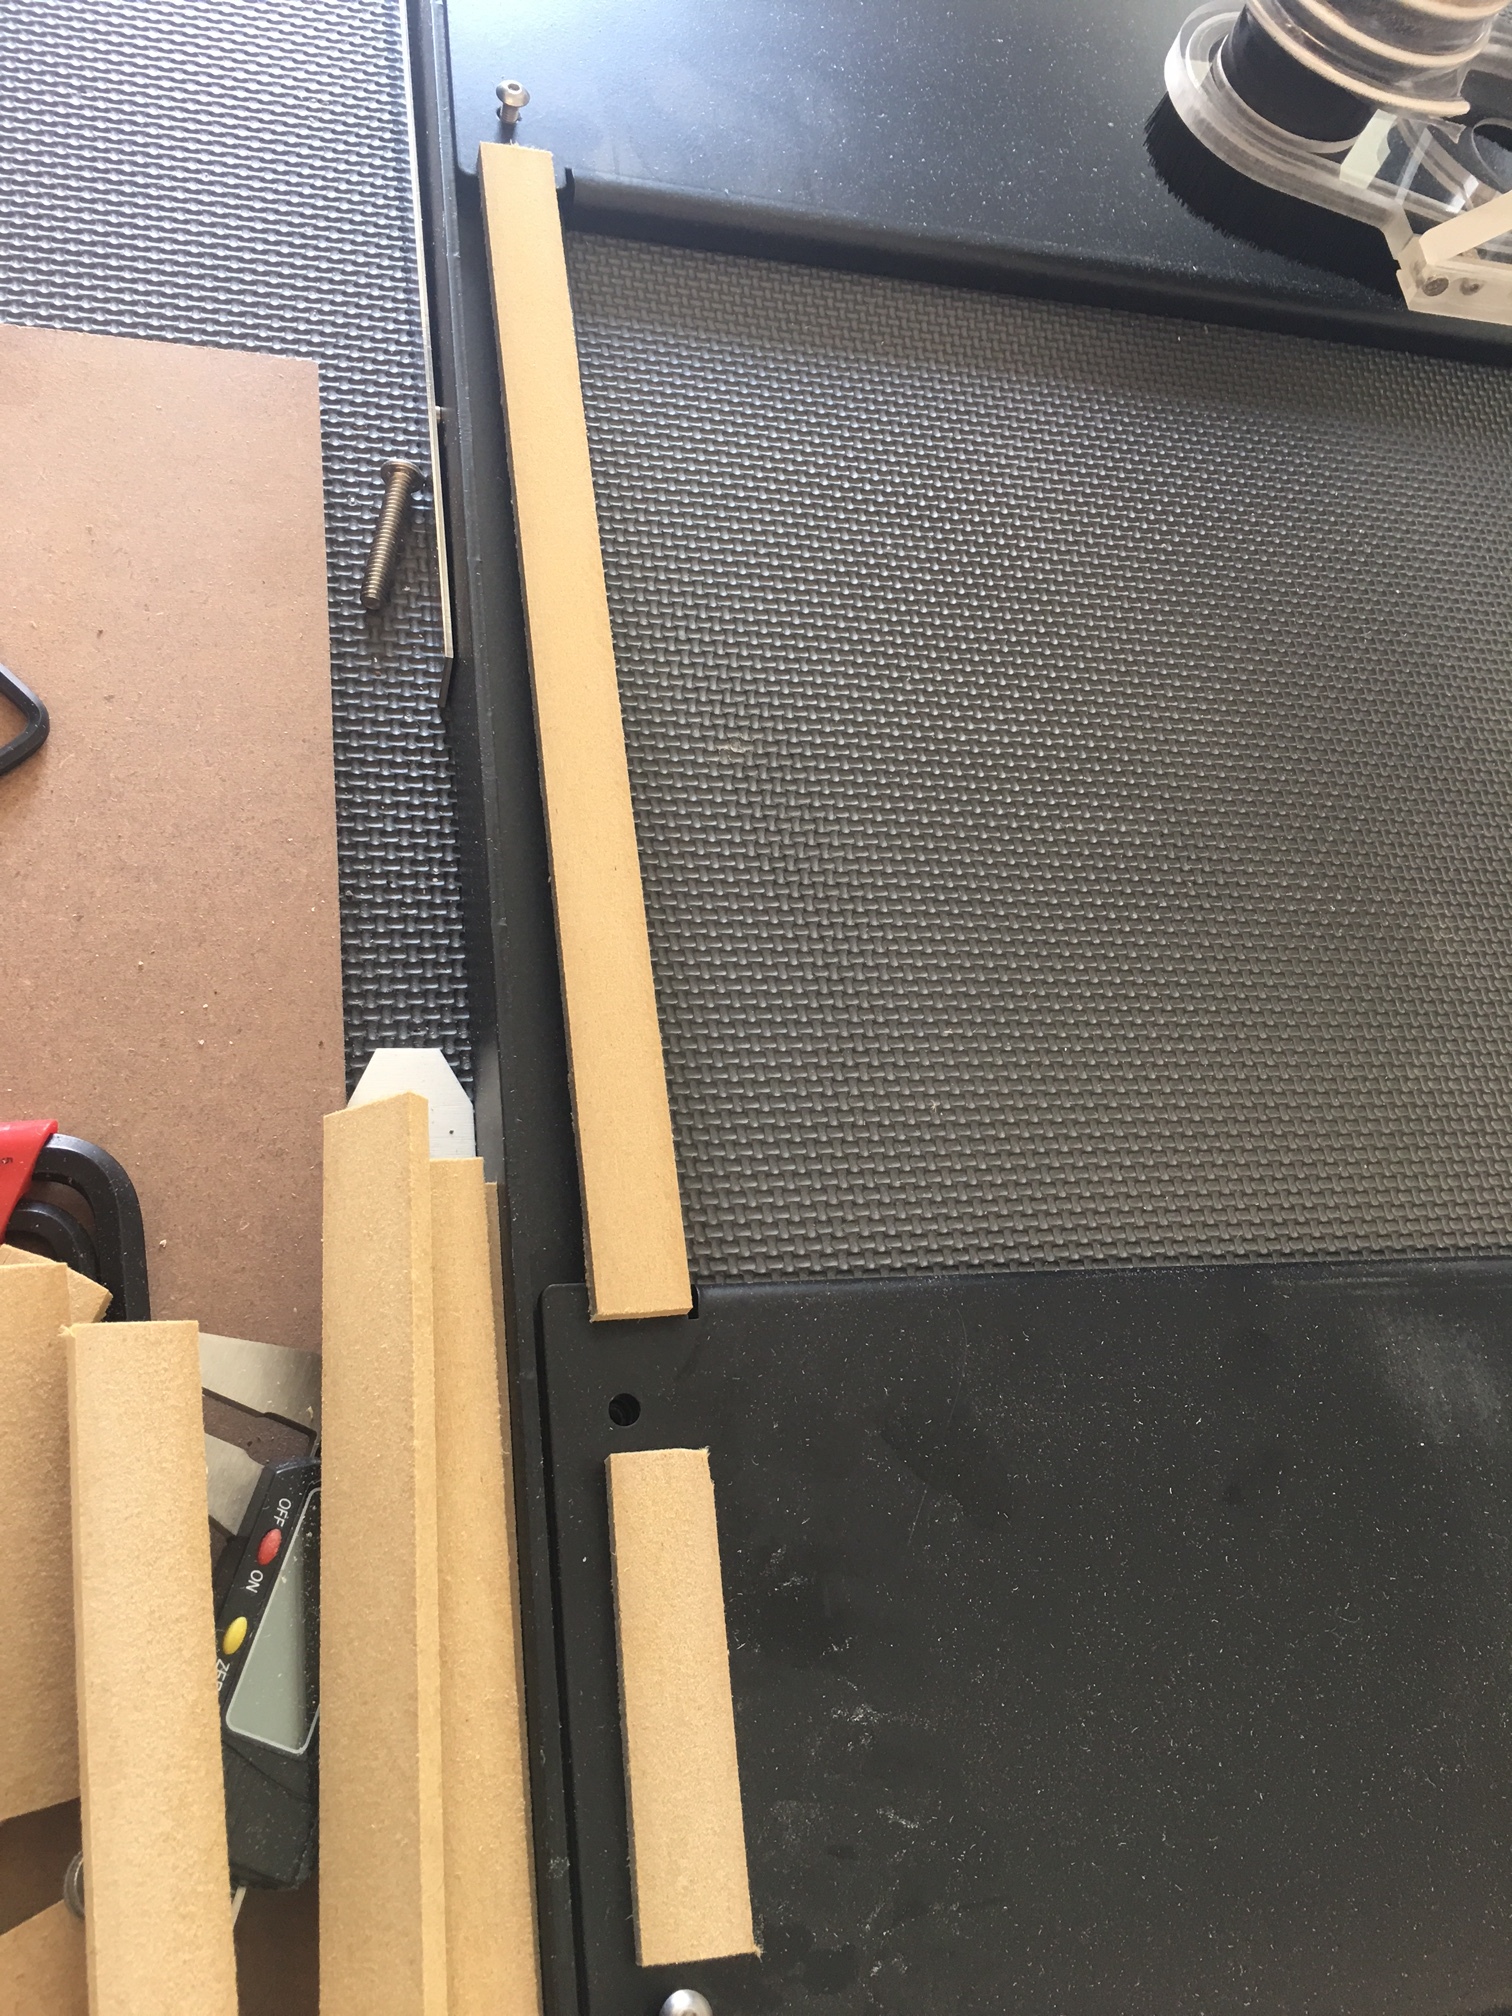
That looks good Jude, but no worky with an XXL because of the straps. Although I had found some moulding material at HD to make suitable shims I didn’t really feel like going to HD today as I have plenty of other stuff to do. Then I realized I own a table saw and I’ve got a bunch of MDF laying around, so I grabbed a piece of 3/4" thick and cut my own shims. I decided to just make a bunch of single pieces, then strategically place them under the end plates, see pictures:

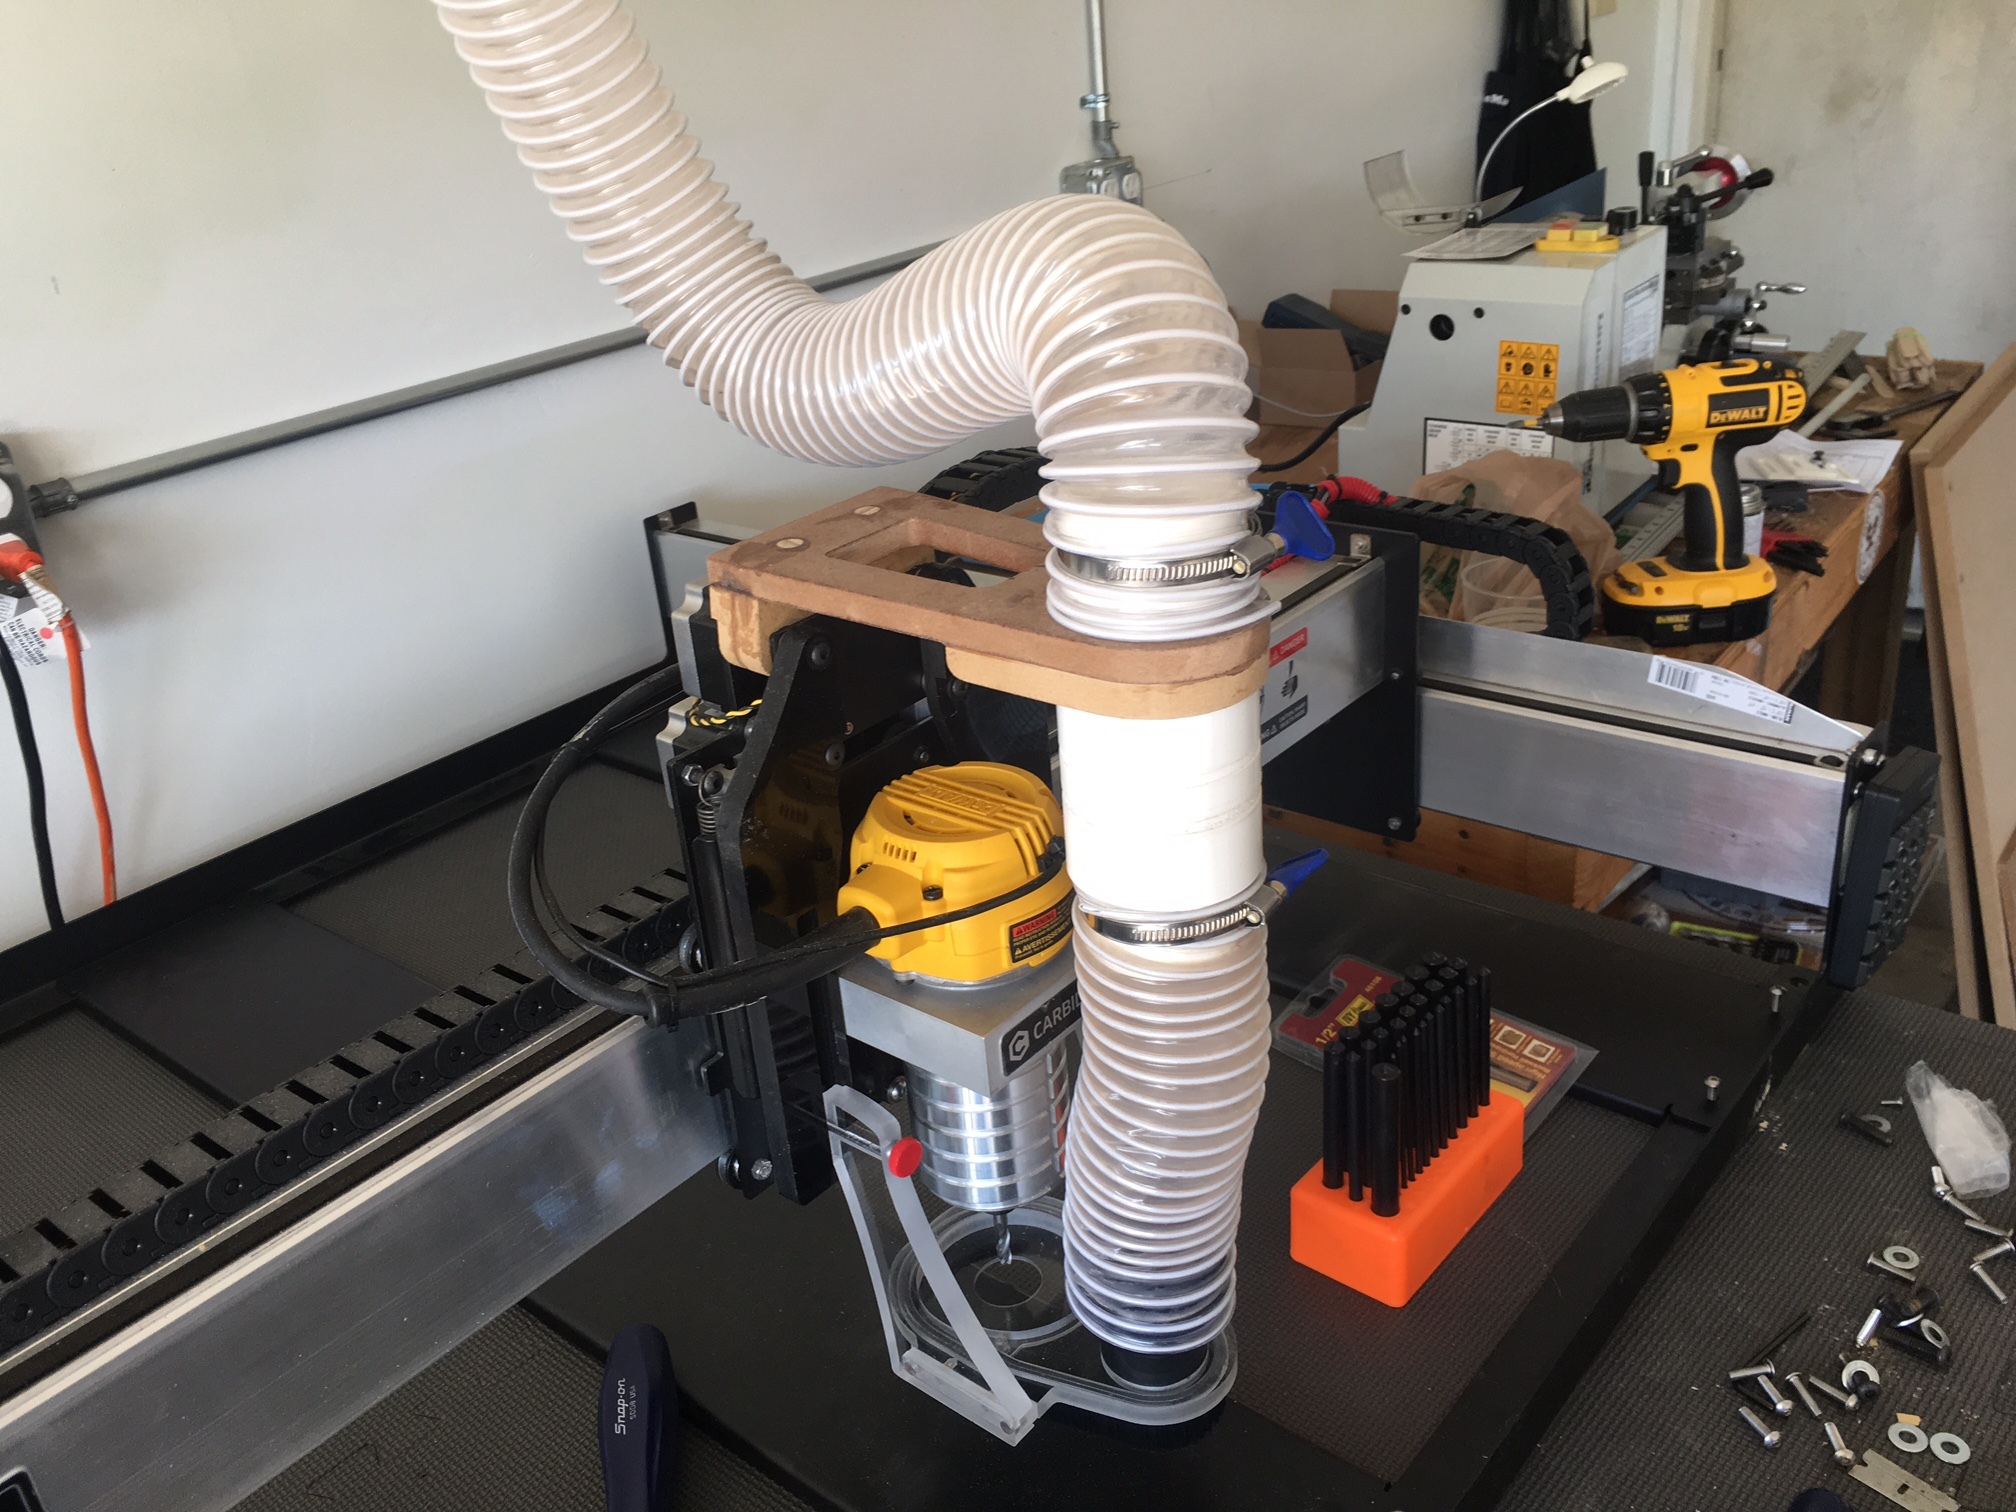
And since we’re on the subject of dust collection, here’s a few pics of what I came up with. 2" PVC pipe (no glue, just pushed together) , MDF Z-axis hose holder cut on the XXL, Suckit dust boot, all feeds an Oneida Dust Deputy on top of a 5 gallon “Homer” bucket that I cut a hole for in my lower table shelf, powered by the little Fein Turbo 1 with a short length of hose I already had. The idea was to make everything as serviceable as possible, while still being effective. I used PVC where I could to give the dust smooth transitions, I shortened flex hose as much as possible for less drag in the system. The PVC connection just above the dust boot I stuck on my lathe to turn just the last 3/8" or so down so it will fit standard Shop Vac cleaning tools, this way whatever escapes the dust boot I can simply unplug the hose, connect a regular Shop Vac wand and vacuum by hand. I know it could be optimized further, less hose, more smooth pipe, better transitions between hose sizees, etc., etc., blah, blah, but it’s working well as-is. I even did a little GCode in CC to run the gantry around after I run a job to vacuum as much of the table after I’m done, because I’m lazy like that, haha!

Pics:

Z-plate dust bracket:

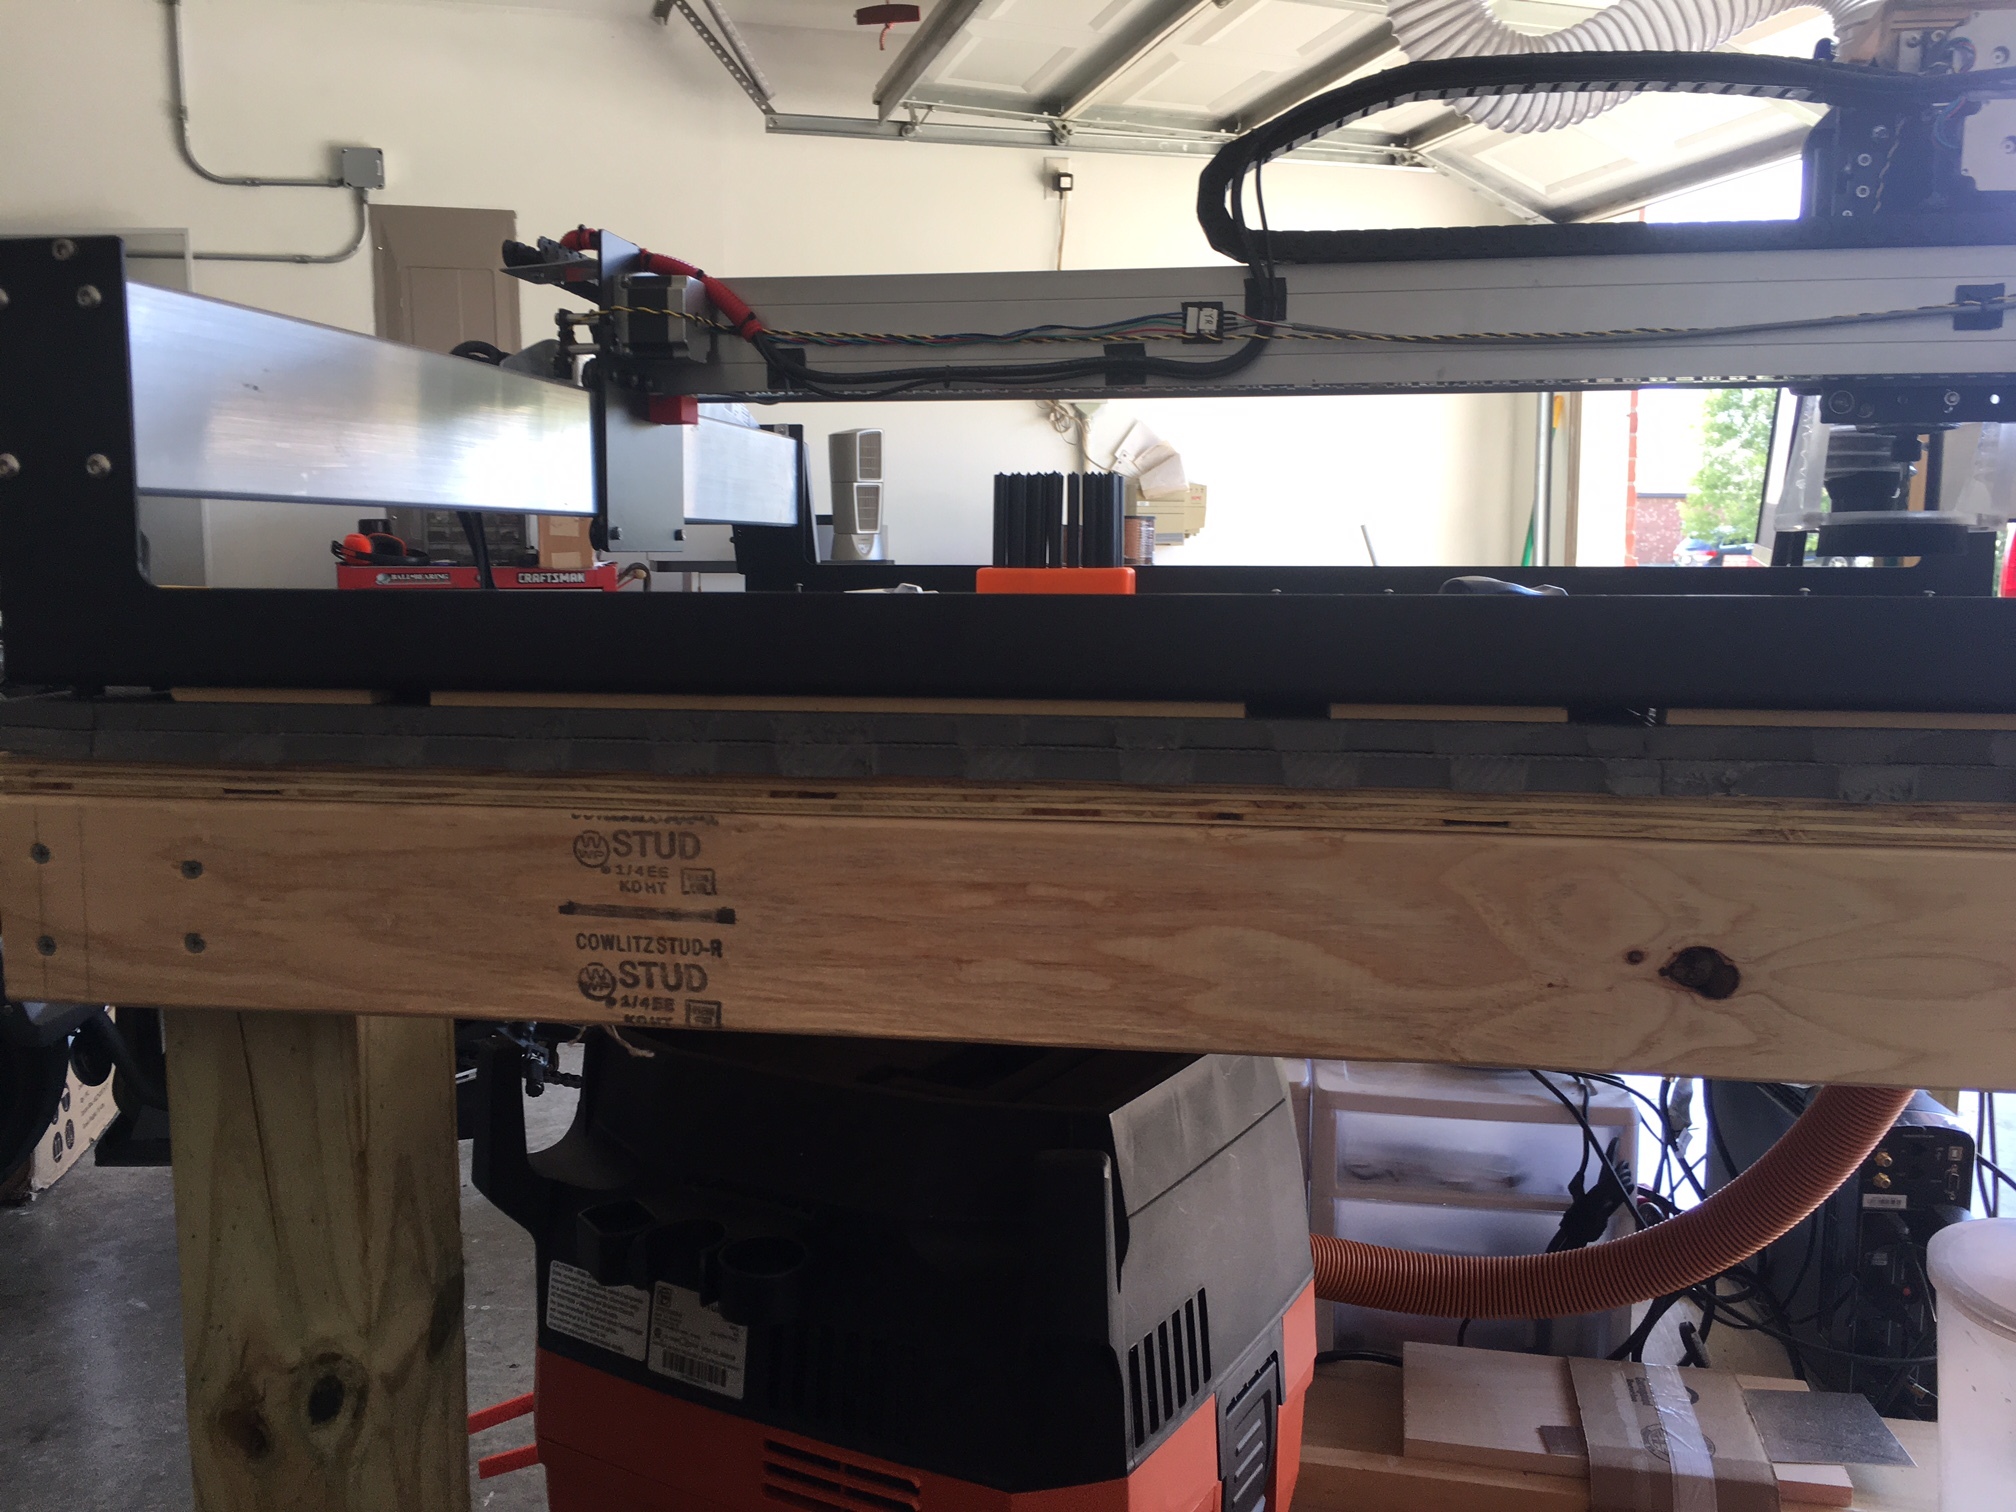
Overall view showing the PVC boom (Also note PC monitor mounted on a swivel arm, and SuperPID controller mounted below on another swivel mount. Swivel arms were like $12 each on Amazon)

Gotta feed the bucket (boom to Dust Deputy)

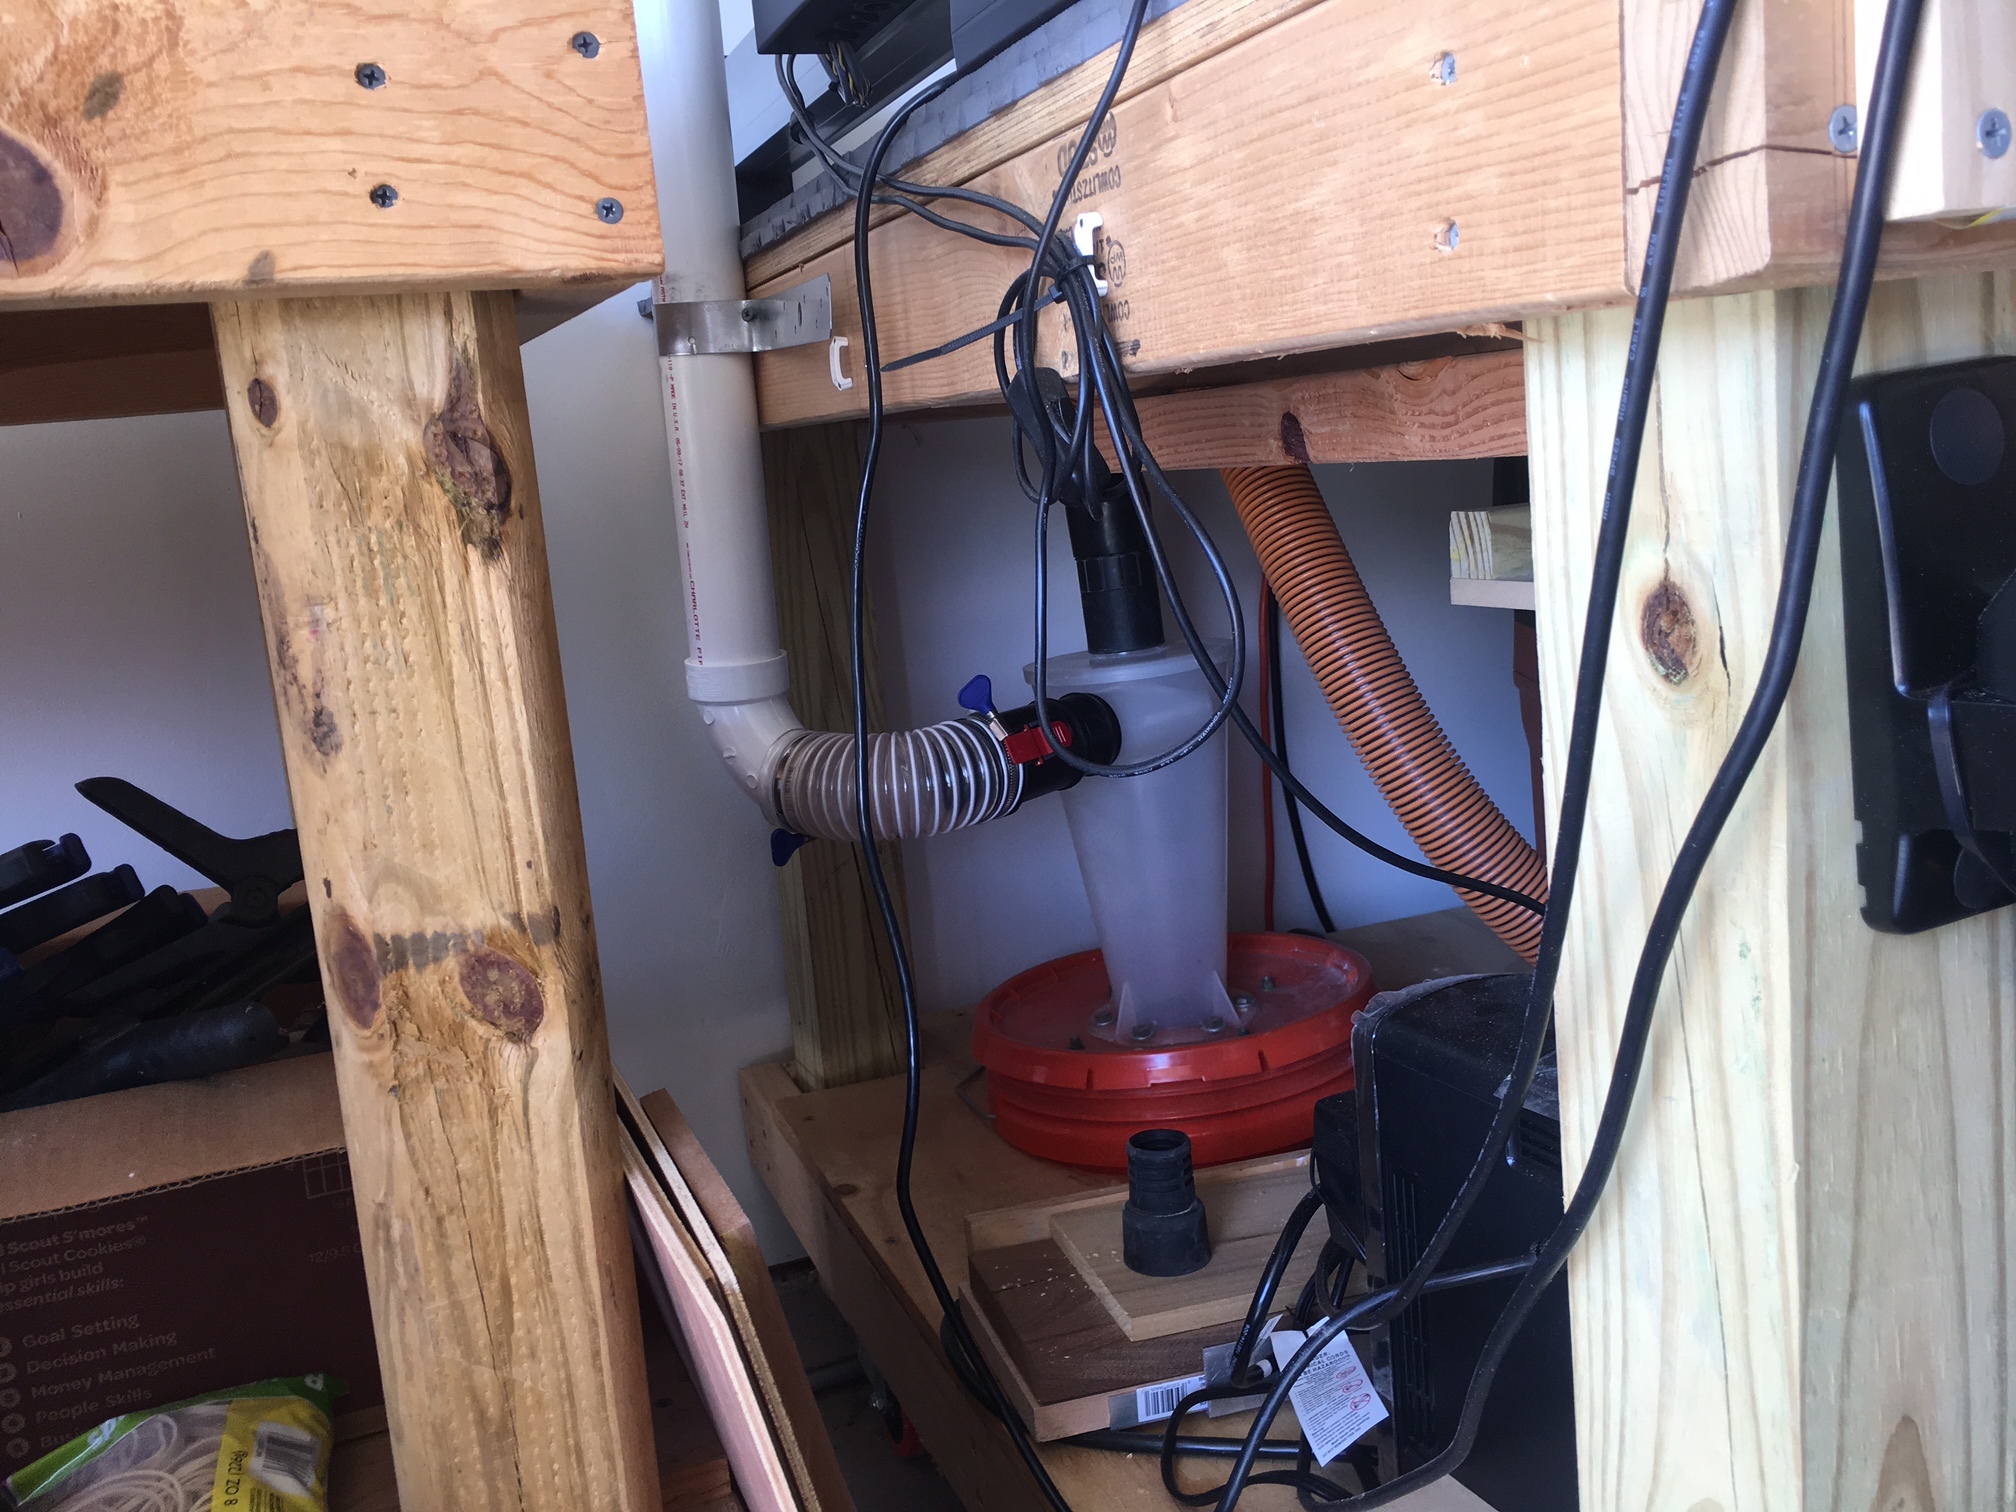
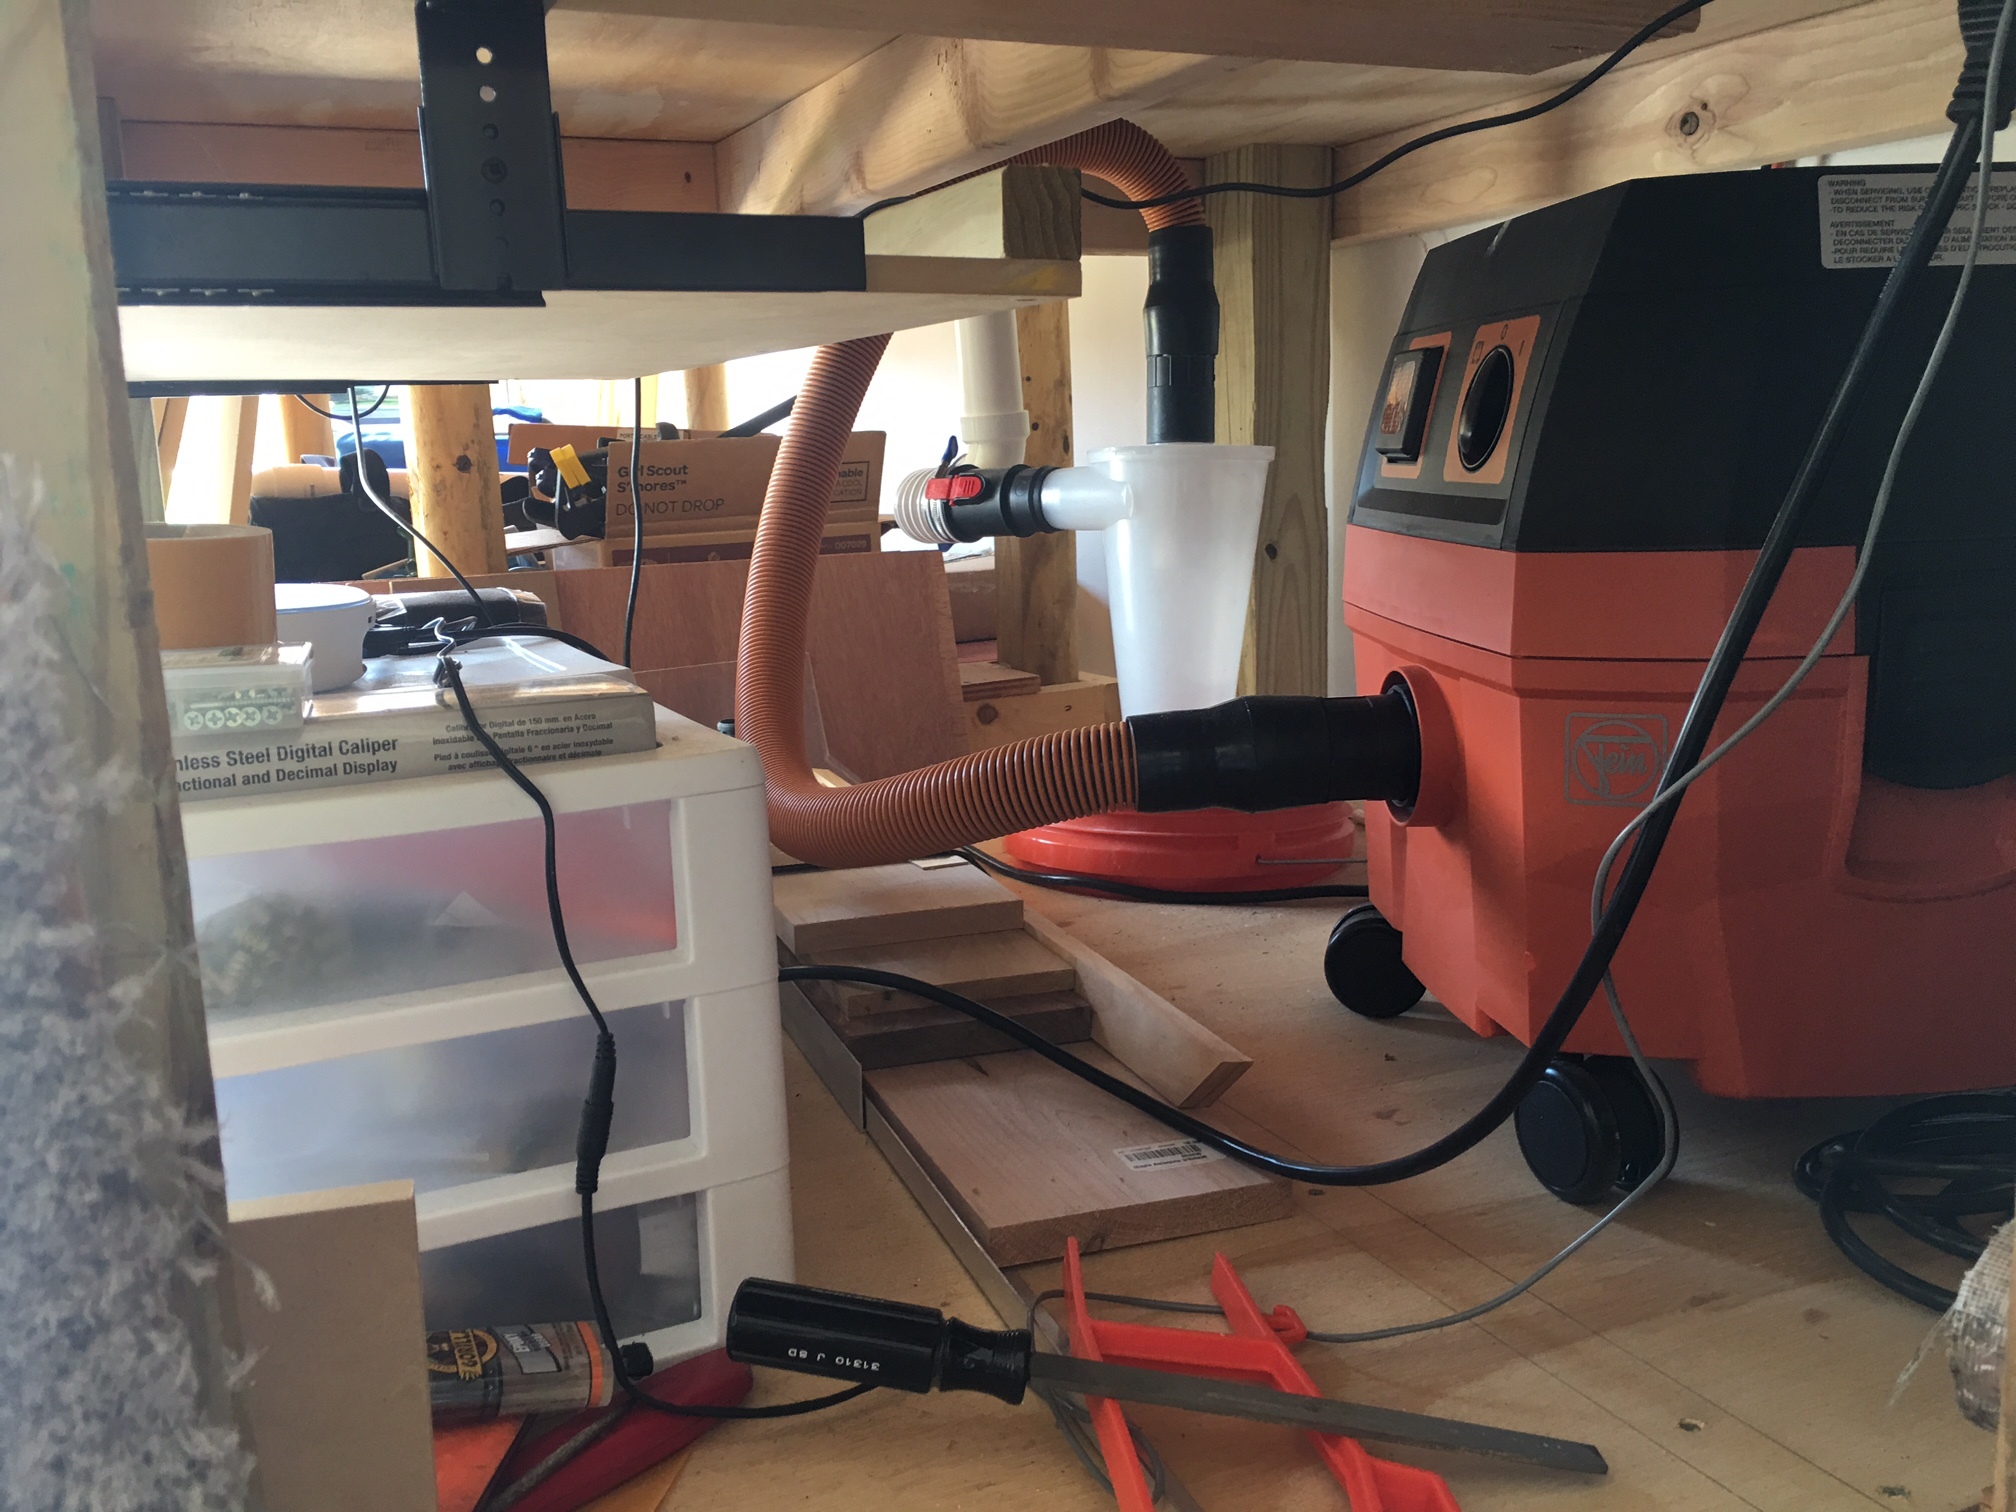
Opposite side of bench showing the little Fein Turbo 1

Now I just have to finish the wasteboard!!

Dan

10 Likes

Magic is always fun…SO are pictures!(ribbing back) ever think about a vaccum table??

I like your Z-plate dust bracket,I may have to steal a page out of your book.Very nice setup Dan.

V carving? What is that? I thought this hobby was all about building a better machine? Y’all don’t use these things to make stuff do you? Anything I need made I can usually buy on Amazon :joy::joy::joy:

Please do! If I can remember I’ll upload the .c3d files tonight. Word of caution, don’t try to edge screw MDF, it doesn’t work, ask me how I know :disappointed: I assembled with 5 minute epoxy, then hand drilled two 3/8" holes vertically and epoxied hard wood dowel in the holes( if you look close at my pictures you can see them right on top of where the Z axis pulley runs). I also had to “adjust” everything with a round file and a sander till it all fit right, but not much.

Thanks for looking!

Dan

2 Likes

I bet you realy bought that CNC machine just so you could program a g code that would direct the vacuum hose around the work bench. That may be the best accessory developed yet. Great work without working. And yes I do like the pictures also.
All kidding aside, I really like your setup, bench and all, terrific work station and clean too.[quote=“DanoInTx, post:69, topic:4875”]
I thought this hobby was all about building a better machine?
[/quote]
I had to use it cus I ran out of work shop room and had to switch to a folding chair. And my machine is the best…

I like your setup, and your vacuum boom gives me ideas! I hadn’t thought about shimming as you show, and now I’m gonna have more experimentation as I explore accuracy and calibration stuff.

Keep up the great work and pics!

2 Likes

Here’s the files. I used a C3D 1/4" flat bit for all of it. 1/2" nominal MDF, although I used scrap pieces and some measured slightly different from one to the next (all were slightly under around 0.490"), so you’ll have to set your tool path depth according to your material. I think I ran my Dewalt around 18,000 RPM+/-, and adjusted a bit on the fly with the SuperPID. The hole for the hose was cut for 2" PVC, and isn’t directly above the Suckit hole because I wanted to make sure my flex hose had some clearance from the router mount as it moves. The two pieces hose_holder_mount.c2d are slightly different, I cut a small pocket out of the top one to clear the PEM nuts on the Z axis plate.

hose_holder_arm_doubler.c2d (76.4 KB)
hose_holder_arm.c2d (103.6 KB)
hose_holder_mount.c2d (184.0 KB)

Hopefully you will find them of some use!

Dan

6 Likes

I have, but I cut so many small parts out of a panel that I can’t see it working for me. I don’t use onion skin cus I have 40 or more parts to edge clean. I am experimenting with a “perforated” tabs experiment which I think will experimentally work. When it does, I’ll explain (with Pictures). Jude

1 Like

Thanks for sharing,ill see what I can come up with :slight_smile:

I didn’t notice the vacuum hose boom (of course if I look at the picture AND read it is obvious). I like that a lot. Great addition! Thanks Dan

2 Likes

New wasteboard ala transfer punch,1/2" Forstner bit and can’t remember think #9 drill bit. Mounted, then drilled using the XXL for 2", 3" and 4" T-track spacing. Mounted T-track using #8x3/4" Phillips pan head screws. The T-track came from www.orangealuminum.com the cheapest I’ve seen and pre-drilled at 3" spacing, easy to work with. Yes, 1/4"x20 bolts slide over the pan head screws just fine, I didn’t need to countersink them. Yes I left space at the front of the machine to get 1/4"x20 bolts into the T-track, about 3/4" from the from plate. Next step is to cut MDF strips to go in between, then tramflat. To answer earlier questions, I didn’t put a DI on my Z-axis as planned (got lazy and didn’t want to disassemble the machine), but laying all of the T-track out I saw little to no gap under the 36" spans, it’s pretty flat, unless of course my T-track has a VERY consistent warp that matches the bed warp. Drilled the holes using the XXL with a 0.0625" end mill at 1/4" deep. I used CC and set my hole radius at 0.032" and did pockets, worked great!

Dan

5 Likes

Very nice Dan,Im in the process of relocating my machine from the tuna can i call shop to my maker space with a/c.Im losing some space but well worth it.Im trying to come up with a new monitor fixture and noticed yours kinda…what did you do there to mount it?

North Bayou F120 Full Motion Gas Spring Articulating Swivel TV Wall Mount for 17"-27" Flat Panel LCD LED Plasma Screens with VESA Mount Amazon.com

I used some odd scraps of wood to get it to the right height. I actually have two, one for my monitor and one for the SuperPID enclosure just below it.

Dan

1 Like

Thanks Dan :)…

Looking pretty slick there also Dan, T track-o -matic !!!

1 Like