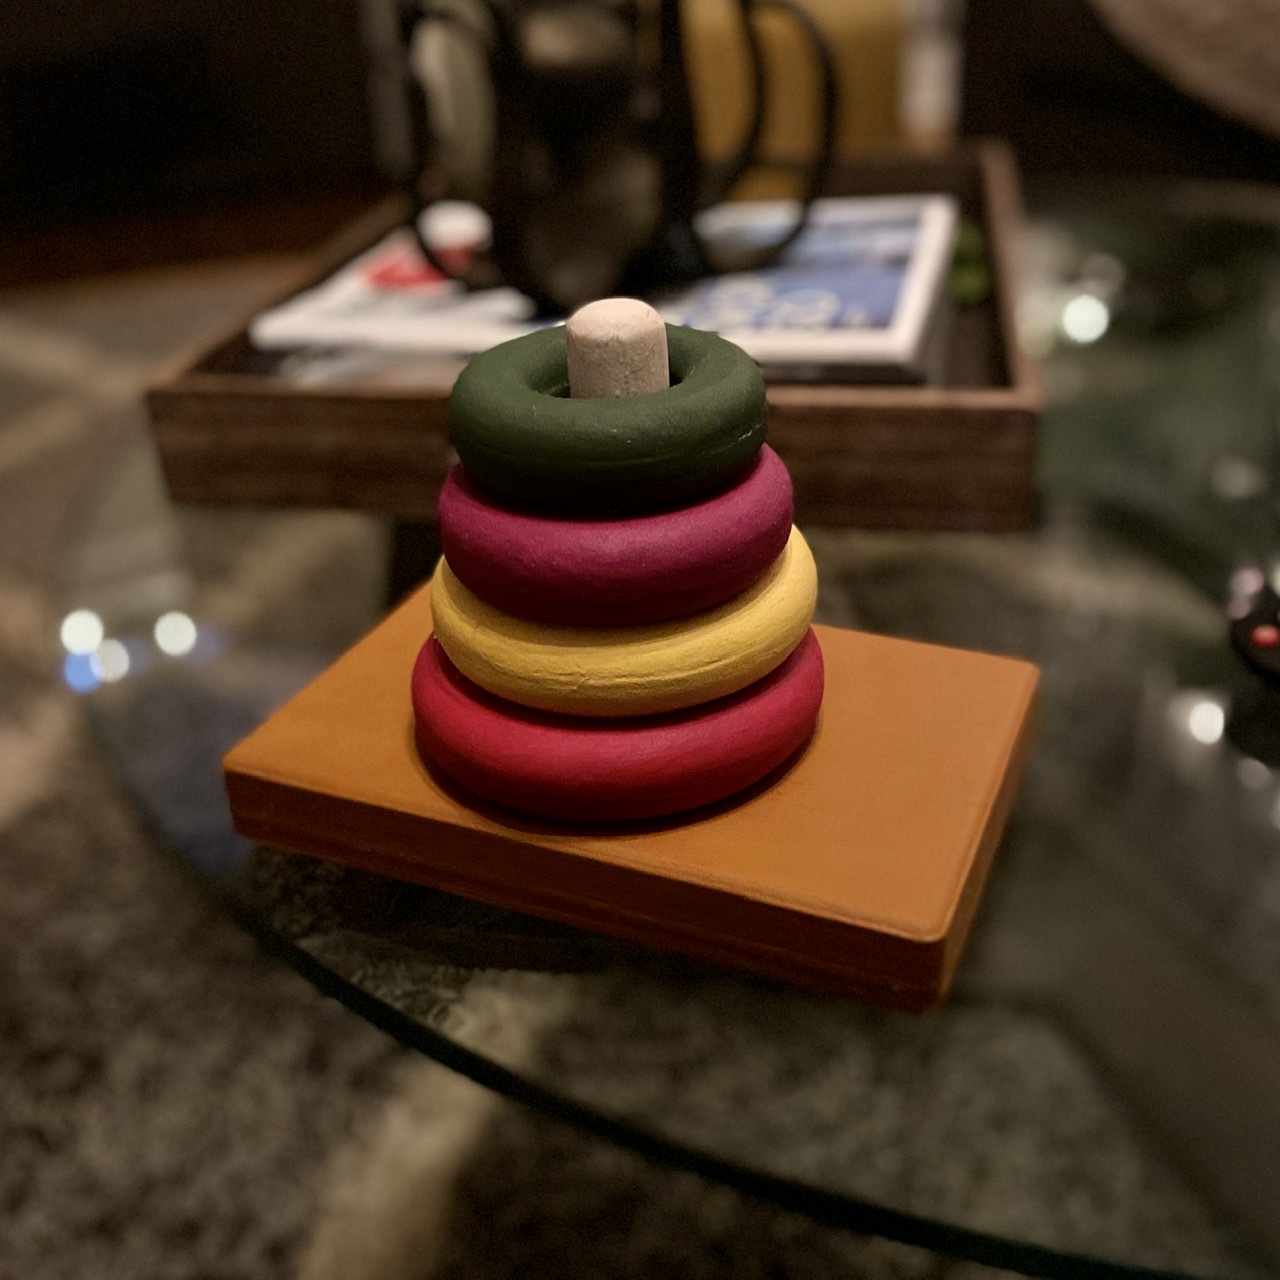
This is probably my first “finished” project with the Shapeoko 3 XL I purchased about a month ago.
It’s made from a piece of poplar that I cut down into about 7 pieces. 2 of those pieces I glued together to make the center ring. The center post and all the rings were basically milled as halves that I glued together.
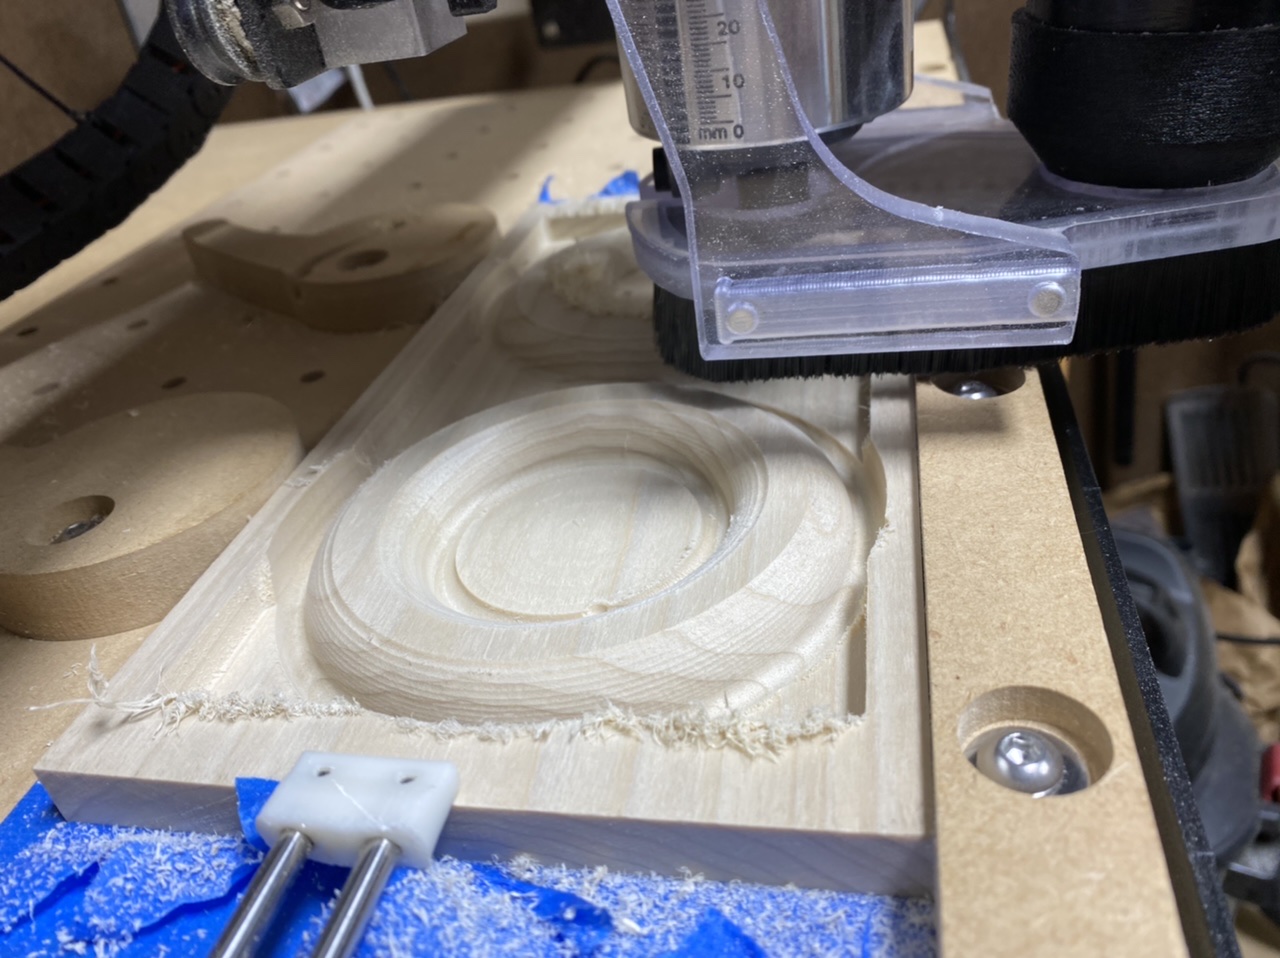
I gradually learned to use a 1/4 and 1/8 ball end mill to get the surface finish nicer.
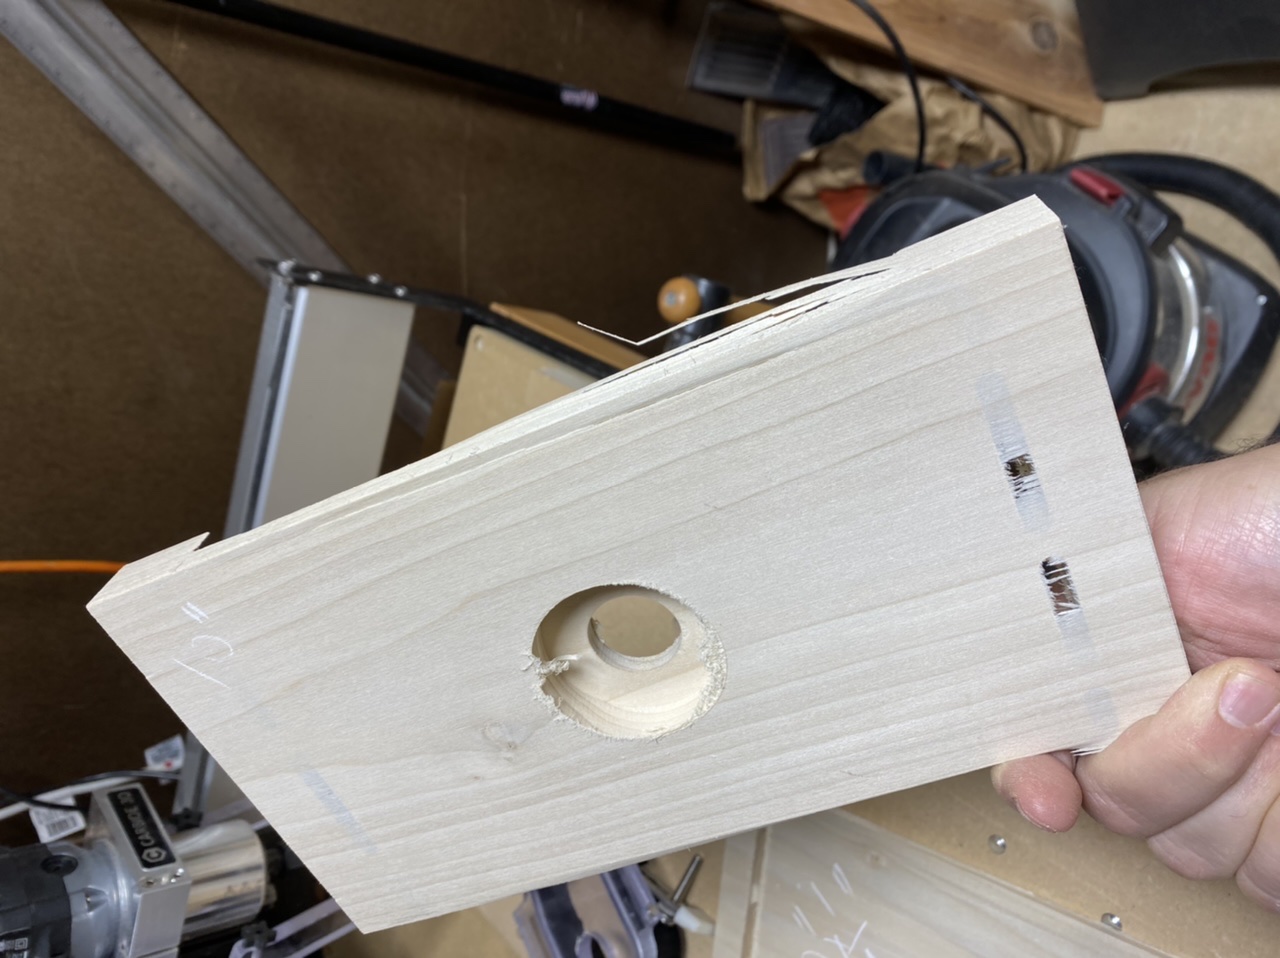
The center post was actually a 1 1/2” in diameter which was glued into the base hole - it’s quite strong. Here’s a picture of the top part of the base that I milled on both top and bottom
There were a ton of mistakes made throughout, mostly because I’m really learning machining. I ended up having to do use the sander and my bandsaw for finishing most things. But by the last ring I was able to get the finishing smooth.
My speeds and feeds were all over the place, eventually learning to hit a chip load of about .0015 as a best result, using the Carbide compact router on the lowest RPM setting.
Everything was designed in Fusion 360. I was used to modeling in 360, but using the manufacturing view was brand new, so there were also lots of learning there. So my project files are probably something I’ll go back to some day and shake my head in disgust
I can tell you that my first project looked nothing like that, and it was not two-sided either.
0.0015" chipload sounds about right, my goto range is [0.001 - 0.005] for wood. Which depth per pass / kind of toolpath did you use in Fusion ?
I experimented a lot with tool_diameter * .5 (.125) for the stepdown for the roughing passes, but it got a bit of chatter and was pretty messy. I’ve been doing a bunch of baltic birch milling, and I’m noticing going down to .075 was just quieter. At one point between this project and another I’ve had to swap out brushes on my CCR router, so I’m feeling that easing off the stepdown and overall speed a little more conservative is the way to go.
For this project I pocket clearing for my roughing passes with the straightedge bit, and then a ramp path strategy with the ballnose bit. I was pleased with how fast both worked on poplar, but I’m also starting to recognize the value of using a downcut bit to start any wood milling and an upcut bit to clear.
I’ve been working with some baltic birch plywood now, and I’m definitely seeing that I can’t be as aggressive with it vs this poplar project.
I ended up doing .025 in step downs with the ramps using a 1/4" ballnose bit and felt that was pretty OK. If I were to do it again I might even let the 1/8" bit do a pass too, probably even shorter stepdowns for a nicer surface finish.
You mentioned chatter at .125 stepdown but you don’t mention the RPM. Did you try increasing the RPM?
I know I started at about the “3” setting on the CCR, which is 18,000 RPM. For this project, I did increase the RPMs a bit, I never went past 3.5.
(It’s now been long enough I don’t recall the exact variations I’ve done - another lesson: take better notes.)
Since this project, I’ve been working on doing a lot more in baltic birch plywood, and I’ve noticed that slowing things down is getting nice and clean results. My approach now is to go with the slowest RPM setting on the CCR (12k RPM) and start with a downcut bit, then, do more clearing with an upcut bit. But this is dramatically slower to process each part.
This is making me wonder if doing the HDX and spindle upgrades would be an improvement for working with wood, so you can slow down the milling even further.
Interesting, these days I tend to do the opposite, for pocketing at least: I use an upcut endmill with agressive feeds & speeds for clearing most of the material (roughing pass) in the pocket, while leaving a bit of material behind (“stock to leave”). Then I do a single finishing contour pass at full depth with a downcut bit, which cleans up the top edges perfectly while removing the remaining stock around the profile, and not having to worry about the disadvantages of downcut bits (poor chip evacuation)
Ah, I’ve not been doing a ton of pocketing, just tons and tons of contour cuts, so I think that’s warped my brain. I should have mentioned that.
Makes sense that pocketing with the upcut endmill more aggressively works. Probably something I’d experiment with too if I ever get around to it again.
I’m also wondering if there are larger bits the CCR can drive then the 1/4" Kodiak bit that I currently am using.
Note that if slower RPMs is what you want, you can get a spindle without the need for an HDZ (which for wood work, honestly, is largely overkill) if you stick with smaller 800W models. This is a great thread about that, and those spindles will fit the stock router mount diameter.
However, you should consider/try going to higher RPMs instead, the higher the better since it decreases the cutting forces. The only catch is that of course you have to increase feedrate accordingly to stay in the sweetspot for chipload. I spent almost a year in the “12k comfort zone”, but then @gmack opened my eyes on this topic, and since I upgraded to a spindle in the meantime, it’s so quiet that using max RPM (24.000 in my caseà is not a problem anymore (I remember trying to use max RPM on my Makita…oh my, the neighbours did not enjoy that very much, and neither did I)