Had a bit of a scare today, the screws on my Sweepy 2.0 fell out right before the end of the job I was running, then the clamp lever dropped and got sucked up and into the bit. Thankfully, it was at the end of the job on a prototype and nothing major got destroyed, but sheesh! Scared the Hell out of me! I regularly check the bolts, but must have forgotten this time and they shook loose.
Called it a day after this, need to check the cutter for damage, too.
Holy Moses, or some words like that. Be careful, you don’t want that to become a projectile.
1 Like
There in lies the reason I have delayed putting a sound enclousure on my XXL. Seems I have to constanly keep checking the bolts/screws on my sweepy to keep it from falling off. I have the lock washers on both screws, but doesn’t seem to help. I ruined my first sweepy before I figured out this needs constant attention or face potential project ruin.
If anyone finds a better way…I’m all ears.
2 Likes
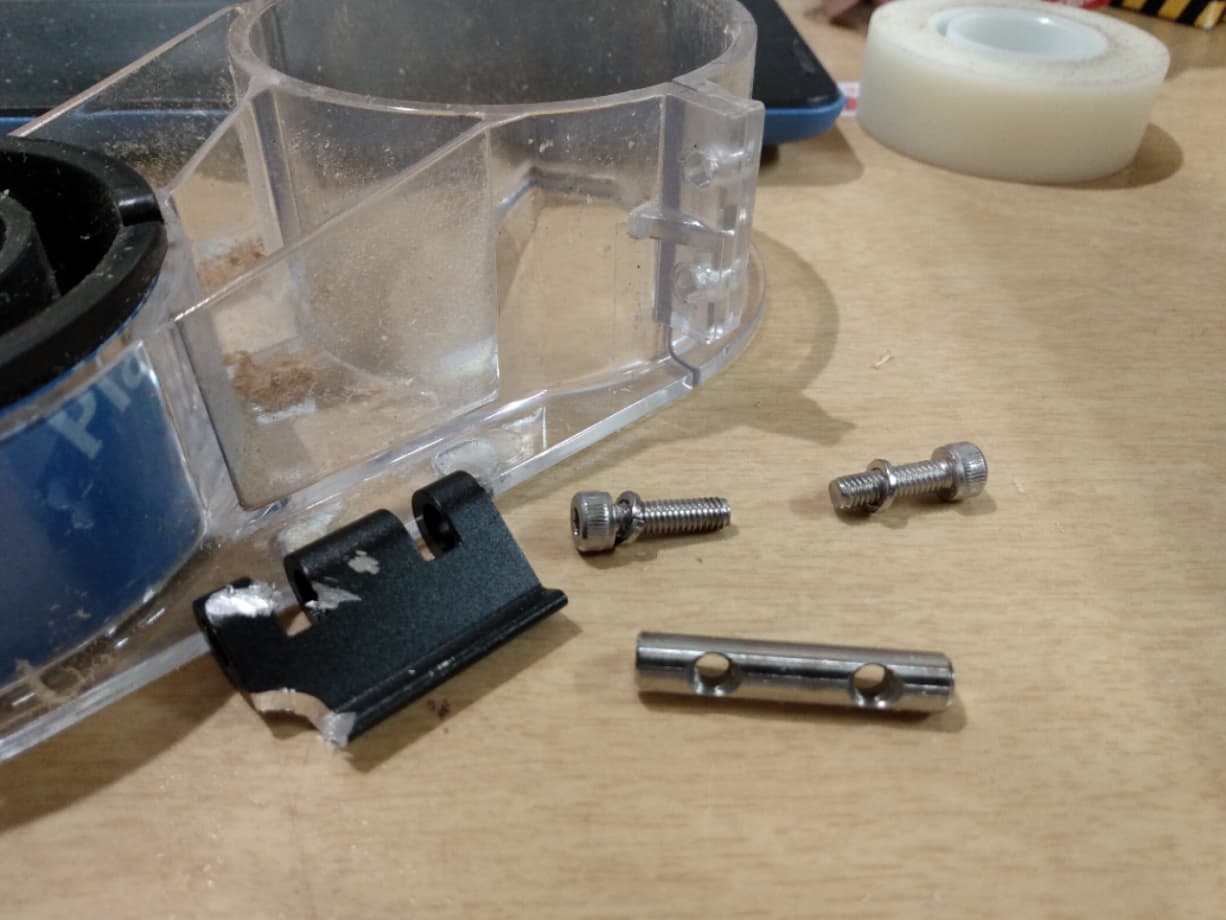
What if we replaced the stainless rod with a nylon unit with unthreaded, slightly undersized holes for the bolts? The bolts would “cut” threads for themselves into the nylon, and that might make the rod function like a nylon lock nut.
Or maybe a stainless tube sheathing the nylon rod, so the nylon wouldn’t be distorted enough to interfere with the smooth function of the cam clamp lever?
![]()
I have had this problem before. I always remove the complete dust boot when I change the bits and every time you do this the bolts will loosen slightly. Once I saw what was happening I always tighten the bolts after a few removals and installs.
Maybe try placing rubber bands around the bolts and the plastic area where the threaded rod is. The rubber band will act like a lock washer and put a little drag on the bolts and reduce movement.
Might work might not work but I always check the bolts before I put the boot back on.
Anthony
1 Like
I’ll comment also, the plastic seems when you clamp it that it’s never really tight.
Seems like a new design would be helpful.
Mine hasn’t fallen off but I do check it every time before a run, since I remove the sweepy to change the bit.
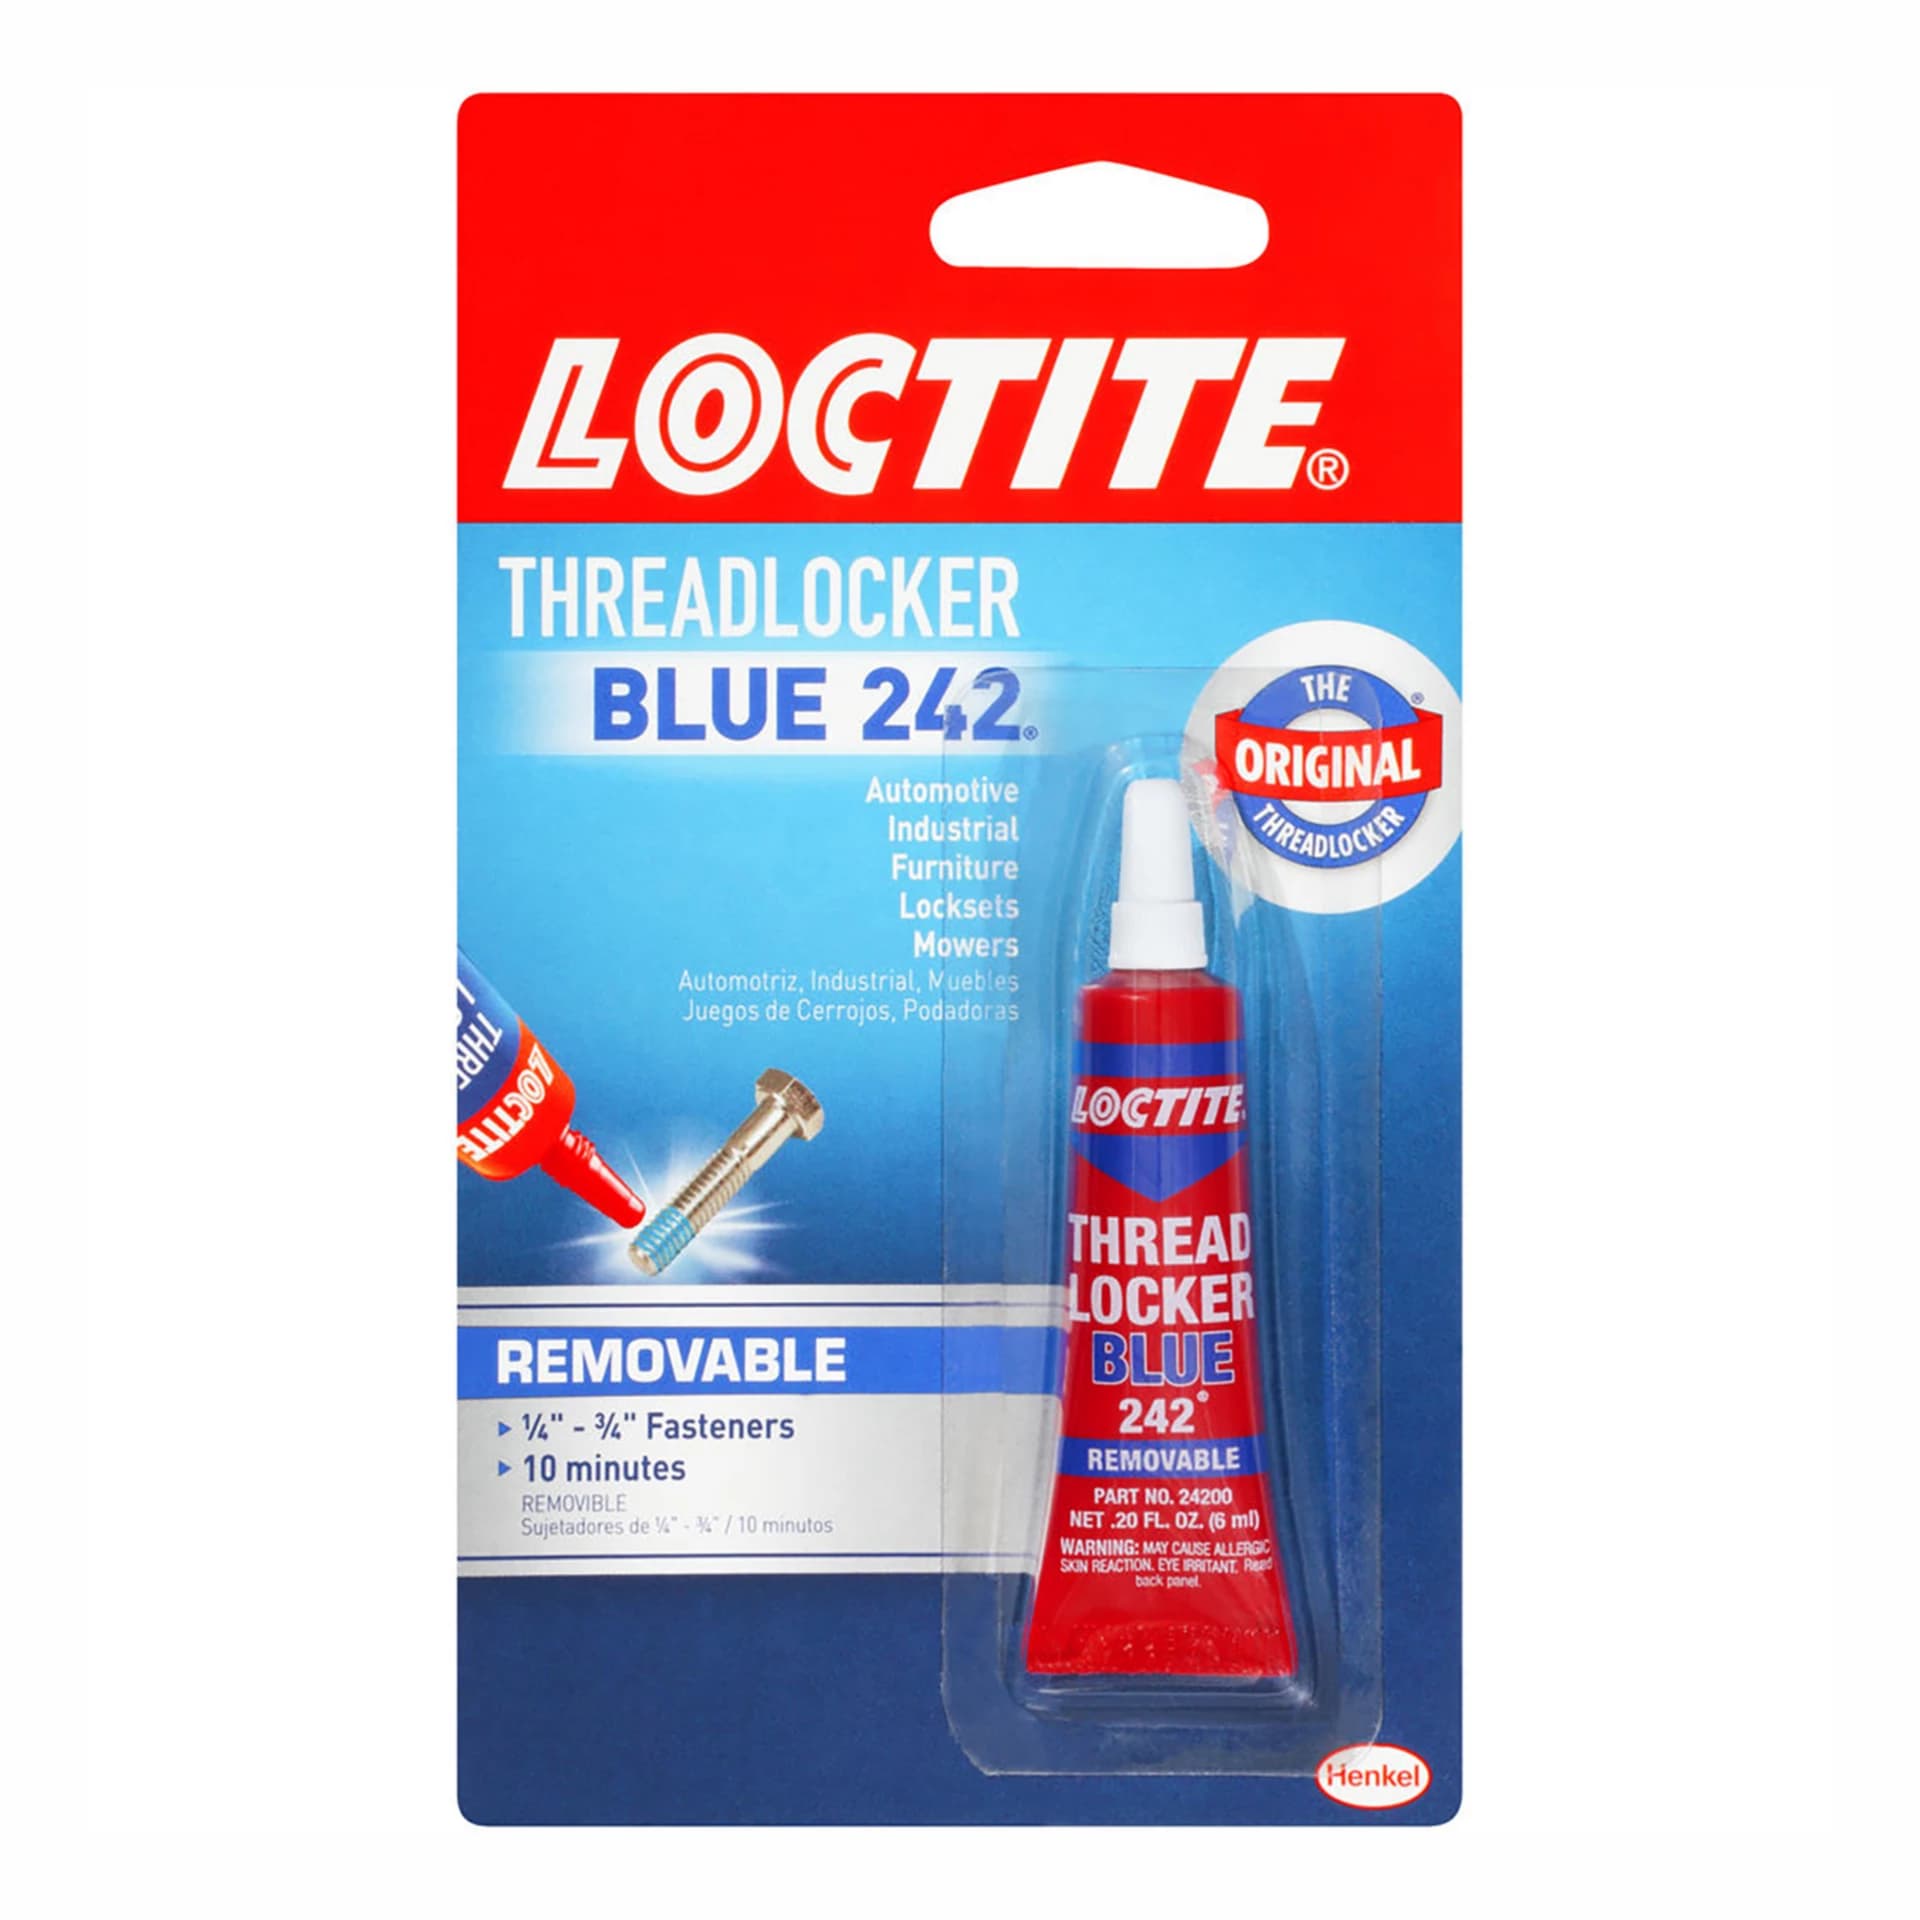
What about using some removable locktite? Once you get the adjustment right you wont need to adjust the screws but if you do the removable locktite will allow adjustment and help with the screws not falling out.
4 Likes
It should be tight – are you sure you have the right size of Sweepy for your trim router?
We’ve seen similar difficulties when folks have tried to use a 69mm Sweepy w/ a 65mm trim router or spindle.
Tried Loctite this morning and it seemed to help with the bolts, but then things got worse. I tightened the bolts enough to keep it secure on the Makita, but not so tight that I couldn’t work the clamp. At that point, it looks like some microfractures in the acrylic decided they’d had enough abuse and the clamp mounting flanges completely crumbled. I’m not sure what my next step is, but I imagine it’s going to involve finding a way to use a large hose clamp in lieu of the clamp.
The shame of it is, I really like the way the 2.0 performs, it’s certainly an improvement over the 1.0.
Mine did this too. I put a small dab of superglue on the threads where the nut goes, then tightened to the proper clamping force. Hasn’t loosened since. If I recall superglue had slightly less locking force than blue thread locker, so it seemed the right amount.
If you still have all the pieces you could try dusting the parts with baking soda and then applying super glue. Baking Soda and super glue makes a very durable repair. You may have to run a drill up the hole to clean out any squeeze out. There are a bunch of youtube videos about using baking soda and super glue.
Here is a quote from a google search about this.
What does baking soda do to super glue?
Adding baking soda to your super glue creates a faster setting and curing time. What’s more, baking soda can strengthen the bond between the cyanoacrylate and base material. In this article, we discuss why mixing baking soda and super glue can cure faster and create a more durable bond.
1 Like
Same thing with me. Loctite ![]()
A few months ago, after getting tired of having to continually retighten Sweepy’s little bolts ( and having it fall off in mid-operation once) I searched for a simple solution and surprise to me - I found one. I cut two small pieces of thin leather, punched a hole in the center of each and inserted them between the lock washers and the plastic. Hopefully I can attach a picture showing it. It works pretty well.
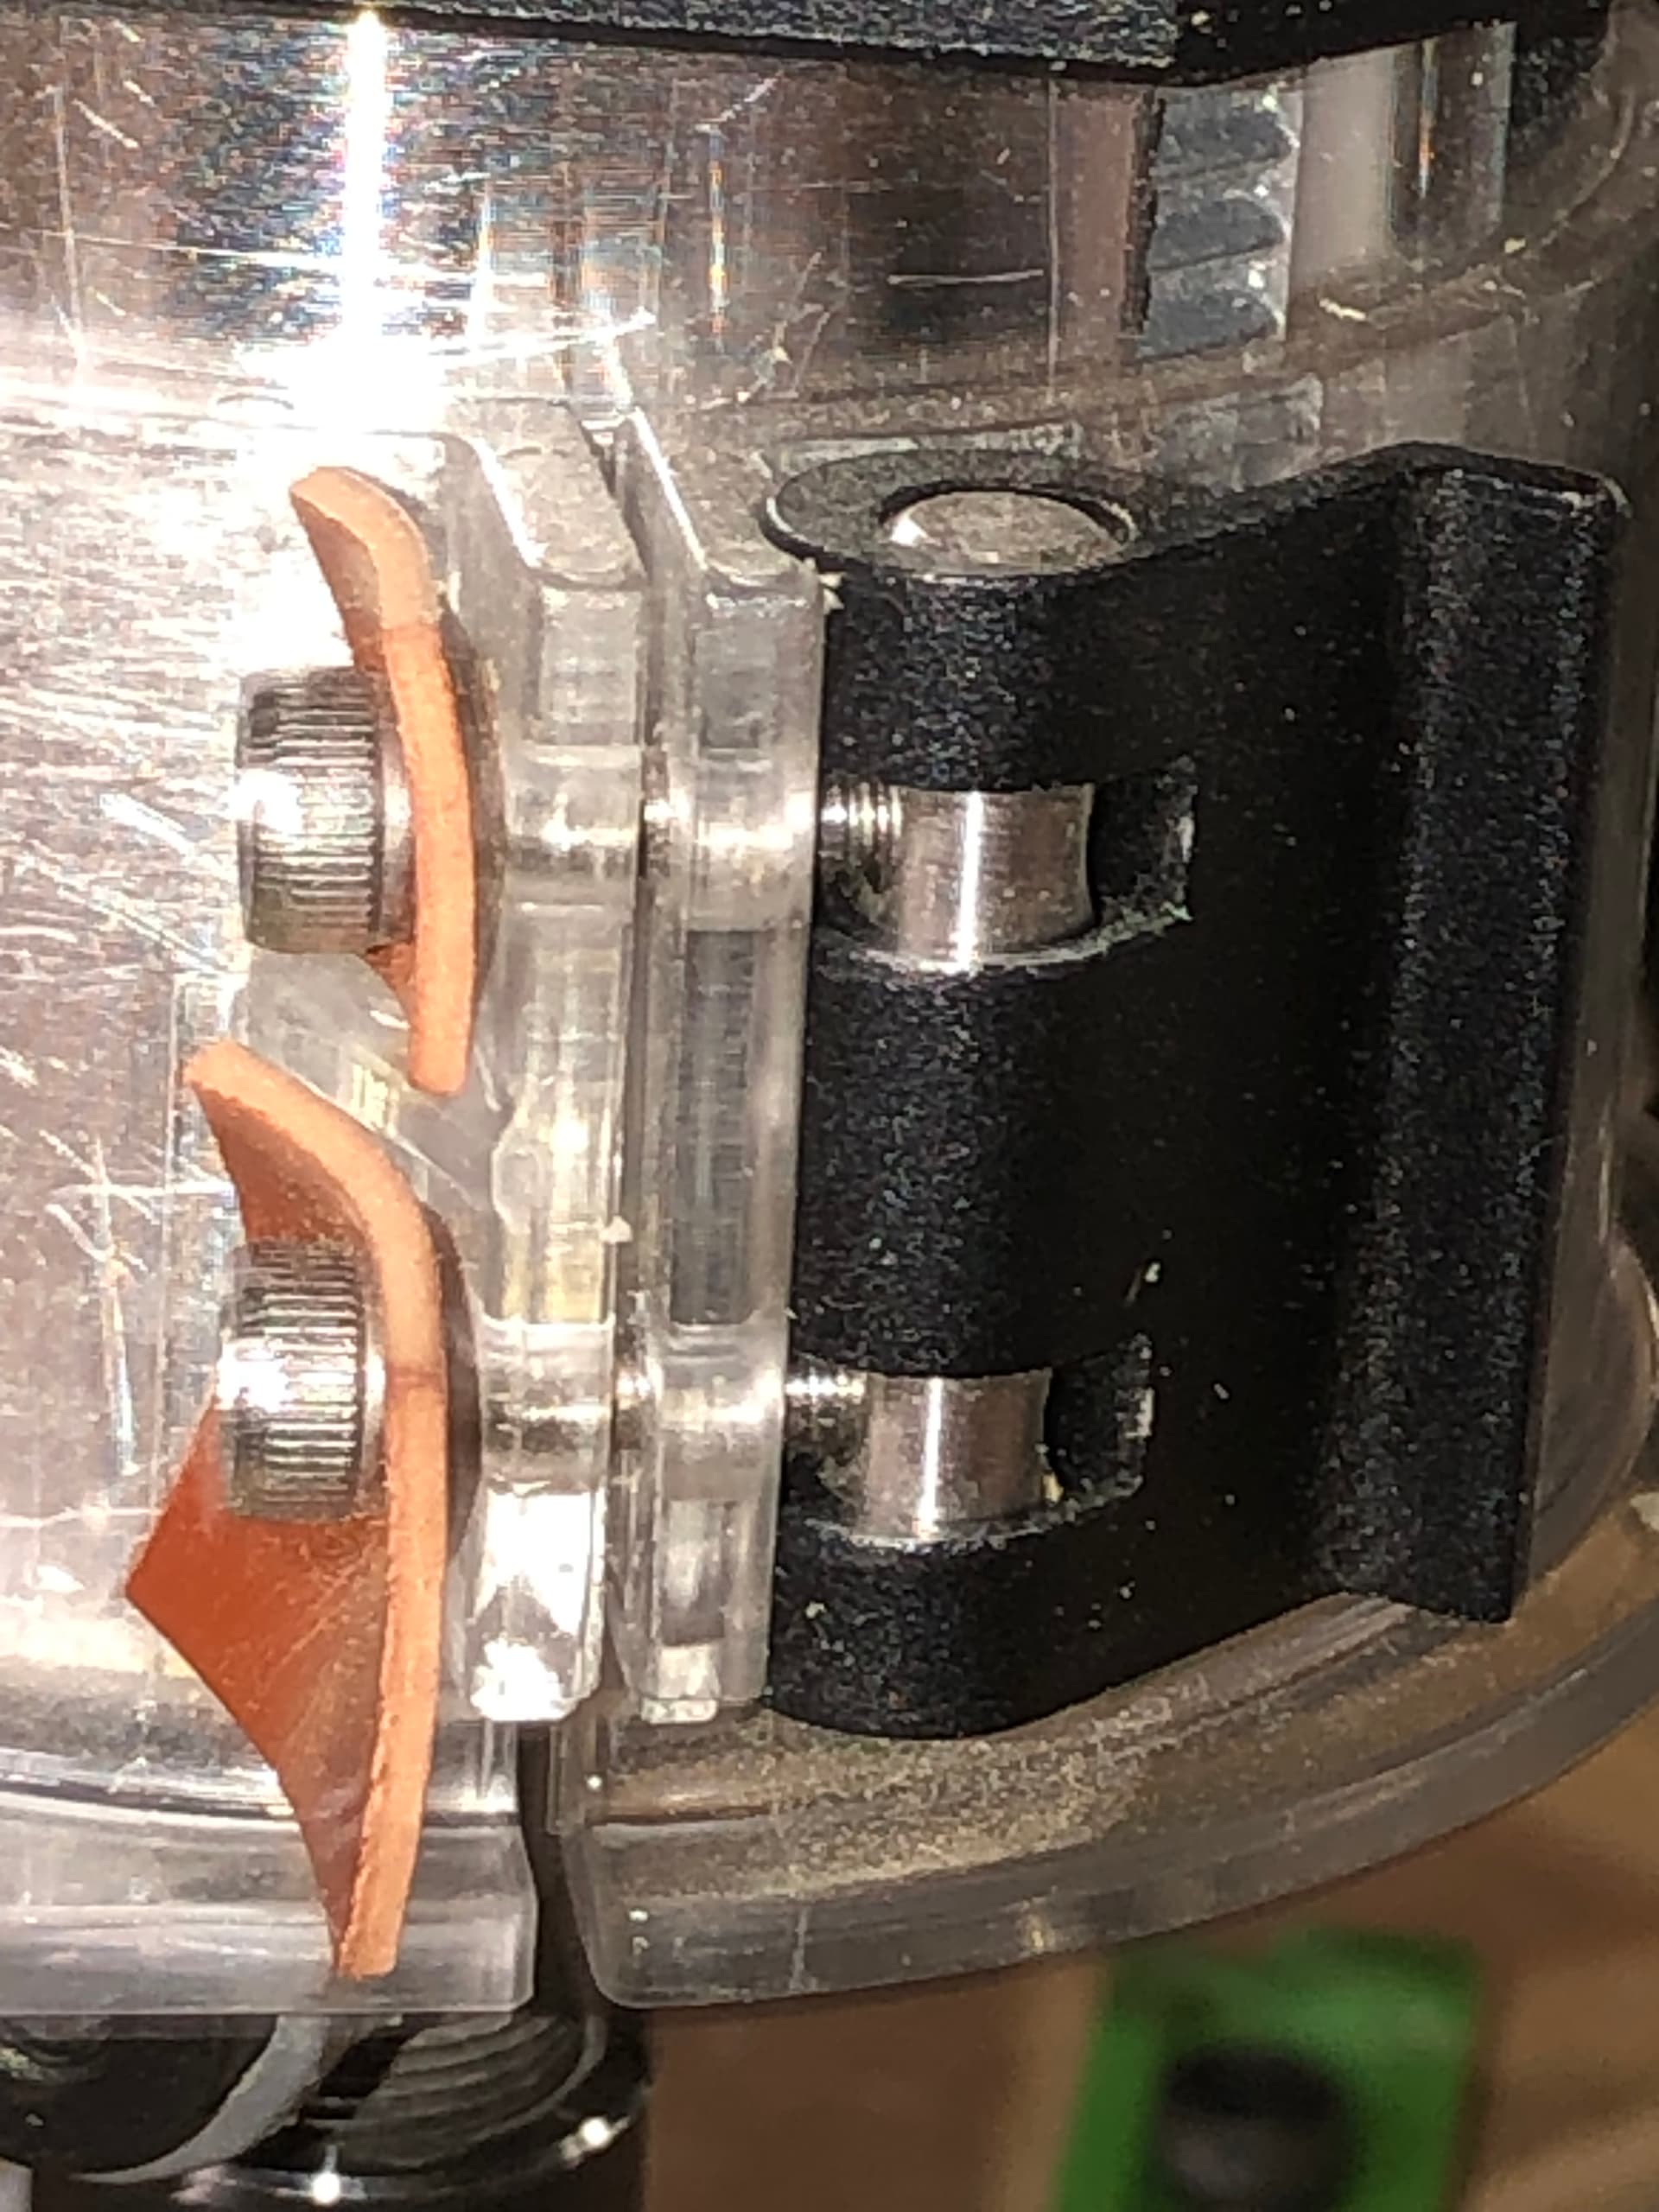
9 Likes
It’s the sweepy that came with my unit. I’ll add, mine was probably an anomaly. Not even a clue of instructions how to put things together, I literally watched the youtube video of Moy building and kept pausing and walking back into the shop to do the step in the video. That was a 2 day build which should have been at most 5 hours with proper instructions included.
Mine was also one that the electronics were FUBAR which didn’t help on a new build. I was so frustrated I purchased another unit to get things running. I guess that’s what you get when the shipping department is in another State.
So back to your original question, I have no idea if it’s the correct size. But I am sure the 4mm difference I would notice, it slips over the spindle fairly tight.
Please write in to support@carbide3d.com and provide a link to this thread.
I’m going to go w/ your Sweepy having a flaw in the casting and that it should be replaced as faulty on that account, even if out of warranty.
4 Likes
Bob:
I implemented your solution. Quick and easy. The best kind.
Thanks for sharing.
Bill
2 Likes
I had the same problem and had a disaster…It was my fault in that my code forced a plunge to an incorrect depth, but my sweepy dropped down onto the lock button of my router and jammed it into the running collet…destroying the mechanism. I ended up getting a new router. Not fun.
My Sweepy 2.0 screws walked out and the Sweepy fell off the router, but luckily did no damage.
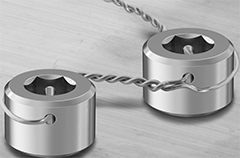
They REALLY should be using Nylocks for this application.
The Sweepy clamp screws should really use aircraft ‘lock/safety wire’. Would definitely be a welcome improvement ![]()
You can either modify the existing screws by drilling a hole through the head, or get some premade on McMaster.
2 Likes