I have the regular sweepy as well but the idea of a Z independent dust boot always intrigued me so I want to give it a fair shake.
1 Like
When I got my first shapeoko, I had the SuckIt fixed attachment. It had a magnetic-only base that was very easy to remove. Since I did not have a Bit Runner, it paused to allow me to start the router up - and that let me put the boot back on.
I loved having the fixed height. No worries about whether you were going to hit clamps when the cut got deep - and much better suction on all jobs, because you can optimize the height of the bristles regardless of where you are in the cut. Plus, the bristles lasted longer because they were never getting deformed on deep cuts.
I moved over to the Sweepy (v1) when I upgraded to the HDZ, because I didn’t have a good mount for the SuckIt anymore. I missed having the fixed boot, but the Sweepy was functional. Still, I was VERY excited to get the Sweepy Pro and to get back to fixed boots.
I STILL believe, even if they somehow work around the reinstallation of the boot issue that is being discussed here - there is still going to be a PITA with the thumb screws, which are easy to misplace and cumbersome (if the boot is very low, it’s not easy to get the thumbscrews out of the holes without raising the holder - which then needs to be reset … And…the thumb screws do not always engage easily…again… lots of steps. Time and opp’y for error.
My wish list:
- Create an ability to put the boot back on before the spindle starts back up
- Make the boot easier to put on and take off - either with a magnet-only solution or a way to remove the boot without having to fully remove the thumbscrews (just tighten and loosen, but not have to remove it).
Gary
If you’re feeling adventurous you might consider milling a pocket in the extrusions down to the floor of the T slots and drilling/tapping mounting holes. Maybe after the warranty is over  . I don’t know if that would give you enough height reduction to remove the collision hazard. I’m still using a Suck-it dust shoe on my 3 XXL with the HDZ. My Bitsetter is ~ level with the spoil board and the tool change position is high enough I don’t need to remove the dust shoe to change the tool. It makes the work flow very simple.
1 Like
Hmm, I have drilled a lot of holes in the legs for various things but that may be a bit adventurous given that I have a total of 4 minutes of cut time on this machine so far. Something to consider though. I don’t really want to do the gantry shift at this point which would allow mounting the bitsetter lower with some creativity. I don’t see myself using that feature much.
This issue has already been solved.
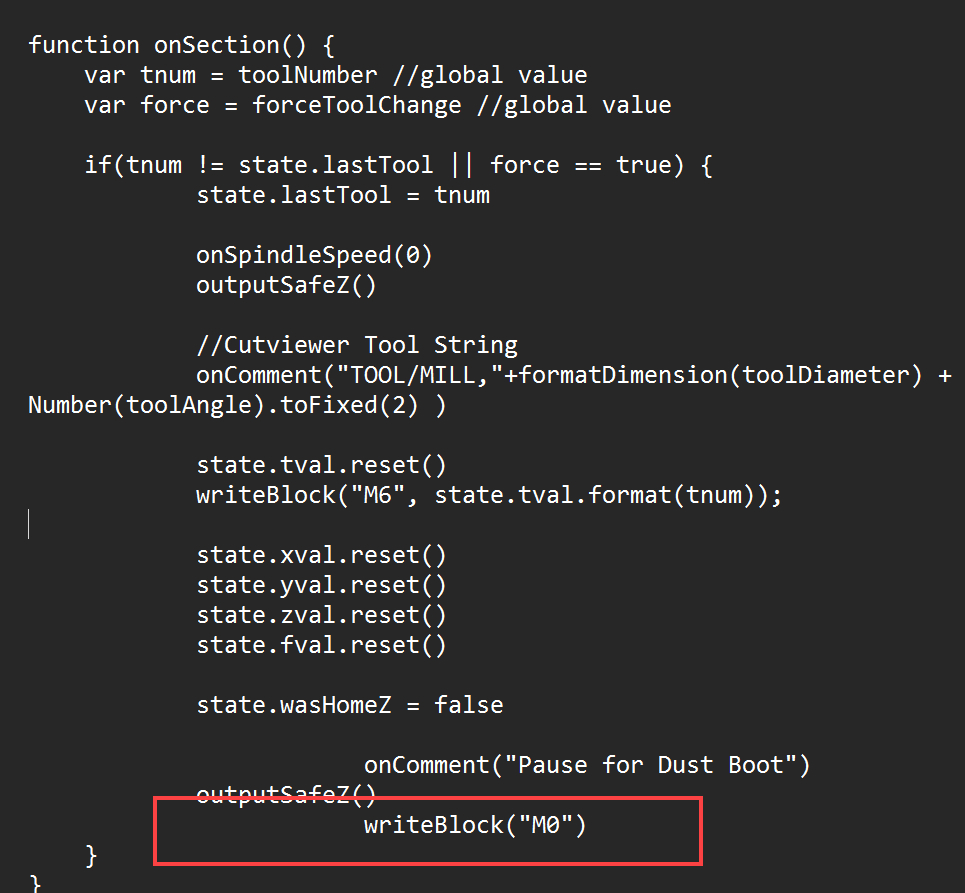
Thanks for the pointer to that, its not exactly my solution but may help. I use Vectric VCarve and the PP from @Allen44
@Tod1d modification to the CC Post uses an M0 command:

In the one from @Allen44 there is an M1 command:
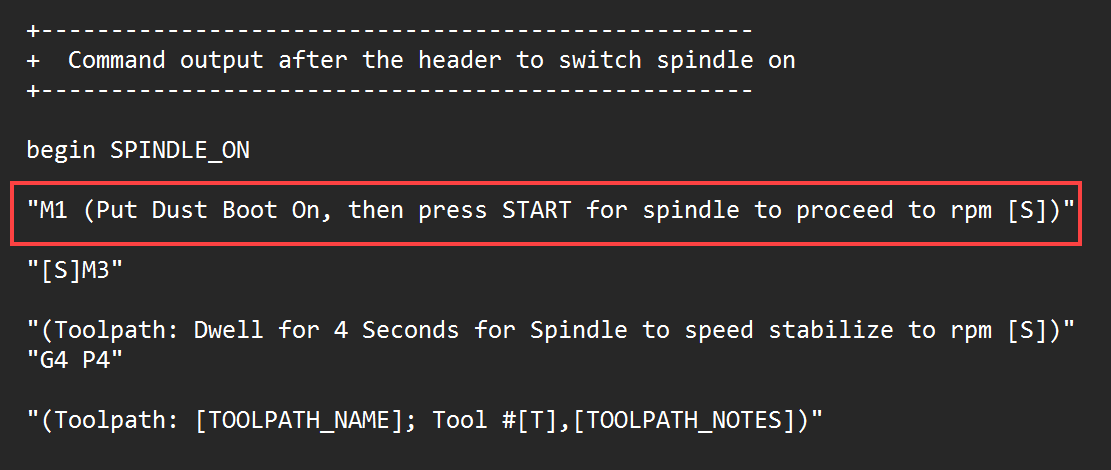
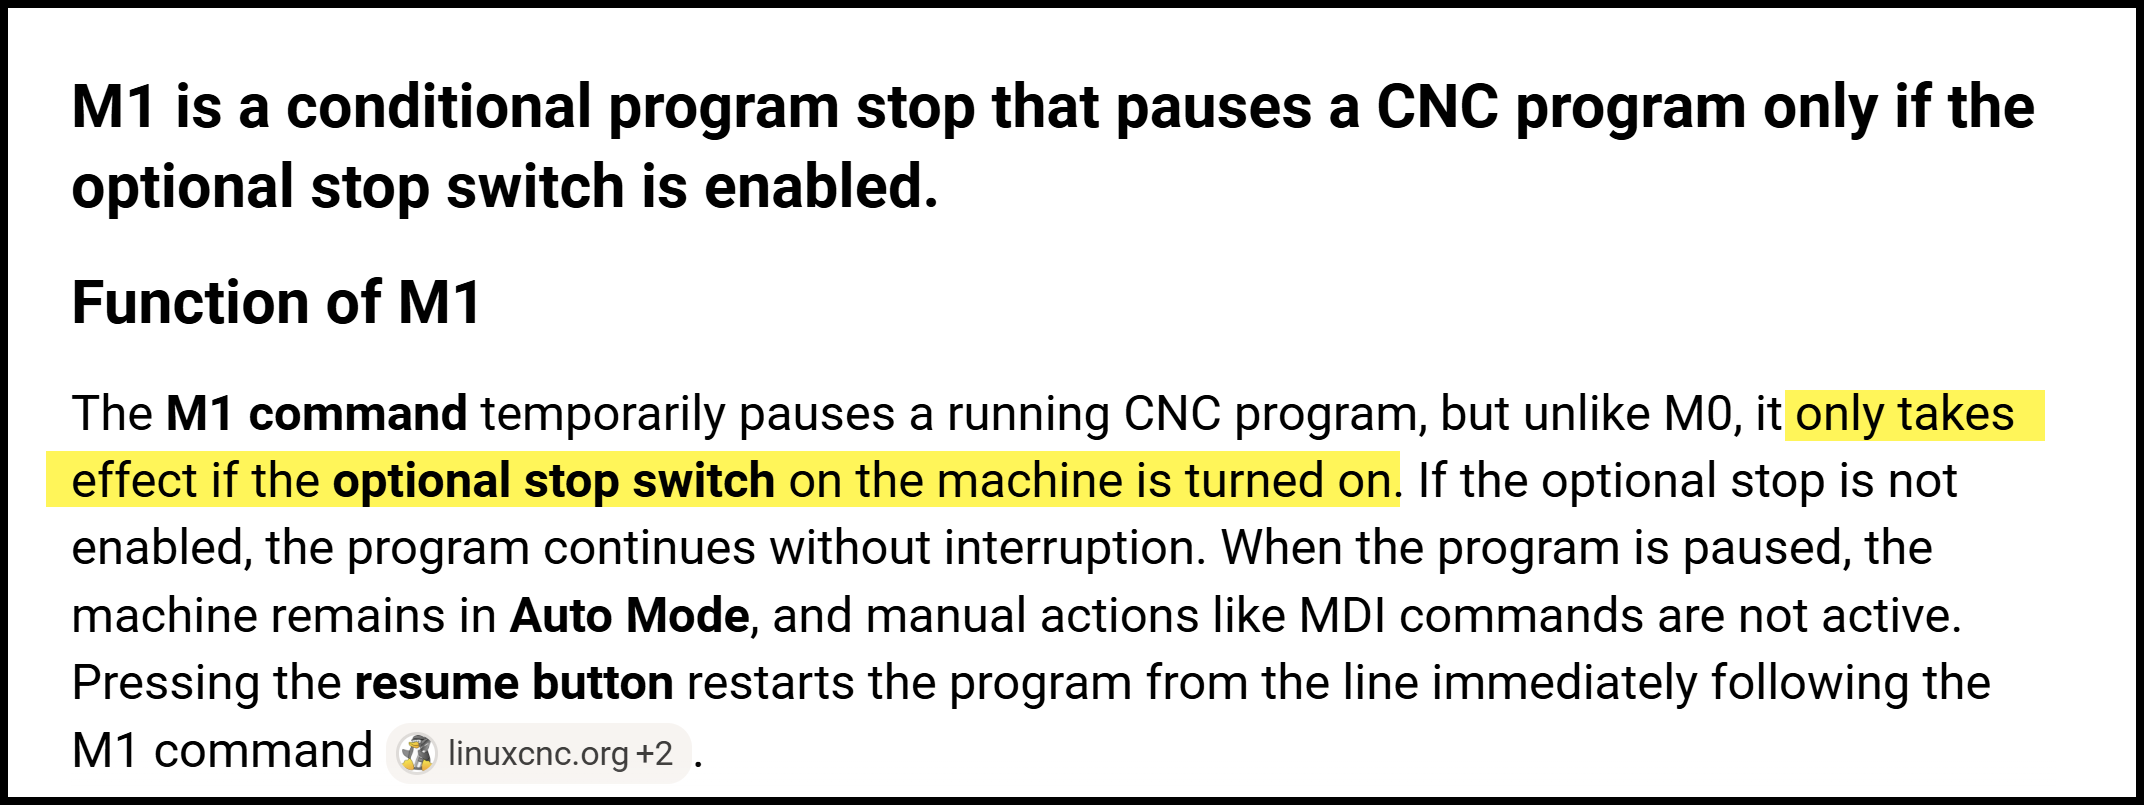
I am not sure what the “optional stop switch” is in context of the Shapeoko machines.
I can try switching the PP to use M0 instead and see if that fixes the problem.
Note however that there are still complications with the Sweepy Pro. One I forgot to mention earlier was that the magnet for the grounding wire on the BitZero needs to be on the collet nut (at least in my machine. I use a 1/4 pin to set zero. Once it measures the top surface on the BitZero the spindle raises slightly, but not enough to clear the Sweepy Pro and there is not enough room between the spindle body and the Sweepy housing to remove the wire and magnet. An alternative would be to feed the wire in from the bottom but it could get in the way during the zeroing operations. The very next thing in the process is that the spindle raises to the top prior to going to the BitSetter. If it raised all the way up before asking you to take the magnet off it would be better.
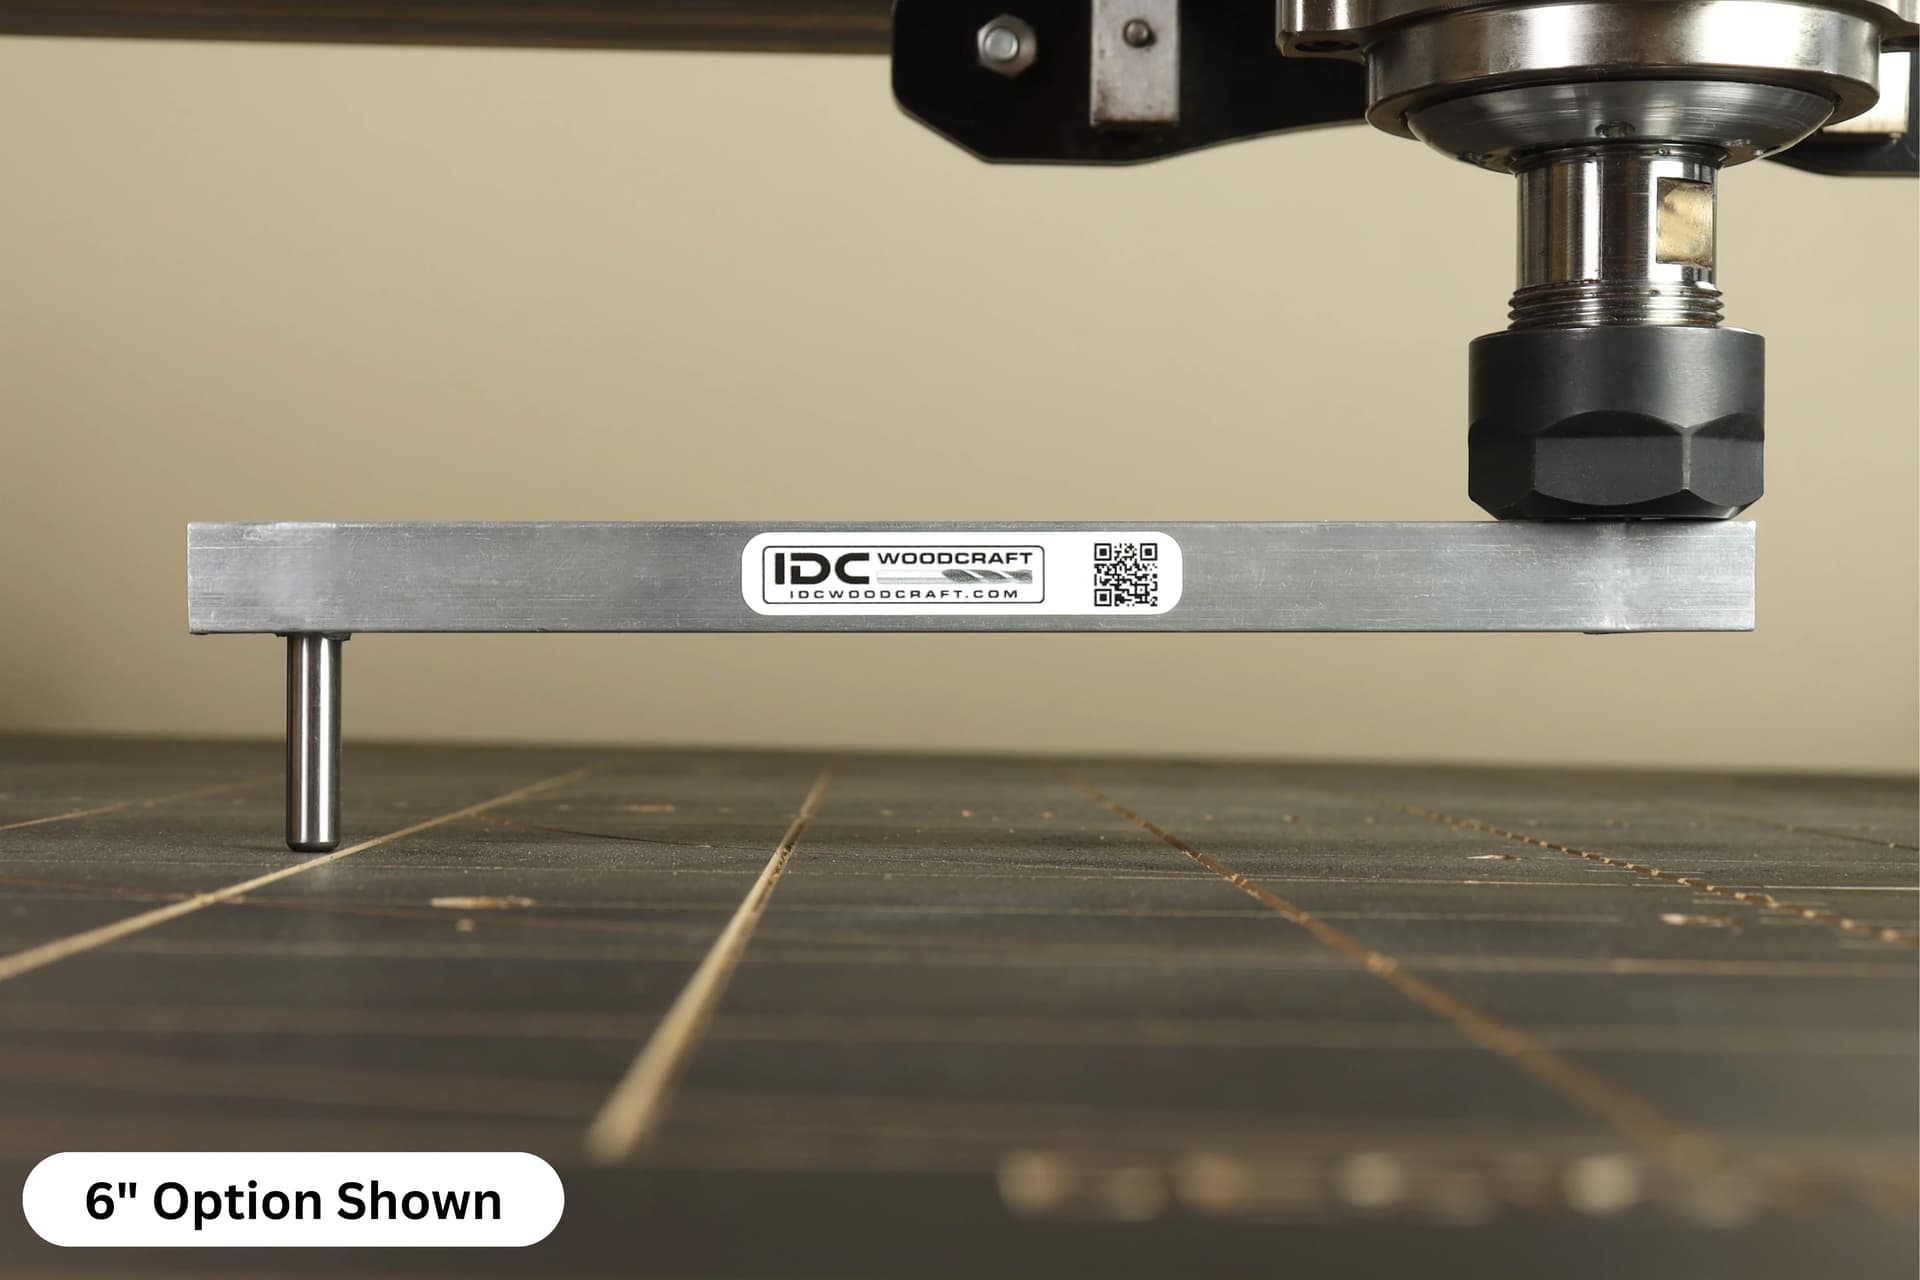
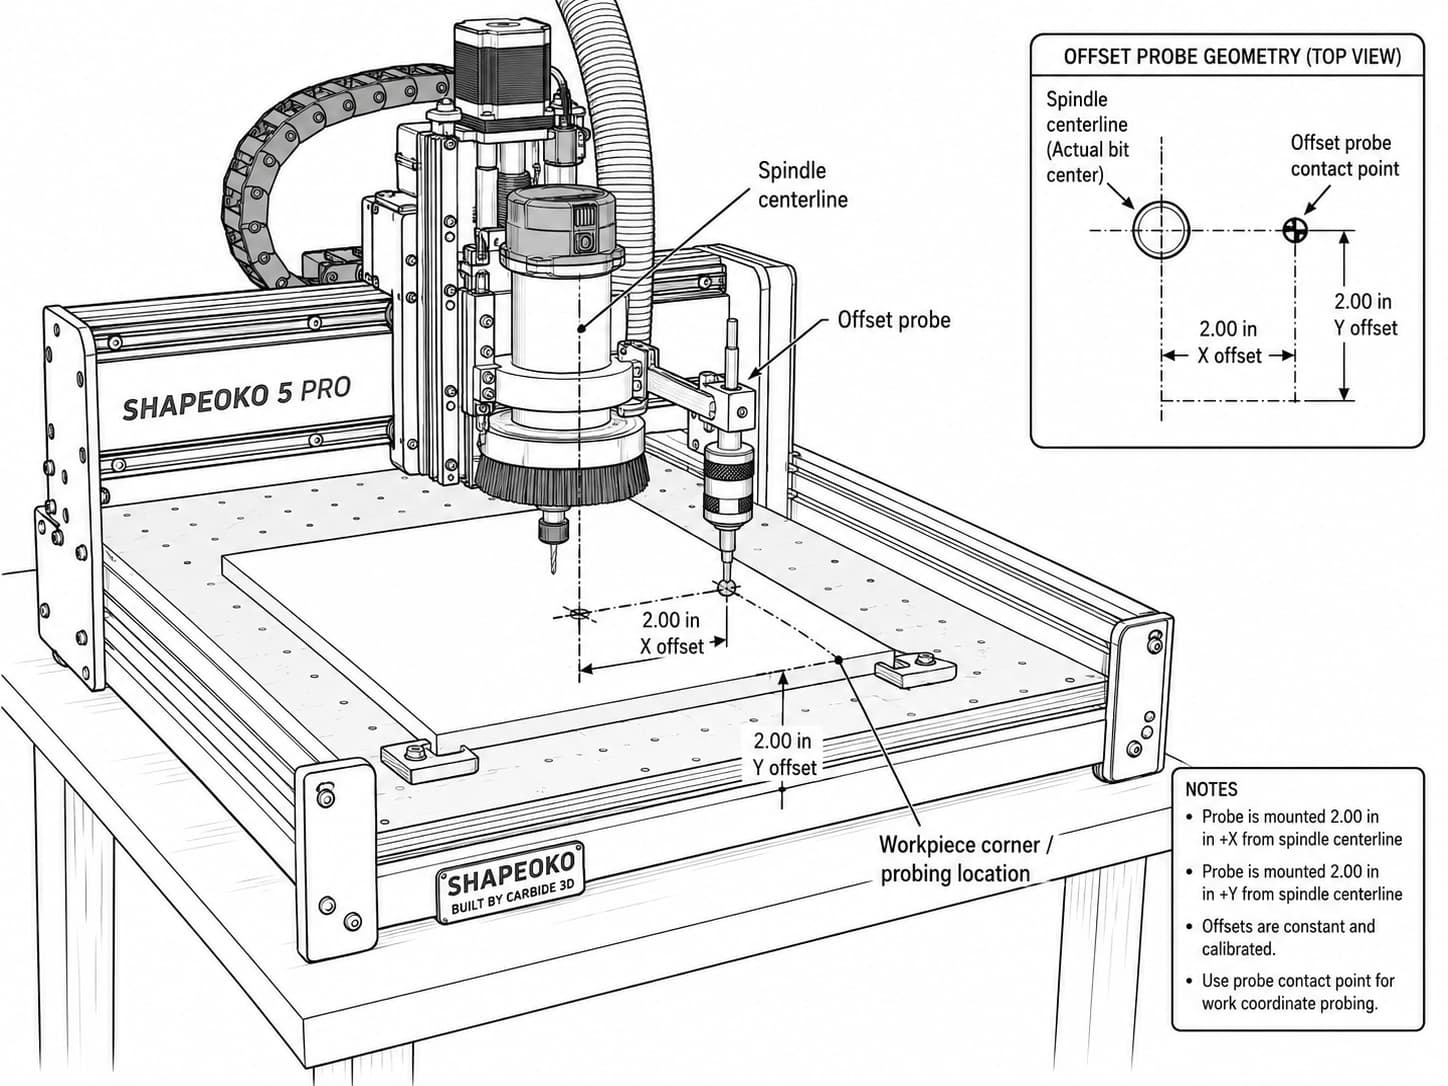
Another potential solution is to use an offset probe. Which would only work for the XY.
Basically, make a fixture that you attach to your spindle mount that offsets where the probe lands.
Then adjust for the offset in your custom post processor.
For example: Make a probe that sits off the center of the spindle by 2" x 2". Then, in your post-processor, adjust for this offset. You’d have to create your own custom post processor for this.
G10
L20 P1 X-2.000 Y-2.000
Alternatively, paste this near the very top of the .nc file, after the initial setup lines like G20/G21, G90, etc., but before the first X/Y cutting move:
(2 inch x 2 inch offset probe correction)(Use only after probing with the offset probe)
G20
G90
G10
L20 P1 X-2.000 Y-2.000G0 Z1.000
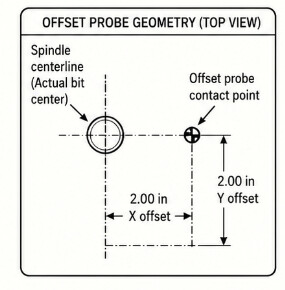
Make something like this:
Thanks for the feedback. You can’t use a solution like that with the sweepy pro. And even if you could it would not be ideal given the money invested here. I would rather switch to the sweepy.
1 Like
I just want to remind folks about one other problem - if you have the sweepy pro and the 80mm spindle…If you have the sweepy pro carrier pulled up to the top, it contacts the body of the spindle as the spindle drops down…and you lose steps. Bad.
I’m thinking of moving my spindle up to the highest possible insertion point to avoid this problem…but it seems like an oversight that the collar of the sweepy pro doesn’t fit over (or doesn’t have enough clearance if it’s slightly off center) the 80mm spindle body.
1 Like
I didn’t let it go long enough to determine whether I would lose steps or break the Sweepy Pro. I was thinking that the plastic would give before the steppers but sounds like you have seen the opposite.
Yup. I heard a thunk and then it starting cutting air. Took me a few tries to figure out what was thunking…because I didn’t suspect that the spindle body wouldn’t fit through the opening. But once I removed the brush, everything worked…and no more thunk. Of course, I didn’t have dust collection at that point…
EDIT: I should point out that it’s not the clear ring that hits…but the brush body itself.
@Allen44 sent me his latest post processor for Vectric to test where he replaced the M1 with an M0 and made a few other tweaks. I can confirm that after measuring the bit it moves slightly to the left (a little more would provide more room to get the Sweepy Pro thumbscrews in) and then pauses. It displays a message to put the boot on and press start.
After pressing start it runs through the spindle warmup procedure which I would rather not have since I do that before any jobs for the day and don’t want to do it as part of every job.
Once the warmup is complete it stops the spindle and then moves to the start position and pauses with a prompt to verify position and press start. Once you press start there it spins up and begins the job. I would prefer a single pause and like the idea of it being over the start position which makes setting the boot height easier. But the double pause is OK.
This is a huge improvement to the workflow when using the Sweepy Pro. Kudos to @Allen44, thanks for your efforts on this.
If you guys use Vectric I highly recommend his post processor.
3 Likes
Thanks Cullen! Version 7mW has the 1-minute Warm-up; version 7m does not. Again thanks for testing this version for the 5Pro. I will post the 7m update under the original Vectric Post-processor thread in a couple minutes for all access.
Regards,
Allen
2 Likes
Ok great. I wasn’t sure what the difference was between 7m and 7mW. I will give the other a try tomorrow.
I made an accidental discovery today.
When building the 5.1Pro I installed the 30mm riser blocks from PwnCNC.
Thanks to that the Sweepy Pro just barely clears the bitsetter even when set at its lowest position.
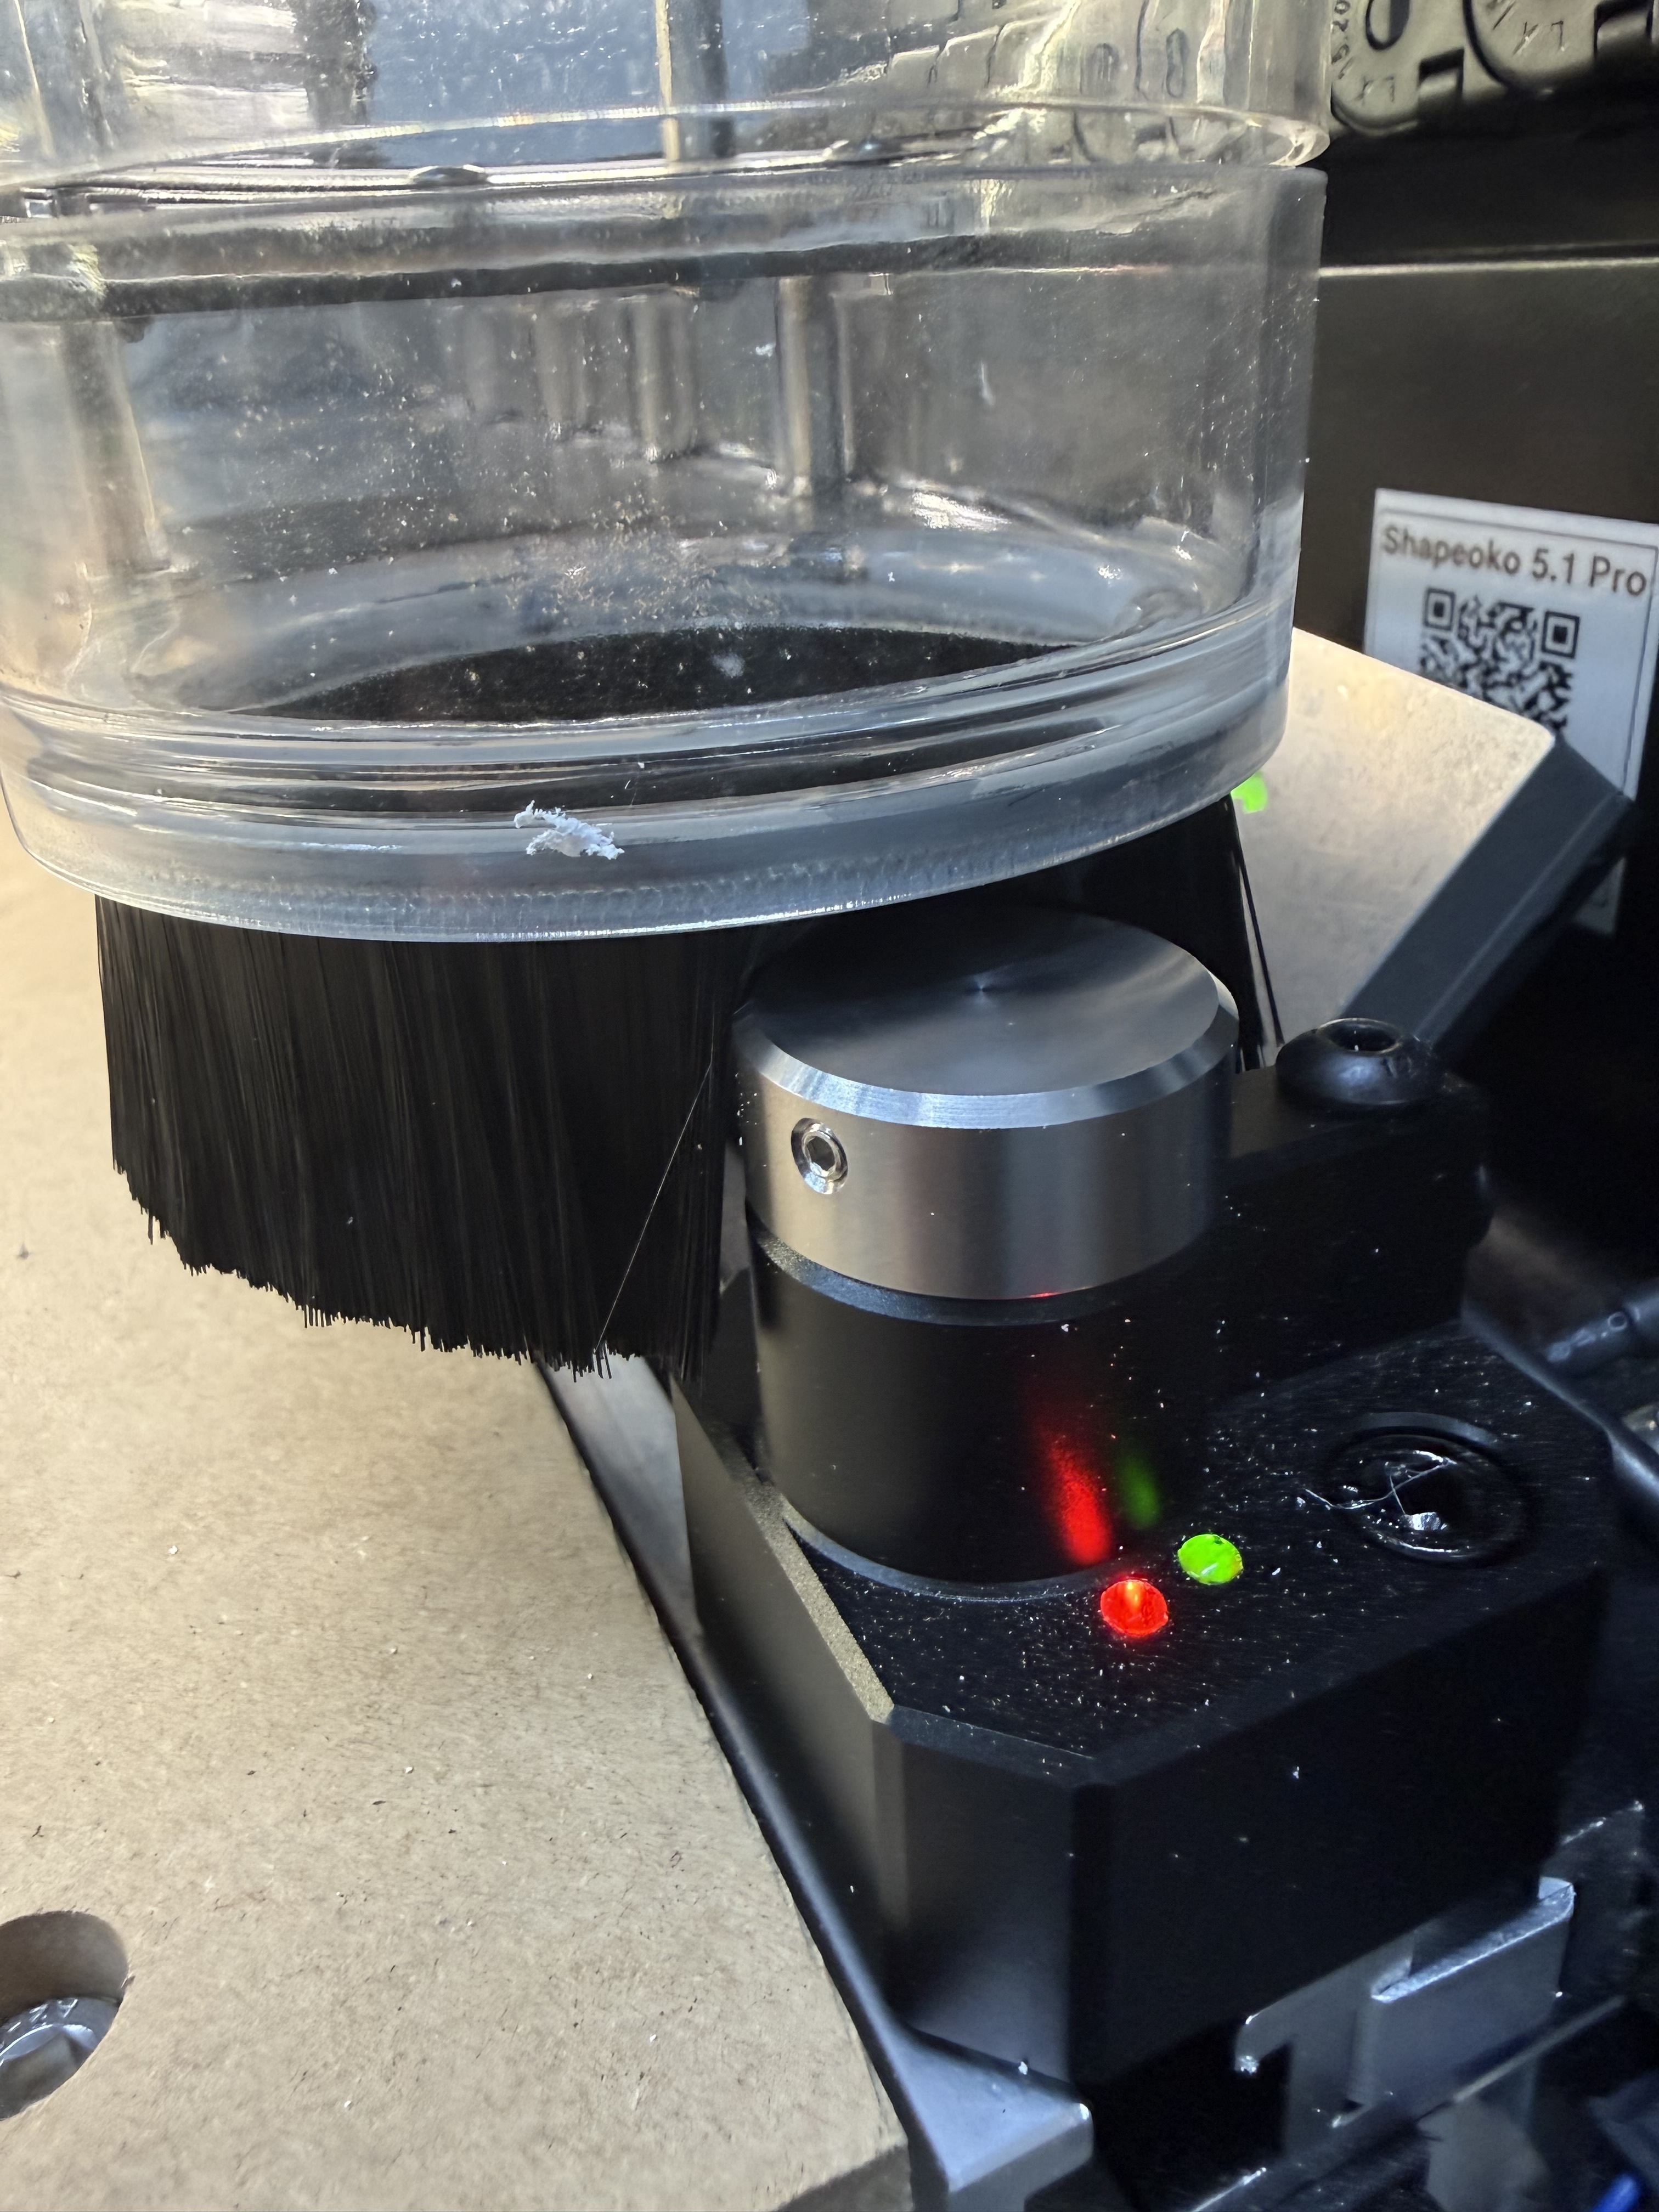
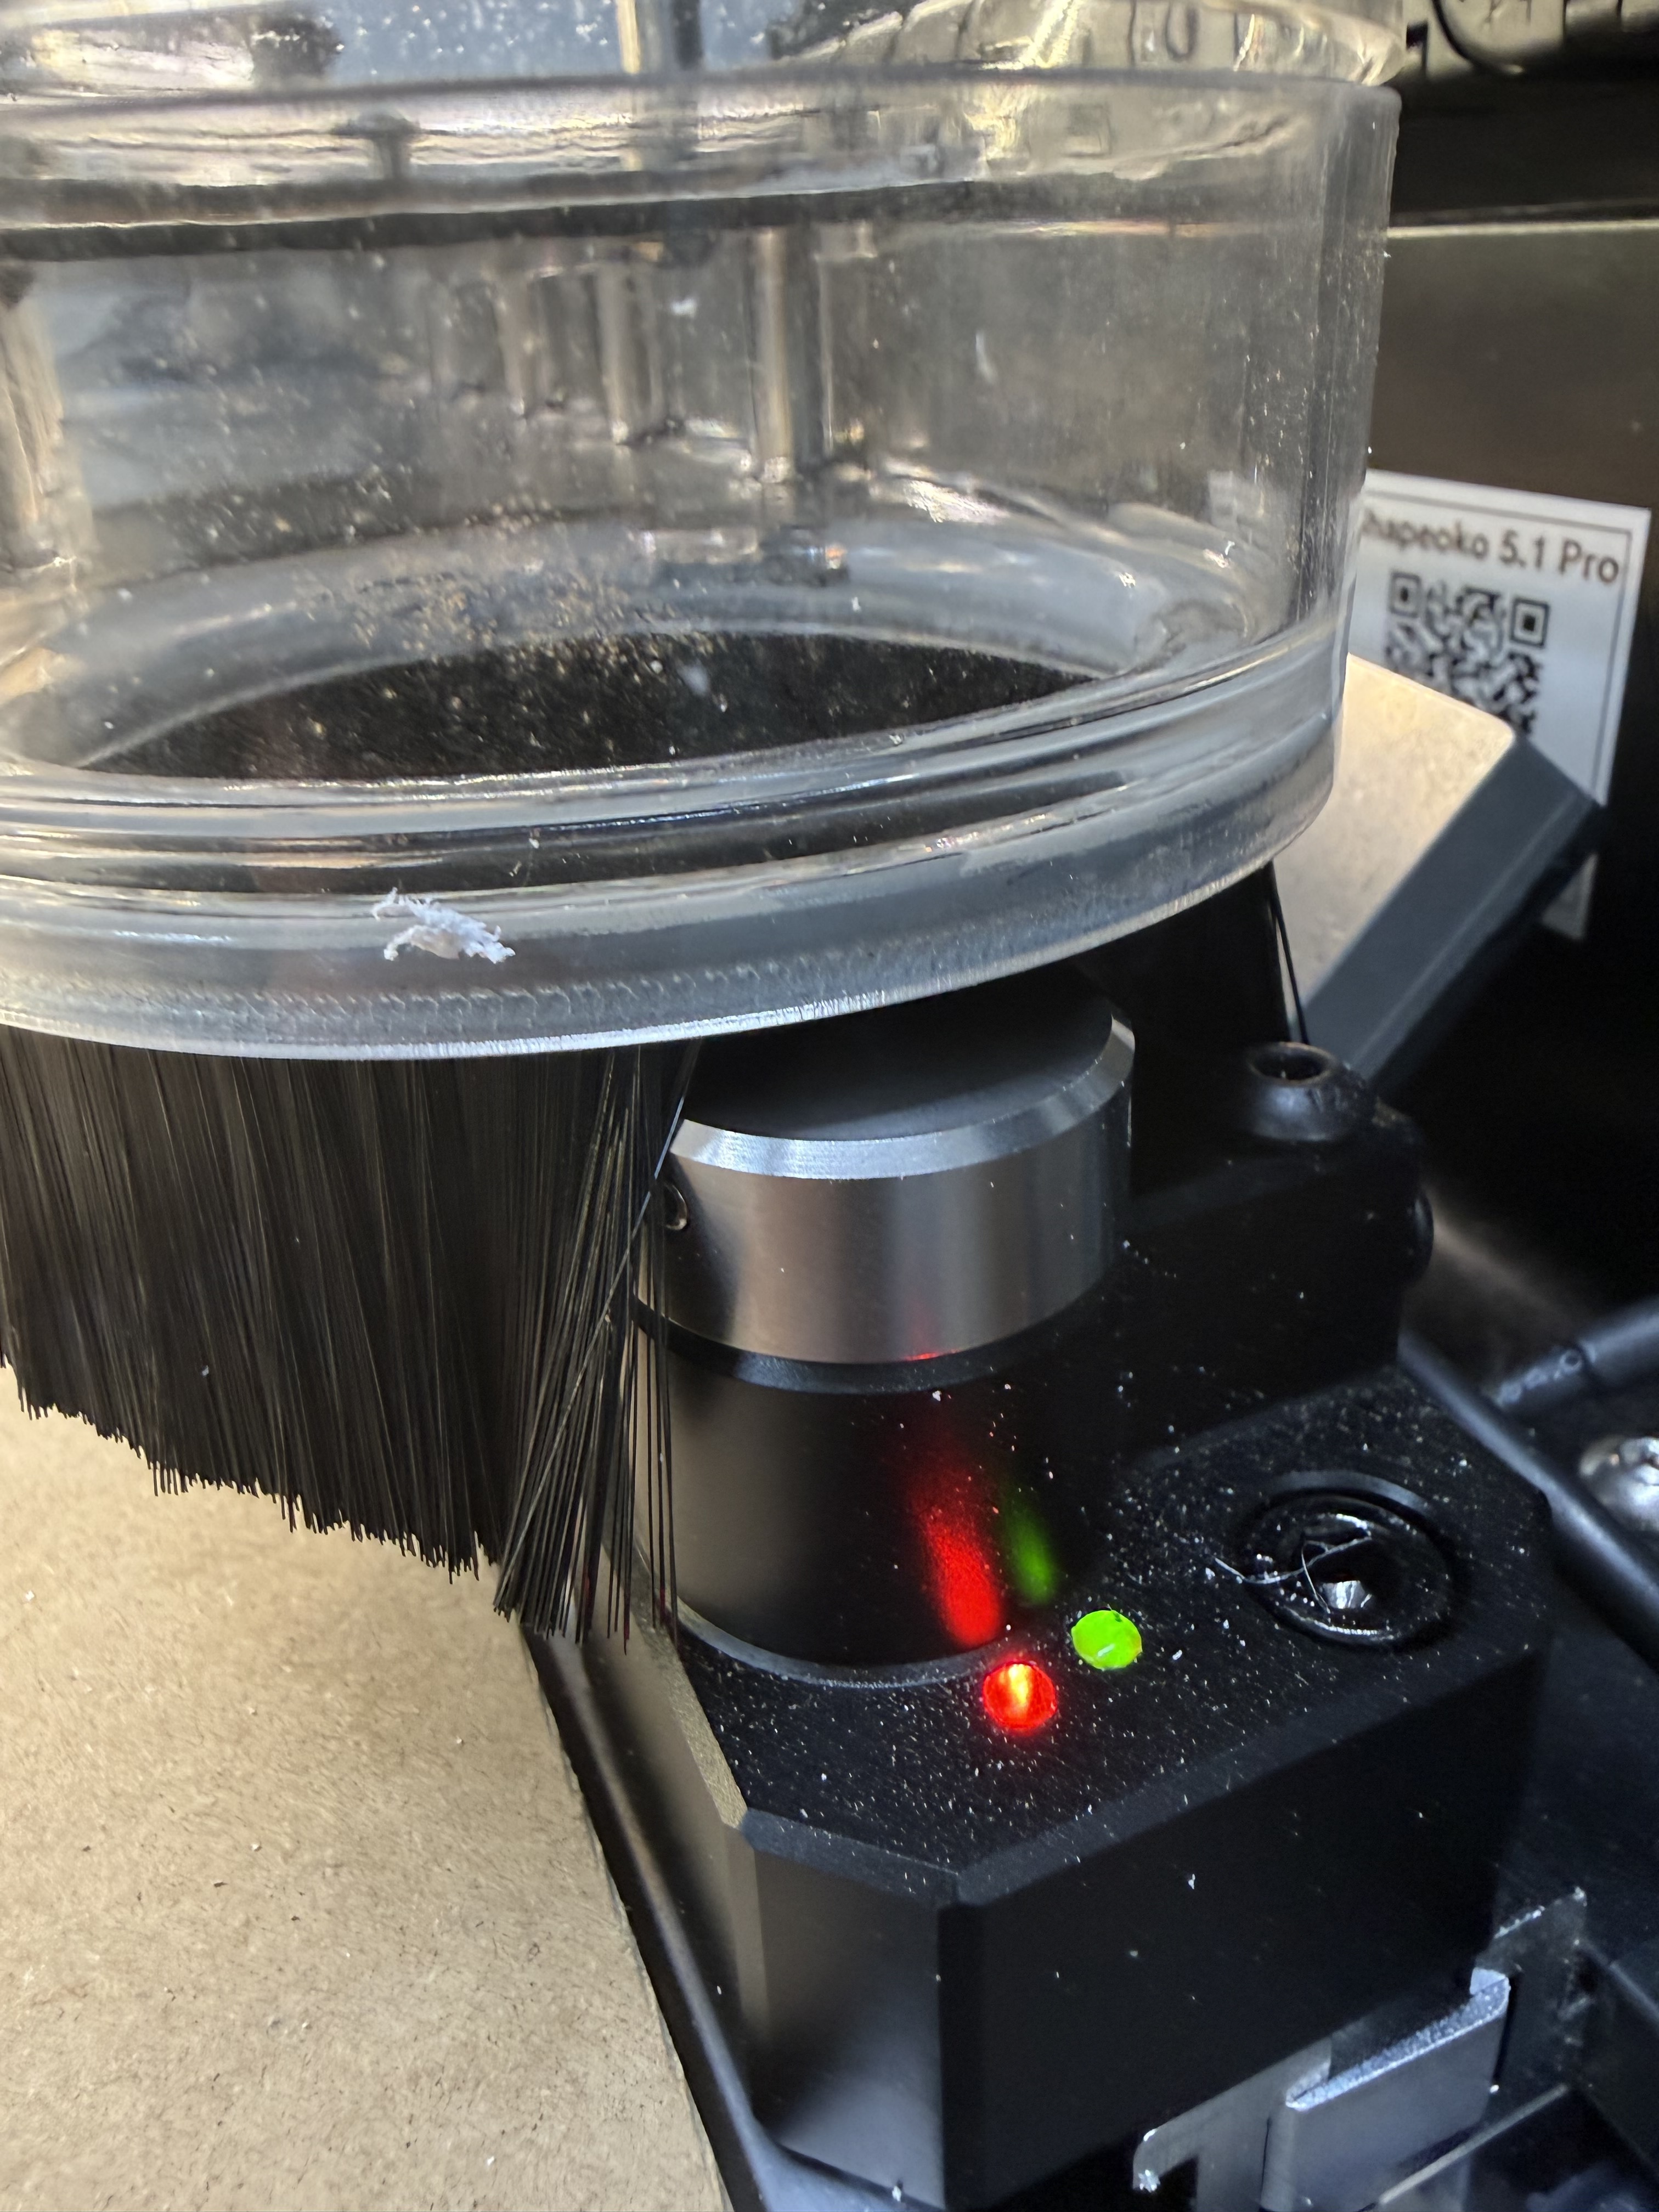
I forgot to take it off during an initial tool measurement after a restart of CM and found that it just barely slides over. The brushes do press the button down but once centered the button pops up and works fine.
As mentioned previously though the downside of the risers is that the brushes on the sweepy only get about an inch from the spoilboard. So, 3/4 is iffy and anything thinner has much less cleanup capability.
I wonder about adding longer brushes to the Sweepy Pro insert that didn’t come with any brushes.
You can’t just get longer pins to adjust the whole thing lower because when raised anything longer would interfere with the gas strut.
2 Likes
Ideally, Carbide 3D would add a “Enable Sweepy Pro” setting that 1) adds instructions at the tool change step to remove the sweepy pro cover and 2) adds a pause after measurement with instructions to put the sweepy pro cover back on.
I try to pause mine immediately after measurement before the spindle spins up. It works sometimes, and when it doesn’t I just watch my fingers!
1 Like
Ok. I did a decent amount of cutting this weekend and have a system that works for me.
I am using Vectric and the 7n post processor from @Allen44. I also have the riser blocks from PwnCNC.
- Remove the lower portion of the Sweepy,
- Load the zeroing pin
- Use BitZero to set XY and maybe Z.
Even when I set XYZ I often reset Z at the spoilboard. - let it measure the tool at bitsetter.
- load the program and hit start
- insert the specified tool and let it measure
- program pauses to let you put the boot on which I do
- it moves to XY zero for an origin check
- set the height of the boot
- start
At bit change
11) it comes to ask for the new bit
12) raise the boot so that it clears the bit setter
13) tool is measured
14) program pauses to put boot on, in my case it’s already on so I just lower it to the desired position.
With the riser blocks even in the lowest position the sweepy will clear the bitsetter, sort of like I showed in an earlier message. But raising it is still good practice probably.
I cut lots of different depth pockets and didn’t have to worry about whether my sweepy was going to jam into the workpiece or my clamps.
1 Like
@CullenS Cullen, with the riser block installed, can the sweepy pro bristles be lowered enough to ride on a 1/2" piece of stock?
No. At its lowest setting the bristles just kiss 1”.
I looked at the other insert that came with the sweepy and my idea to modify that one with longer bristles may be a non starter as it has a smaller diameter opening on the bottom.
Maybe I can cut that out and find a way to attach longer bristles.