The beginnings of a near drop-in Nomad Pro 30kRPM spindle upgrade

Hi all!

Inspired by the Modkita, Modwalt, and other VESC-based spindle modifications by @Vince.Fab and @CthulhuLabs for the Nomad (ex: https://community.carbide3d.com/t/brushless-makita-mod-unsupported/), I set out to find a solid upgrade path with the least amount of physical alterations to the Nomad 883.

I have instead of these more ambitious projects landed at mounting a smaller 5065-size BLDC outrunner directly in place of the stock spindle motor. The way I managed this is through using the Nomads stock mounting hole pattern, but with a small 3D-printed plate to offset the motor outwards by a few millimeters, so that it clears the top of the Z-axis like this:


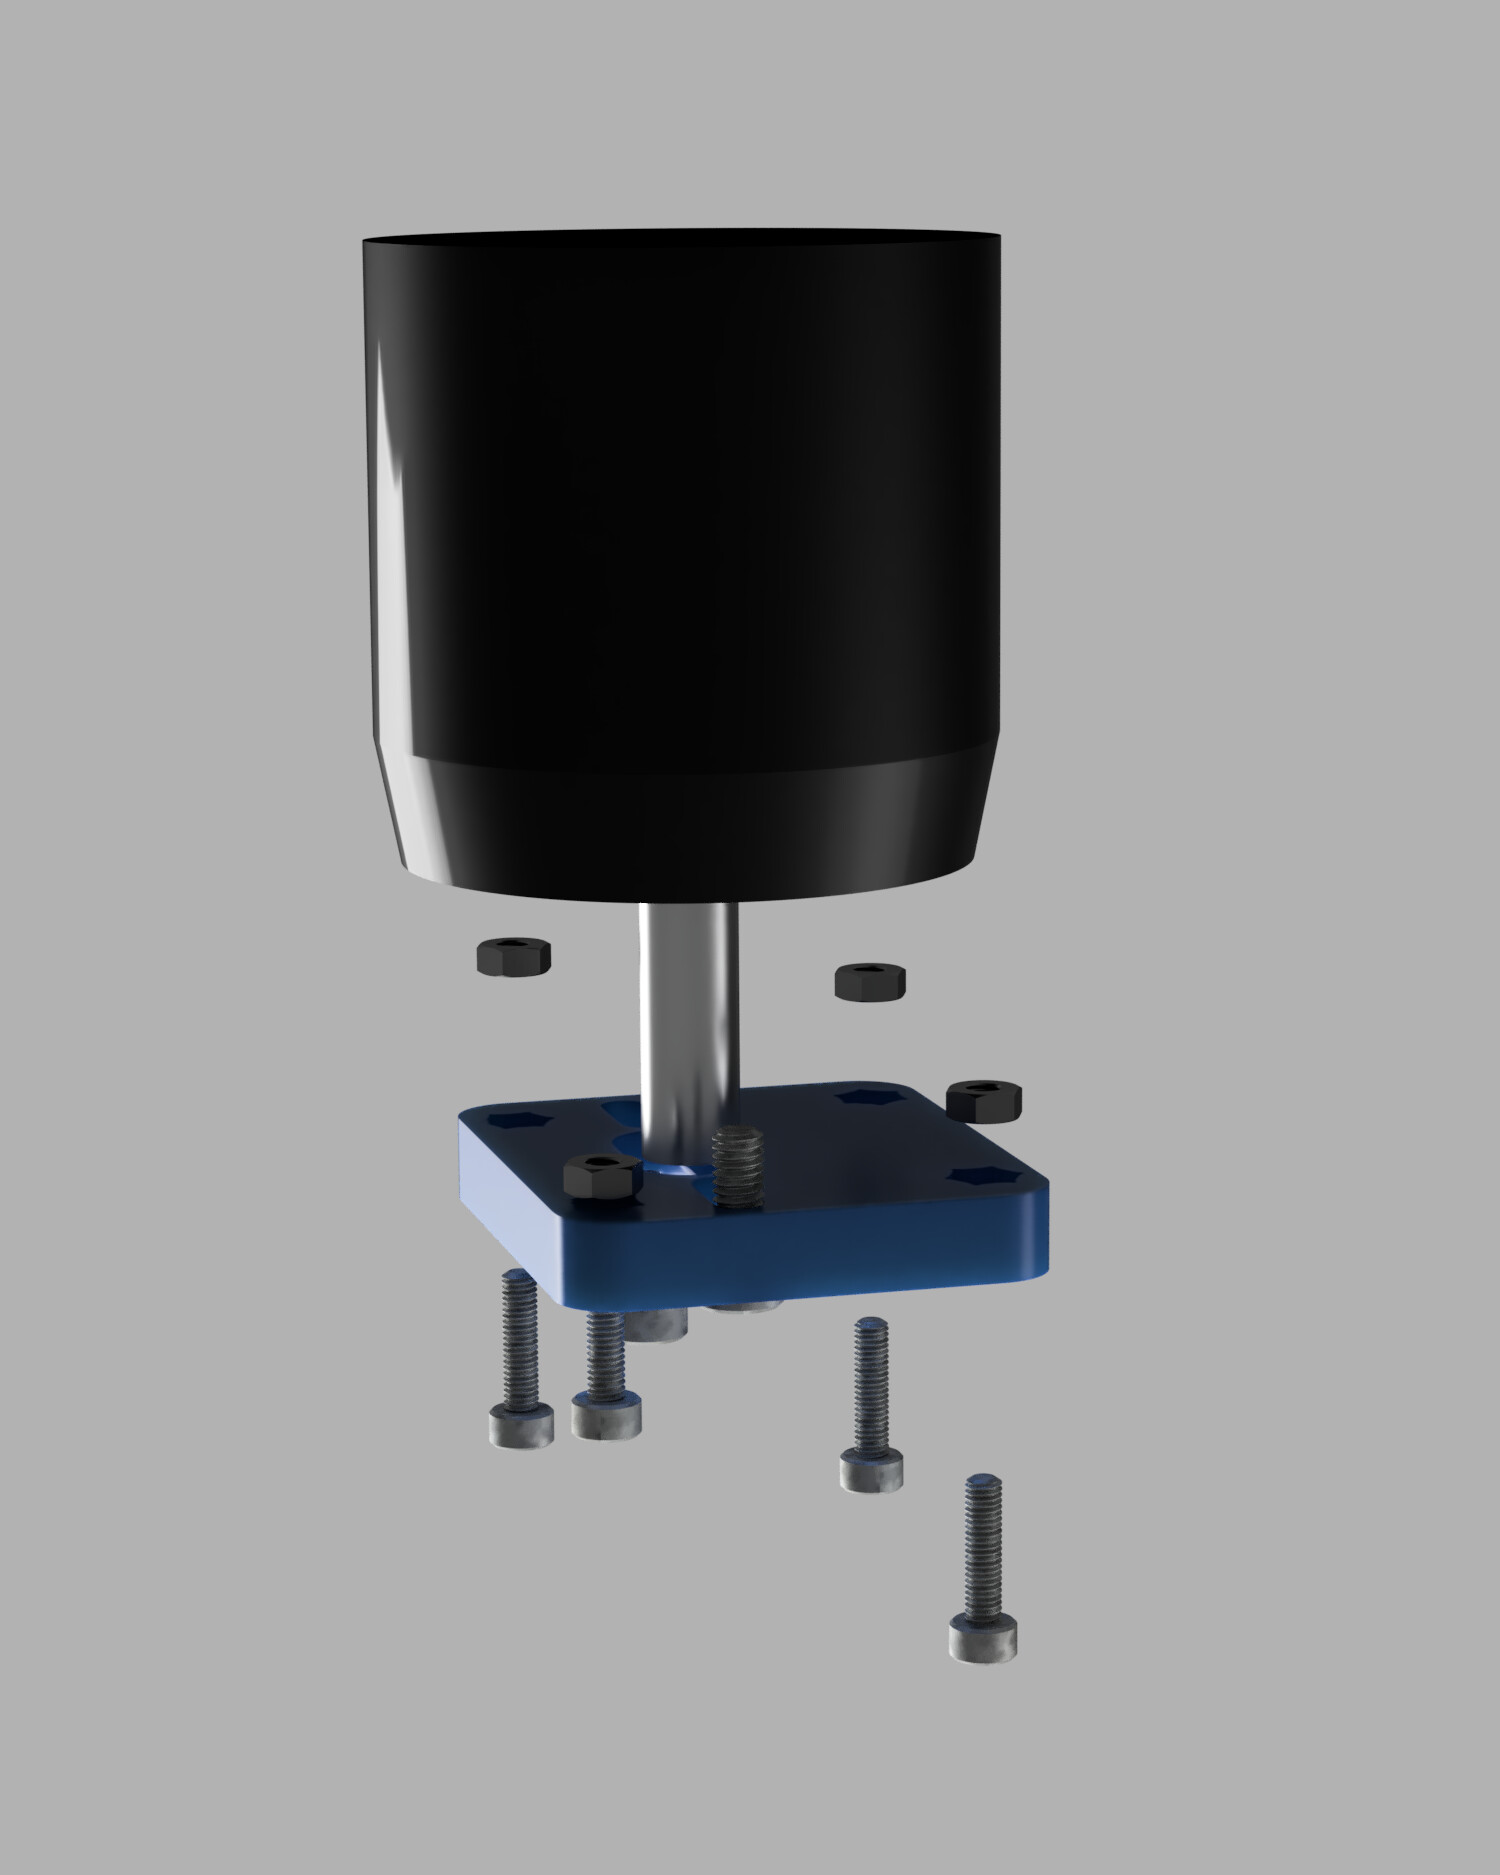
The reason this is even possible is the fact that the Nomad has a very wide slot for the axle of the spindle motor, giving a good centimeter or so of room to offset outwards.

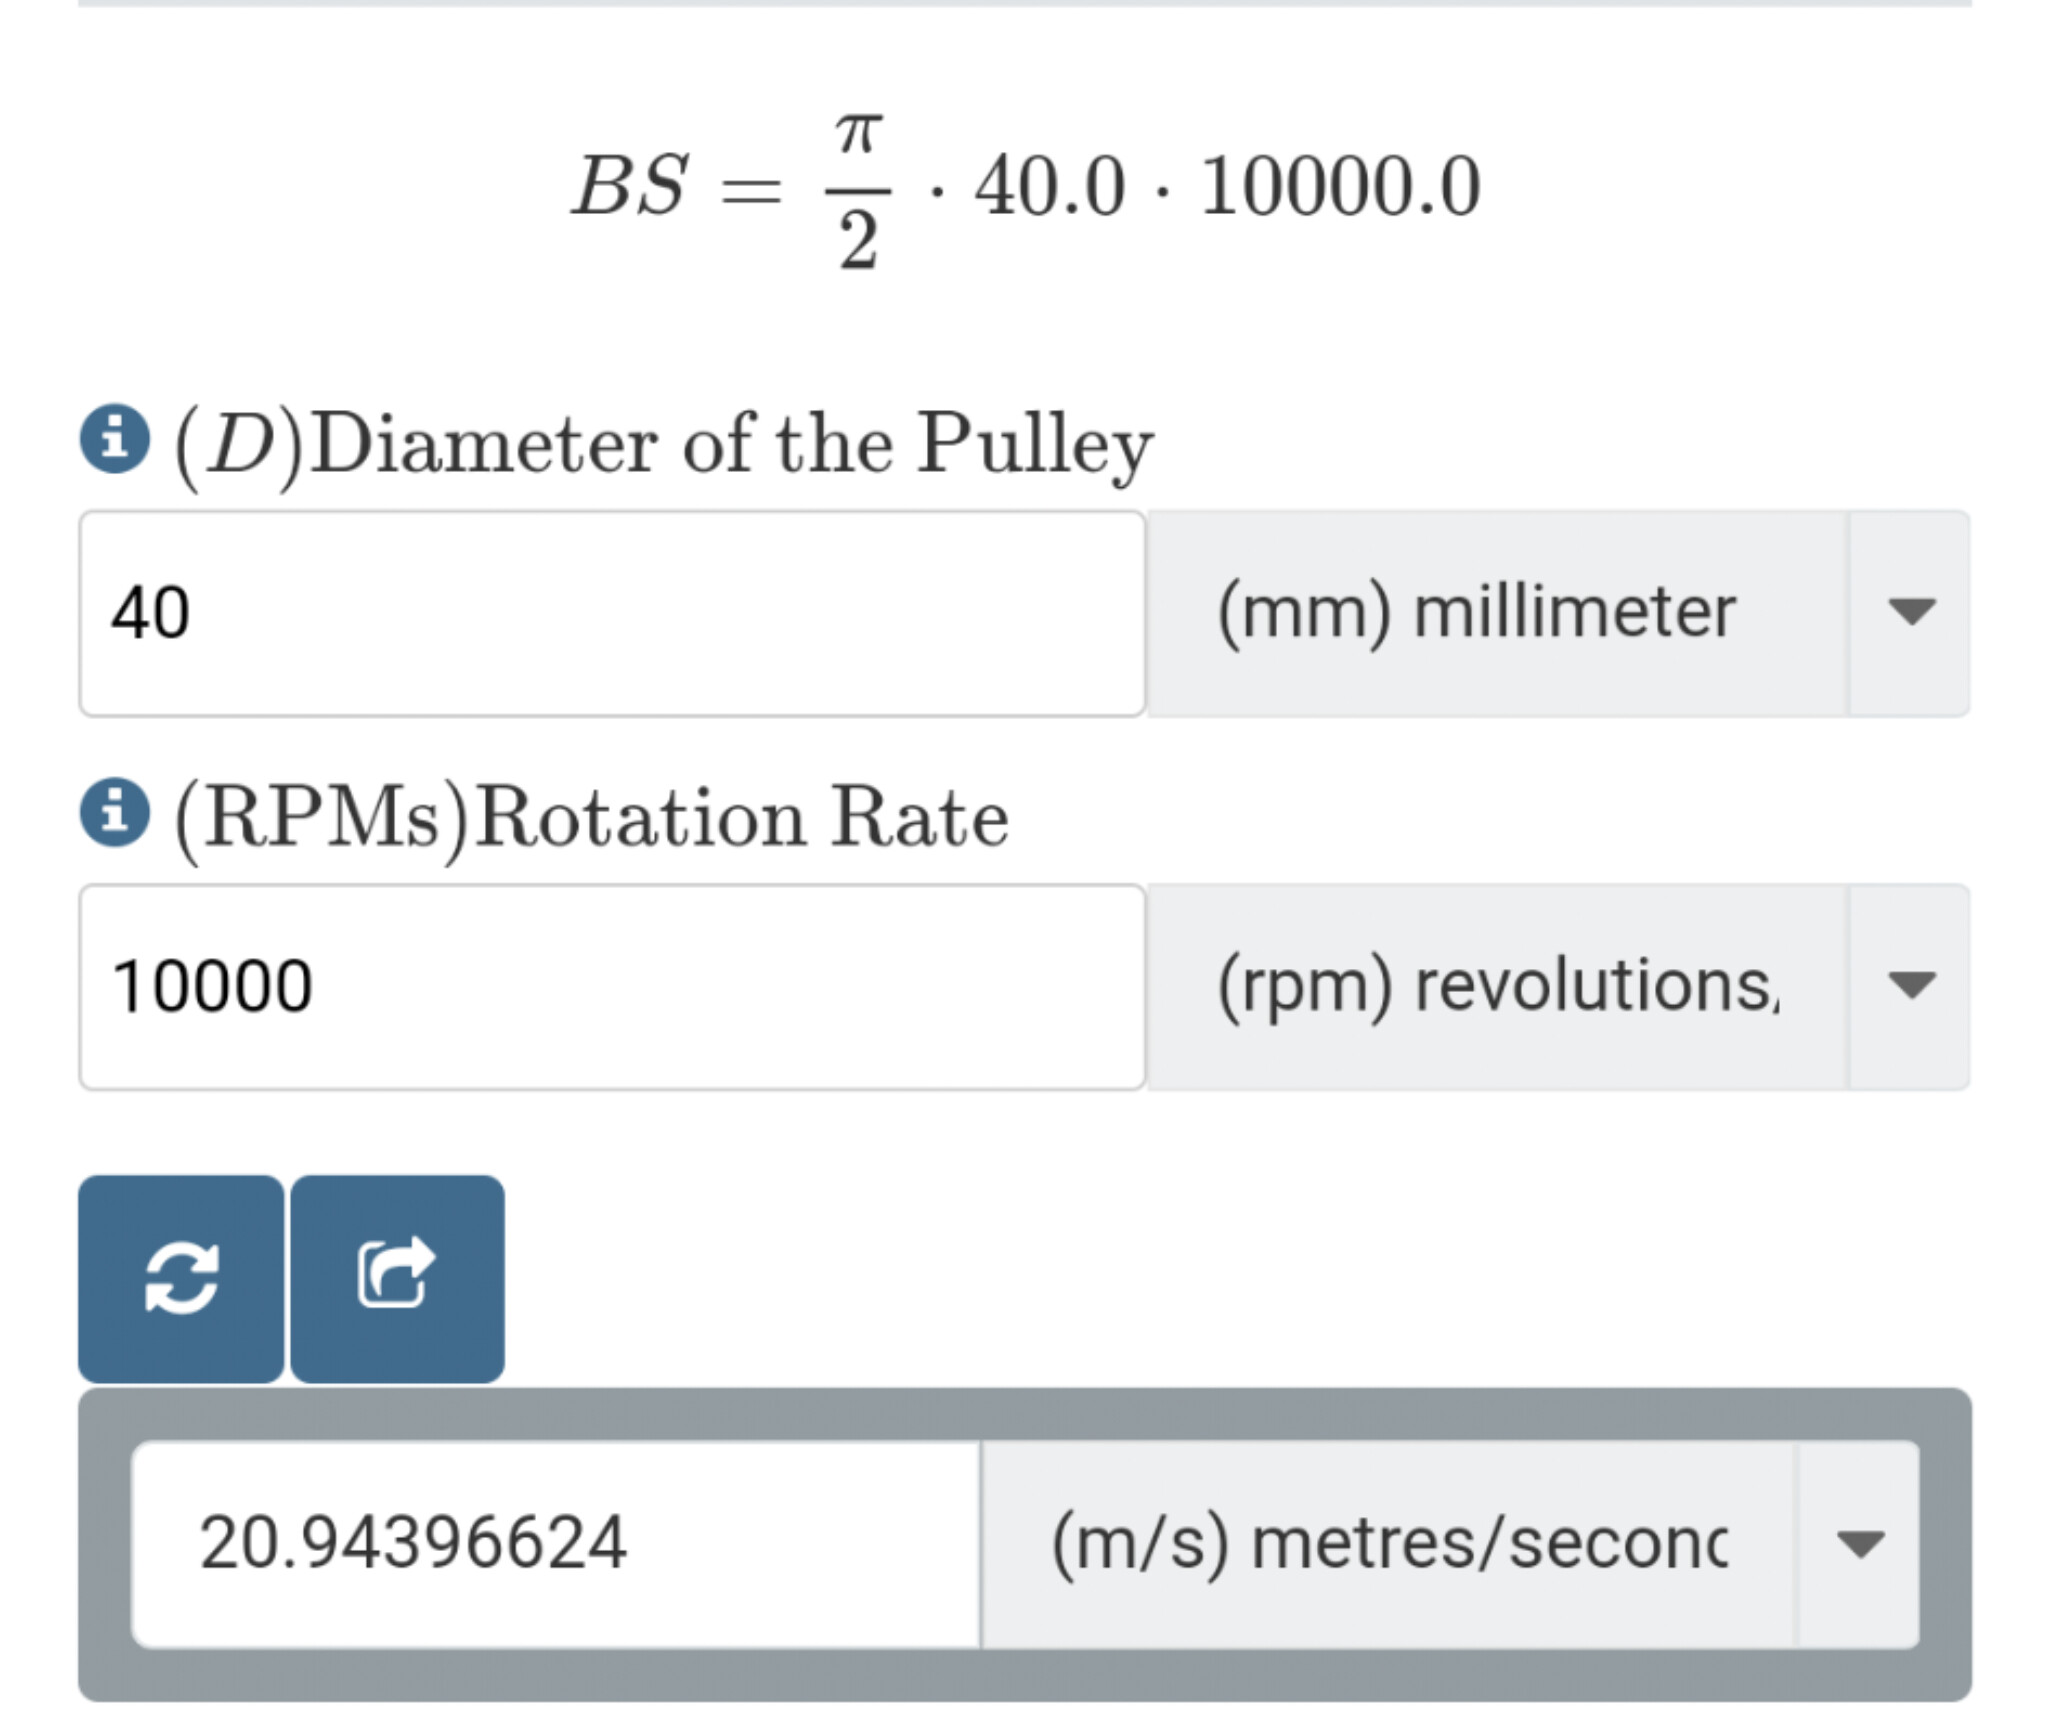
This motor is then be ran by a VESC 6.6 powered by a 48V PSU, which gives me the possibility of running at up to (a theoretical) 32.4kRPM at the tool with the stock spindle gearing!

I just received the VESC 6.6 today, and did a test run in plastic at 25kRPM: Nomad 883 + Modified Spindle at 25kRPM in hard plastic - YouTube
Material is an unknown hard plastic, feels similar to HDPE, maybe a little harder. Tool in this cut is a 2FL Carbide 3.2mm endmill. Toolpath is a 3D-adaptive, at 2mm DOC, 2.8mm WOC, 2500mm/min. At full speed this cut sounds a little too scream-y, so I ran most of the job scaled down to 1750mm/min at the same RPM.

Issues so far have been:

  1. Spindle motor heat management. Even during a relatively short job (~15min), my motor mount out of 3D-printed PLA does THIS D: once the motor is at too-hot-to hold a finger to temperatures. This really doesn’t come as a surprise, since PLA starts getting soft at around 70°C. I am working on a mount to mill out of aluminium right now, which should lower motor temps a good bit once heat can be sinked into the machine.

  2. No automatic spindle speed control. I have yet to set up the Nomad control board to talk PWM to the VESC, but this should be fairly straightforward once I have the right connector for the VESC to do this.

Other modifications I have done to accomplish this:

  • Switched out the ball bearings in the stock spindle cartridge to ones I know are rated for the higher speeds
  • Replaced the Z-axis endstop bar with one extended ~20mm or so upwards to give me a little extra room for the longer spindle motor.

I hope a few of you are as excited as I am to reach Nomad 3 speeds with the 883 Pro. Let me know if there are any questions or interesting ideas to try out!

9 Likes

Nice work! Would be a nice combination with @TonyDangerCoiro’s drop-in spindle replacement when he makes it available.

I’m curious though, why did you go for the higher RPM with plastic? Is there something useful about higher RPMs in plastic or do you intend to move on to Aluminium later?

2 Likes

Thank you! I have looked at the spindle upgrade by Tony, and I was in contact with him about buying one a while back. Unfortunately it was a little out of my student budget (~300$ if I remember rightly), but I do agree - it would really pair well with this modification.

My end goal is aluminium, the run with plastic was more of a “lets see if it all holds together” test. Which it didn’t! As I understand it though - does the higher RPM not generally allow a higher MRR for the same force constraint? I feel like that’d be useful even in plastics, so long as nothing melts :slight_smile:

Hooking up the VESC to the PWM output on the Nomad is not as straight forward as it sounds. The VESC expects a PPM signal which is what remote control radio receivers output and for some reason is incorrectly labeled PWM. The Nomad outputs an actual PWM signal. This website:

should give you a good idea of the deference.

I would recommend instead first passing the PWM signal through one of these:

to reduce the chance of a ground loop and then using an RC circuit to convert the PWM signal to an analog voltage. Then use the VESC’s ADC to read that and adjust the speed that way.

Also I recommend twisting the three power wire phases together and looping them through a toroidal ferrite bead a few times:

This will greatly reduce the electrical noise from the power wires and cross talk.

Lastly that motor is rated for a Max Voltage of 41 volts and is recommended for a 8S lipo which maxes out at 29.8V. This is why the motor is overheating. At 48V it is possible for you to destroy the motor. If the surface is getting hot enough to melt PLA it is very possible that the coils inside are getting close to melting the lacquer insulation on the motor windings. I recommend getting a 36V power supply and adjusting the voltage down. I do not see anywhere in the documentation if that motor has a thermistor. If it does make sure that is hooked up and configured to the VESC.

5 Likes

Looks like the PWM carrier frequency on the GRBL board is 8kHz so you want to shoot for an RC value of 0.0002. So a 1k resistor and a 200nF cap should work.

3 Likes

Thank you for the thorough comment! I’ve read around a bit on the VESC + PWM situation and found this thread that got my hopes up: Vesc PPM/PWM labelled wrong? - ESK8 Electronics - Electric Skateboard Builders Forum | Learn How to Build your own E-board Have you seen the opposite yourself?

About the motor - I was hoping it would be able to handle 48V at the relatively low power operation I’ll be running it at (100-200W, compared to the rated 1000W+). My thinking was that higher voltage, lower current operation would be beneficial to the heat situation too, but maybe that’s not the case?

1 Like

Interesting. I took the label at its word when I was looking into this. The ODrive I am using definitely uses PPM. At the very least you will want to electrically isolate the VESC from the GRBL board using one of those isolation chips. Ground loops are not fun.

As for the voltage, I was actually wrong because I forgot something. The output from the VESC is an AC waveform that gets generated by the VESC using PWM and smoothed by a capacitor on each phase. That AC waveform is actually a much lower voltage than the 48V you are feeding it because of the caps. So that actually is not why that motor is overheating. My current guess is that you are not getting enough airflow around it. You should probably get a 24V fan and have it blow across the motor.

2 Likes

I’ll have a look at the motor temps again once it is thermally connected to the Nomad, instead of pretty effectively isolated by PLA. As you say, a fan might be a good idea as well.
Another slightly odd idea for the heat situation would be to get an air compressor (which I might want anyway, for chip evacuation) and feed air straight to the stator at one or two of the M4 mounting holes. I could integrate this within a 3D-printed bracket, even.

Regarding the PWM situation - I can check the output of a remote control for the VESC with an oscilloscope sometime this week, that’ll be a pretty definitive answer.

2 Likes

About that spindle cartridge upgrade @TonyDangerCoiro, do you know of a supplier of ER11 shanks with the threaded end for preload, or was that a custom job by yourself? I’m looking at doing 61900-2Z bearings + 10mm diameter ER11 shank in the stock cartridge, if the rest of the modification goes well.

So I took the plunge on spindle parts, it turned out to be a very shallow one from AliExpress at right under €50 in total! Time will tell how the quality holds up…

I have ordered:

  • 4x 61900-2Z NSK bearings.
  • 1x C10 (10mm diameter) ER11A 100L straight shank collet
  • 1x GT2 25T 10mm bore pulley.
  • 1x GT2 65T 8mm bore pulley
  • 1x GT2 175T belt (6mm width)
  • A bunch of spring washers, similar to the ones the Nomad already uses for spindle preload.

The idea here is to achieve nearly the same performance of Tony’s custom spindle, for a fraction of the cost. I don’t know how important for example his threaded preload and angular-contact bearings are, but I’m hoping I’ll see some rigidity benefits with the 10mm shank that’ll help me out when moving on to more aggressive aluminium milling.

1 Like

Have you verified that the GT2 belts are rated for the RPM that your motor is going to be spinning at? There is a reason why the new Nomad uses a different method for transferring the power from the motor to the spindle.

1 Like

Yes, while I haven’t found a rating for the specific GT2 belt I bought, other manufacturers spec theirs at a maximum of 38m/s. My setup with a 65T pulley at 10kRPM should land at 20m/s, so I think it’ll work out:

1 Like

This topic was automatically closed after 30 days. New replies are no longer allowed.

Exams and covid quarantine kept me away from the Nomad for a good while, but I have finally made progress!

First off, I machined a motor mount out of aluminium (thanks Stockholm Makerspace!). Works wonders for rigidity and heat dissipation.

Second, I 3D printed a fan mount and wired a 24V fan to sit right next to the spindle and keep temperatures in check. So far very promising results here as well.

Third, I did a test cut in aluminium! Here is the 1/8in 2FL ZrN coated 102-Z endmill at 1000mm/min, 0.25mm WOC, 9mm DOC, 25kRPM:

Not a fantastic cut looking at chatter and wall finish, but it does work and outperforms the stock Nomad by at least a factor of 3 or 4 in MRR. I’ll be getting some 1FL endmills soon, which should be interesting as well.

After the cut above, I assembled the 10mm spindle cartridge, but realized I had ordered the wrong belts. Therefore, the gearing with the new cartridge is now 1:2 instead of 1:2.5. I did another test cut using this at the same settings as above, but at 20kRPM:

The cut sounded pretty much the same to me by ear, but looking back at the recordings now I’m not so sure (there should be a higher load too on the machine during the second cut due to the lower RPM, right?). Either way: more testing to come!

Edit: Any suggestions on what/how to do my testing? I’d like to compare capabilities of the more powerful spindle, as well as potential differences between 8mm and 10mm spindle cartridge.

I also tested the VESCs capability to talk to the Nomad directly. I could get the full range of PWM mapped to throttle on the VESC, but turning the spindle off was always interpreted as 100% duty cycle. Not optimal. Controlling using the VESC-tool works well enough for now, so that’s what I’ll be doing.

6 Likes

The Nomad 883 Pro doesn’t deal with high axial engagement well. This isn’t a spindle thing, it’s a rigidity thing. Even with my 800W Mechatron spindle and rail + ballscrew based Z-axis, I can’t reliably do cuts with high axial engagement. I suspect to make that work, I need to upgrade my X and Y axes to ballscrews at the very least (where not “the very least” would add linear rails).

I’d recommend you stick to high radial engagement, keep the chipload reasonable and increase cut depth to find the limits of MRR. On my machine for example, I routinely use a 6mm 3-flute endmill with 0.5mm DOC, 5.7mm stepover, 27k RPM, 30µm chipload (2430mm/min feed). That gives me an MRR of 6.93cm³/min, about triple what you’re seeing.

I’m able to push it much harder though, IIRC I’ve pushed it down to ~2mm at times (27.7cm³/min MRR).

On the other hand, an 8mm DOC, 0.3175mm stepover cut with a single-flute endmill produces chatter.

On my Nomad pre-upgrade, I used 3mm single-flute and was able to get to 1.5mm DOC, 2.7mm stepover, 10k RPM and 25µm chipload (250mm/min feed). That was 1.01cm³/min. IIRC, there wasn’t chatter.

If you duplicate that cut with 24k RPM and bump up the feed rate accordingly, you should be able to get 2.73cmÂł/min of MRR, which is a bit higher than the 2.25cmÂł/min you got already.

When I pushed higher than that on the old Nomad, IIRC the motor started to slow down or stall. Since you have a more powerful motor you should be able to go even deeper.

EDIT: Also, if MRR is your thing, 6mm multi-flute endmills are your friend. They allow you to increase MRR (and with it torque/power utilization) without substantially increasing cutting forces (and hitting the Nomad’s rigidity limits).

2 Likes

Slightly off topic… I recently stripped my nomad to remove the “aluminium composite” material entirely. For me it is now much easier to clean, but more topically, the bolts that are hidden by the enclosure were slightly loose, and I feel (but do not know) that after tightening them the machine feels tighter and less noisy (but the missing composite material might be responsible for the lack of vibration)

1 Like

Interesting - how are these panels attached? I’ve thought they were glued and a mess to remove, but maybe not?

They are attached with double-sided tape and took a lot of effort to clean. A lot of effort.

But I am liking the stripped-back minimalism. I always found that the Y rails, although covered, always ended up covered In particulates. At least this way I can air blast and wipe them between cuts.

1 Like

Would you mind sharing a picture of your Nomad with the aluminium composite removed please? I’ve been on a mission to silence my Nomad 3, and have had good success with an enclosure - to the point where it’s quiet enough to use in an apartment any time of day. But it feels like there’s still room for improvement and those composite panels seems to vibrate intensely.

1 Like