I cut a lot of parts that require a decent level of accuracy on my S4 XL. I usually use 2mm burr bits to cut carbon fiber and lots of holes are milled out. For example if I have a 3mm hole and use a 2mm bit I have to build in an offset for the tool to actually get a 3mm hole. I’m guessing there’s some tool deflection mixed with the acceleration of the machine that causes this. So I program a custom tool at 1.8mm to account for this. Seems to work well enough, but it can be inconsistent since there’s some tool wear after cutting for a bit. I also have to do the same for outside profile cuts, but not as bad. I use a 2.1mm tool offset to maintain accuracy for conventional cuts. I suppose I could use a 3mm bit to drill 3mm holes, but even with the correct bit, I get some tearout on that hole. It’s much cleaner to use a smaller bit with ramping to get a nice clean finish.
I have tried adding geometry and cutting pockets but I find the level of accuracy is similar to a contour cut in my case.
My question is, is there a hard programmed increment for tool diameter that you can use or that the machine will be able to recognize? Is it .1mm or can I use .05mm? I’ve noticed in CC if I try to do a contour of a 2mm hole with a 2mm bit, it will skip that hole. If I change the tool to 1.98, it will then basically drill the hole. So the software does recognize it, just not sure if it translates to anything when the machine is running the gcode. I feel like don’t notice a difference between 1.85 and 1.8. I know it’s such a tiny difference but you can tell a difference from 1.9 to 1.8mm in how well a 3mm screw inserts into the part.
My feeds and speeds are very conservative:
300mm/m on plunge and feed for any of the inner geometry or holes at 24k rpm (if I go any faster, I notice the accuracy goes down)
450mm/m on outer geometry at the same 24k rpm.
Note that this sort of thing can get maddening, esp. if one has a belt-drive machine and chooses to do belt-stretch calibration.
Nominally, the steps/mm are 40 to 1 one for a belt-drive machine (leadscrew (Nomad) and ball-screw (HDM/SO5 Pro) have a larger number of steps/mm, so are capable of smaller movements), so the potential positional grid is 1/40th of a mm with any other positioning being either interpolated (while moving from position to position) or grid-fitted (if trying to hold a particular position, or I believe if it is moved to/from explicitly).
I have the 4 XL. I replaced belts and v wheels about 3 months ago. Also did the belt tension adjustment method I found here using the frequency app to get the same frequency on each side for the Y-Axis. Also just upgraded to water cooled spindle and the accuracy didn’t really improve from the old belts and makita router.
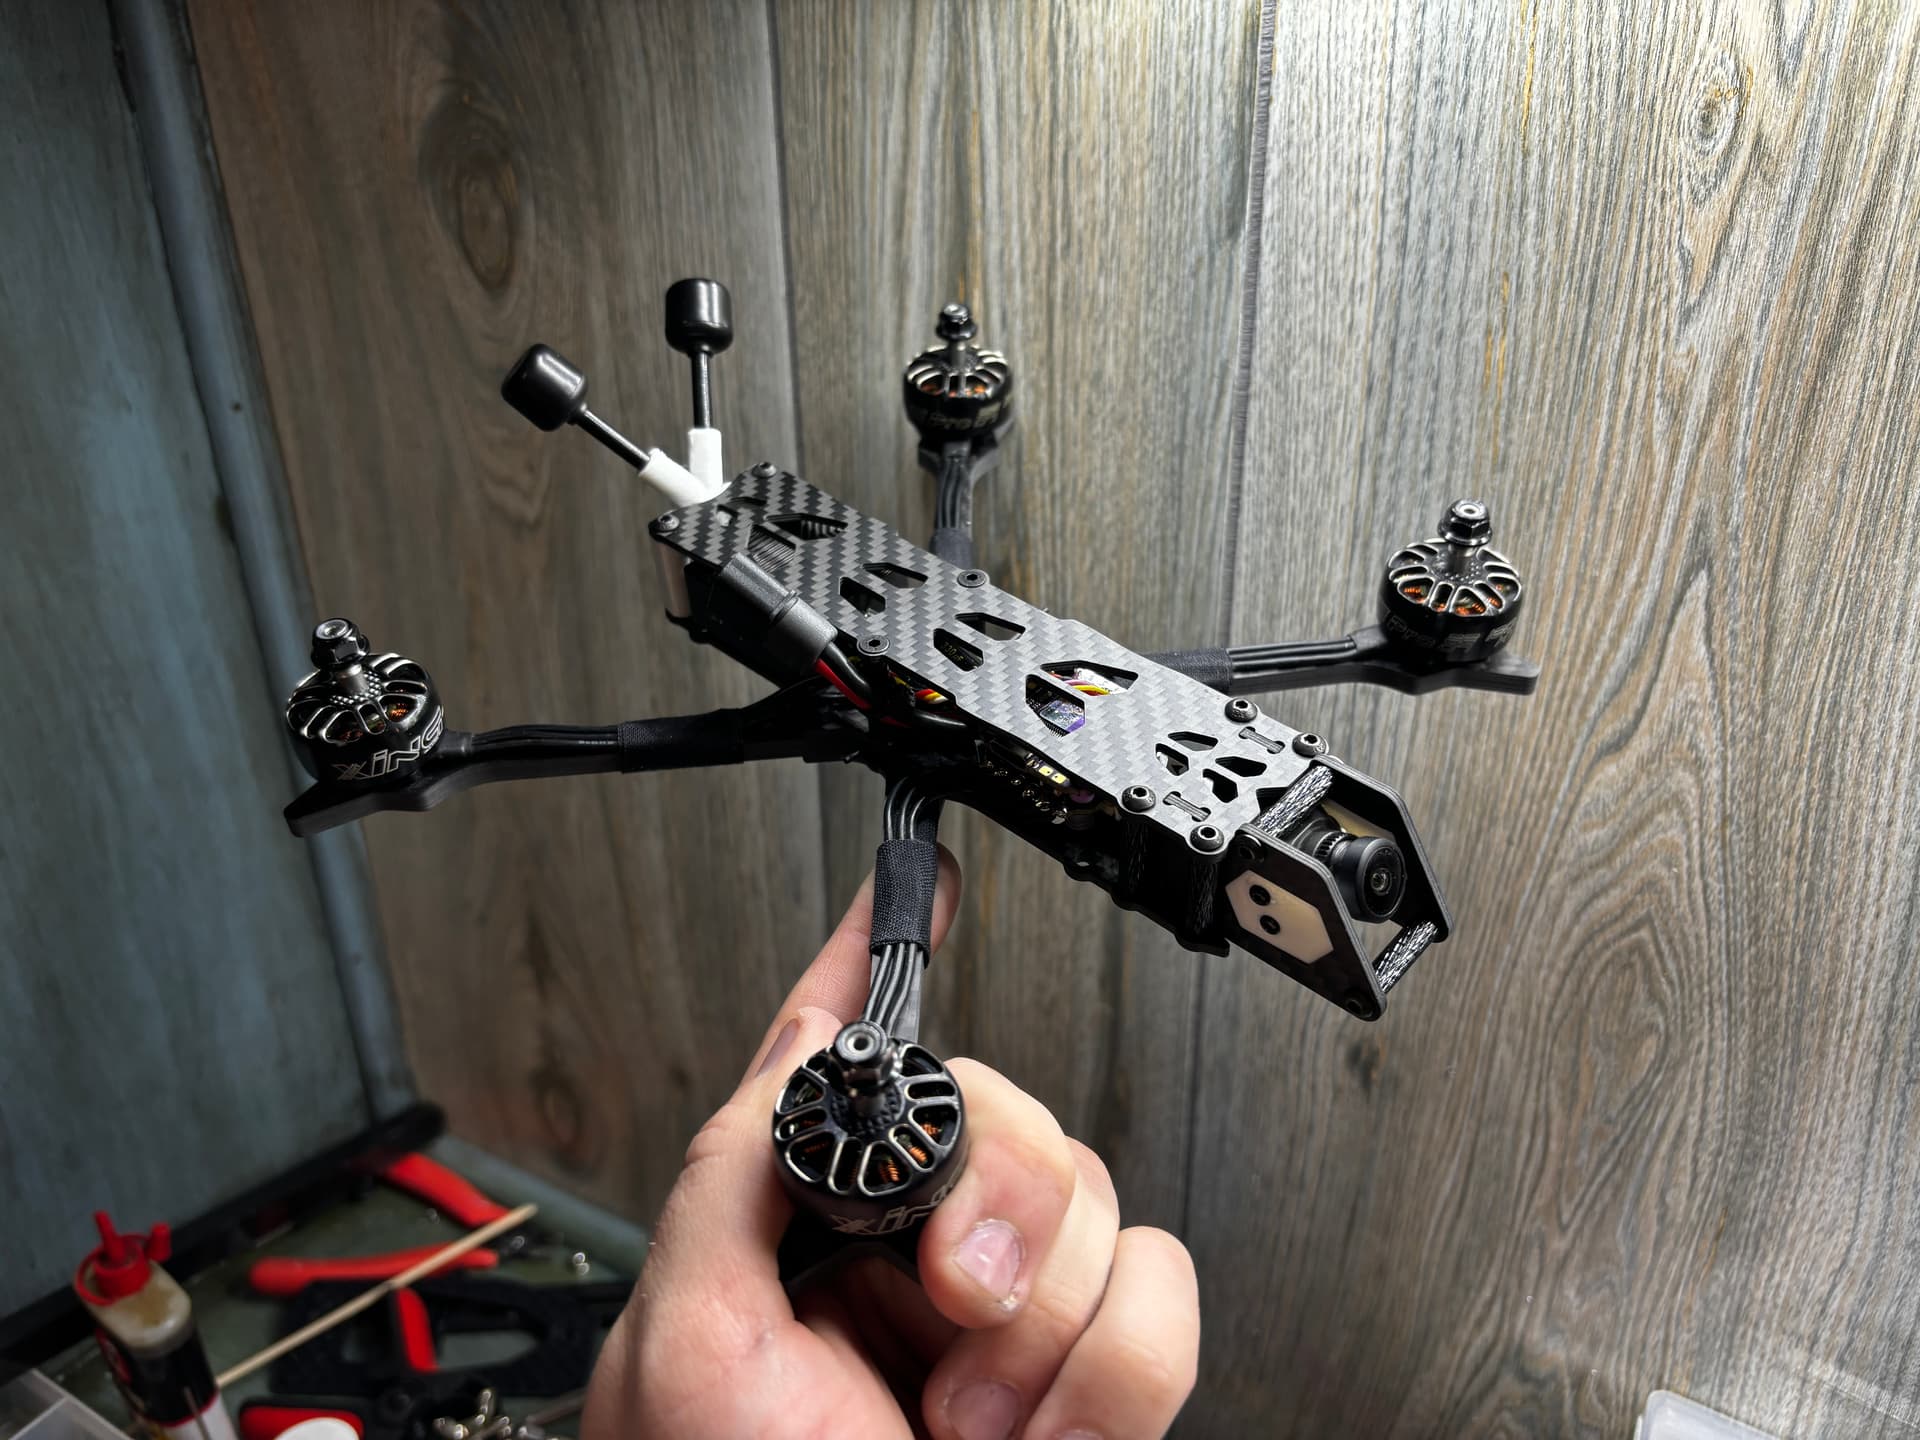
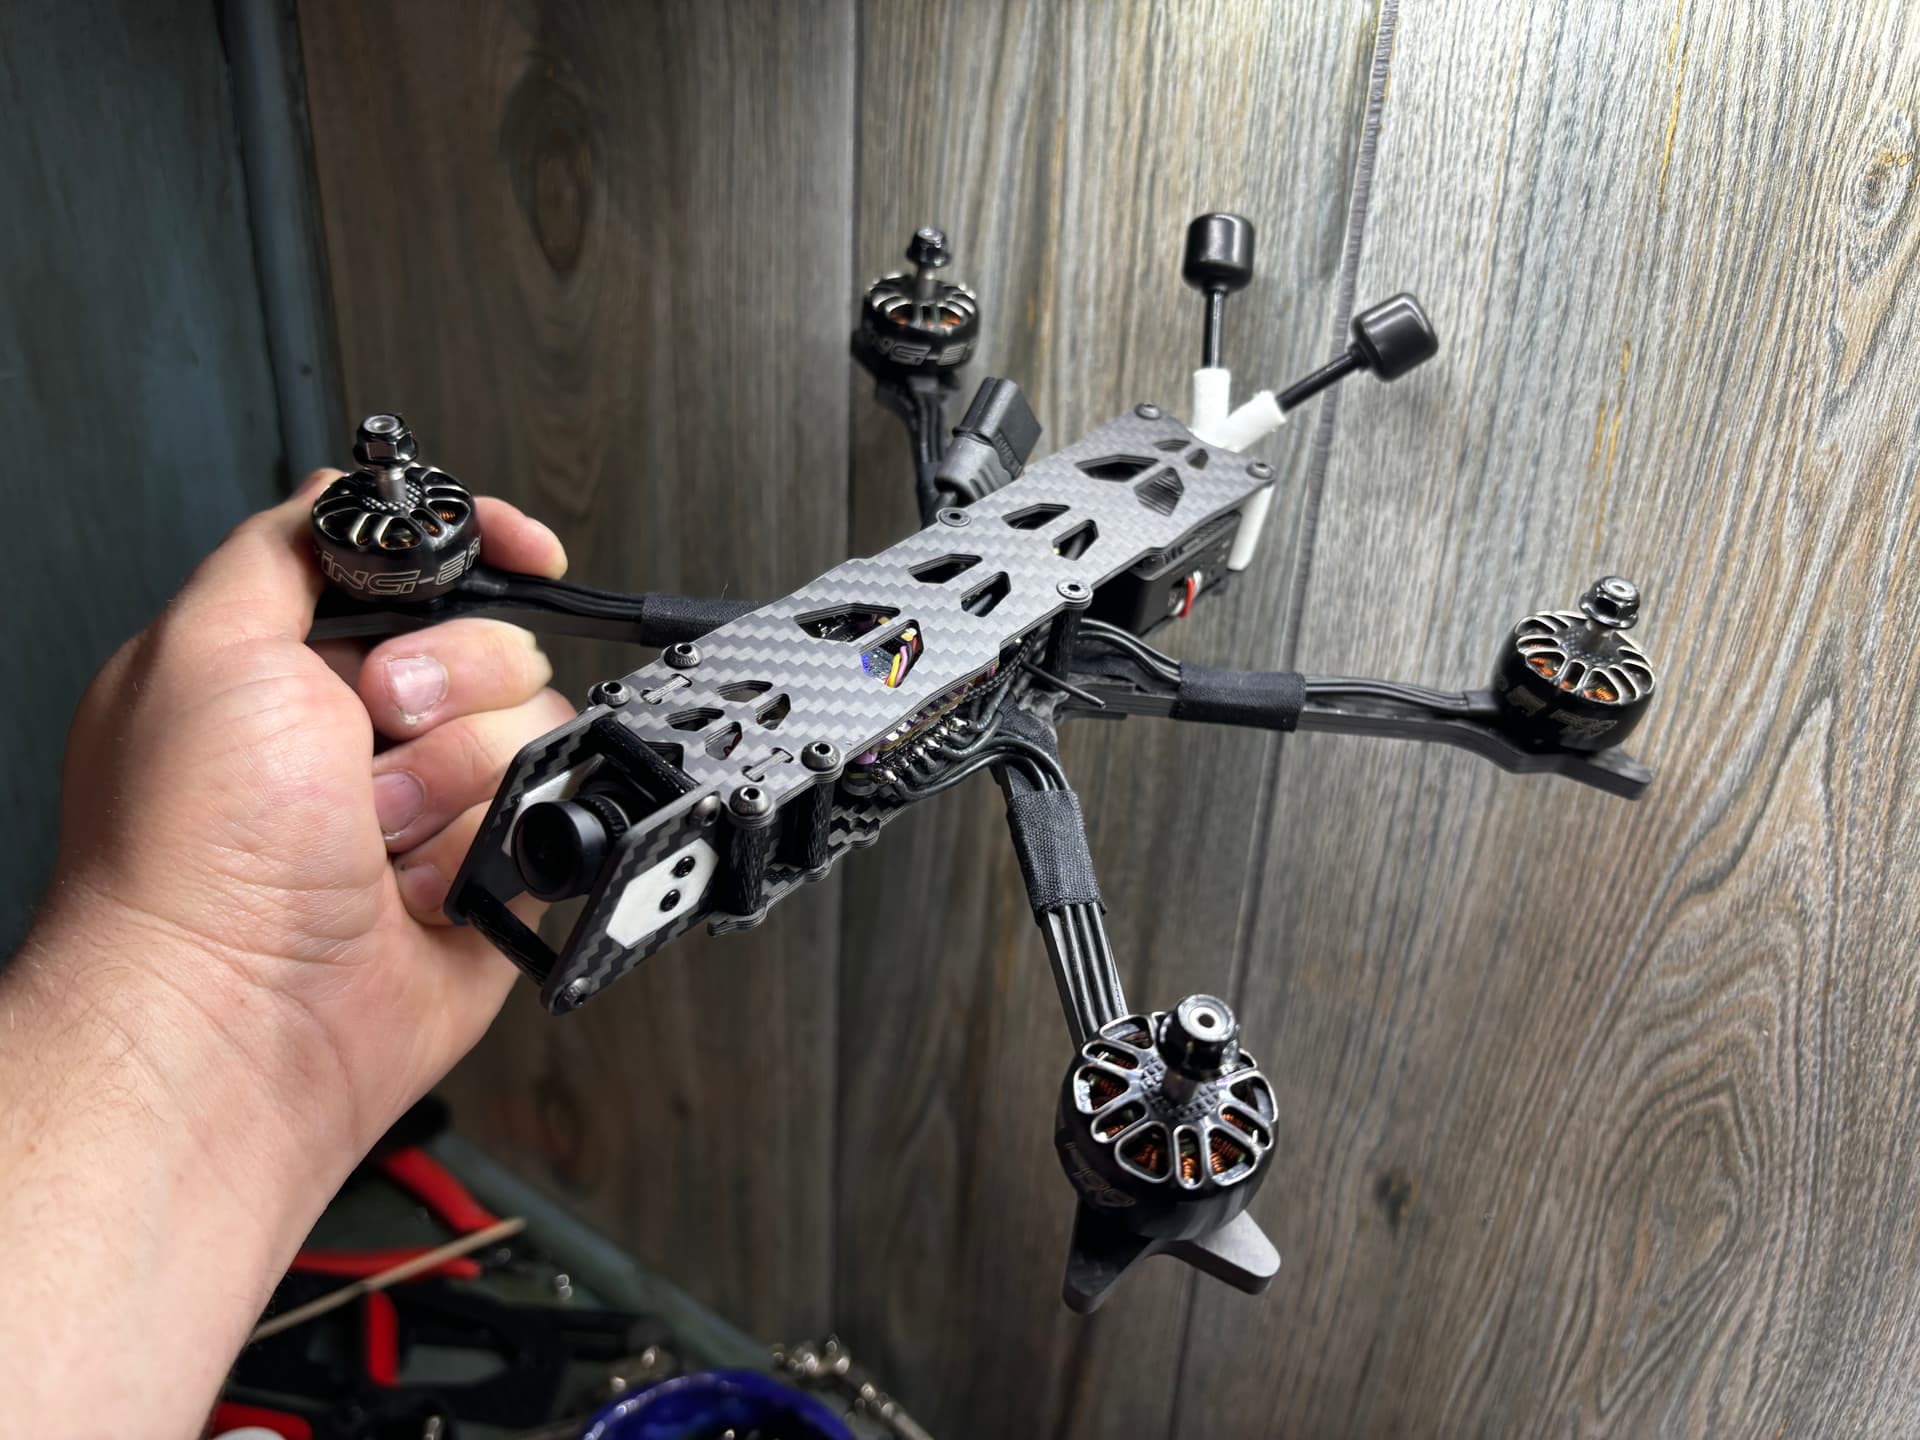
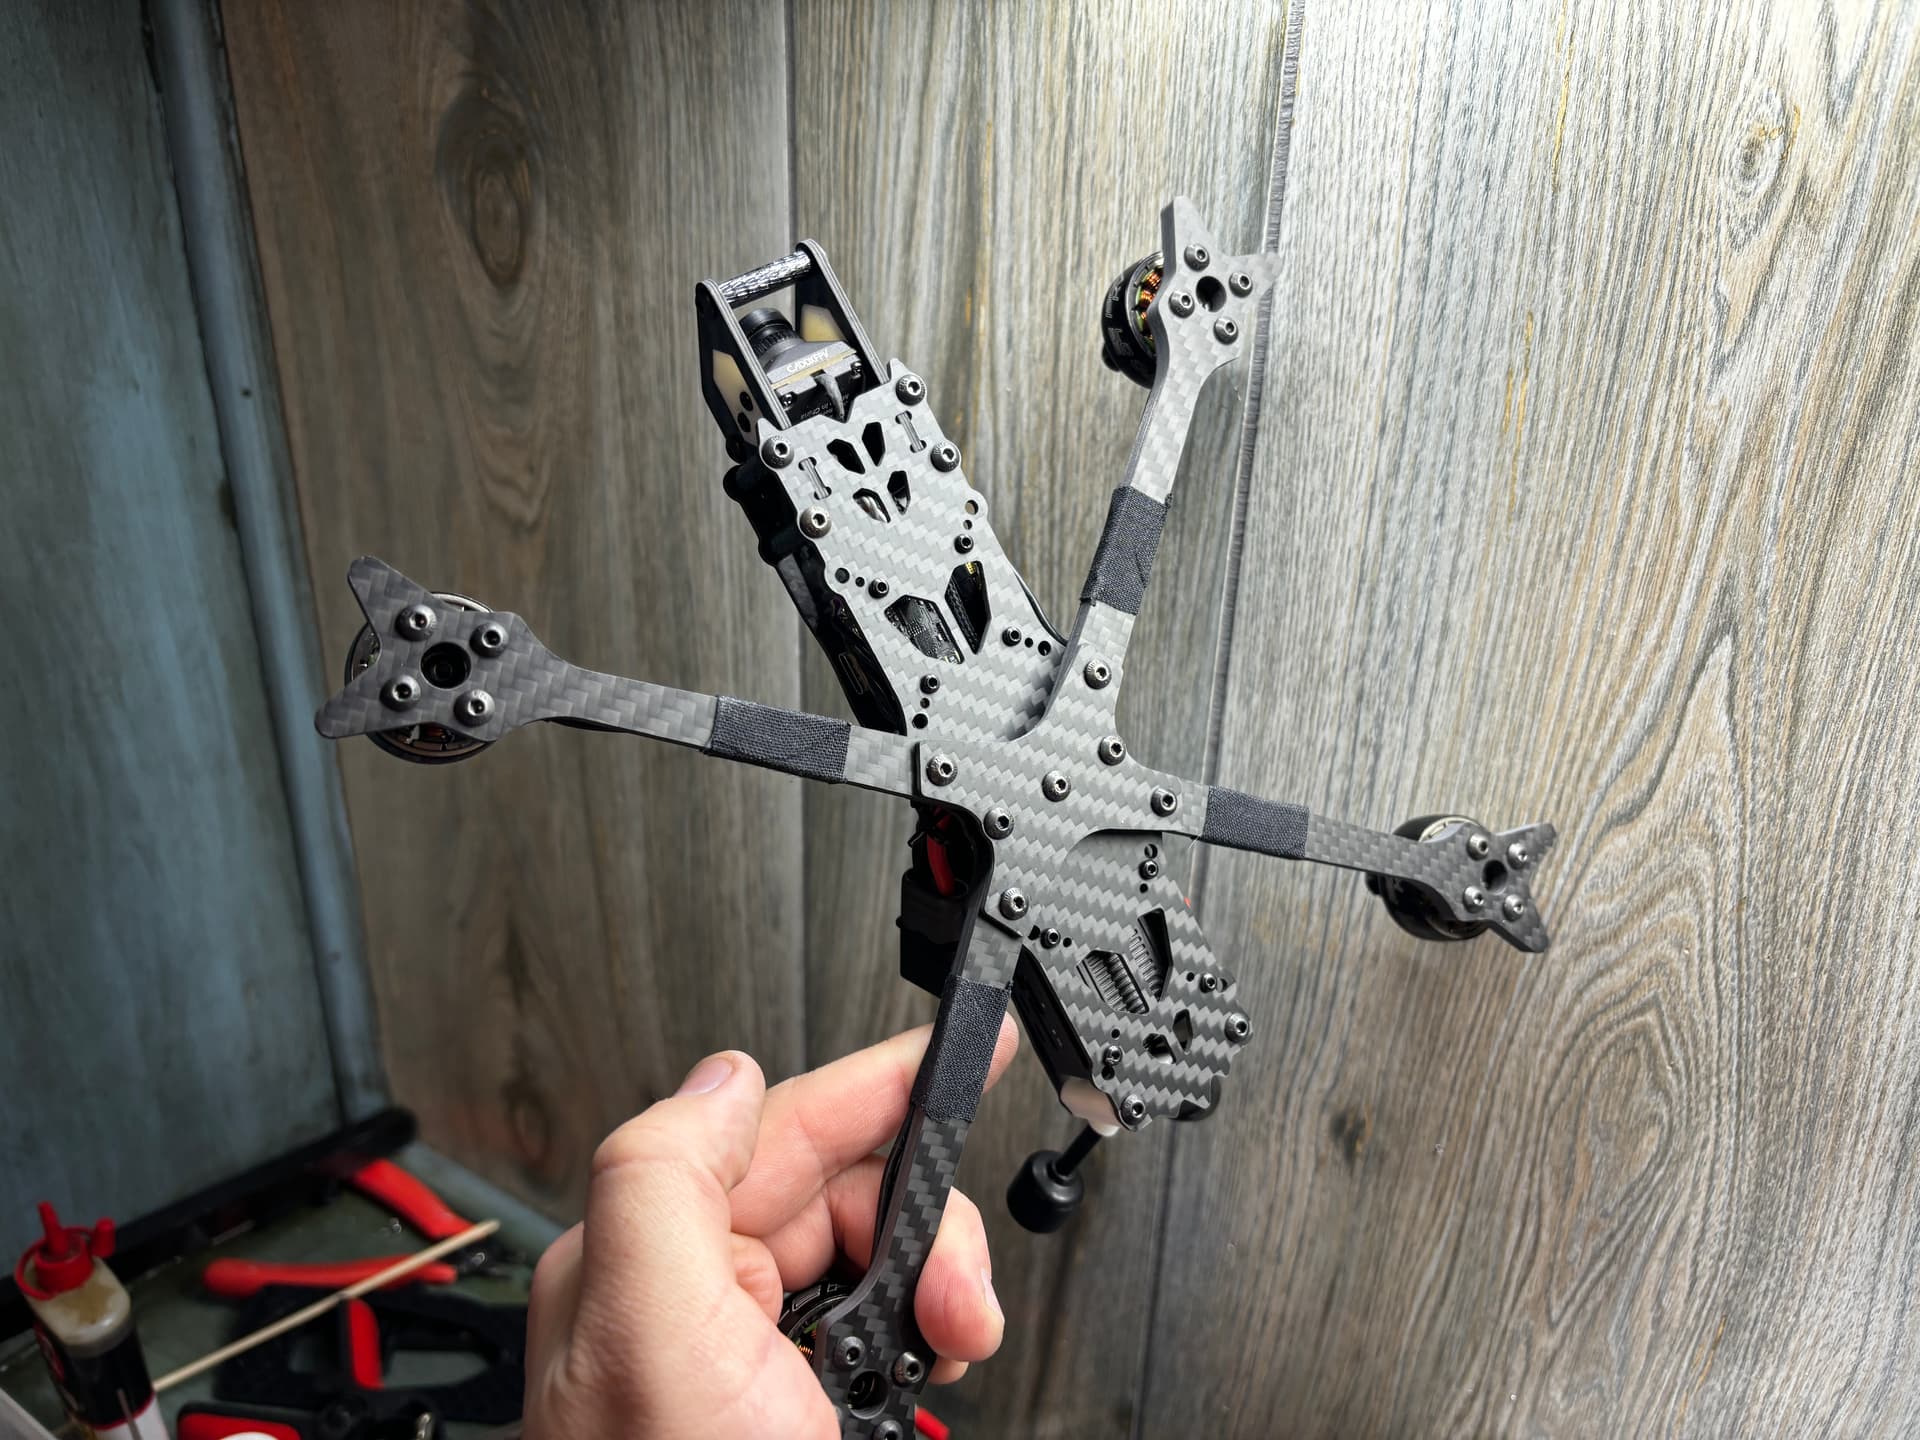
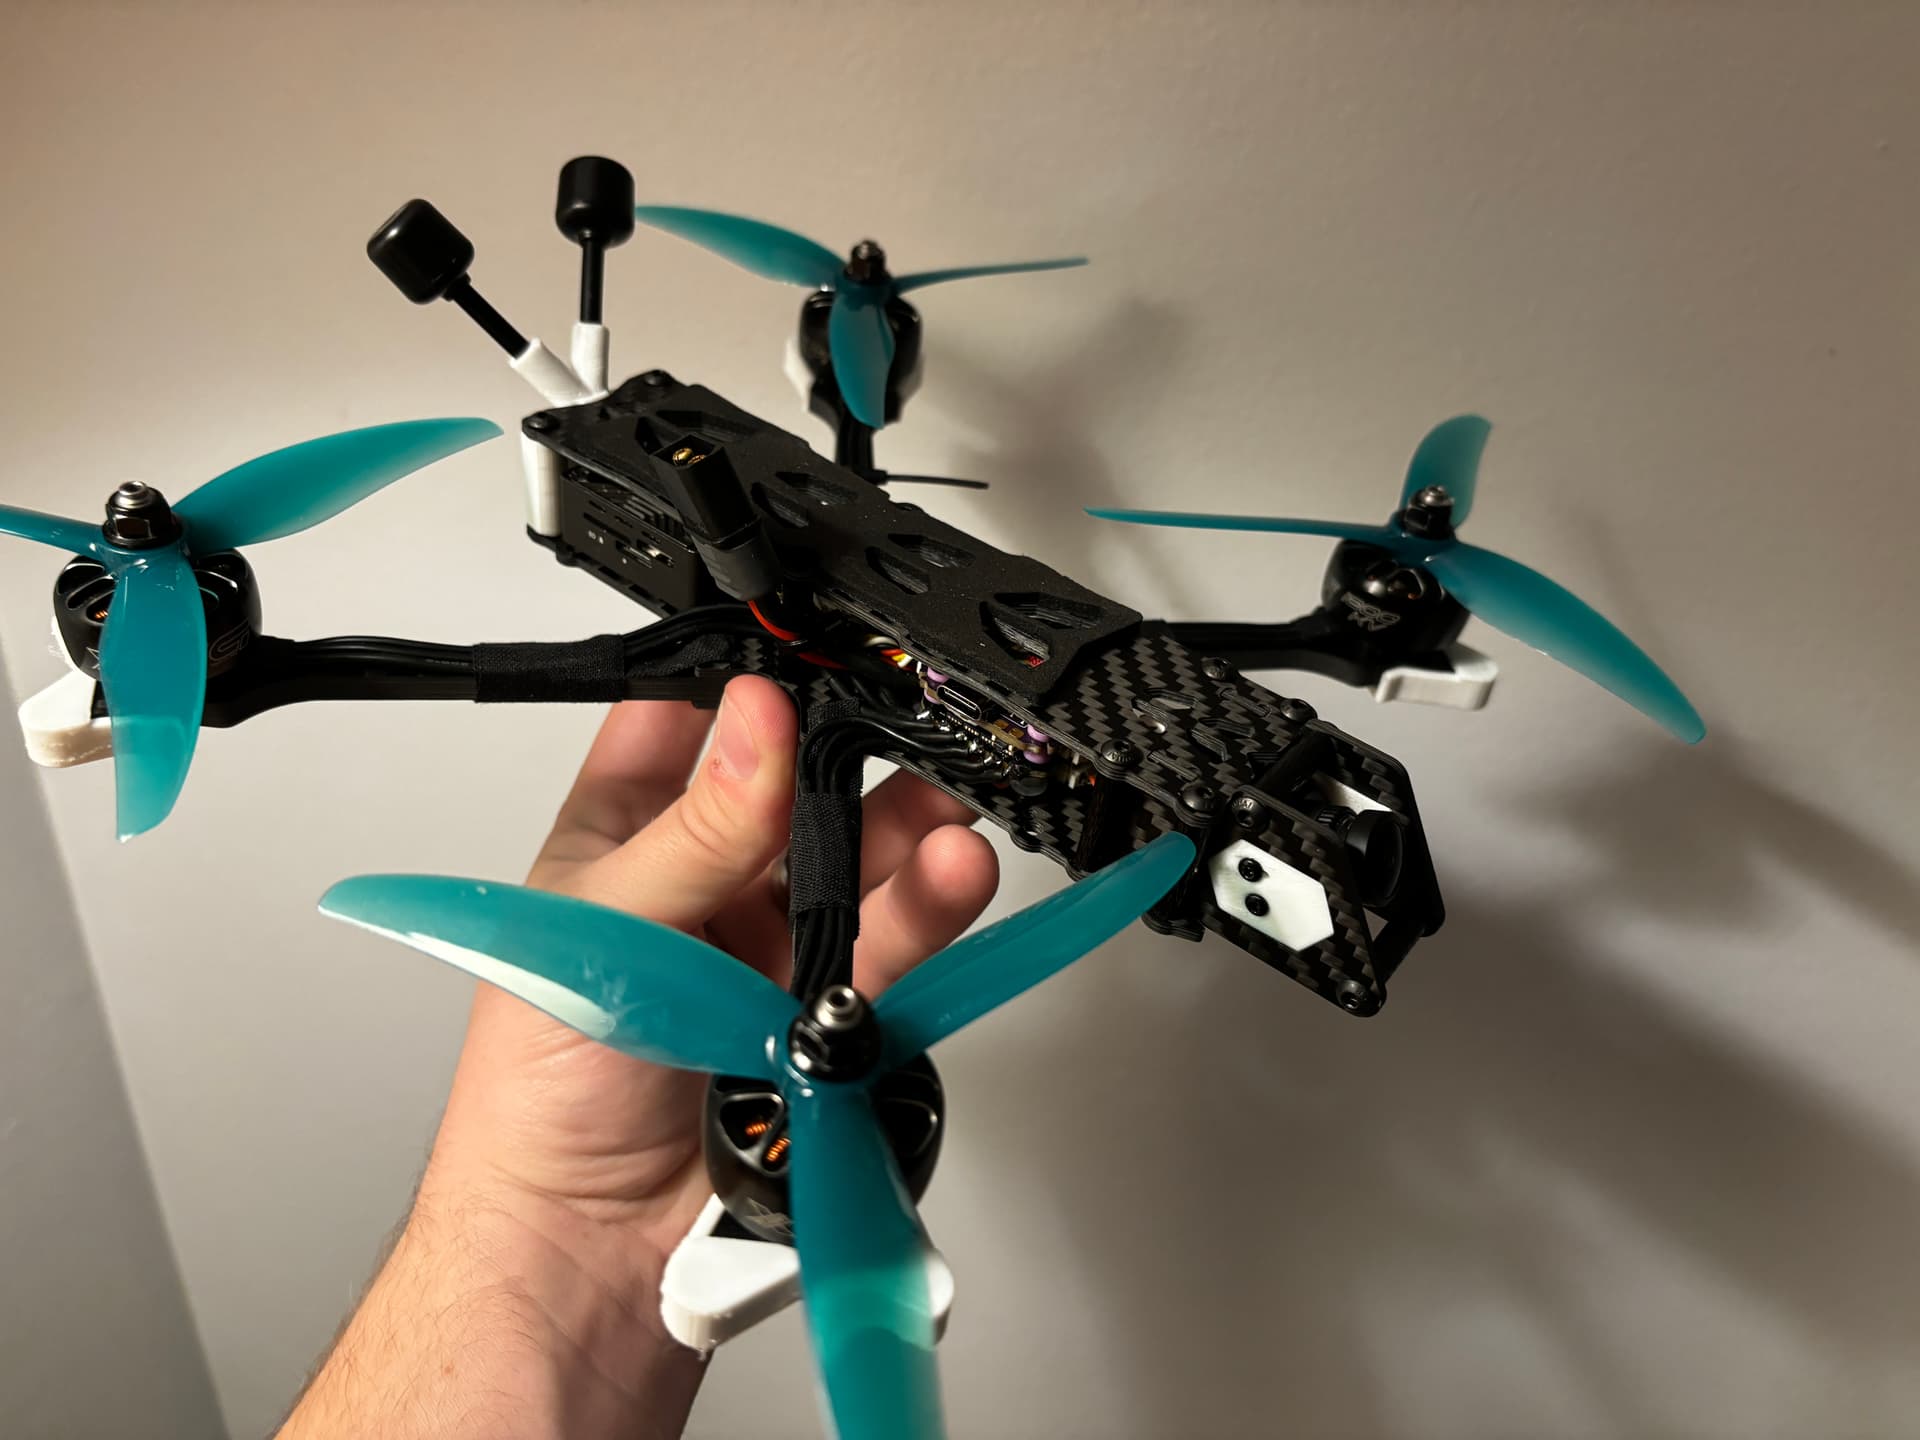
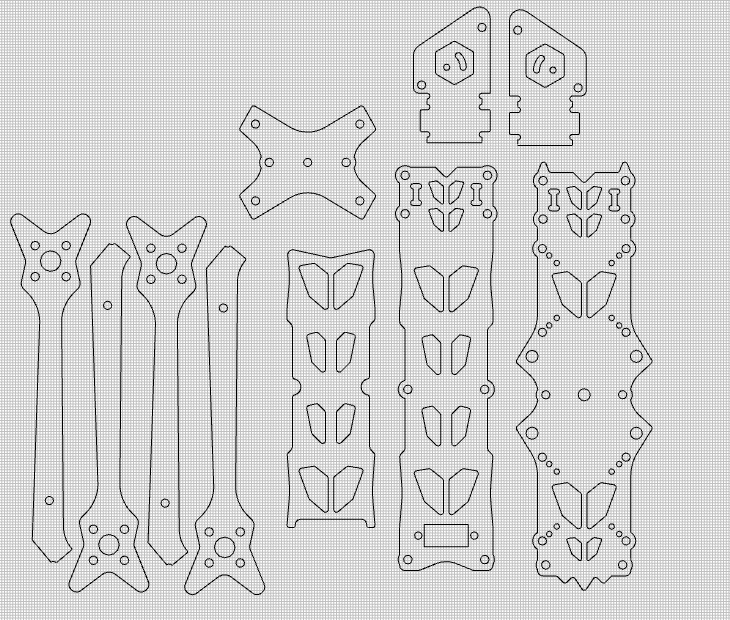
Here’s an example of a drone frame I designed in Carbide Create and cut on my machine. Accuracy is pretty key to get the arms to not have any slop and the slots to actually function as designed.
use the machine as-is — this works fine for signage and single-part projects
calibrate for belt-stretch and call it good — this works fine for wood joinery in my experience, and may work okay for most other projects (it allowed me to make a largish adapter plate for my machine twice now)
cut all parts oversize with a roughing clearance, measure, then adjust the file based on the measurements and then cut — note that this requires deferring an internal holes/features until after measurements are dialed in and one is confident of getting them cut correctly
have a spreadsheet with a grid which contains the offset of every point significant to how the current part is to be cut — adjust the file based on that before cutting — if I understand correctly, @RichCournoyer works in a fashion similar to that
I’m at the second bullet-point, and most customers stop at the first.
Yeah I’ll just continue on the path for tool offsets as it’s been working for a couple years now. I’m not really a fan of trying to calibrate equipment. Getting the belts to have the same tension was hard enough lol.