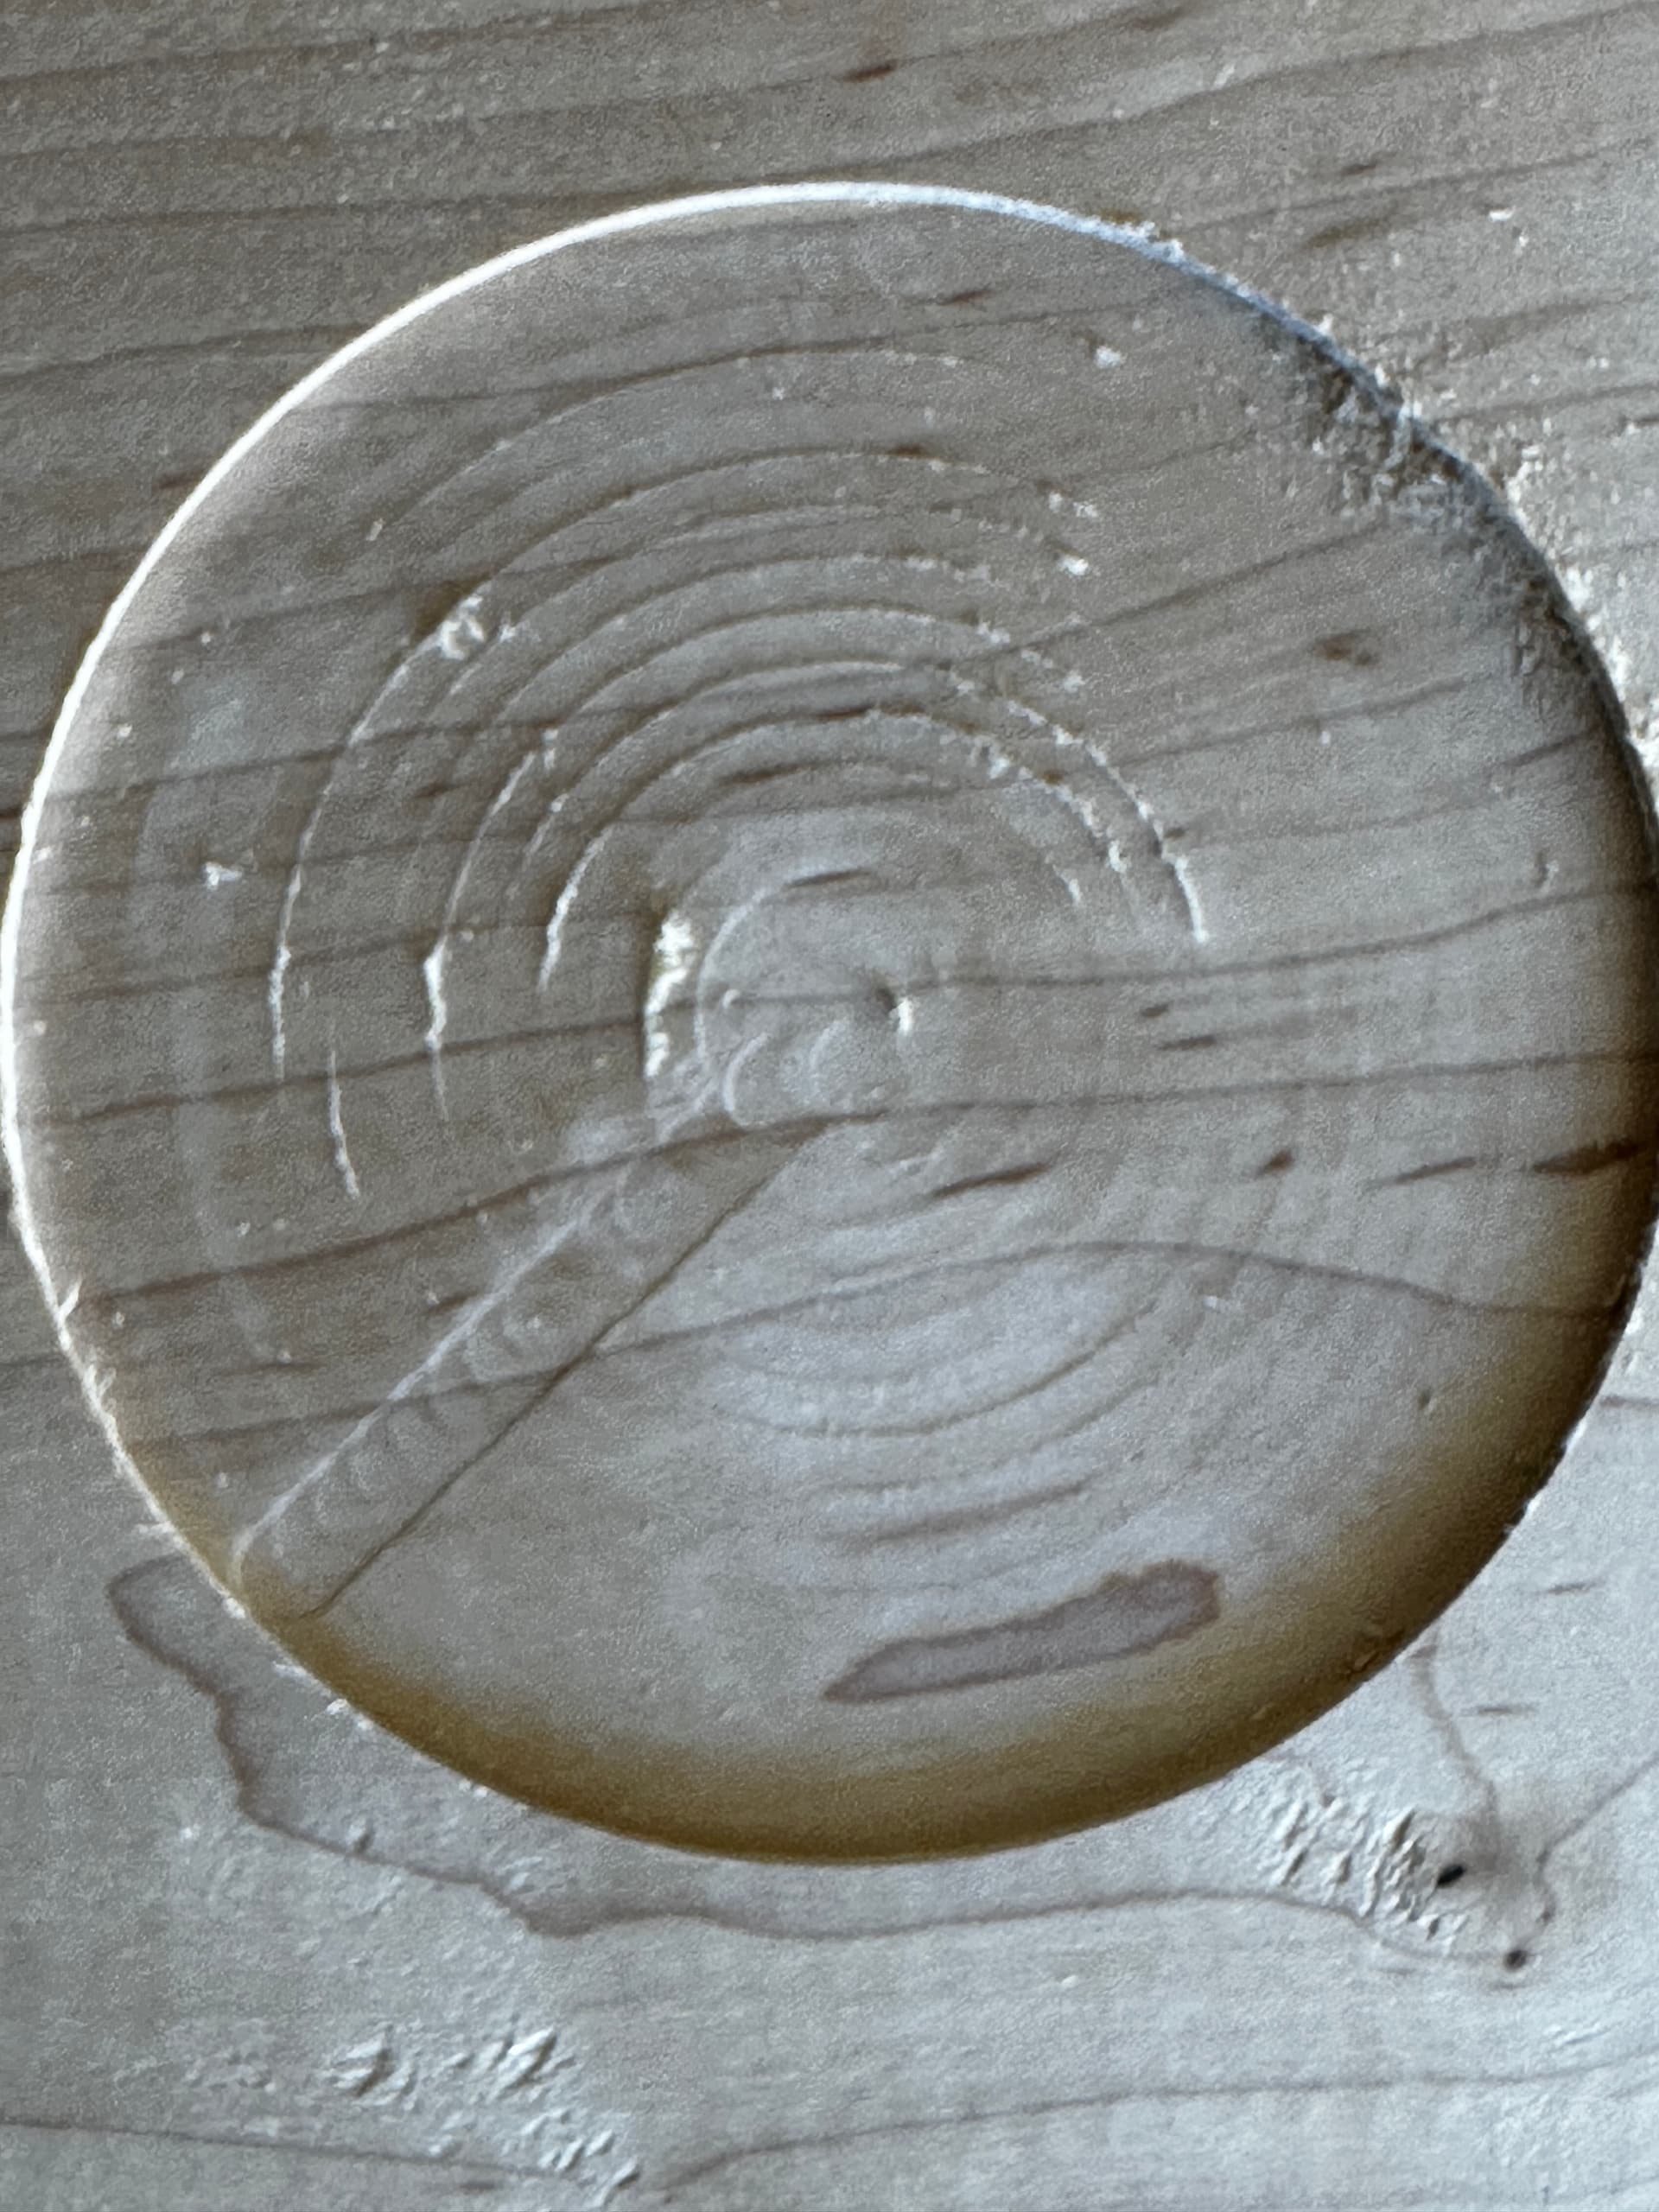
After leveling my waste board and doing some minor cleaning/maintenance I appear to have introduced an unwanted pattern in my pocketing.
In the example I’m not concerned with the spiraling, I know how to address that and I plan to fill this with epoxy resin, so that’s not the issue, but along the points where the tool advances outward it’s creating a shallow trench.
This wasn’t an issue before my maintenance, so what did I do to cause this?
Other than leveling the waste board, I did the following:
Removed the router and bracket from the Z-carriage
Removed the Z-carriage from the Tramming plate, following the Carriage Maintenance instructions.
While the Z-carriage was removed, I noticed the bottom V-wheels were not fully in contact with the bottom rail and there was some slight play in the plate, so I adjusted the eccentric nuts (less than 1/4 counterclockwise turn) so they were in contact with the bottom rail and got rid of the play, but they still moved freely per setup instructions.
I’ve gone back an undone the adjustments I made to the V-wheels, so they are back in their original position and the play is back as well, but the issue persists.
Other than that I’m not sure what I did.
I suppose I could try to extract the 1-2mm of oil and restore the sawdust clag to all of the V-wheels to turn back time, but I’m sure there’s something I’m missing.
Check that the machine is mechanically sound — if it is, check the toolpaths.
Best thing to do is to adjust the depth per pass so that the final pass is essentially a finishing pass, e.g., if cutting to a depth of 0.5" w/ a depth per pass of 0.125", making four full depth passes, instead, reduce the depth per pass to 0.12" — that will result in 5 passes, the last removing only 0.02" of material.
I hadn’t noticed the issue before, but I will make those adjustments and try another test.
I have to go back and adjust those V-wheels first though, I can’t imagine the play is a good thing to have. I undid my change to see what if any effect it could have had.
That helped somewhat, but there is still a distinct line there. Tested with both circle and square shapes and it’s consistent.
I wasn’t being very scientific in my testing as I changed multiple elements including the depth per pass, step-over, retightened the lower V-wheels removing play, changed to another 1/4" endmill and I chocked the endmill lower in the collet, where before I had it in further than I usually do for no particular purpose.
I believe I’ll give the waste board one more leveling pass to make sure it’s square. That’s the only other change I made to things since the last ‘issue free’ cut.
When the path plunges & steps over, the downward force is (more than) doubled on the tool.
I would test to see how much up/down slop you have in the machine.
With the machine sitting still, either with an indicator or just with the tool sitting a small distance above a reference surface… pull down on the tool or collet nut & see how much it moves.
If it does move, trace the movement up the kinematic chain (spindle, Z axis, X axis, Y axis)
keeping in mind that it could be torsion (rotation) as well as linear slop.
Once you have the machine as rigid/stable as it’s going to get, the next step is to avoid burying the cutter with plunges or full width stepovers. Ramp engages, spiral cut pattern, adaptive machining.
And Will’s suggestion of rough & finish passes.
Logically, since it worked before your changes and didn’t afterwards, I’d focus on the hardware side of the equation - thresholds and finishing passes are great ideas all the time, but this problem isn’t going to be about the smoothness of the final pass — you’re getting a gouge that the same toolpaths didn’t give you before. It almost has to be some slop somewhere. I assume this is more than tramming?
Maybe undo your changes and see if you can get back to where you once were…and then make the changes again, one at a time to reproduce the failure?
Thank you for the help and details in troubleshooting steps.
The biggest change (that I know of , so far) that I made was to remove slop by adjusting the bottom V-wheels on the tram plate. Previously they were barely in contact with the bottom rail, but I tightened them slightly, removing most of the slop, but out of fear of over-tightening and restricting the tram movement I left a very slight amount. (Side note: The install instructions indicate they should move freely (?? spin on their own or with the tram movement?), which could be changed to to describe the expected behavior, e.g. ‘wheels in contact with the rail, so there is no ‘slop’ and the tram moves easily in both directions along the rail’).
Yesterday I undid my changes, and added the slop back; no change in the cut results. Weirdly it has been cutting fine with the slop. I’ve since retightened the bottom V-wheels on the tram and there is no slop at all now and the tram moves easily. I haven’t retested the pocket test yet, but will be the first thing I do today.
I’ve been looking at the Z-carriage that secures to the tram plate with six screws to make sure it is square when tightened, but there’s not a lot of wiggle room to get it wrong. The other area is the router bracket, where there is a bit more movement - tighten the bigger top screws first, or the smaller bottom ones, tighten under its own weight (presumed square), or while held up (square) at the top of it’s ‘wiggle room’ in the loose screws?
The only other changes I made were to level the waste board, which I did again yesterday after tightening the V-wheels. I did also change the brushes in the router, when the bracket was detached, but I wouldn’t expect that to cause an issue with the cutting angle or pressure.
Sorry for being so pedantic but the devil will be in the details.
I see where you are checking slop at the vee wheels, and the machine, but no mention of checking how much play is in the spindle itself? The bearings might be perfect for radial play, but what about axial play?
Good call. I hadn’t checked the spindle itself, until now. Simple hand resistances check and I can’t feel any play in any direction; up/down or lateral.
I’m going to run a baseline test in a minute after the changes I made yesterday and if the issue persists I will swap the router with a the Makita that I have not been using since getting the Shapeoko and test again.
Short-ish followup for anyone who may be interested.
I haven’t been able to eliminate the issue completely, but I’ve been able to reduce it to a level that can be tolerated for what I’m doing now.
I changed the spindle to a different and less-used router, but that did not affect the issue, although the Makita router seems quieter, so I’ll stick with it.
Removed the Z-carriage and checked the bottom V-wheels again and adjusted each slightly. They were both in contact with the rail and there wasn’t any noticeable slop with multiple pushes, pulls, twists etc. but there may have been slight difference in the contact pressure between the wheels, so I evened that out as best as I could discern.
Reattached the Z-carriage, (top screws first, bottom then middle).
Checked the four screws on the router bracket, all snug.
Checked the Y-axis bottom V-wheels and they were all in contact, not binding and allow the gantry to move easily and with out slop.
Wanting to not to let perfection get in the way of getting anything done, I’ll accept it for now. Still bugs me, but hoping it’s not a noticeable issue elsewhere later.