Or a finish nail, screwdriver, metal end of tape measure… ![]()
So long as it wasn’t recently dropped and the end bent — had a project get seriously derailed when that went unnoticed for most of a day.
4 Likes
Personally, I’ve had less than perfect results from tiling without a proper physical registration. Eyeballing invariably ends up with a crooked transition…even if just a little shift in the line - particularly with a repeating pattern, it becomes quite obvious when you look at the piece. It has a wave in it at the point of the transition.
The only way I’ve really come “close enough” is through physical registration with pins inserted into holes cut by the first pass that register with pins in a fixed position. That’s why I’d love to see CC allow some sort of placement of a registration shape that can be used to register the piece for the next tile. I’m pretty sure making it an automatic function would be impossible, given the permutations of shapes and sizes, but maybe there’s a semi-automated way to help the user place one at just the right spot relative to the last…or something. It’s a challenge.
- Gary
2 Likes
Just to be clear, I do think it’s very important to have a reference edge to slide along, otherwise you have too many degrees of freedom to get correct.
We think this would be a win as well, but we need to see what people do with tiling because you’re right, there are too many permutations to make it work everywhere.
2 Likes
Even with the edge…over a long piece, the slightest deviation from that edge is a problem. Unless I’m locking it in top and bottom with registration pins, I have never had a perfect line. I mean, near perfect and my customers would not likely complain (or notice) - but not really good enough for me.
3 Likes
It might be a good idea to have pin locations already done in your wasteboard. Then just set up the tiling operation around that spacing.
1 - Run your file to put some shallow pin locations on the back.
2 - Remove material.
3 - place pins in pre-determined locations.
4 - Flip material, place in first pin locations, run first part.
5 - Move to second locations, run sending half.
That’s what I’ve come up with to make growth charts and tall door signs. ![]()
2 Likes
What I’ve done is made sleds using my CNC that the work rides on…and those have CNC-placed holes for metal dowels. Then, my designs use the same layout for those holes to create registration holes ahead for the next tile after they cut the current tile.
Your tile size cannot be maximized to the CNC bed using this method, because you need to cut the registration hole for the NEXT tile…which technically can’t be on this tile’s workspace. So I tile shorter than my piece and then allow the hole to be cut above it. I wonder if that will cause problems for the new tilling system…since it won’t see the hole that’s located in the “next” tile.
1 Like
Your registration holes can be spaced within the cutting area and still allow movement within a space. Spacing 3 holes 24" appart (on a SO5 Pro in my case) allows you a 24" movement for a tile. That gets you 6".
But a sled could make for more. I like that idea. ![]()
1 Like
Agree. A square reference edge and reference pins are a must.
I opted for 6 registration pins on my SO3 for this project.
2 Likes
I remember that project now. Loved that one since I’ve thought about doing just that too make a rack for my Outback. ![]()
So nice and easy to use! Keep up the good work guys!
1 Like
For example if one wanted to cover a 12 x 8 wall with a routed design made up of six 4x4 feet square panels. Indexing in x and y is the only way. Or maybe this does not fit the definition of tiling. (Cutting a large design on multiple panels that fit together vs cutting a design on a panel longer than the machine area). To be able to design a large panel and divide it up at will for routing on multiple panels would be very nice. This is not indexing physically but from the softwares perspective, the same?
It’s different. For tiling we’re clipping the toolpath or the regions that span multiple tiles but everything will eventually get cut into a single piece of stock so we don’t consider the borders between tiles beyond the clipping.
If you’re turning a design into multiple physical tiles, then you end up needing to add additional contour cuts to ensure that you end up with separate physical tiles that can be merged. This is not something we currently do, and it’s not something we’re planning on at this point, because it seems like the usage-to-support-problem ratio is low.
That said, we did add clipping in the X direction when tiling is enabled so it’s definitely possible to achieve this on your own using the feature as-is. (You’d be able to work on a design much wider than the machine and the toolpaths will also get clipped in X.)
2 Likes
Can you elaborate. I’m not seeing anything in 754.
Make a pocket or toolpath that’s way bigger in X than the stock. It will be clipped to the width of the stock plus the X margin defined in the tiling setup.
2 Likes
Ah, OK. I see it now. So you’d still have to make 4 copies & position them to the stock, but you don’t have to chop the design up into sections. Cool! ![]()
We just uploaded 755 to Carbide Create Beta Downloads with some fixes for Tiling:
- (FIX) Texture tool paths were not properly clipped by tiling.
- (FIX) Contour toolpaths without any offset were not clipped by the toolpath tile.
- (FIX) Better V-cutter simulation.
- (FIX) “w” and “h” variables were incorrect in expressions.
- (NEW) Added “Shapeoko 5 Pro” as an option for the machine type.
- (NEW) Added expression parsing in the tile window.
4 Likes
Here’s the first video featuring Tiling. Drop any further questions here or in the comments of the video itself. GO MASSIVE!!! - Giant Art with CNC Router - YouTube
5 Likes
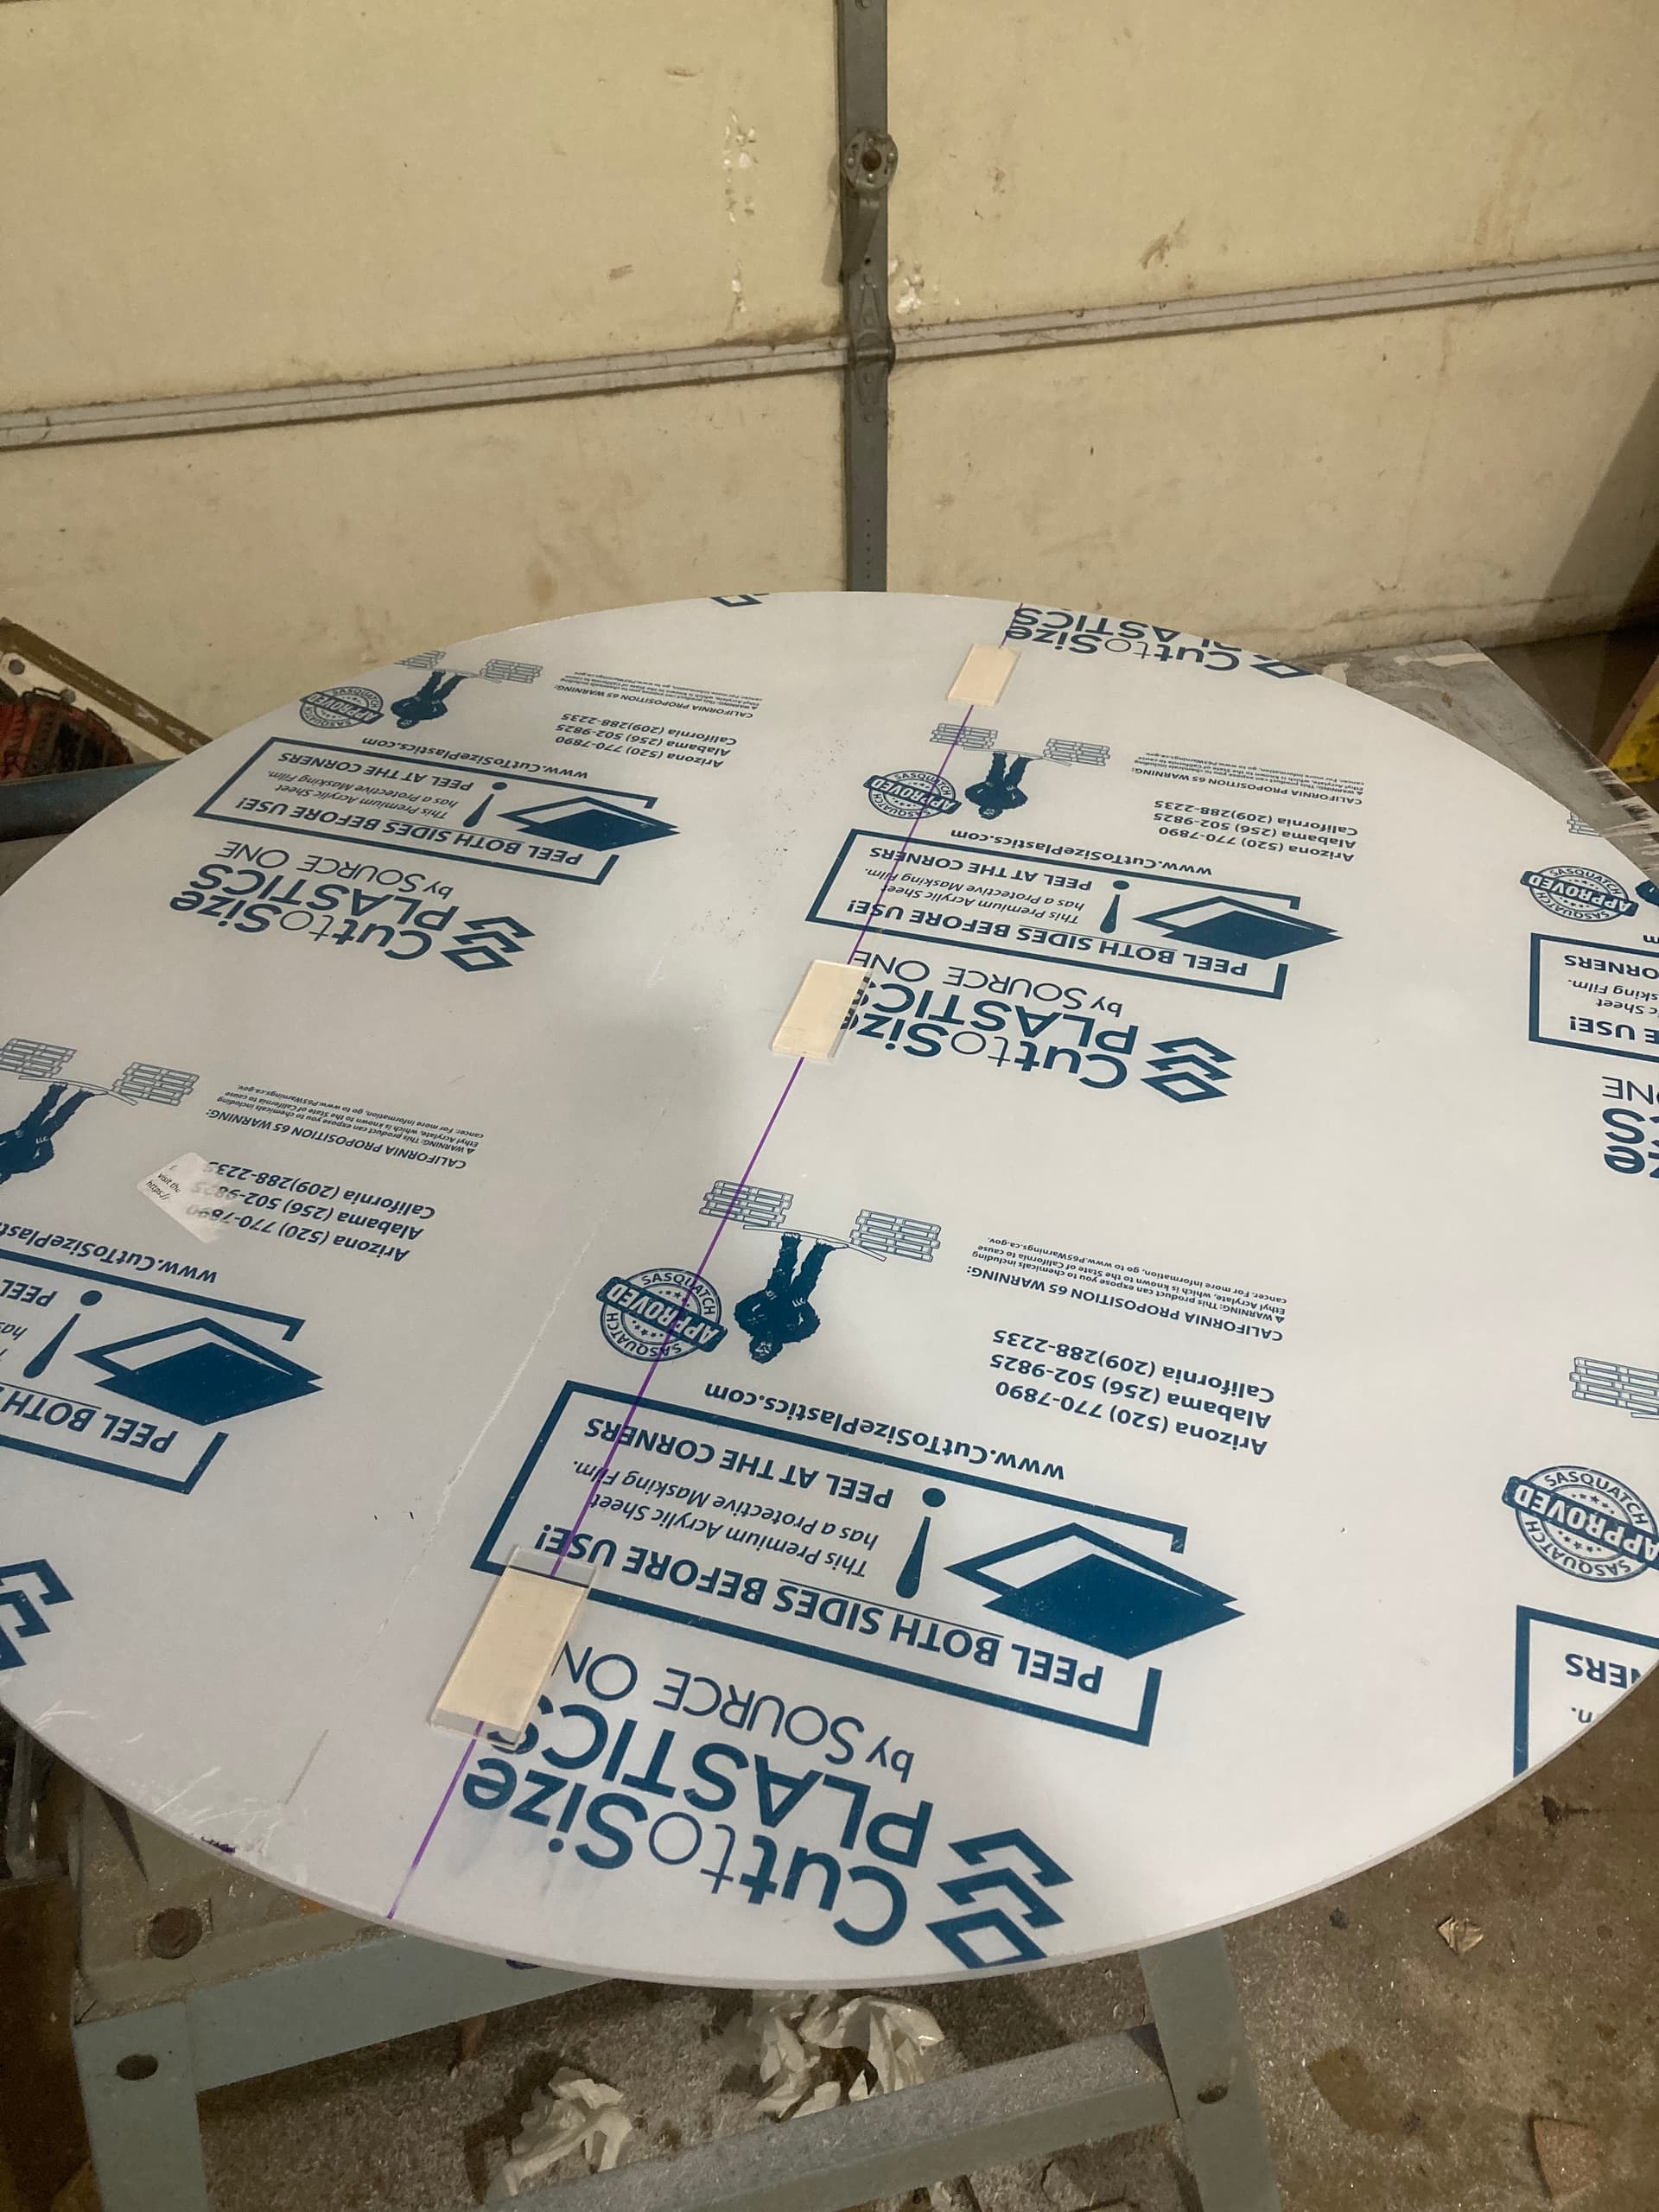
OK, did my first tiling job. But decided not to use the tiling feature. I didn’t have any vectors that needed to be chopped so I created a lower & upper tool path & posted them out separately.
My stock is a 30" round piece of 1/4" acrylic. So I couldn’t use a fence.
I cut some pieces of 1/8" acrylic the same width as the slots between my table slats & 2-way taped them to the backside of the workpiece. Now the piece is centered on the table & slides in that slot.
I marked the center point with an Xacto for a nice fine line, and when I moved the part I just reset the Y position.
5 Likes