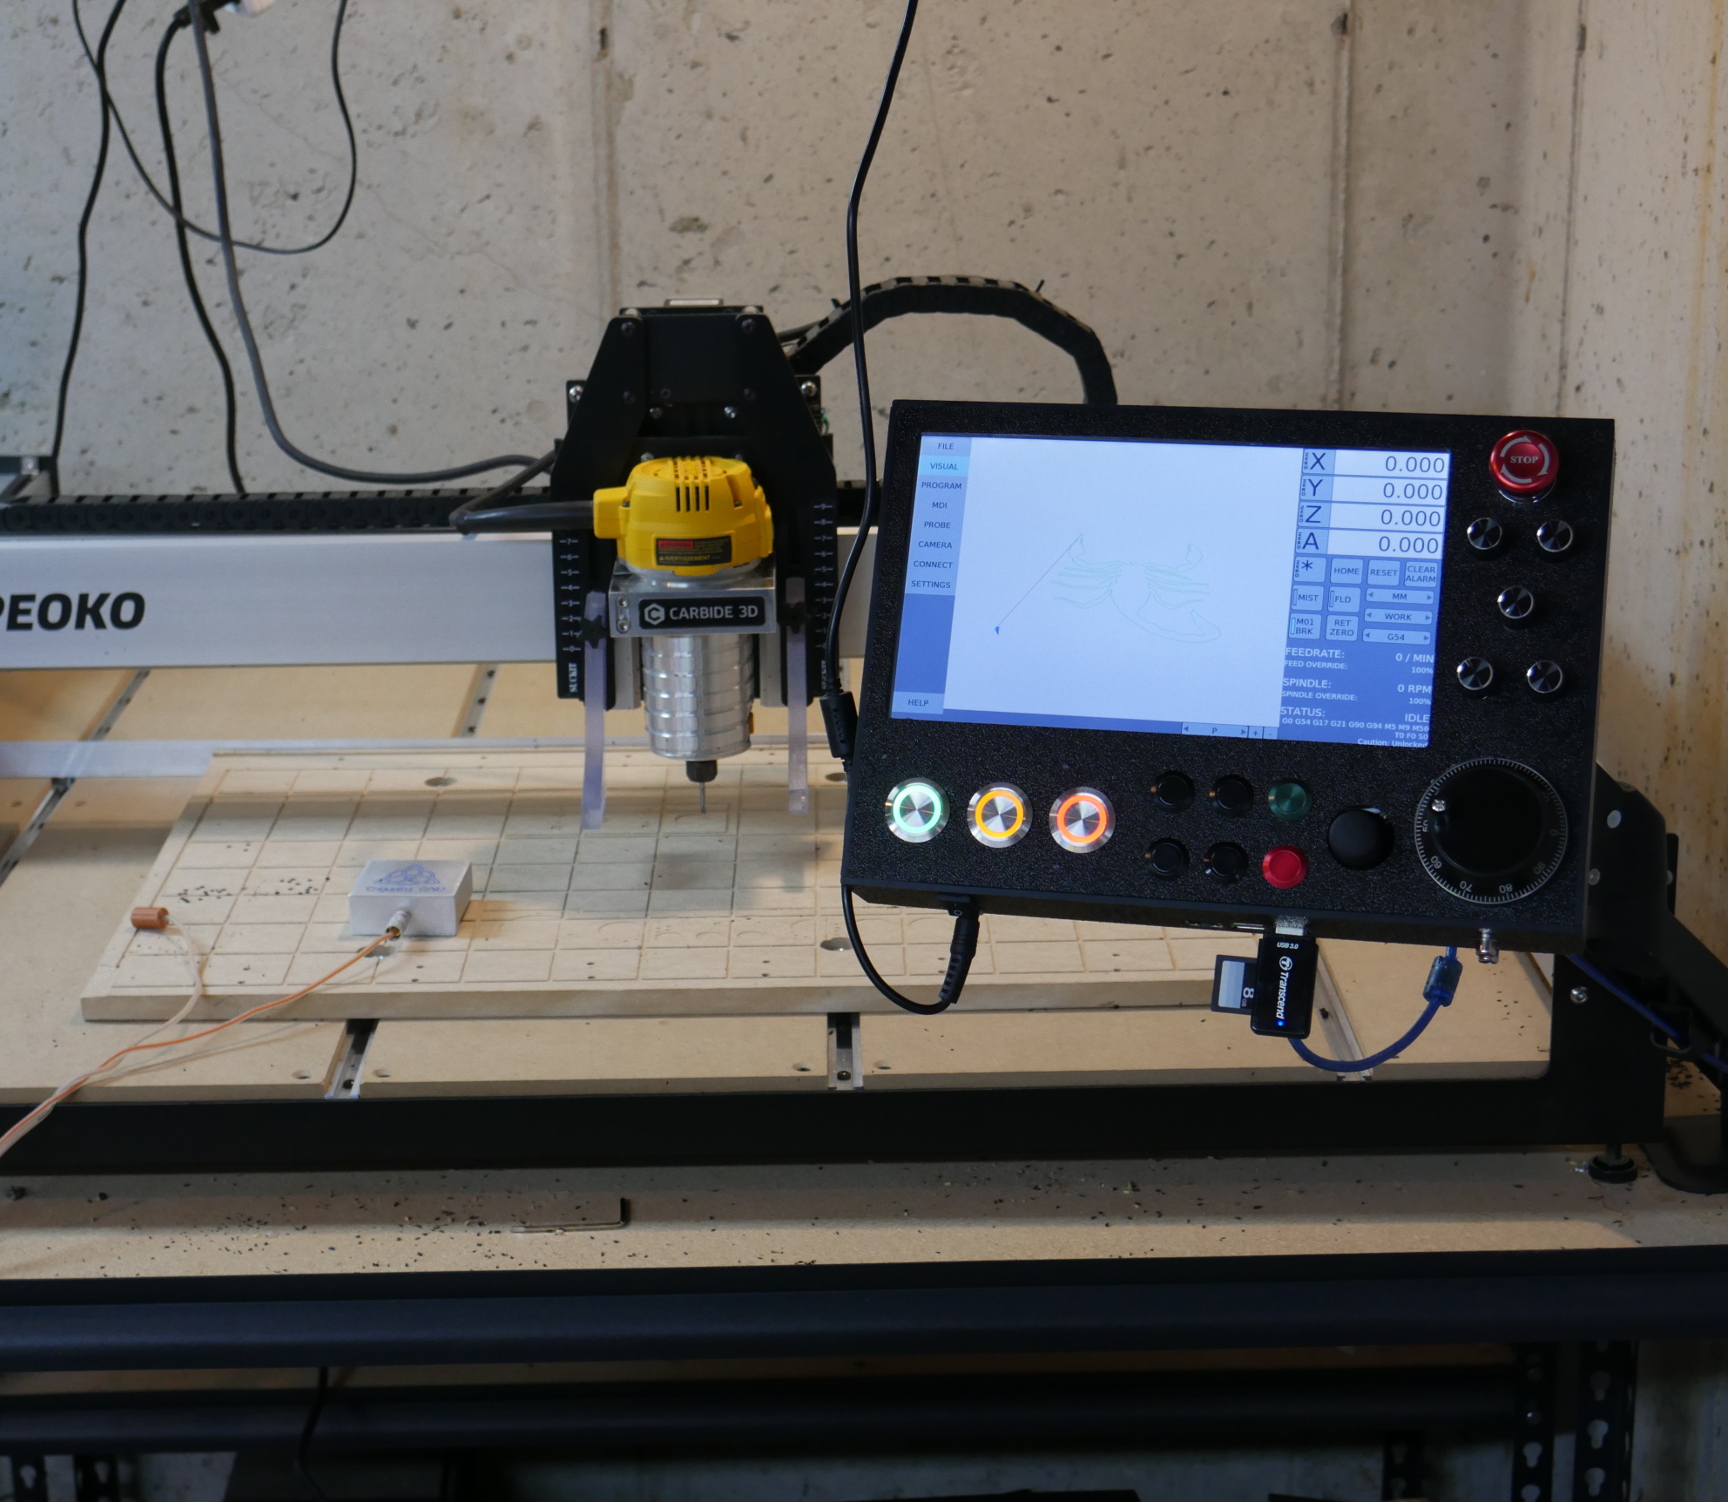
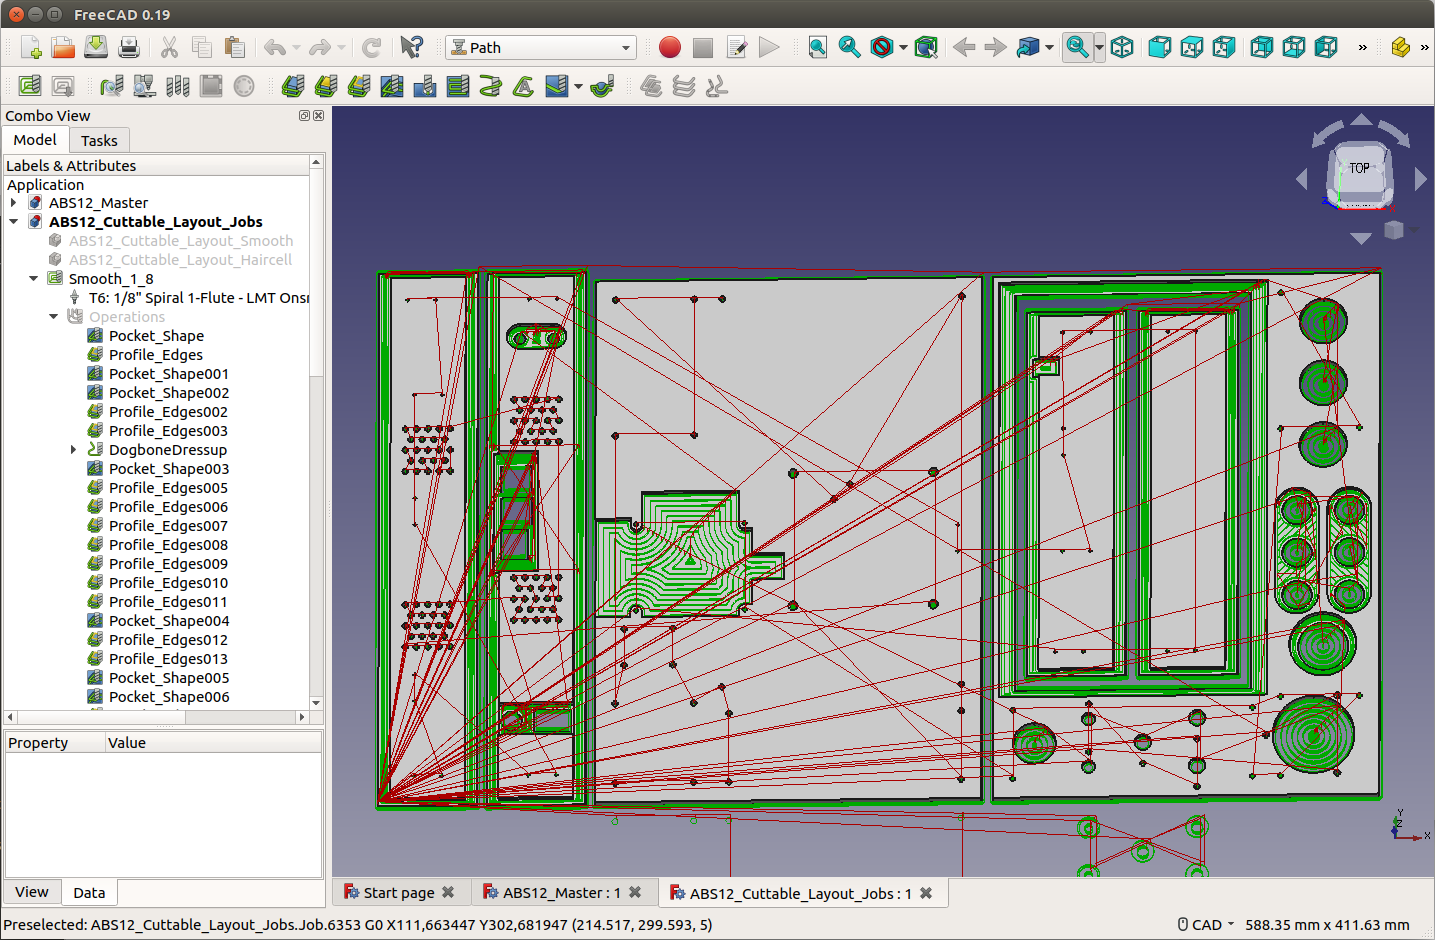
I decided that I wanted to control my Shapeoko with a more industrial control panel than a laptop. I wanted features such as a hardware MPG, emergency stop buttons, physical buttons and knobs, a touchscreen, simple file access, and a rocker switch for power on/off without a shutdown procedure. I created a PCB with an ATmega328P MCU and some shift registers to read the touchscreen state and button/knob states. The enclosure was designed in FreeCAD Path and cut with my Shapeoko from 1/4" ABS. I then wrote a new sender program that runs on the Raspberry Pi and reads the information from the MCU over the serial pins and communicates with Grbl accordingly. It’s stilla work in progress but is already quite functional. You can read more about it at https://hackaday.io/project/169898-touchscreen-control-panel-for-grbl
This is pretty impressive! Both your controller, and the time it took to document and share all this. I definitely will be absorbing it over the coming weeks. I do a lot of microcontroller and electronics projects myself so can appreciate this. Would love to try to implement this myself.
Thanks. Let me know if you have any questions.
Here’s an update on some of the changes I’ve made the past week.
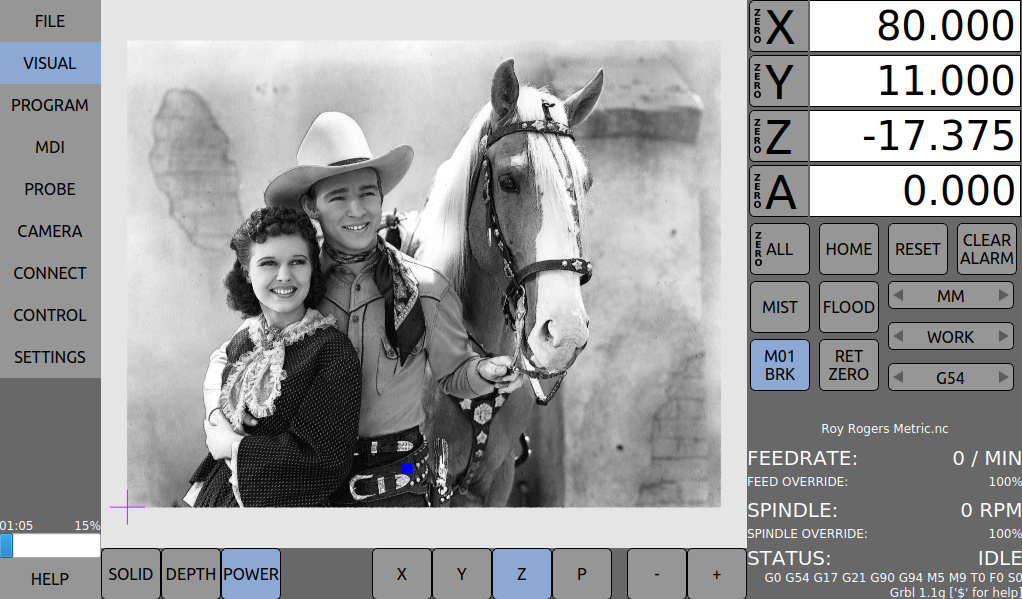
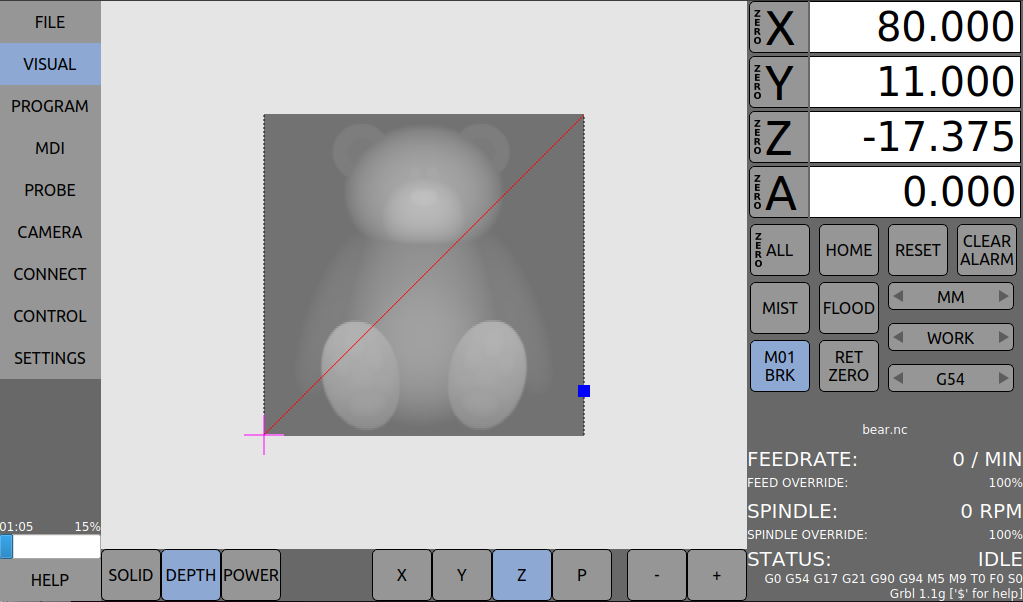
- Added support for coloring tool paths by depth
- Added support for coloring tool paths by spindle speed/laser power
- Updated the look of the medium sized modal tool buttons
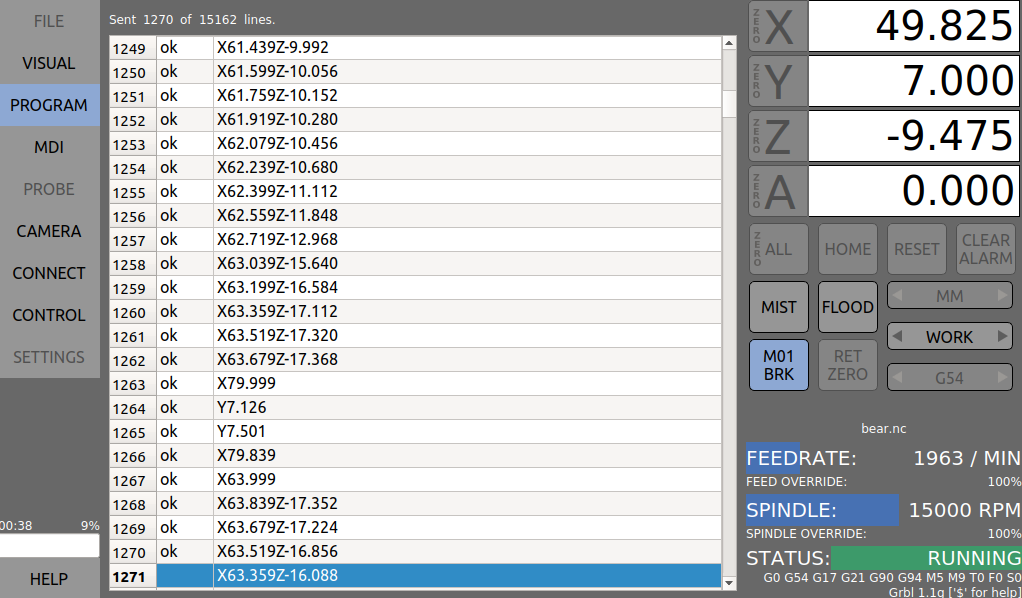
- Added support for displaying the current line number in the Program window.
- Added support for tracking the program table to the current line.
- Added support for displaying the ok/error response for each line as responses are retrieved from the machine
- Added a Clear button to the program window
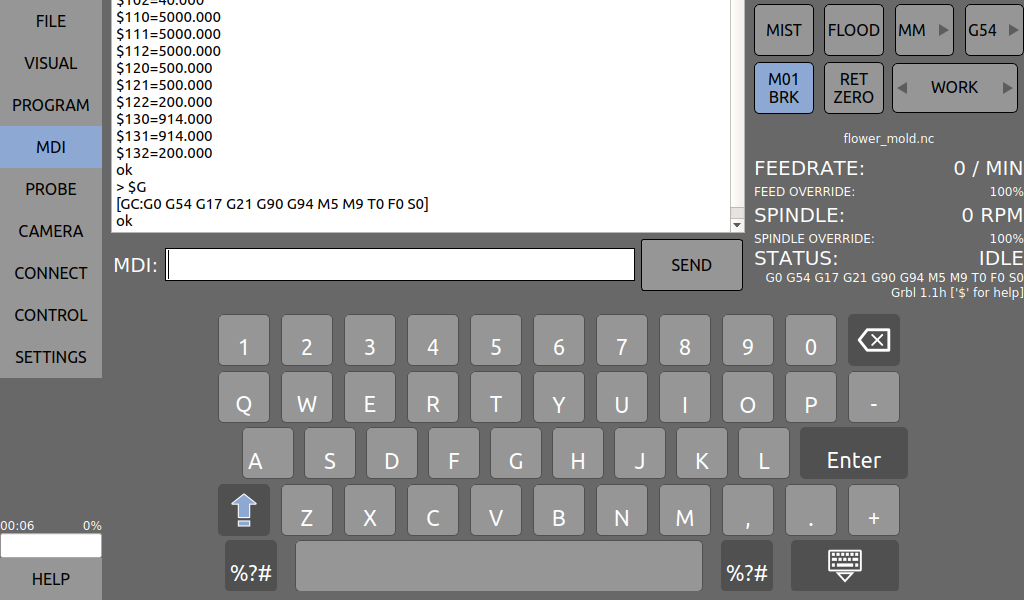
- Added a row of numbers to the onscreen keyboard
- Added support for zooming the perspective view.
- Added support for panning the orthographics views to track with the location of the mouse or finger on the screen
- Added support for scrolling the scollable areas with touch gestures.
- Added support for unloading a loaded NC file.
- Added the ability to change the verbosity of the serial communication on the MDI page
- Updated M01 handling to issue a M00 to the controller and removed the previously existing “paused” state.
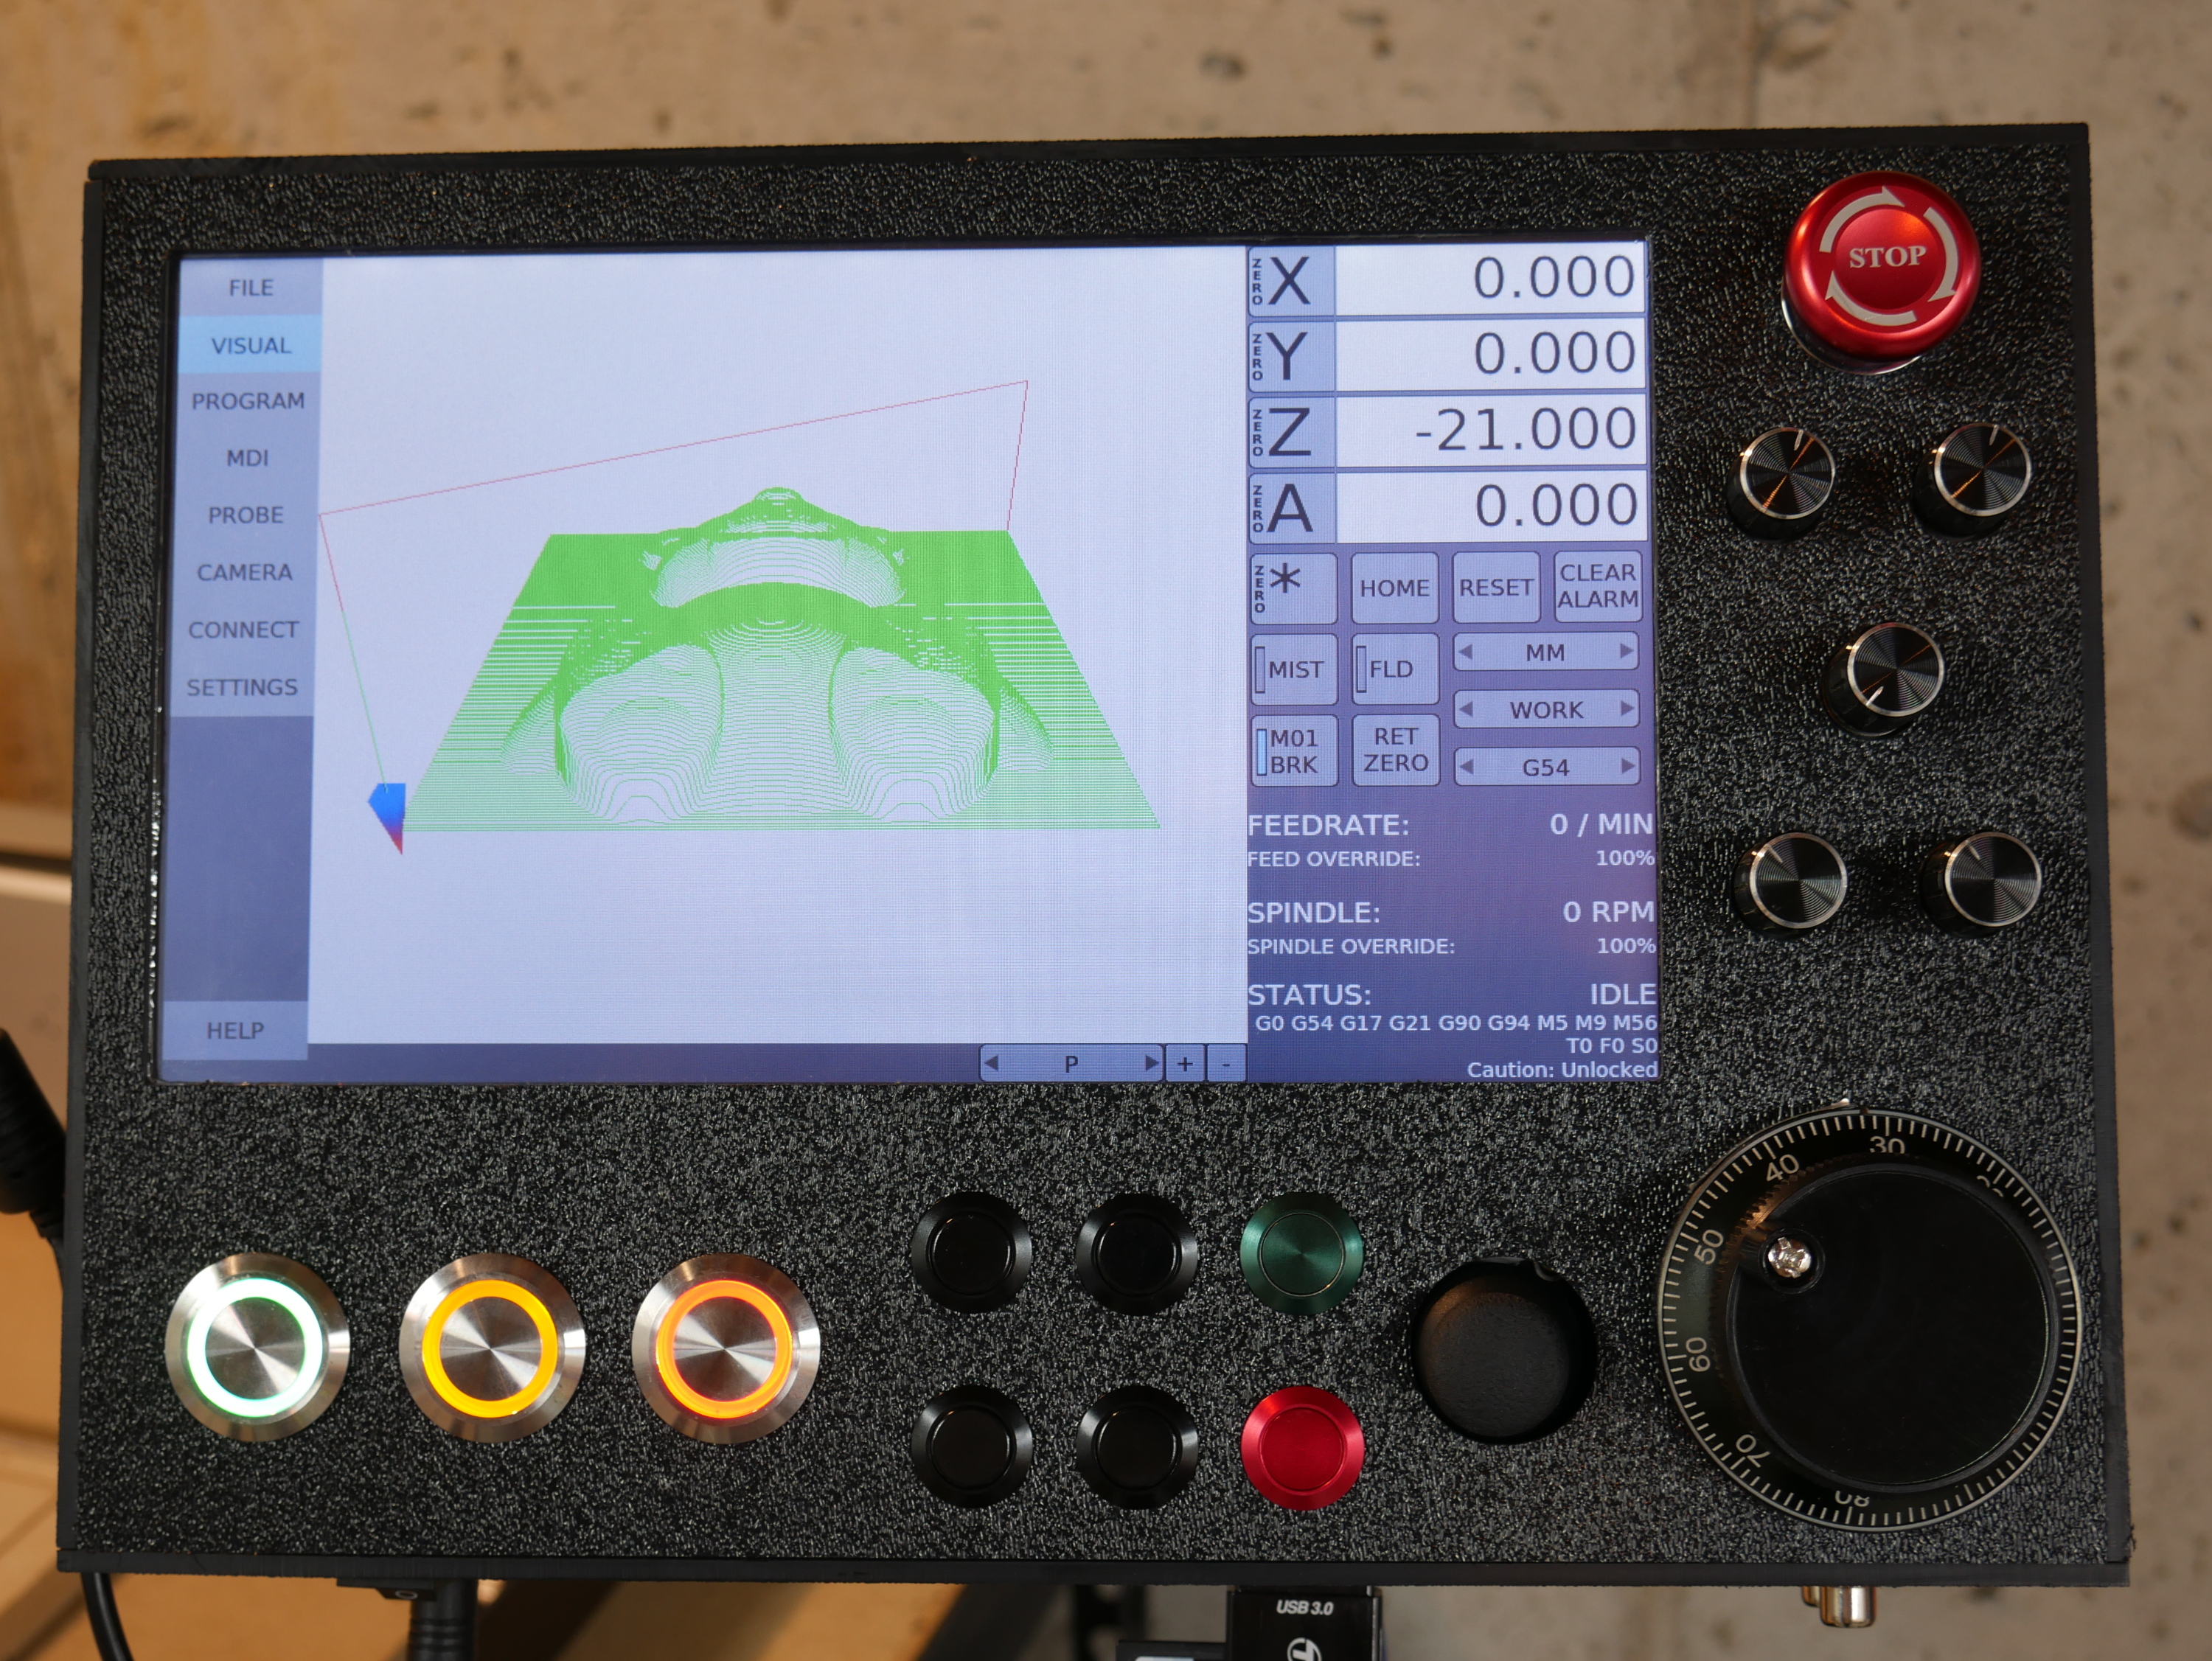
- Added blue lines to visualization window to show the machine origin and axis
- Added purple lines to visualization window to show the work coordinate origin and axis
Really nice work, @Uriah! Any chance you’ll share the code or create an image?
@Uriah Super excited about your Control Panel. I would be super interested in purchasing one if you ever have them for sale.
Wow that looks like a great upgrade! Please keep the updates coming.
I’ve thought about doing something similar(in terms of large format touch screen) with my Surface Book, I’ll have to wait till winter is over before I can work with no gloves in my shop though!
X2, I would buy one too:)
Let see if we can get enough peeps to buy one so it makes it viable for Uriah to make a production run.
Who else is in?
I would buy one!!
This would be a huge upgrade for my xxl, but well worth it.
@Uriah, What do you think the price point would be for this unit?
I mostly do production runs on my machine. Both router and laser. So this would make my workflow much smother!
holy crap that is awesome
Dang man that’s insane
Shut up and take my money
Nice, and good writeup on Hackaday. Keep us informed
Thanks guys! I appreciate the feedback. I just posted an update on Hackaday explaining how the onscreen keyboard works. Below is a summary.
Classic platforms such as Windows and Linux/X were designed long before touchscreens were common, their integration of onscreen keyboards is often non-intuitive. The onscreen keyboard in this project seeks to operate more like an iOS or Android keyboard and avoid the issues of Windows and Linux/X ones.
The goals of the onscreen keyboard were as follows:
- Automatically appear when an input box has focus
- Directly input into UI controls and not via separate Input Box
- Go away when the input box loses focus
- Keep the control receiving input visible without moving the keyboard
- Be flexible enough to support multiple languages
Before clicking the keyboard:
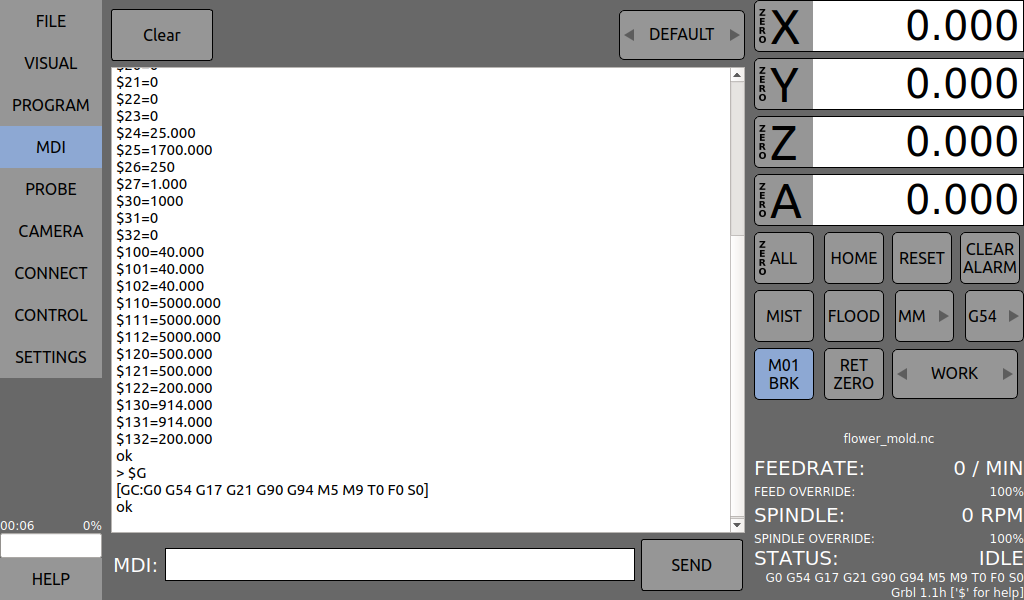
The onscreen keyboard:
Video of keyboard operation:
@Jairo, It’s difficult to speculate on price because there are still hardware options I would like to add and I need to determine the amount of labor that’s required after creating jigs and such (assuming there is enough demand to warrant it). If I do make it available, it would be priced to be affordable for the average Shapeoko user.
I’d be interested in purchasing one too.
Would you look at creating a plug and play unit including the RPi or a kit-type of thing?
I’m definitely following this one. I have a Nomad, but I would buy a Shapeoko XXL if something like this was available to go with it.
That is awesome. Would love to build one of these if you decide to open source the design.
Very cool.
Crazy thought here… but it might be possible to have some Carbide 3D owners help out with the manufacturing. Set up and help batch out parts. It might also be a logistical nightmare.
Like I said, crazy thought.
Count me in as interested in buying one.