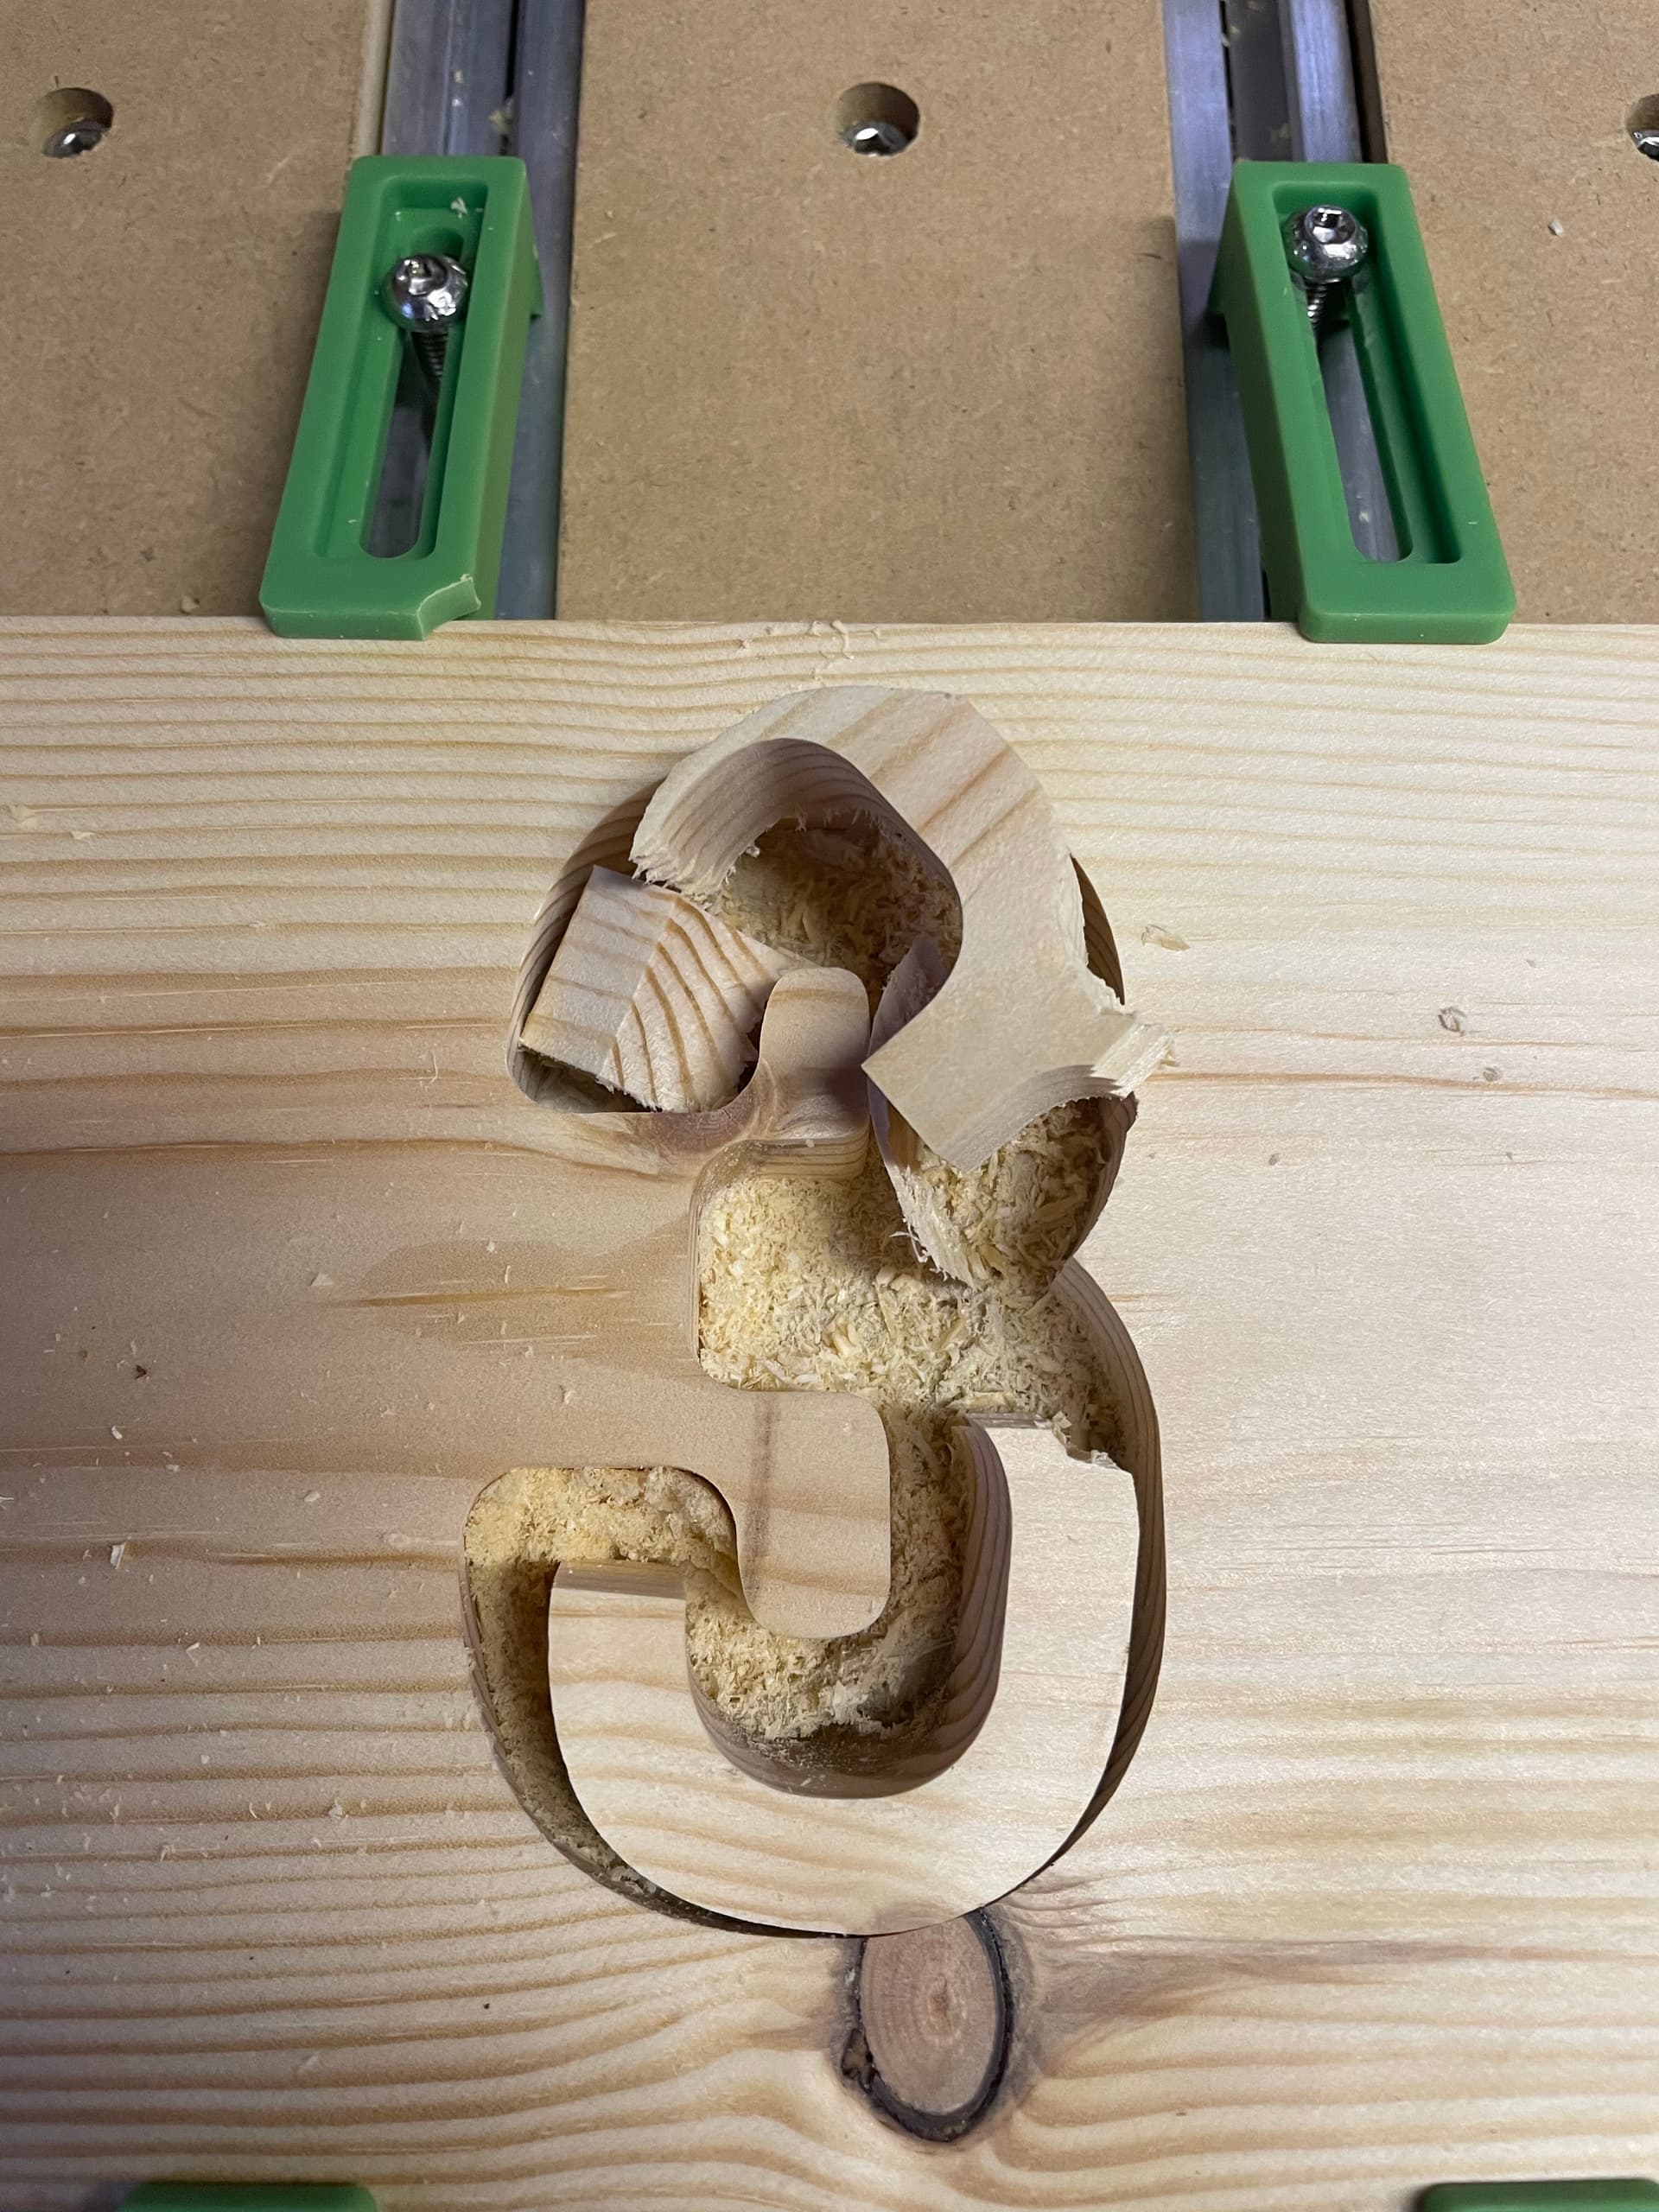
I am still fairly new to the CNC world. When I am cutting out numbers and some letters, the pieces break on me. I am not sure if it has anything to do with bit size, the speed, or what. I posted a picture of what the pieces tend to end up like. I will also upload the file as well. I do have them clamp and double sided table on the back. Any tips would be greatly appreciated.
Thanks!!!
First: As the bit cuts through, the inside wood could be coming loose from the tape and once the bit hits it, it breaks.
Second, the wood grain of pine makes them very subseptable to breaking in the grain on narrow pieces.
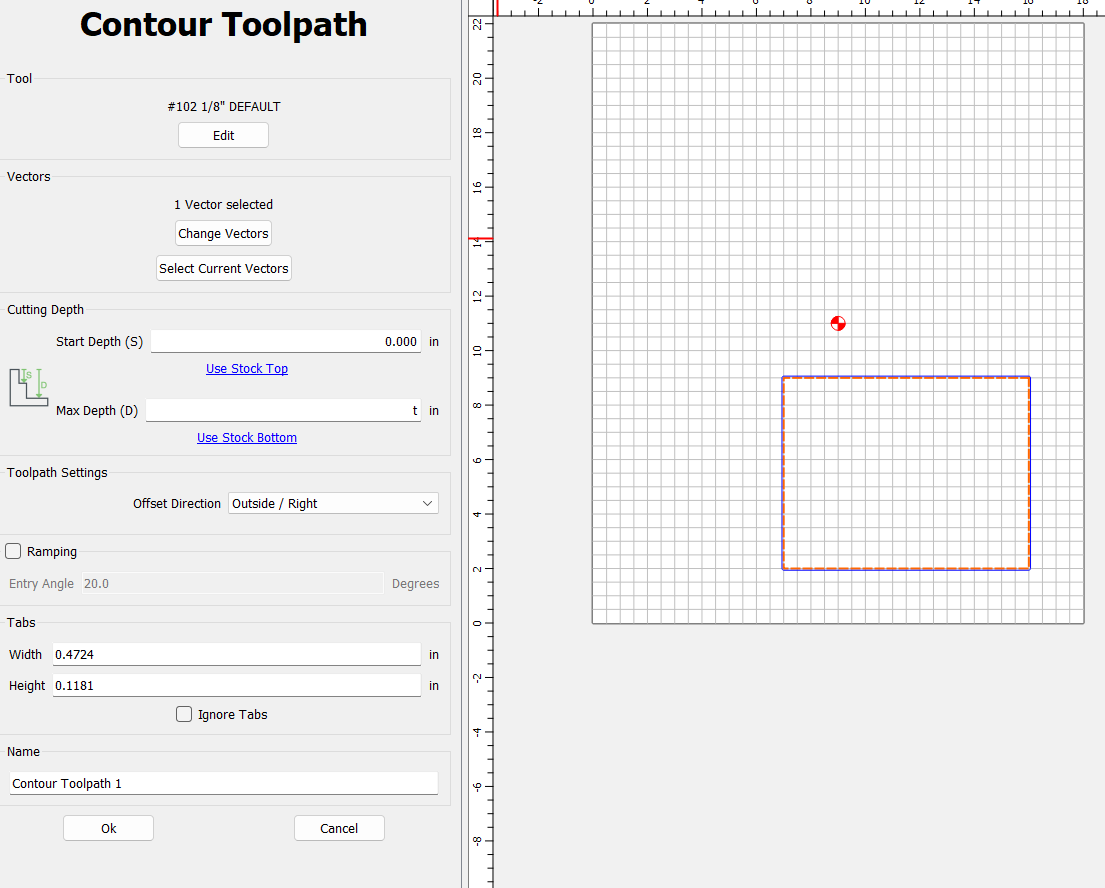
I would use tabs for something like this, so it’s held in place all they way to the end of the cutting process. Then you just flip it over and break or cut the tab.
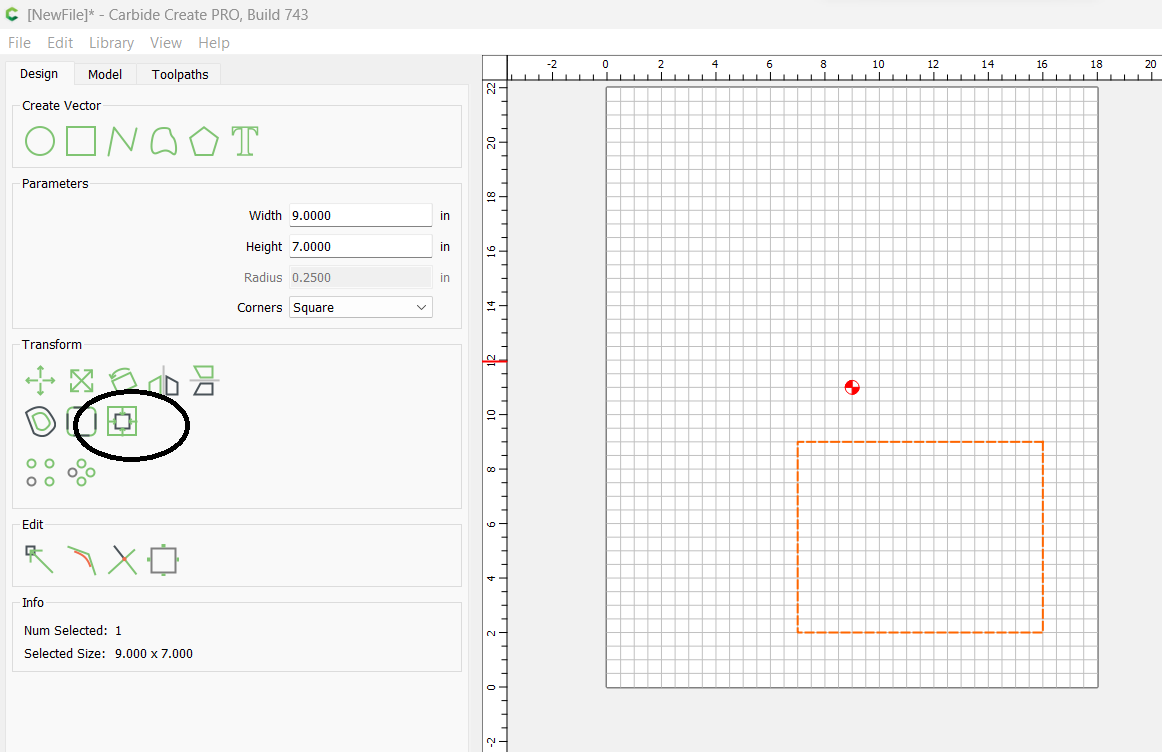
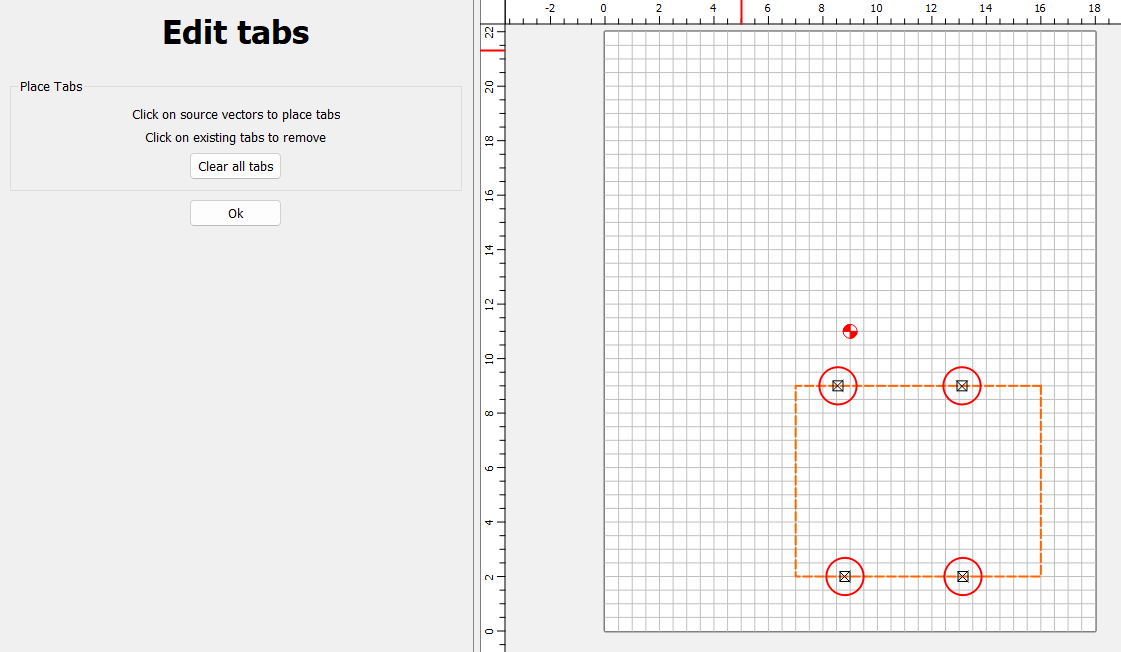
I also don’t see or maybe I’m missing them but you can add tabs to the material on the design page by clicking on the line where you want them and adjust the tab size in the contour tool path it’ll keep the piece from moving when the machine makes its final cut.
When you create the tool path you define the length and depth of the tabs. They are not added there. Go back to design and highlight the object and there is an add tabs button. The tabs will be added where you click and are defined in the tool path.
The most obvious change that I would do is the grain direction. Turn your letter/number 90 degrees so the grain is lengthwise through the narrow section instead of crosswise. Its a trade-off with letters and numbers being cut in so many directions.
Also, get rid of the double-sided tape. Use the tape-and-glue method of holding down your parts. From the photo, your parts could very well be lifting, moving and jamming into the bit on the last cut through. This goes to what @WillAdams says in his post.
Also, be careful not to overload the machine with too deep of a cut. Feeds and speeds go along with depth of cut. Start small and go big gently and carefully. Get a feel for what your machine can do and listen to it talk back to you.
Was this picture what it looks like at the end of the job before you moved anything? Looks like your double sided tape may not be holding the work piece well enough. Adding tabs is the first thing that comes to mind, or using a better method to hold the pieces to be cutout down when the cutter goes all the way through them and they are no longer connected to the clamped down stock.
Thank you all for reaching back out and for the tips. I didn’t think about adding tabs. Like I said, I am still trying to learn my way around this beautiful machine. However, I will say it is truly a love/hate relationship. The whitewood was some scrap I had laying around the shop and it’s also fairly cheap, so its why I used it. Thanks again. I absolutely love how responsive this community is!