If there is anyone out there doing epoxy resin lettering with the Pro XXL, what would you suggest as a starting product for someone who is just now starting out?
Thanks for any suggestions in advance.
Charlie
If there is anyone out there doing epoxy resin lettering with the Pro XXL, what would you suggest as a starting product for someone who is just now starting out?
Thanks for any suggestions in advance.
Charlie
I’m using two types. A faster set that I’m mixing with paint from Total Boat. And a table top epoxy when I want a really flat surface with no chance of bubbles. For the yellow color I mix paint directly into the epoxy.
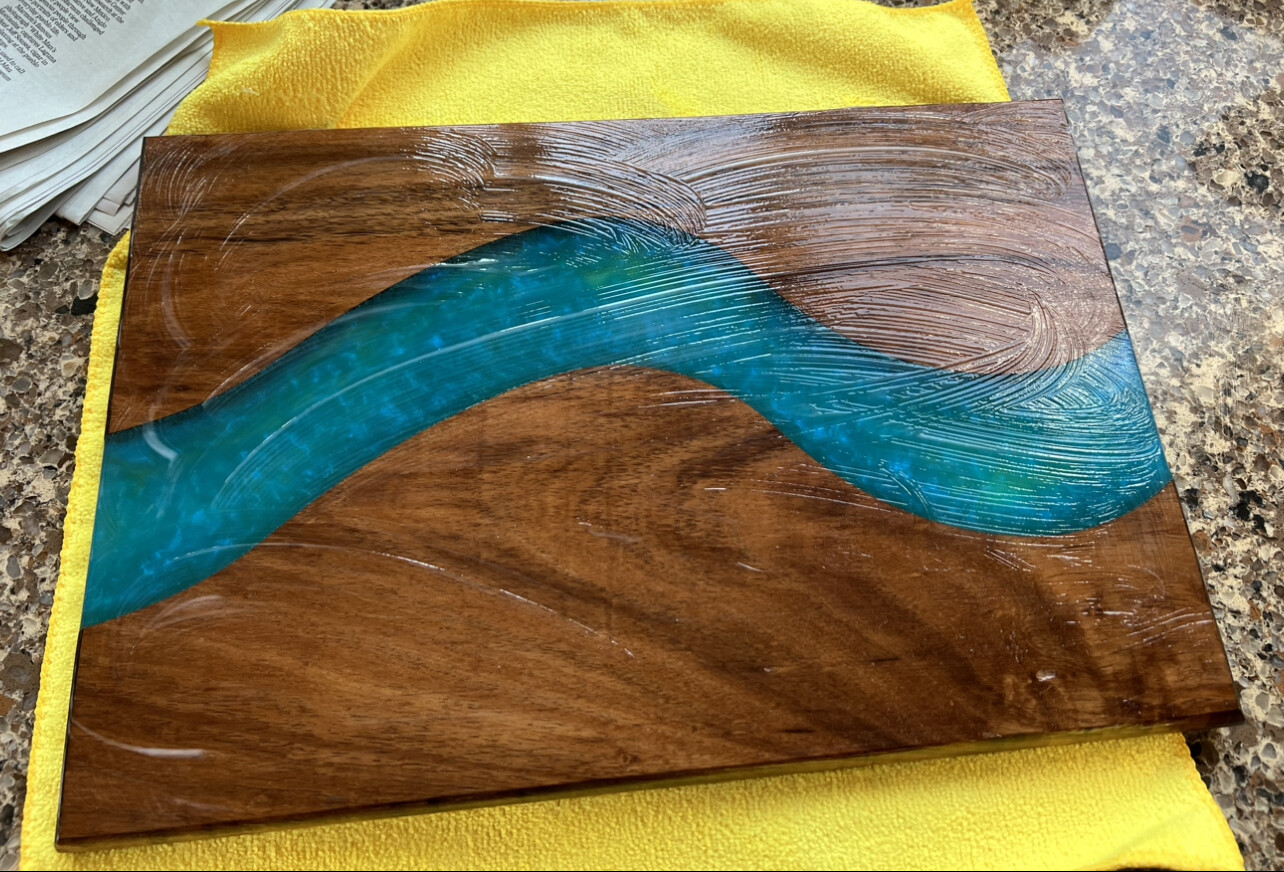
I used this for my first adventure in epoxy.
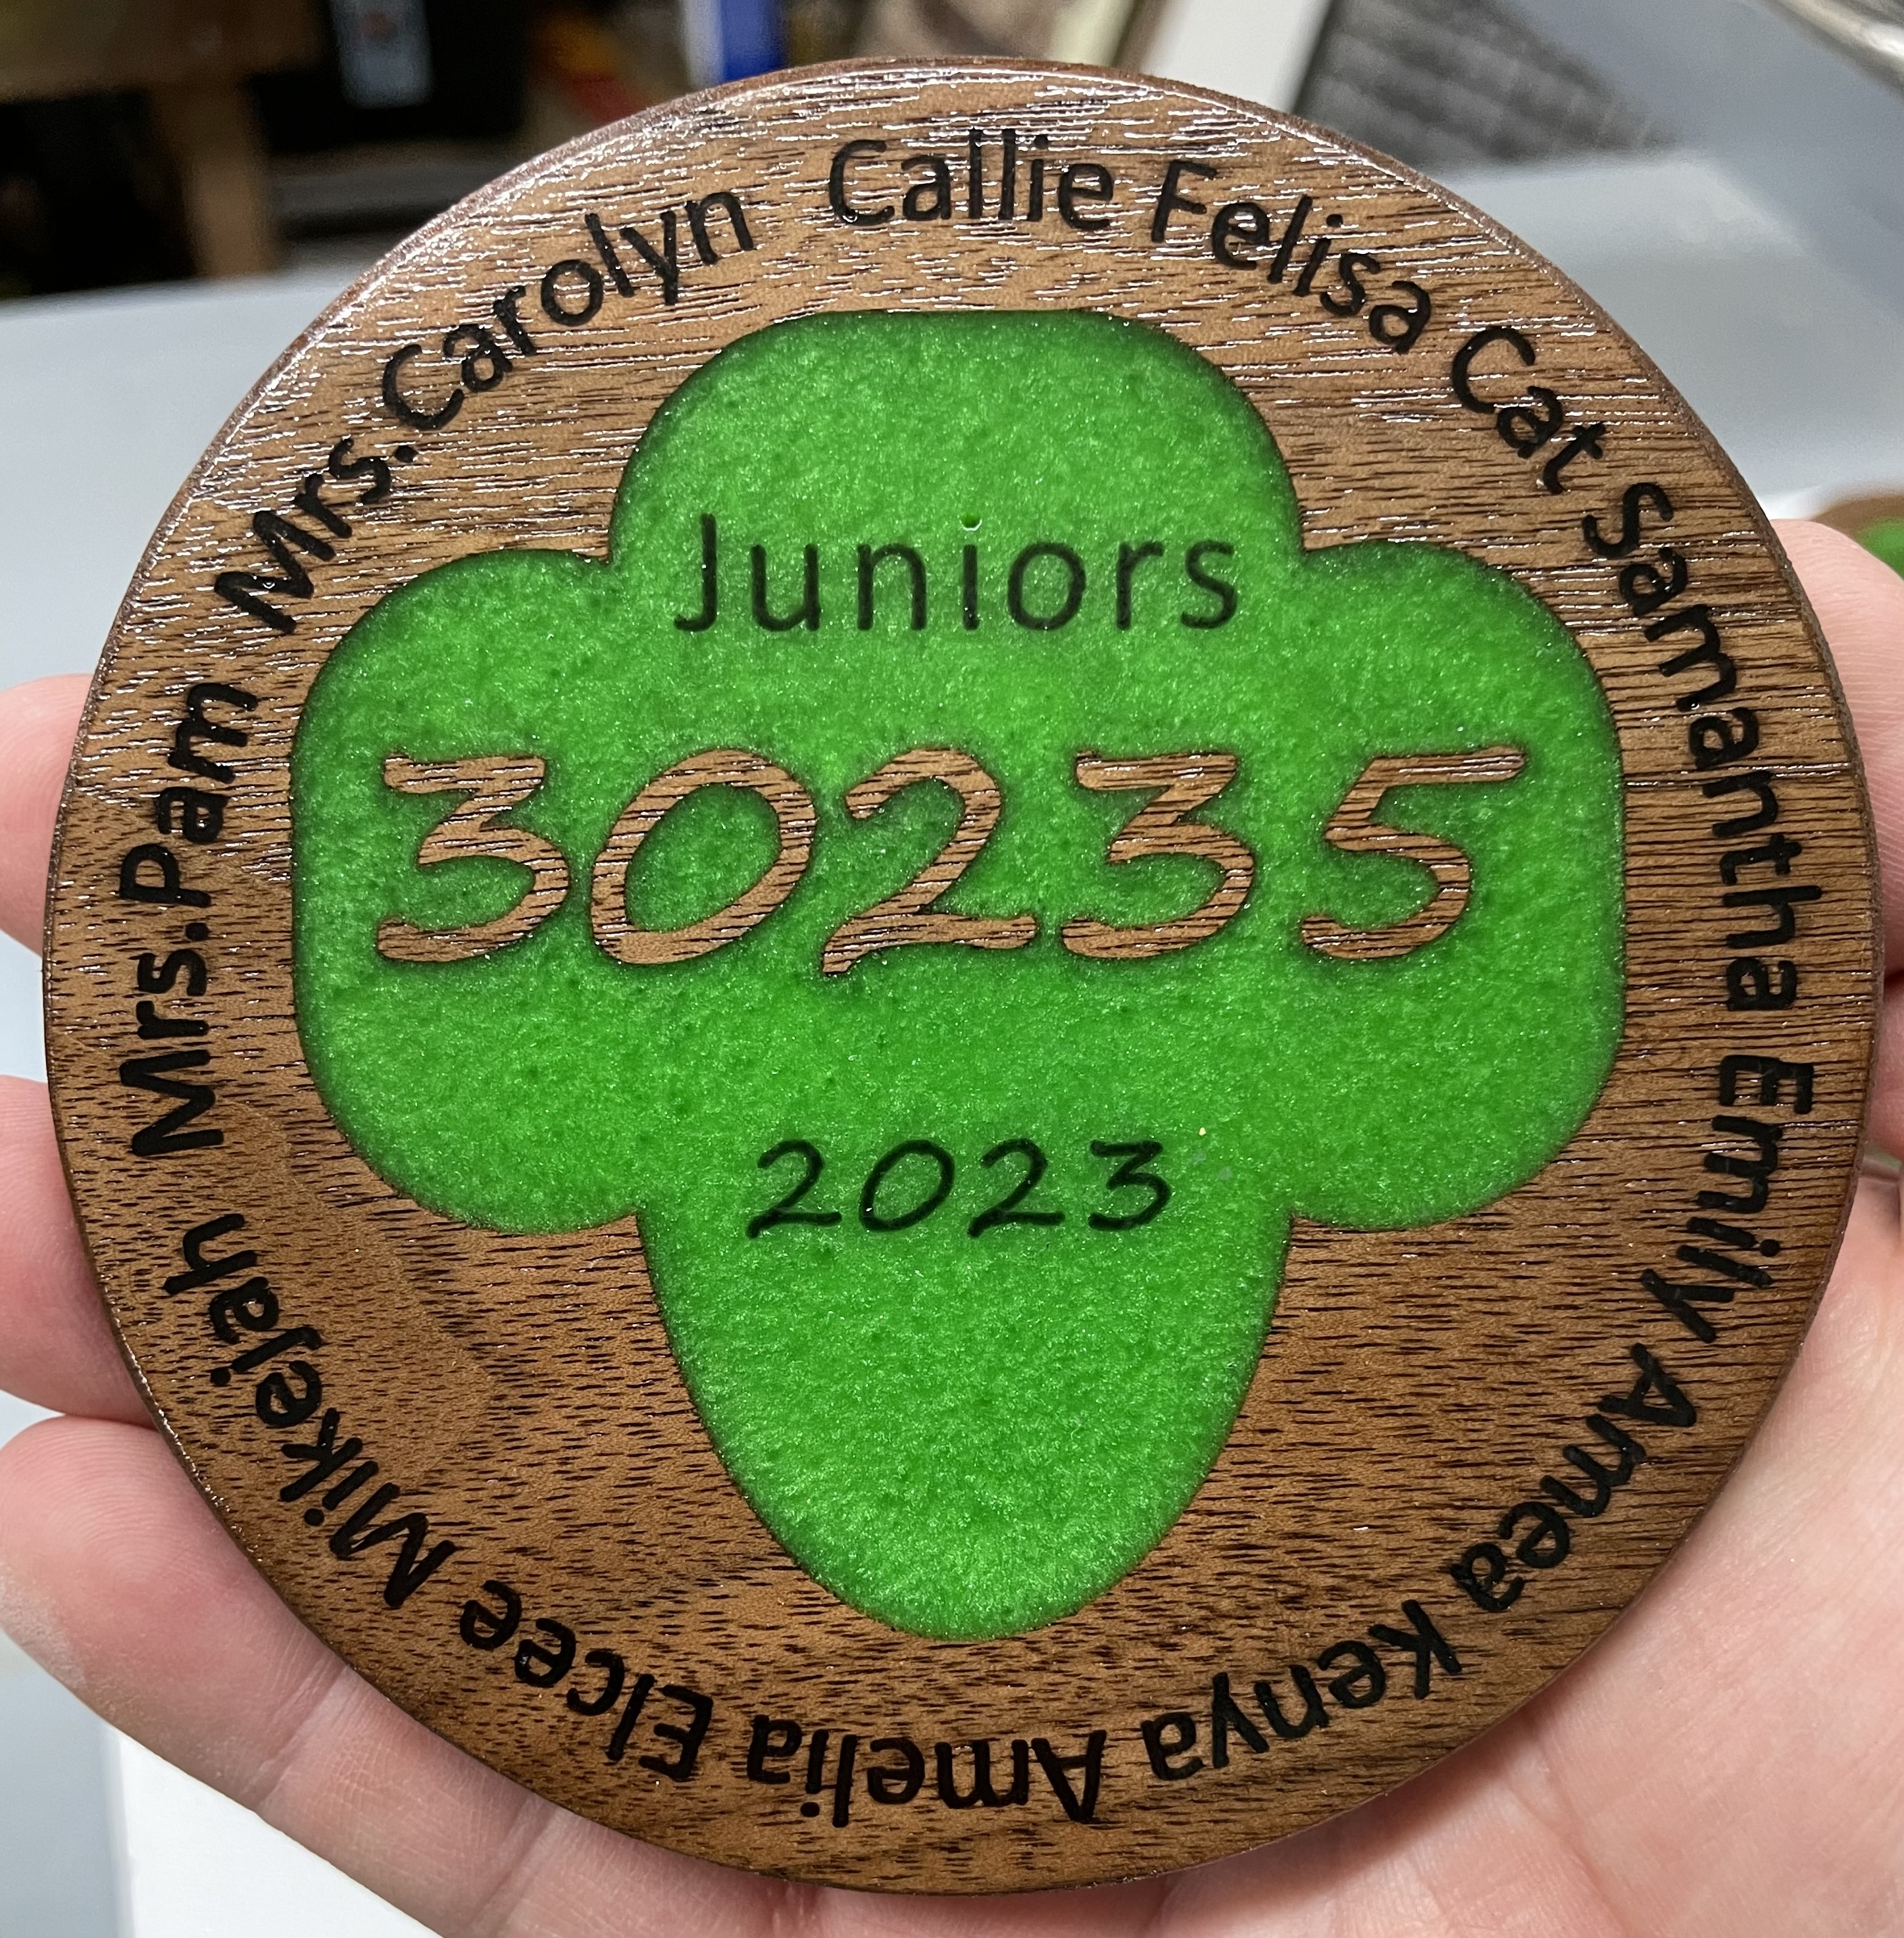
I have used it for lettering in coasters. I apologize to anyone that has seen the pics below a million times.
The first one is black epoxy for the lettering and green mica mixed in for the logo.
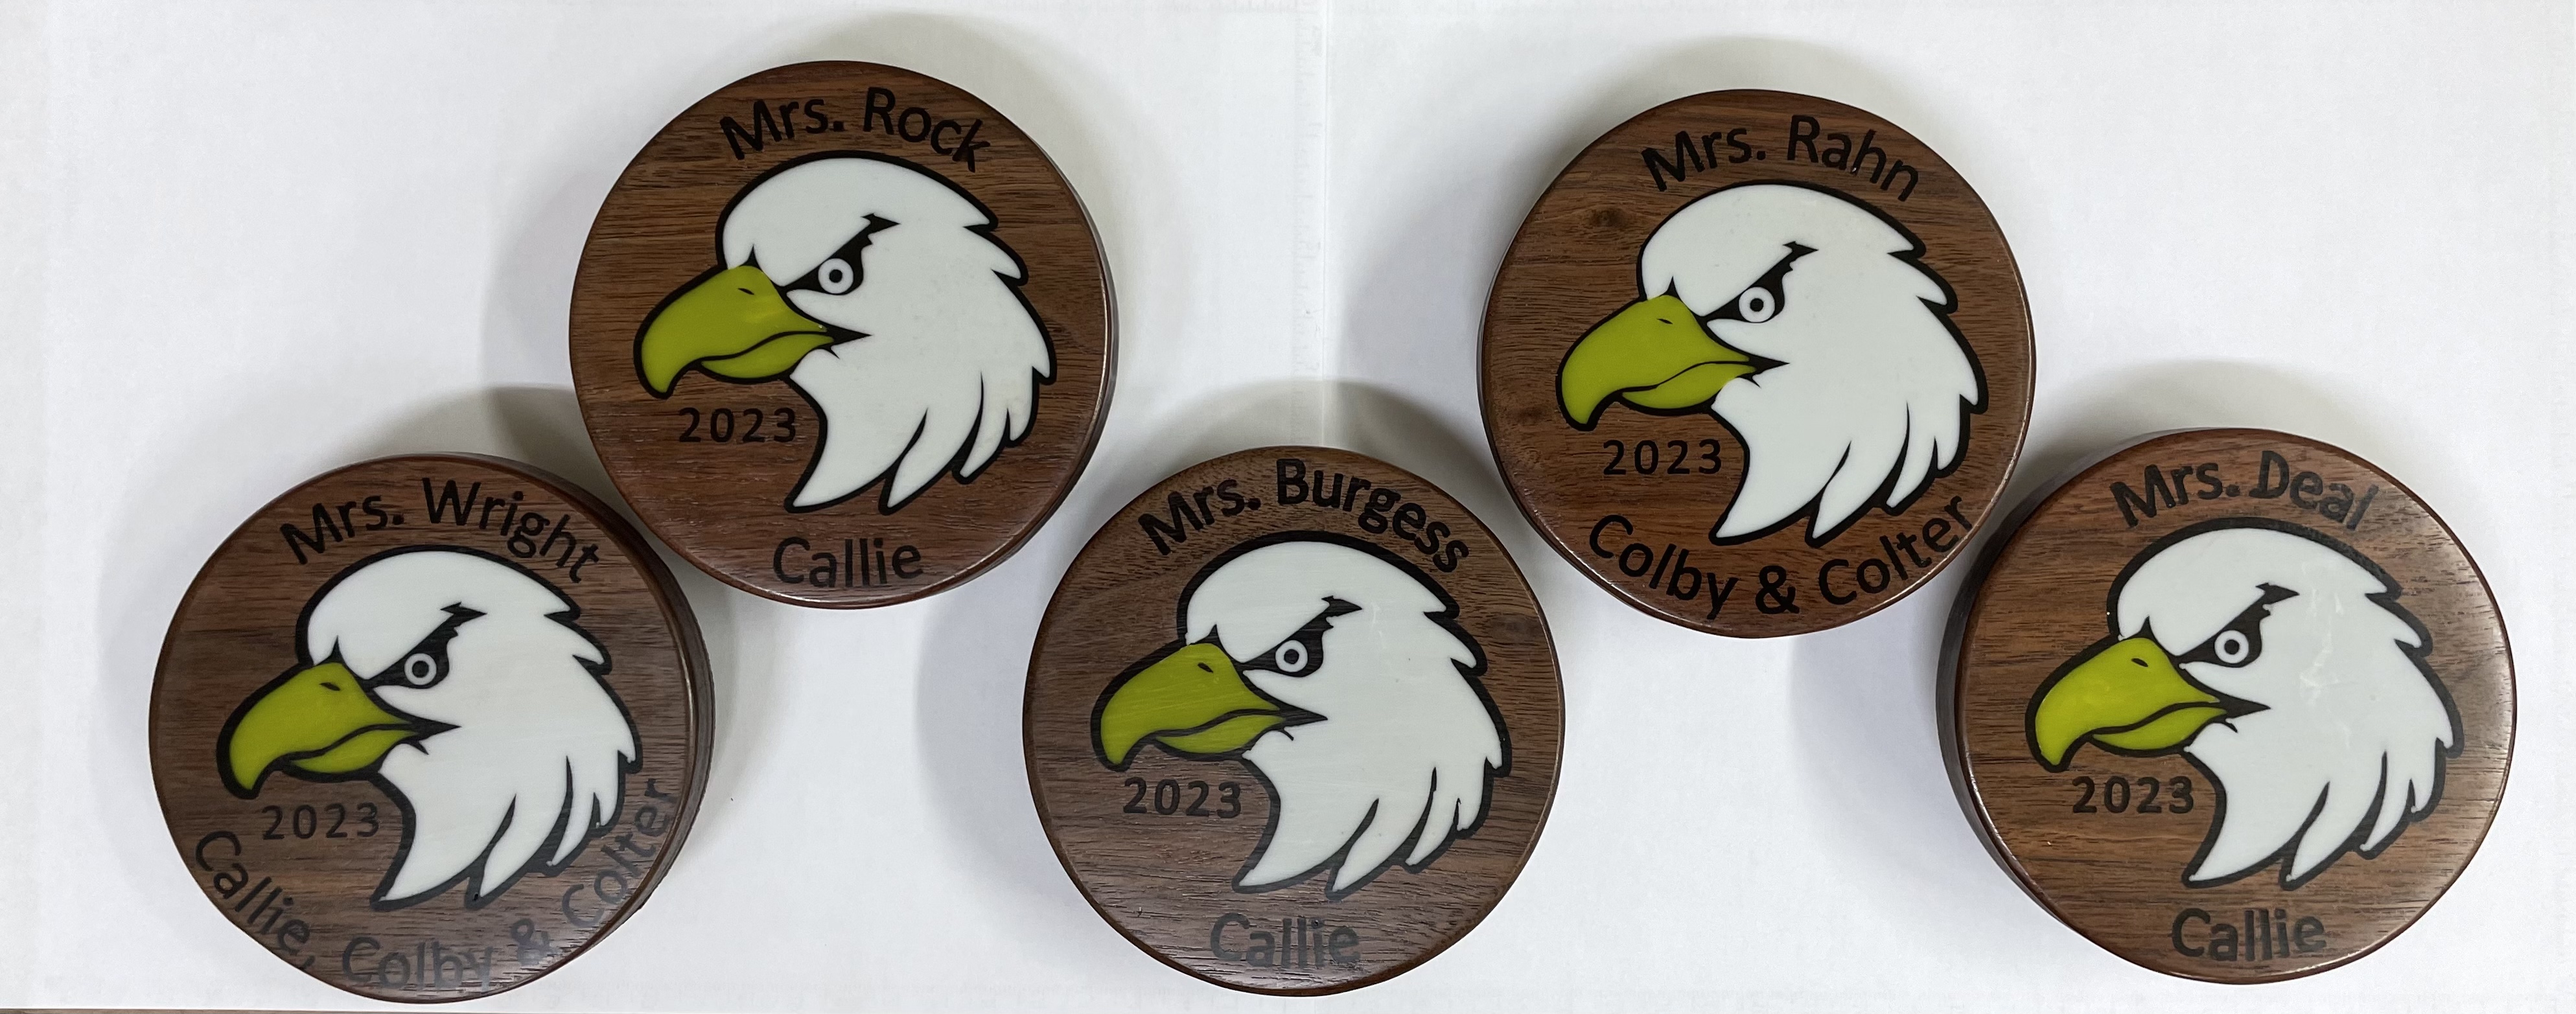
This one has black, yellow and white epoxy but I used liquid dye this time that gives a much more consistent color. Depends on the effect you are going for.
After my first attempt I did end up buying a torch to help with bubbles.
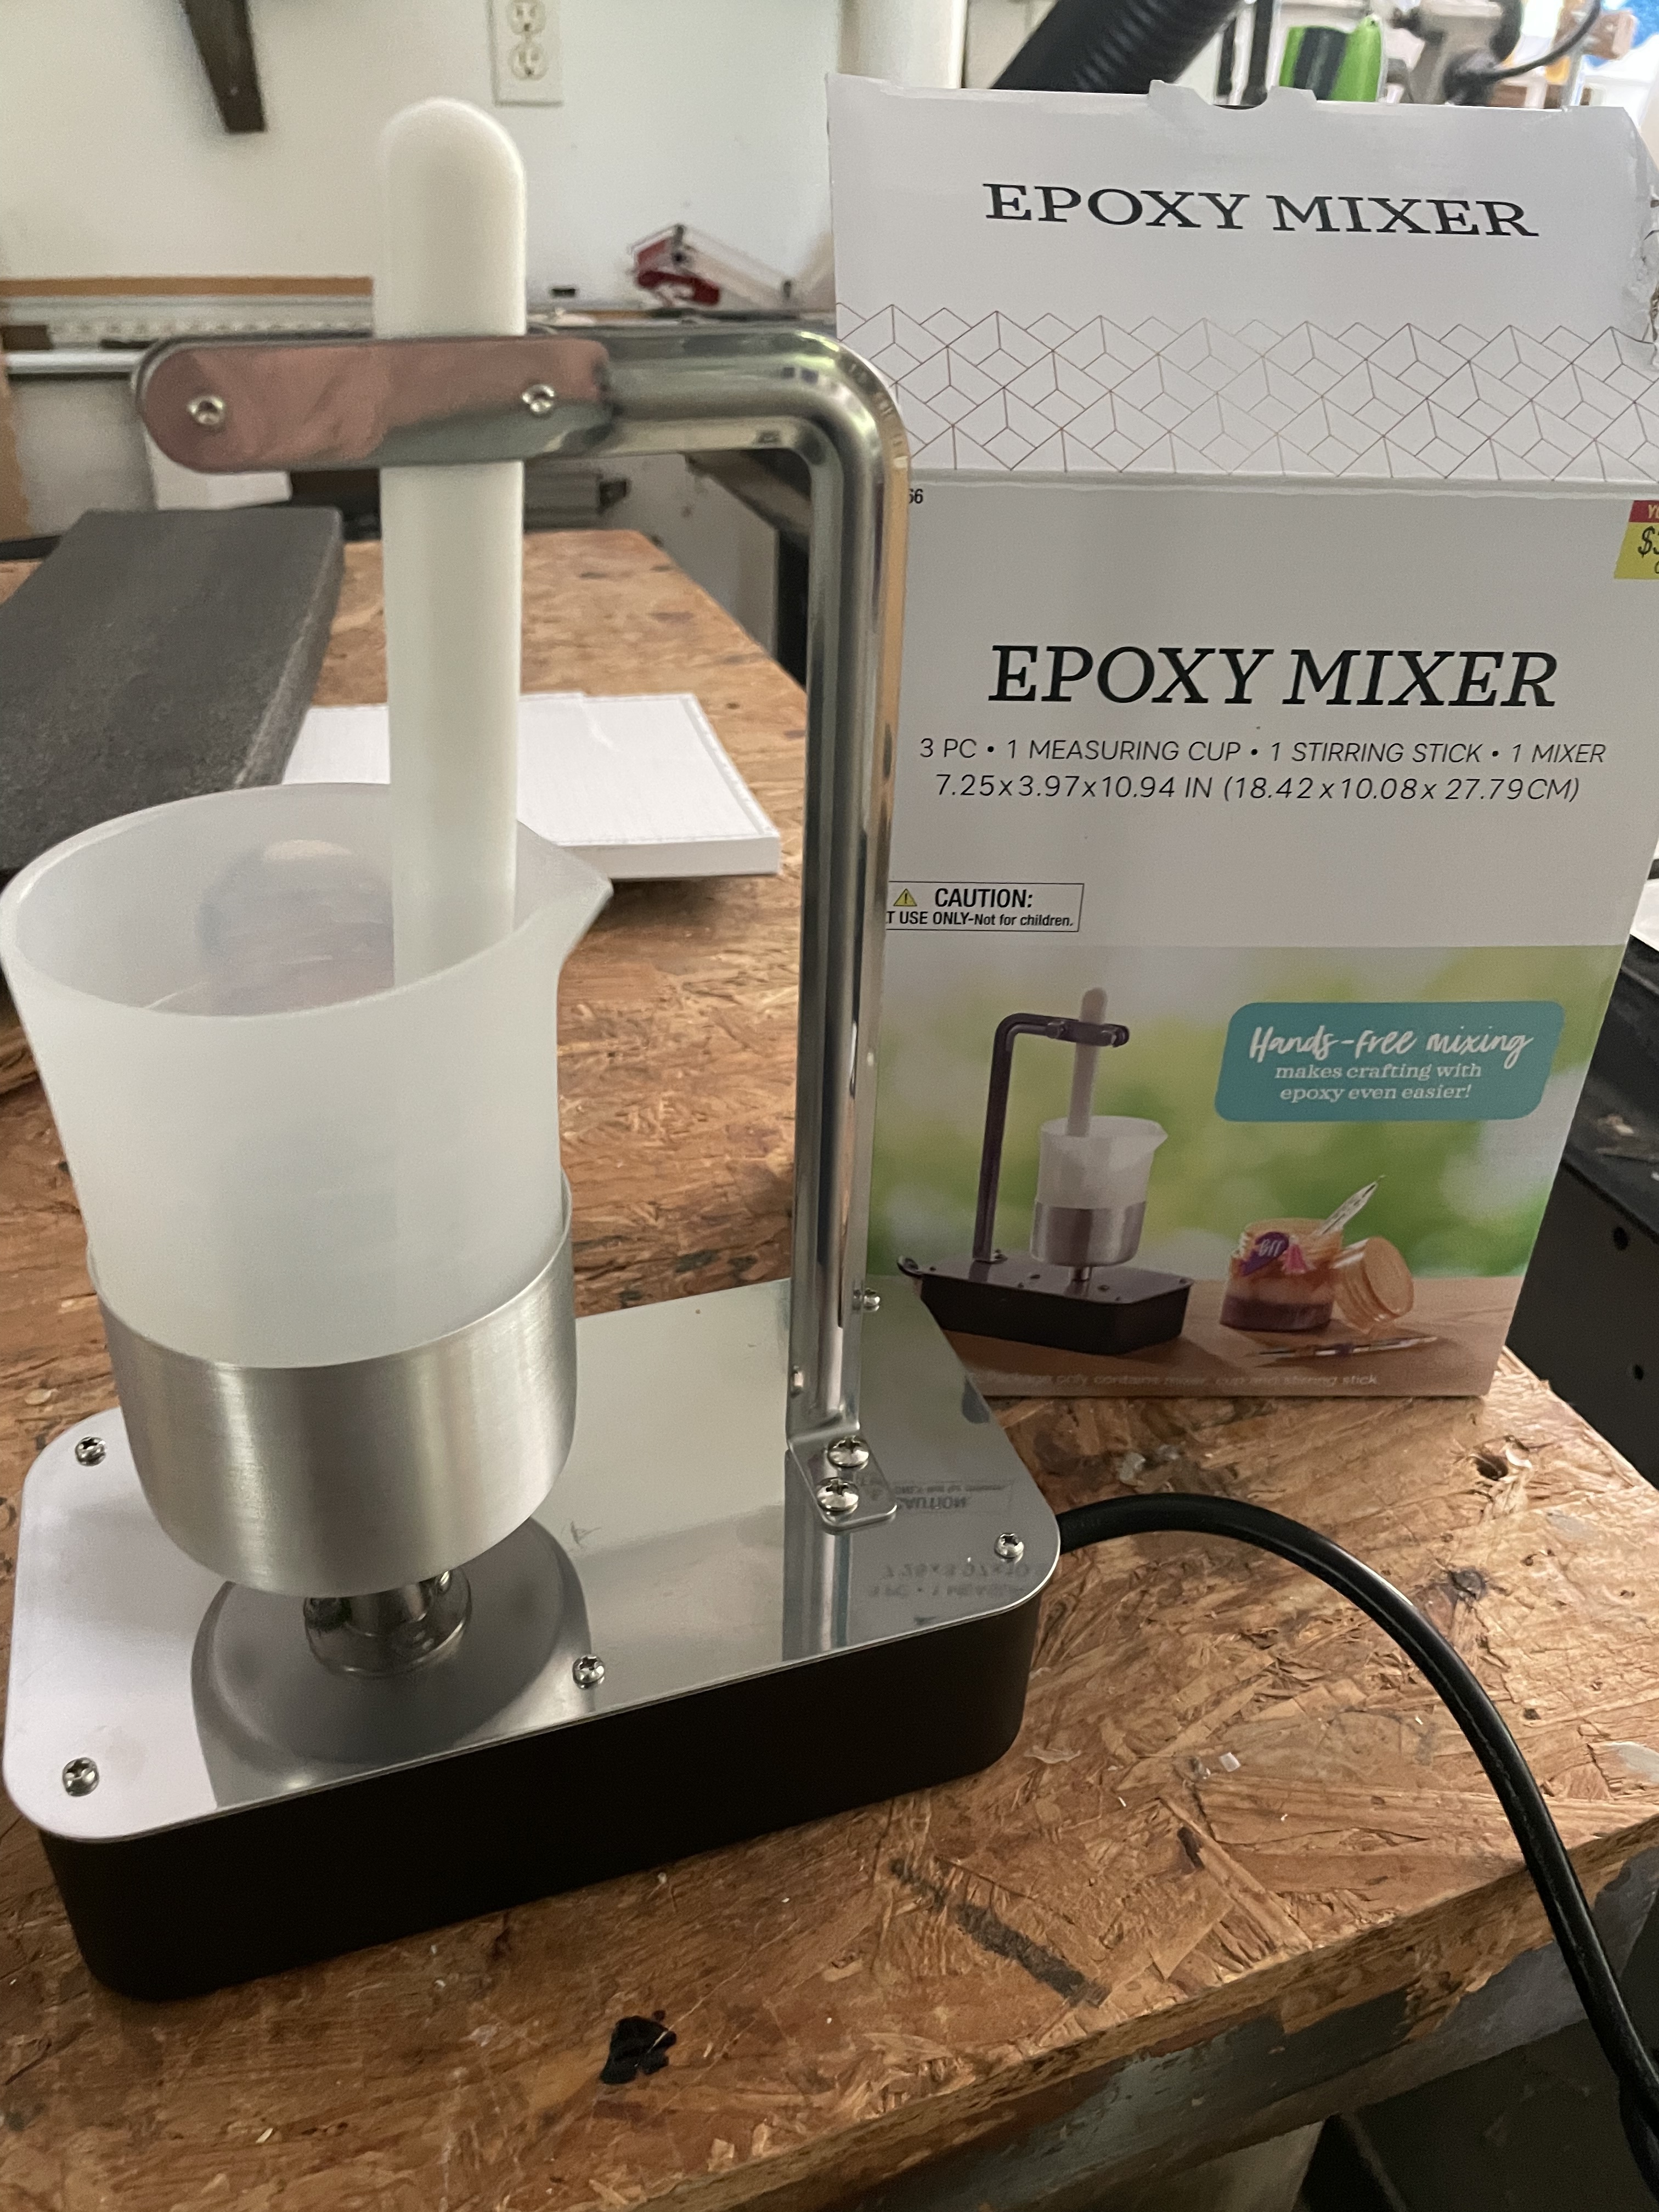
I also ended up buying an auto stirring rig for about $35. It allows me to do other things but more importantly it does a more consistent job of stirring.
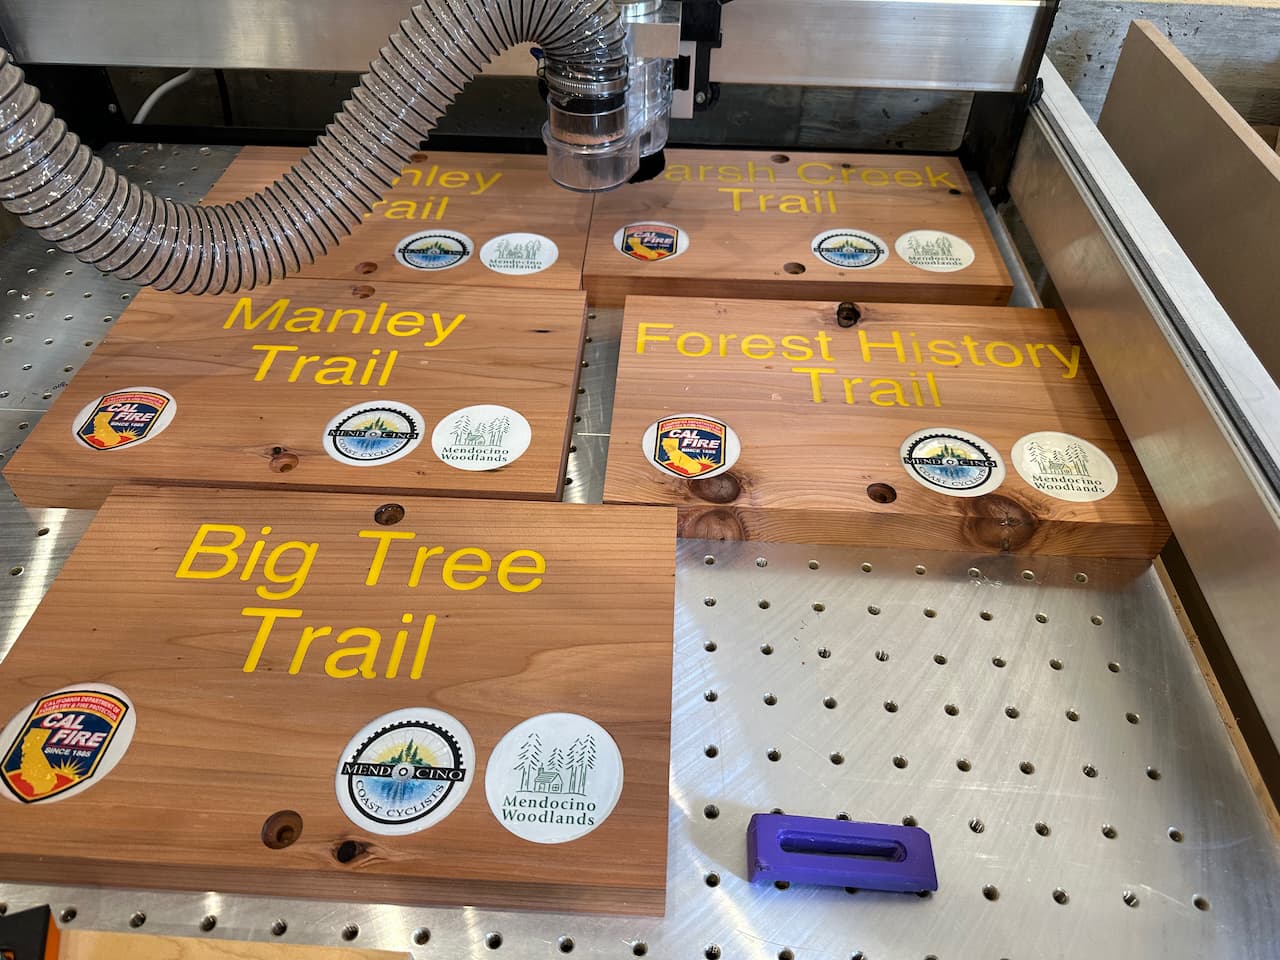
I love those trail signs. I want to make some signs for the local Girl Scout troop. Are those cedar? How wide?
Nice job on the coasters ![]()
The wood on the signs is redwood. It came rough from CalFire. I ran it through a planer first.
Nice. Wrong side of the country for me to get redwood at any reasonable rate.
It’s tough to get wide planks of anything without doing a glueup.
I have filled a lot of projects with MAS Table Top Epoxy. It is rated up to 1/4" thick. The MAS epoxy gets quite hot and tends to get a lot of air bubbles. I use a torch or heat gun to bust the bubbles. The MAS tacks in about an hour and dries overnight. It is not fully cured for 24-48 hours but is set hard in 12-18 hours. The MAS is readily available and takes color well. I used a solo disposable cup on the first use and it started to melt the cup. I bought several plastic mixing cups from Amazon and that solved that problem. The trick is to mix slowly but thoroughly. The harder you mix it the more air bubbles you introduce. Plus you need to seal the wood with shellac or something to keep air from the wood rising up.
I have used Magic Resin for deep pours. The deep pour epoxy takes a week to fully cure and is not really a good thing for shallow pours. This epoxy is liquid for 12 or more hours and if you add certain colors it will sink to the bottom and must be stirred when the epoxy gets to a jello like state to get the color distributed evenly.
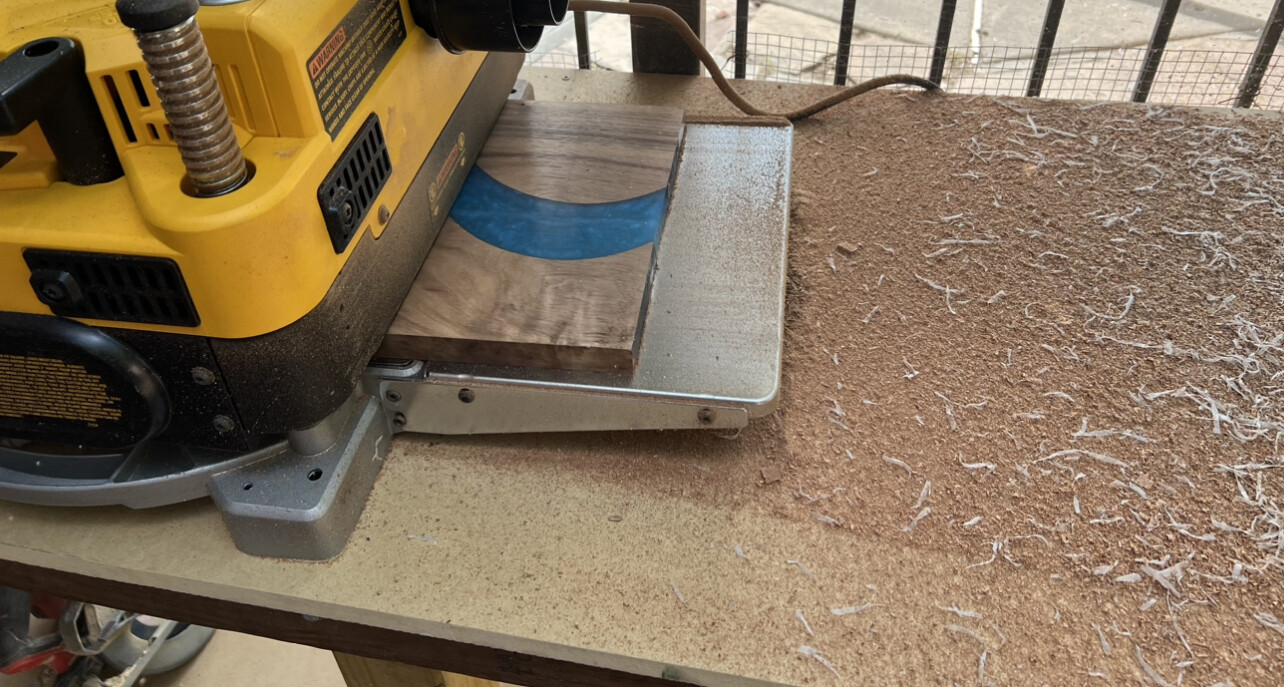
I use four different types of epoxy from two different companies. Ecopoxy is where I get my deep pour epoxy, works great for anything that I need zero bubbles. Then I use Amazing Epoxy for quick, fourty minute epoxy, for shallow pour, 1/8", and a their thick pour, 3/8", this is what I use for almost all of my epoxy inlays that are getting colored where bubbles are not a concern. It is always harder to get bubbles out of a fast curing epoxy, but over time you will learn how. Do yourself a favor and learn to seal your work prior to pouring and dont listen to anyone that says you cant run cured epoxy through your planer, I do it all the time. A form to put your work in will prevent you from searching “How to get epoxy out of (insert word here)__”. and remember, epoxy is easy, but it is a learning experience. Dont worry if you ruin pieces and throw a few away, it happens to all of us. My first throw away piece came after two years of doing epoxy, it happens.
I have been using the CNC for flattening on the coasters but it is a bit nerve racking as occasionally the job goes too deep.
I have been worried that running through the planer with little blobs of epoxy proud of the surface that it might grab. I do have some mess ups from a previous project I may try though.
I would hate to have planet snipe mess up a project so I guess I can keep a few inches on either side free from the real work.
Mileage varies using a planner to remove epoxy overfill. I have used the planner but got burned a few times. Now if I use the planner I get it so some epoxy is left on the surface. Then I use my Jet Drum Sander to finish. The planner is quite violent and it does not really like epoxy. I have also used the planner to remove wood inlay and twice I thought about stopping and made one too many passes and ripped out some of the inlay.
So for epoxy fill I use the planner and leave a skim coat, run through the drum sander and finish up with a 5" random orbit sander.
Yesterday I filled a sign for SFA Sylvans lumberjack team. I ran it through the planner and got significant tearing of the purple heart even though I left a skim coat. The drum sander was able tame the tearout but not totally. With the random orbit sander I was able to smooth things out using 120, 180 and 220 grit paper.
So use the planner sparringly. The difference for some people maybe the epoxy used. I used MAS Table Top epoxy and my Dewalt 735 does not like epoxy.
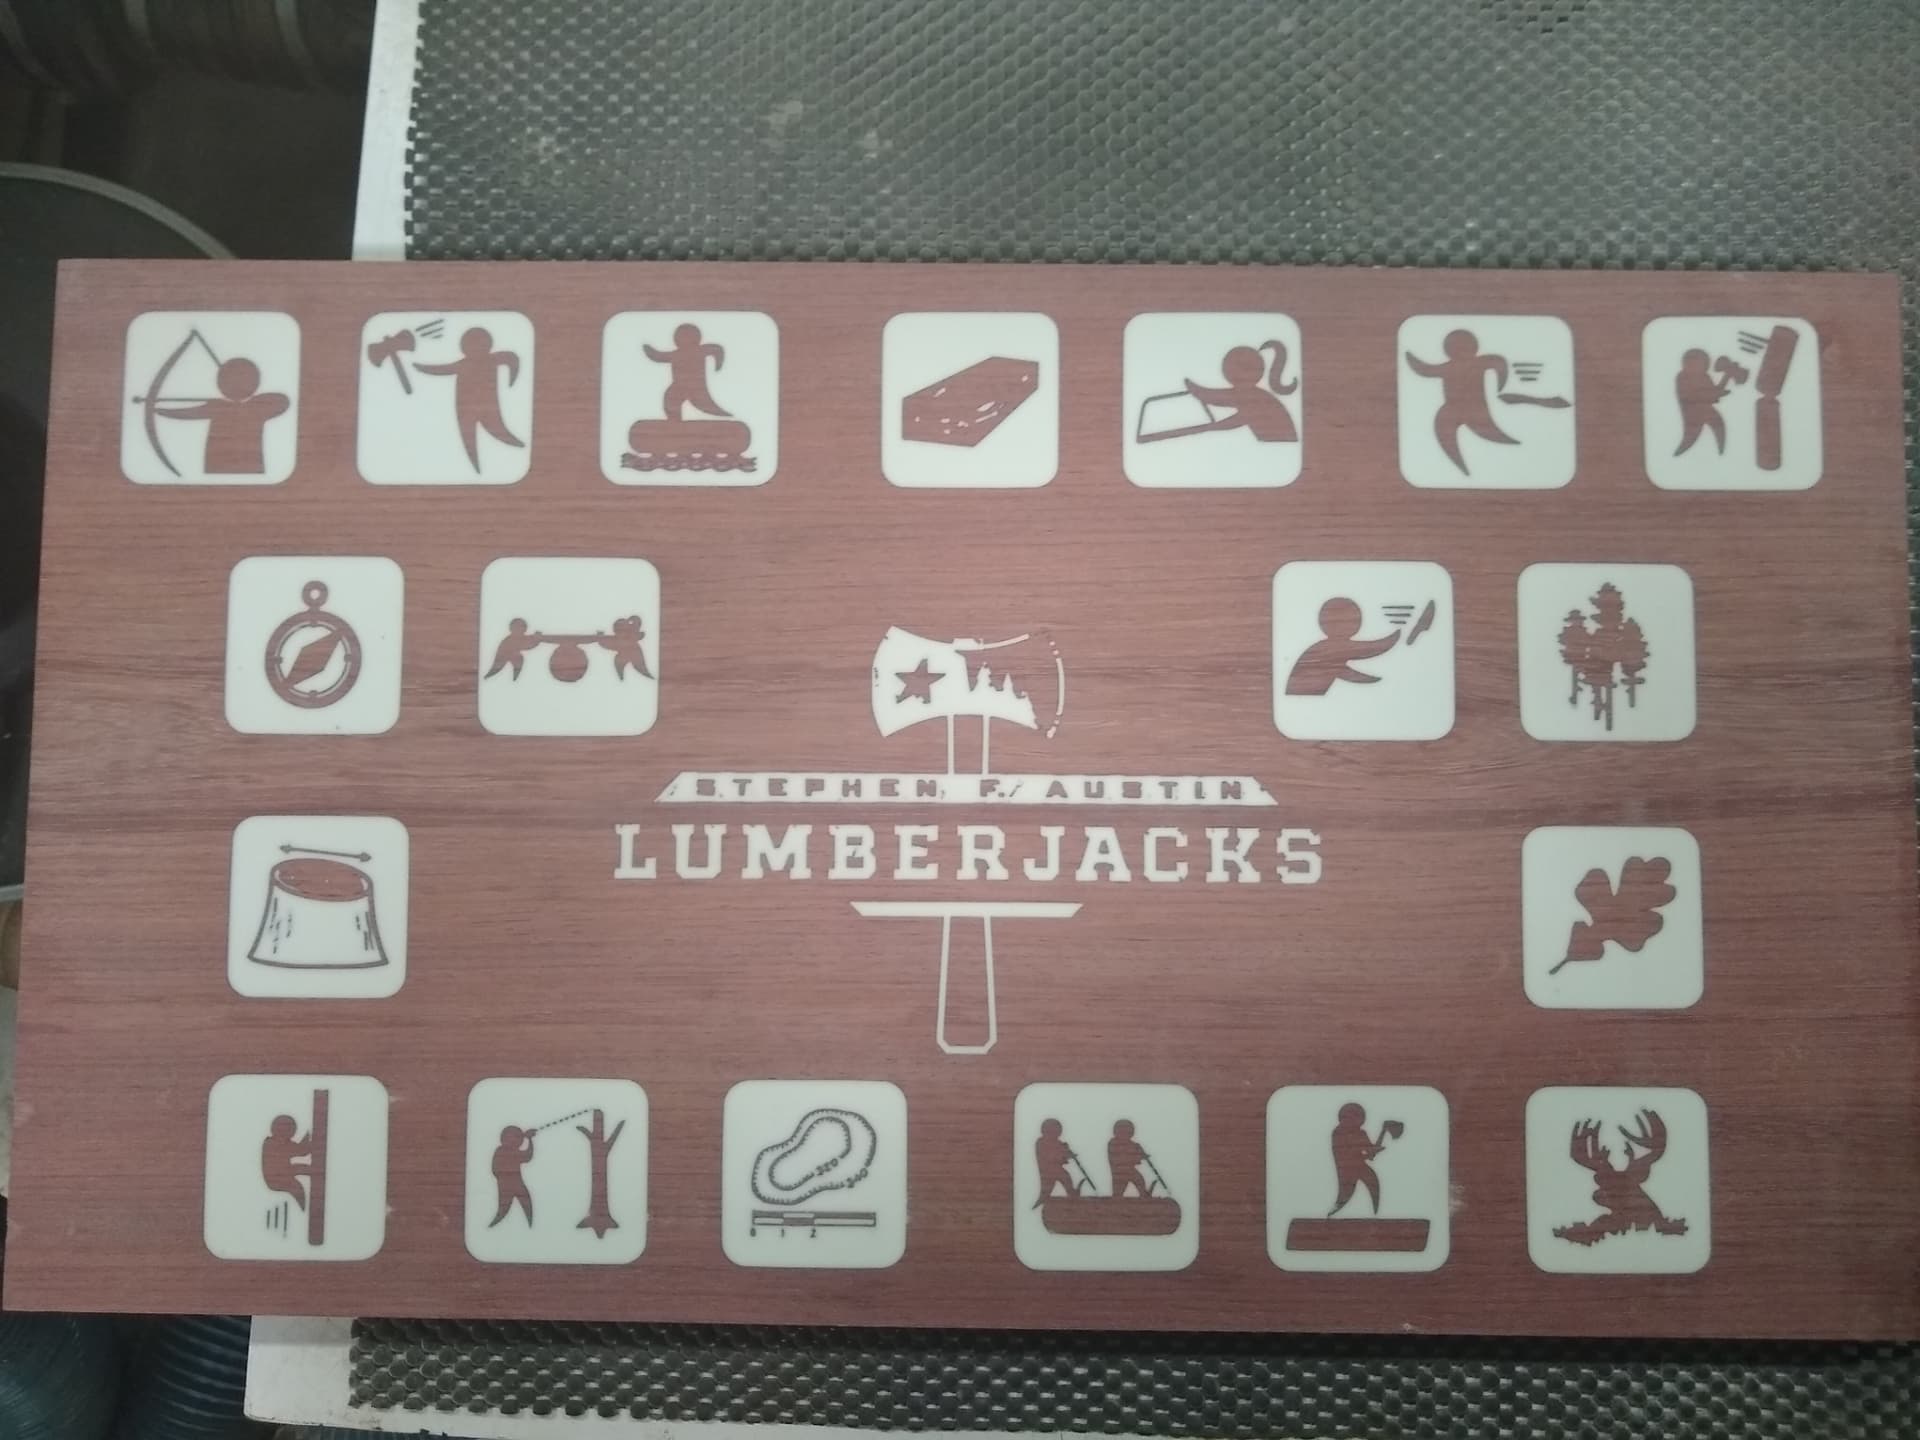
This is only a prototype and some mistakes were made. I only carved to .1" and should have gone .15 or .2". These icons are only about 1.5" square and in the SFA Lumberjack there was some areas that were not deep enough and after planning, sanding and finish sanding the axe is a little light around the head of the axe. That is the purpose of the prototype to work out the bugs. The sign will likely become a wall hanger for some of the staff at SFA and wont go to waste. The sign is 19.5" long by 11" wide. The icons are about 1.5" square. The icons represent the events the lumberjack teams compete in. They have male, female and coed teams for some events, thus the ponytail on some of the avatars.
The epoxy was MAS Table Top with Alumite White Epoxy Dye. I mixed up about 6 ounces because that was the last of the bottles I had and did not want to run out. I likely wasted about 2 ounces but it would likely have been wasted anyway. The Part A was less volume than the Part B so I poured the part A first on a scale and added a 1-1 ratio for part B leaving some waste in the part B bottle. The bottles may not have been exactly the same from the factory or during 8-9 used I did not put as much B in as the A. I always use a scale with the fluid ounce setting and zero the scale with the empty mixing cup.
The purpleheart was given to me by the SFA Forestry staff to make these signs and I got 3 splinters handling the rough cut purpleheart. I have not had that many splinters in 10 years. The last time I got splinters was working with wenge. I have a special pair of tweezers to remove splinters and really needed them with the purpleheart. Another issue I had some some of the boards was there were dark streaks that turned out to be resin in the wood. I planned the wood and a couple of days later the dark streaks returned. Other boards were still nice and purple after planning. There was no guarantee that the boards were from the same tree. So if you buy purpleheart and you see dark streaks maybe pick another board at the lumber yard.
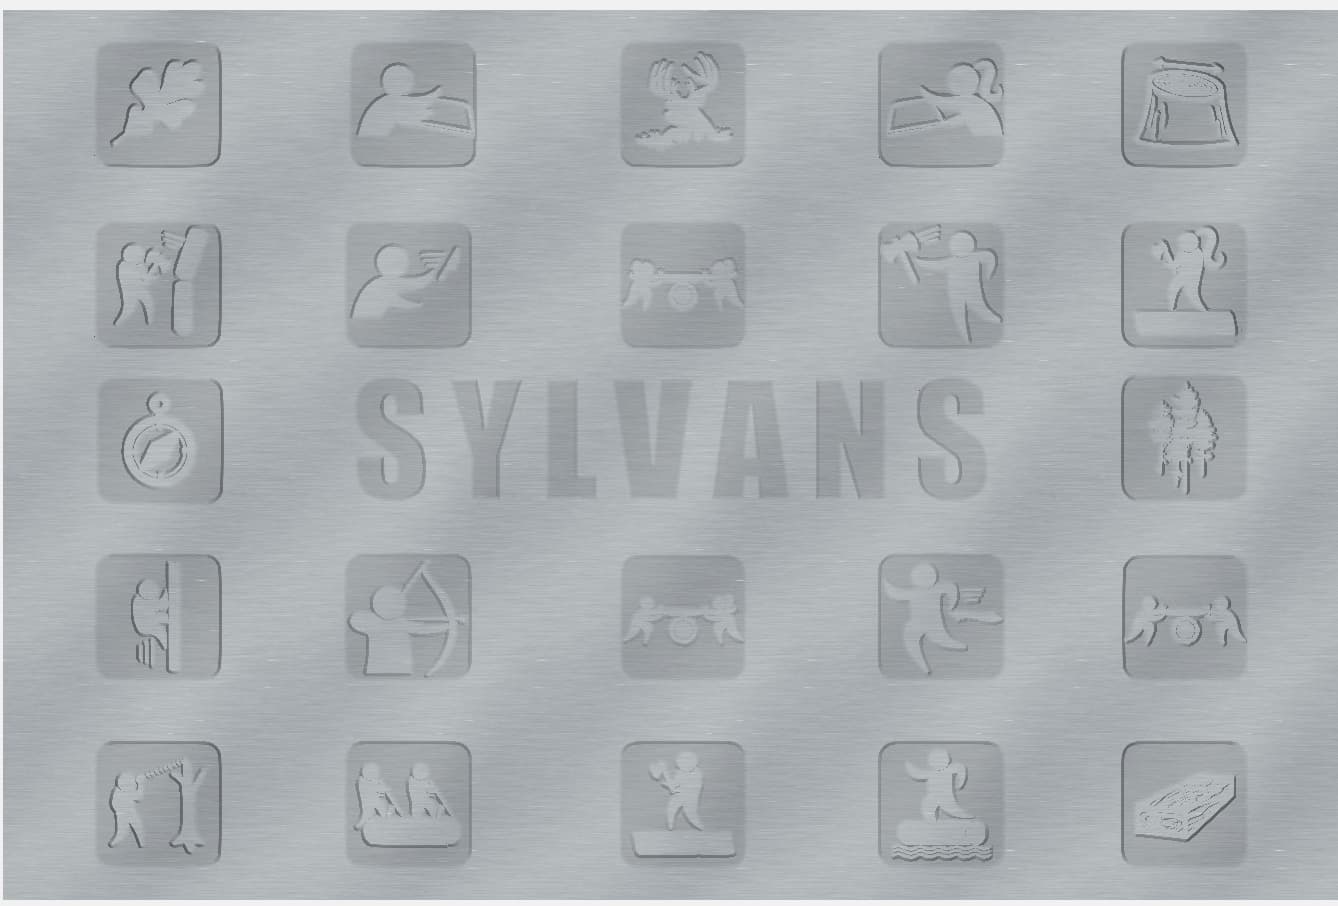
After submitting the simulation to the SFA Staff they sent me a revision with additional icons and elimination of the axe logo. Seems the axe logo is for SFA athletics and not Forestry.
I will be making this rev 2 sign and filling with the same white epoxy and MAS Table Top Epoxy. The SYLVANS will be a maple inlay. The SFA school color is purple but since the material is purple the white epoxy works the best for contrast. They will display the sign at competitions at their team headquarters.
Very neat sign!
How are you carving the squares with the fine detail?
Guessing either advance vcarve or is this all with small diameter bit?
I’m glad you made this topic because I’ve been meaning to ask which epoxy people recommend. I’ve tried 4 different ones (Dr Crafty, Puduo, Naked Fusion) and they all seemed decent, but I think the one that worked best was ProMarine. I’ve only tried one cutting board through the planer but it worked well.
It was one of my first time using it deep, so I naively didn’t know there was a separate deep pour epoxy. The tabletop worked well for 3/4” without issue, but next time I’ll use the proper one. It also works for small intricate things.
I guess she put it up instead of using it, and hard to tell in the photo, but came out pretty shiny and well with the tzalam
The tool path is an advanced vcarve. The clearing bit was a Grizzly 1/8" down cut bit and the vee cutter was a Groovee Jenny 60 degree down cut bit. I used the new feature of cutting the vee bit first and then the clearing.
I think the down cut bits was the key. The #102 bit is an upcut and tends to leave a rough edge. Using the down cut bit makes a smoother top edge. I recently ordered some parts from Grizzly for a 20 inch planner and was a little short for free shipping so I ordered the 1/8" down cut bit. The bit has a 1/4" shank so I dont have to replace the collet.
I use a down cut bit whenever possible. The carving was pretty smooth but because I was going to epoxy fill I did no cleanup because the pocket would be covered by epoxy. The 60 degree Groovee Jenny also cuts very smoothly and has not needed any cleanup that a #302 needs.
I completely agree. Once I started using downcut bits, everything turned out much neater. Especially for epoxy
I thought that an upcut but was supposed to leave a better surface on the bottom. Depends on the bit I am sure.
What is the process for mixing paint directly with epoxy?
From what I’ve read and used, downcut does cleaner top, up cut does cleaner bottom, and compression does both (if the piece is thick enough).
I was looking at that stirrer, that sounds like a good idea.
In my experience, paint (various types), dyes, and powder pigments, mix directly into the clear epoxy and stirred/mixed. Alcohol inks you get an effect putting drops in or on after you’ve poured the epoxy.
I’ve also seen where you can spatter paint onto pure white epoxy and then spread it around with a heat gun or hair blower to get that marble effect.
So it depends on what you are going to cut. I was cutting a pocket that would be covered by epoxy so I did not really care about the surface finish. However the down cut cut a very nice bottom. The bit was brand new. The other thing to consider is your Tram. If you router is level with the spoilboard an up/down cut bit will make a better surface. Also step over effects your surface finish.
The down cut bit leaves a better top surface along the edge of the pocket and for me that was paramount since I was going to fill the pocket with epoxy. A good sharp up cut bit tends to leave a little fuzz around the top edge of the pocket that can be quickly removed with a light sanding. Using two down cut bits was beneficial because I did not have to waste time cleaning up anything.
If you are cutting pockets that will show both bits are good but an up cut bit will likely work better for an exposed pocket. The key is both types of bits are sharp and your tram is good.
Axe 'em Jacks! My daughter graduated from SFA.
I like the ecopoxy it’s a little pricey. but i have had good luck with it . then follow this guy’s step by step. Instructions and you epoxy will be clear as glass.
[(8) How To Polish Epoxy Resin Like A Pro! - YouTube] How To Polish Epoxy Resin Like A Pro! - YouTube)
I only sand to 4000 grit Tho