The CL is 1.5" so the shaft couldn’t make contact, but it’s possible the the bit deflects due to the rub polishing @Lowbrowroyalty mentioned.
2 Likes
On occasion I put a sanding drum/burr in my cnc to sand some ruff endgrain…not sure if that could be an option here…maybe some psa sand paper wrapped on a bit? With plenty of pauses to rewrap…
On another note I know when I am using my hand router and get chatter changing to a larger diameter bit reduces the chatter.
1 Like
My guess is it would heat up and get absolutely caked with acrylic dust, but that is a very interesting idea.
Mark is correct.
I have had occasion to use a small sanding drum in a variable die grinder, the results are not desirable. A carbide burr is superior, but not for this use case.
I don’t know what you have access to tool wise, but it might be less problematic to create templates and use a shaper or beefy router table should the geometry allow. You could still use the CNC to cut out the letters, but with a stock to leave offset. The templates for final brush up. Absolute mess of addional work, but so is sanding stuff where a mechanical sander will not fit. I do this periodically for stuff where sanding is difficult or detrimental to visual appeal. OR, and I do this more often than not, I design the stuff, allocate material, and contract a shop for X hours of machine time to cut it for me. For my current situation, this is generally more equitable.
1 Like
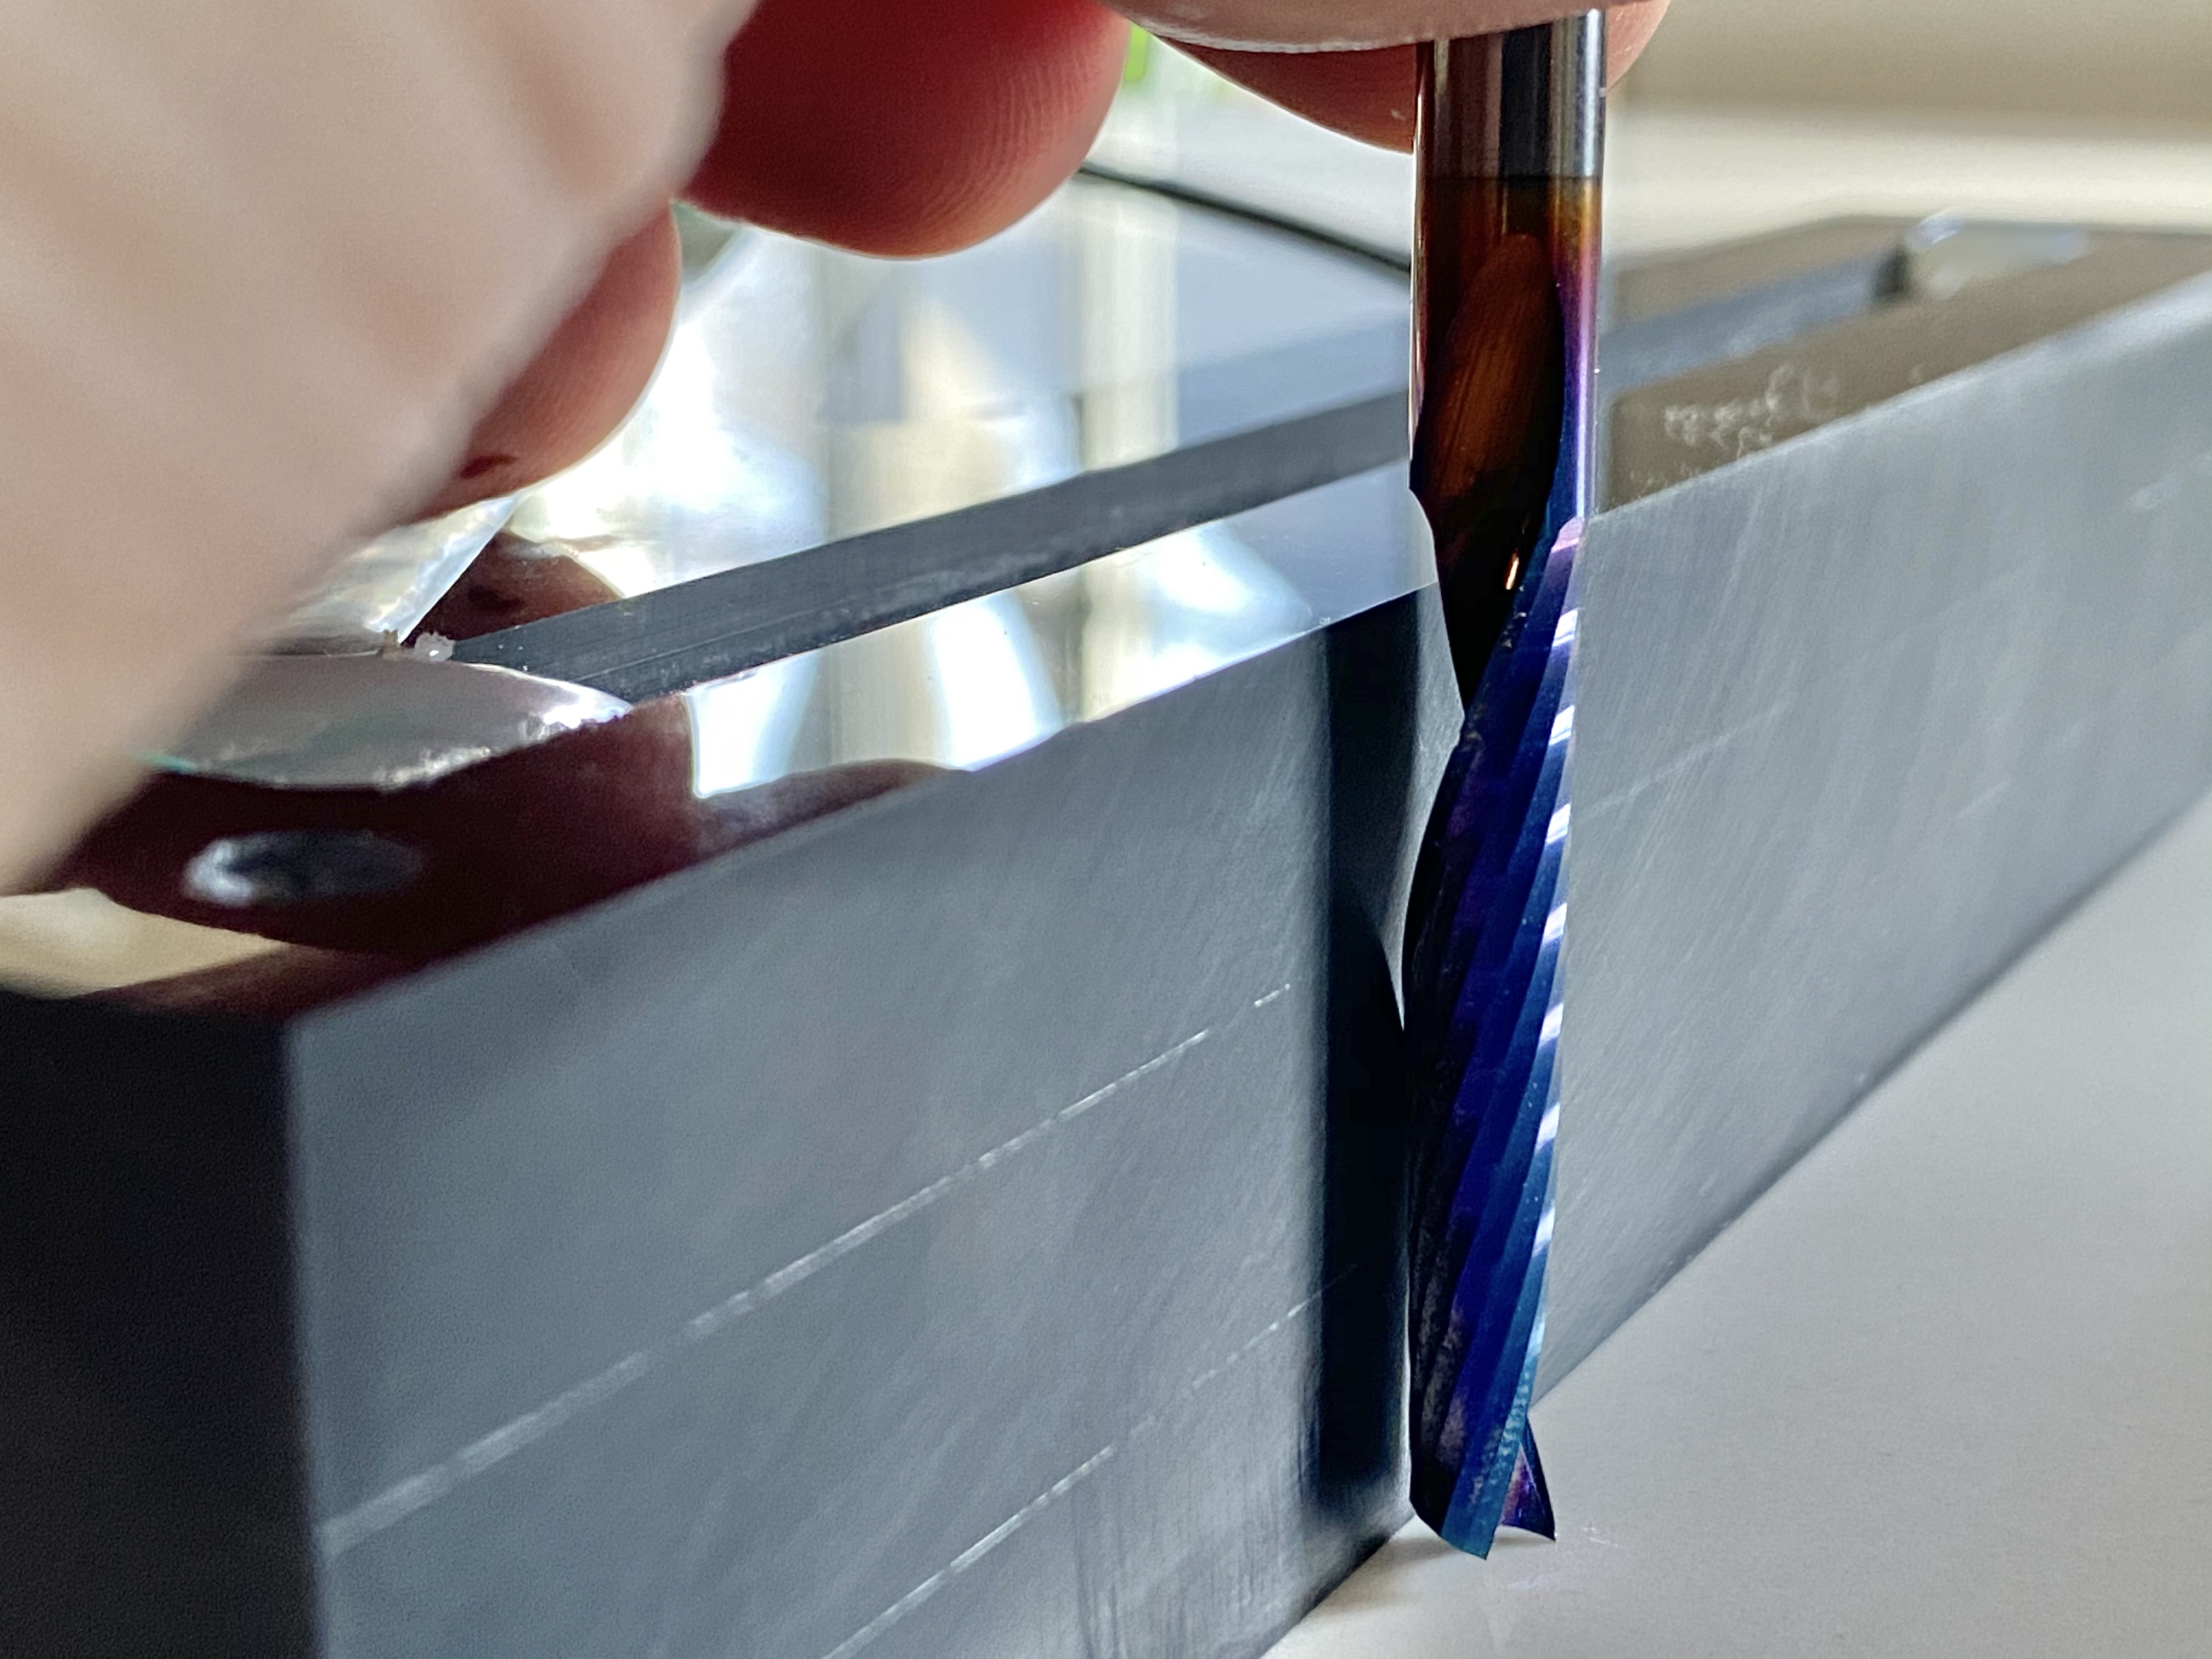
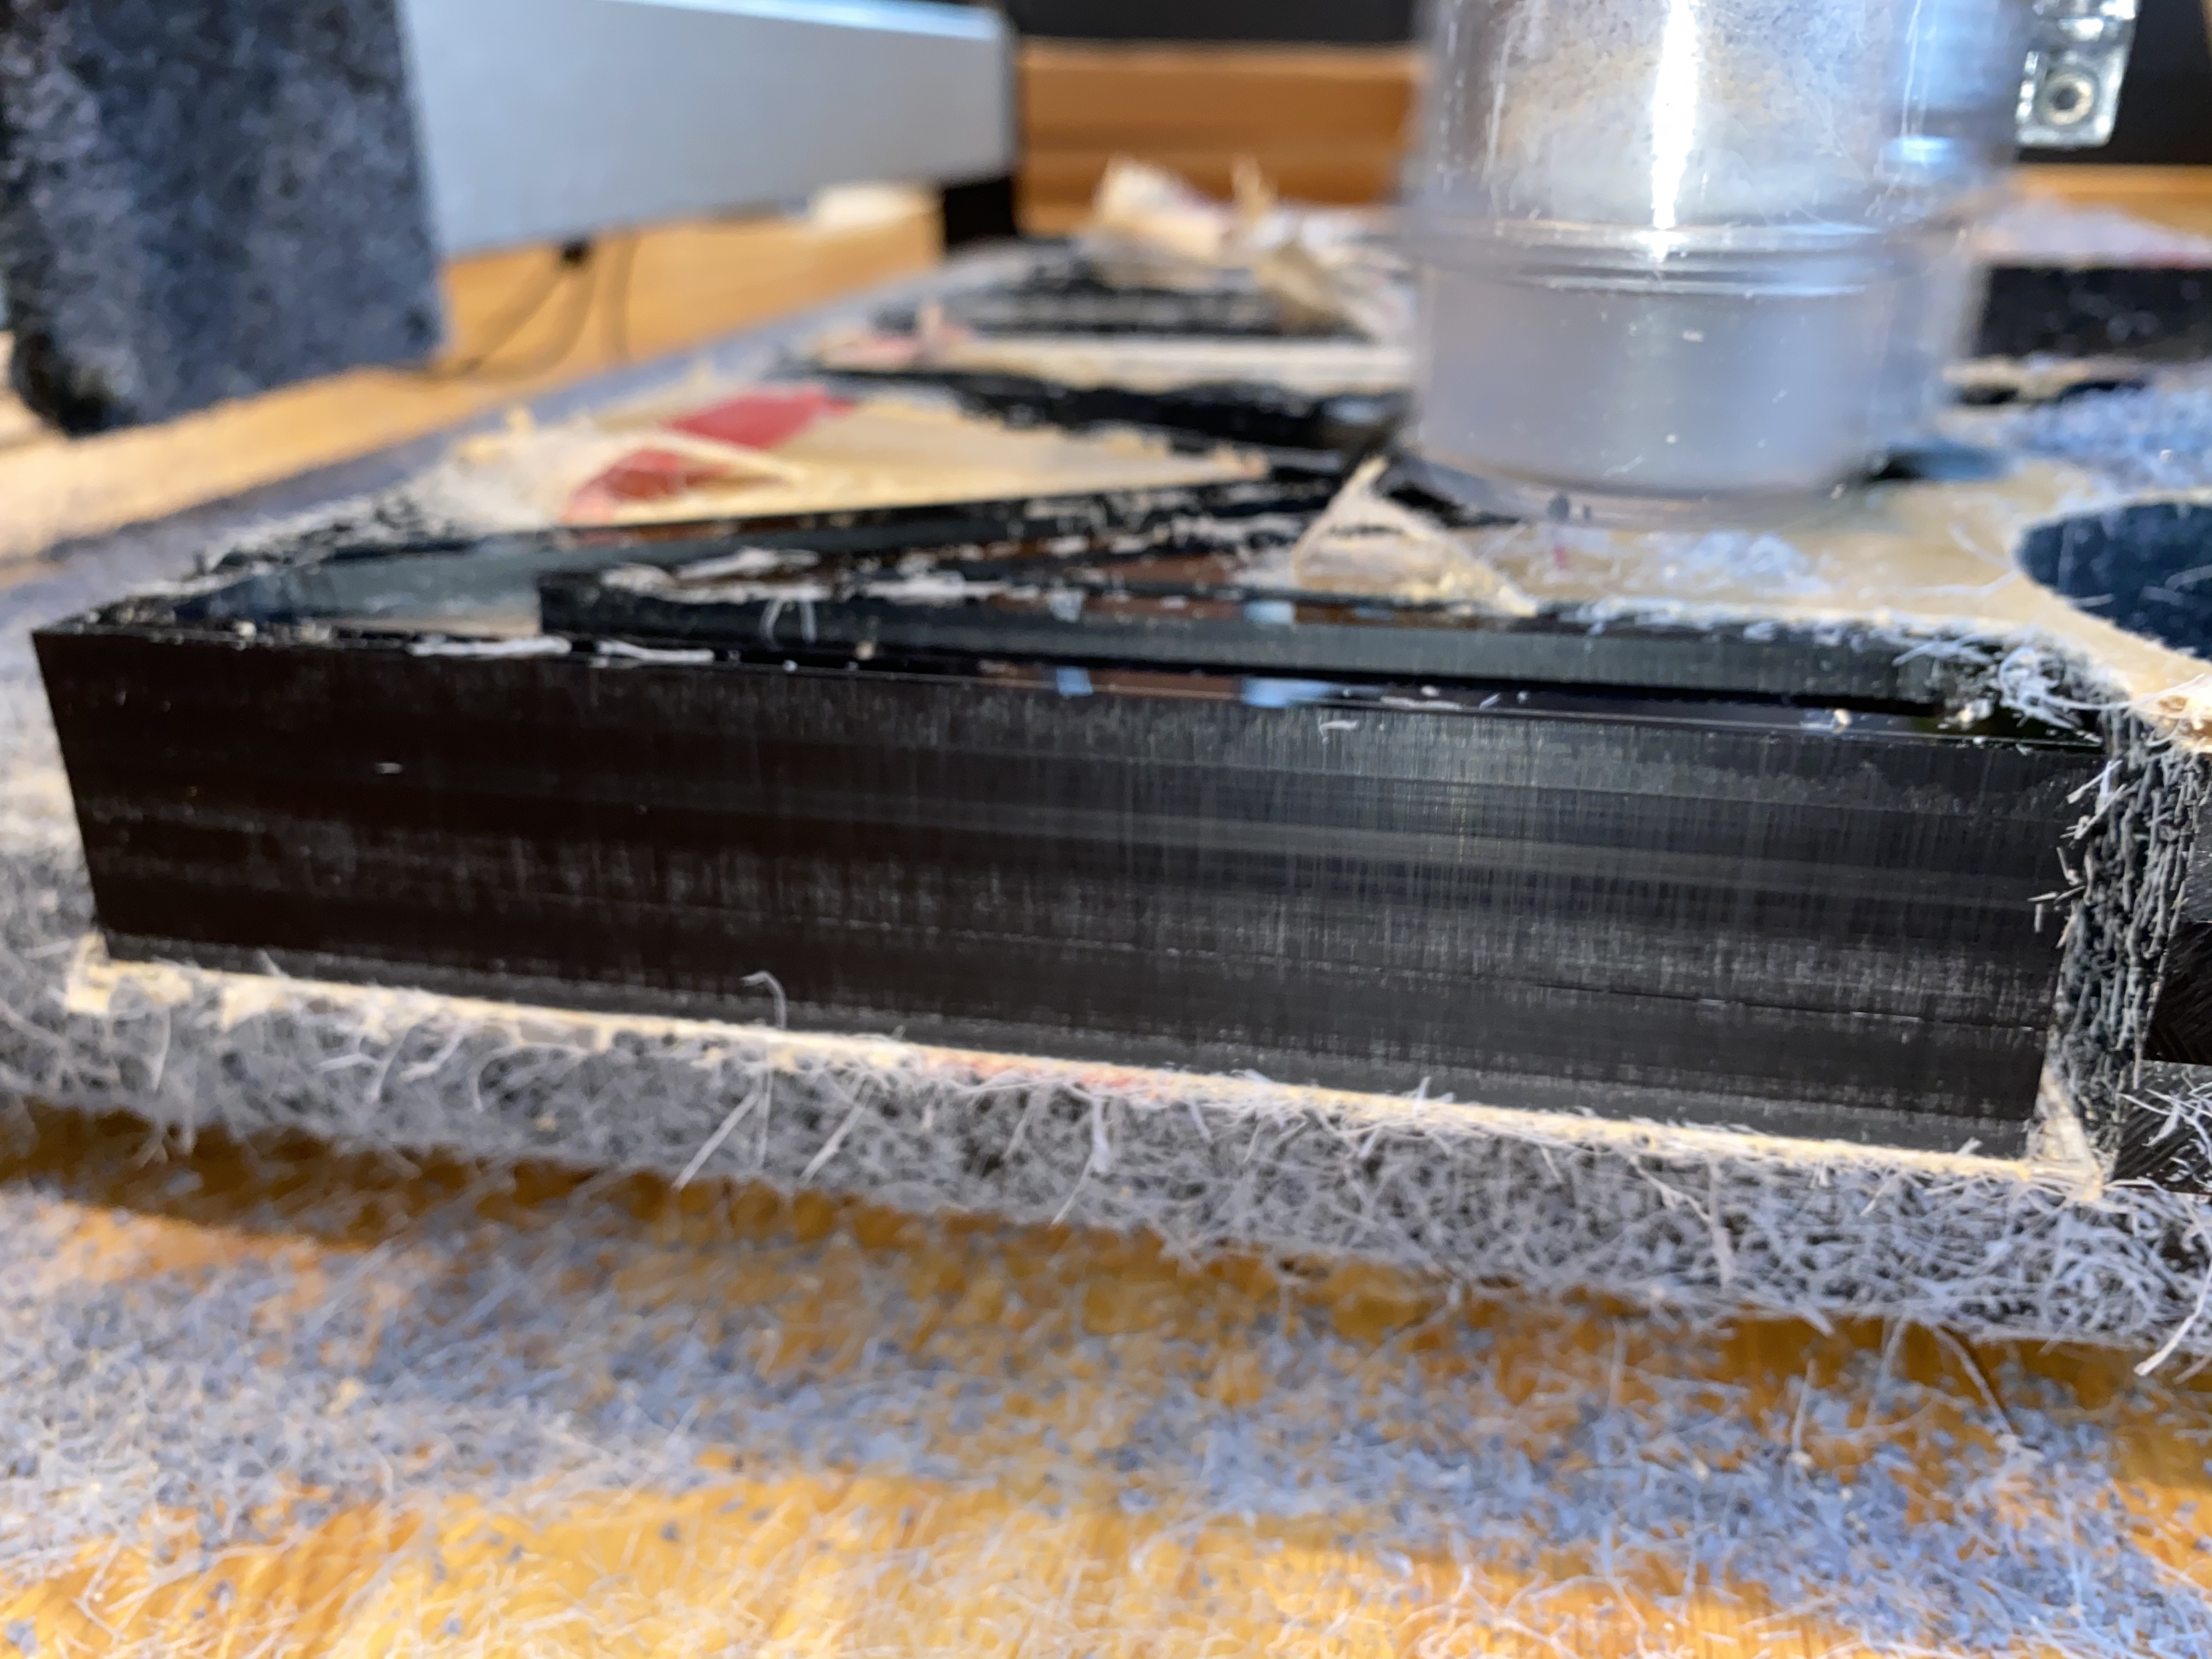
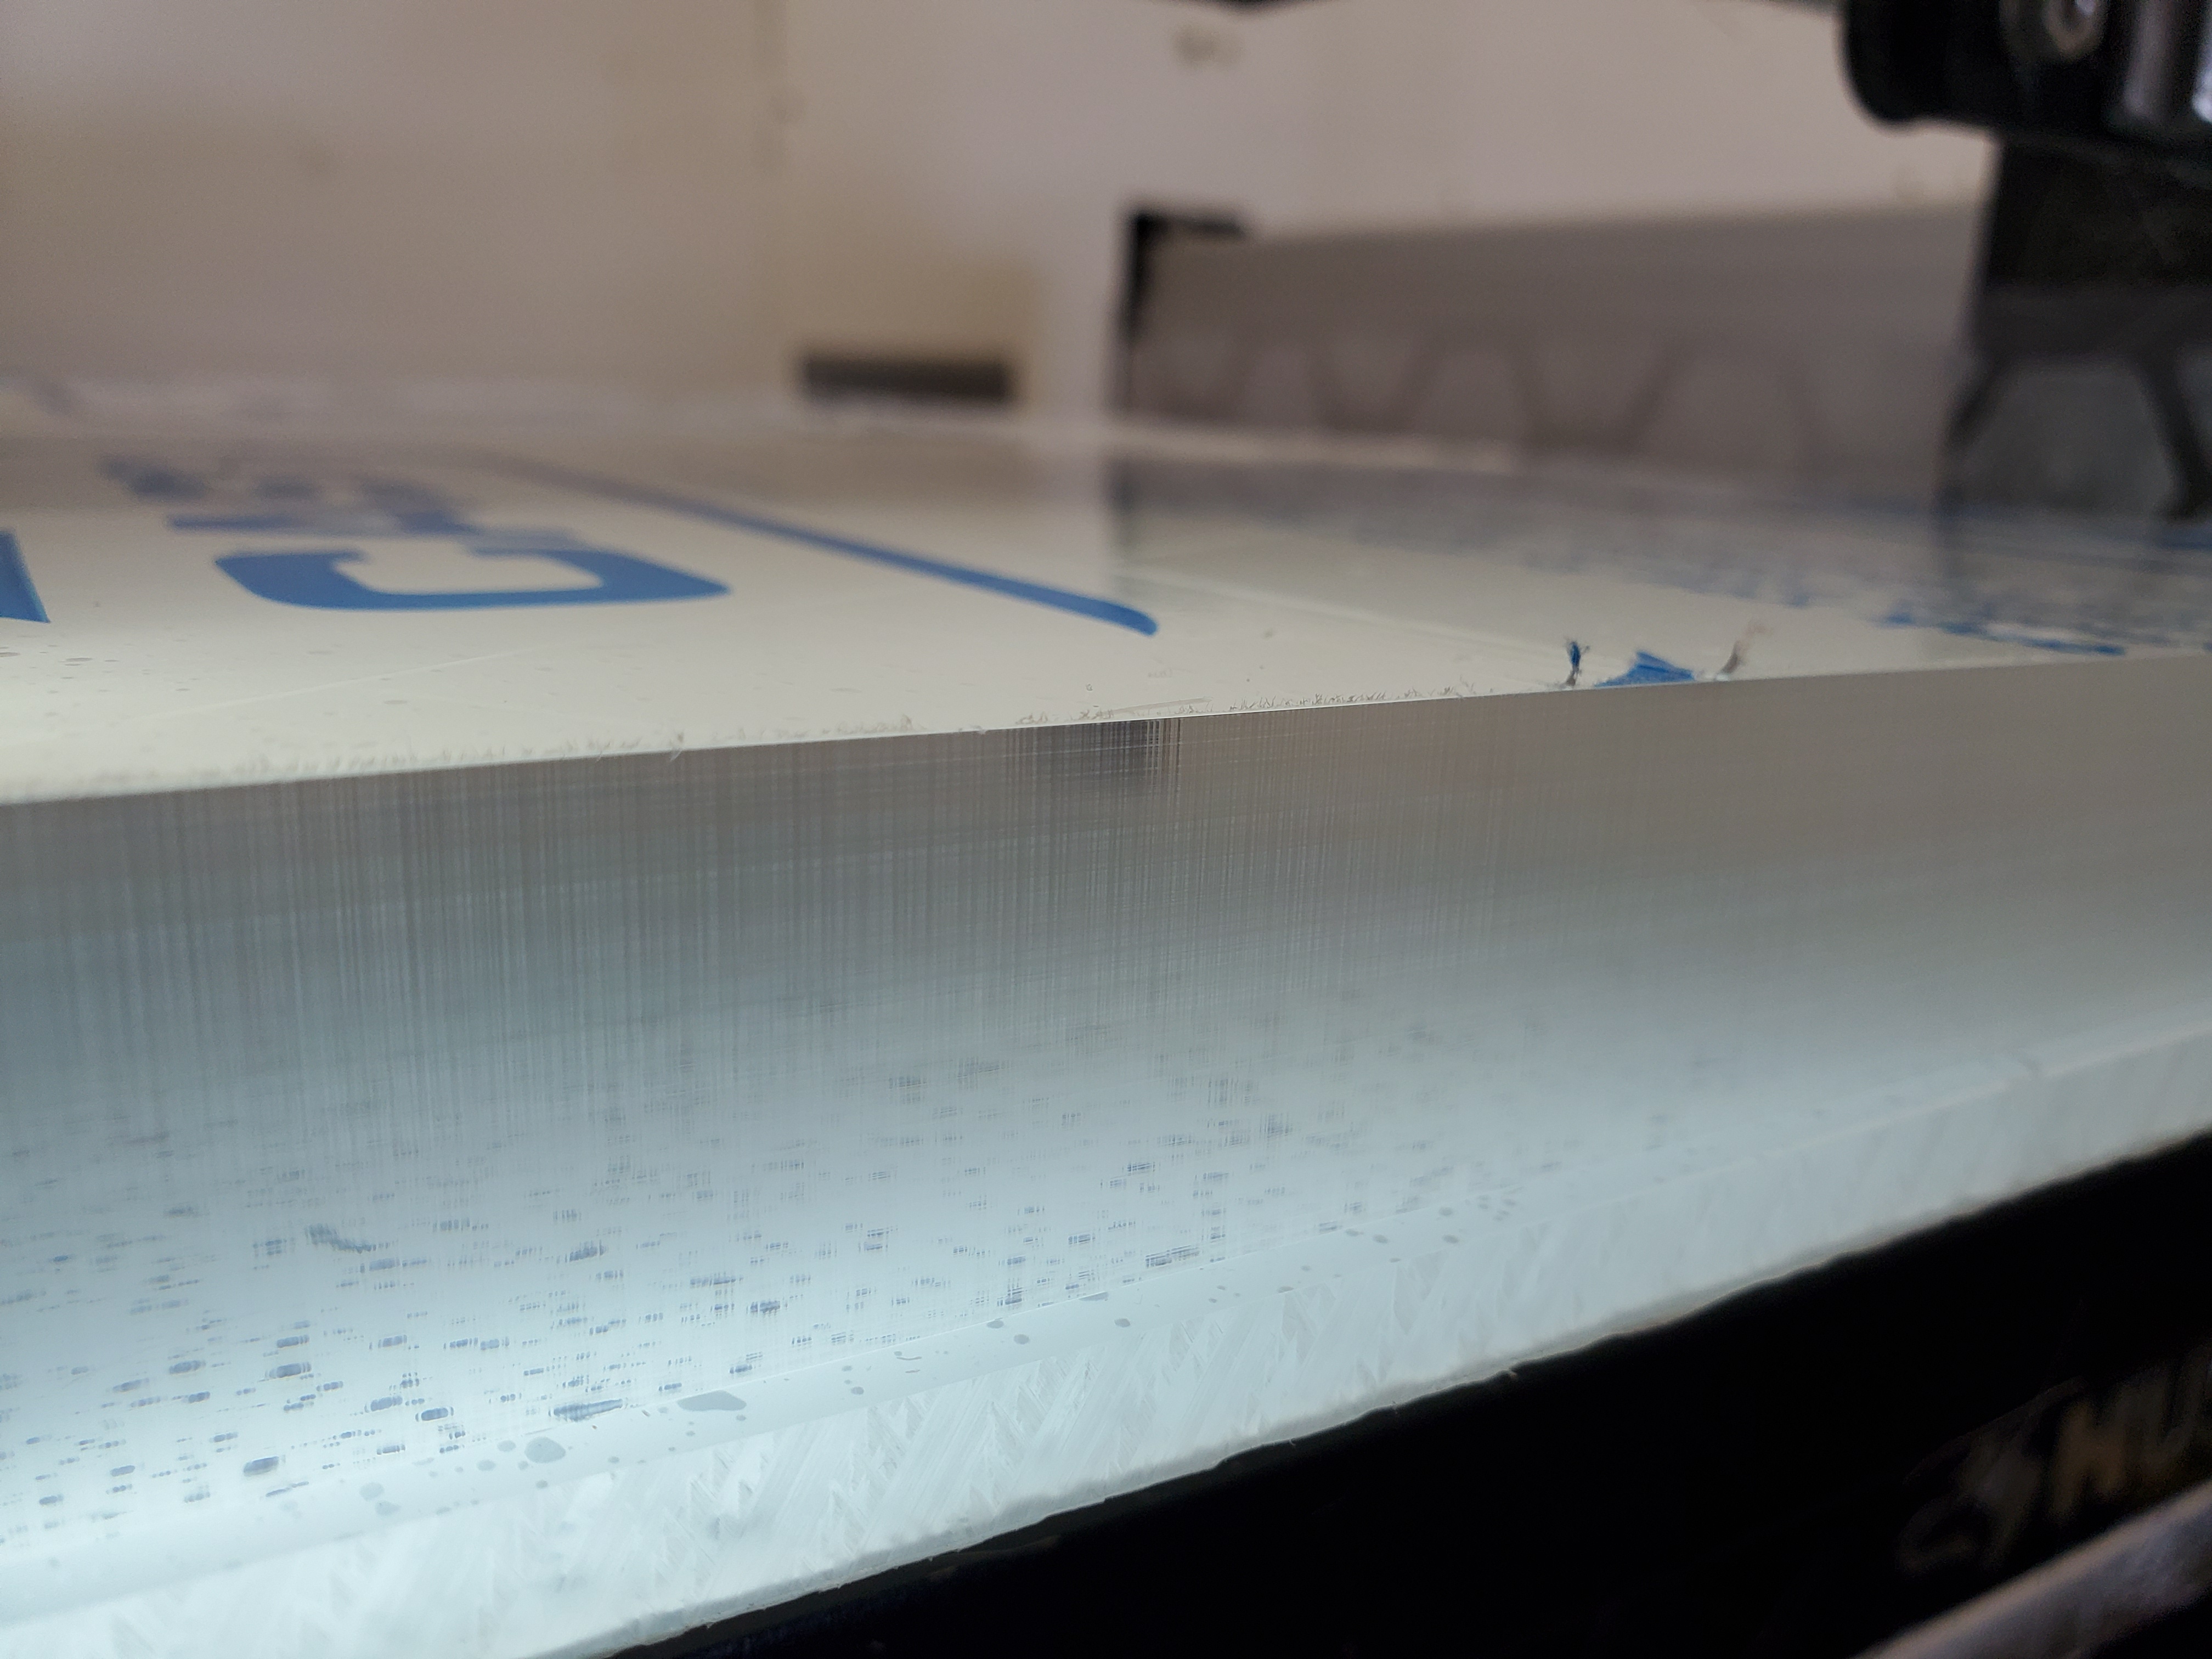
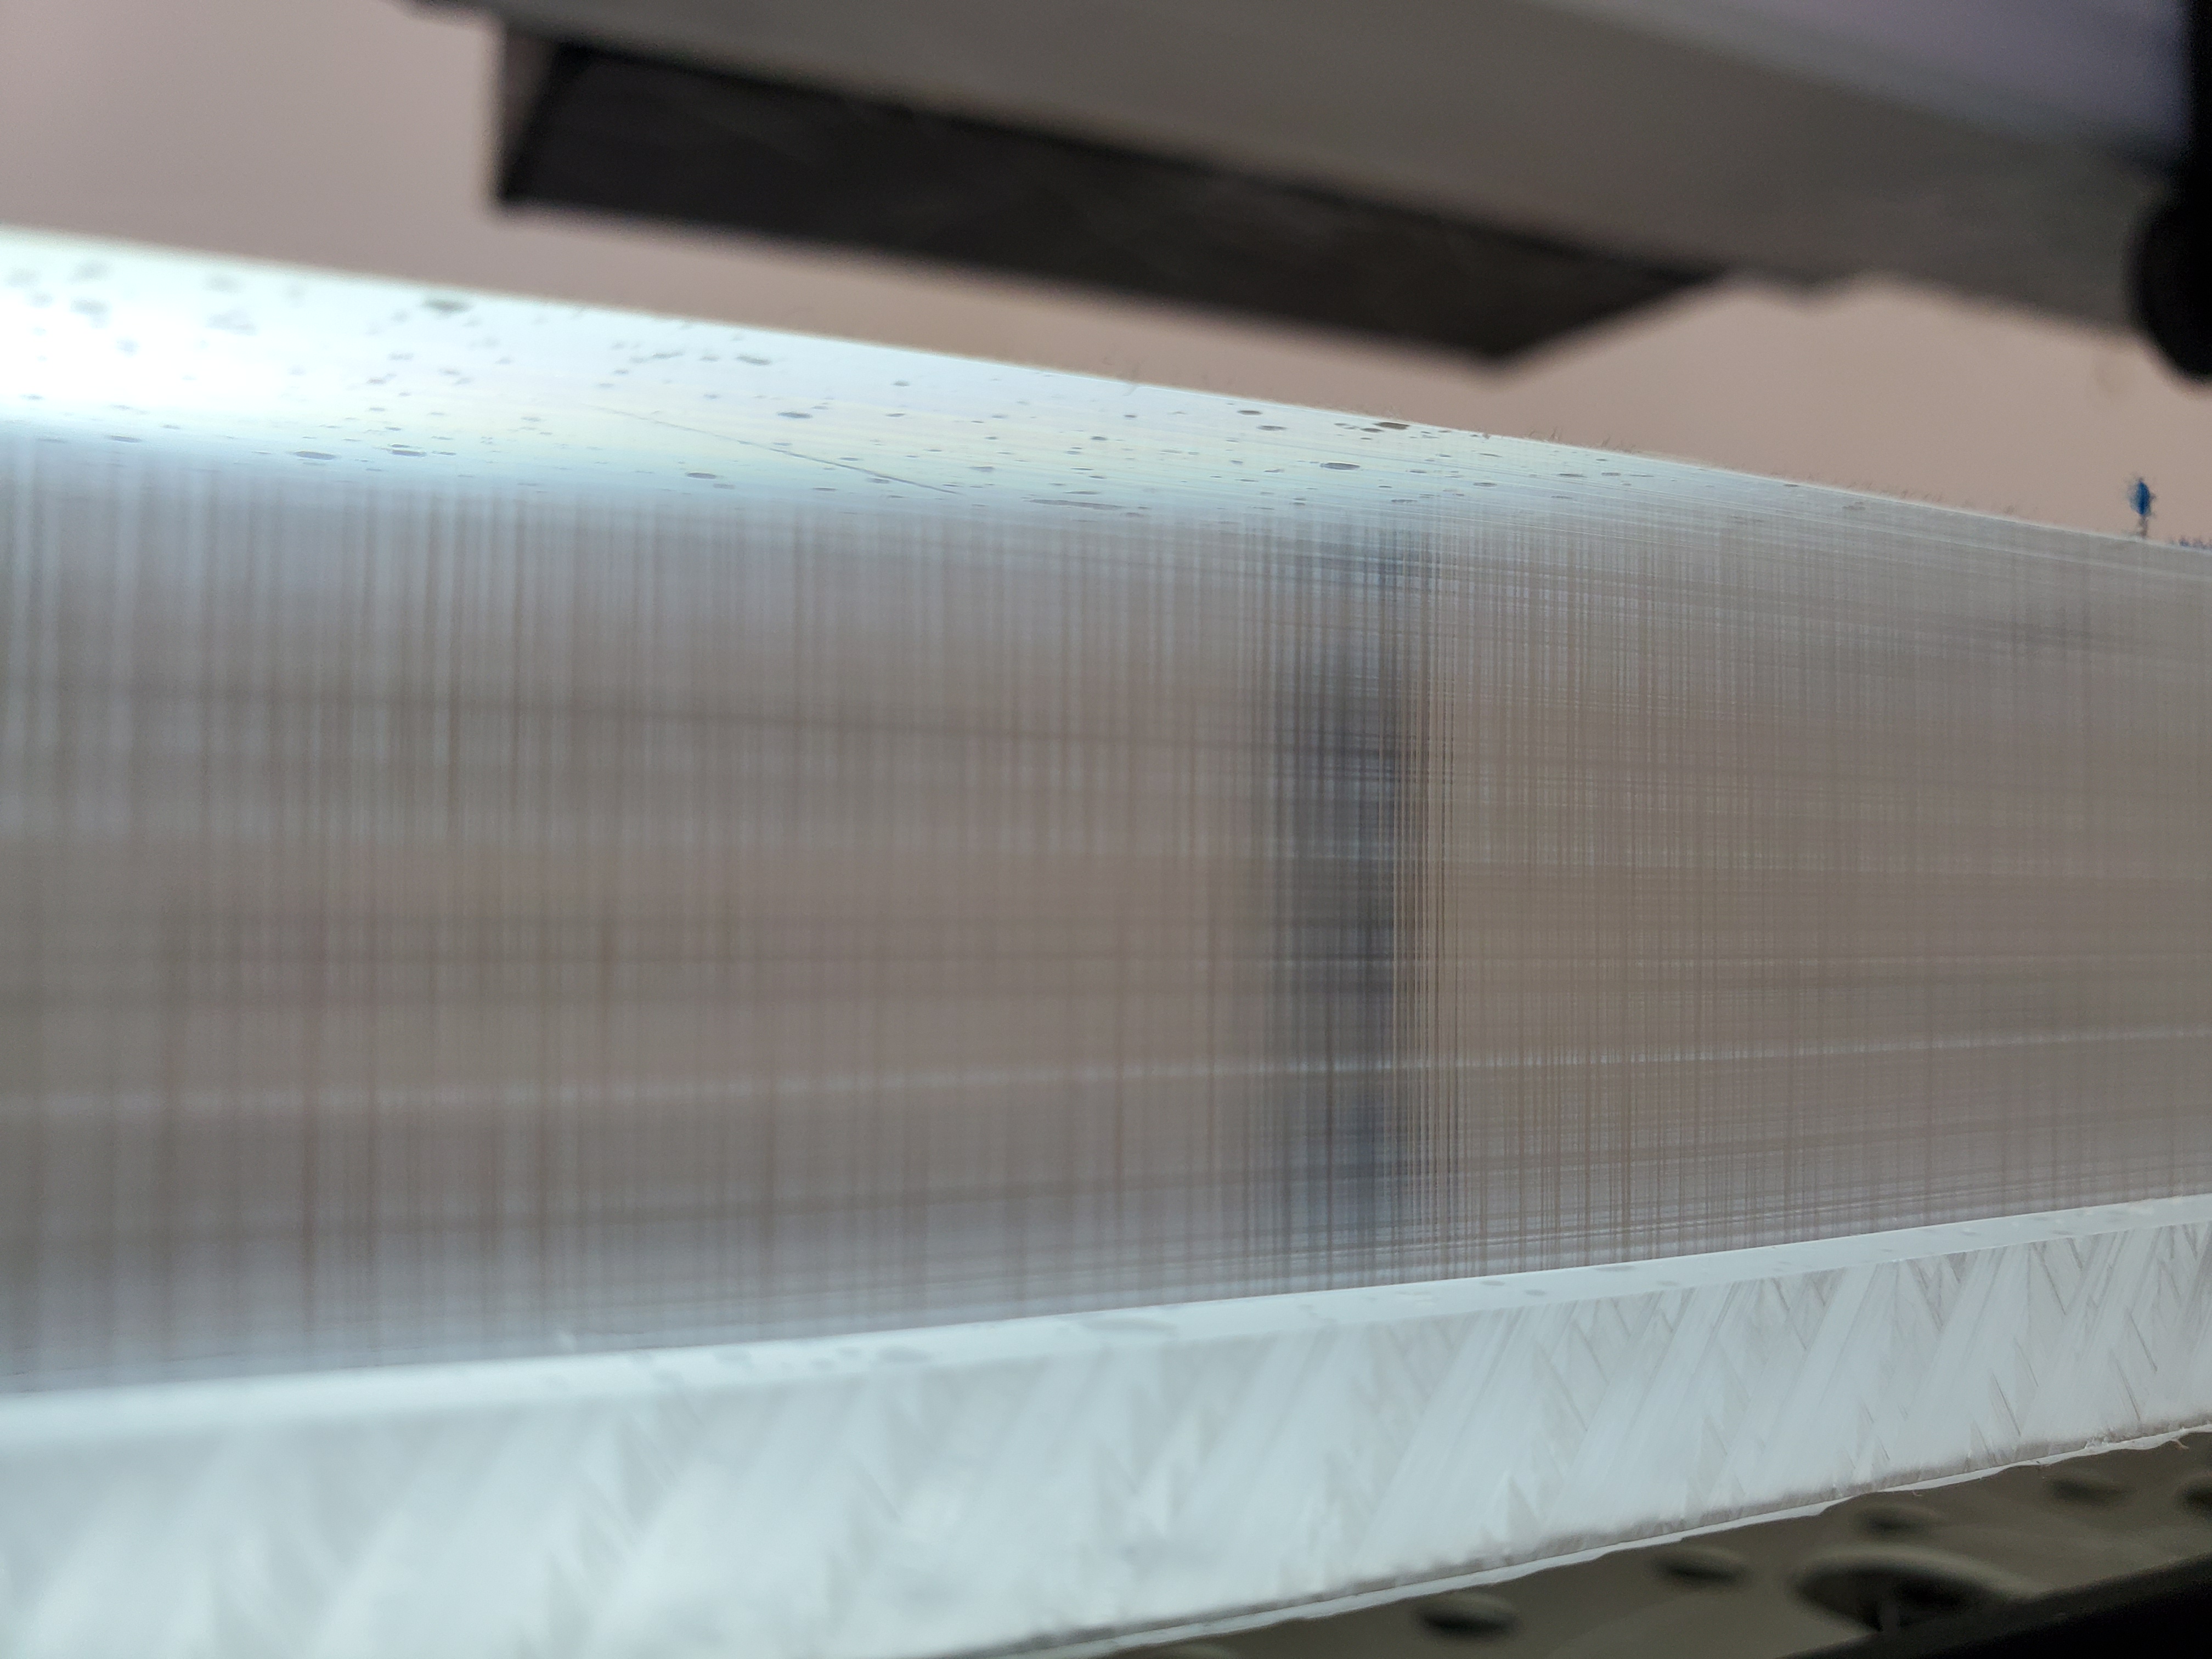
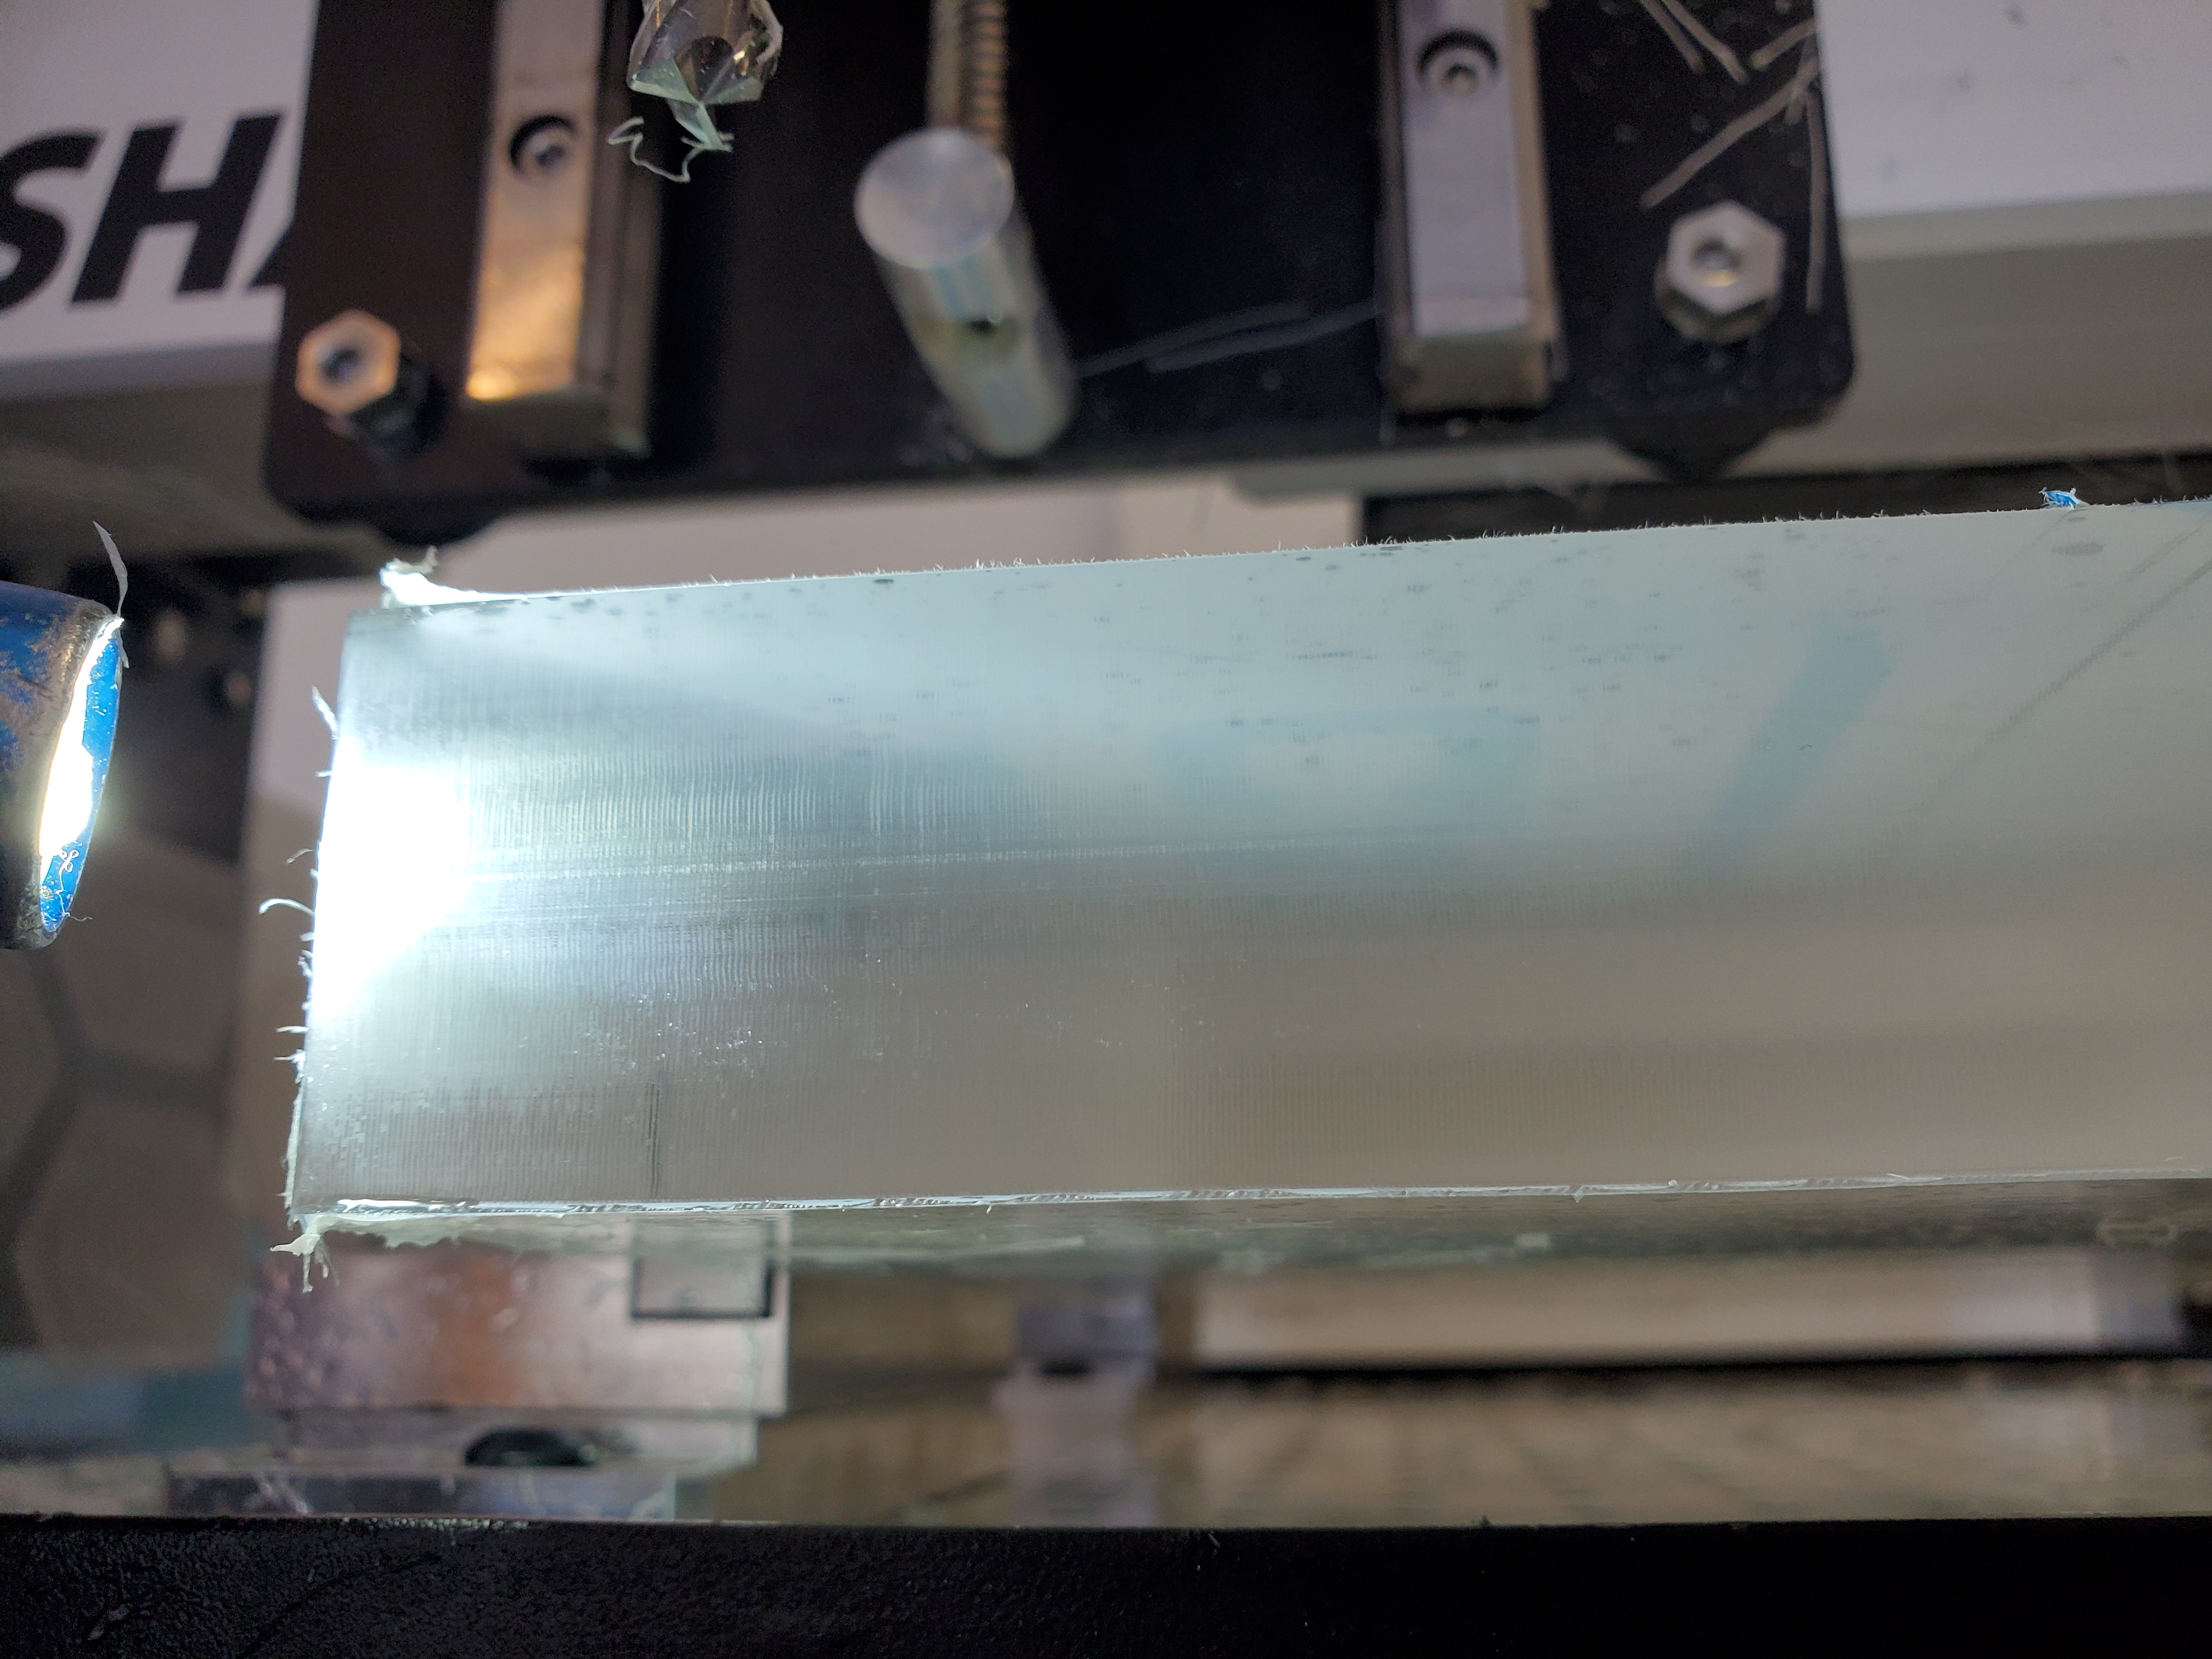
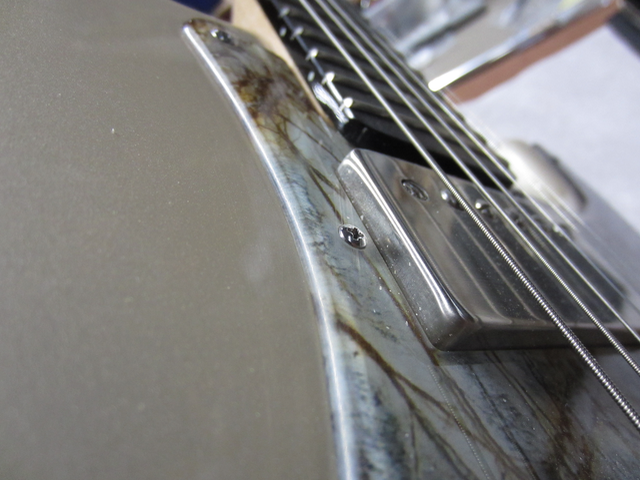
Not quite a $30k Slow-mo camera, but thought I would post this to see what everyone thought. I’m leaning toward bit deflection.
This is the 2nd of two finishing passes (with a ramp) with a .02mm stepover removing a total of .04mm of stock to leave. Adding a spring pass didn’t improve much. C3D router at setting 5.
This is what it looked like when done:
4 Likes
I’ve temporally stopped doing any work for customers with my Shapeoko. Ordered a few newly offered acrylic specific cutters, and plan to run a bunch of experiments when they arrive. Back to chatting with tool tech support, working on some minimum WOC and chip load ranges. I’ll share whatever they work up.
I also have a selection of new cutters on my desk where the leading edge is offset from the rest of the flute, these should not rub as much as the polished flute cutters. I haven’t put these into fusion, or cut anything with them yet.
1 Like
Which ones, I’ll test with you in tandem.
1 Like
I haven’t yet run my project due to holidays and getting ready to move in a couple weeks. Did you happen to try conventional cutting the finish pass yet?
No…I think I read that somewhere else though and tried it on a roughing pass, but not finishing.
After watching the very exciting, riveting videos by @LiamN about vibration, deflection, and backlash…I am wondering if the fact that your machine has the standard waste board and is sitting on the floor is causing an vibration that is translated into the cut…
1 Like
In the video some chatter & vibration is definitely audible, the question, as you correctly identified, is what is causing it? I have personally found plastics to be the most challenging to get really clean surface finish on, give me a bit of hardwood or Aluminium over a plastic any day.
It could be the cutter, but that’s not very likely, it should be relatively easy to check in Millalyzer what sort of cutter forces are in play here but I suspect they are small. The cut is on an outer edge with excellent flying chip evacuation, it appears that the cutter is moving fast enough to not be locally heating and melting etc.
The acrylic itself is probably large, heavy and rigid enough to not be vibrating that much, but it’s worth checking. If the baseboard is ringing to the tone of that audible vibration damping it down may well help.
My completely unsafe methodology (which I don’t recommend anyone else try) when I hear that sort of vibration is to use a wooden dowel in my hand to check the router / spindle clamp to see if I can feel the vibration there, then on the X beam to see if it’s still present at that level. Sometimes you can feel the vibration most clearly in the wasteboard (well away from the spinning metal please). It’s rather primitive in the level of scientific process and measurement, early days of the Royal Society, but I’ve found it does help if you can find out where the vibration is most clearly evident.
During some of the excellent feedback spargeltarzan gave me on the vibration video one of the key ‘aha’ moments for me was when he pointed out that if you have vibration or chatter in one pass of a cut, the physical profile that vibration leaves in the material may well be sufficient to re-trigger that exact same resonant vibration mode during the next pass of that cut.
It may be that the pattern developed in the early passes at the top are to some extent just being copied down the cut as the passes get deeper. A close up video of several passes would probably give some evidence for or against this hypothesis.
3 Likes
Onsrud 63-500 series tooling is what I have on order now. To date, I use 63-750 series tooling the most. Retail is somewhere just above $30 per.
Cool, I picked up a 63-727 to give it a try.
I also ordered a spare C3D router in case there’s a runout issue (and just so that I always have a spare on hand).
3 Likes
Excellent quality tools, and balanced for 60k rpm. The tool you ordered, 63-700 series, has geometry for a smooth finish on “Hard Plastic” or “HP”. I have a few of these sitting in my office, but haven’t run one yet. I currently use the 63-750 series, which are specified for “Soft Plastics” or “SP”. It’s my understanding that Acrylic would fall into the Soft Plastics category, but I may very well have mucked up that assessment. I bought the same cutter series you purchased to compare results with 63-750 series, but as of yet, haven’t so much as unwrapped them. Interested to see your results.
Back to strategy. To fill you in on how I arrived at where I currently have. The recommended chip load per tooth is .008-.012" at 1xDiameter DOC/Full WOC for a .25" tool, this is for a single pass operation. Obviously, we might have some trouble here. For a finishing pass, chip load would remain the same, but you have much greater latitude for greater DOC. WOC, which I think is our primary moving target for acceptable finish, is to be no less than .03"(while this was previously only personal conjecture, I have now confirmed this).
It seems reasonable to assume that most premium tool manufactures are targeting the primary industrial market, and the minimum machine capabilities one would expect there. As such, I don’t think any of these tools are designed for the particular use case we are presenting. That said, I think a compromise exists that we can extract a reasonable finish from.
Most of my acrylic test have included quite at bit of detail, this simply to get as much data as possible from the least material($$). The high feeds from large chip loads make for a angry shapeoko in these tight scenarios, and as such, reduced finish quality. Moving forward, I plan to test some larger profiles, at much higher chiploads.
Run out was my first look - And my first C3D had considerable runout, enough so that it was visually apparent. C3D happily replaced it. I now run a Makita. The run out on either is measurable with shit indicators… but I do not think this should be a terrible problem considering our tool choices. I would guess that a 1FL tool would offset some degree of runout. Assumedly the cutter is in the same spot, some angular discrepancy aside, on every rotation.
2 Likes
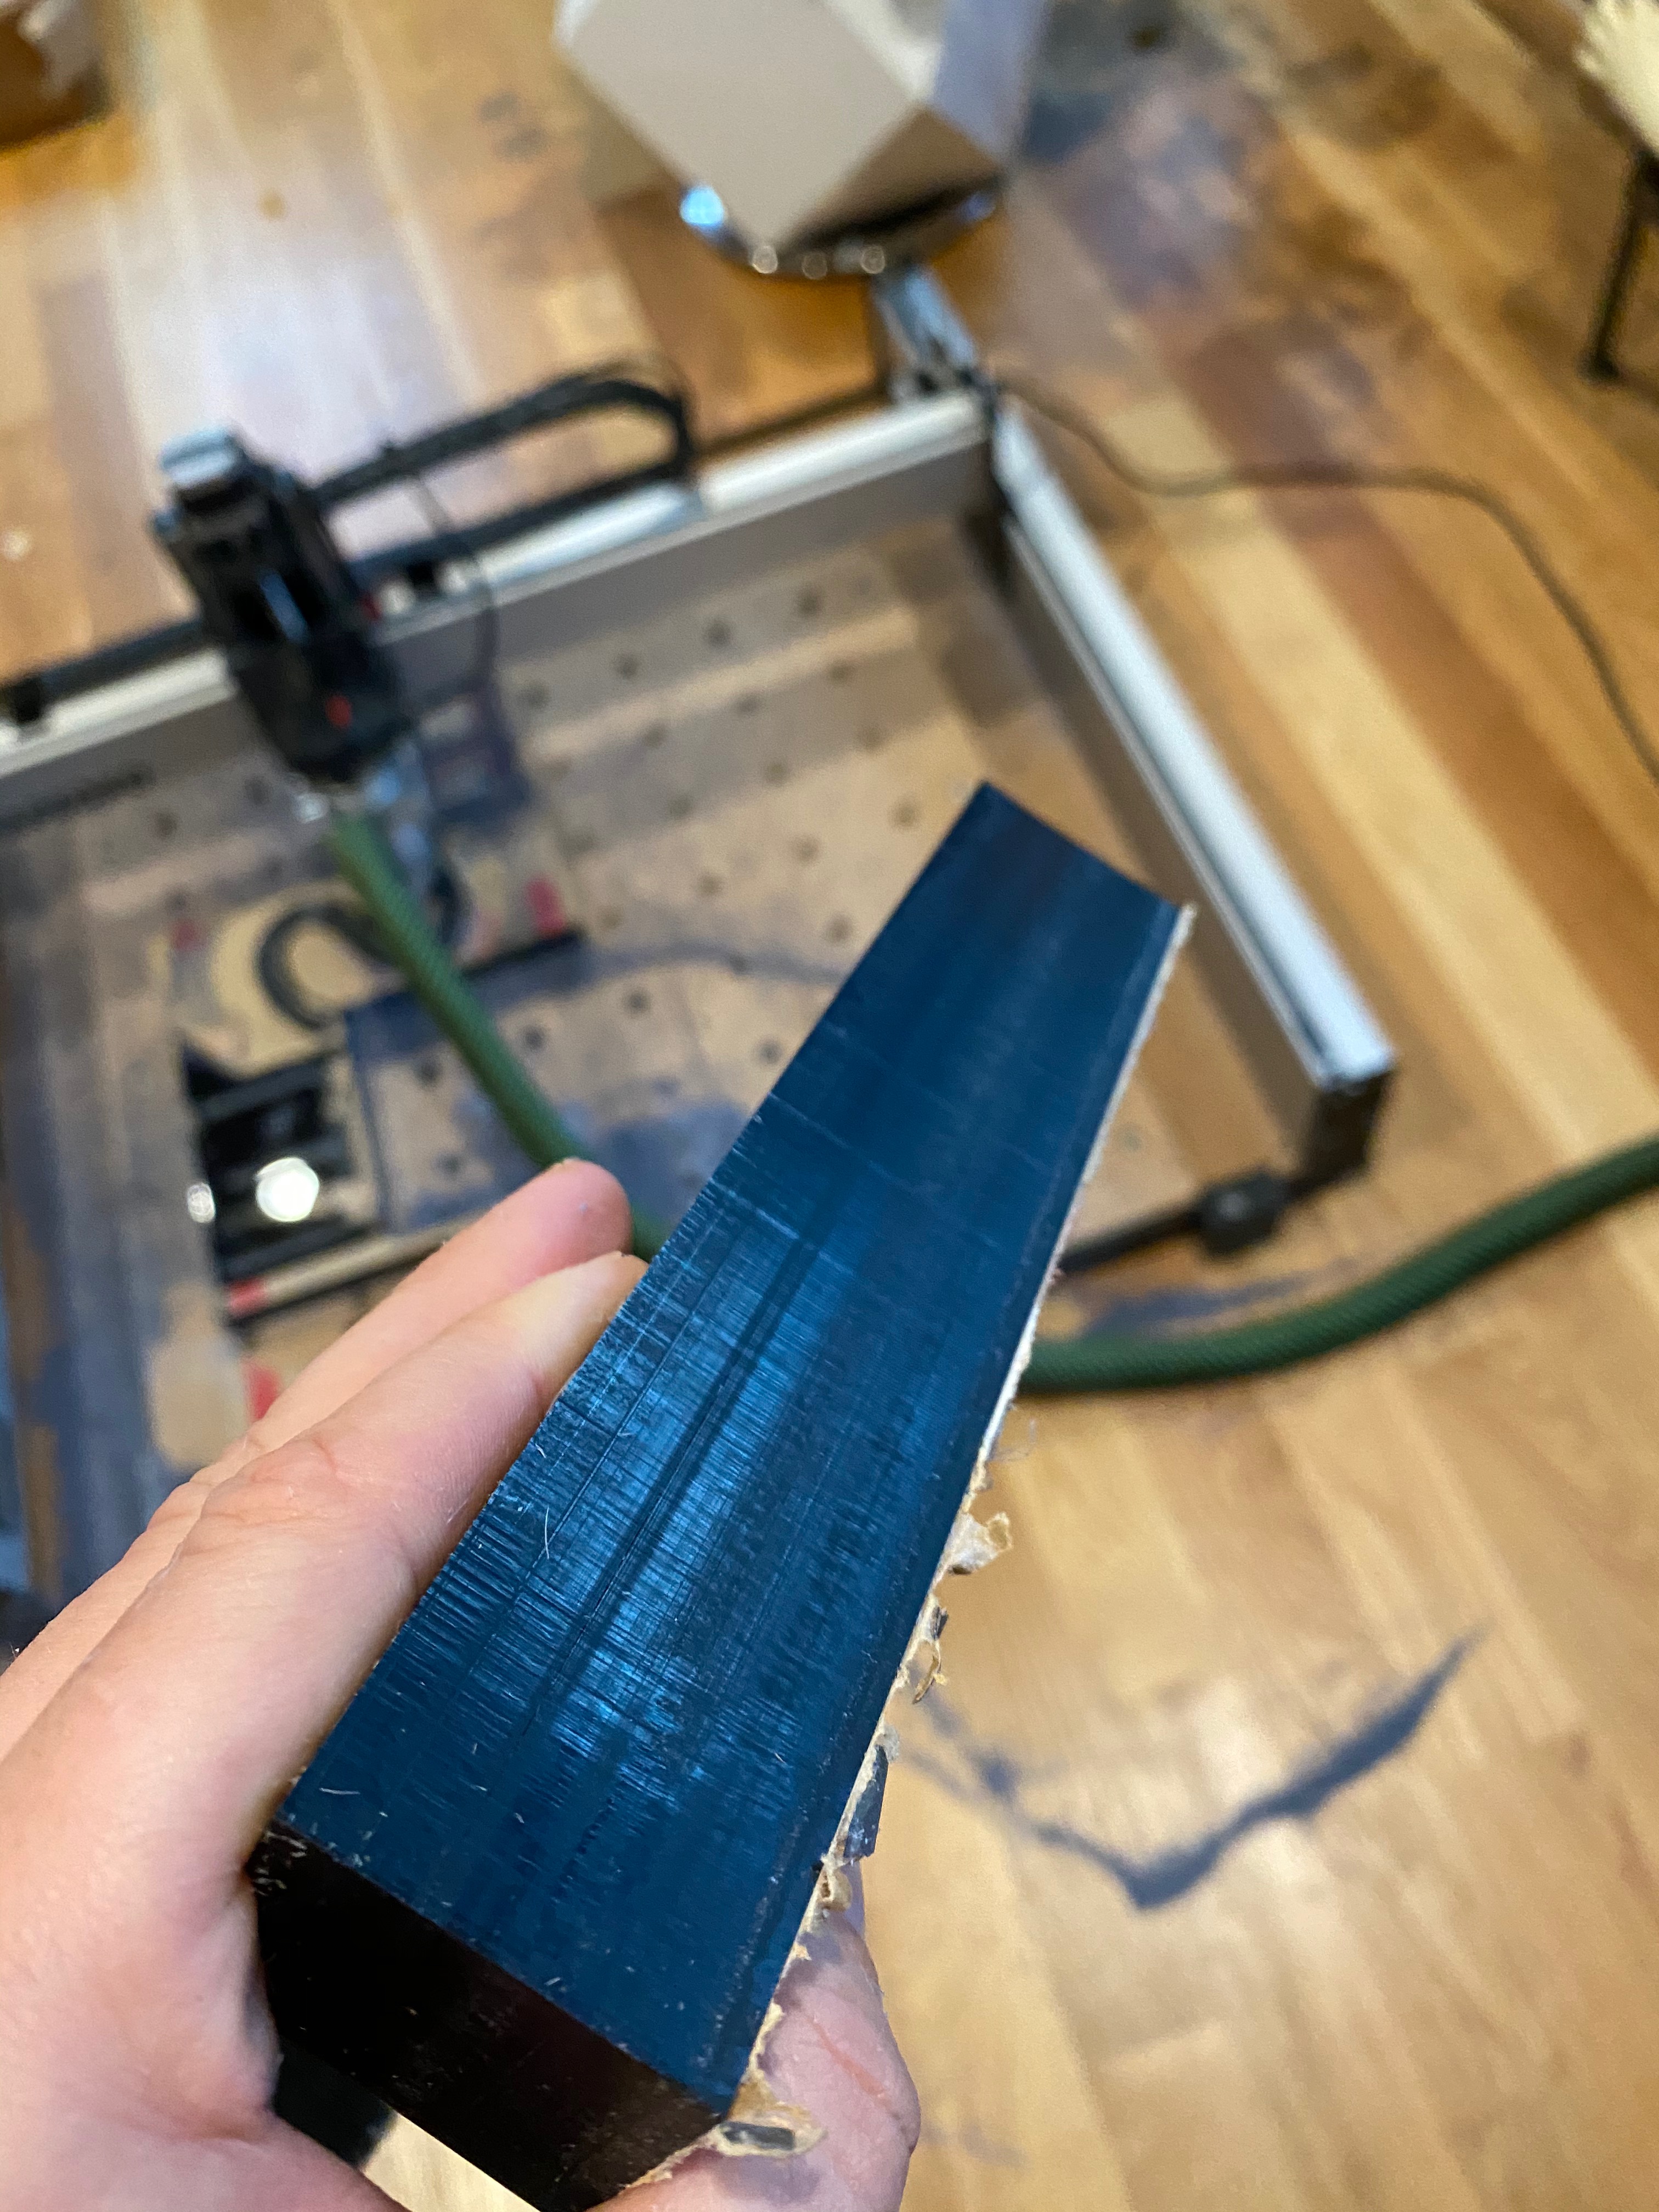
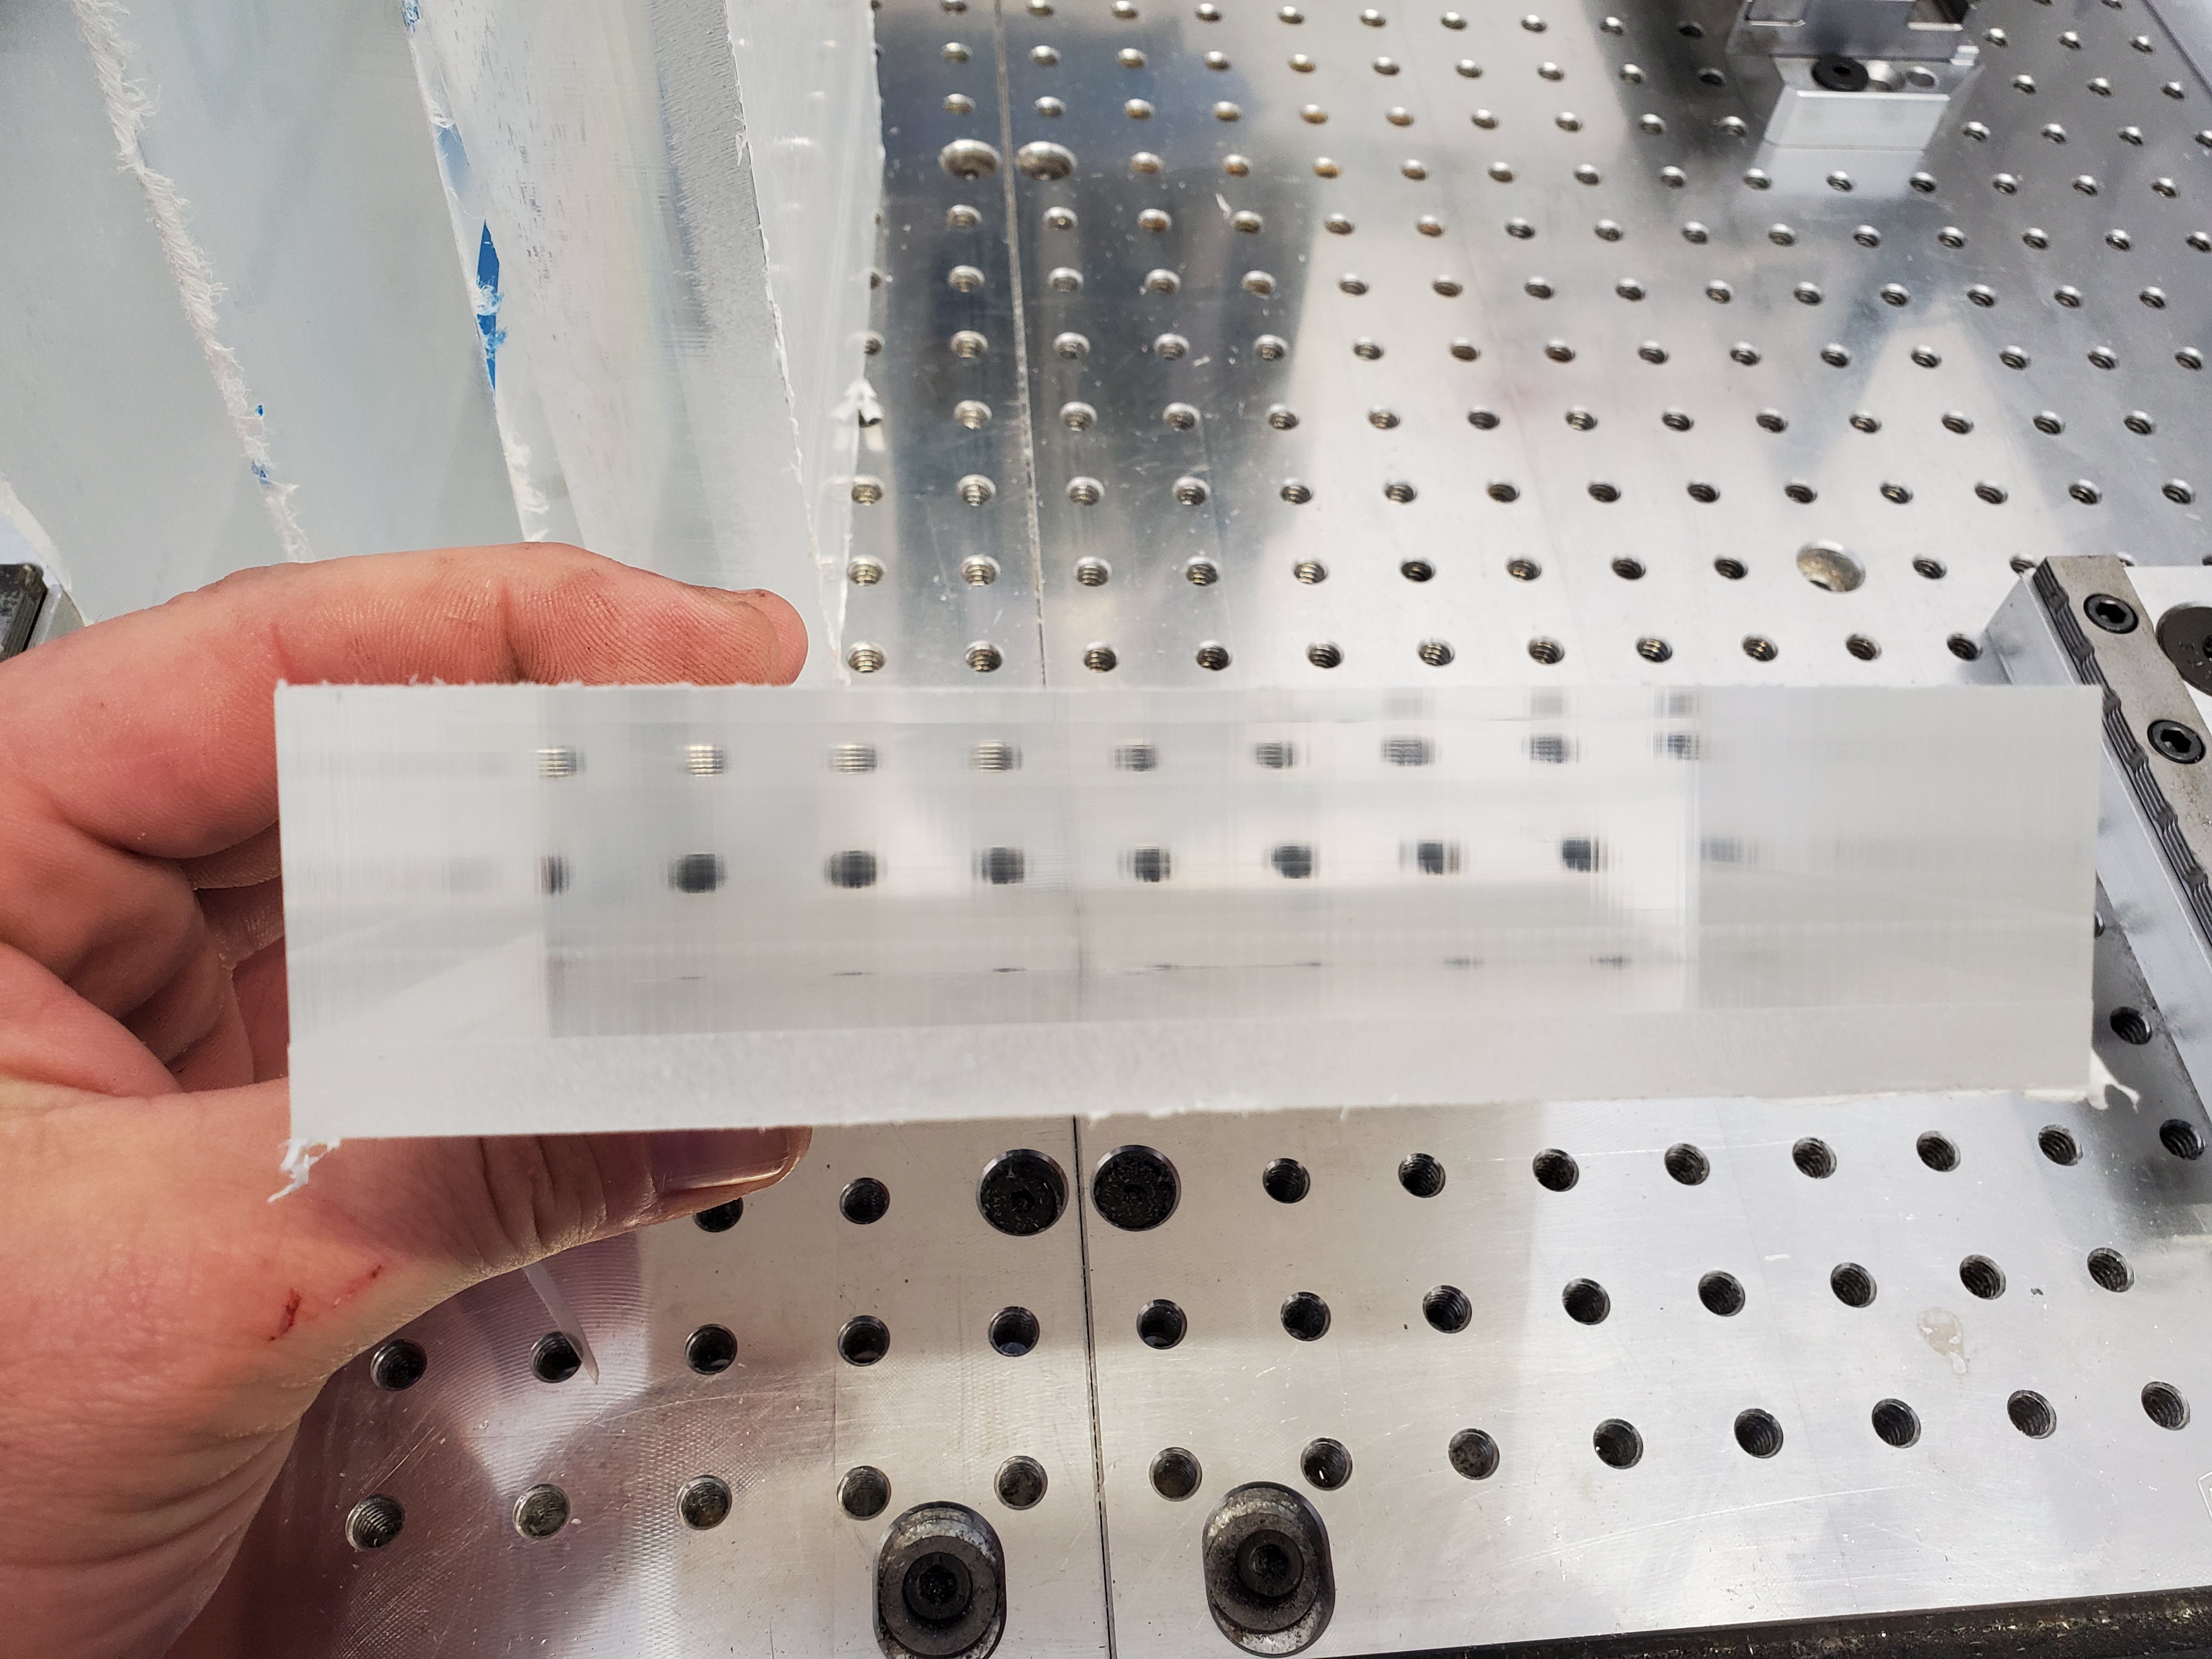
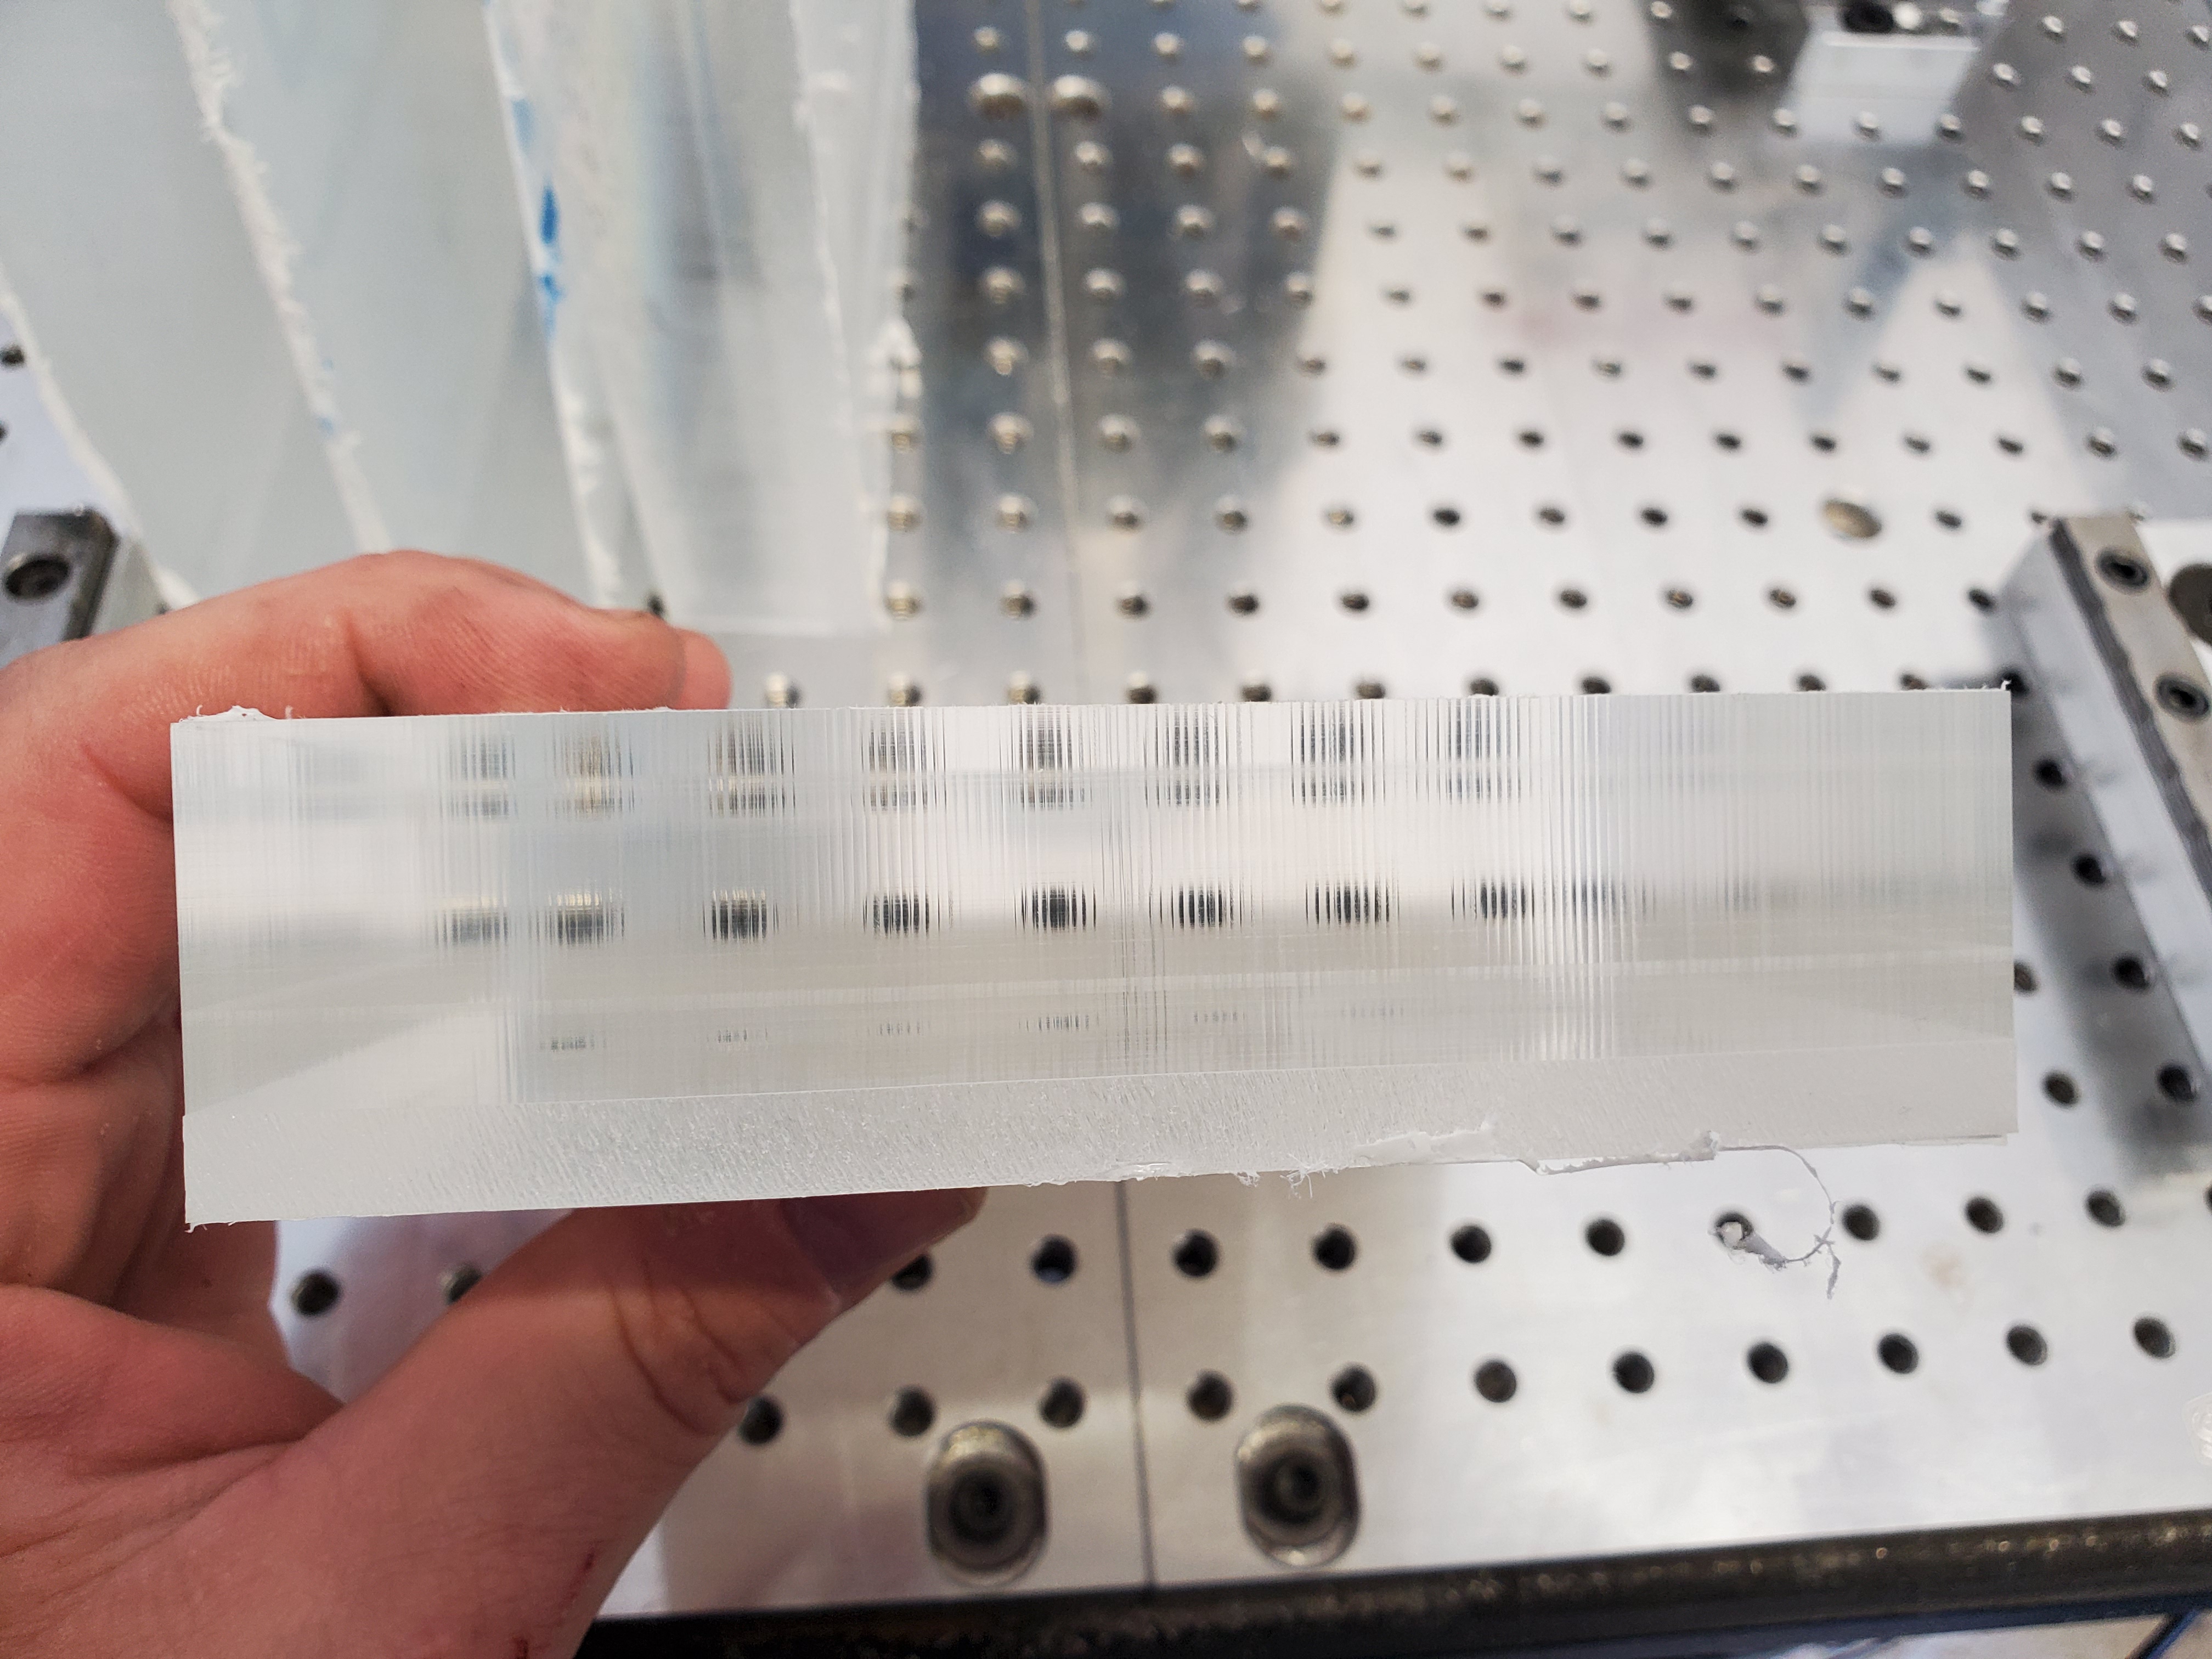
Finished up a few recipes for wall contours today. Found out conventional isn’t always the best way depending on depth of cut. I’ll upload the wavy contour photos later but for now here’s a straight line cut.
8mm Datron 4-1 @ 20krpm
1.000 depth of cut
This recipe preferred a climb and a bit of soapy water really helped. Optical clarity is pretty good.
9 Likes
Interesting, Pretty similar I think to my results except that Black probably shows way more imperfections.
Can you add some detail on the tool-paths, feeds per tooth, ramps etc… Looks like a FDOC based on the shaving hairs around the first picture.
I’ll see what I can share later but it looks like the 3F needs curve testing as well. A good cut shows very consistent machining marks.
The 8mm shanks definitely moved around less than the 0.250 tool.
I feel like I have gotten marginally better surface finish by using a conventional finish pass with a 20% of diameter stepover, but it really could have been placebo effect as the difference was small.
I have only gotten smooth (near mirror) finish in extruded acrylic by sanding the edges by hand: 220 -> 320 -> (400) -> 600 wet -> 1000 wet -> (1500 wet) -> 2500 wet -> 5000 wet, (steps in parenthesis may sometimes be skipped). Yes, time intensive but worth it depending on the importance of the finish quality…
The following pics show surface finish after using onsrud 65-000 series (Super-O) and a Yonico 14103Q Carbide v-groove (2-flute)…
No finishing, just endmill:
After finishing with the sanding method above (only to ‘2500 wet’ though):
Can you find the polished one? (It does have a finish blemish though…):
3 Likes
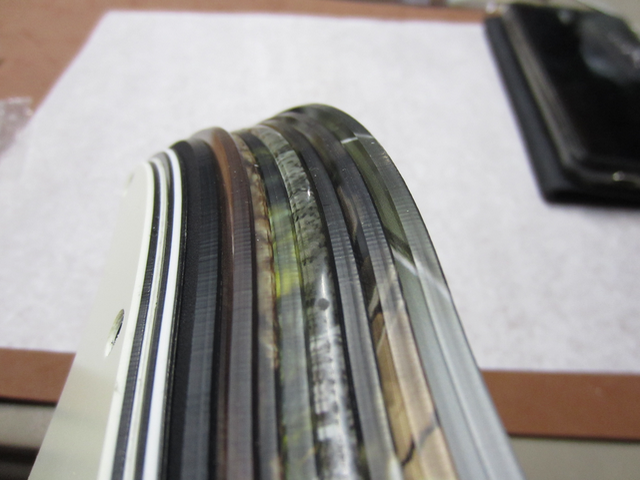
Same part rotated 90 degrees between photos. 2nd shows chatter from V wheel deflection as the spindle moved in the Y direction. It looks worse than it is but at least its consistent!
Parts straight off the machine, no post processing. The top 1" is final OD, the bottom 0.0290 is +0.010 radial and was cut with a 4mm 2F, ready to be setup for the flip and final machining.
5 Likes