After going down the rabbit hole of @Julien 's Acrylic Wall Finish Tips thread and messaging the man himself privately I’m no closer to achieving anything close to a mirror finish… I could deal with a little sanding and torching, but I feel like I should be able to get more resolution out of my machine.
Setup: S3 XXL, with newly installed HDZ, Wheels cleaned, Belts Tight, Using this 3" long Unicorn Cutter https://amzn.to/35AqMYE
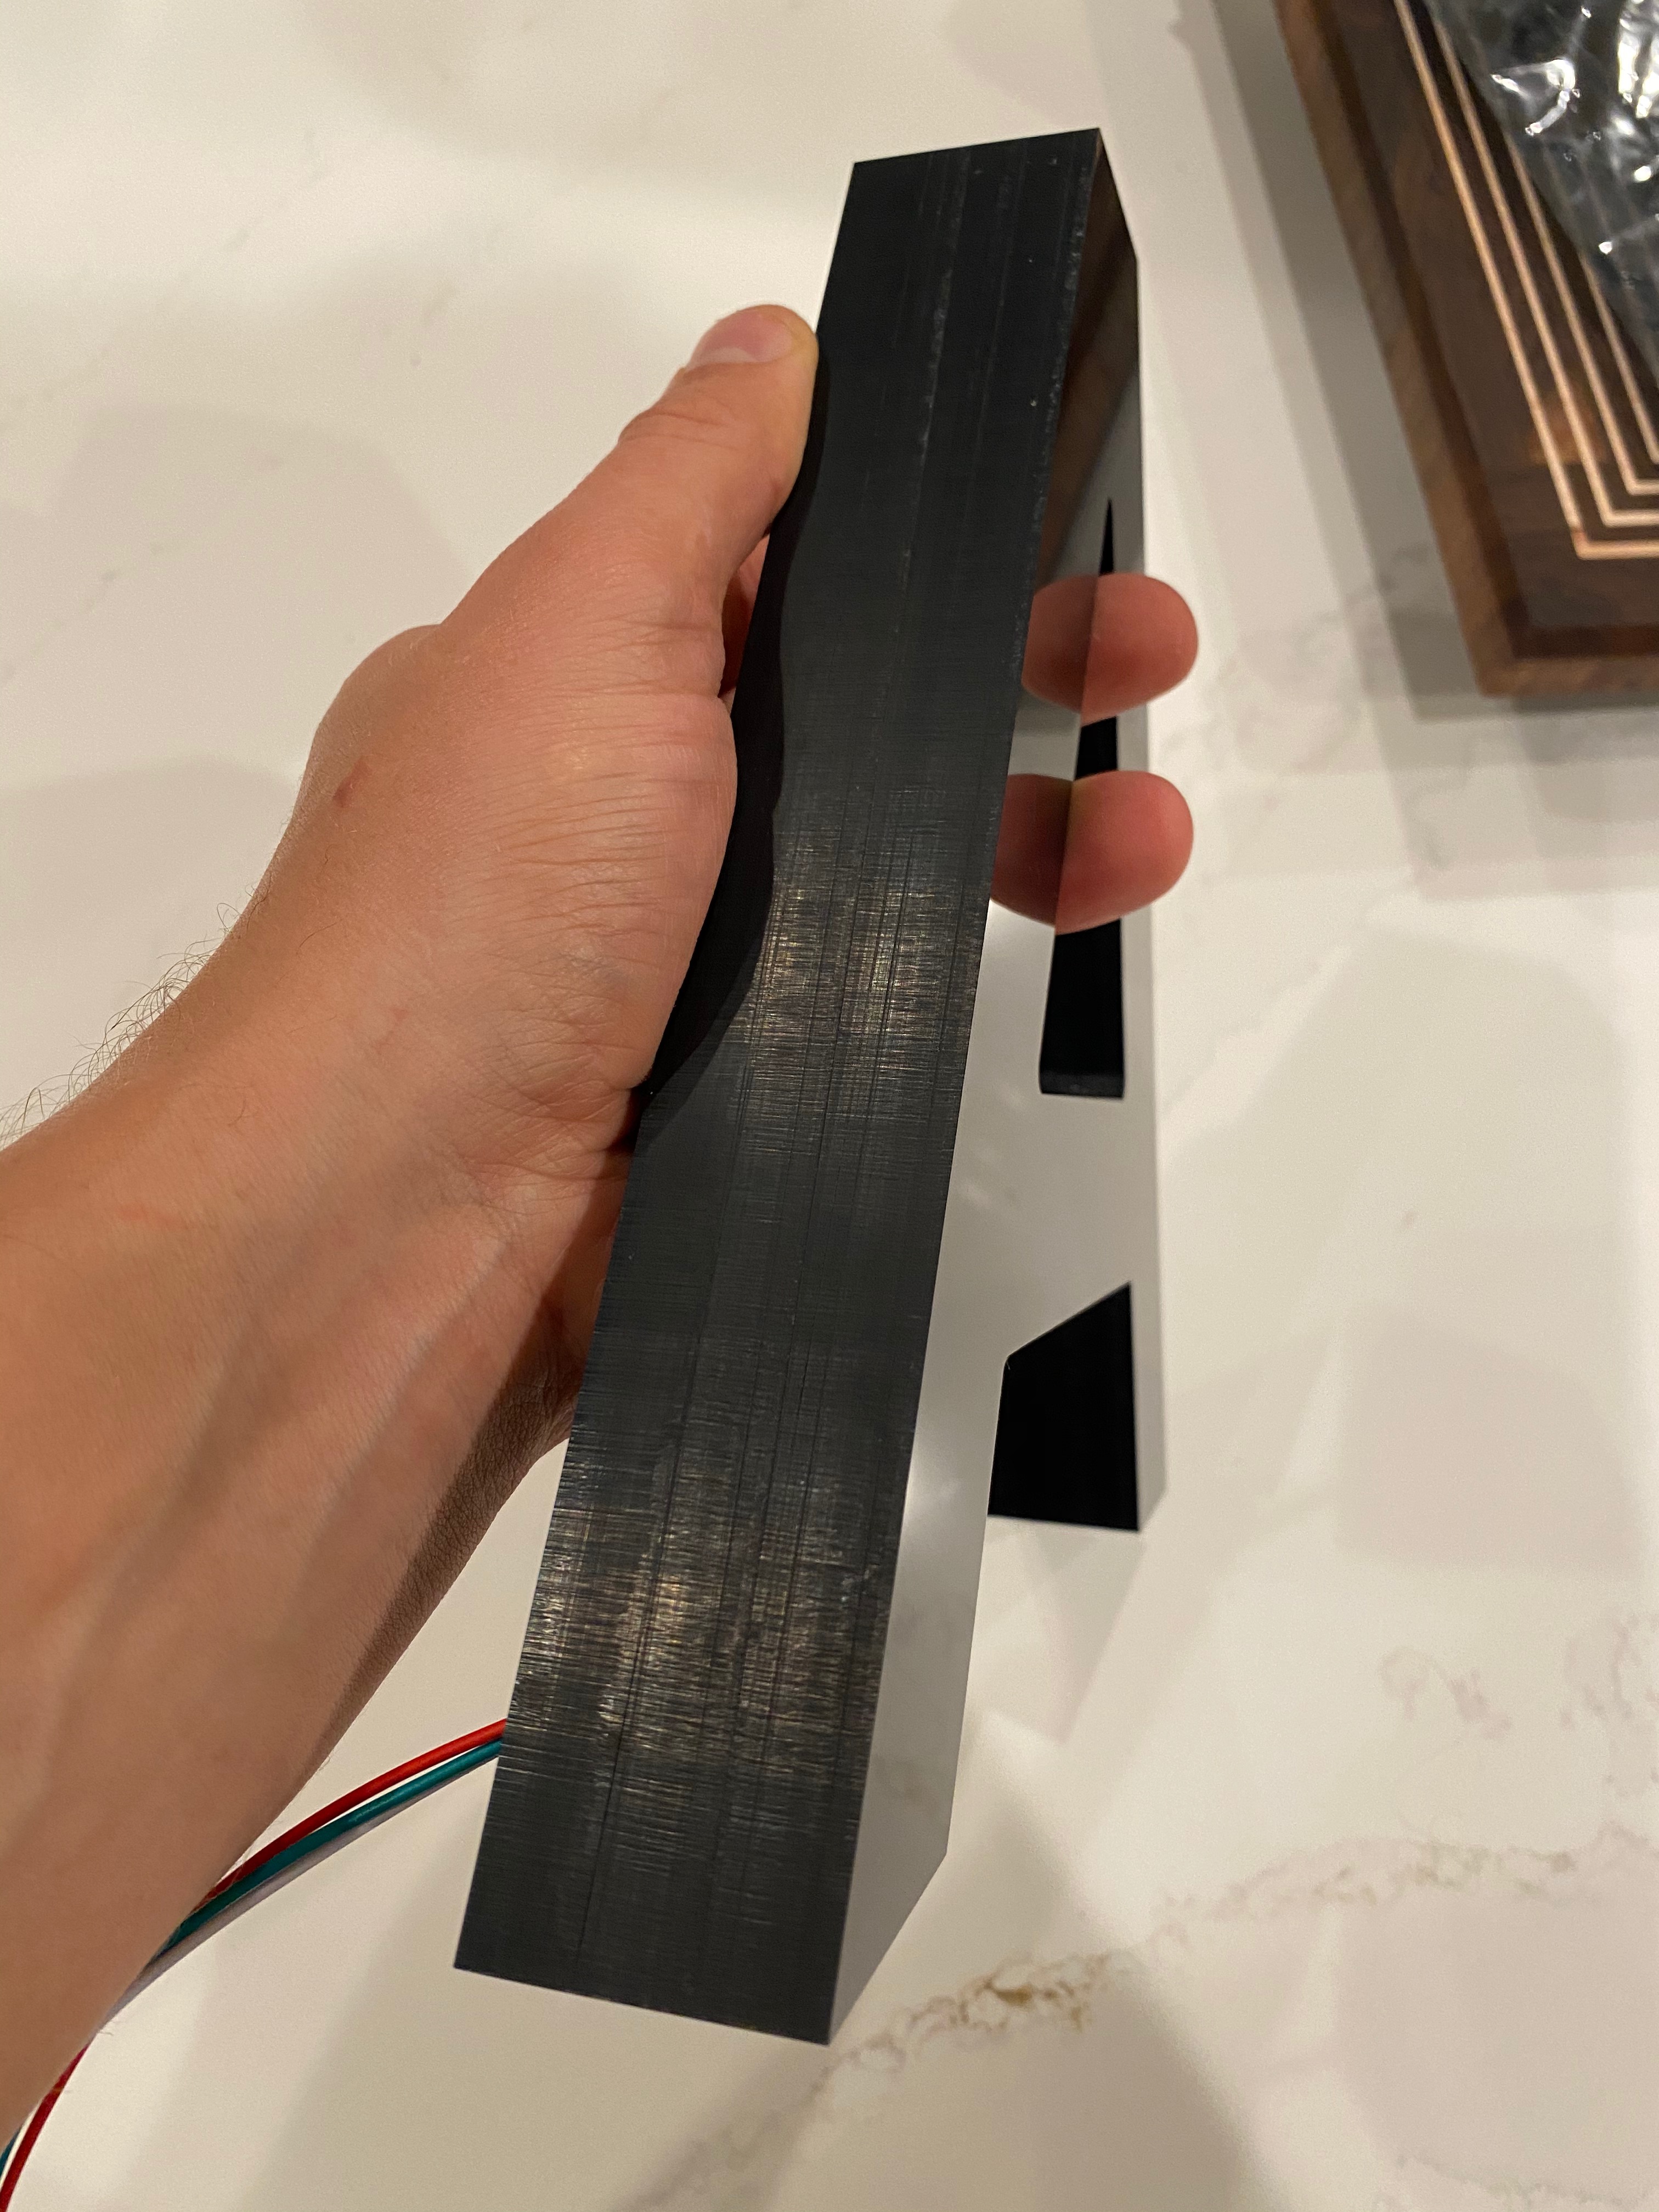
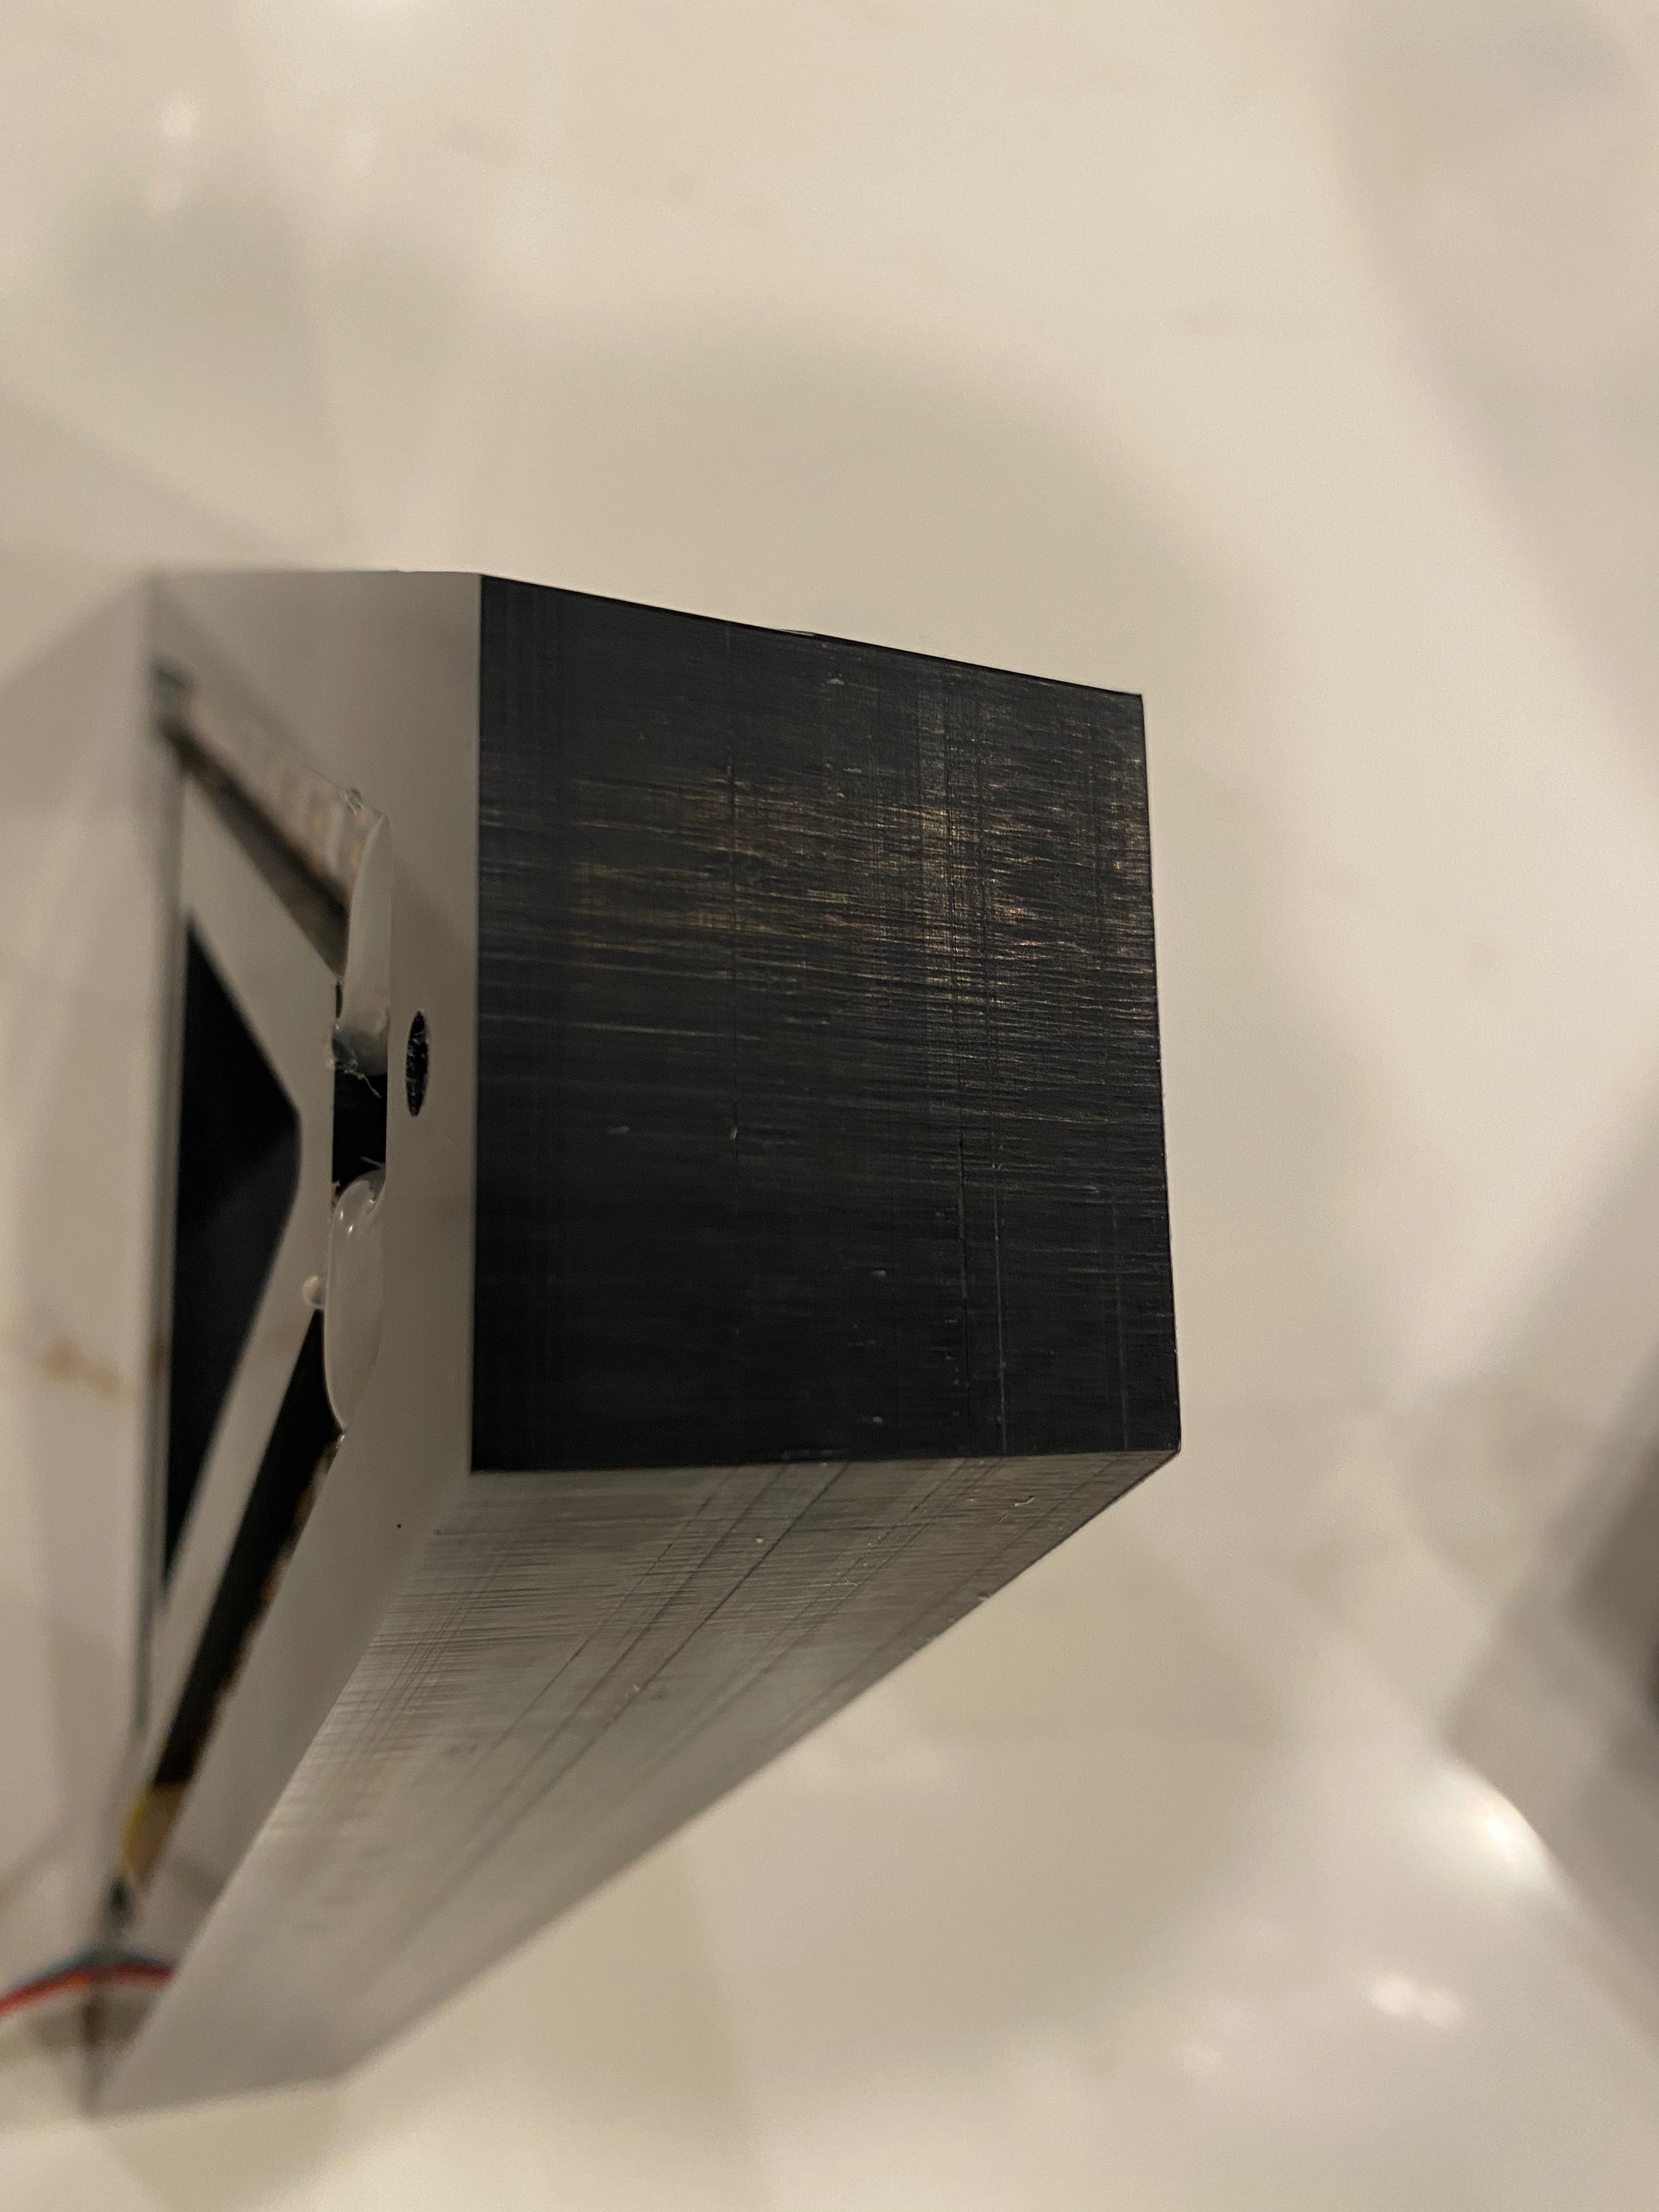
Material: 1/2" Black Acrylite fused with Weld-on to create 1.5" stock
C3D Router: Set to 3 or 4 (tried both no appreciable change)
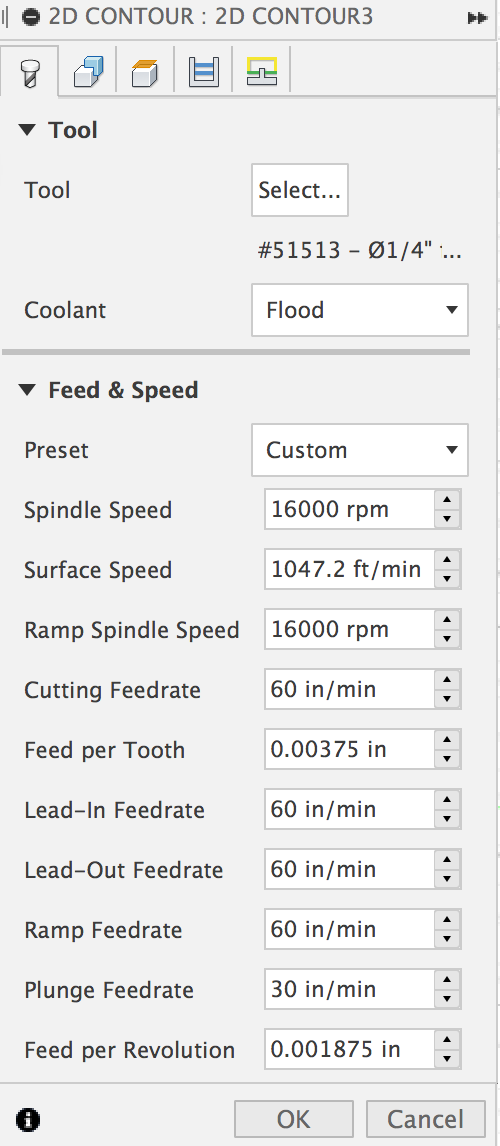
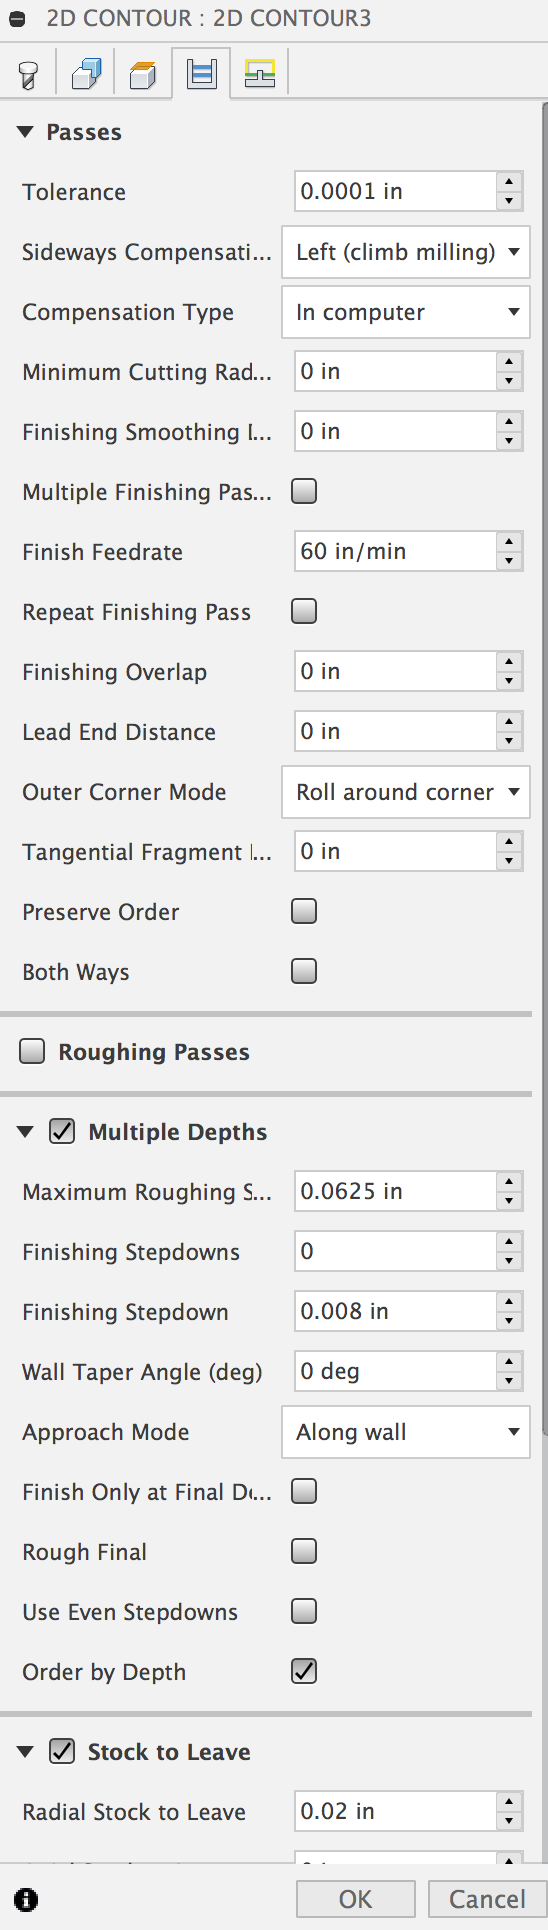
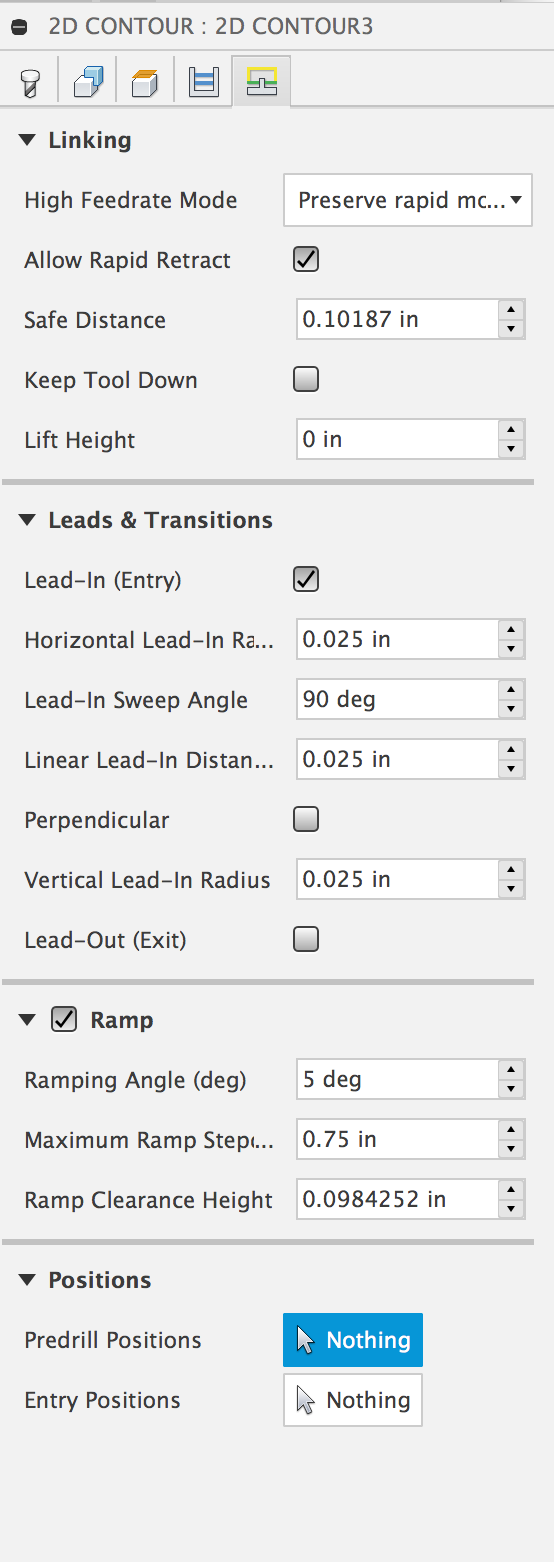
The Tool-path settings:
Roughing:
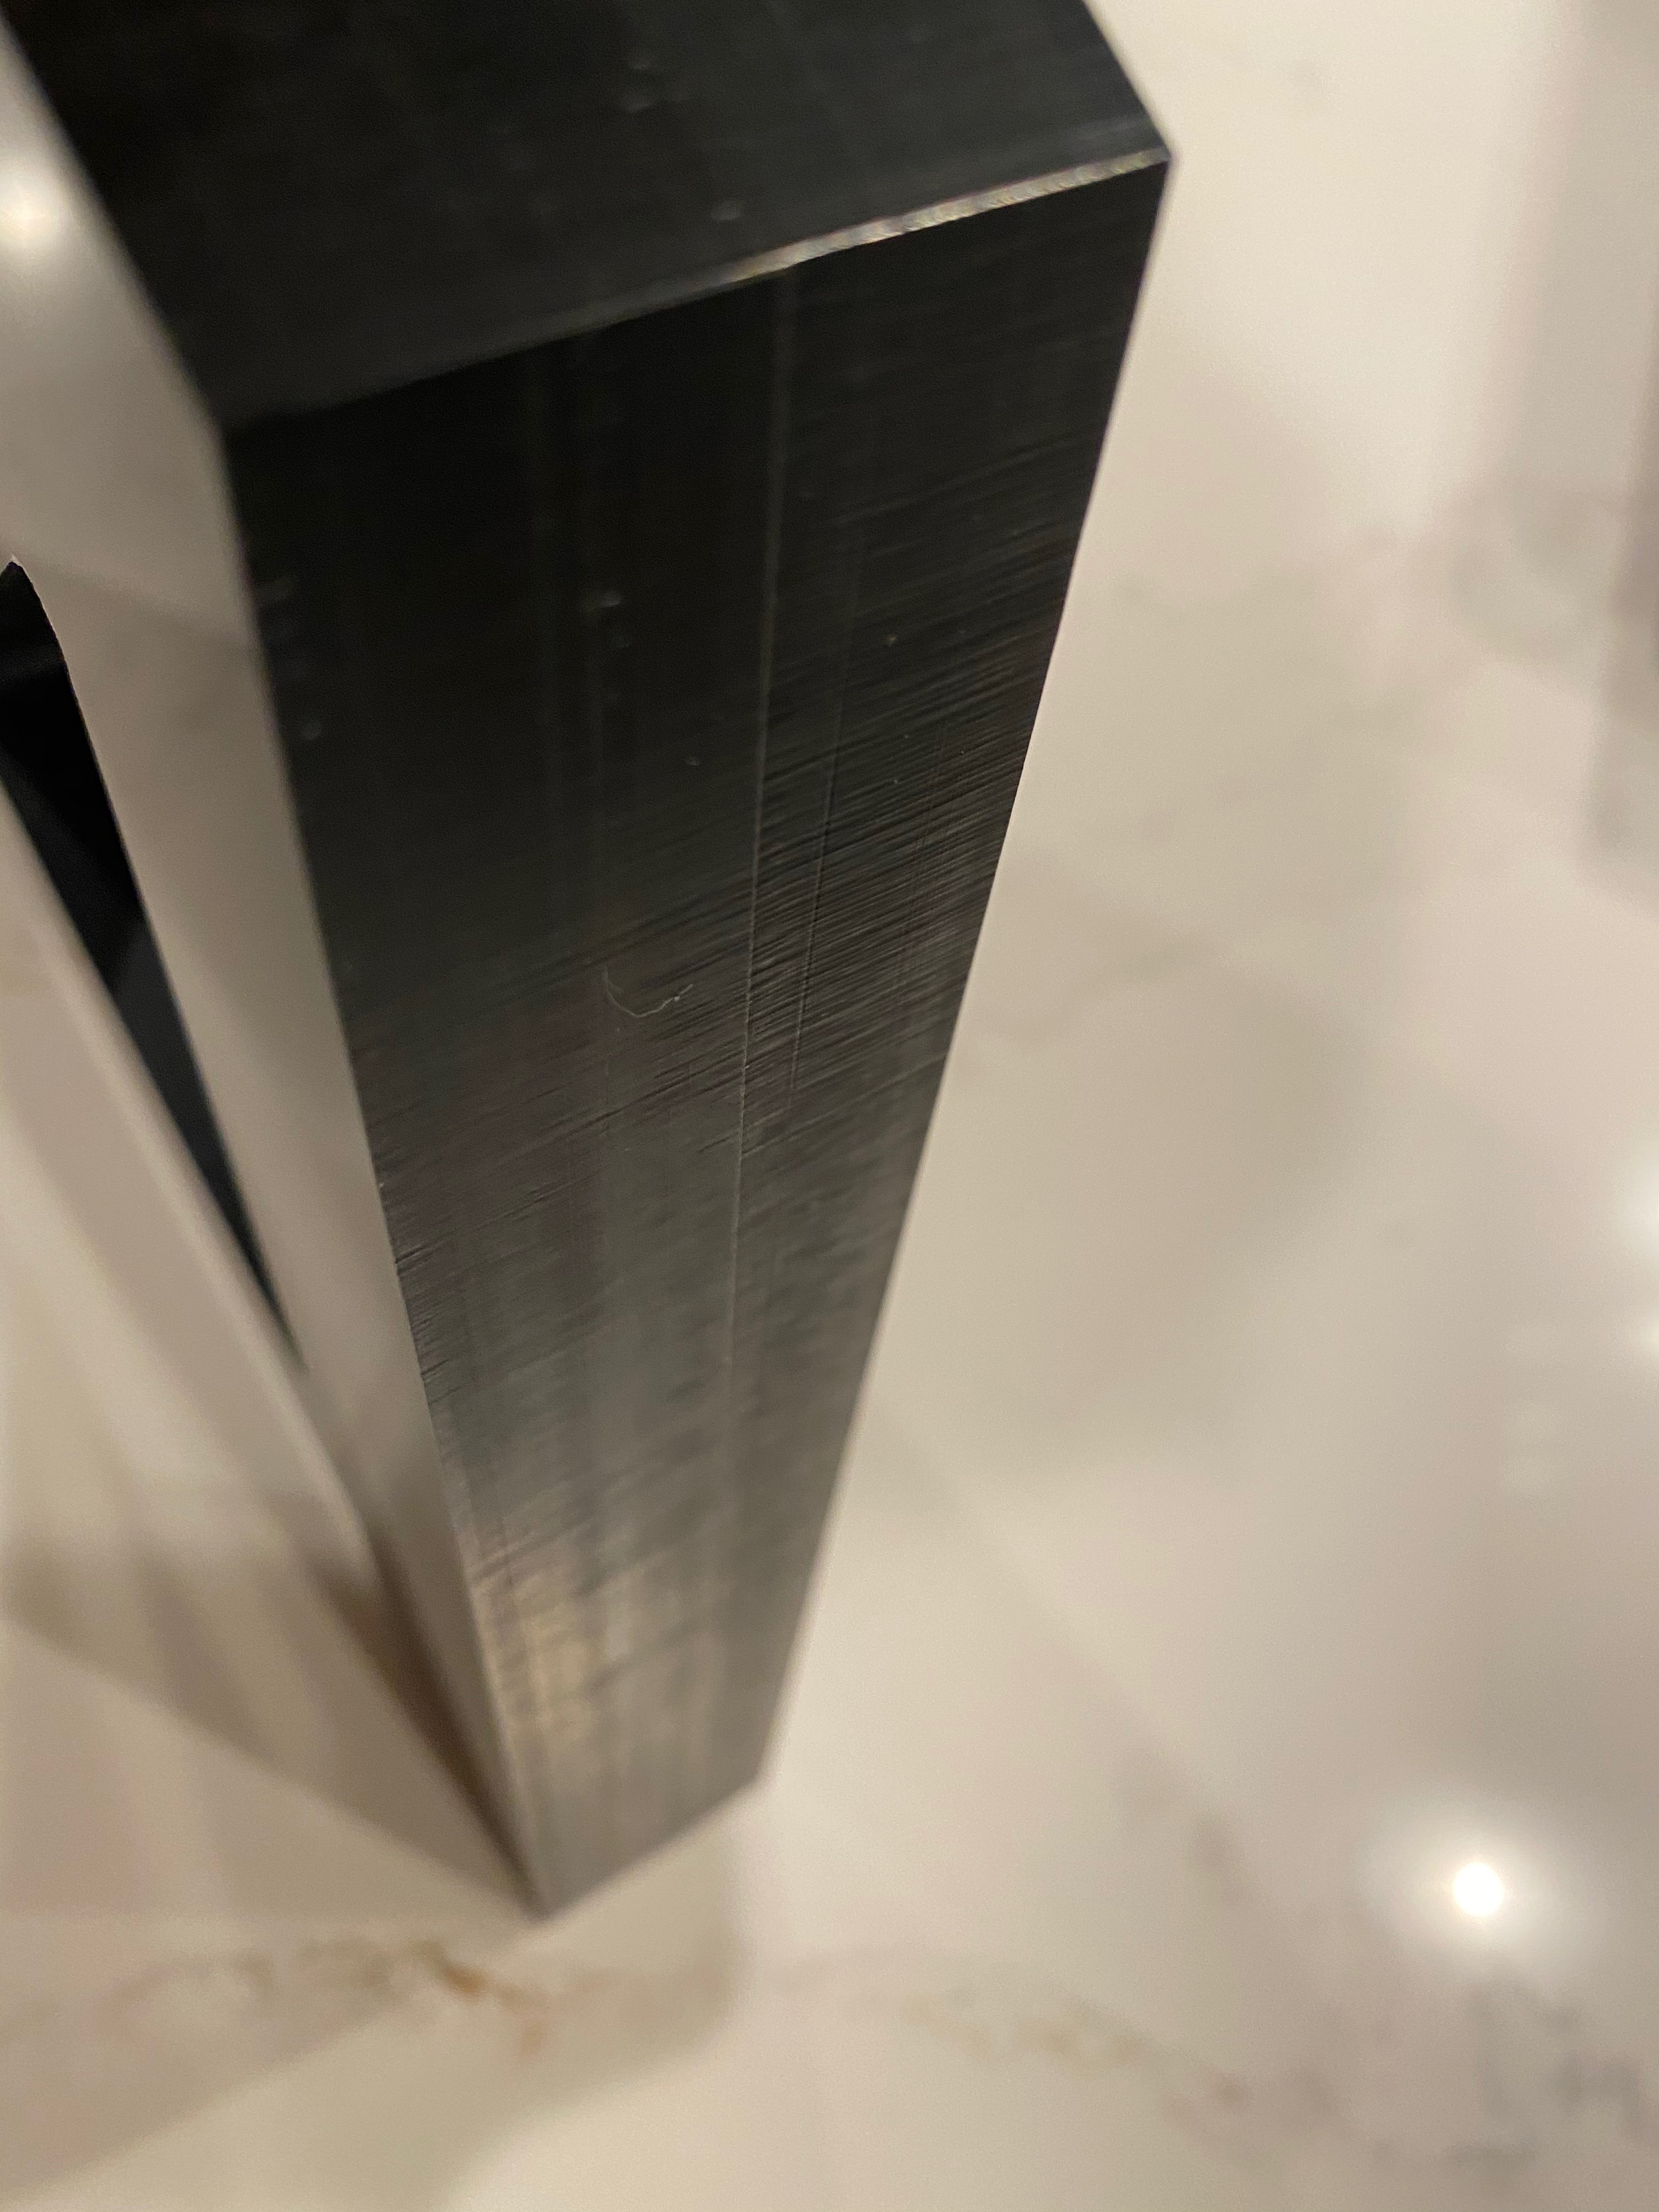
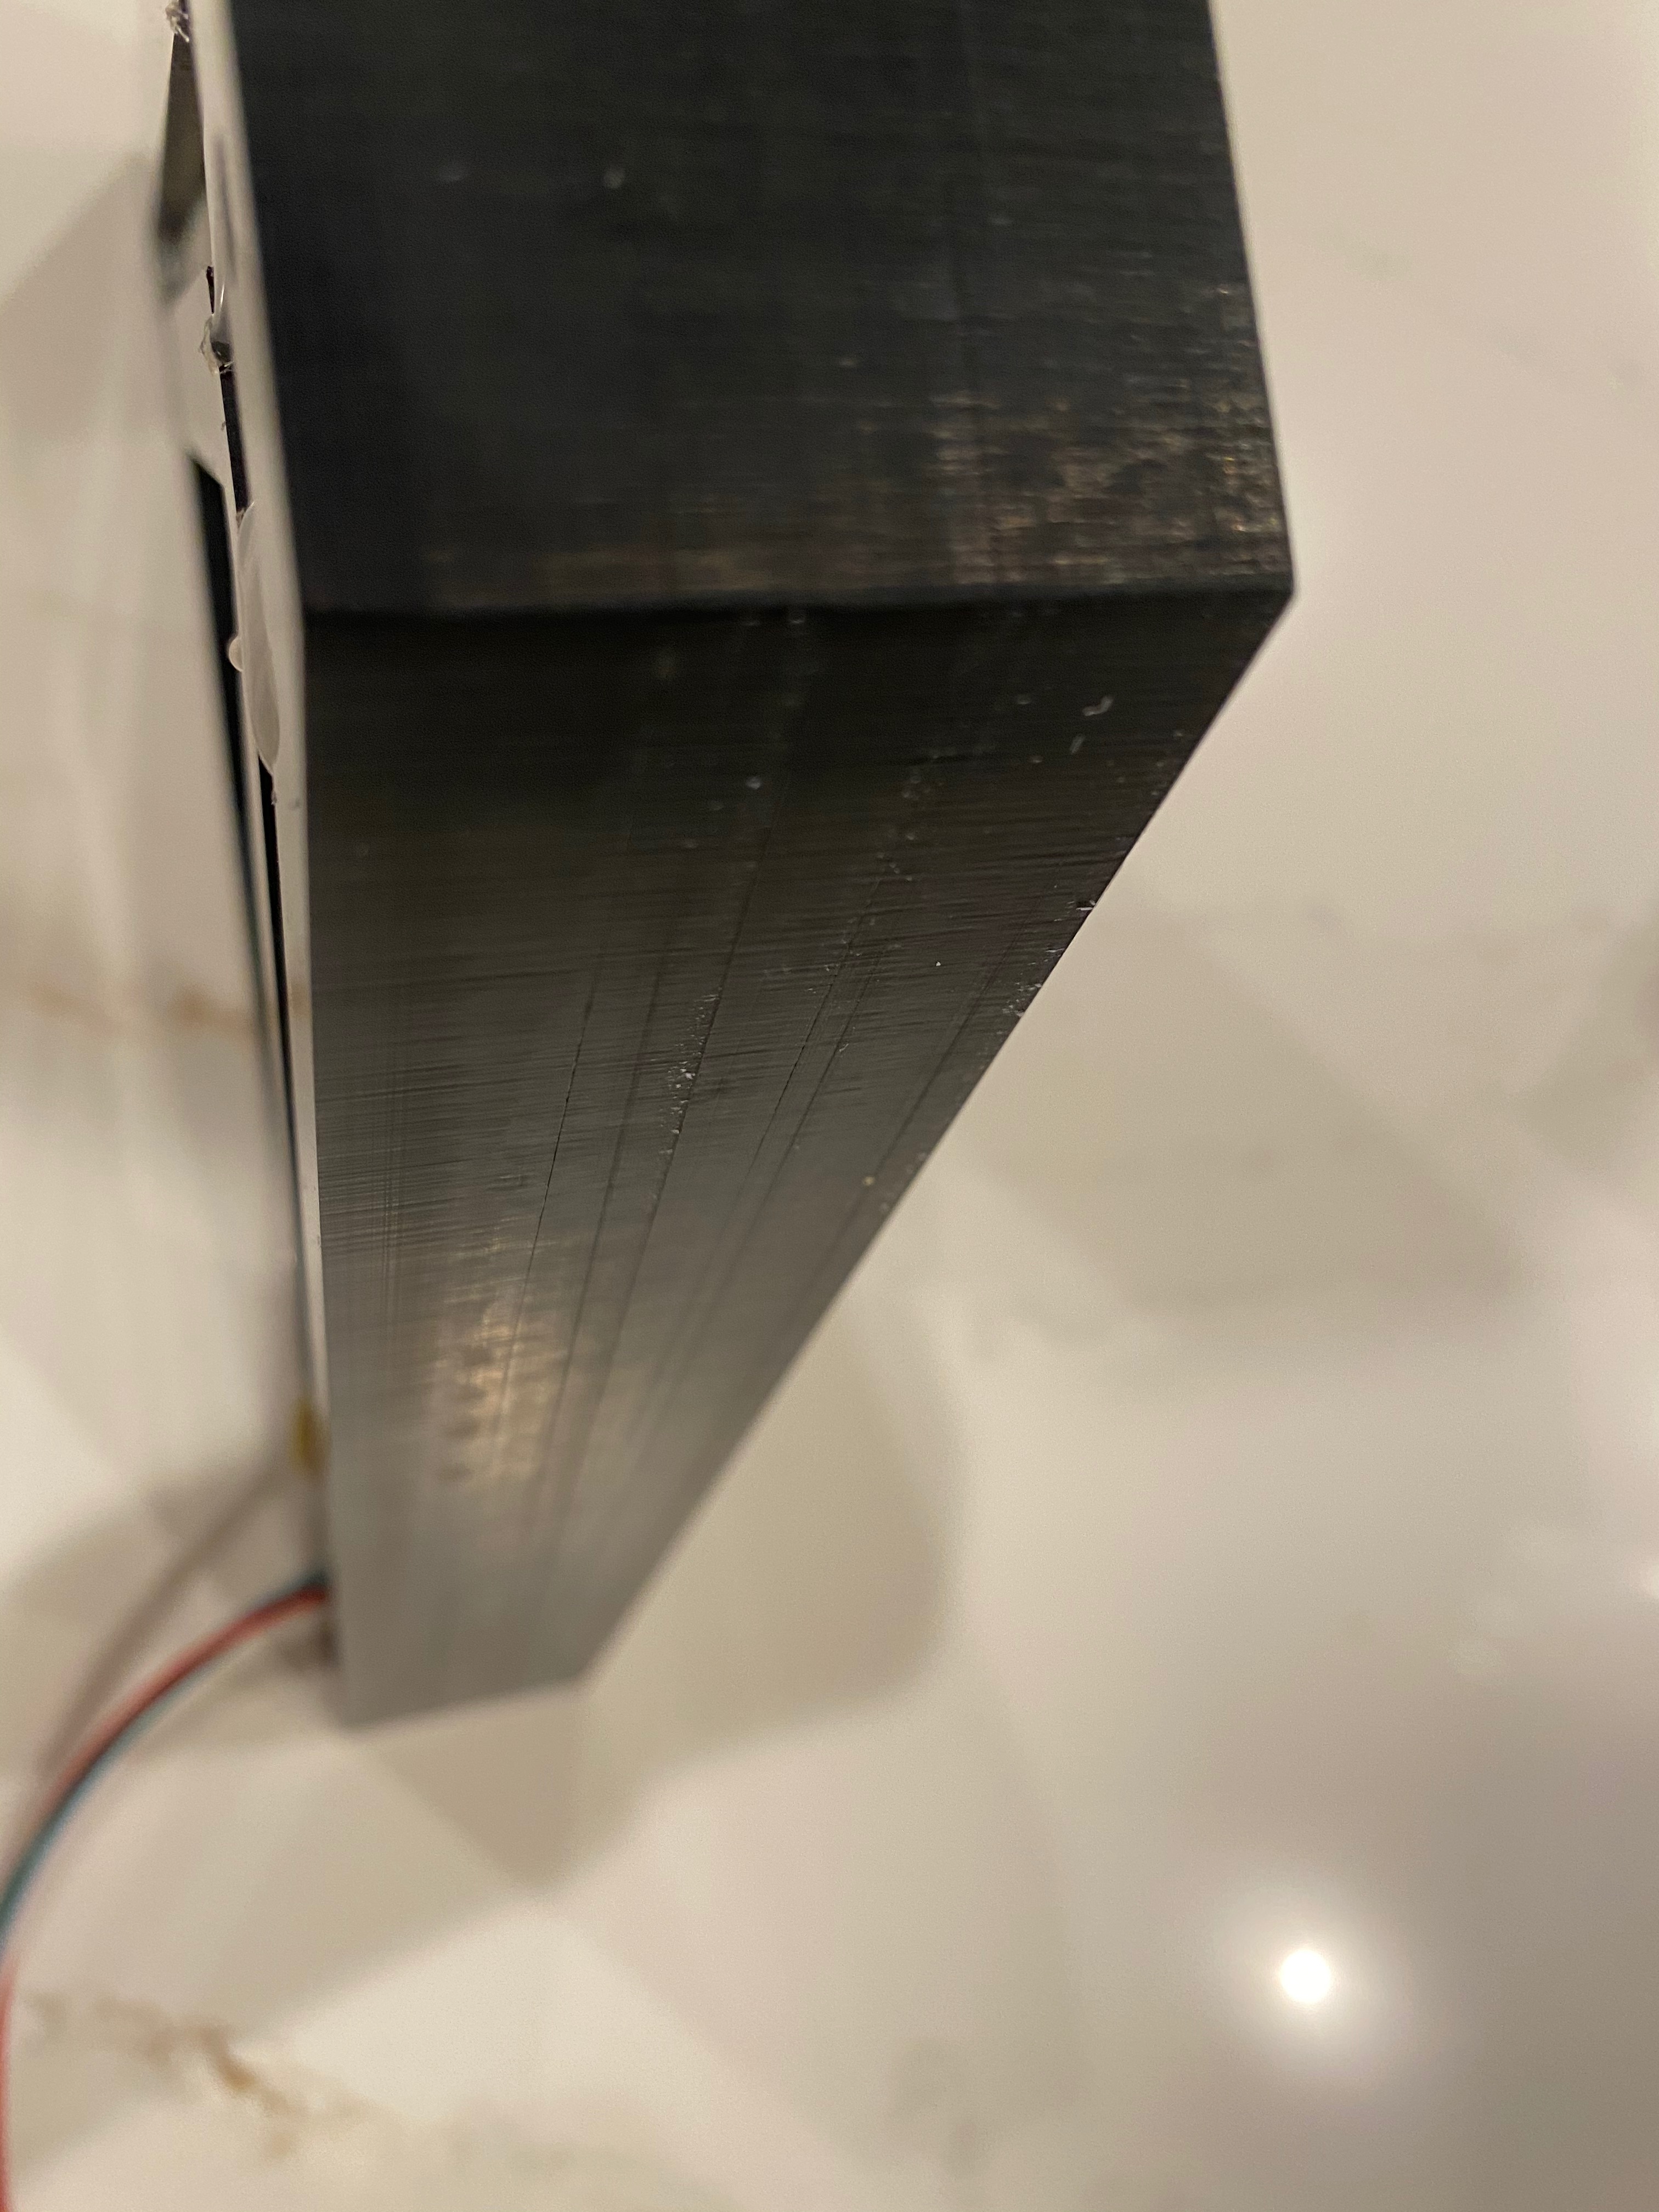
Note the result before and after finishing isn’t drastically different and this is the best result after a lot of toying around. Also, each travel seems to produce a slightly different result aka… traveling X+ vs X- I won’t even get into the curved letters (they are worse) …
Roughing passes with multiple depths (finish only at final depth), check multiple finishing passes and run a couple low stepever cuts (0.002ish), repeat finishing passes is sometimes good too.
The full depth wall contouring really help smooth everything and look into tightening the tolerances and smoothing to deal with resolution around corners. Also not sure ide use a down-cut on stock that big.
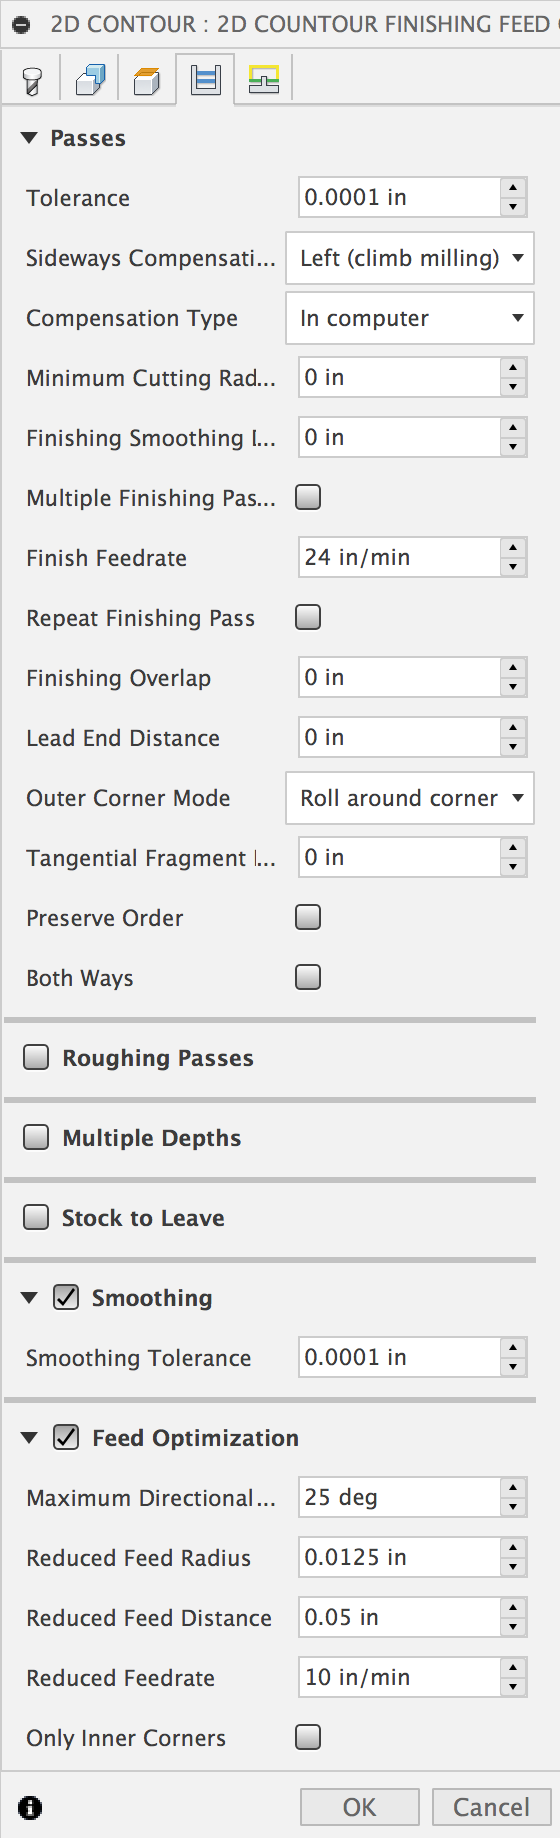
Vince, I tried the 2 finishing passes and finish only at final depth method in addition to the separated roughing and finishing passes I posted above. Turning on full depth finishing did not improve the result and I found the separate Ramped finishing path at a slower feed rate removing .02 of the stock that was left worked better… are you saying that perhaps removing .002 of axial would be better?
Its 14 letters and custom font, so not worth the effort. Really i’m just complaining about about 2 hours of sanding and polishing if I really wanted a perfect mirror but I would settle for torch-able outta the machine.
Did you try a conventional finish pass? In something at soft it should be able to cut full depth without much issue. I was saying a couple full depth passes with a small radial step.
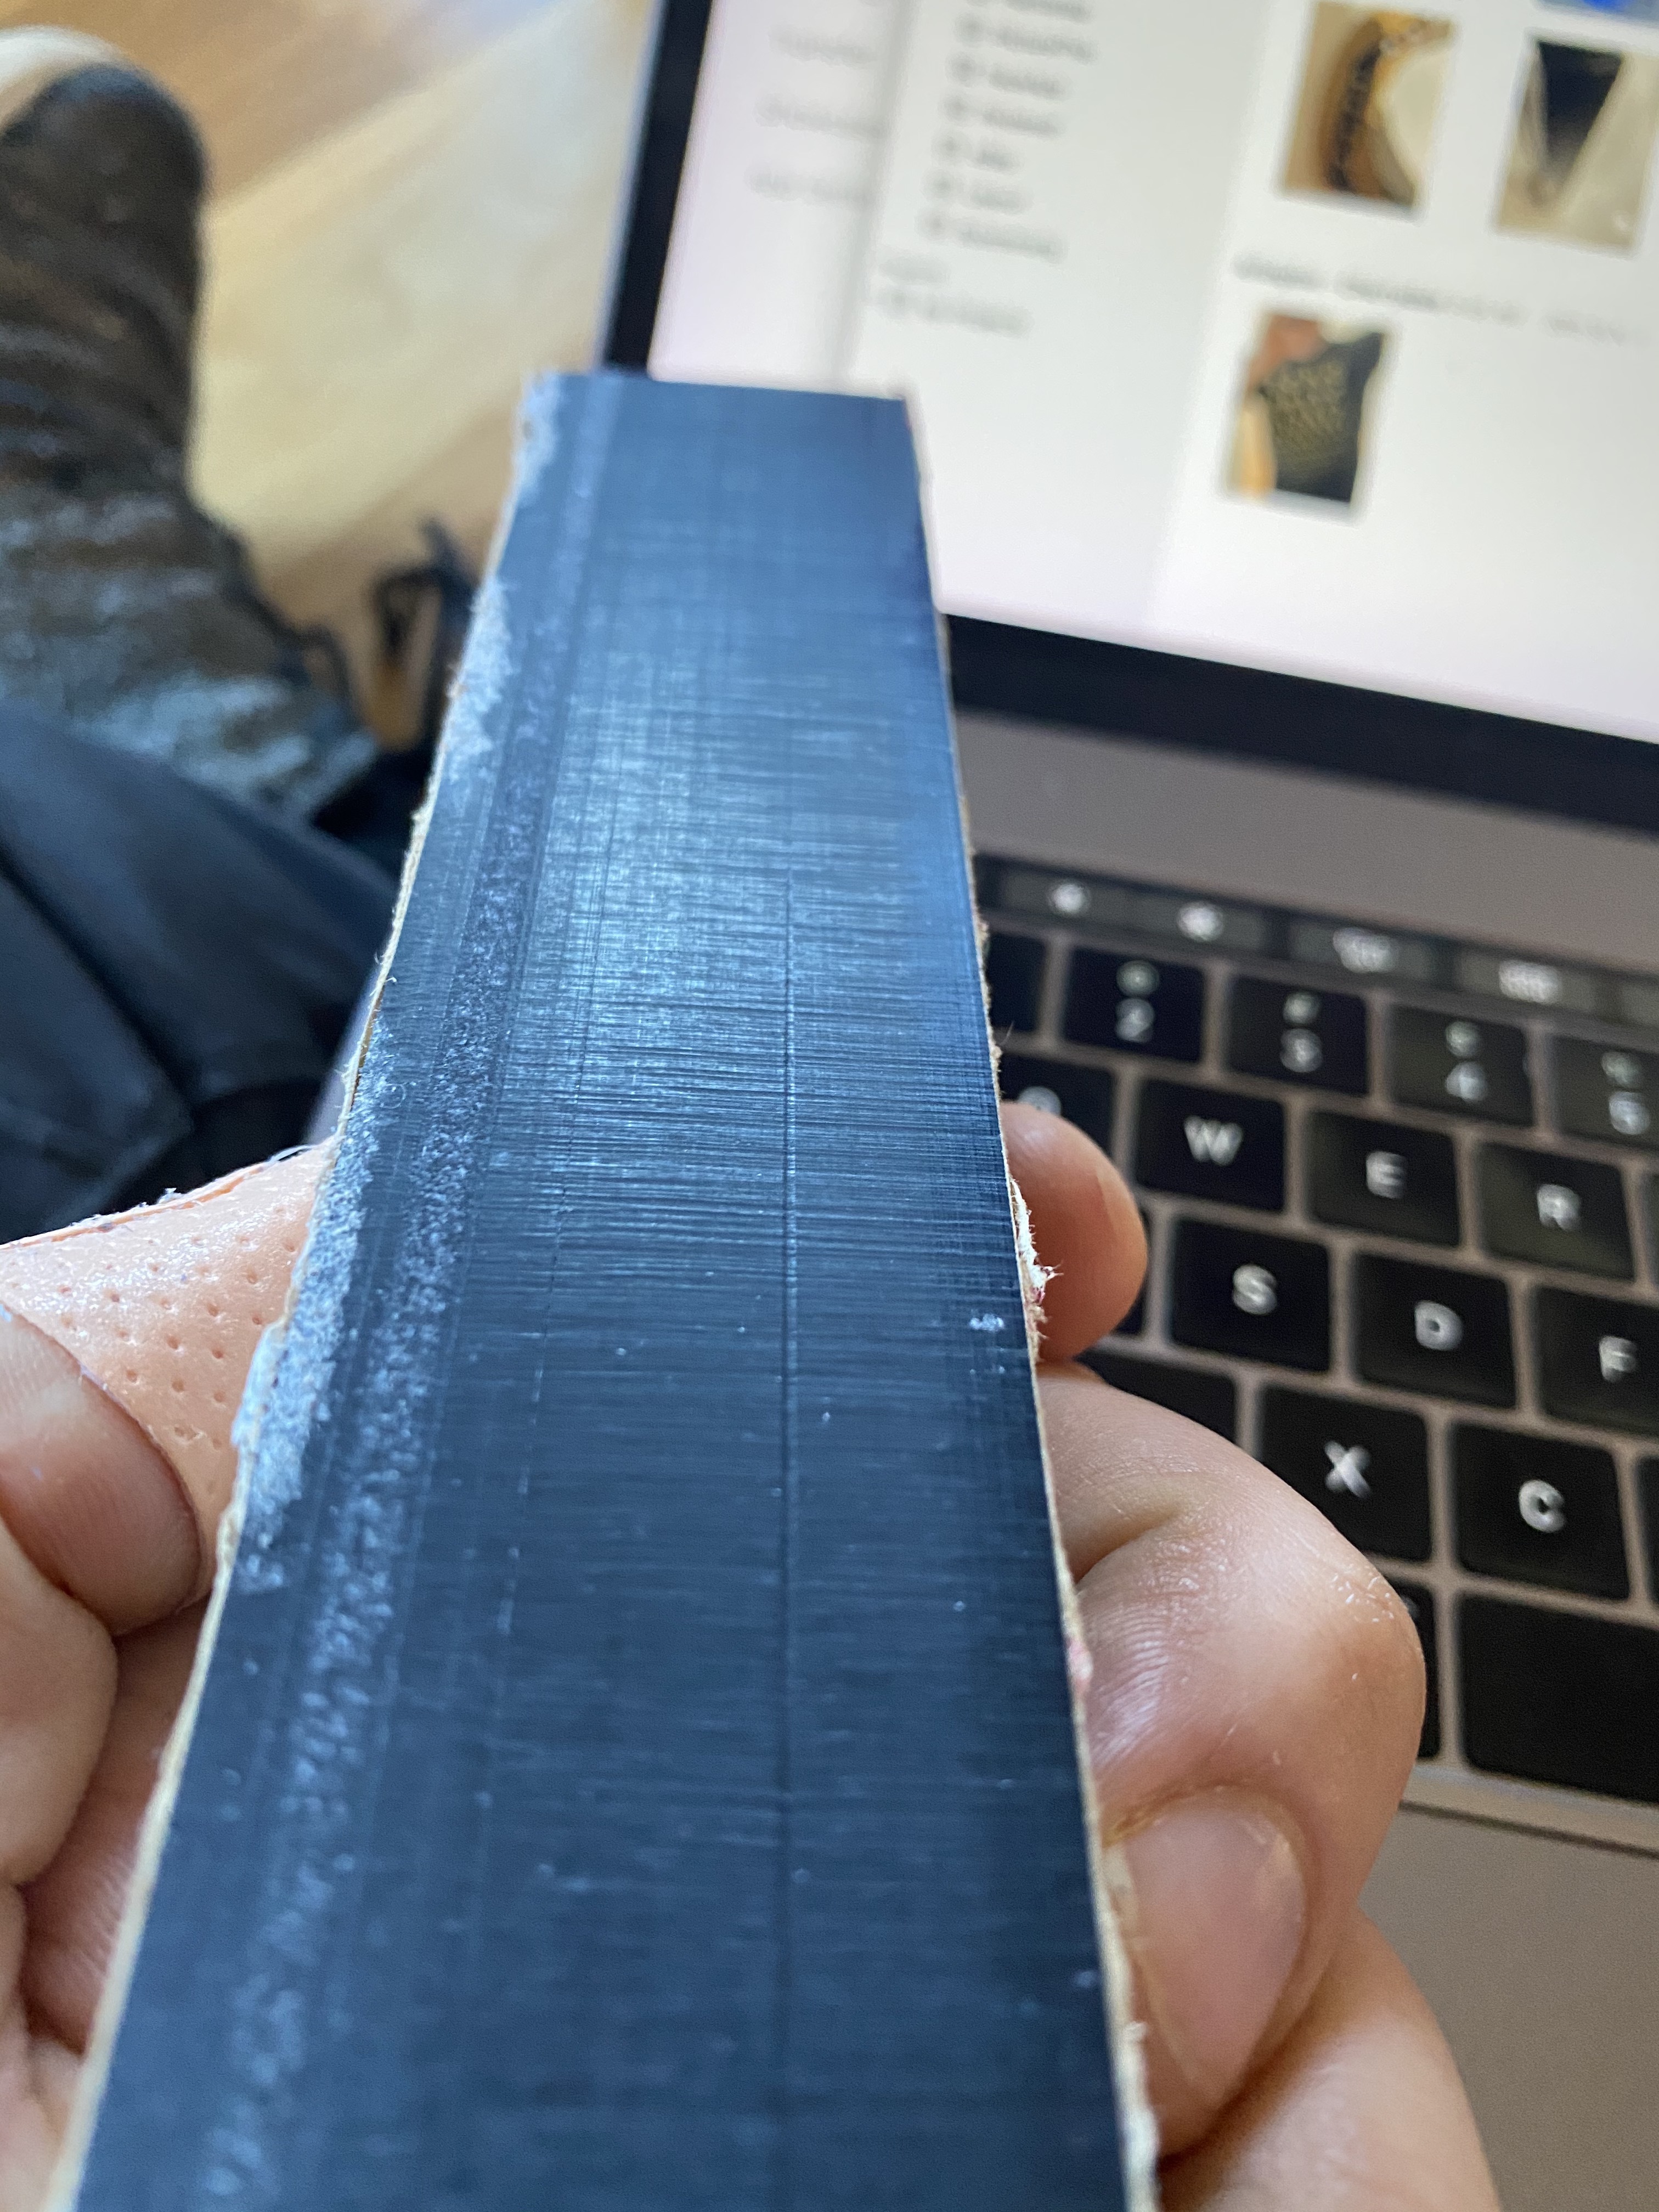
Negative, the result before and after finishing aren’t drastically different.
Yes, but It did not like a full 1.5" depth removing .02" of stock to leave and 60"/min… Entire HDZ started to vibrate as it tried to go through the cut. At 24"/min it doesn’t have as much of an issue… but I did the ramp to help it out even more.
Oh yeah, 0.020 at 1.5 is quite a bit of load. Can you ramp down and still leave around +0.005 radial, then clean that up full depth in a couple passes?
I do the same thing for making really nice surface finish bores in aluminum.
Yes, I can try that tomorrow… to be clear… you want my roughing pass to leave say .02 axial AND radial… then have the first finishing ramp down and remove all but .0005 of the radial (and all of the axial?)? and then one last FDOC removing the final .005 of radial?
1
… not appreciably better or worse than before. I’ve got a bit of LED soldering to do on an “S” happy to try any other ideas for the remaining 4 letters in about 1.5hrs from now.
I have a bunch of questions…it looks like it is several plates glued together. If it is how is it glued together? Have to tried the cut on a thinner sheet to see edge finish difference? Have to played spindle speed? I’m leaning towards more speed on finish pass. Make your cut wider to help the chips escape maybe…
There are a million variables we could play with…but if I remember correctly you said this is a one off build…time and money…I would sand and burn
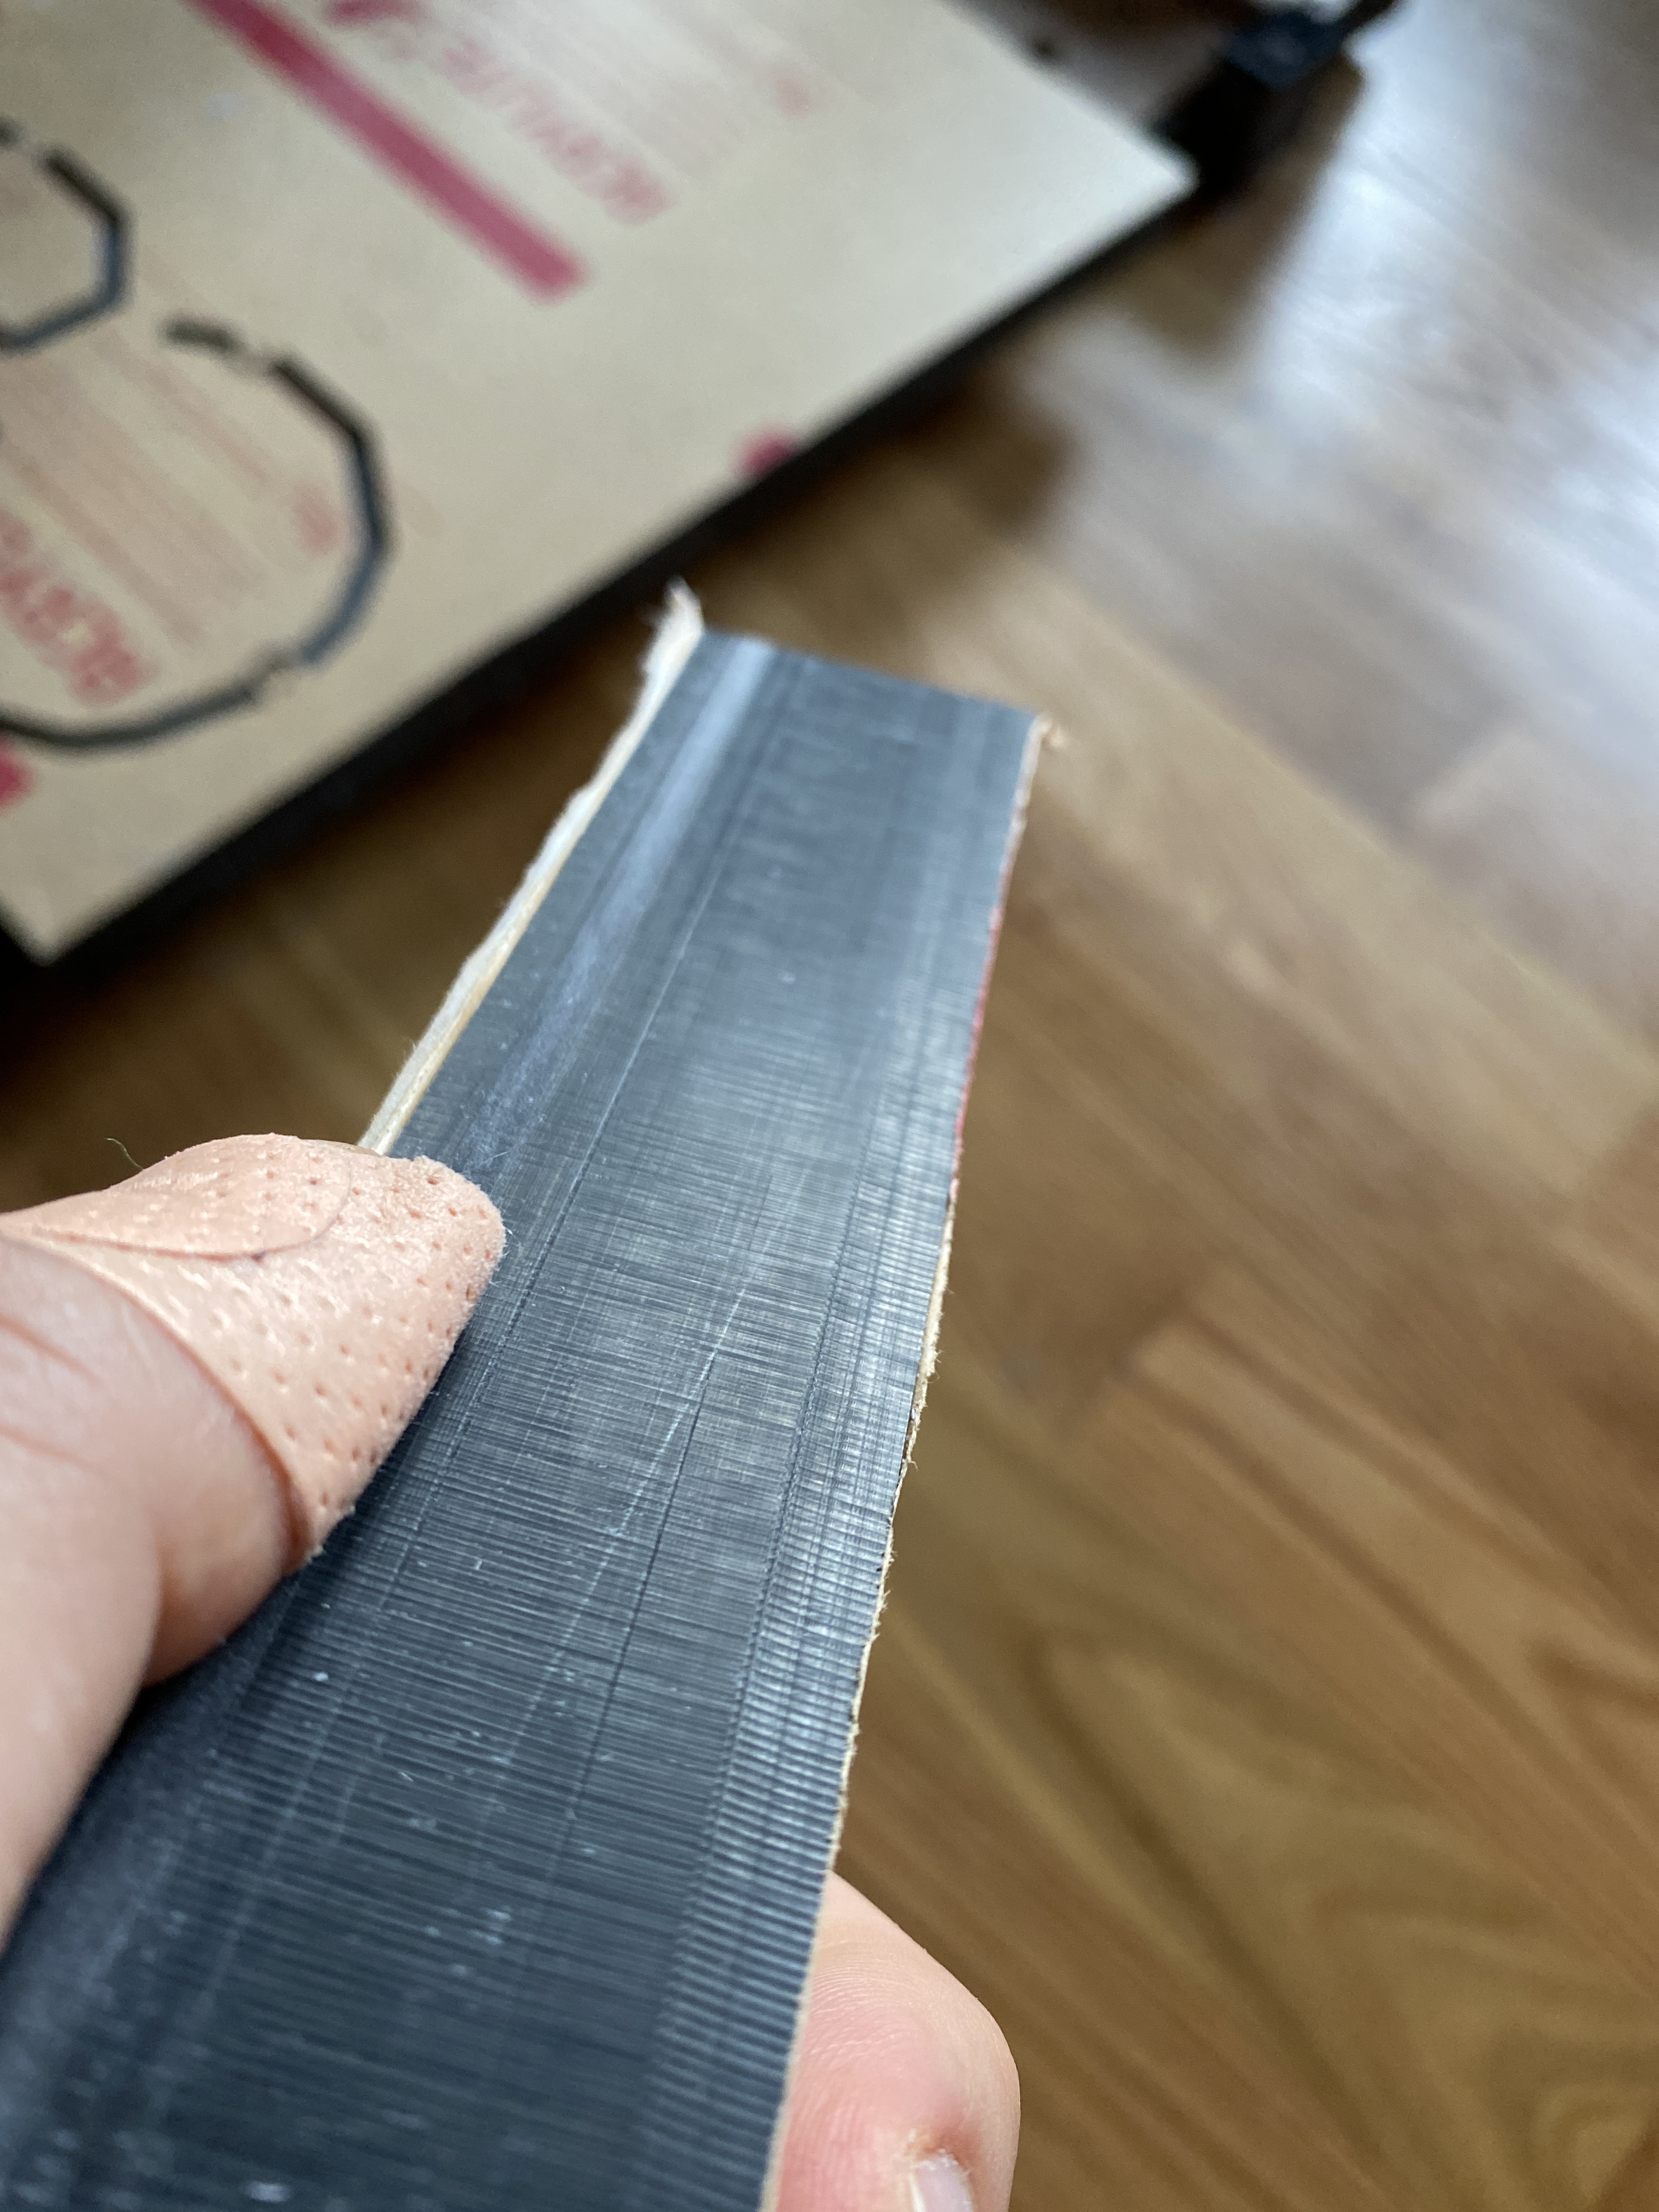
Well that didn’t work… while blowing did get more chips out of the slot it clogged the x axis z wheels so quick it didn’t make it through 1 letter before skipping steps.
Your other idea of FASTER might have helped tho, I cranked the C3D router to max RPM and this is the result.
Not only that, but when you fuse the layers of acrylic the glue used is really bad for you. Most retailers won’t sell it any more citing cancer as a concern.
Torching it reacts with the glue differently then the acrylic. Not a huge fan of the smell and what it might be doing to me.
We if cranking the spindle up helped I would suggest slowing the feed down. I know when I watched the rough pass I didn’t like the sound it was making. I’m all about nice even tones…