What did you cut on your Shapeoko/ Nomad today?

Yesterday:


Just messing around learning more about the SPXXL.

Today:
I surfaced and put a two inch grid pattern on the waste board.
I BIG THANKS to WillAdams for helping me with the grid.

10 Likes

Please forgive my ignorance.
What the heck is grist?
Thanks for the Progress statement! :wink: :blush:

1 Like

Wikipedia

1 Like

Cut some steel for a Haas VF6 upgrade on the Pro xxl

13 Likes

Hi @Vince.Fab - could you provide a bit more info about that fancy deck on your pro?

It’s not this one: Carbide3D Shapeoko 3 XXL Aluminum Fixture Tooling Plates – Saunders Machine Works

Will it be coming soon? How many plates are involved?

2 Likes

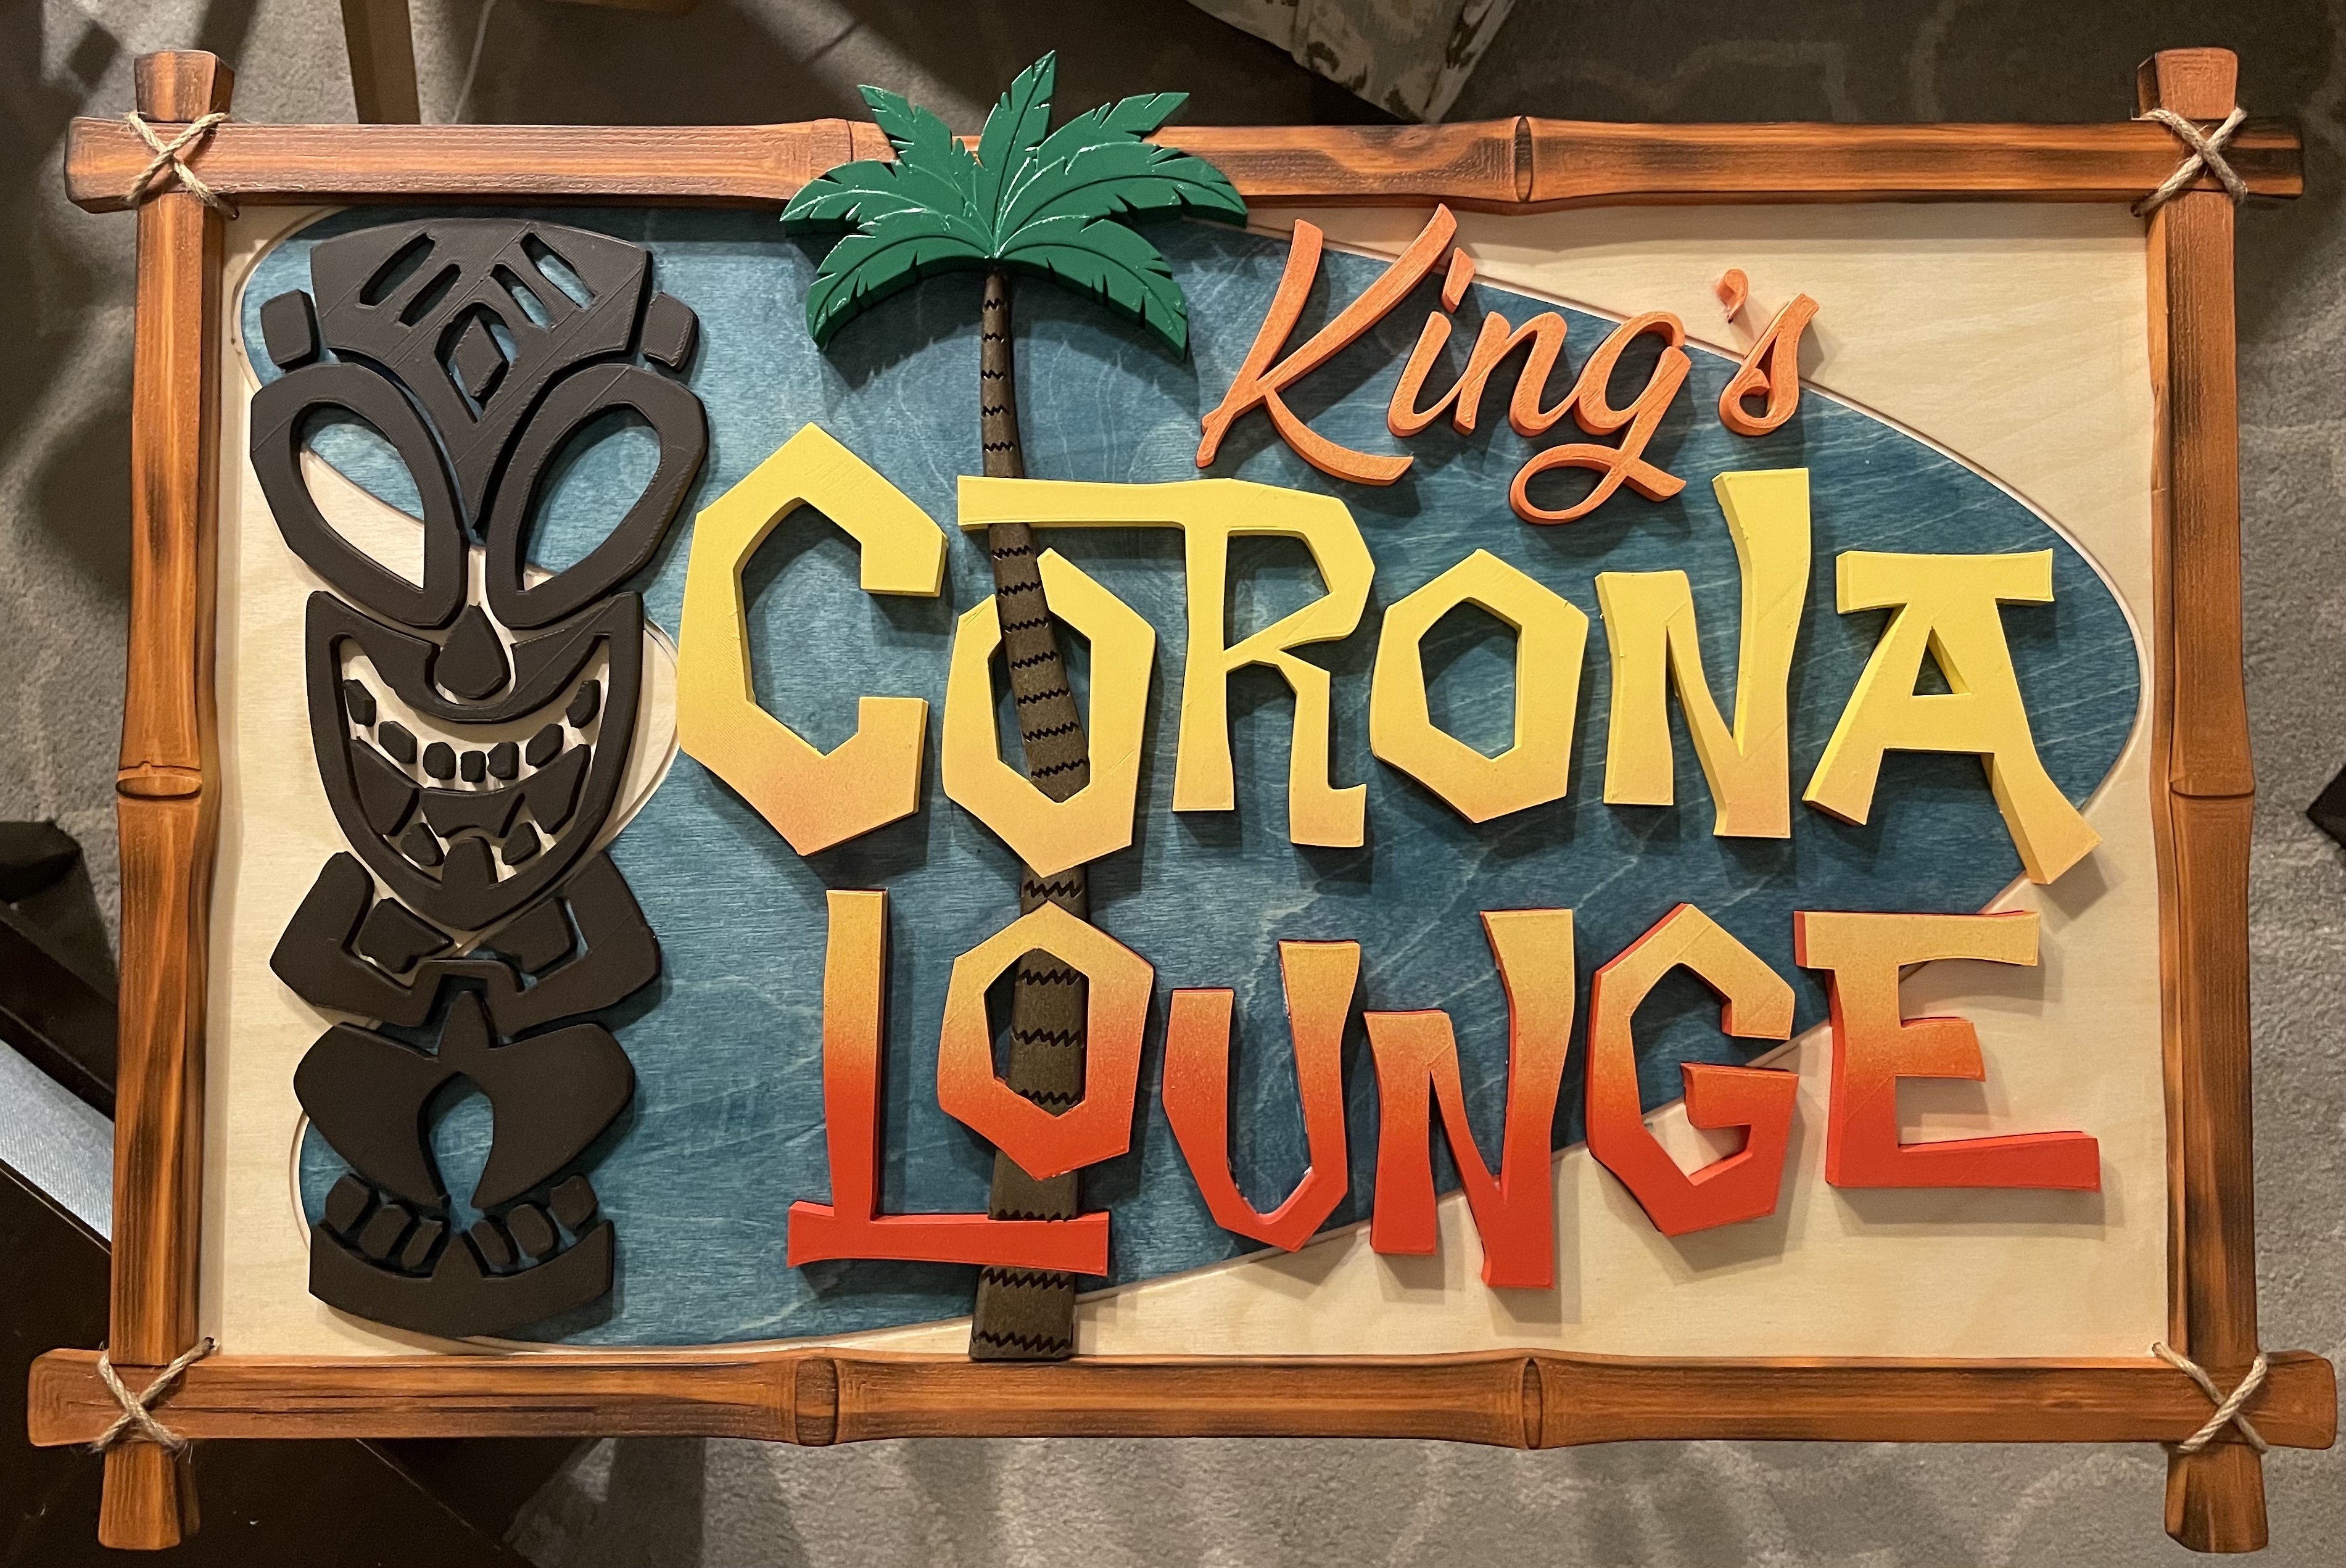
[Note from the future: I posted a full write-up of this build as part of Community Challenge #23. Click here to see the full details]

Over the last year or so my in-laws decked out their garage as an open-air area to have guests, they call it their “corona lounge”. I carved the background and border on my new Pro, the letters/statue/tree are 3d printed and sit in shallow pockets for alignment.

36 Likes

That sign is very nice. Good looking. The word Lounge looks like a gradiant. Did you air brush ?

2 Likes

Still rather new to cnc and have had my nomad3 under a week but happy so far. This was a test of some jarrah, local very hard wood, 1860Ibf/8270N. It’s distinctive colour and weight makes it easy to spot from my Dads scrap wood pile I’ve been raiding.

20 Likes

If you don’t mind sharing,
What bit did you use for Finishing?

Yes sure, it’s a tapered ball nose 2 flute in 0.5mm.

1 Like

Thanks! I used spray paint to get the gradient. First painted the whole letter orange, then slowly layered the yellow down from the top. Took a couple tries, but overall it was surprisingly easy.

Starting with Grayscale images, I am beginning to work my way through CCpro.
Learning to import and manipulate images and what combination of bits to use for Roughing, Finishing and cleanup.

12 Likes

next step: STL files as input :wink:

@fenrus
Well, I did that, and used your STL2PNG converter which I want to say “Thank You” for that.
Found an image of a 3 mast sailboat in .stl format. Did the conversion in about 3.5 minutes (188Mb .stl file)

8 Likes


Here are a few signs I made to dress up my garage.

16 Likes

I experimented with a drag engraver. I’m pleased as a novice cnc’er.

27 Likes

@AndyP
Which drag engraver and what material did you use? Turned out great!

3 Likes

Aluminium. 60 deg diamond tipped drag bit from gf tools (uk)

I’m not familiar with that brand and google doesn’t return anything. Would you be able to share a link please?

I think I got to them via eBay. Small family run business. It was a quick service, some instructions. They gave me these details to contact them on:
GF Tools. Genmy215@hotmail.com. 07725834745