What did you cut on your Shapeoko/ Nomad today?

The bit that Cadence is “famous” for, the “GrooVee Jenny”, is always “Out of Stock” when I look, and I haven’t rec’d an email notice on availability. Maybe its just me.

How’d you get the copper look in the epoxy? Powder additive?

Yes. I just mixed in the mica powder as I was mixing the two part and got that coloring out of it. I’m just experimenting, so I picked up a mix of colors on Amazon.

Amazon has some decent and affordable bits here.

You can just select a bit with same geometry from the library or take the time to add new bits. ( nother topic altogether.)

Regards,

MRB

I guess I had lucky timing. I have both the 60 and 30 degree versions.


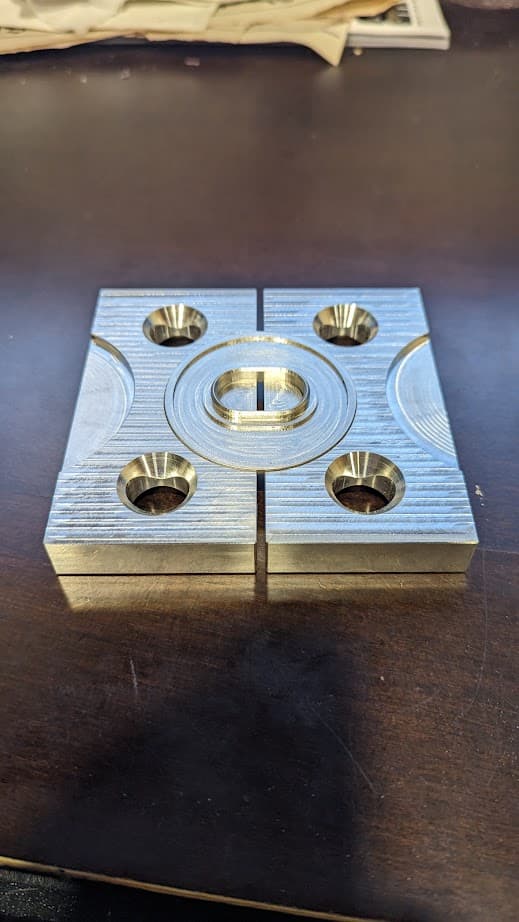
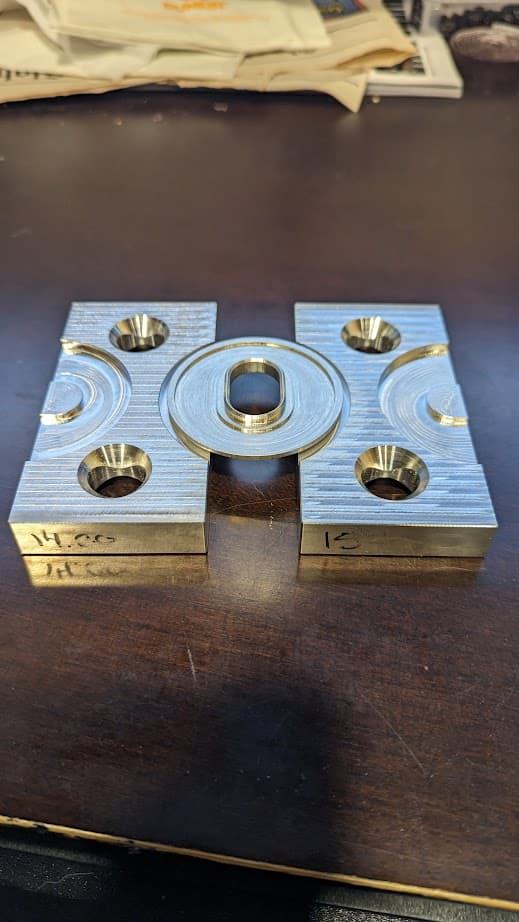
finally cut some soft jaws to allow me to make this part.

op1 will use either regular jaws for square stock, or these soft jaws for 2" round stock.

Full Build Thread Here

10 Likes

I have an 1/8" down cut bit from Grizzly and just use the 205. I have made a lot of custom tools but generally just copy a similar bit from the builtin library and modify it accordingly.

1 Like

Hard to beat that price. Especially if you are close/near an outlet. I myself have the Milwaukee 16" 18V chainsaw (as well as the 10" pole saw & 6" hatchet). Definitely beats messing with the occasional use of a gas chainsaw & the 12 amp hour battery last decently. Just add bar oil and go.

My son’s neighbor gave me a chunk of walnut, with an actual walnut grown into the tree.
Been waiting for something to make of it. I started calling my grand-daughter, “squirrel”
So it seemed just right…

Then I figured I should quit goofing around & make some real parts…

23 Likes

it a little s-q-u-i-r-l-l-y. :smile: :chipmunk:

2 Likes

Just for fun I made some Mandalorian coins for a neighbor who always goes as some Star Wars character for Halloween.

I bought the STL file and had a scrap piece of walnut that was 1.75x18.5 by .3" thick.

I created a vector to define the circle to import the model into. It had some raised writing on the side which was going to be impossible for me to get to turn out right given the dimensions. So, I created a couple of vectors for the flat spots where the letter would go and excluded those from the 3D toolpaths. Then I traced (more or less) all the letters. I used a ridiculously small advanced V Carve for the lettering. It of course created a lot of fuzzies that I was able to clean a portion of. It is still not readable, but I don’t speak Mandalorian anyway. I think it gets the point across. Probably would have looked better if I had either found a way to skip the text or simply engraved rather than having it raised as the model indicated. It was scrap so why not. And besides it will be dark when I give them to him.


14 Likes

6061 Test equipment control panel. The PLC simulator in the background was also cut on the Shapeoko 3 XL. More test equipment to come.

12 Likes

My kids are into making clay earrings which they are selling in local markets. They we’re about to buy off Temu some display racks but instead I made them some using upcycled pine doors for an old DIY TV cabinet I picked up off the street. Not my most artistic piece of work but functional and saved a few bucks :smiley:

19 Likes

I finished my first box today.

This thread has more details around the material and process: 3D Design Question - #11 by CullenS

Since then I applied Watco Medium Walnut Danish Oil at the request of my customer (11 year old daughter). After a few days to allow that to dry I added a couple of coats of shellac.

I am happy with it and I think she is as well.
The lid fits super nice and has a crisp little snap as it closes.


21 Likes

Nice! The lighter wood tone along the top gave you a good light sky tone and snow cap on the mountain.

Well-planned or “happy accident” it turned out really well.

I’m sure you’ll have a returning customer! LOL

2 Likes

Thanks. It was a happy accident. I don’t know if I can repeat that. Maybe a good use case to take a picture of the stock and import.

I plan to make 2 or 3 more for other girls in her riding group.

3 Likes

Went looking for a 1/4" ID barb to 1/16" NPT fitting for a vacuum thingy I’m working on and could not for the life of me find one that either wasn’t brass or wasn’t ridiculously expensive. I’ve been wanting to try out the flip jig for a while so I figured I’d try and make one!

Got a CAD model of both a 1/4" barb to X NPT and an X barb to 1/16" NPT and cut 'em in half and spliced 'em together.

It isn’t finished yet, I still need to cut a hole down through it, but considering it was just an experiment to play with the flip jig I’m pretty happy with how it turned out.

Top

Bottom

Profile

16 Likes

Mas Billet


Double side machining with softjaws that have a built in reference bore for probing

18 Likes

You are driving innovation!

1 Like

Test cut for a Magic: The Gathering, Commander variant organizer:

Some dice pockets were upside down, others weren’t oriented correctly, and I will be making a more intentional pattern at the bottom of the Command Zone, and then I’ll need to make it a two-sided cut w/ a couple of add-ons, and will have to source material to cut in all the appropriate colours.

15 Likes