What did you cut on your Shapeoko/ Nomad today?

:grimacing: :grimacing: :grimacing: :grimacing: :grimacing: :grimacing:

19 Likes

You are not the first and likely not the last to do that.

9 Likes

This is what I ended up doing after I took the cap off surfacing.


Glued a magnet to the top

Place my putty Knife on top for my surfacing bit.

Put extra magnets on when the spoil board gets in the way of the dust shoe.

9 Likes

Tried my hand at a Topo map. Might try with different wood. Any recommendations for best wood to use for Topo map?

17 Likes

Looks promising.

I’m guessing the hardest hardwood you can afford? Maple, Ash, hickory?

2 Likes

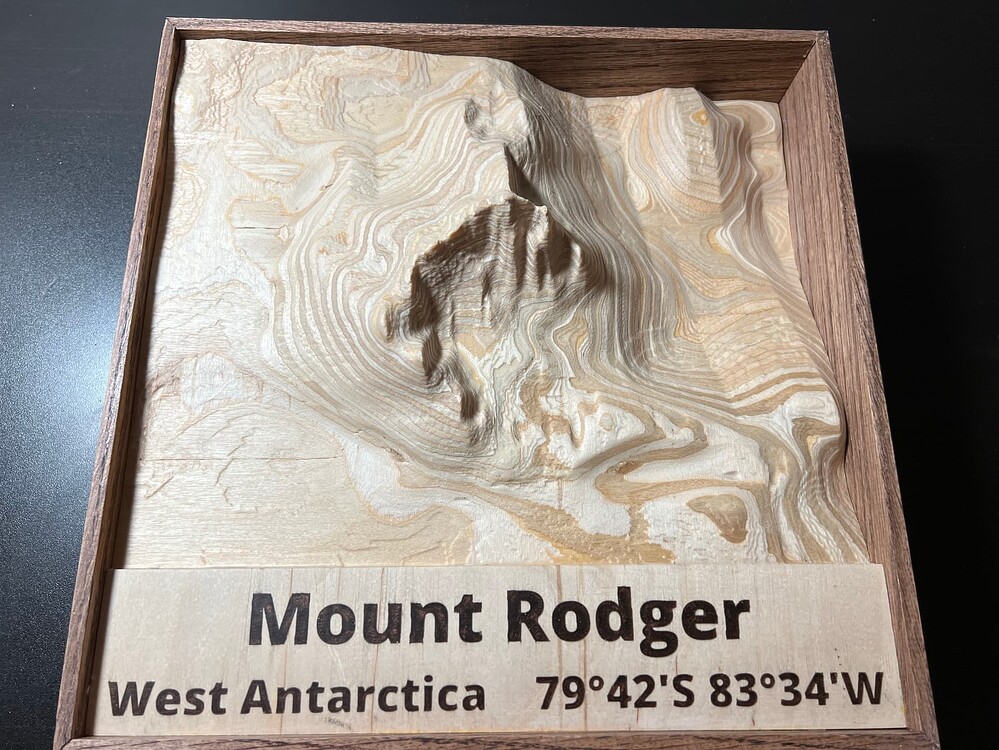
If you can find “good” plywood, especially with 7 or more layers. The different layers in the material can result in isolines aka contour lines.


(more photos)

20 Likes

Bruce Lee Quote Plaque.

16 Likes

Nice plaque. Paint? Epoxy inlay?

What was the obstacle that prevented you from using spellcheck? :wink:

5 Likes

That’s the Englineese spelling :joy:

2 Likes

Maple is a favorite of mine

Shifting our game, BlokHeadz from Resin to hard wood.

7 Likes

Thank you very much. I think it looks decent for a first attempt. Still waiting for my epoxy to arrive, another first.

That is really slick. Very realistic look.

Excellent attempt. I haven’t tried any 3D stuff yet.

Paint and Poly.
#@$* this 20 character crap! :stuck_out_tongue_closed_eyes:

2 Likes

Thanks for the recommendation, I might have a piece of firewood I can retrieve for a try at it.

Thanks, keep playing.

1 Like

Thanks, very nice work. I tried with 2 pieces of 3/4" glued together and it came out pretty good but, I need to work on getting something as nice as yours. I think I need to decrease the stepover on the finish cuts

.

6 Likes

What I like to do is use the angle feature on finishing toolpaths.

Without changing anything the 3D paths work left to right, right to left, etc. You can reduce the stepover and it will make the horizontal lines thinner, however you can also use the angle property on a 3D finishing toolpath to make the tool work up to down, down to up, etc.

So I rough first with a 1/4 (no angle setting available, always left to right)
image

Then make my first finishing path using angle at 90, so the tool is now pathing perpendicular to the previous.
image

Then make a second finishing path using angle back to 0, smaller bit, very high feedrate.
At this point very little material is getting removed, so I start really pushing the feedrate into the 100 to 200ips range. At this point you can make the argument that an additional finishing paths are faster than hand sanding.
image

And remember that each finishing toolpath does not need to be the entire area. On my mixed resin/wood project I added an additional finishing toolpath just over the resin area.

Note: Be very aware of the stepover used in 3D finishing. There is a bug in Carbide Motion that it will always default to 50% of your tool width, which is not a good value when using ball nose bits. You will need to do the math yourself and override the stepover until the bug is fixed. I use 12%, so 1/4 ball nose is a 0.03in stepover.

3 Likes

Very nicely put. I think that some fail to realize that the machine has values preset that will not do us justice in finishing a project. It’s not that it is necessary the company’s fault at this. They set values and we have to learn what values we really want. For newcomers to 3D carving, when a toolpath tab pops up, we don’t always know what the values on that page actually mean, which means one would allow the default settings to be left as is.

This proves to be frustrating when someone is working on something like these topographic landscapes that come out with tool lines in the project. This also means that the person new to this feels they have a lot to learn on 3D carving, and may even step away from it for awhile, because they don’t understand it. I have that issue at the moment because I’m still learning the basic principles of Carbide Create Pro.