Glad to help that is what I like about the forum and the community, free thoughts, ideas, and sharing with the passion of creating, woodworking, and crafting being the most important part fo all of us!
2 Likes
Wow, excellent, great job. How will you finish them?
Funny thing is I havent yet lol lookong at options abd best way no thinking butcher block finish.
1 Like
I finally got closer to the max size of my XL without tiling on a sign I made. 24 inches wide by 16 inches deep. It was also my first crack at two different colours on a piece. Stained the whole thing first and then painted the lettering after.
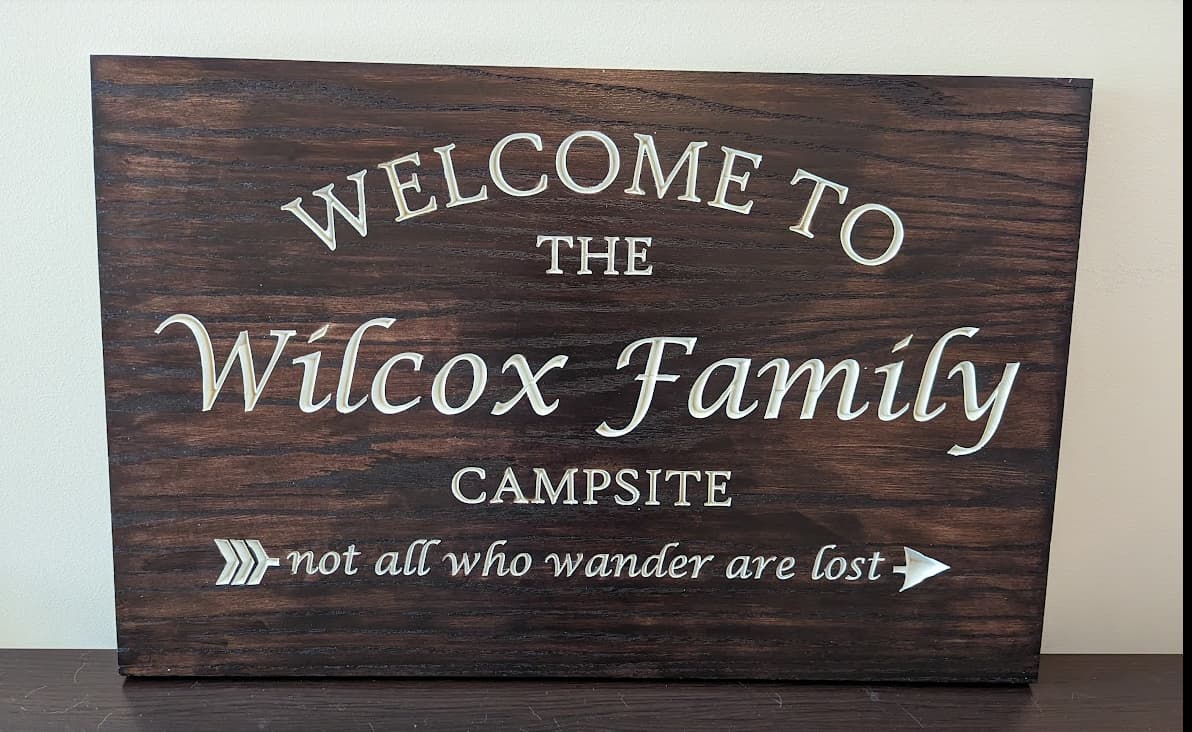
14 Likes
Nice work, Did you hand paint the letters (if so you have a steady hand) or did you use tape (a film or something) to cover the stained wood, then rout the letters and use the tape (or whatever) as a template (covering everything but the lettering) and spray paint the lettering?
I have the opposite of a steady hand. I used oramask to cover everything and then carved it. I had read about it on the forum before. I did still hand paint it but won’t do that again. I will spray it next time I try something like this.
5 Likes
Thanks for quick reply. I’ll have to try oramask next time, I DO NOT have a steady hand.
Oramask works great but a cheaper alternative and is locally available is Easy Liner Adhesive Shelf Paper. I get mine at Walmart and Lowes carries it as well.
1 Like
A sign for my campsite at TCPC (Tennessee Cumberland Plateau Campground), a member owned campground near Crossville. I created the board by milling and glueing some cypress salvaged from old house shutters. Designed in Carbide Create using the shape of a US government National Recreation Area or National Forest sign. Produced on a Shapeoko Pro XXL. Letters carved with advanced V-Carve. Oramask used to mask for the painting. I used exterior paint purchased in sample sizes from Home Depot brushed on with foam brushes.
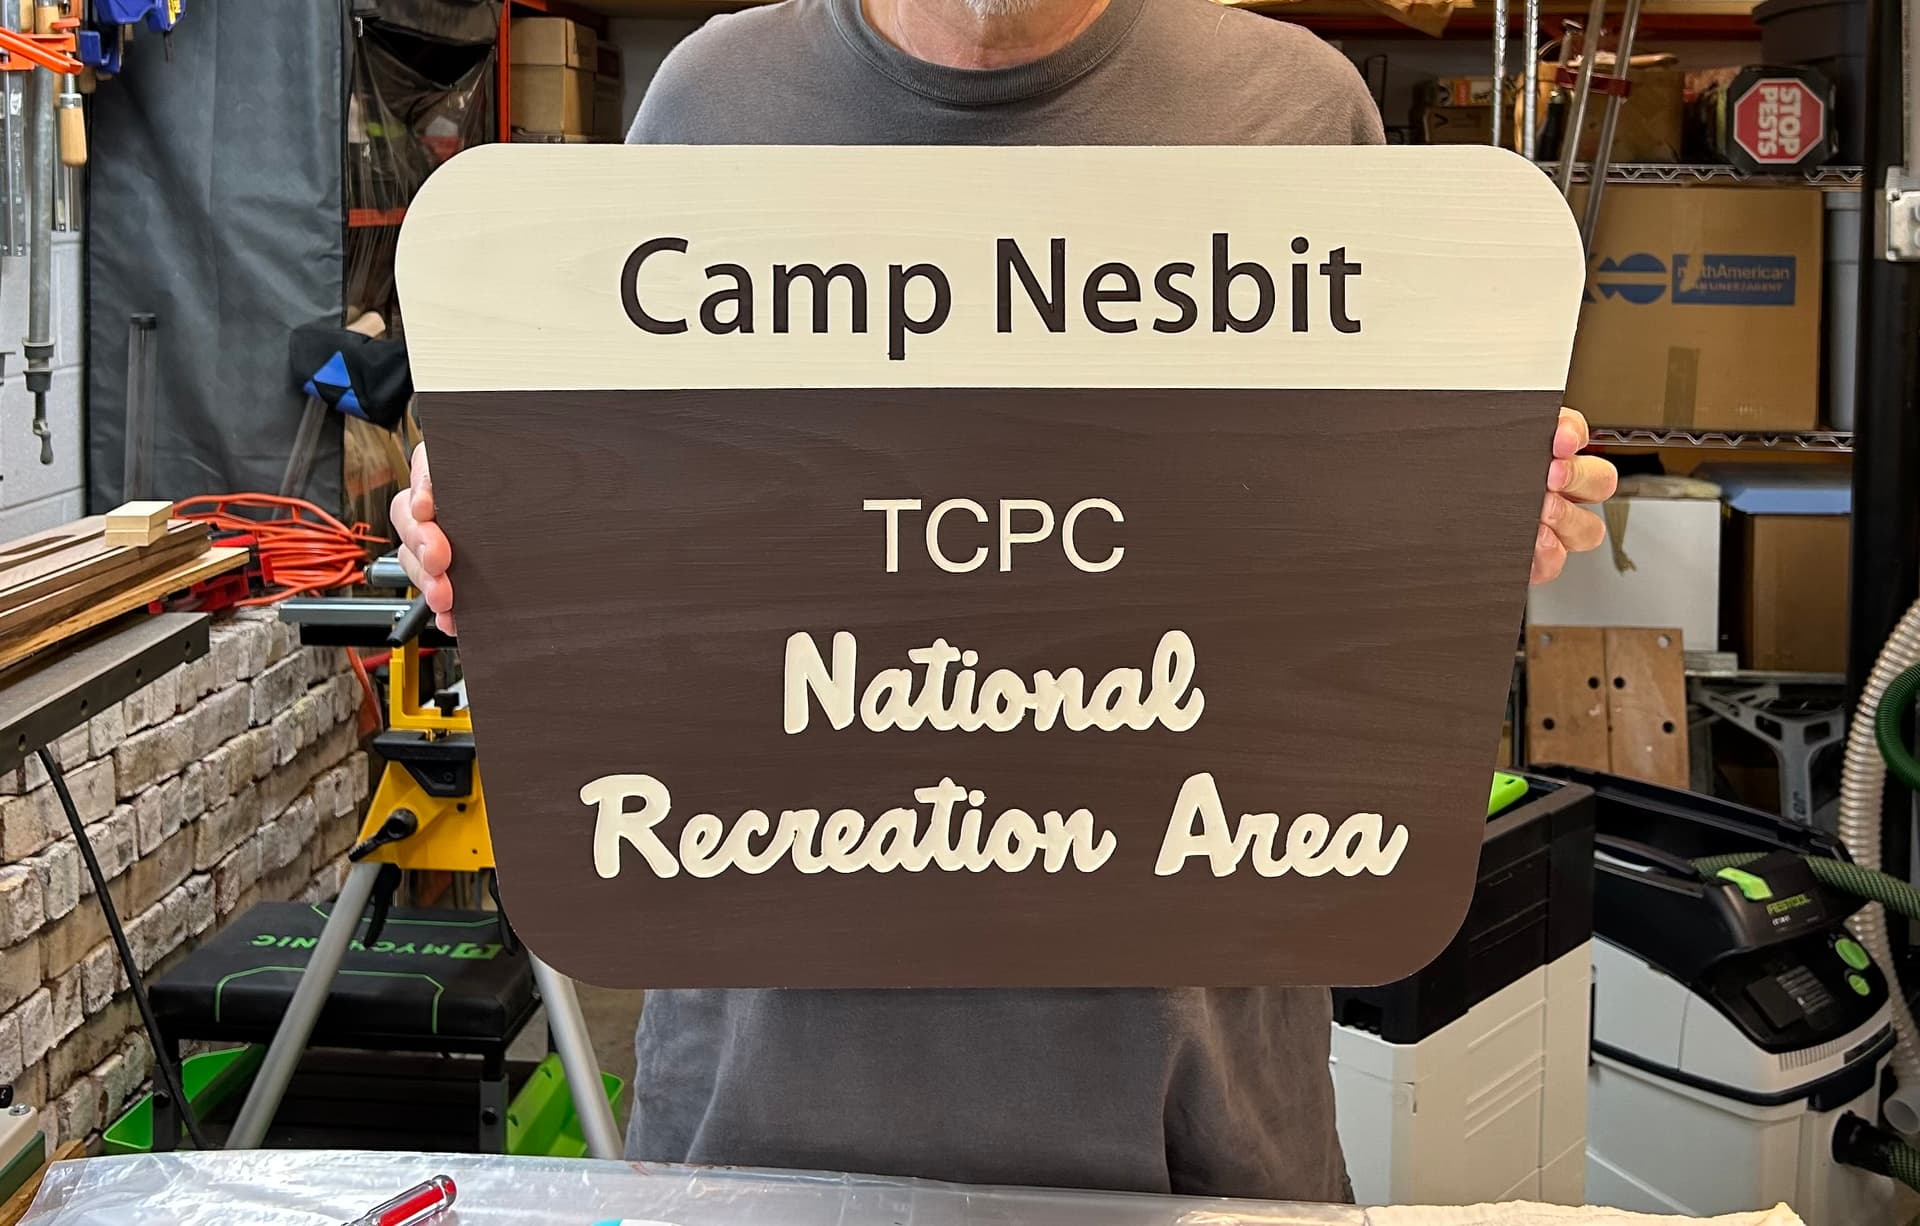
17 Likes
Looks like you may have used the National Parks Font but for others that want to duplicate the NP Fonts here is a link to a site that talks about using the fonts and styles.
4 Likes
I purchased the National Forest font set from MyFonts.com. It has both the script font and several regular fonts and a number of symbols. Per style the cost if $3.80 each. The entire family of five fonts is $19.00. An easy download to my Mac computer. Here is a link: National Forest Font | Webfont & Desktop | MyFonts
2 Likes
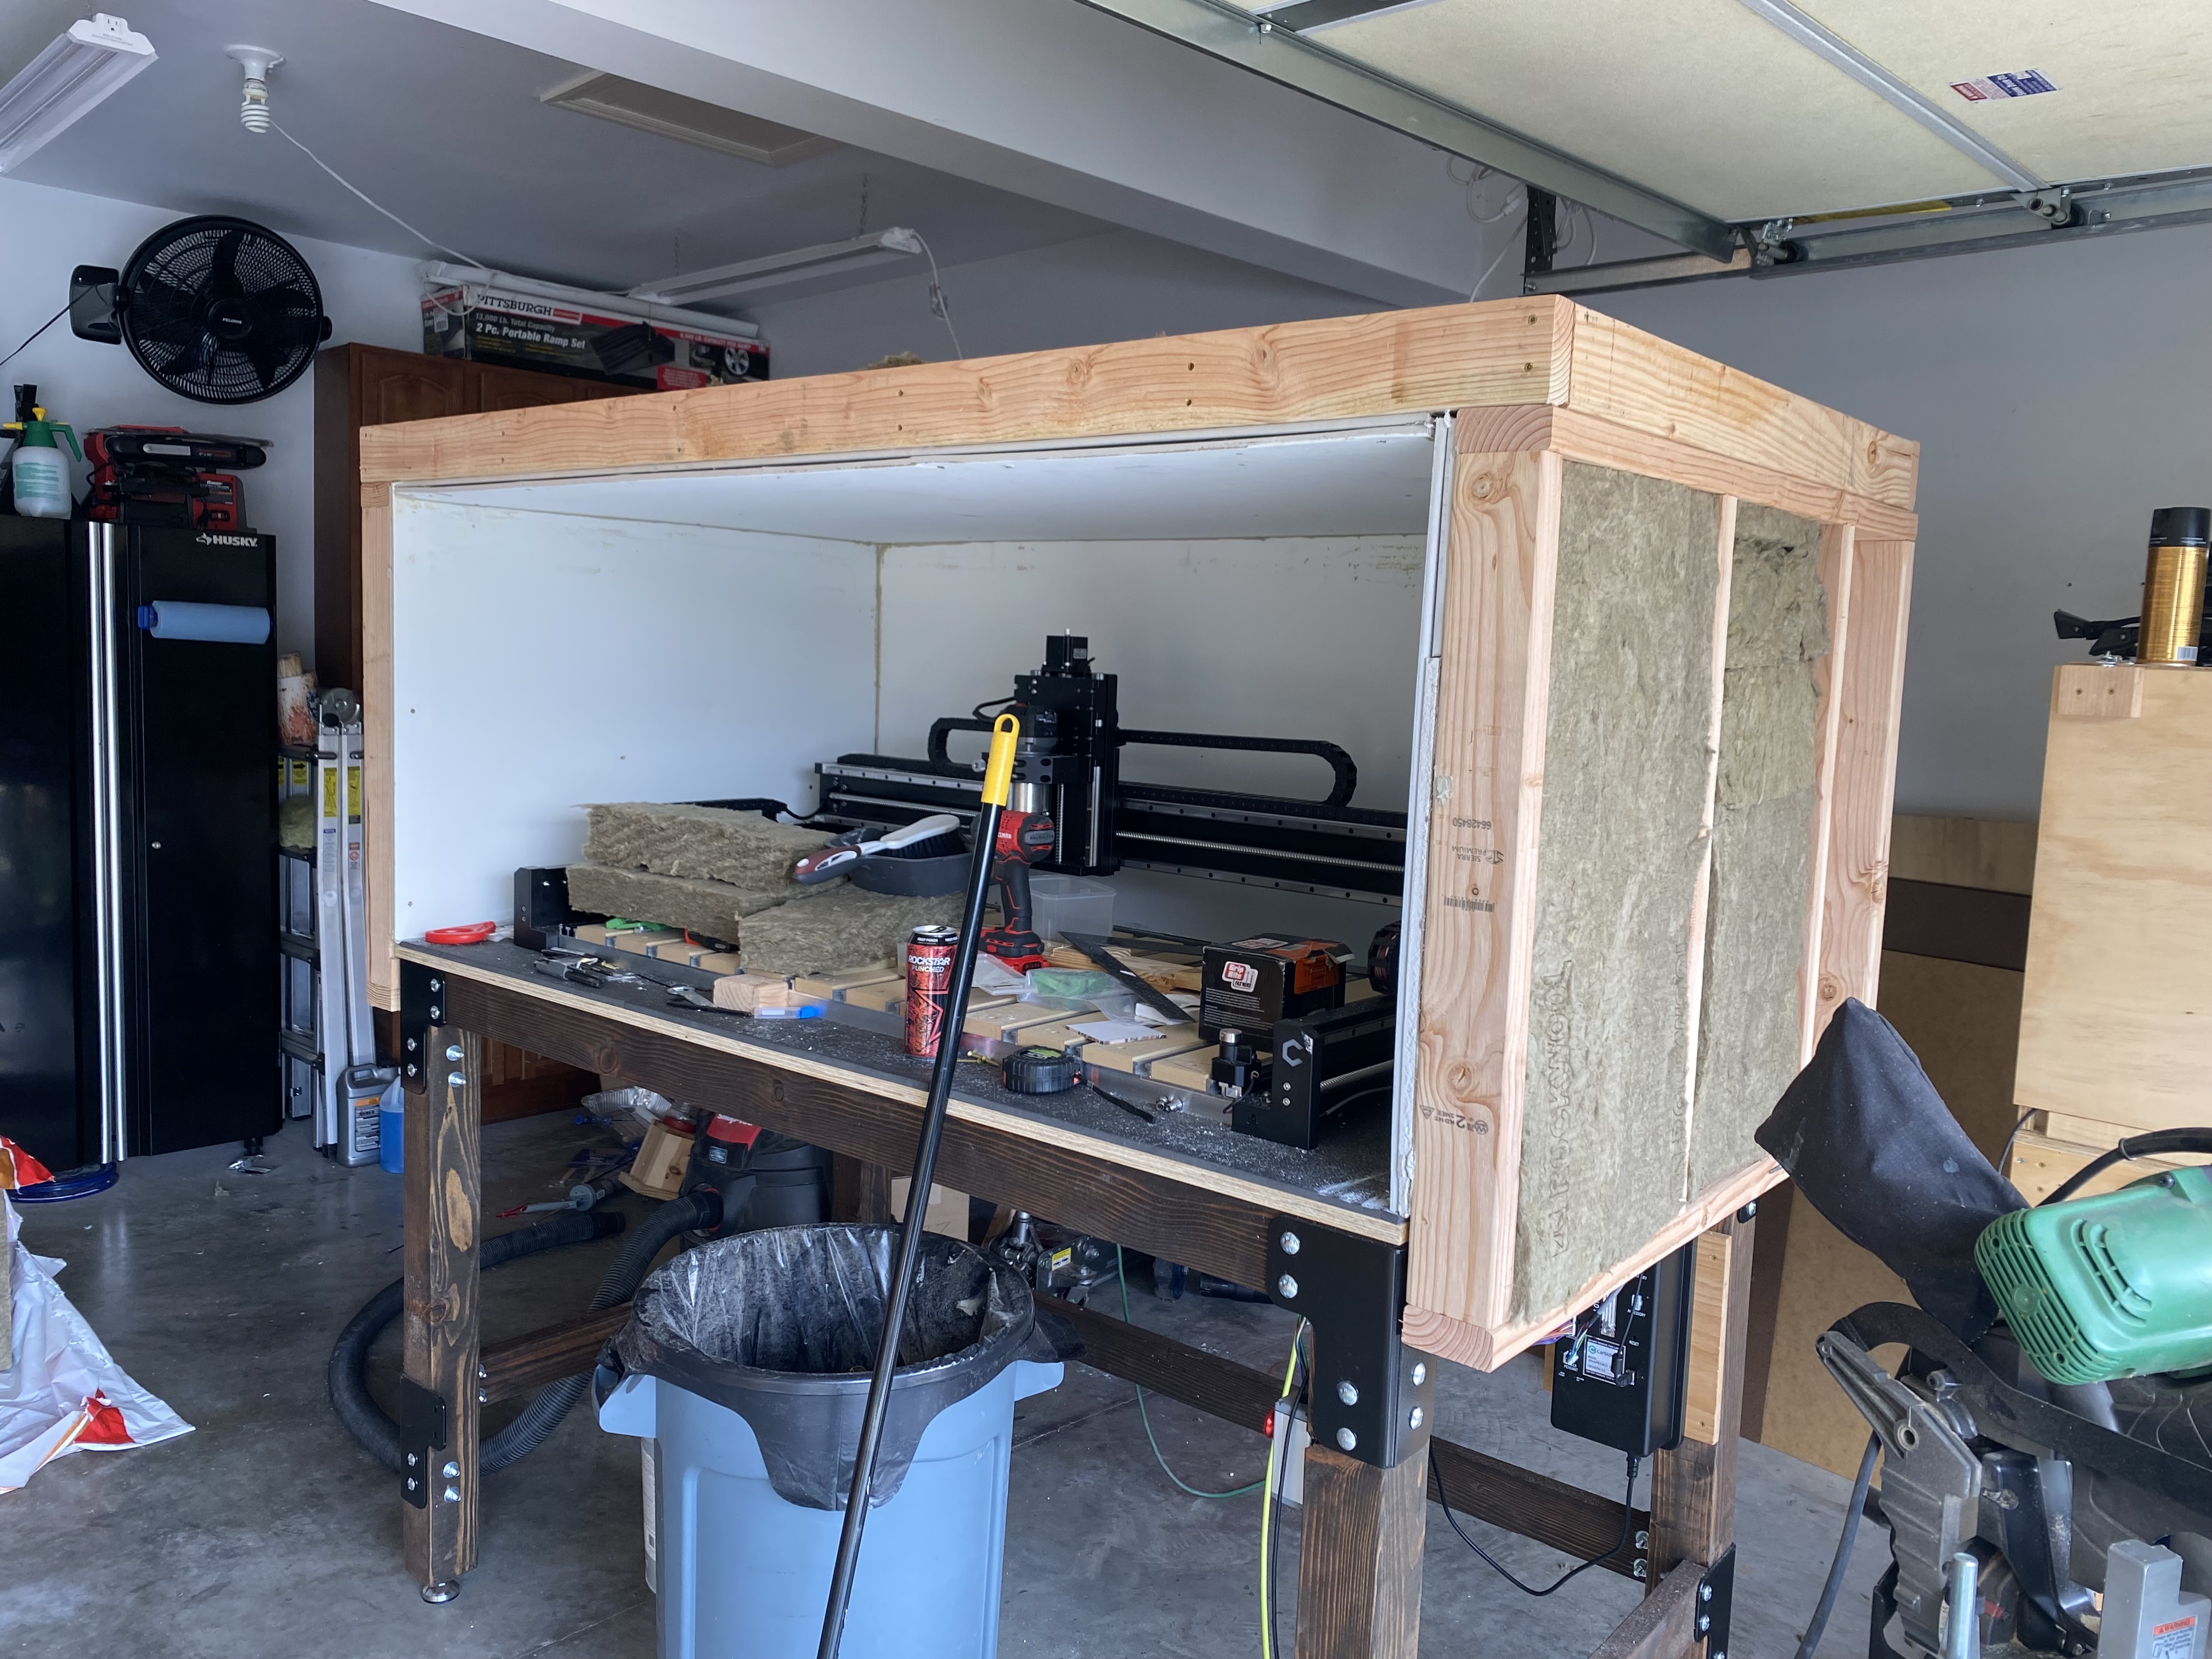
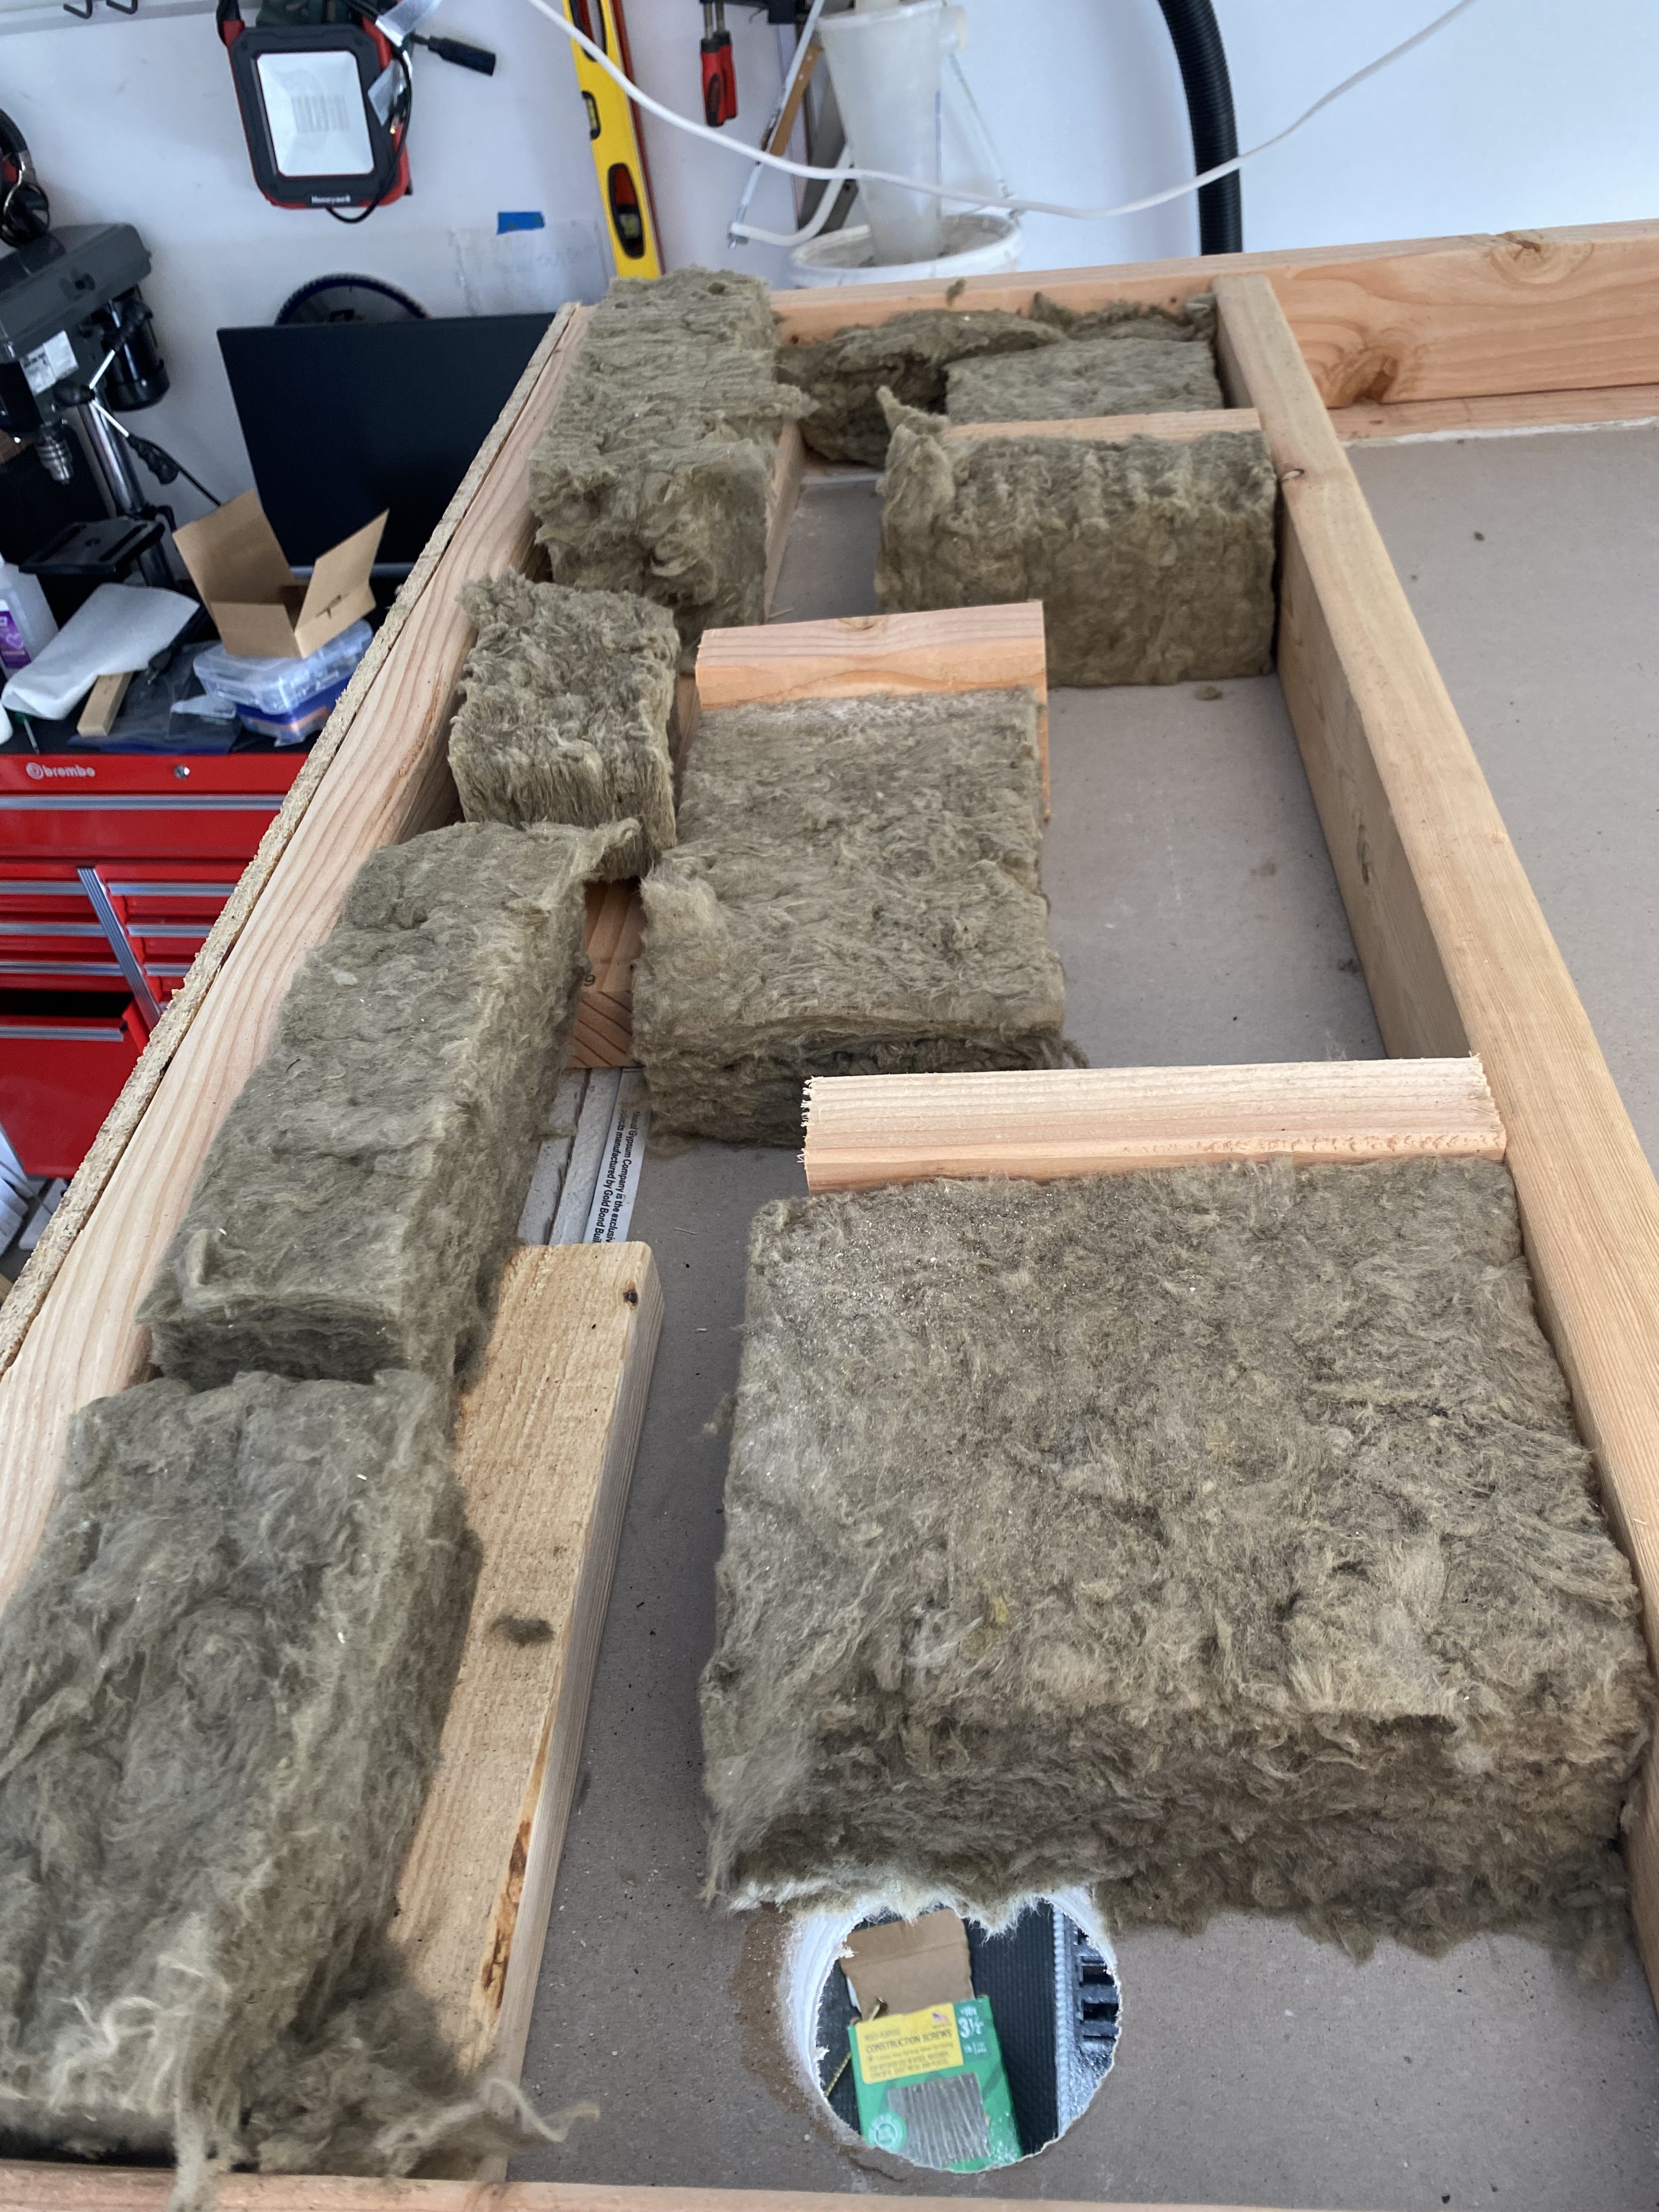
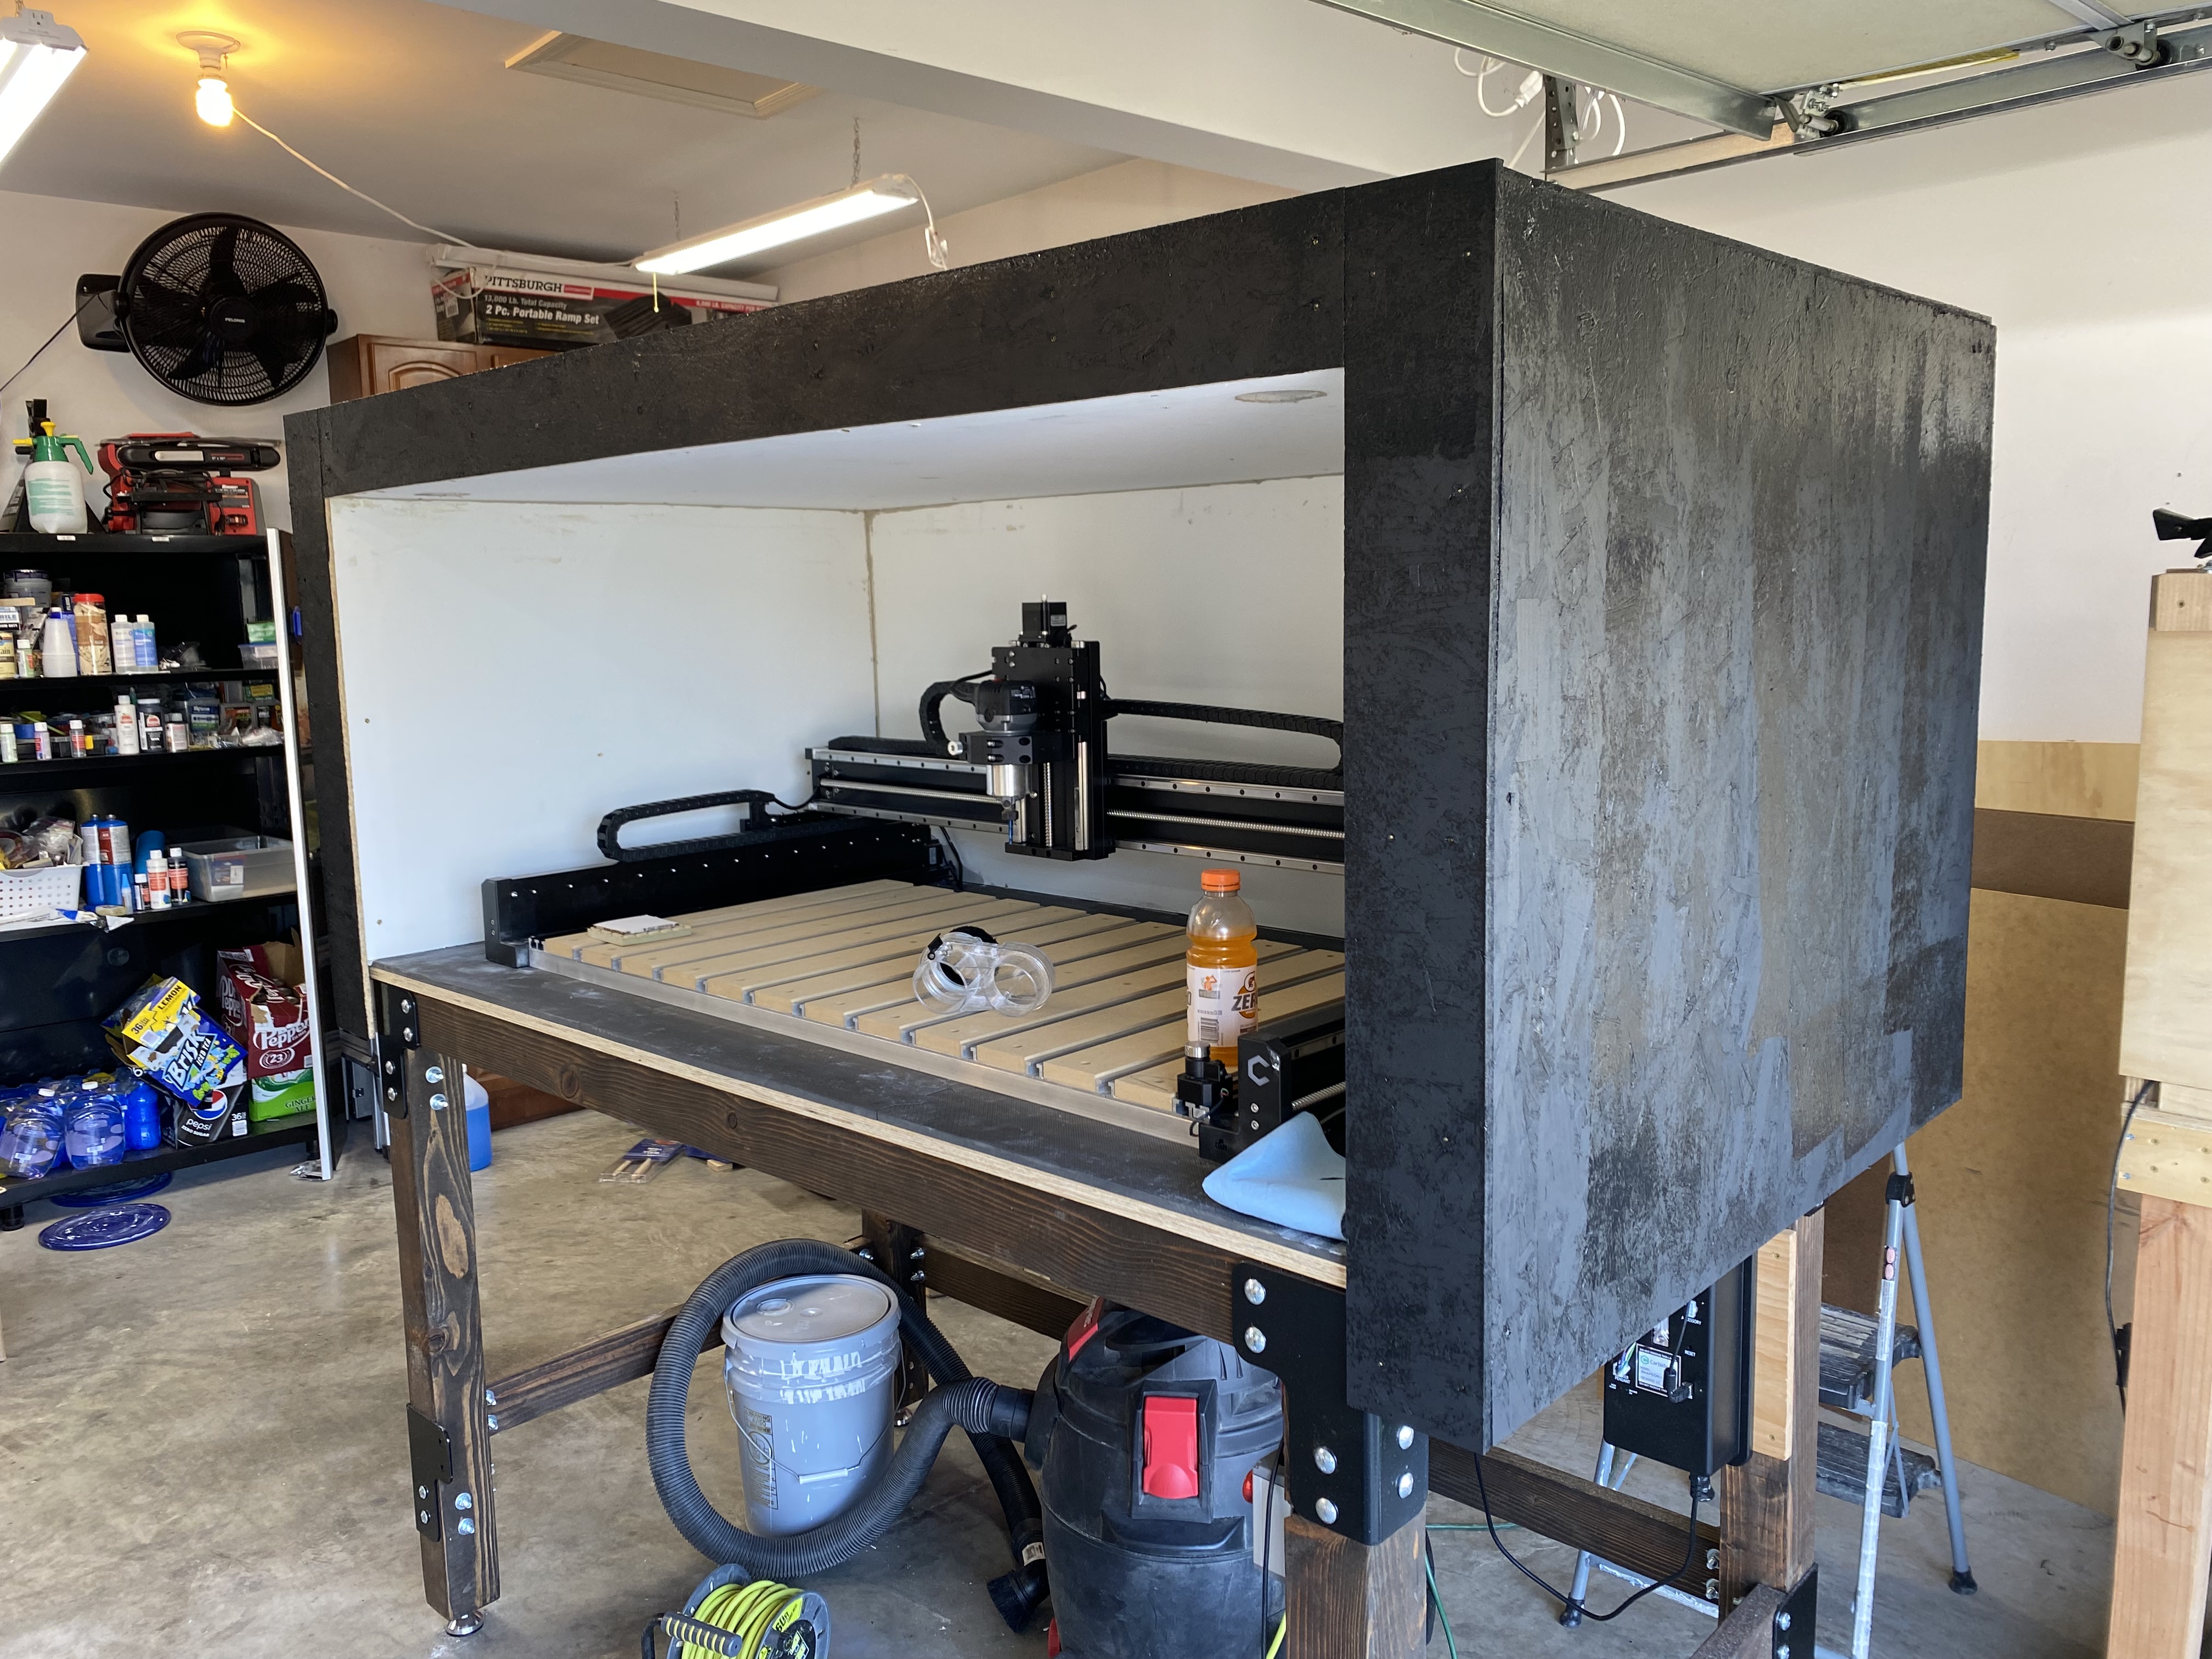
Worked on my enclosure for the s5 this weekend. I’m looking mainly to cut down on sound. The inside is lined with 2 layers of 1/2” drywall, framed with 2x4 and filled with rock wool insulation. 7/16” OSB was used on the outside. The one pic shows my air intake chambers in the top. I tried to baffle them to cut down on sound while still allowing air in. I’m not sure if this is going to work well or not. I’m currently figuring out my front doors. I believe I’m going with 2 bi-folds in the front framed and insulated with 2 panes of acrylic in each. I’m not a carpenter so it isn’t perfect, but it should do well for me….hopefully!
14 Likes
It will be interesting to see how much sound that cuts down. You may want to put legs on the cover, perhaps with rollers so you can access the back if needed. It looks like all the weight is sitting on the drywall.
The drywall is actually sitting on the table top which is supported by the legs. Originally I didn’t intend to make an enclosure like this but the loudness of the s5 kind of forced my hand. My original intent was to build directly on the table but if I had done so I wouldn’t have had any space on the sides or front of the machine, so I improvised. If I had to do it over again I would have made the table wider, but everything is secured to the table using 3 1/2” screws and adhesive caulk. I still may support the underside as you have suggested because I know there’s a lot of weight there.
That is an amazing amount of work, great job.
May i ask a question about this though. If the noise is made in a box its going to make it even louder however that accoustic insulation will dampen that down i understand. My curiouslity comes in how to dampen down the noise in the box first. Would something like cardboard egg crate linning the walls take some noise down as well? Or is noise in a box still noise in a box?
1 Like
My thought is, as long as it stays in the box I’m ok with it! Lol. I may add something absorbent in the inside as well but it has to be thin. My last enclosure I used foam board and anti fatigue floor matting. I have to get it finished and see if the result is sufficient before I do anything else to it. I might end up with something else in there as it is a work in progress.
1 Like
Great work :)…putter waway ![]()
Think about the dust collecting on all those egg-shaped surfaces. ![]()
Might have to use an air hose and run the vac for a couple minutes haha. Gumption isnt perfection hahaha
1 Like
At first looking at the photos thought you might be hiding a stash of cannabis! You certainly have done a lot of work. One of the things I have learned about my enclosure is that it needs to be vented as the suction of the vacuum drawing cool air across the bit will be diminished. I cut a lot of acrylic which can get dicey when things heat up.
1 Like