That’s awesome. It would make adirondack chairs cool again. Would you ever sell the plans?
Hahaha yeah a buddy of mine asked if i could make it so just got around to it, only cost bout 75 in material but not too bad. Thinking of painting or staining the chair black and the skull white??? Or taking the torch and burning it a little? Dont know yet up for suggestions though.
1 Like
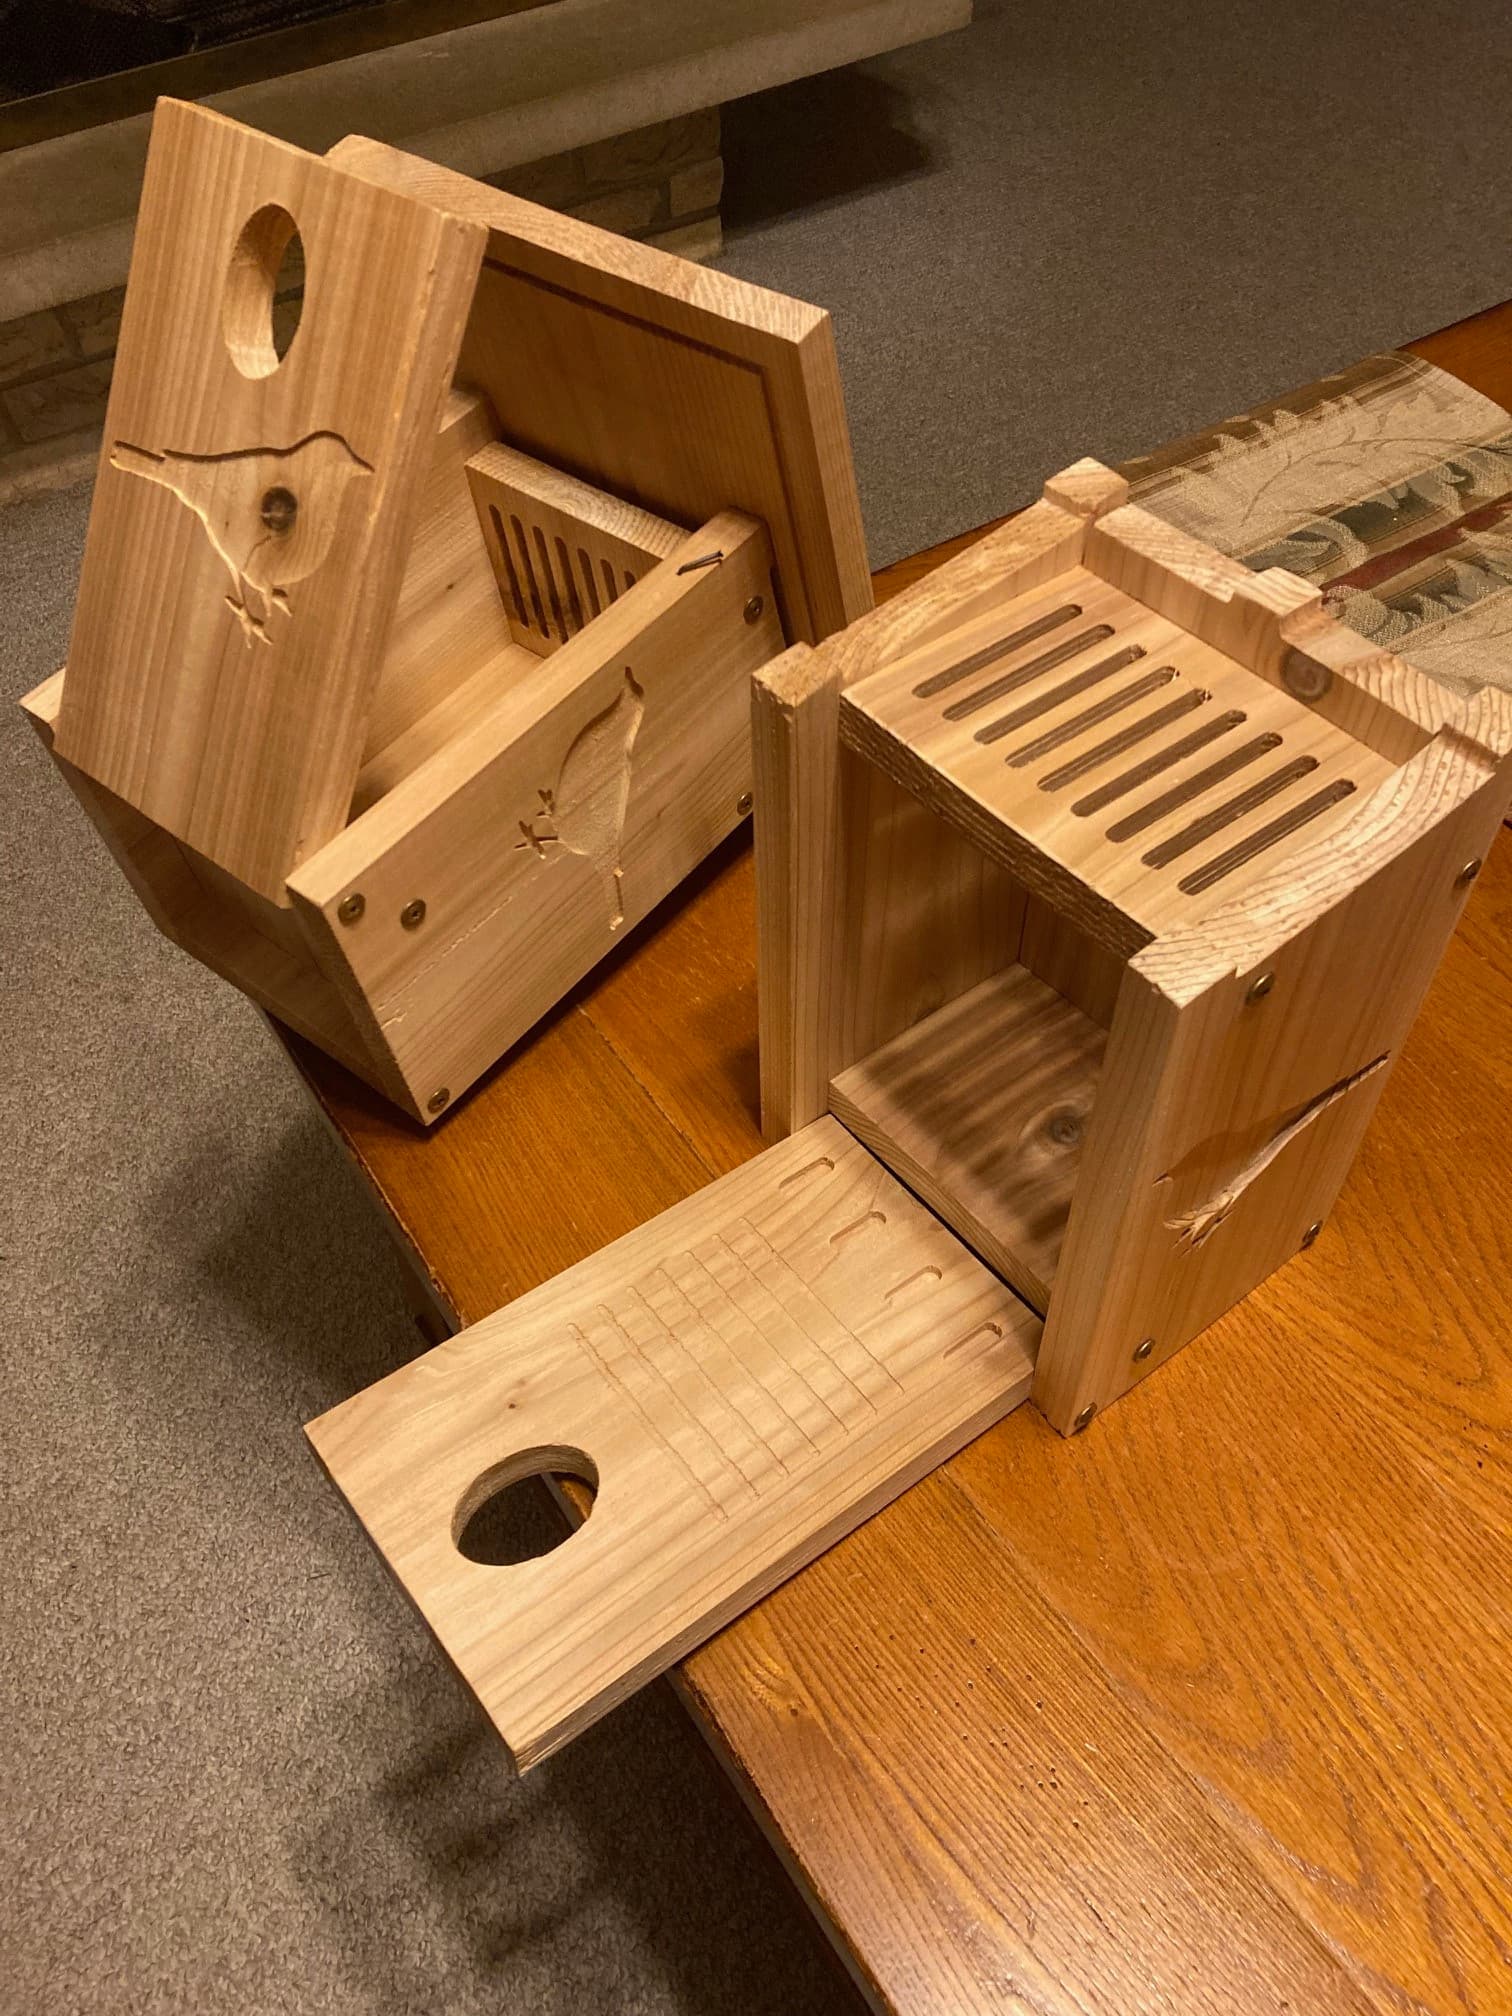
Bluebird houses (1 less its roof to show ventilation detail). 4 ft cedar 1x6 for the box and a section of cedar 1x10 for the roof. 1/16 endmill to pocket the birds. Turn over board and finish with 1/8 compression and 1/8 upcut bits. Dados in the back and blind dados in the sides to accept the floor and ceiling. All press fit. All screw holes in faces are pocketed by the shapeoko 3. Finish cuts are all done on the cnc. Tried to maximize top ventilation while minimizing water intrusion. After months and 23 toolpath revisions, finally have a birdhouse people want to buy for less than the cost of the wood ![]() I have given away 20 and sold 1. FYI they do attract bluebirds.
I have given away 20 and sold 1. FYI they do attract bluebirds.
21 Likes
I bought the shell of the plans from etsy but made my own modifications nothing more than any standard woodworker could and probably would do, once I get them in CC designed up I could share possibly.
Unique DIY Plans for Adirondack Skull Punisher Chair Step by - Etsy
1 Like
Makes sense I made this out of pressure treated decking boards 5/4 priced at lowes for $6 and took 7 boards so not too bad. I have the double and footrest as well as standard and folding adirondack chairs from rockler. My daughter built the double for a school project a couple years ago. If the storm doesnt wipe us out too bad i could copy all the templates and give them to you for some walnut!
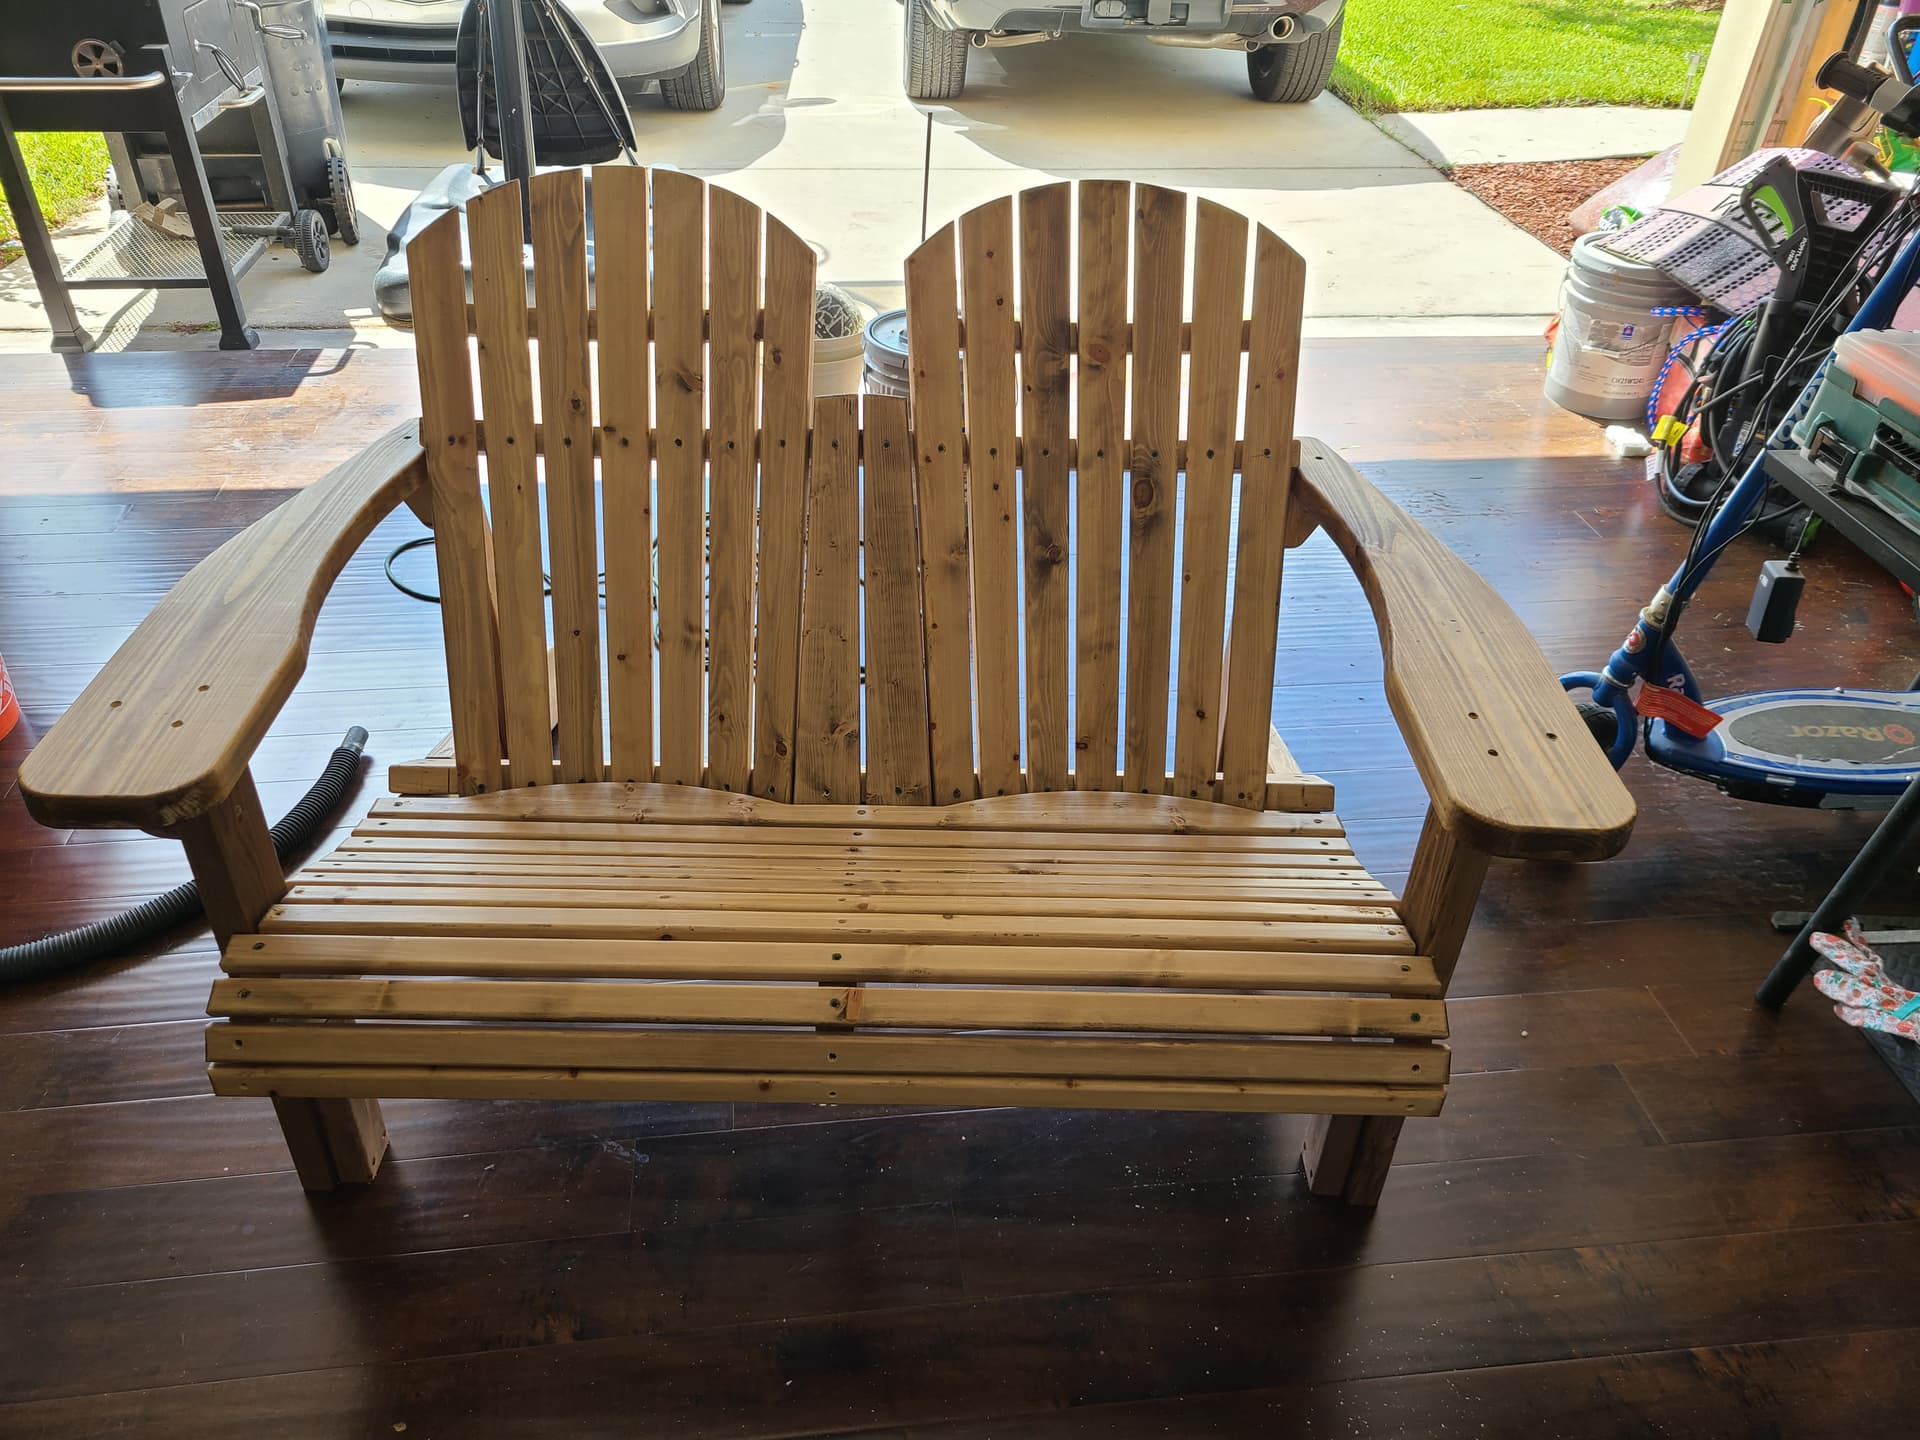
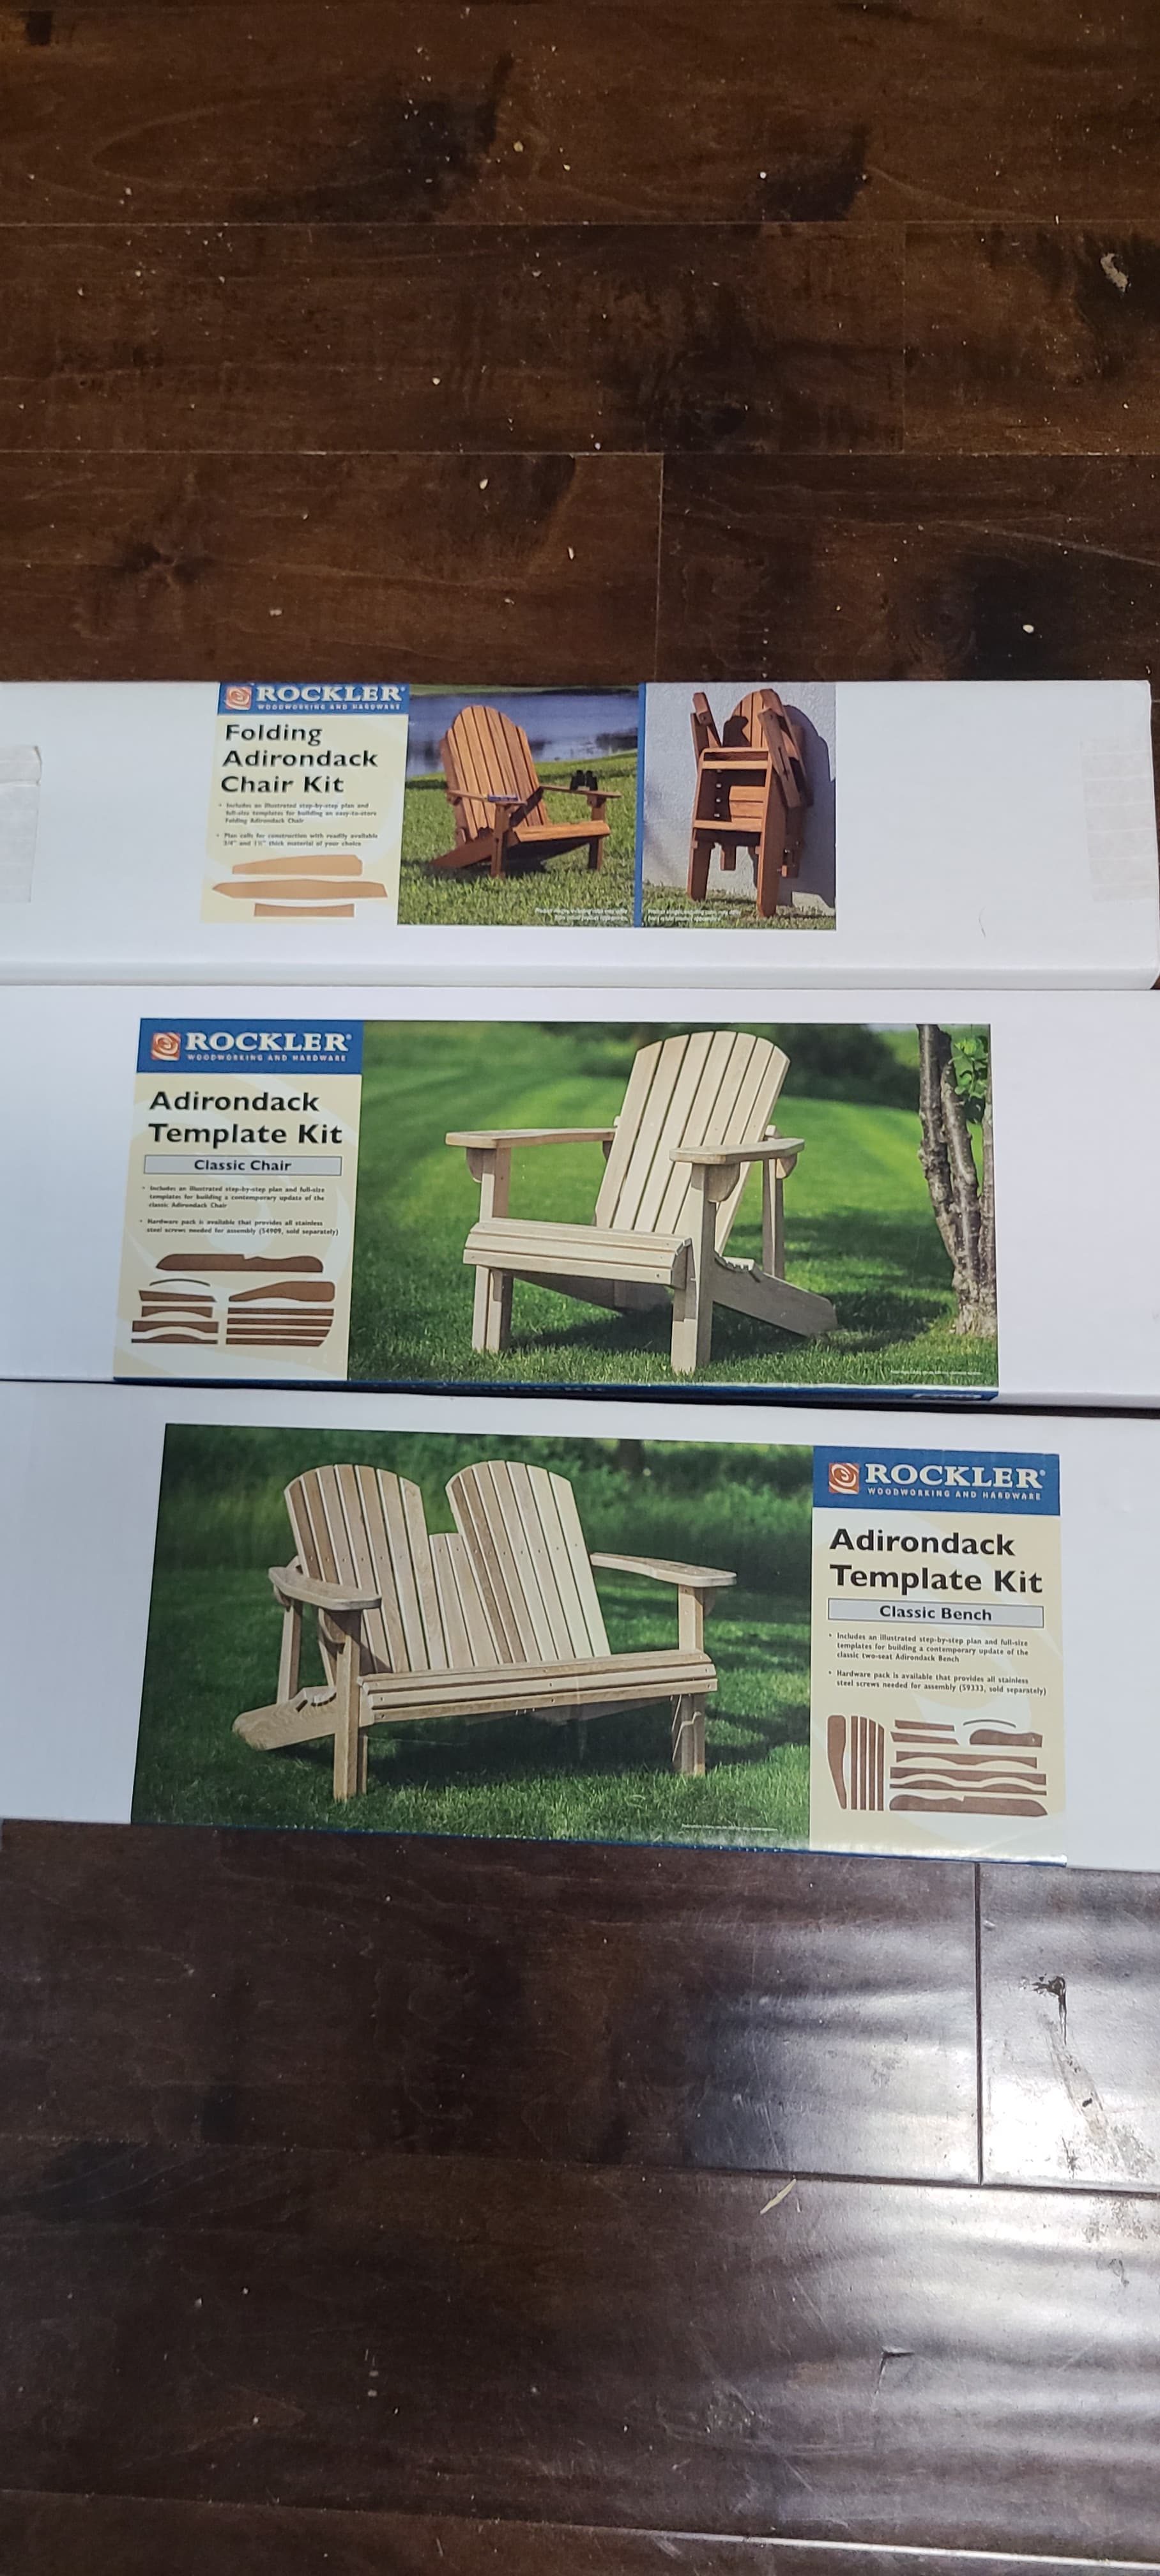
9 Likes
Speaking of the storm yall stay safe up there the path keeps shifting north from us! Same to all you Floridians
1 Like
Yep. Current track has the eye pretty much headed over our house but it has to go through a lot of land before it gets here. Hoping that will dissipate it pretty good. From the models I looked at you may see worse wind in St Mary’s than we do up here.
1 Like
Try using inks or dyes for your color as they don’t settle out like mica powder. For 5th+ layers you could put a bead of silicone caulk as an outline and fill just that with epoxy.
Good luck!
Making things with templates and cutting them out on the cnc both have pros and cons. As far as time they are about the same. For templates you have to rough out piece close to size on a bandsaw and then finish with a flush cut trim bit. For the CNC you just have to cut the piece to gross size and let the cnc cut it out. The cnc is slower to cut out the shapes but it is more precise and less prone to mistakes and things that can happen to the operator.
Making chairs for a hobby is much different from trying to make them for profit. Making things for me or family I dont really care how long it takes to make something. If you are trying to seel products then of course any time savings is important.
For some jobs in my shop I use the cnc. For others strictly analog methods. I simply use the best tool to get the best job done. Sometimes using a hand plane, sometimes a chainsaw, sometimes a cnc, sometimes all 3 on a project.
4 Likes
I was thinking to create the templates on the CNC to get the accuracy and then cut the req boards on bandsaw and router with bearing bits.
It depends on the time to run the paths though and what wood I choose. I don’t think I want to do pressure treated on the CNC but maybe if it’s dry enough.
Setup and toolpath time for each board on the CNC may take much longer than traditional methods in this case.
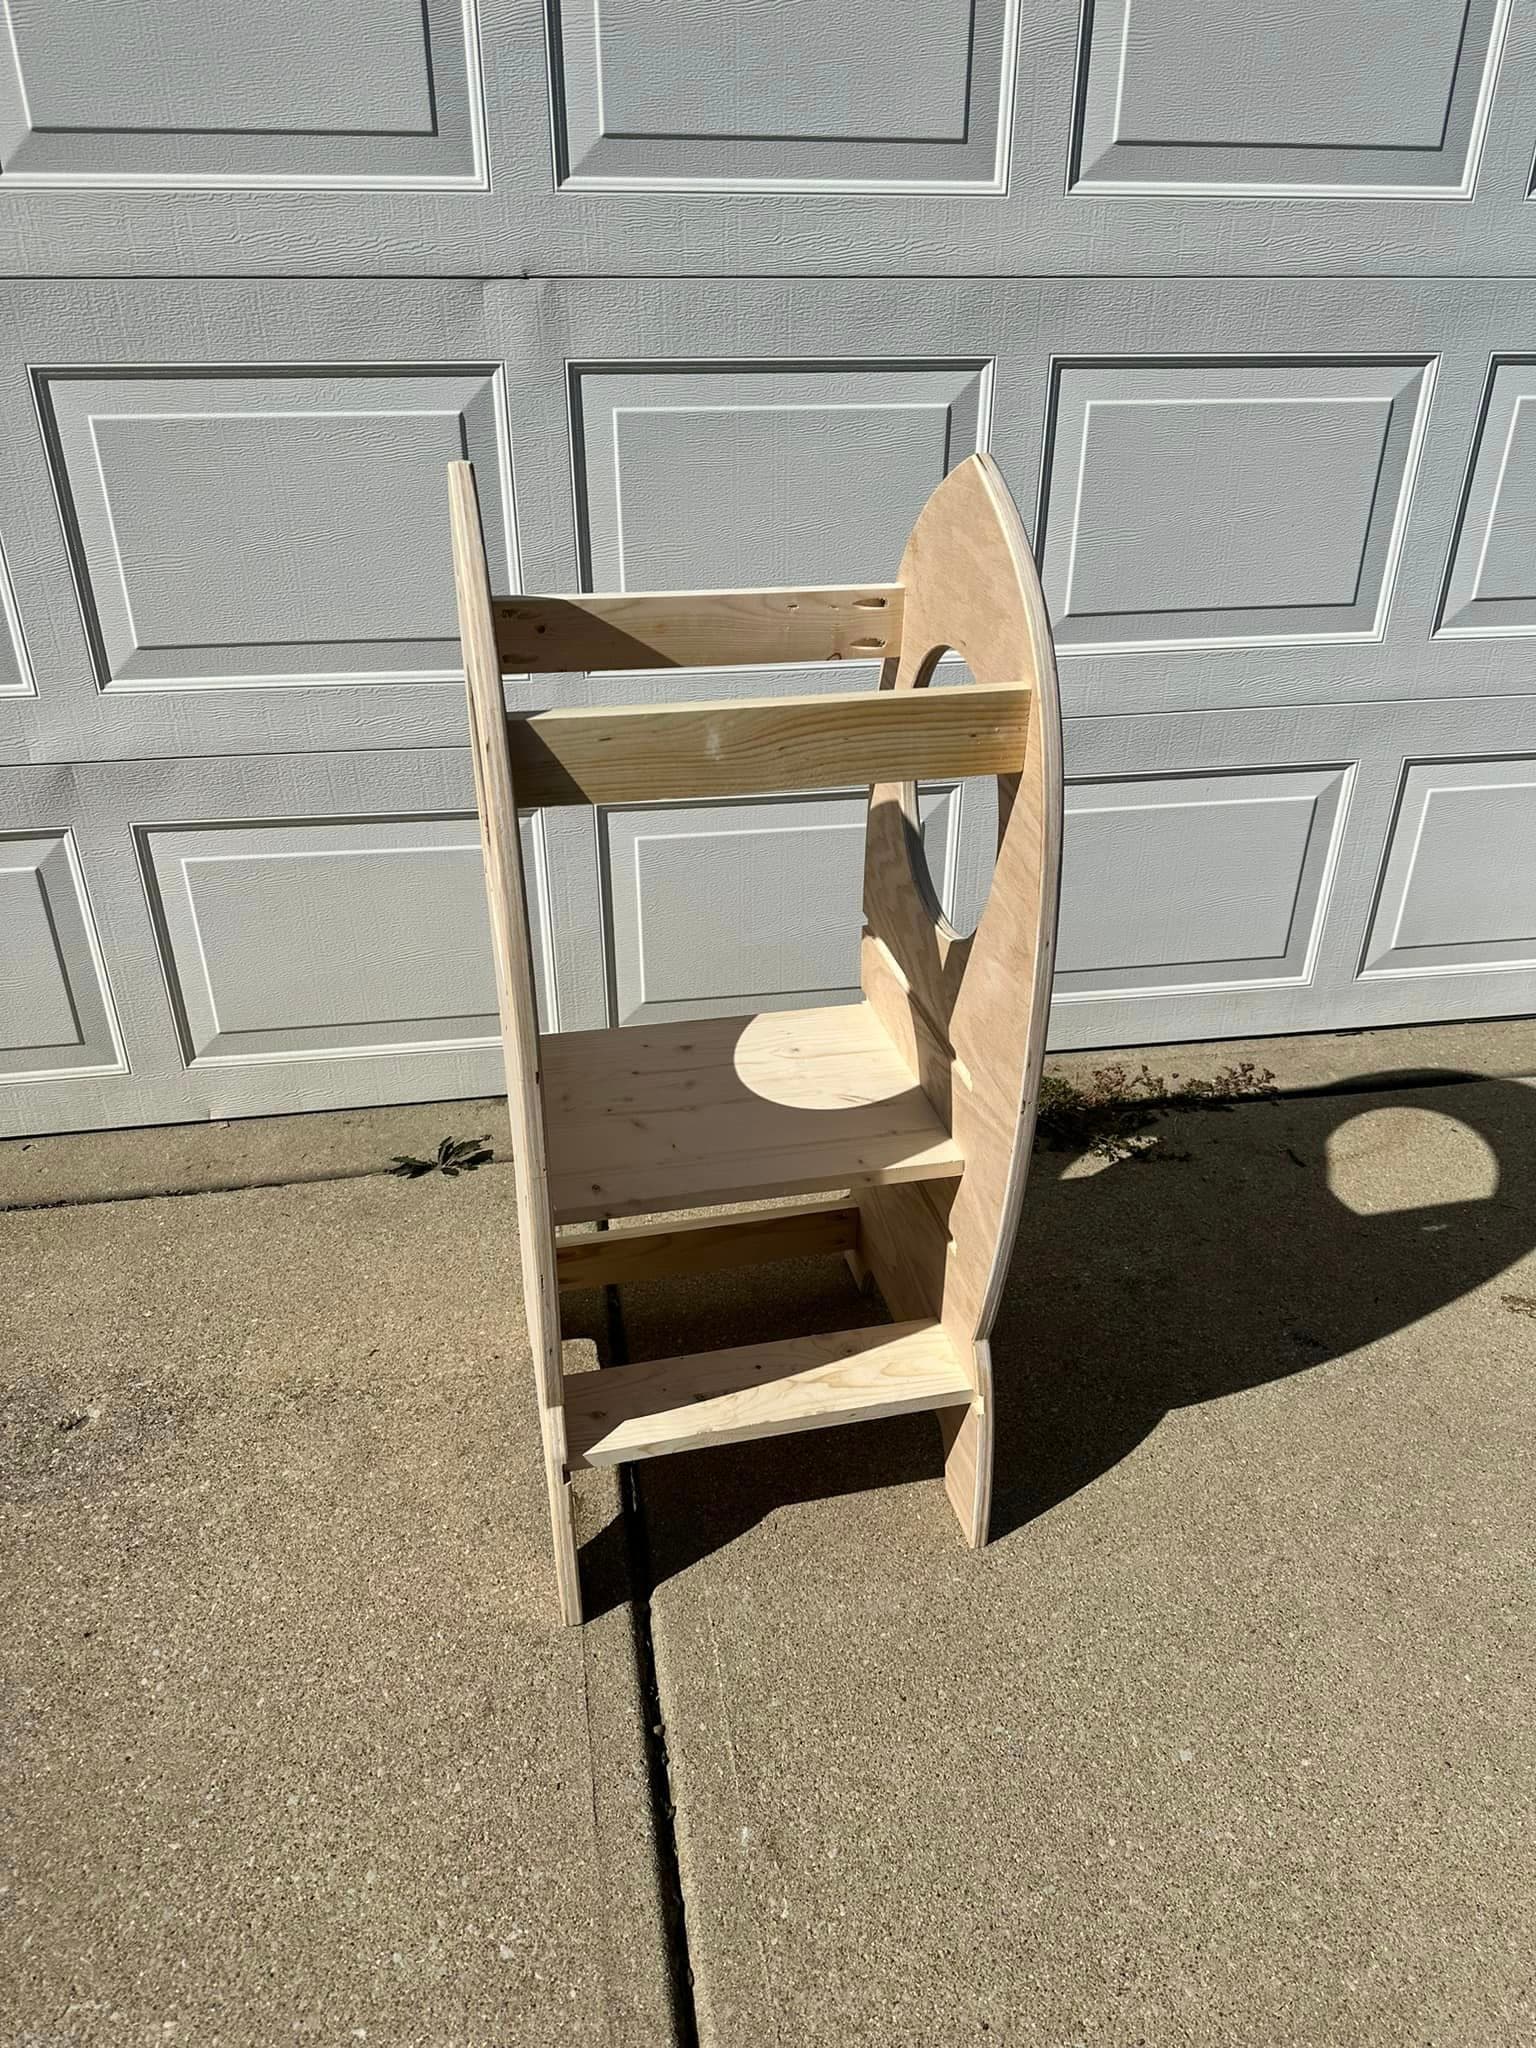
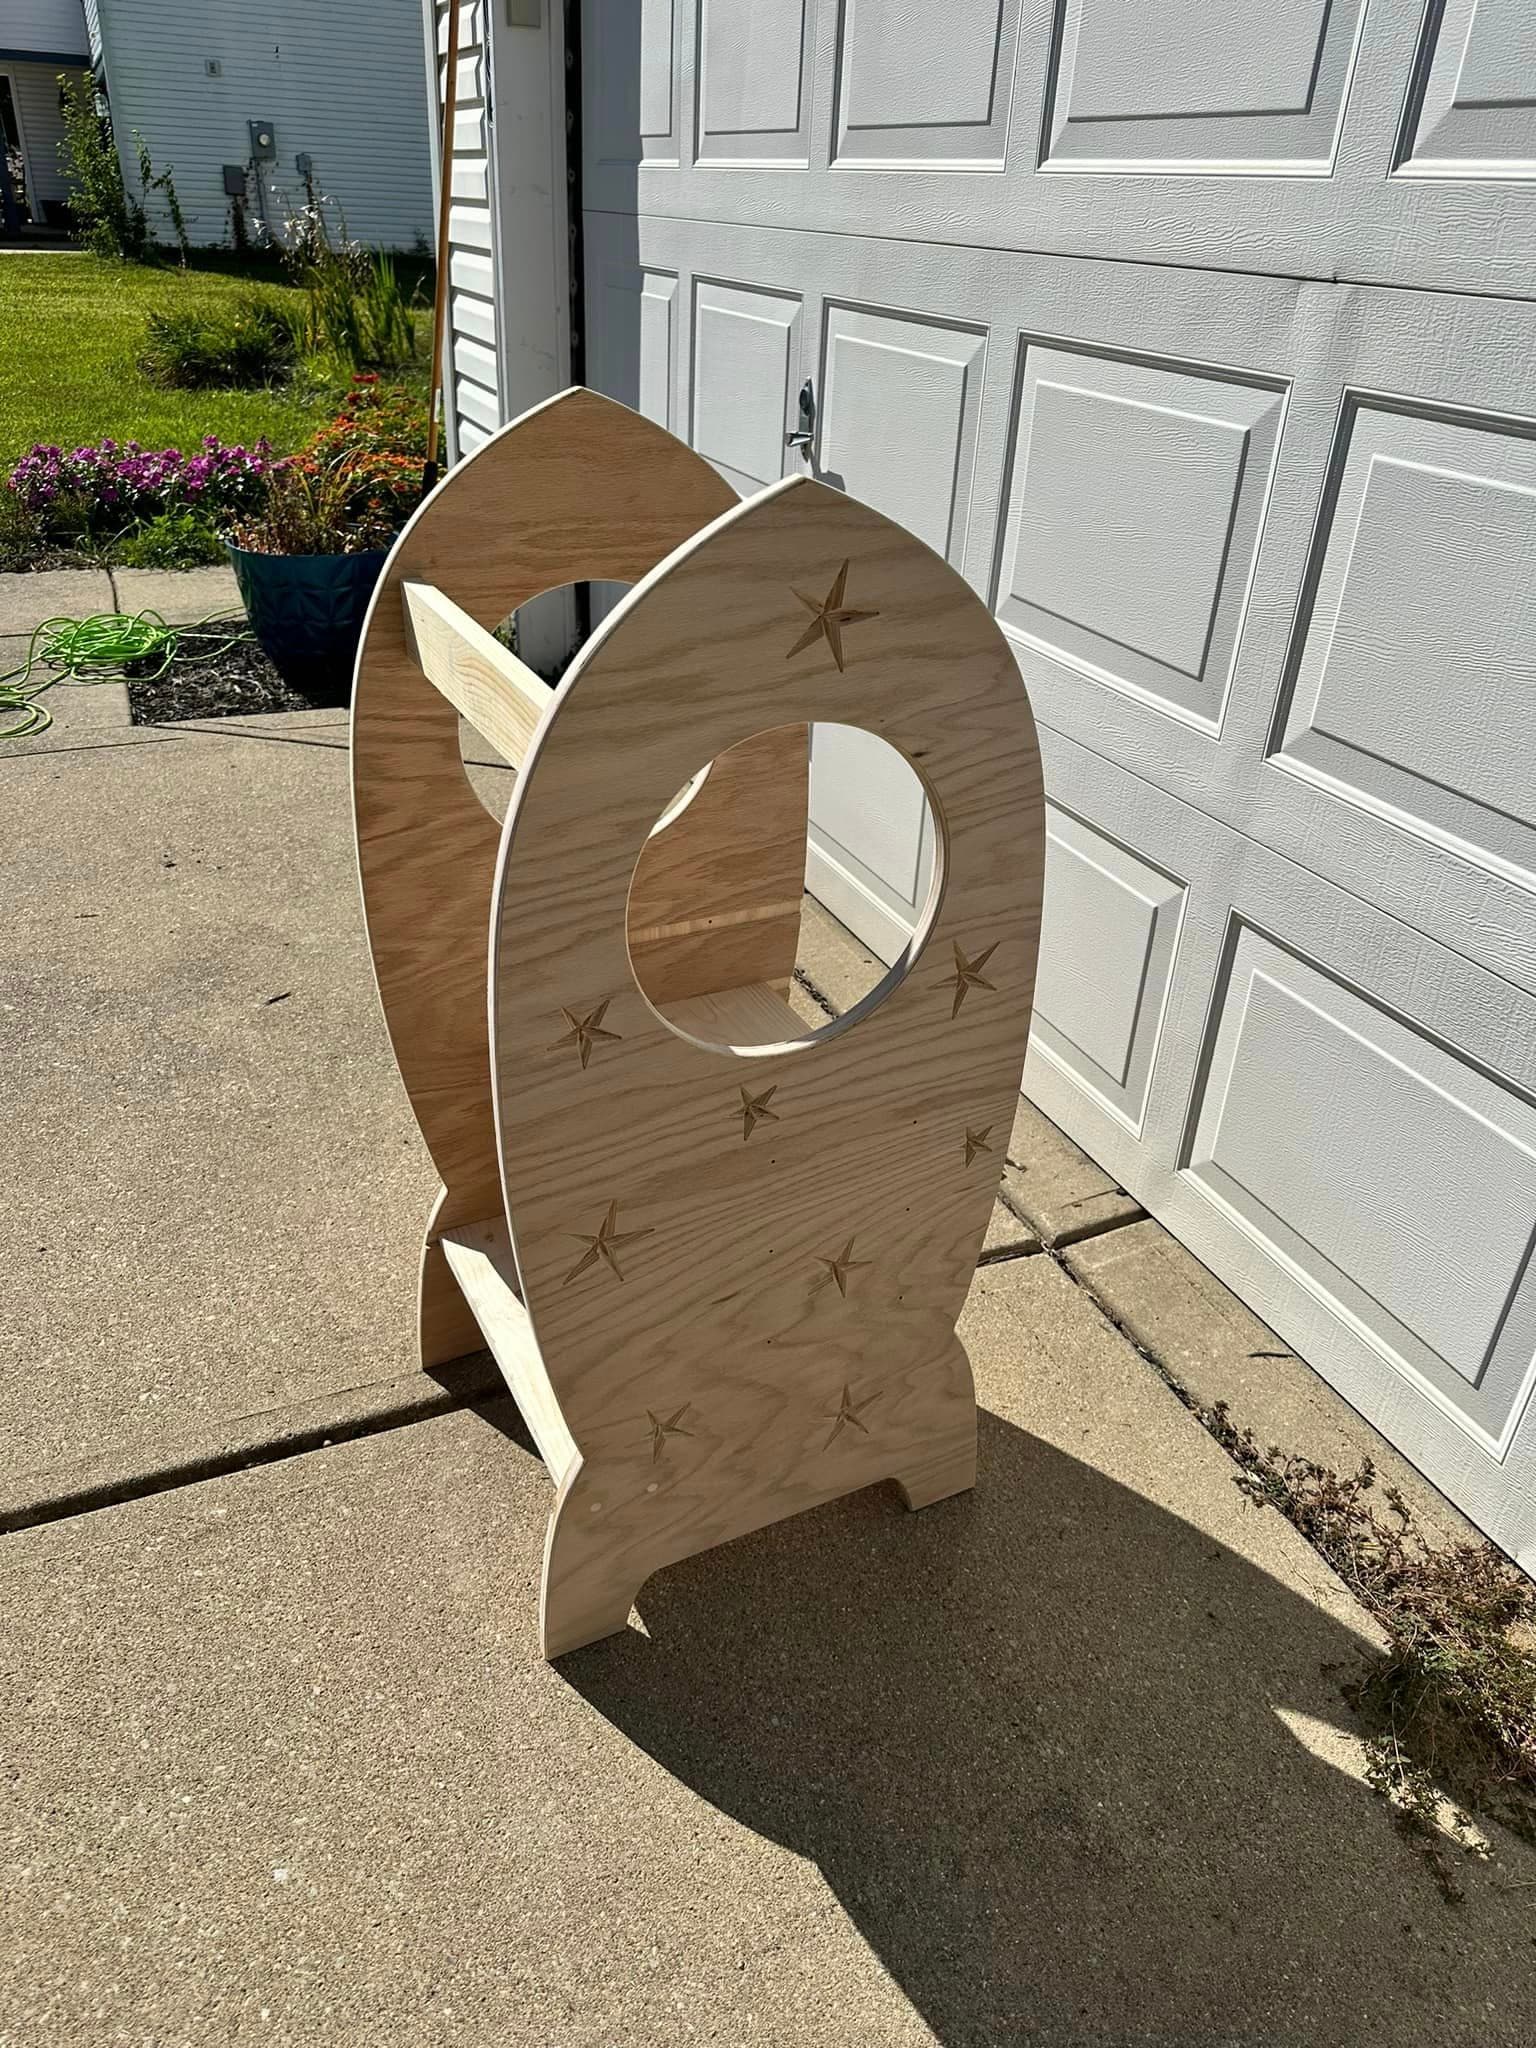
Today I cut and assembled my first large scale project on my S5P! A kitchen helper step stool for my little ones. Decided to let my 4x4’ stretch it’s leg on a double sided project. Wanted to challenge myself. Eigenbot posted similar plans on cutrocket but with tiling, and since I have a machine large enough to cut it all out in one cut, I decided to use inspiration from their design to model it to my liking and give it a shot. I also wanted to vcarve the stars so we could paint them.
I’ve only been using a CNC for about a week. I’ve never done woodworking before, although I have used a chop saw a few times in the past. There are a few things I’d change but overall I’m pretty satisfied with it. The machine did its job very well, even on the oak plywood.

24 Likes
I have cut treated wood both “wet” and drier. I use a 1.5" cutting length 4.0" OAL bit to cut the treated wood. The trick for long bits is they can run out of round very easy. I insert my long bits all the way up in the router and then pull them back down about 1/4". When the router starts spinning you can tell if they are not running true from the sound. Plus about every 5 minutes I pause the job and tighten up the collet. The long bits tend to vibrate more than short ones. That can lead to the collet nut coming loose.
For 3/4" boards you should have no problem cutting out lawn furniture. The modern treated lumber does not seem to last very long so I have used an opaque stain to help protect the wood longer than just the treated wood exposed to the weather. Plus the opaque stain stays the color you spray and not turn gray/black.
I use a Wagner paint sprayer to spray the stain. The stain is quite thick but the Wagner works good. I have an Earlex HVLP sprayer but it will not spray thick paint/stain. It has to be quite thin to spray. So the Earlex is good for polyurethane and other thinned paint. I have used Floetrol to help thin paint and get it to flow better on the surface.
I just used the Wagner today to spray a cabinet. The paint was very thick.

The sprayer is easy to clean up for water based paint/stain. There are only a couple of parts to clean. The Earlex takes over an hour to clean thoroughly so I only use it for large projects.
3 Likes
Nice Job.
I am attempting the same project, but I decided to try it out with Western Red Cedar… ummm yeah that was a mistake.
Excited to see that, hopefully it works out, why do you say mistake?
Western Cedar cost me about $250.00, and it’s a PHD (project half done).
Ahh yeah I gotcha, I have that same problem with a cedar chest I started, about $200 in cedar, and been sitting more than a month… wife loves it when I spend leave 1/2 done projects laying around lol.
2 Likes
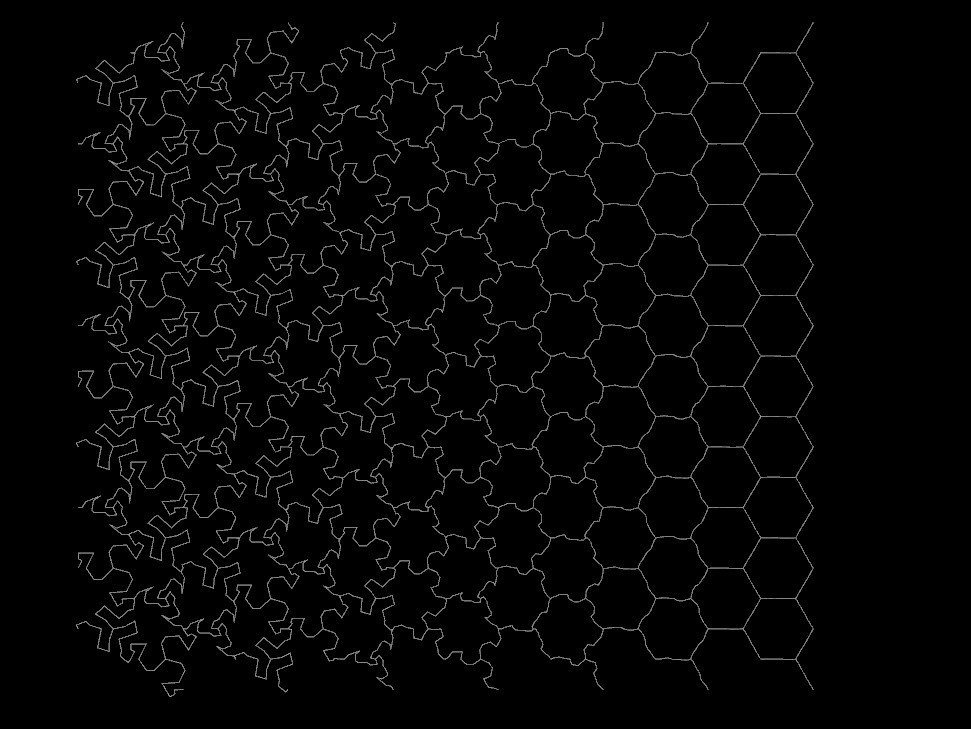
I thought i would have a go at some Escher-esk design, the tesselation design.
Still early days. I have a method of creating a design using the resource from this great website on Escher and the approach in this YT video by Entagma using a free version of Houdini by Sidefx. I modified the program a bit.
I have attached an image of a quick engrave using the diamond bit etcher on Aluminium. Its hard to photograph the aluminium because of the reflections but if you zoom in you should see some squashed lizard/tortoises tesselating and transitioning to hexagons (hmm, isnt it always the case, when you post something you see something wrong - a couple of my lizards are headless - thats tomorrows geometry problem). I think i should try it as an inlay with constrasting woods, meanwhile i have attached an image of the file.
Any thoughts as to what would make a good tesselating shape (Escher is quite the genius)? Any thoughts on application? (i was thinking of an Hexagonal chess board

Machine: Nomad
Material: Aluminium
Bit: Diamond drag bit
Software: Houdini and VCarvePro
EDIT:
I resolved my pattern issues. See Below:

The challenge now is that I would like to do an inlay project but the I think the design is so tight that I can not get enough width in the lines for an inlay.
15 Likes
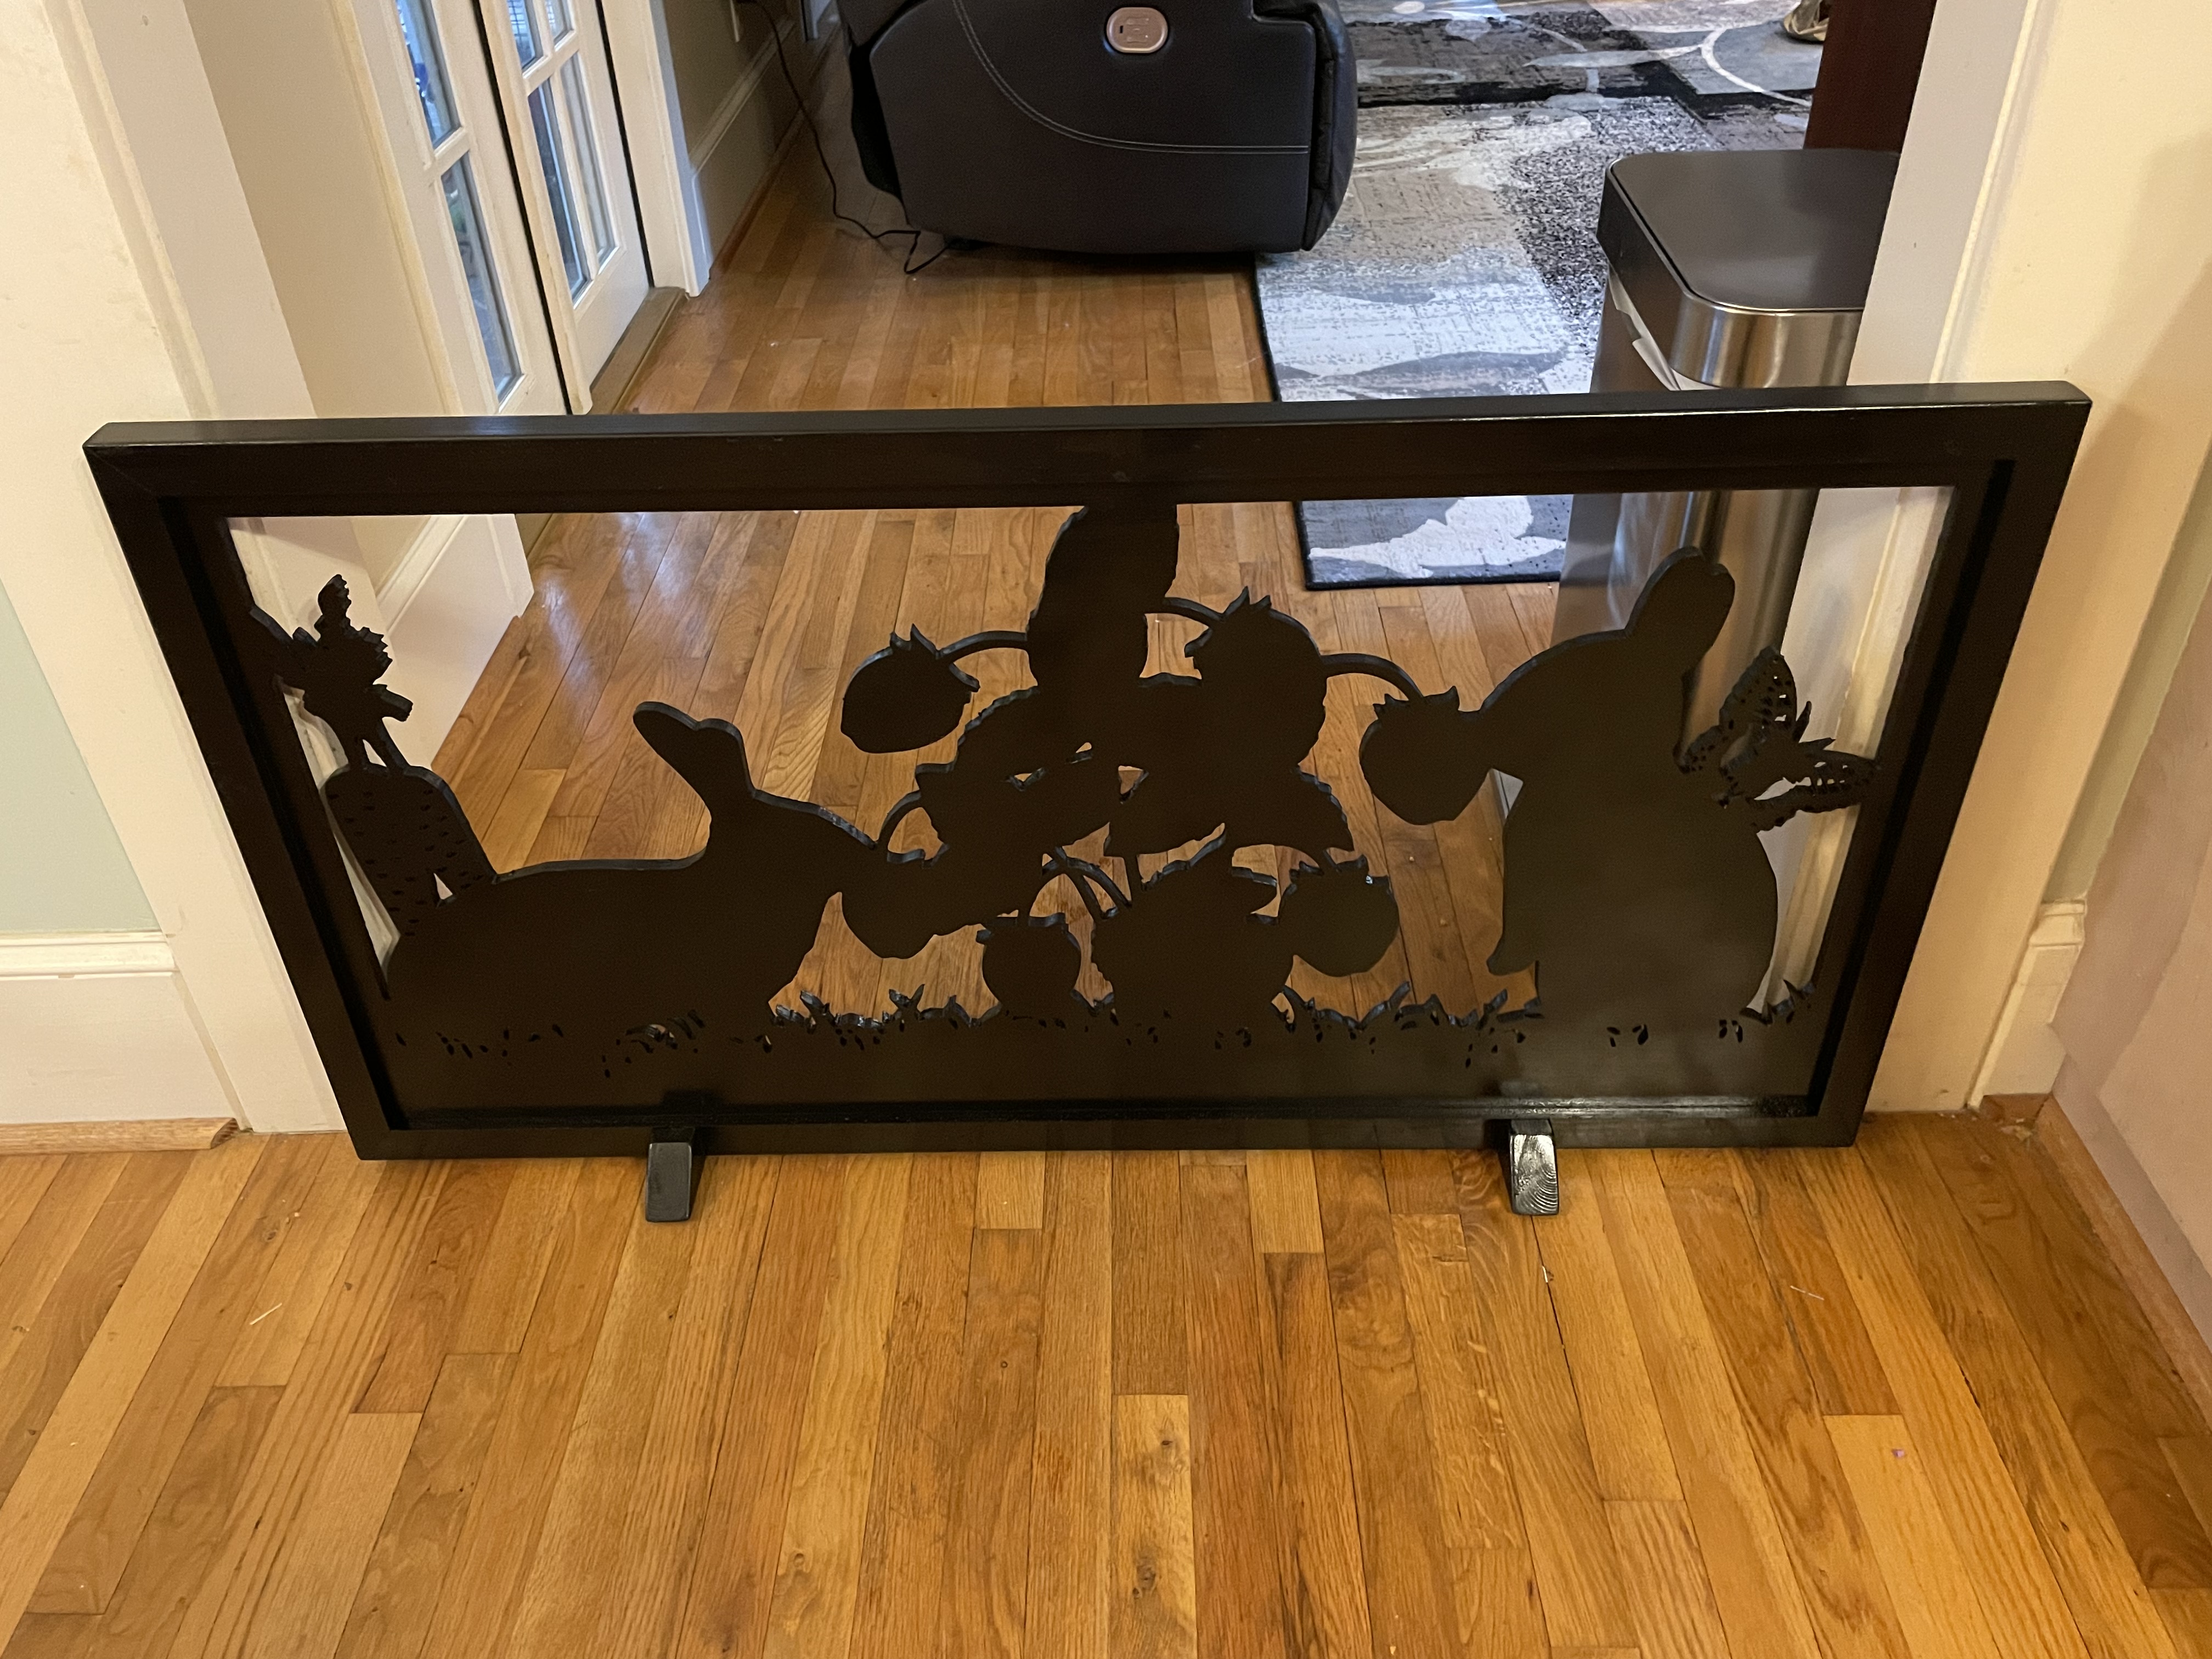
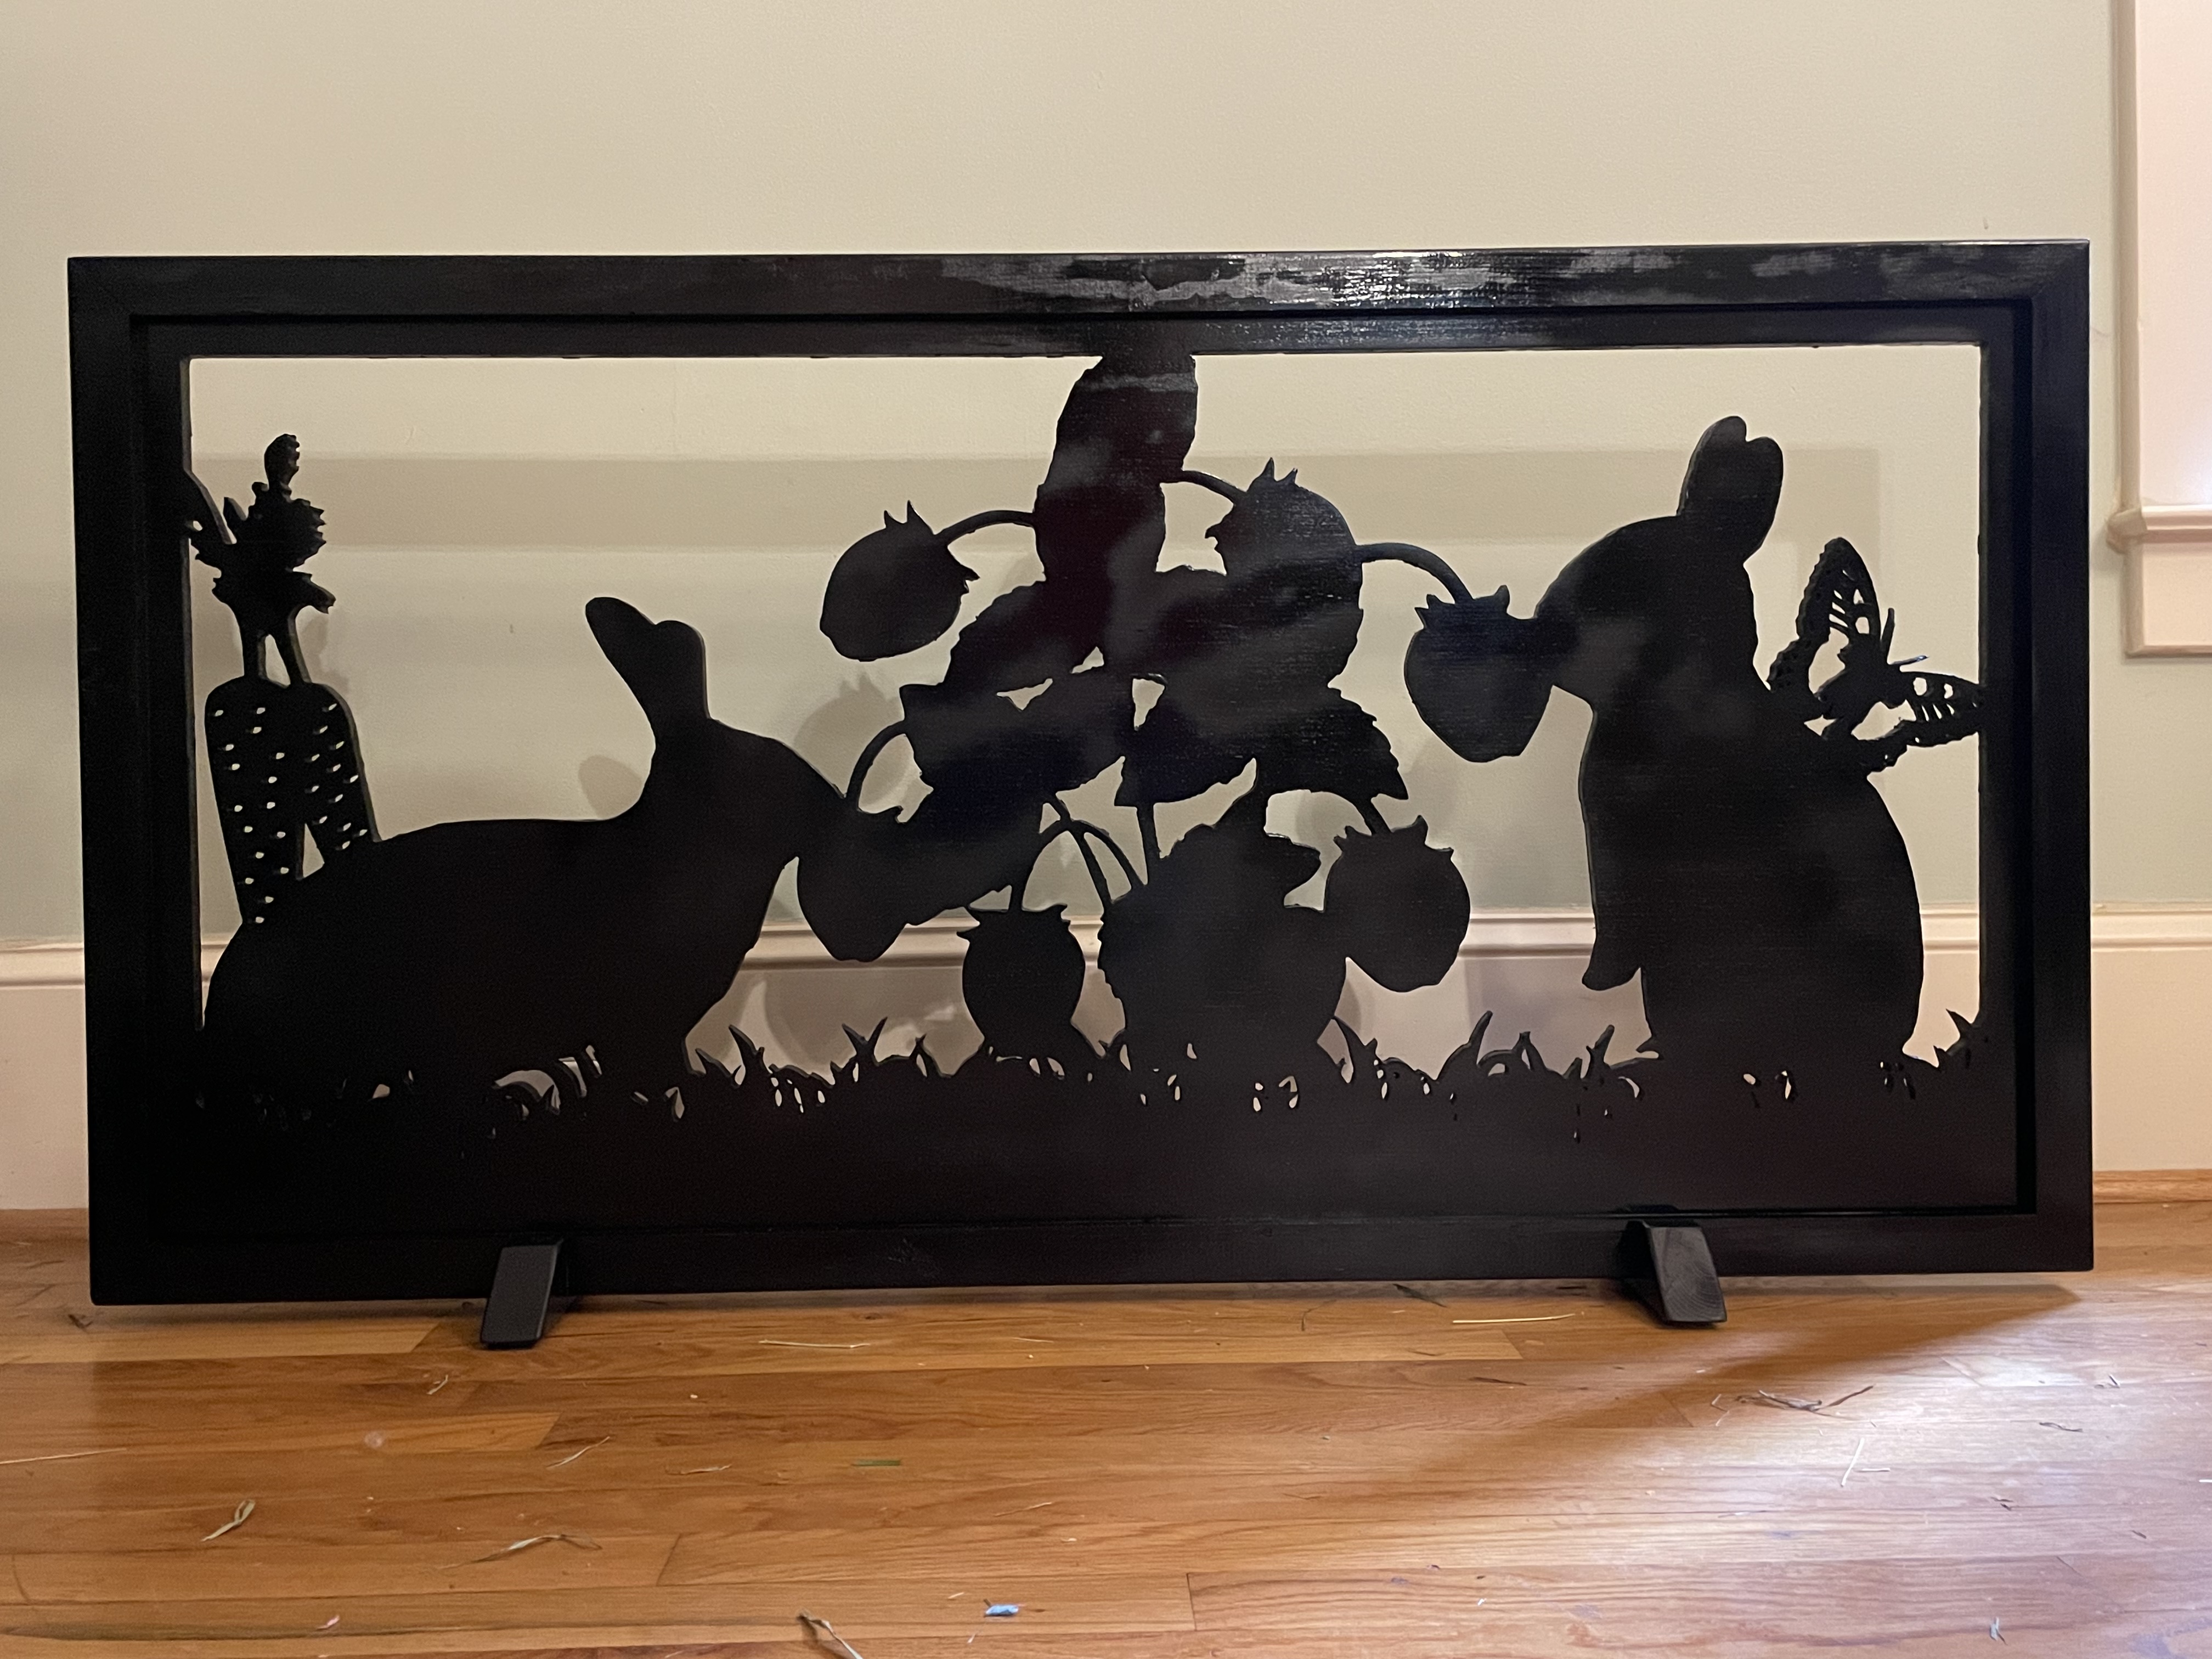
I finally had time to finish my Bunny Barrier to keep the rabbit out of the den. Used tiling to cut the 48” piece of plywood. Then cut a frame and feet from a piece of 2x4 and painted black.
Before painting I put wood putty on the exposed plywood edges and then a coat of shellac to seal the whole thing.
Super happy with the tiling process. I feared trying it but it went smoothly.
25 Likes
Things seem to be just hopping along for you. Cute design. Lets just hope your rabbit does not try to eat the wood strawberries/flowers or the carrots on the screen.
Yes that is a concern. He didn’t go anywhere near it last night but we will see what happens moving forward. Hopefully the smell of the paint will put him off.