Hope it is about tools with pictures. ![]()
![]()
More’s the pity no — for folks who want that, it would be hard to do better than the extant:
Another good choice (if one can get past the errors — I’m assuming that they haven’t yet done a corrected second edition) is:
Given that the provided excerpt:
still shows the wrong photo at the top of pg. 70 (a pair of flat pliers which are actually covered on pg. 142), it seems not. The irony of a book about a craftsman who, “made things as perfectly as possible” being rife with errors is something I’m still obviously not over.
That said, if/when a corrected second edition is done, I’ll gladly buy it, even if they don’t improve their micro-typography.
3 Likes
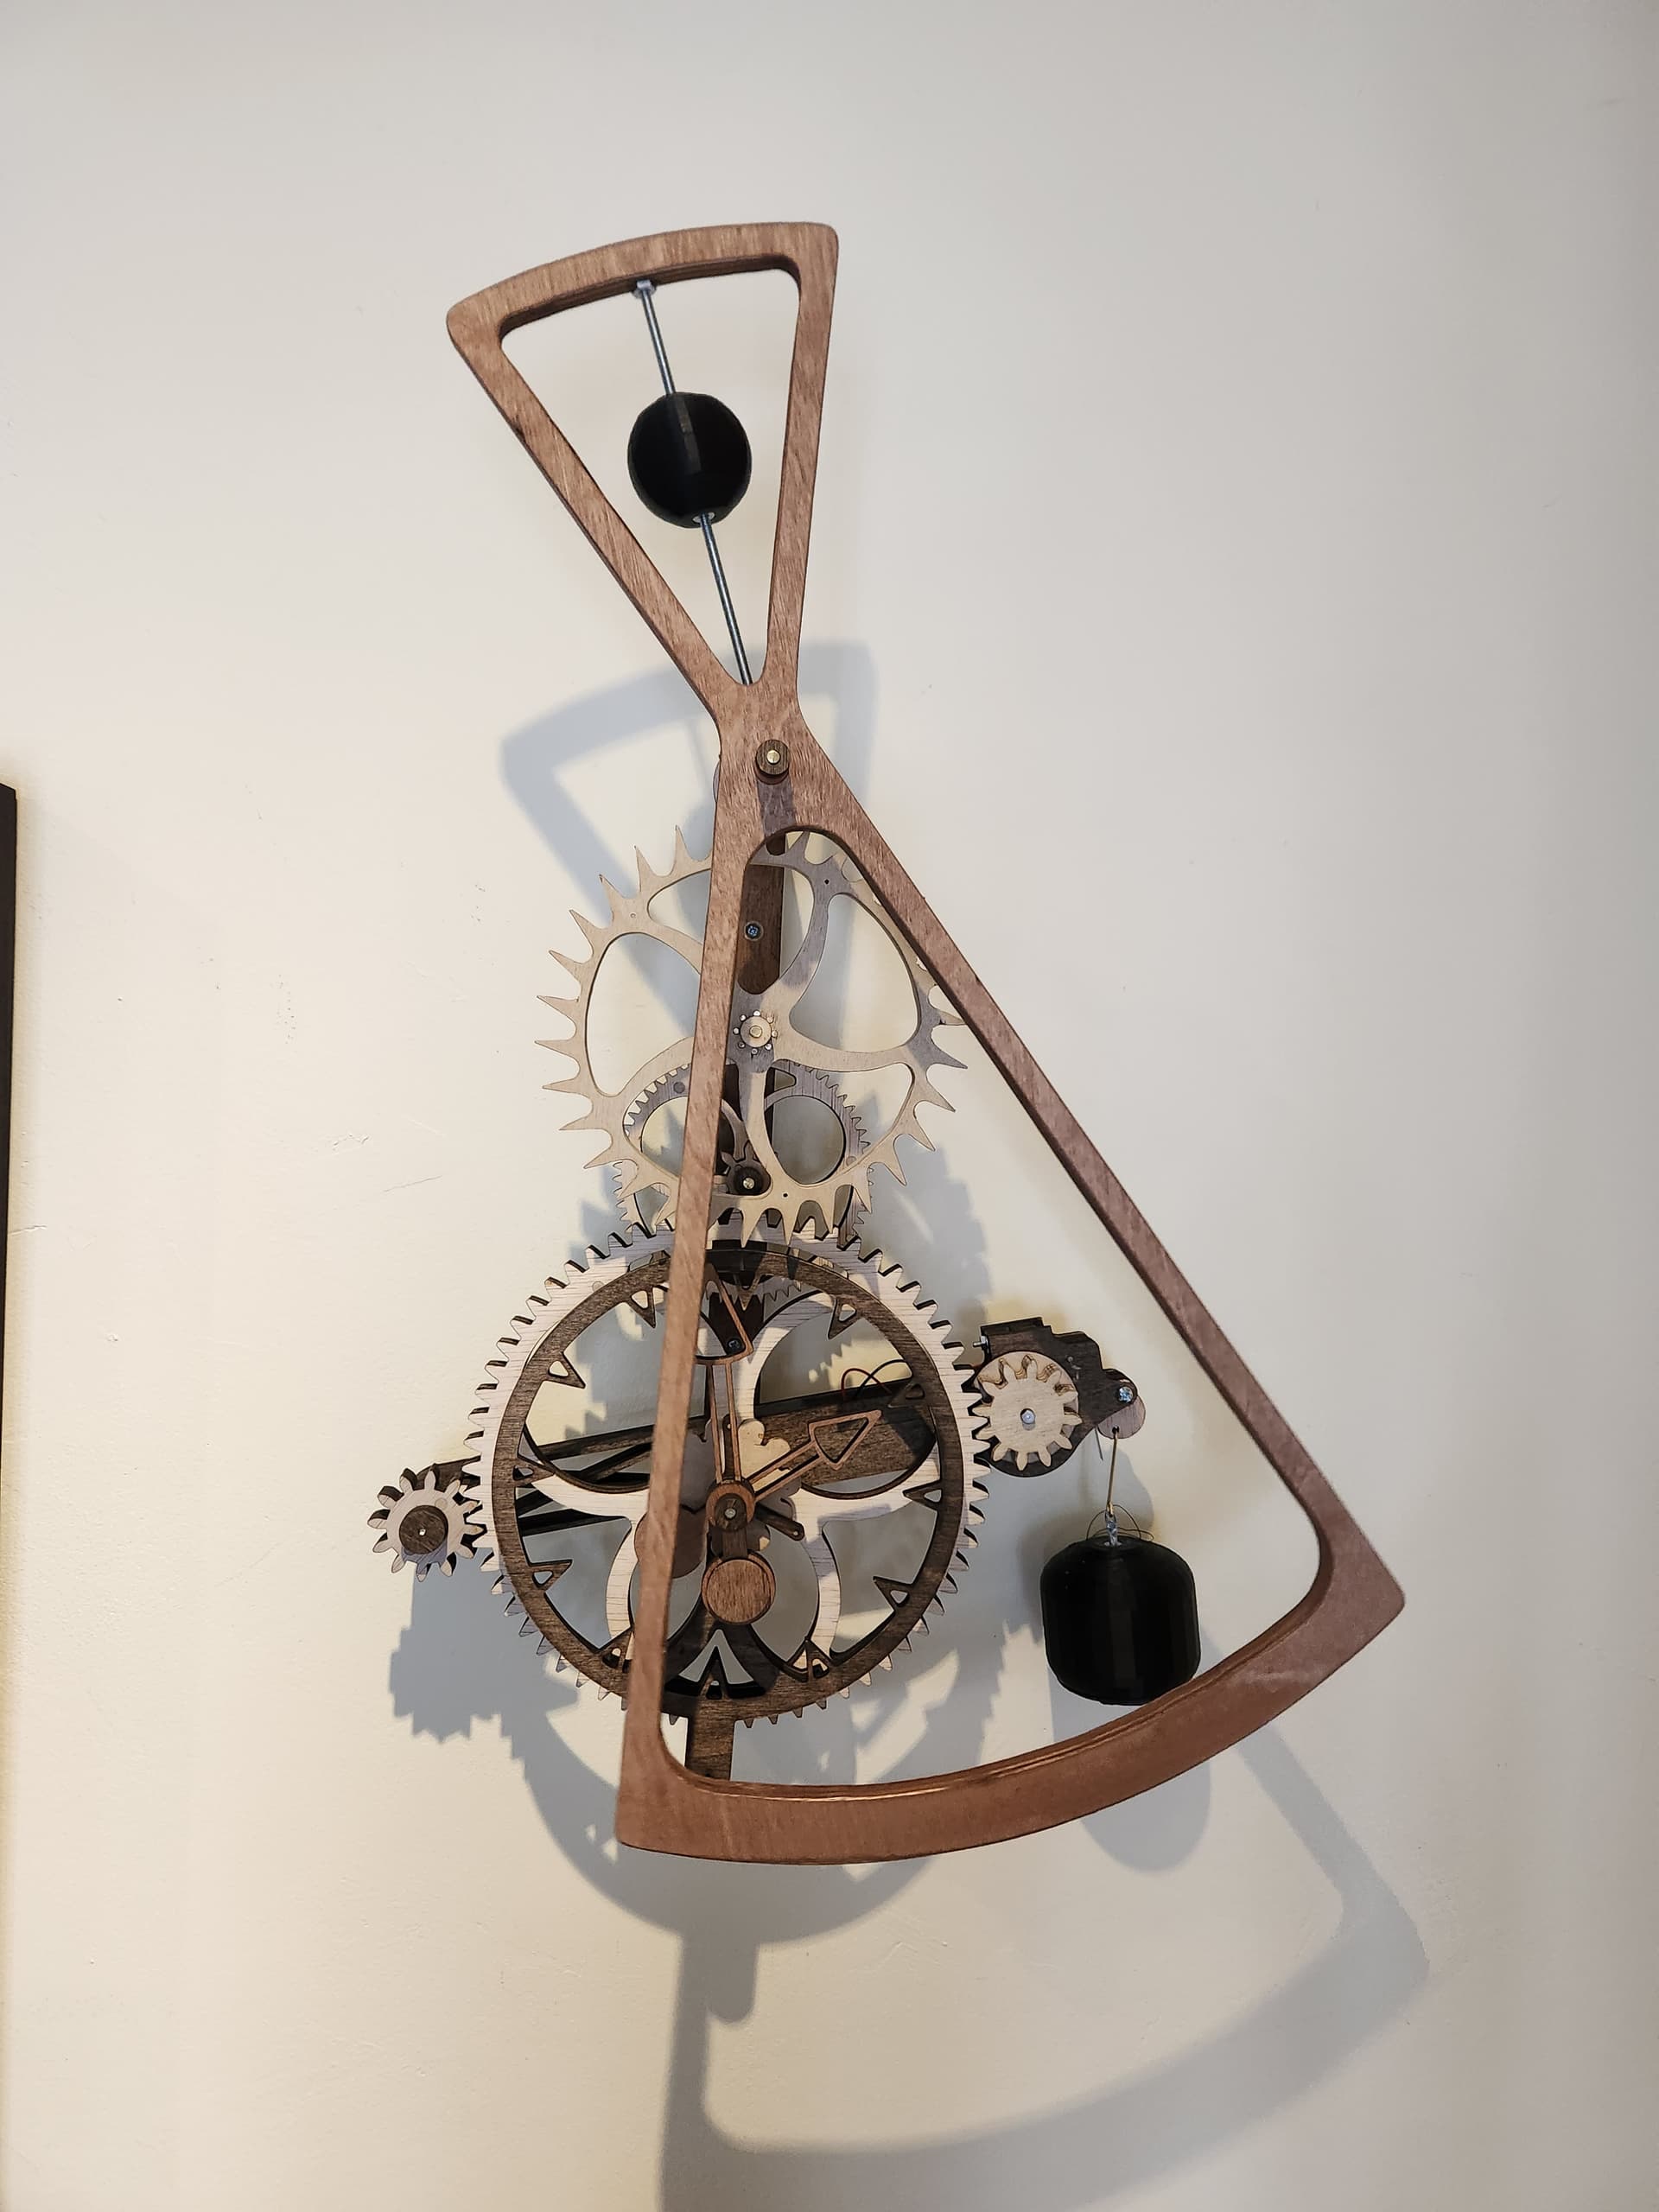
What clock design are you making. I built one last year. Started out cutting the gears with a laser and then laminating them up to full thickness. Then I bought the Shapeoko 4 and remade several of the gears from thicker stock.
The escapement on this clock design looks like it will be fairly quiet. The one I built has a very definite “Tik-Tok”.
16 Likes
This is awesome. I’m interested in trying to make a clock someday with my SP5 but it’d be totally out of my wheelhouse. Do you have any recommendations on resources to get started with designing and cutting something like this?
I’m working on Clock 49. Ultimately I’d like to put this in an enclosure, kind of like a Grandfathers clock, at least that’s direction I’d like to go.
Good to see a local Shapeoko owner near by!
1 Like
Everything you need to get started including ready made designs.
7 Likes
12"x18" curly maple with cherry inlay.
Finished with Danish oil and wipe-on polyurethane. Poly layering is still in progress.
It’s a gift for some in-laws who recently moved from Michigan.
I won’t bother to list the things that went wrong along the way. ![]()

25 Likes
I love that, Tim. The cherry looks great.
Very cool! Im a newbie trying to learn all I can. Love this!
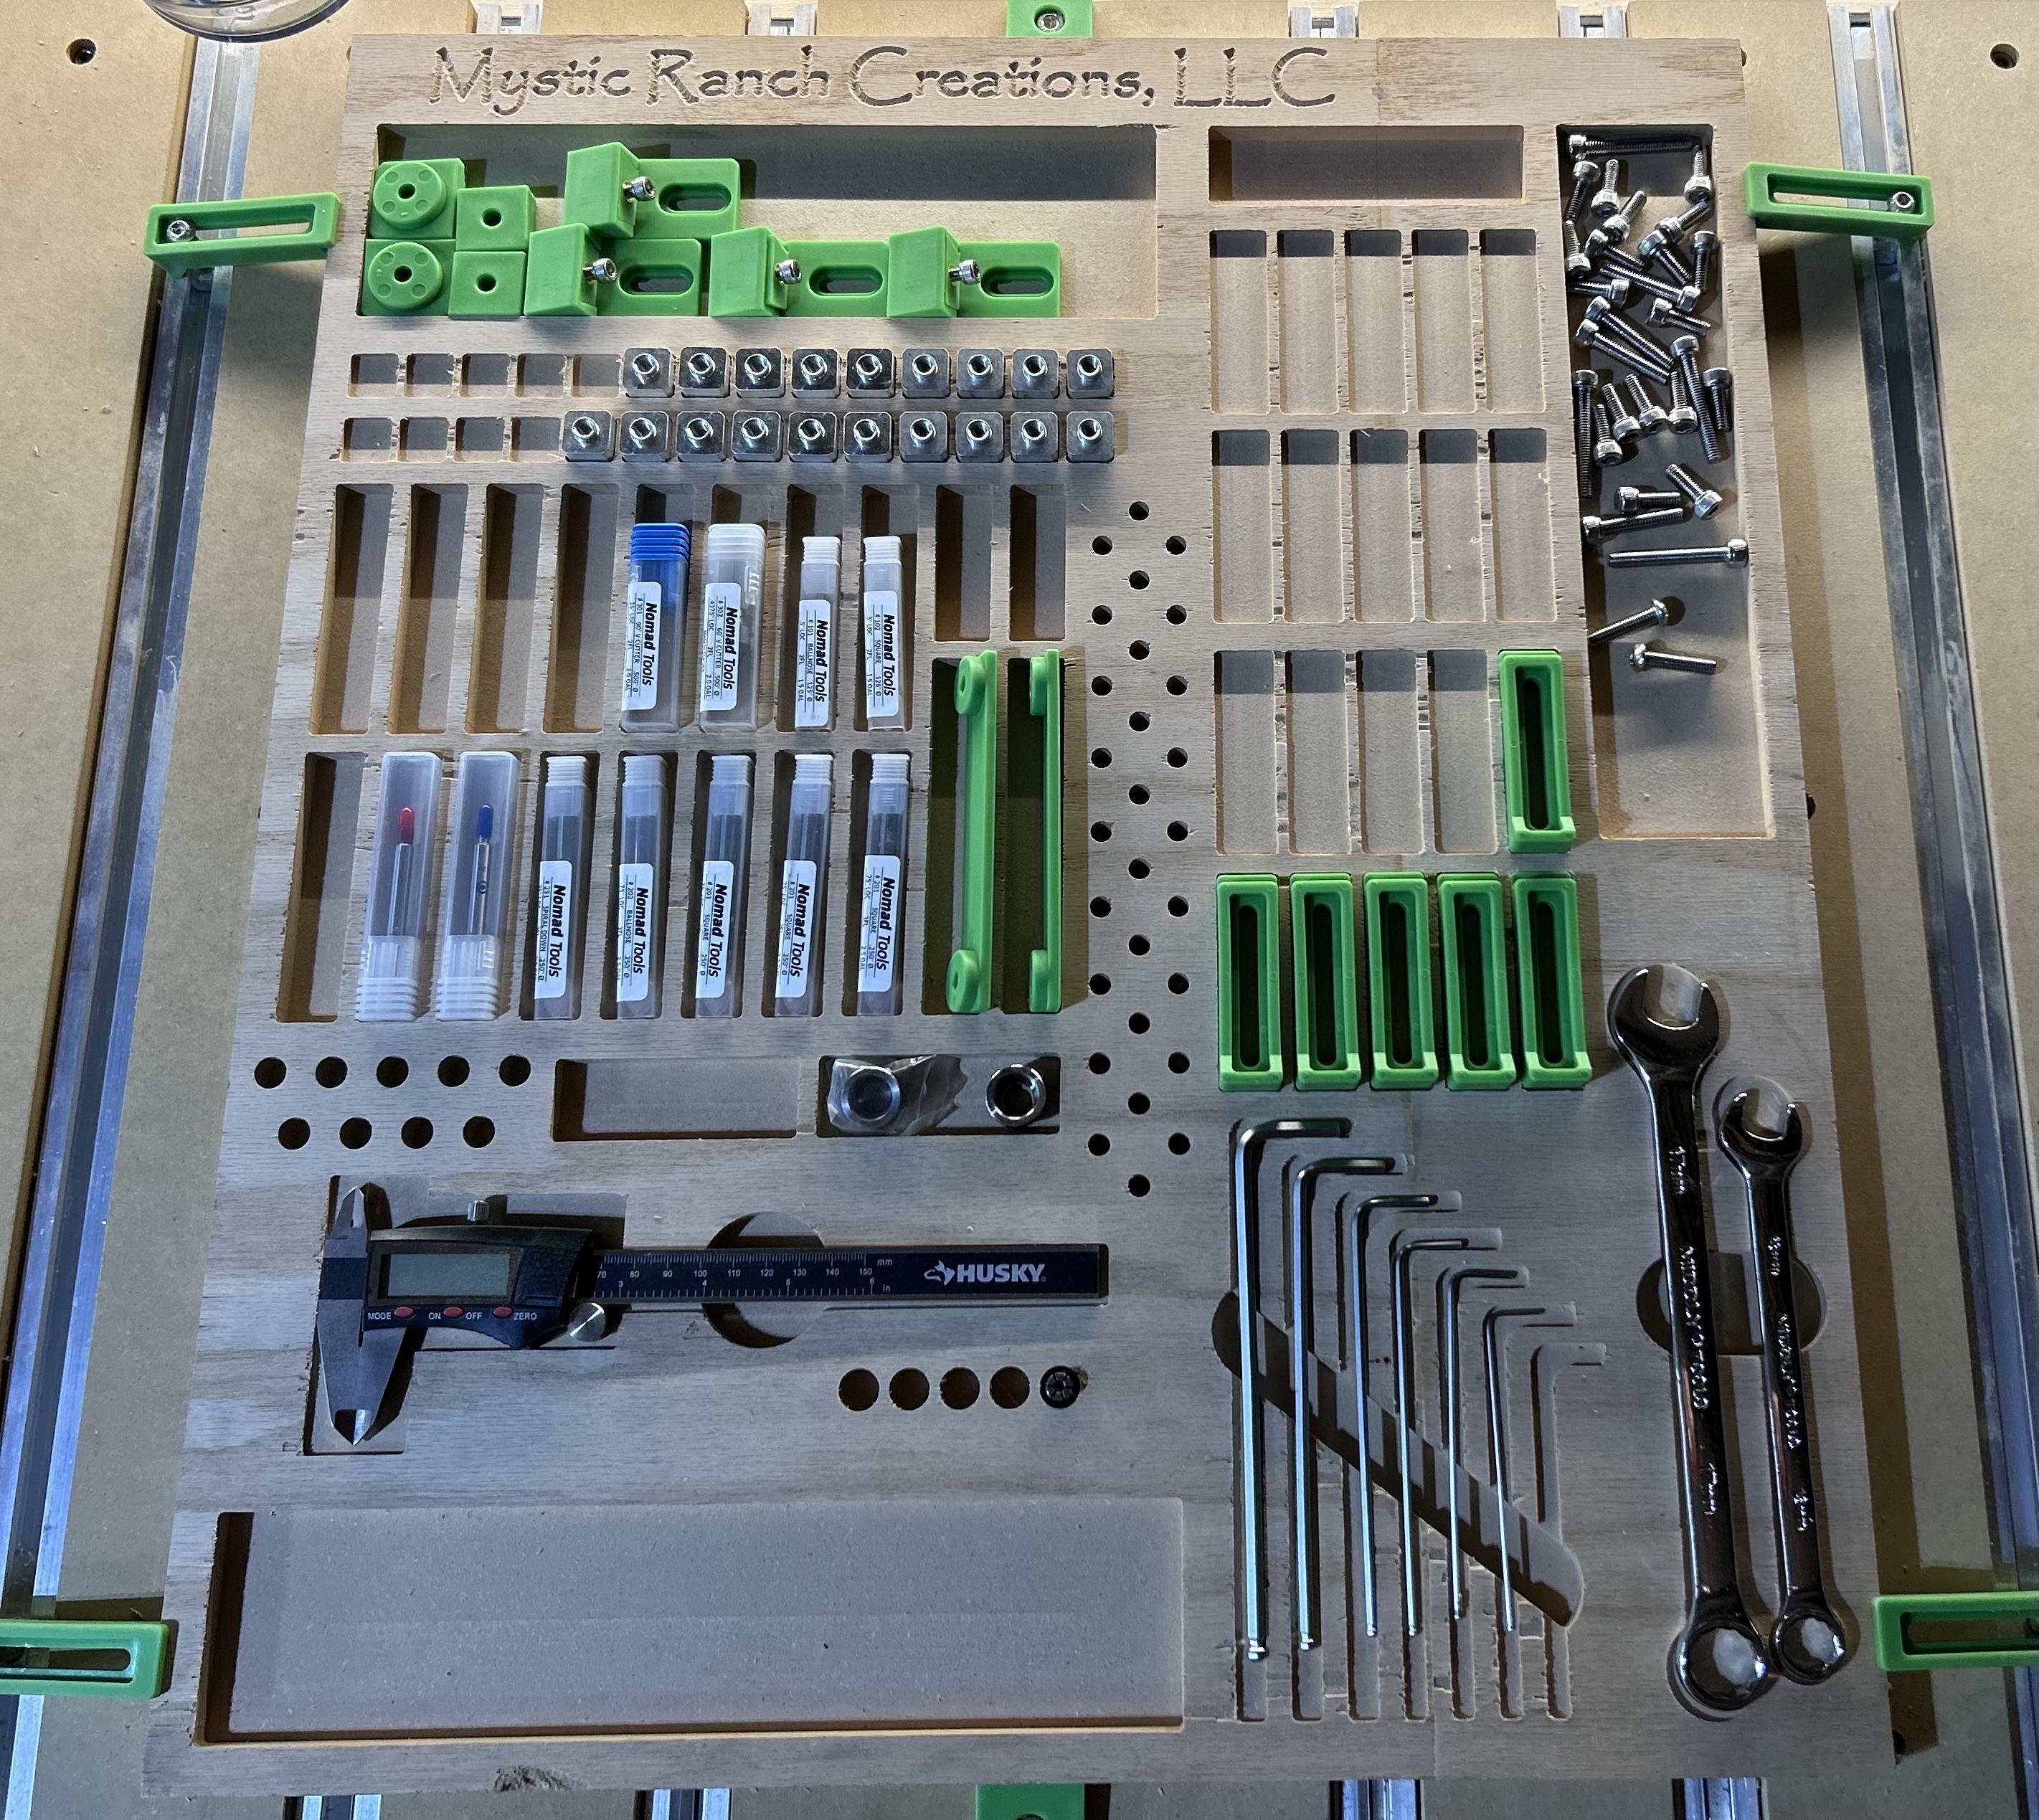
Finally got my machine running today and completed my first project. Just wanted to make a tool organizer and it came out pretty good.
19 Likes
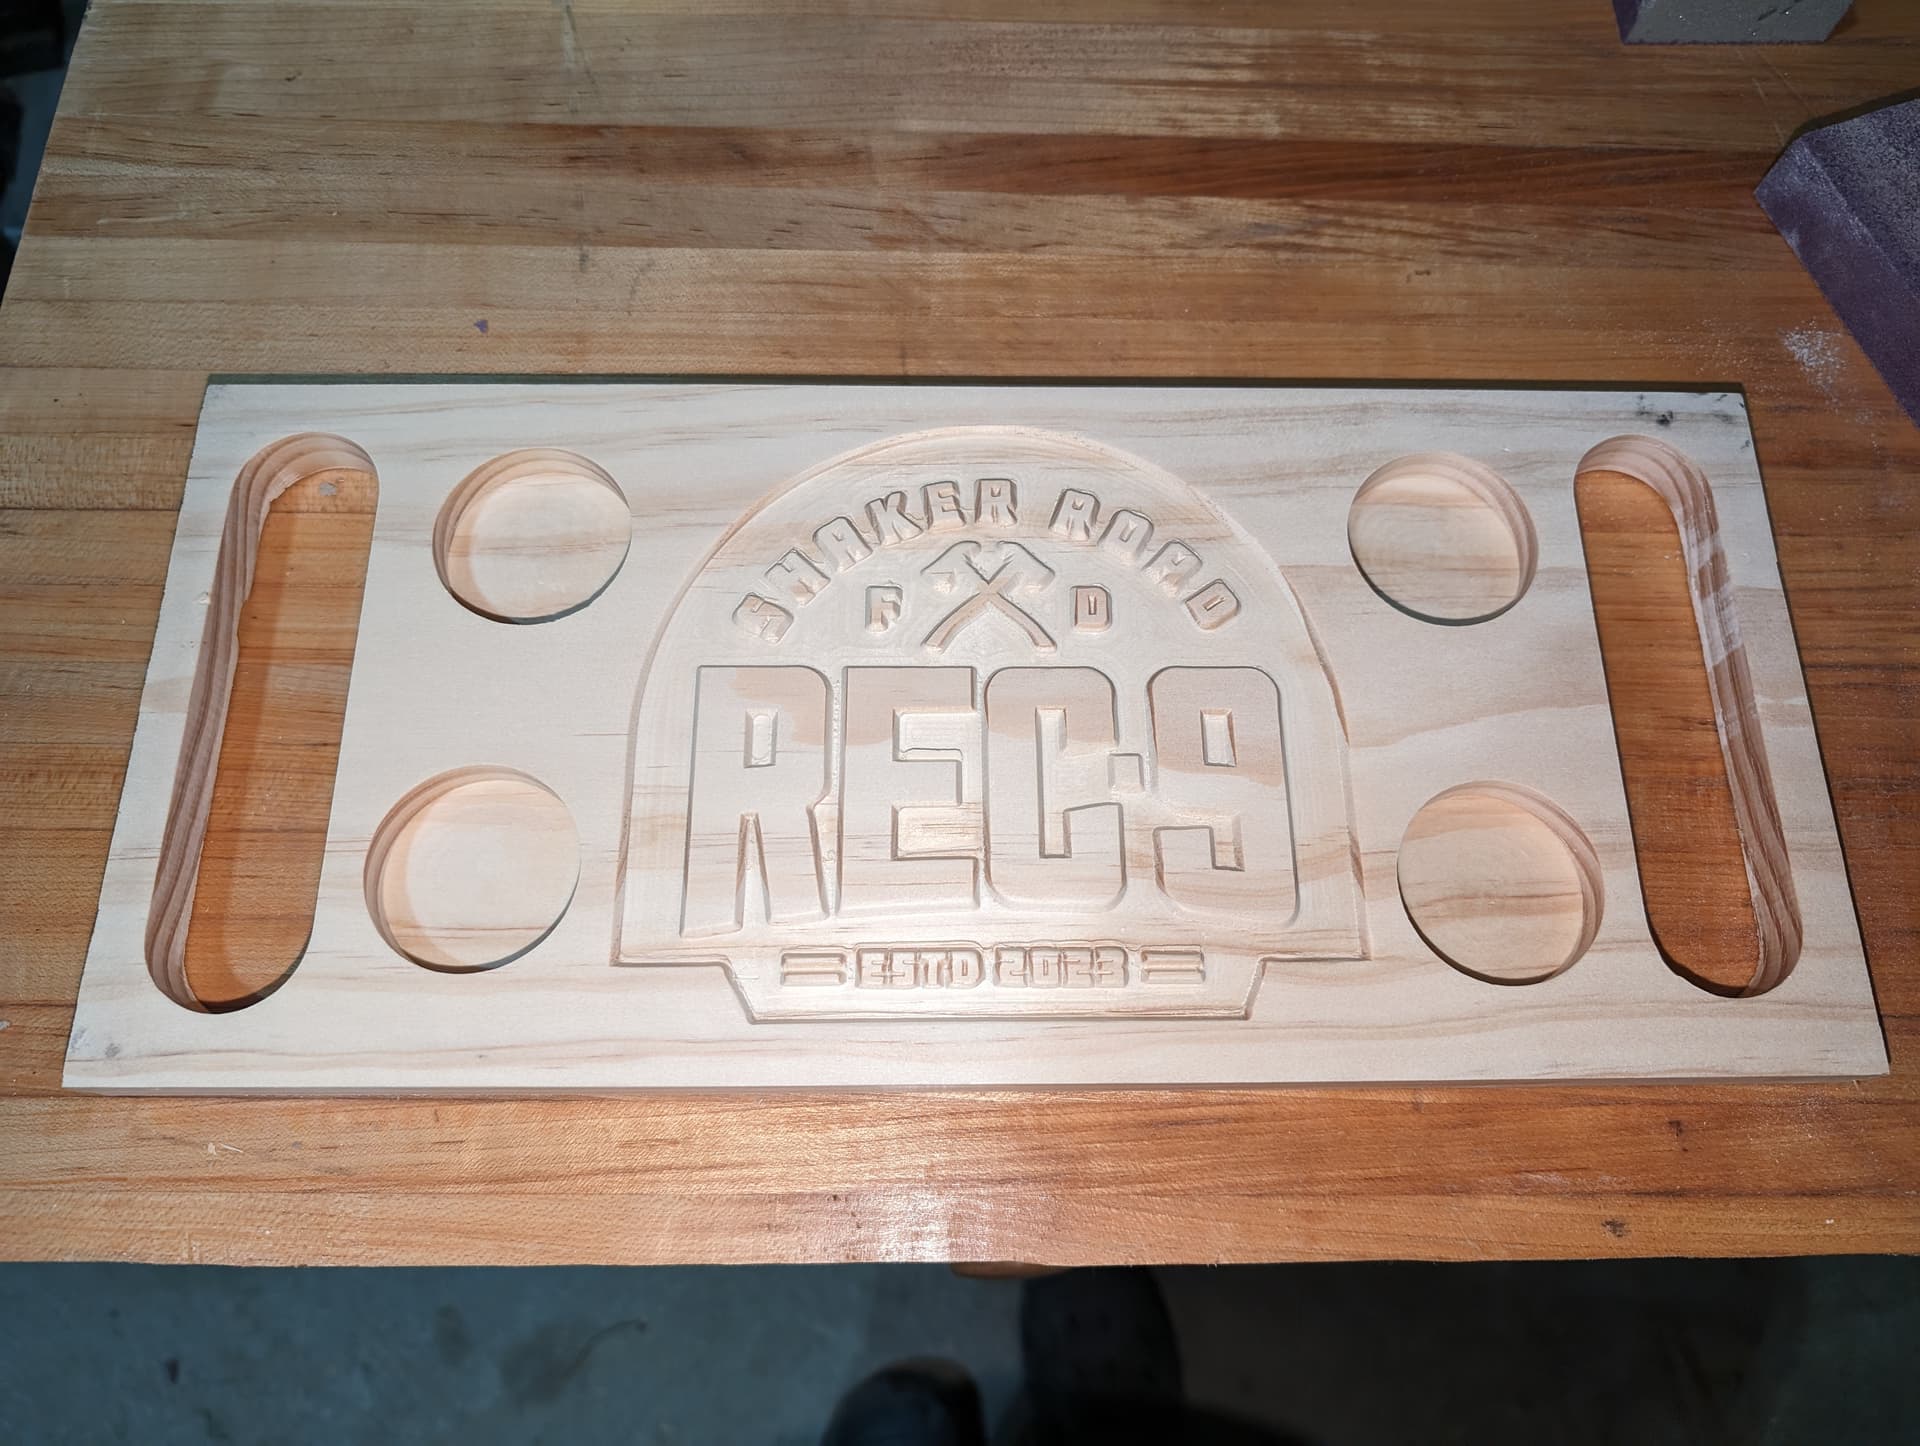
One week newbie to CNC here. I think the setup was the toughest part, but onto the cuts. Seems like all is working well. Here is a flight board I just finished for a fire department recreation room - can be touched up in some areas, was a trace then advanced v carve
14 Likes
Looks really good. You found a font that works well with vcarve. Is this a test piece? You may find the pine isn’t very strong with handles that thin.
1 Like
Thats the plan before cutting it into cherry - was a test piece. I may change out the handles for actual hardware on the top. going to inlay with a red epoxy.
2 Likes
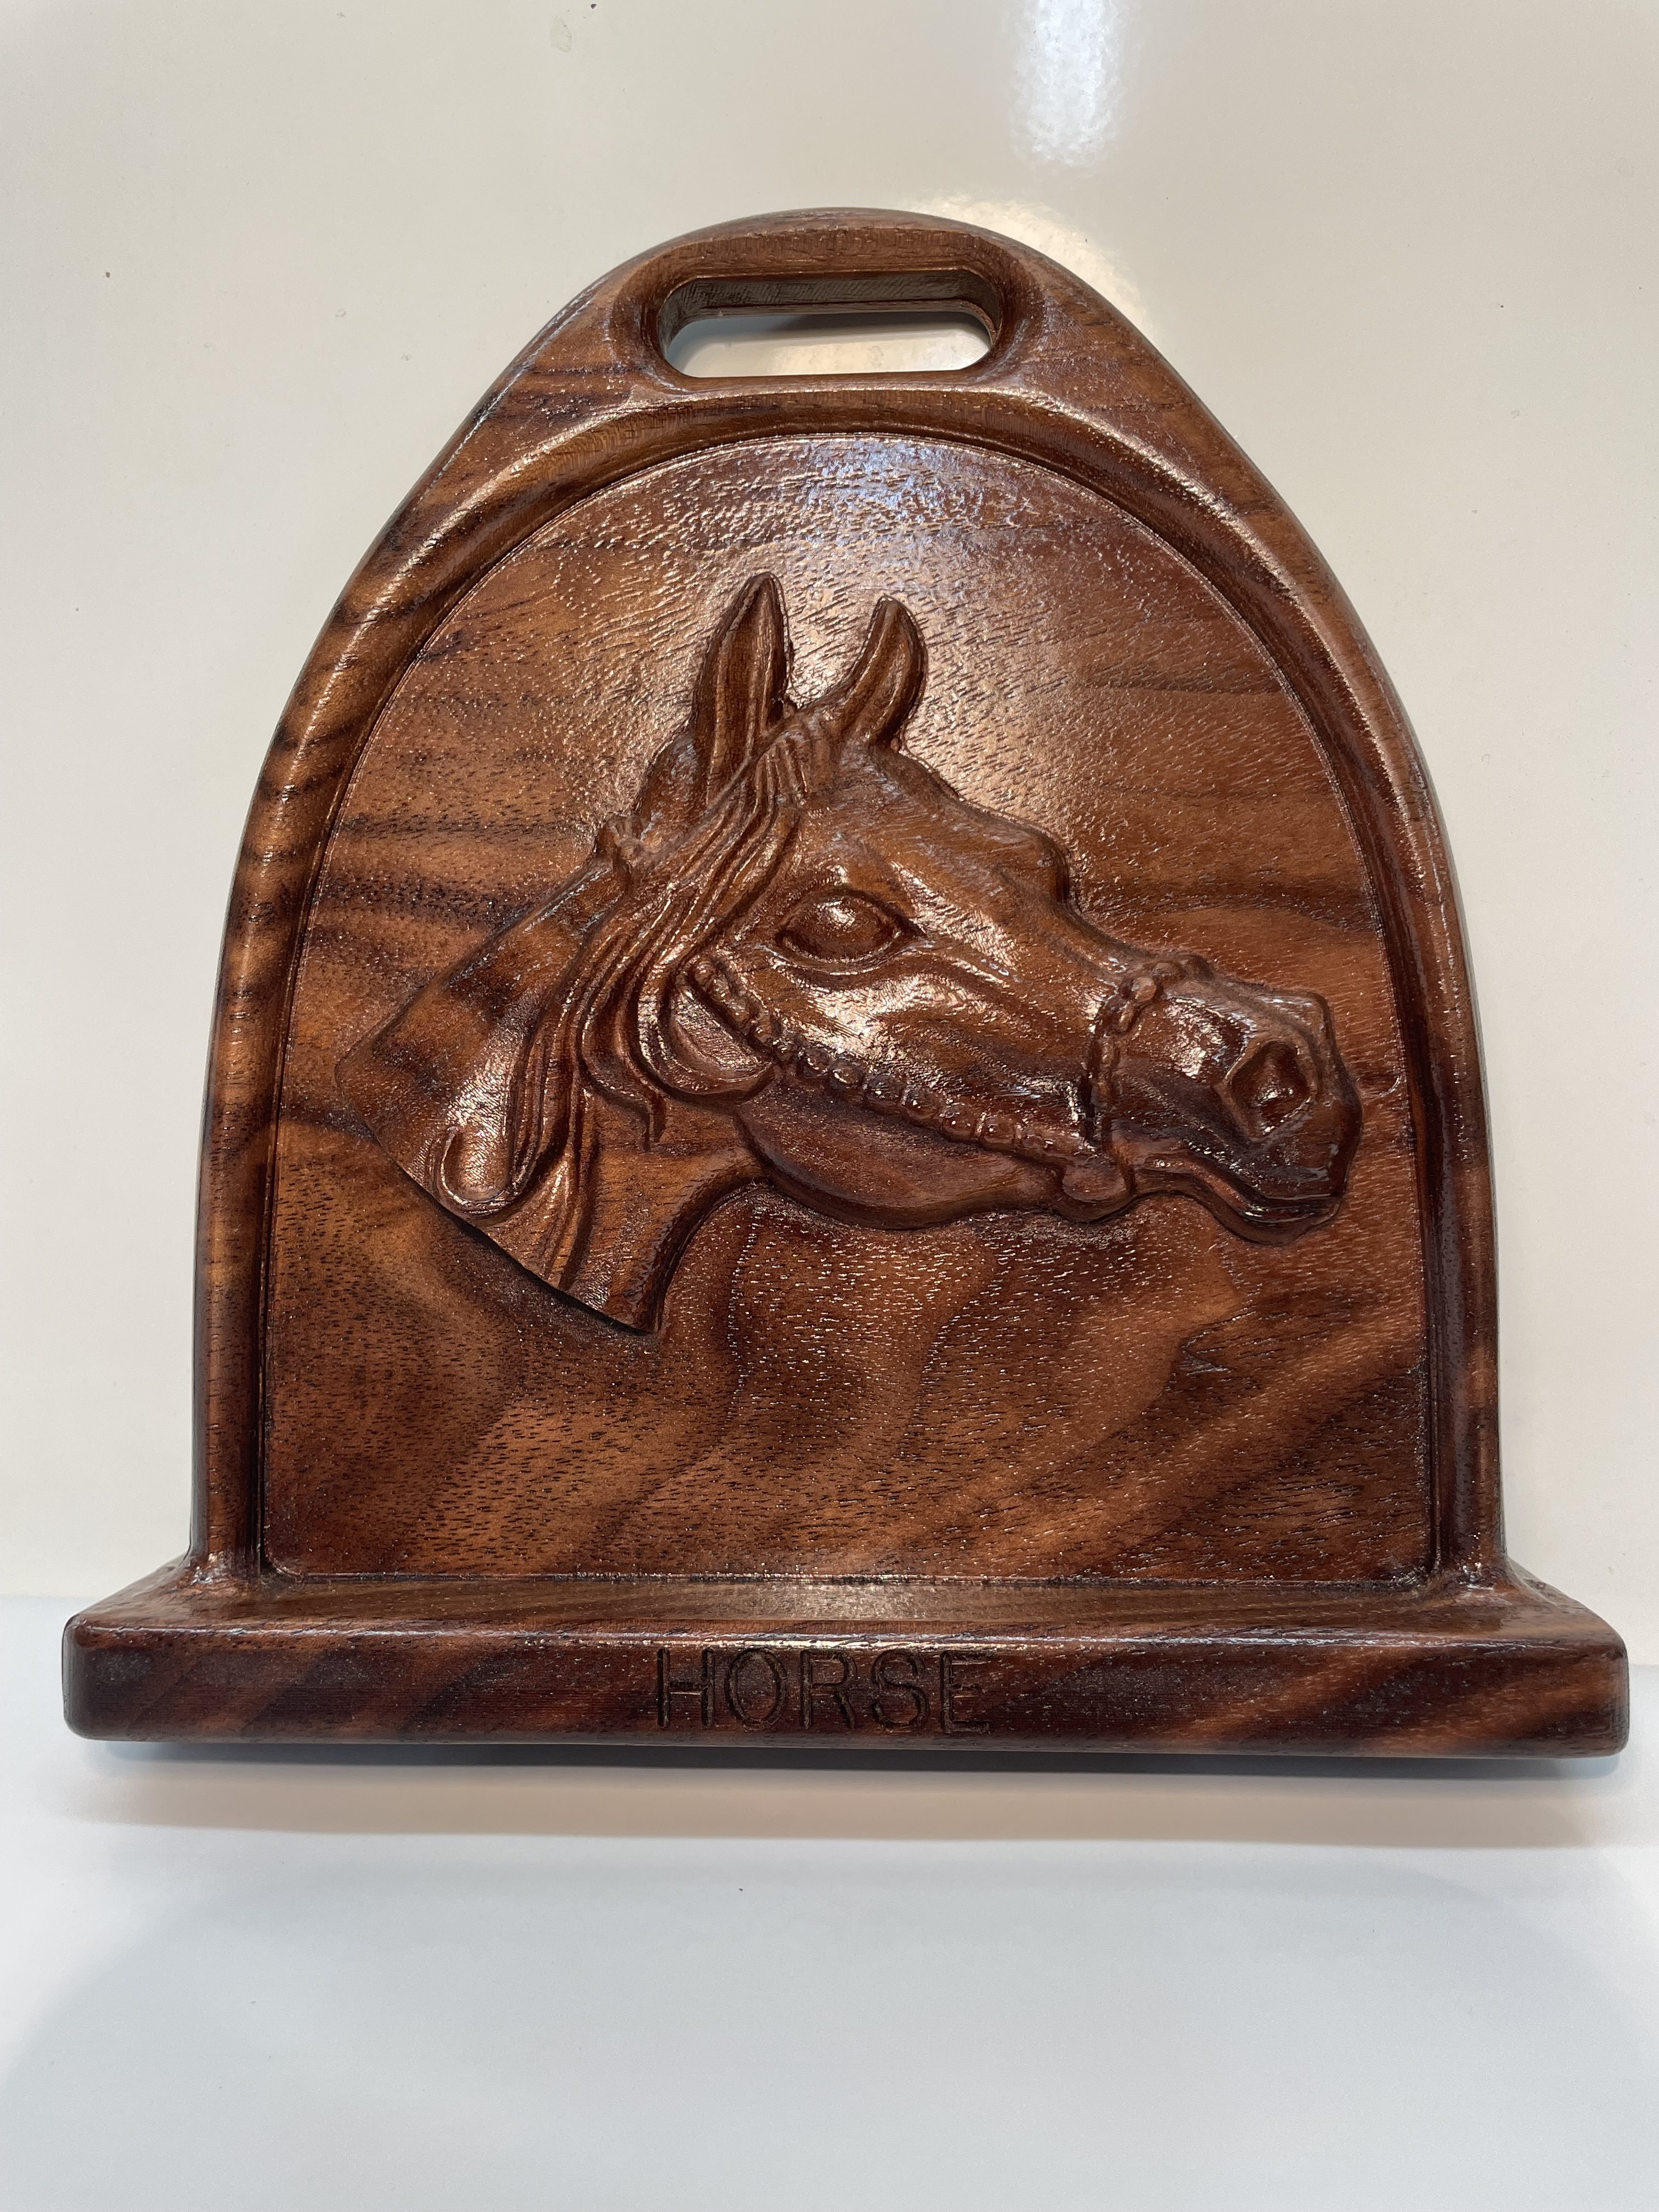
Well, I finished it today anyway.
The two pictures are flip sides of the same piece.
The horse head and dog were from Vectric’s clip art although I had to make some mods to the horse as it contained the full body and reins dangling which I didn’t want.
I modeled the stirrup in OnShape. It was my first OnShape project and it made more sense to me than FreeCAD.
The material was 1.75” thick walnut. The finished piece is 7”x7” and about 1.5” thick or maybe a little more. It’s hard to measure from peak to peak across the sides.
The solid piece on the inside of the stirrup is 1/4” thick. Originally I wanted it open but the shape of the dog head and the horse head wouldn’t work right. If I just did one or the other maybe.
My sides were off by .03 so I guess my width measurement was off by .015. Need to be more precise next time.
It’s hard to see in the pic but one side has HORSE inscribed and the other has HOUND. It is for a local hunt club.

15 Likes
I posted above that I finally got my FunkyGear cut out. After getting it cut out I realized there was no way to turn the nautalis. So I added to one of them and will recut and add a dowel to turn them.
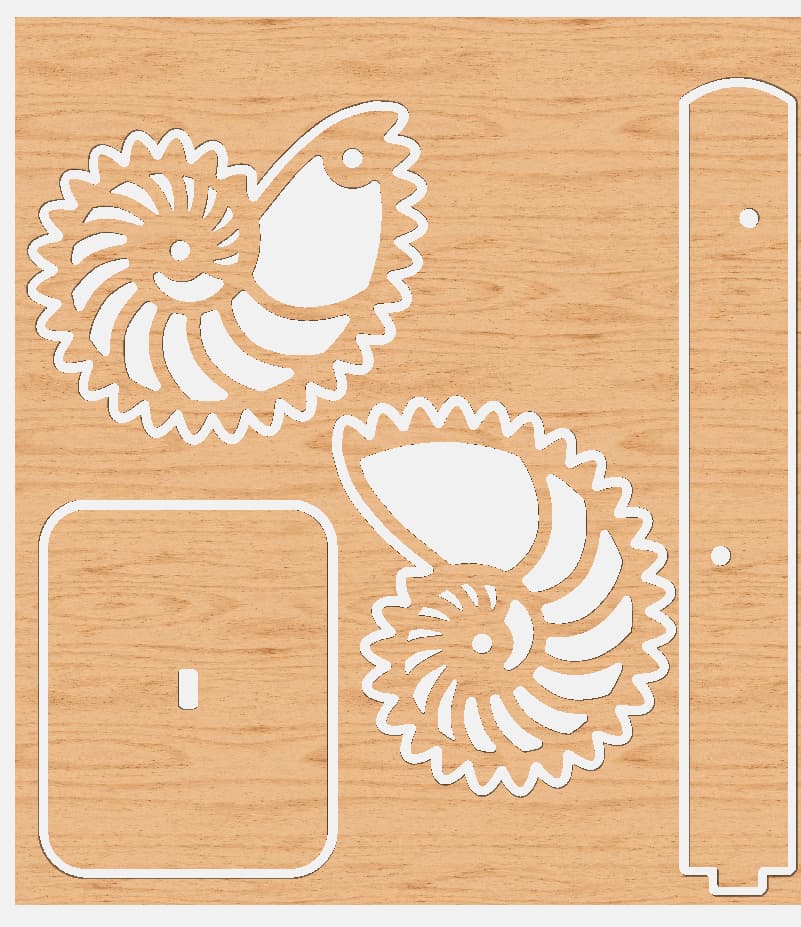
This project was mentioned here on the forum but the creator is here:
I receive scroll saw magazines and a lot of scroll saw projects can be easily done on a Shapeoko/Nomad.
6 Likes
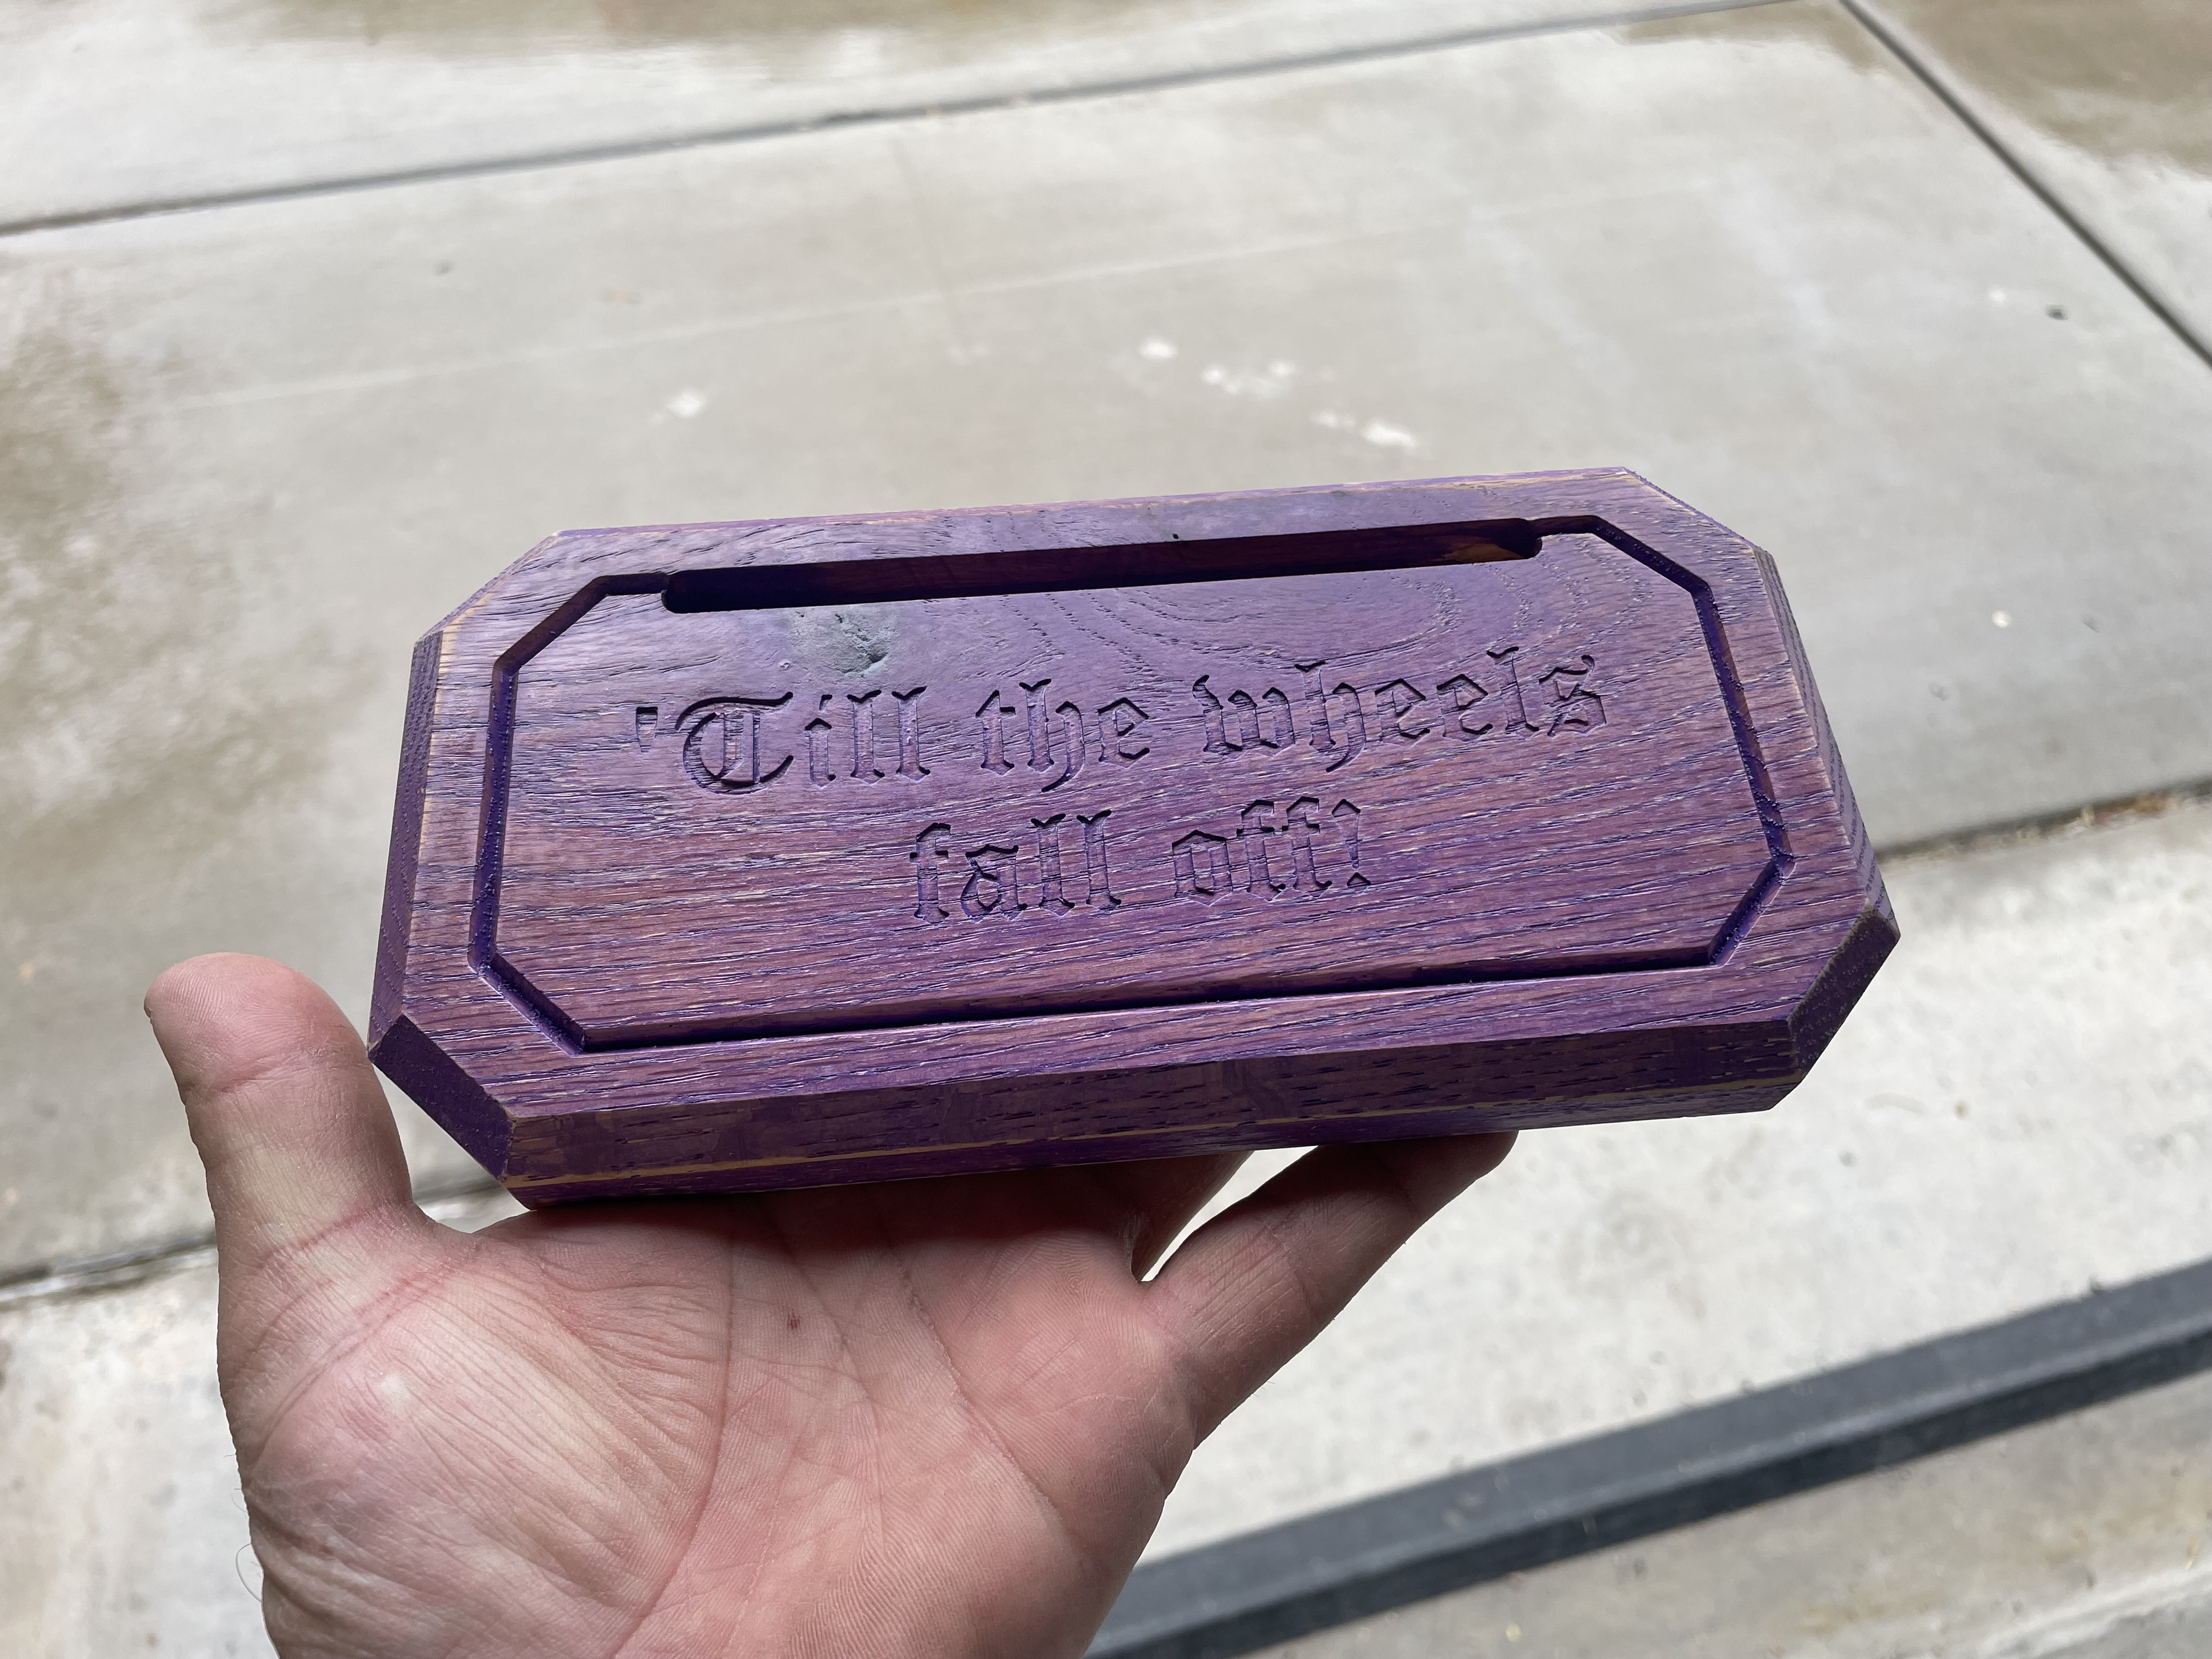
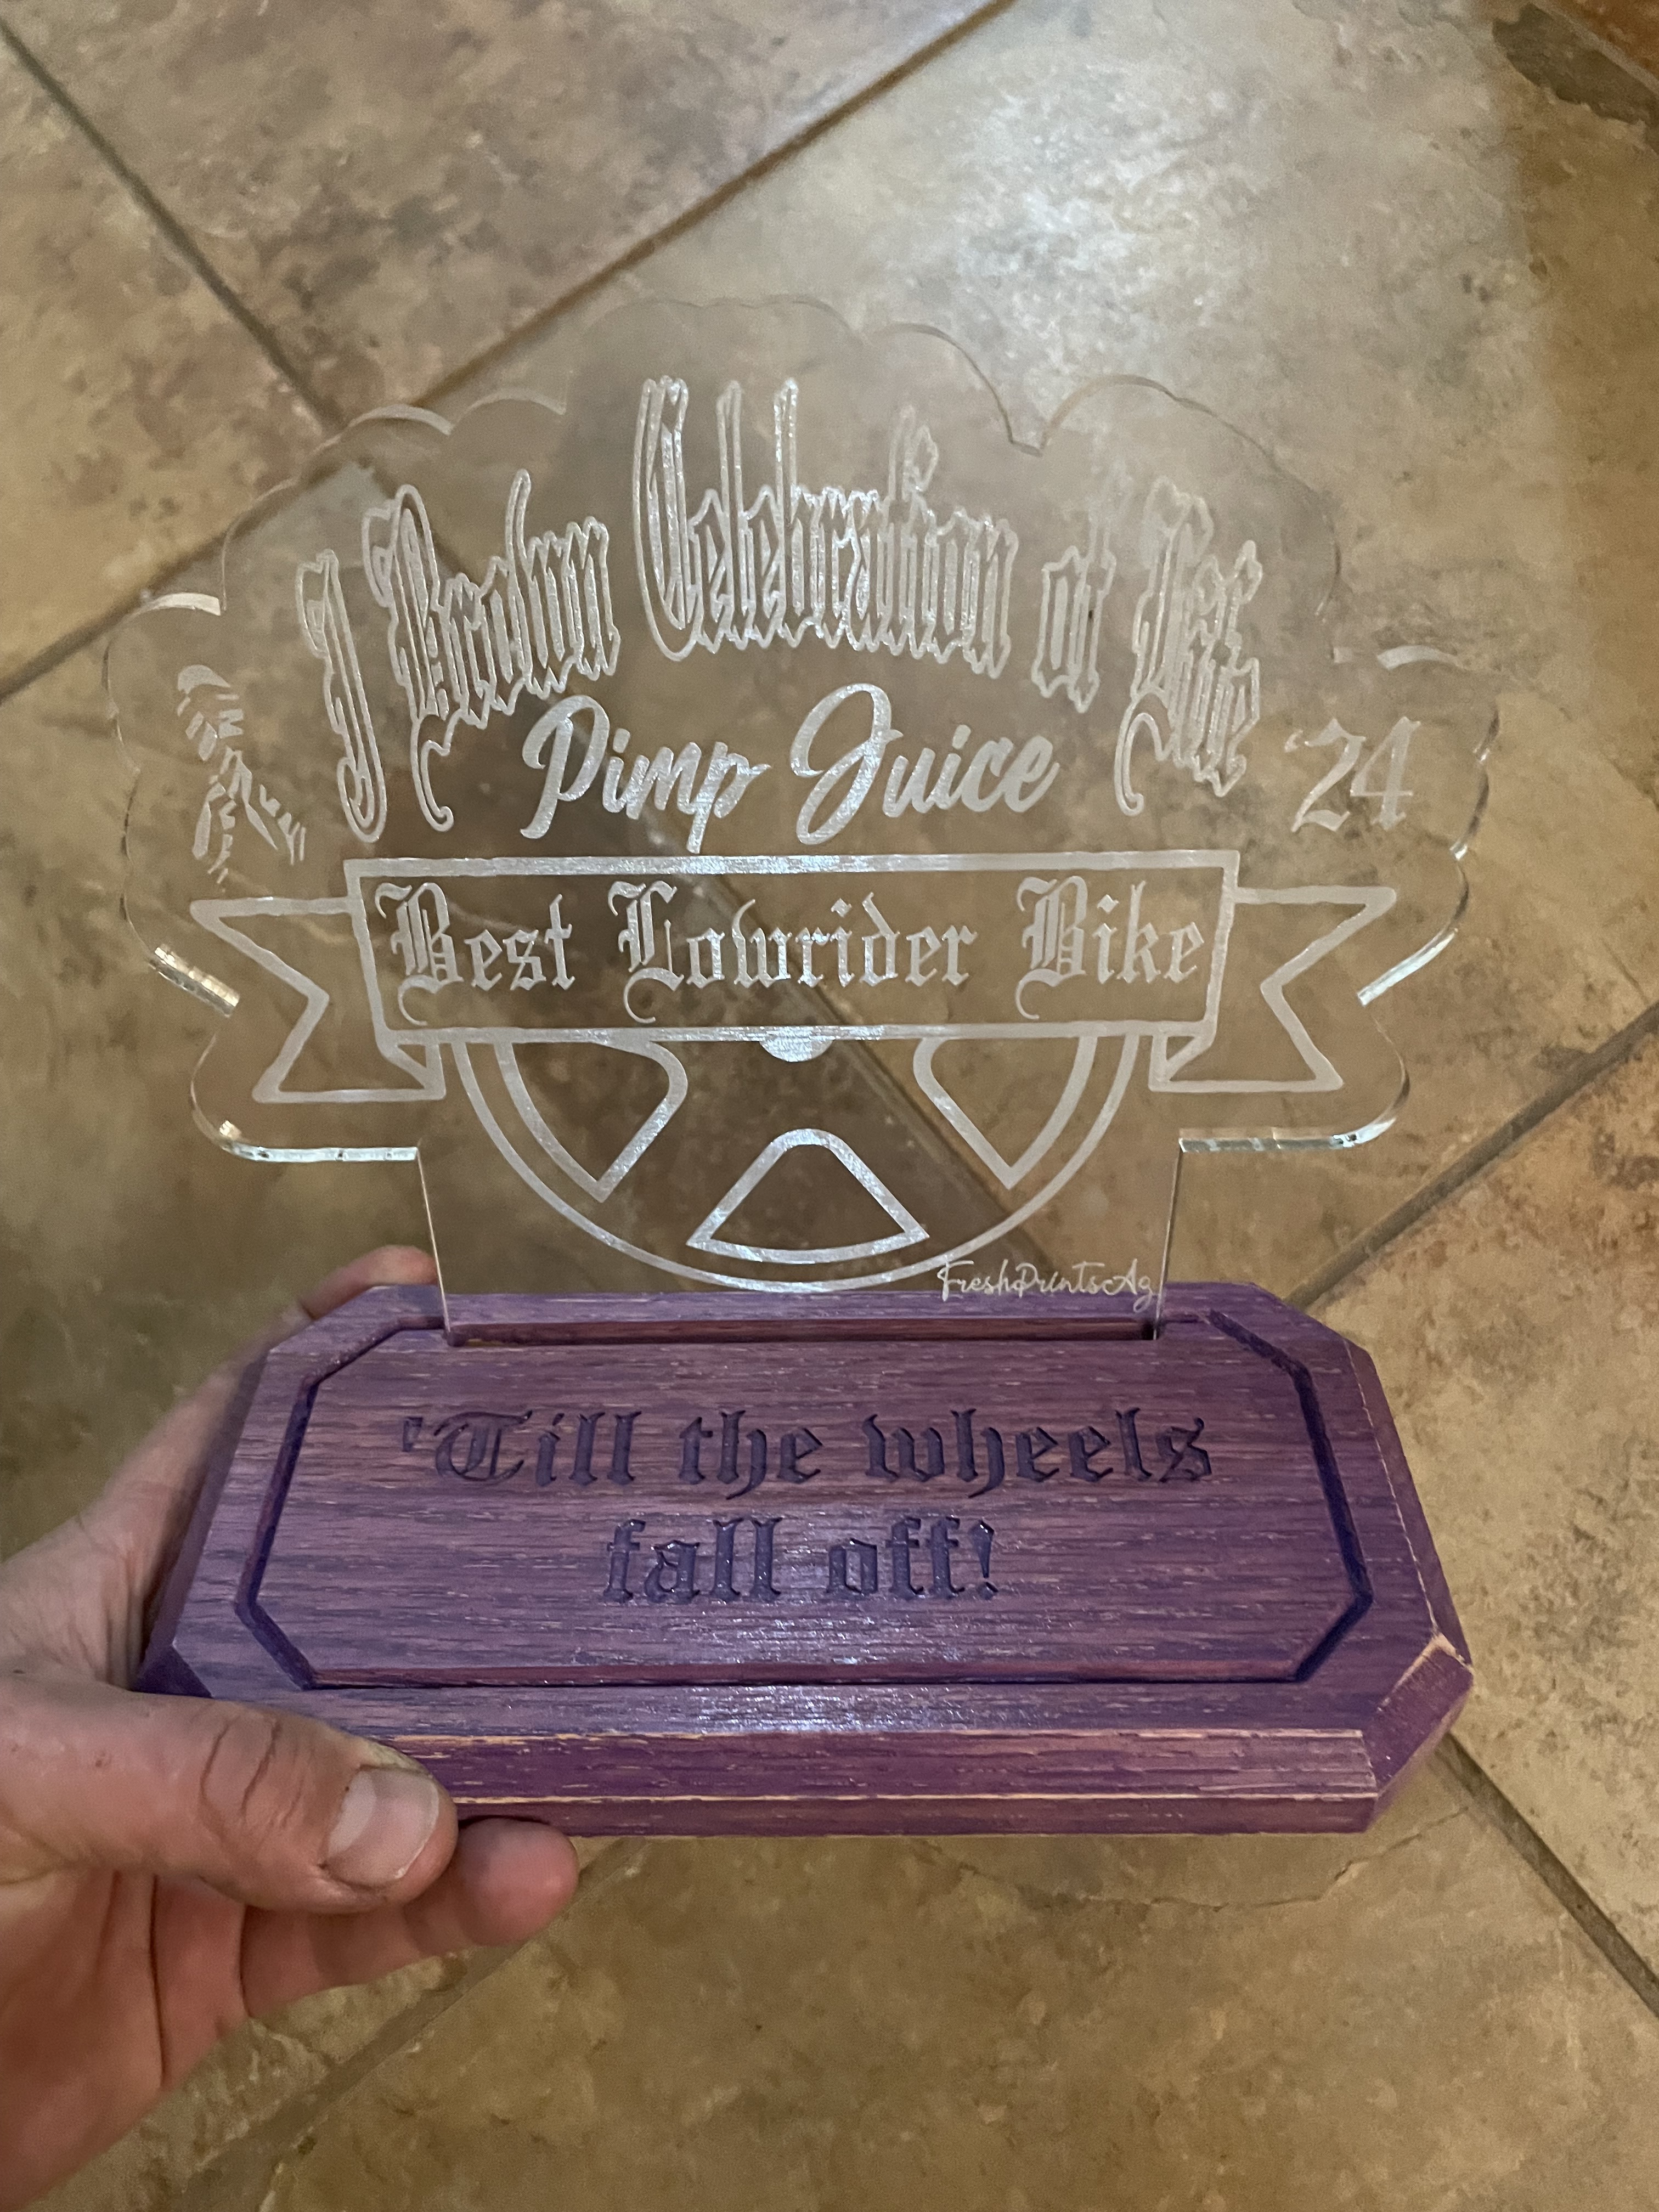
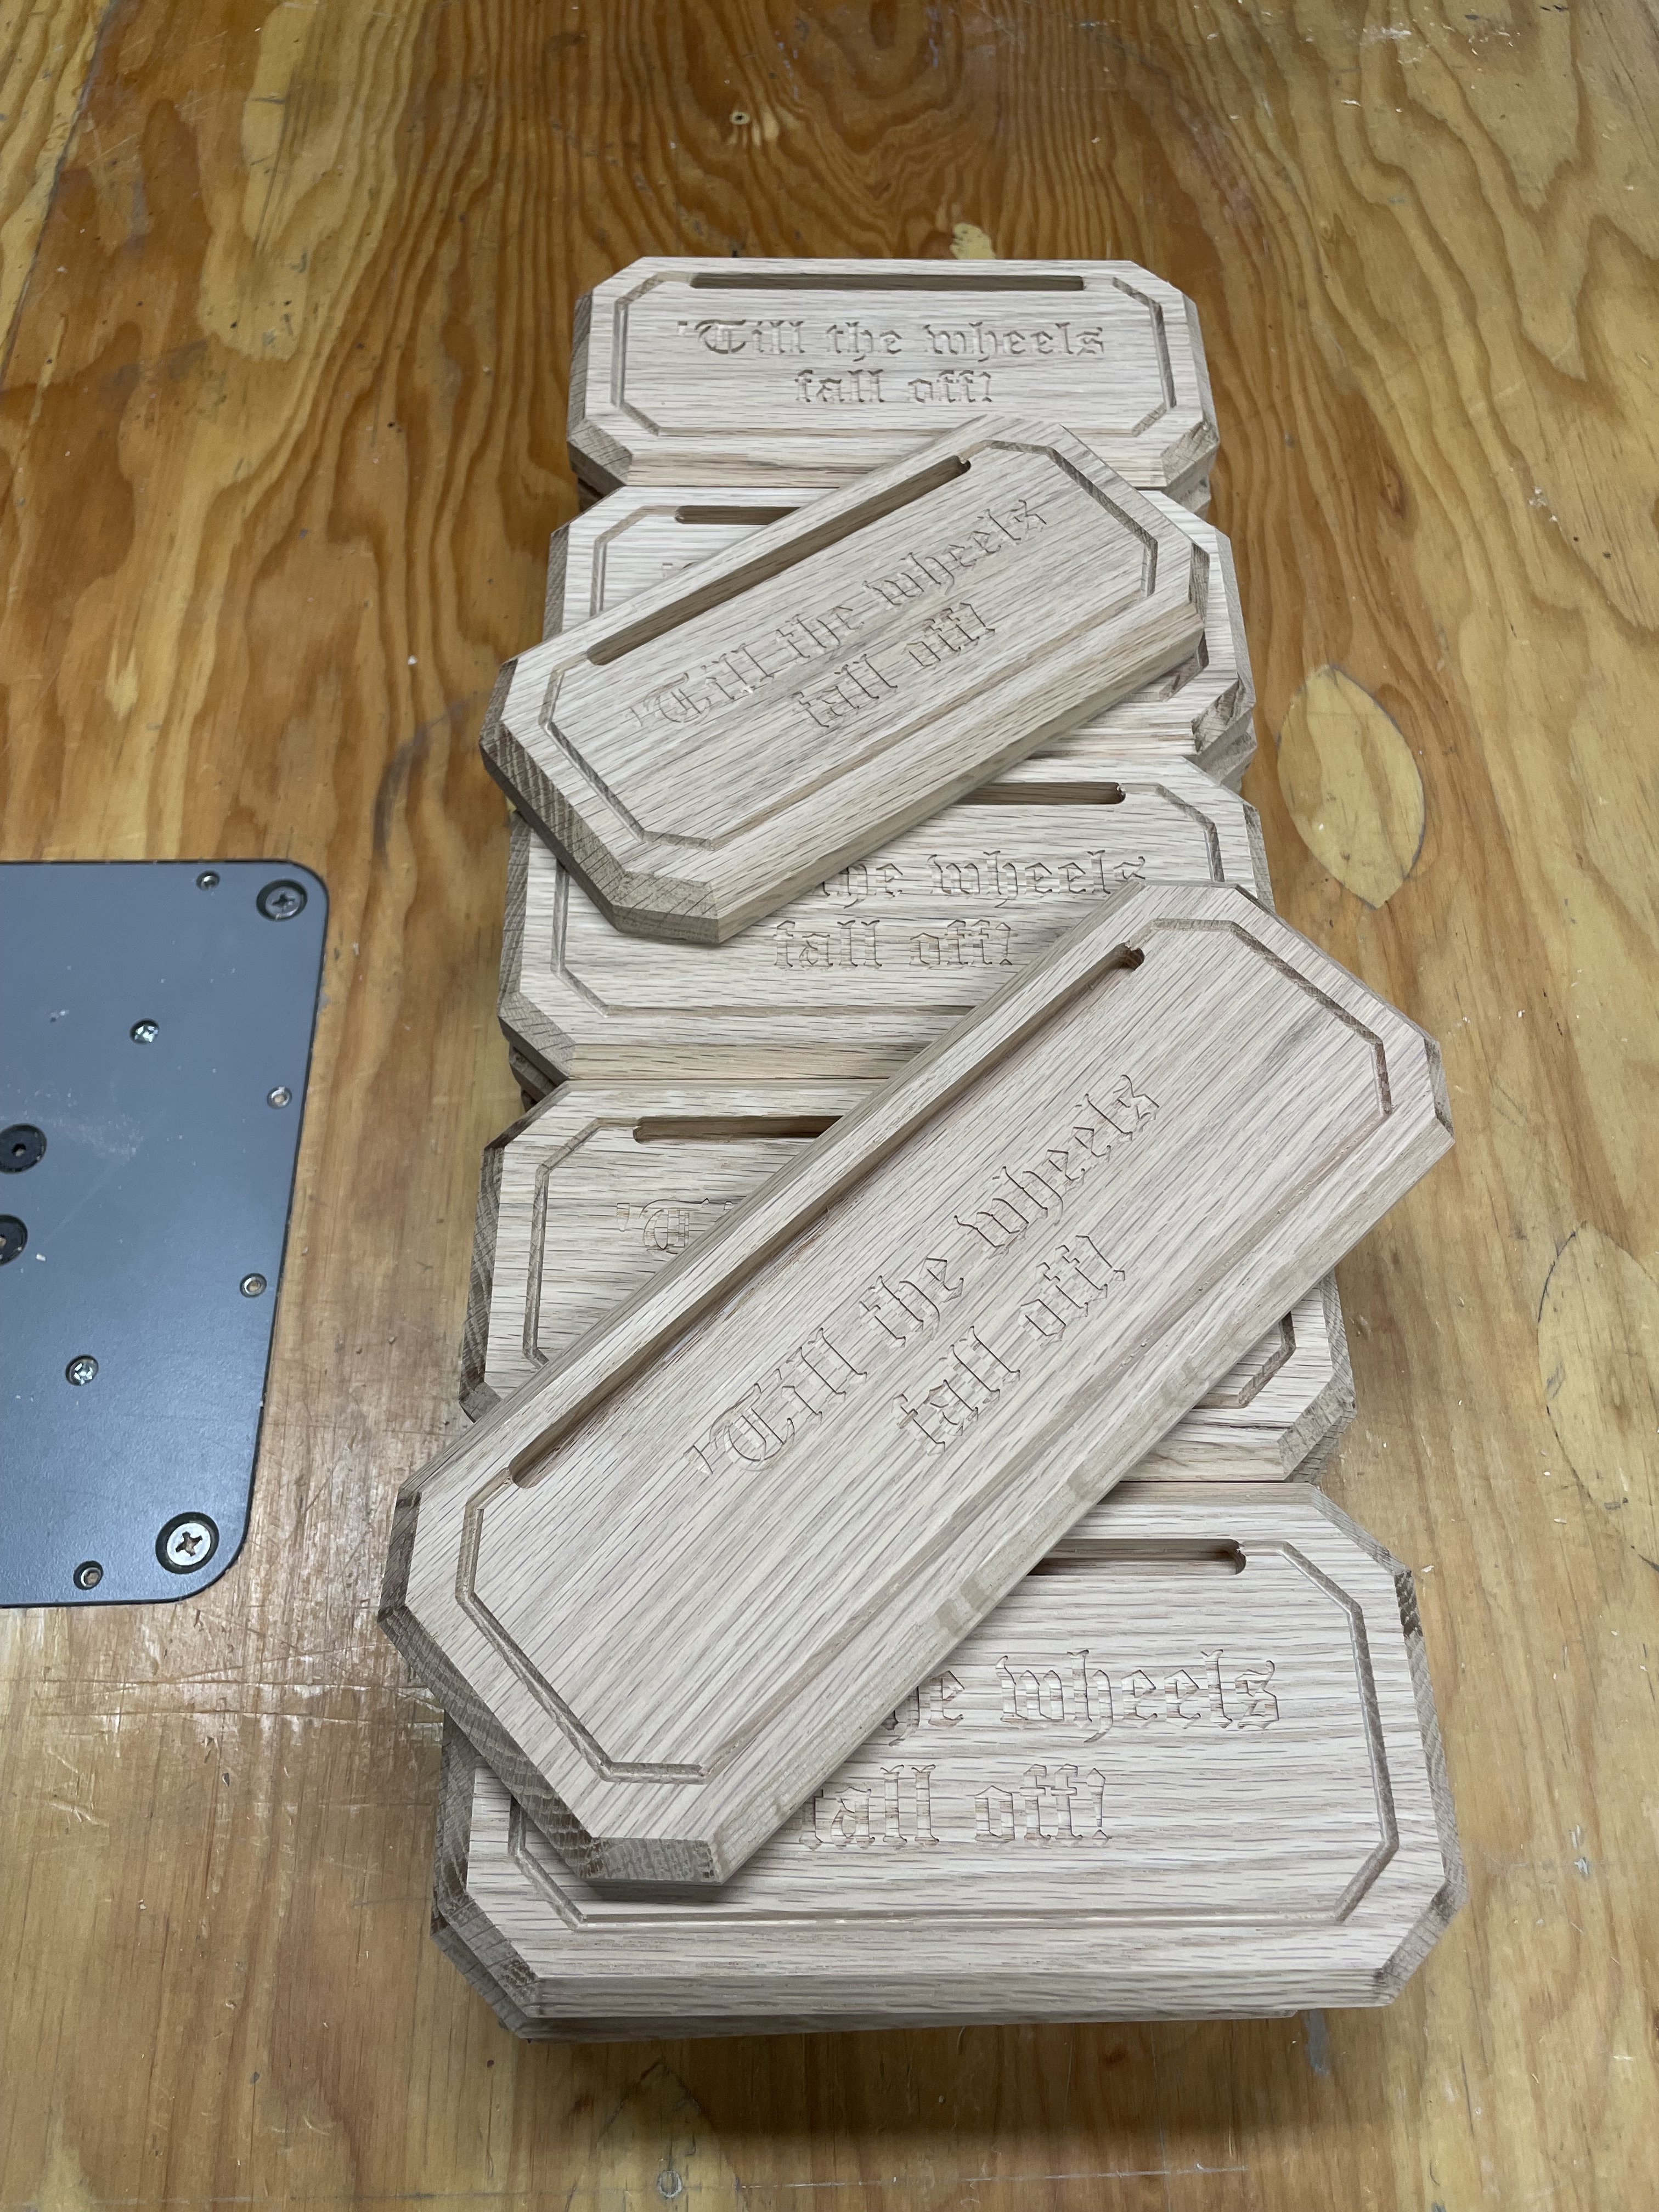
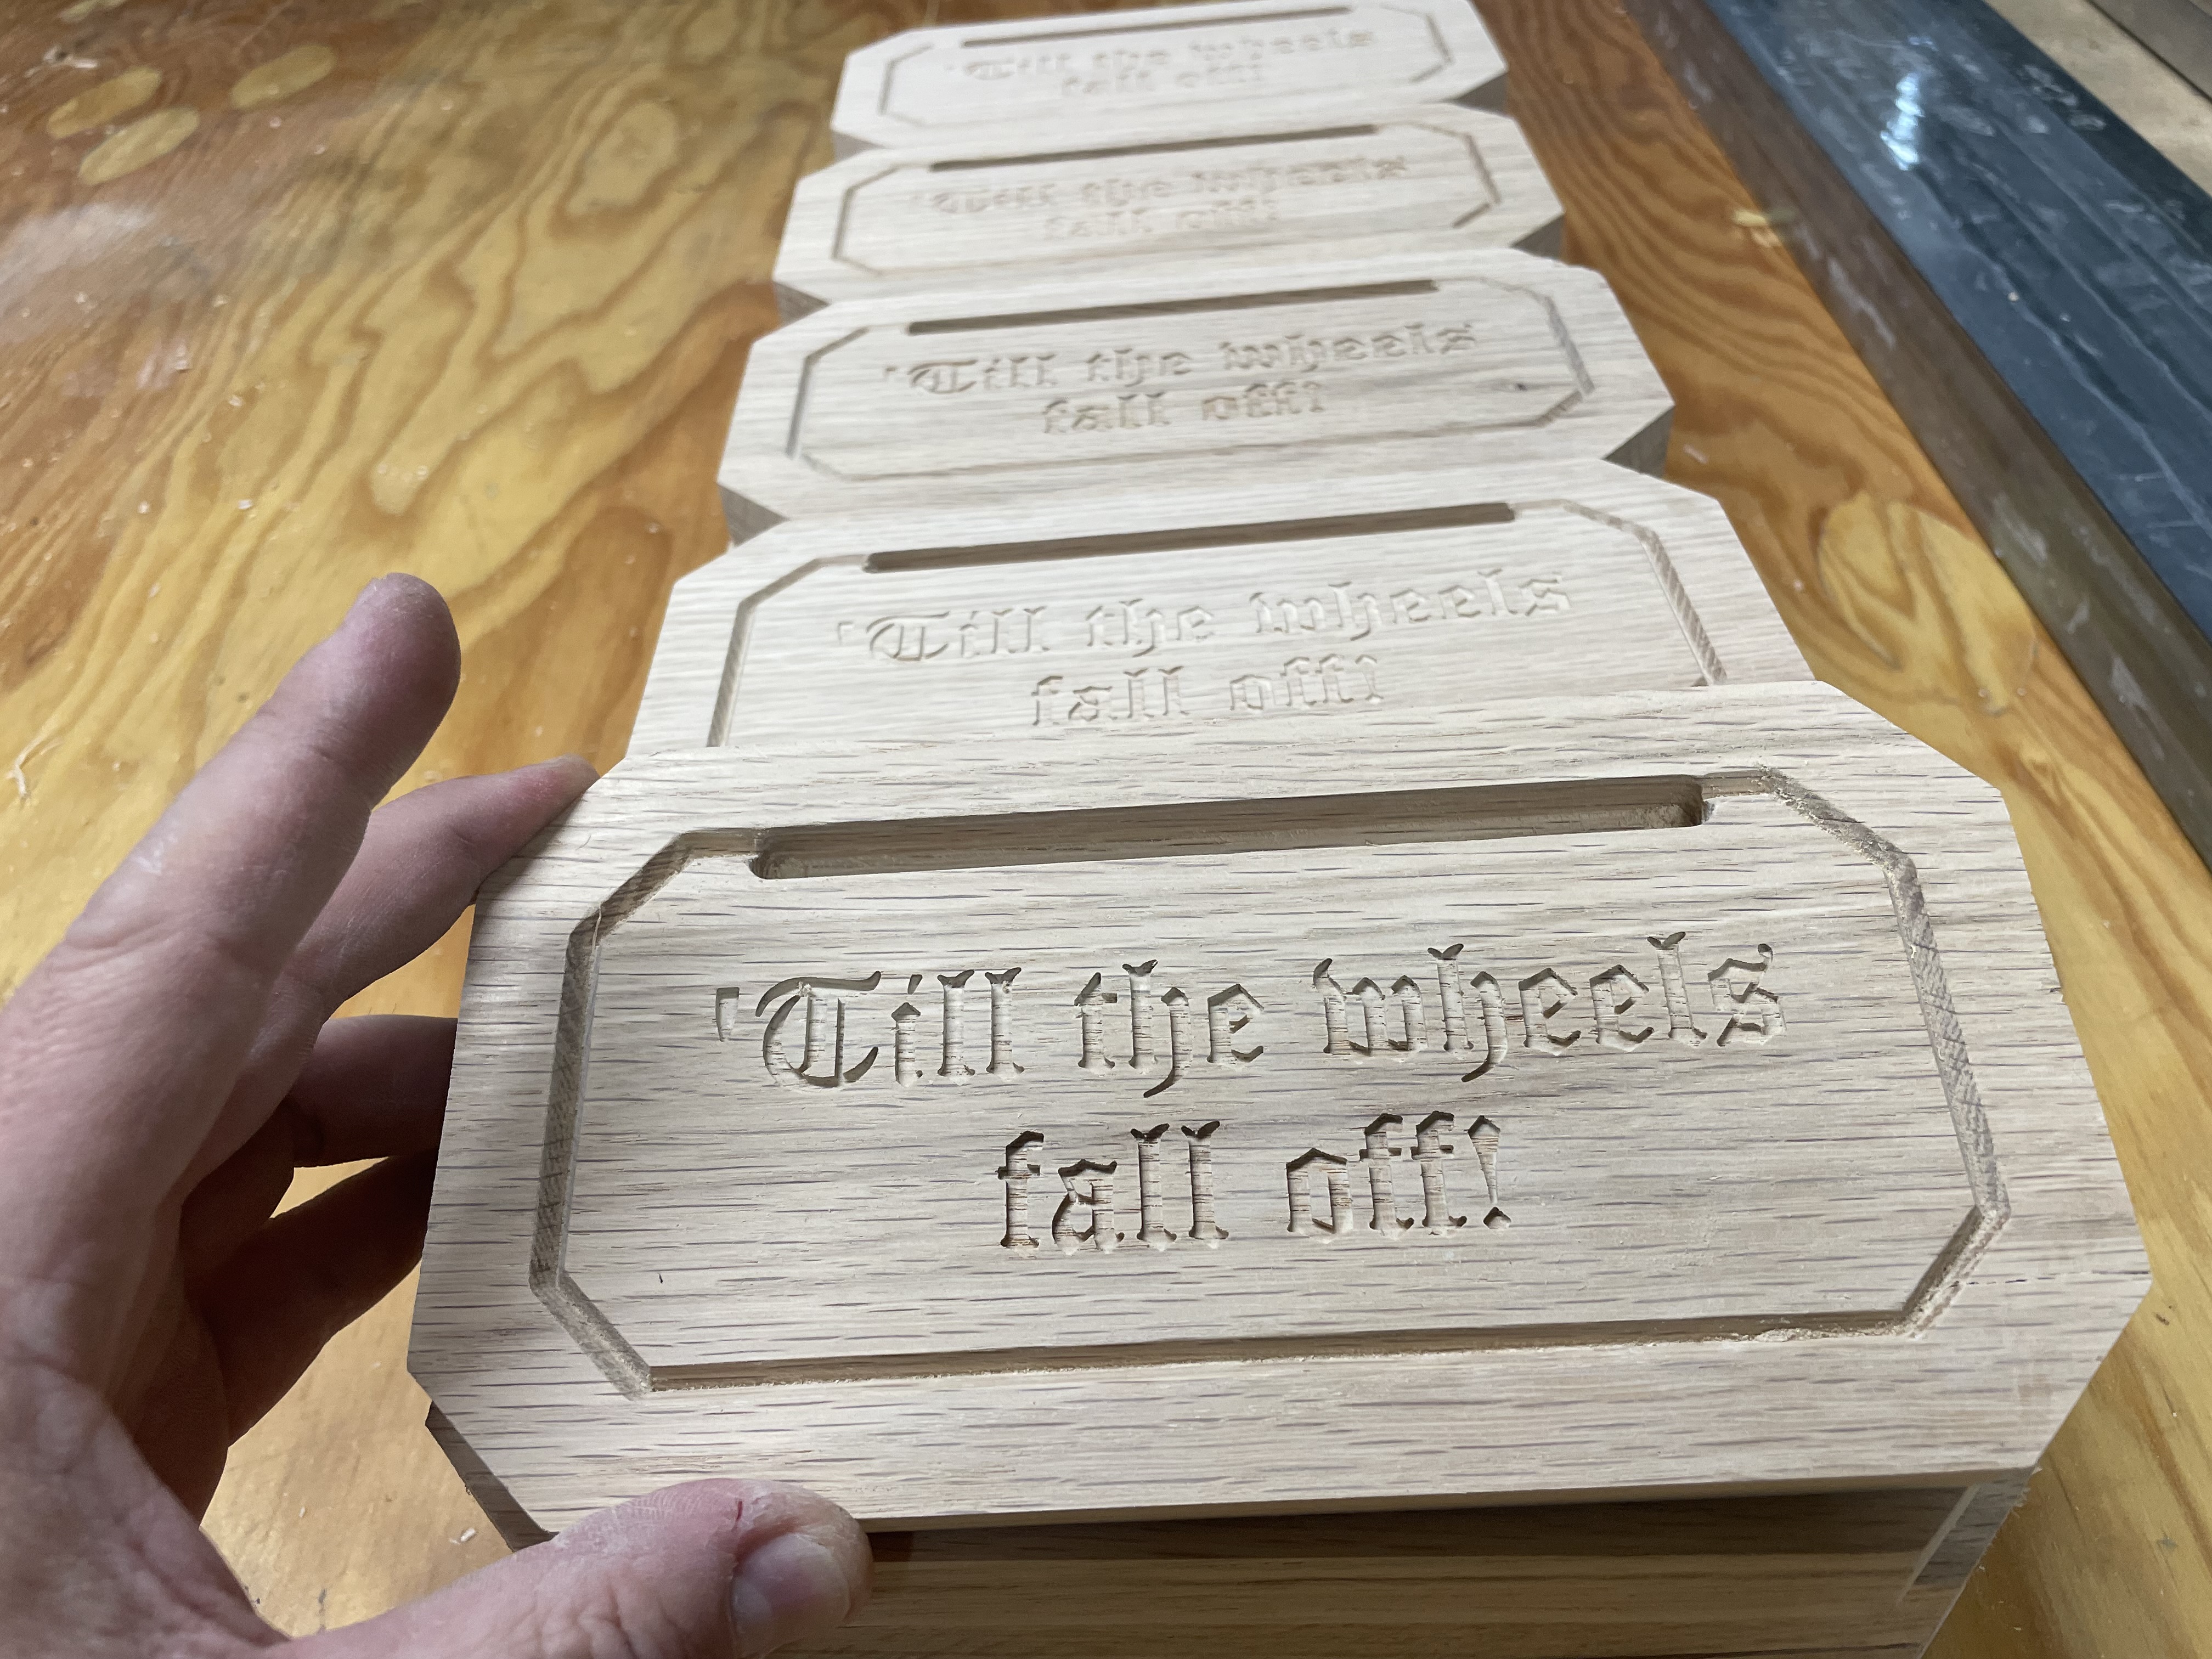
Here are some award based I made for a memorial benefit.
27 in total
Used roasted oak then stained with a tintable stain from Ace Hardware. Color as close to guys car. Then sealed with a clear polyurethane from a spray can. I didn’t want to loose the wood look so I kept the stain in light coats then scuffed it before clearing.
12 Likes
I got the new nautalis cut and it works better.
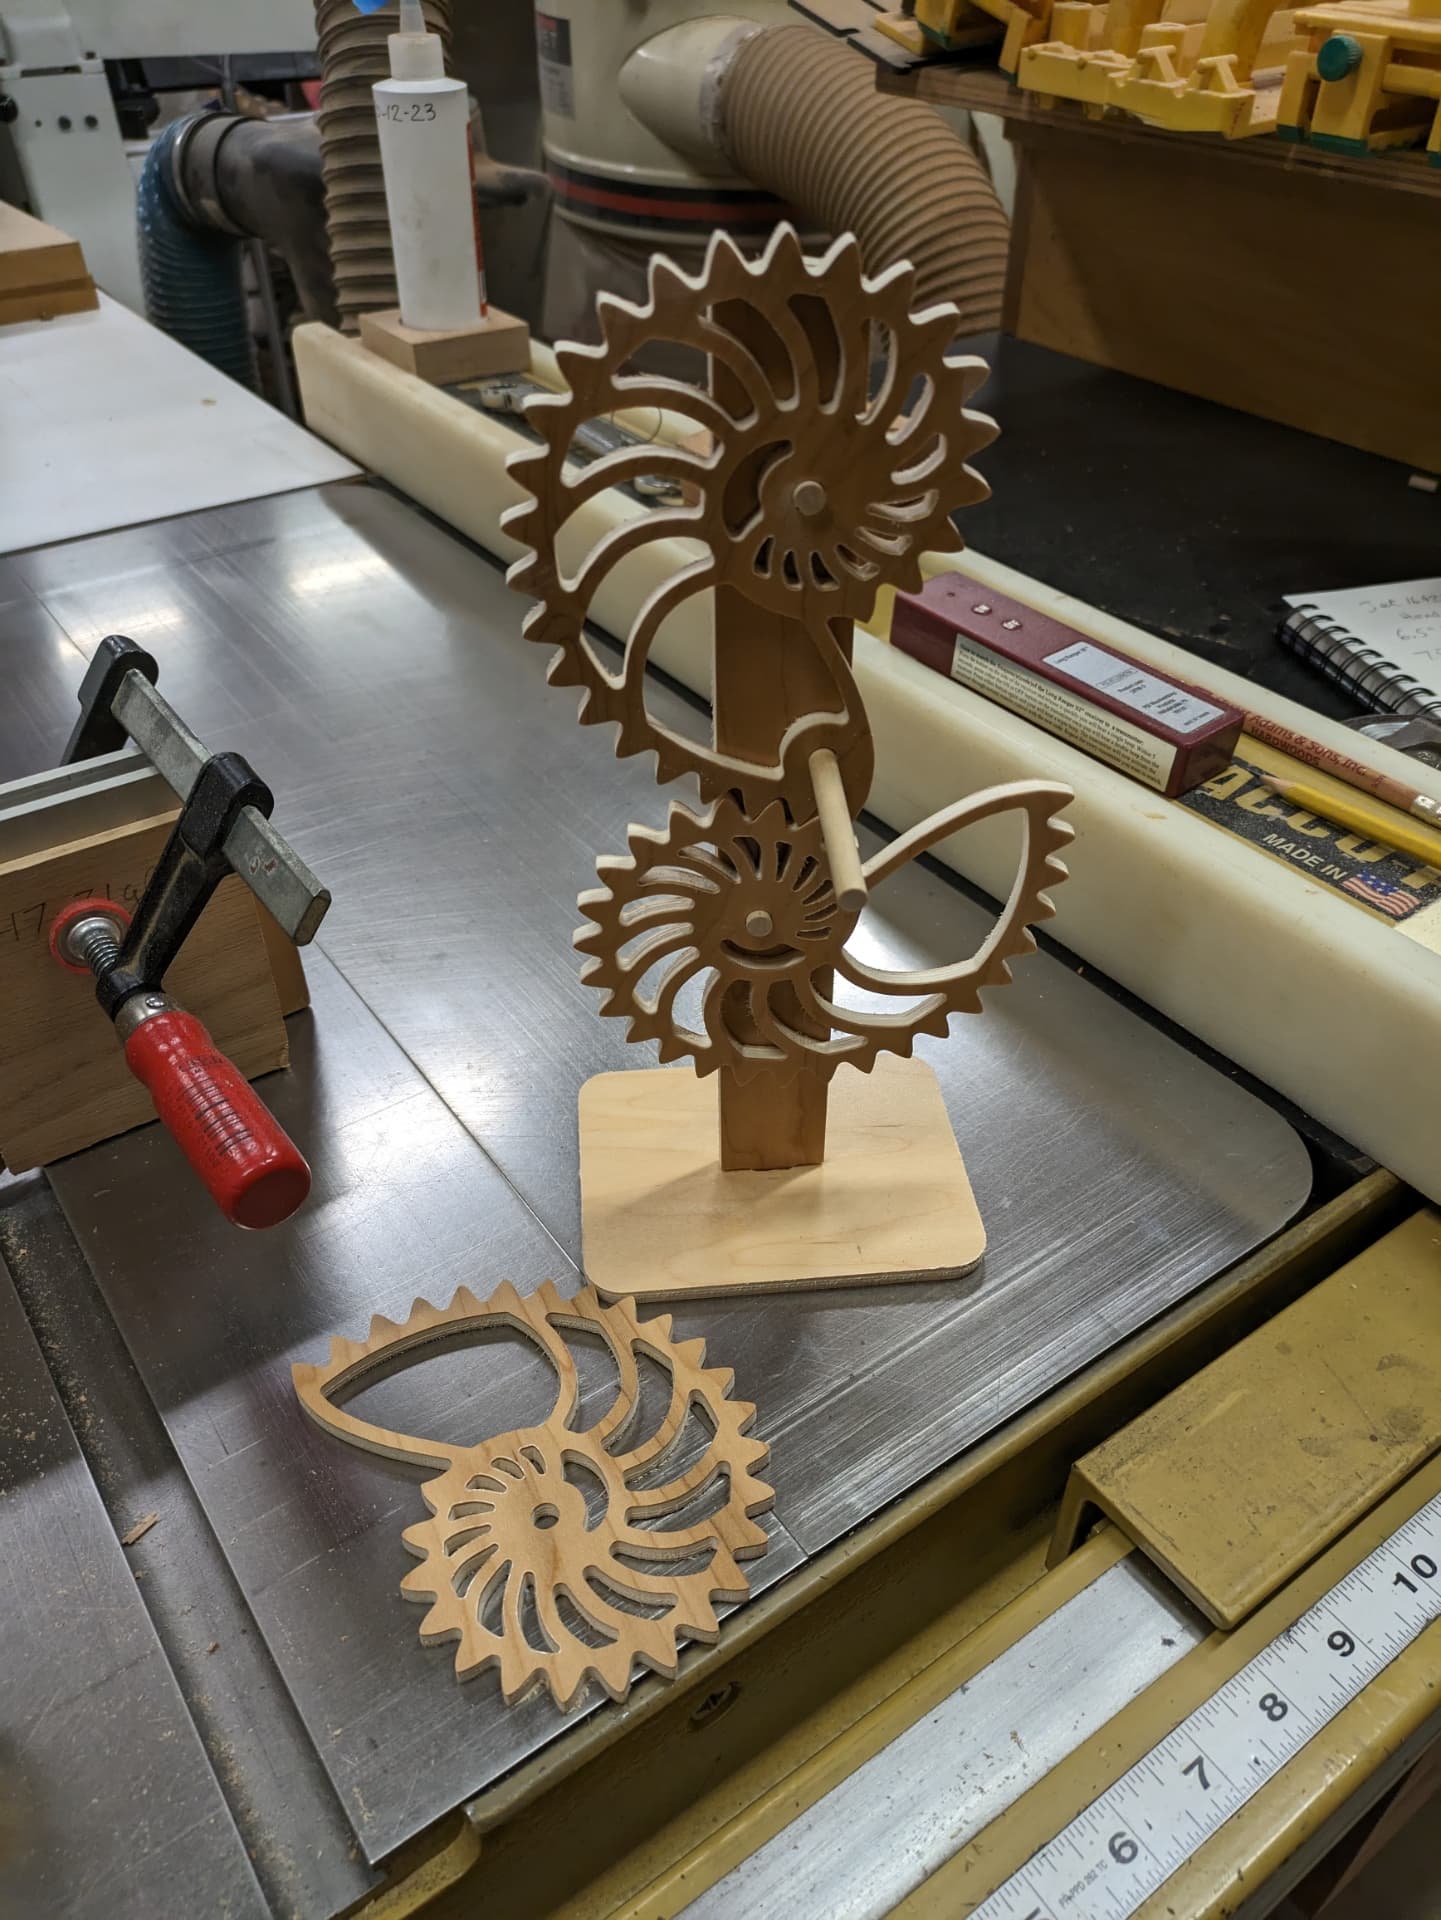
So now I need to get the dowels secured and this fun project will be done.
I did find that you can only rotate in one direction. If you turn in the wrong direction when you get the long/large part of the nautalis it hangs up. If you turn in the right direction it just keeps rotating. I think it would be fun to get a little motor attached to keep the thing rotating on your desk and just watch it.
14 Likes
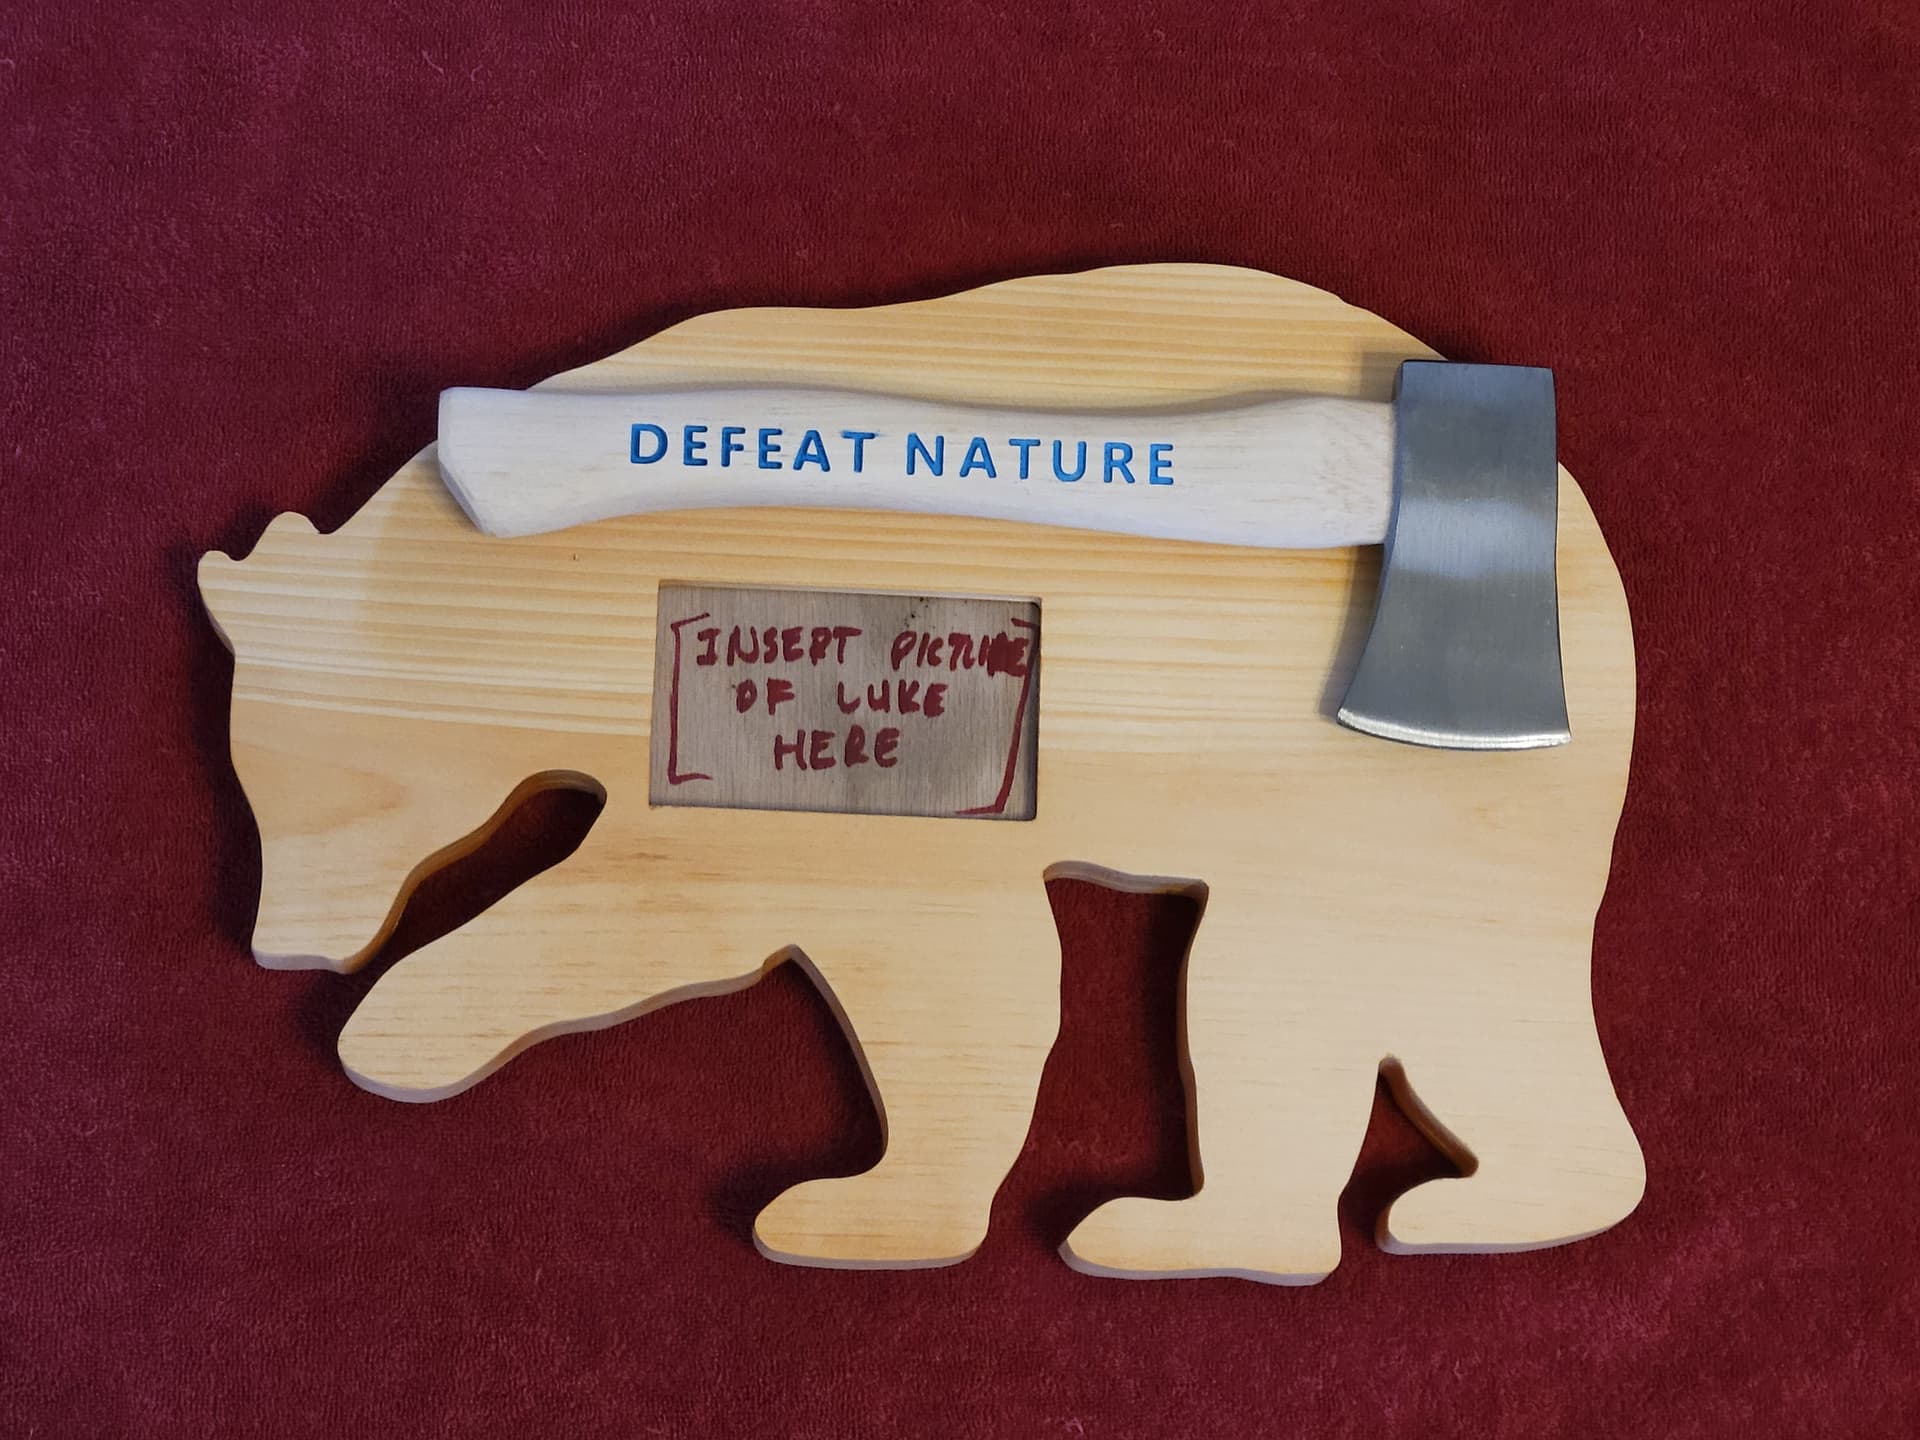
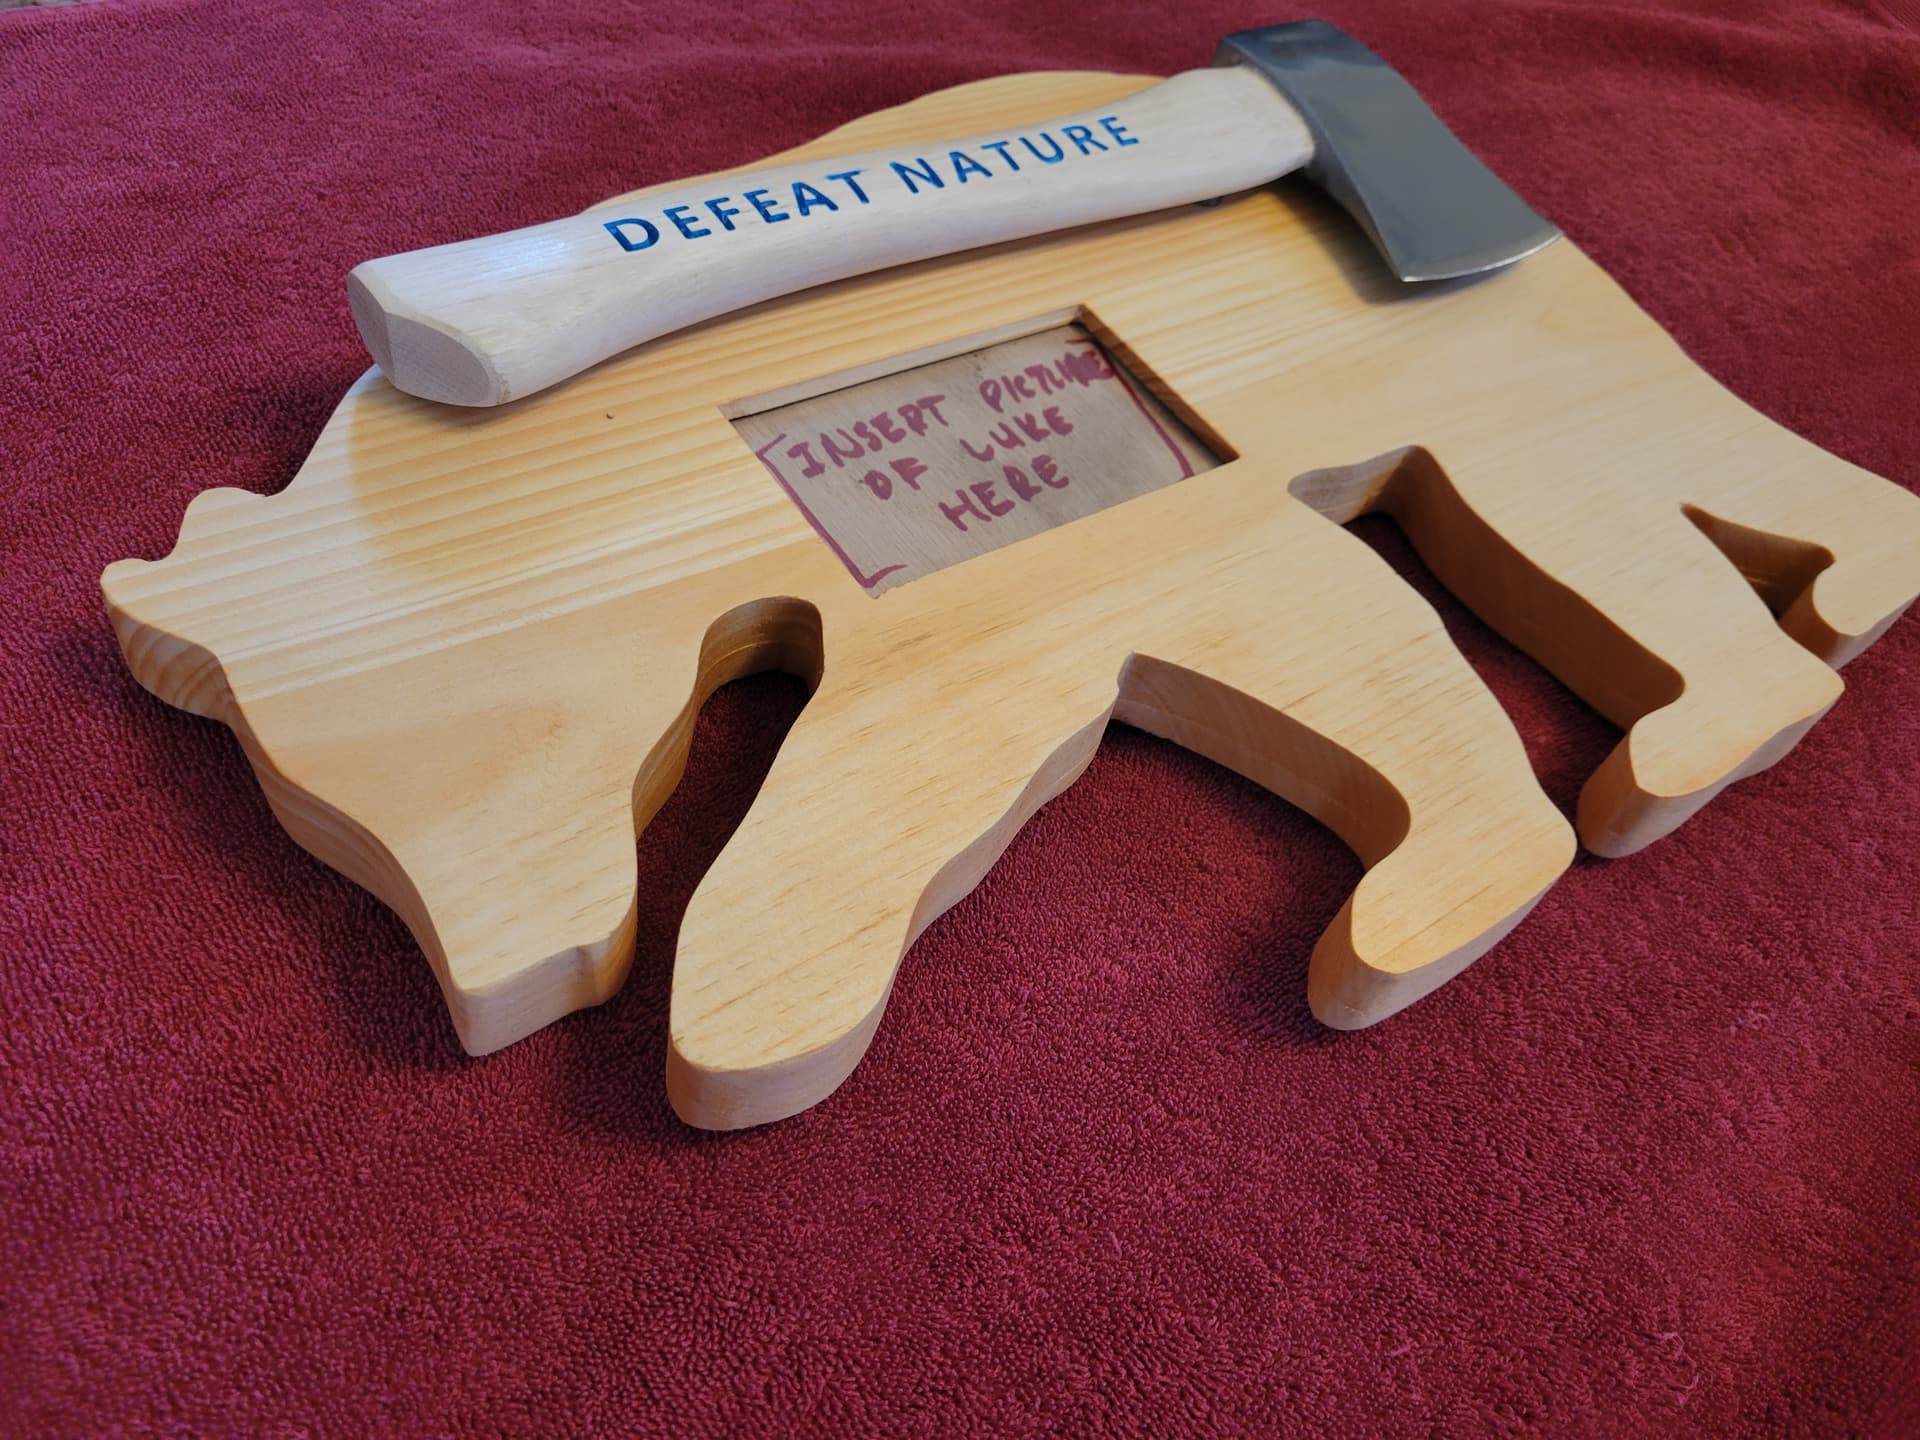
Little bit of a weird one.
The phrase is an inside joke. A wildfire pushed a lot of Canadian bears south and they made our life miserable for a summer. I promise I’m not actually anti-nature.
Meant to hang on a wall.
7 Likes
I would add a chamfer layer to all of your pocket and contour edges. I like the 90° V-Bit for those operations. Try a .7mm to 1mm offset from each line and then run the V-Bit along those contours, with “No Offset” at a depth of 1.5 to 2.5mm. Chamfers add a professional look to any project.
A couple Instagram Reels covering the process:
7 Likes
That is awesome!! Great job! I’m a newbie to the cnc world. I see something similar coming in the near future!